How to Make Macrame Earrings (Free Pattern) + Video Tutorial
Learn how to make stylish and comfortable macrame earrings with our step-by-step tutorial. This is a beginner-friendly project, plus we’ve added a video and a free pattern to make things easier for you.

Hello Crfataholics, we’re sharing a new craft technique today, Macrame! We’re sure you already know a little about macrame; it’s a knotting technique with the use of cords or strings. To get started, we thought it would be easy and fun to work on macrame earrings.
Macrame earrings give any style a chic, bohemian vibe; the designs you can come up with are endless! Once you learn the basic macrame knotting technique, you can make any kind of macrame earring; tassel earrings, hoop earrings, dangle earrings, and so on. For the cord or string part, you can use a variety of materials, such as hemp, leather cord, cotton, silk, etc; and also add beads or beautiful jewelry charms.
Macrame-knotting technique ranges from easy to difficult but we’ve chosen the easiest knitting technique for today’s project. So, It is beginner friendly and can be done using a few supplies. This can also be a great project to practice your macrame knotting skills.
If you don’t have jewelry supplies, you’ll need to invest an amount initially but overall a pair of macrame earrings won’t cost more than $5.

How to Make Macrame Earrings at Home
List of Supplies
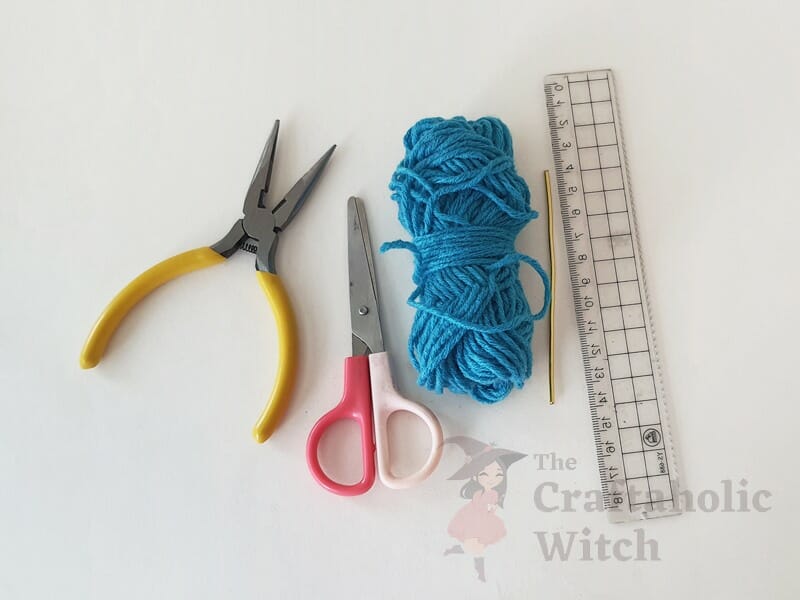
Tools
- Craft pliers – looping, cutting, and flat-nose
- Ruler
- Scissors
Materials
- Yarn – medium or thick
- Craft wire – 16 gauge
- Earring hooks
- Jump rings
Step-by-Step Macrame Earring Tutorial
Step 1: Preparing the Frame Wire
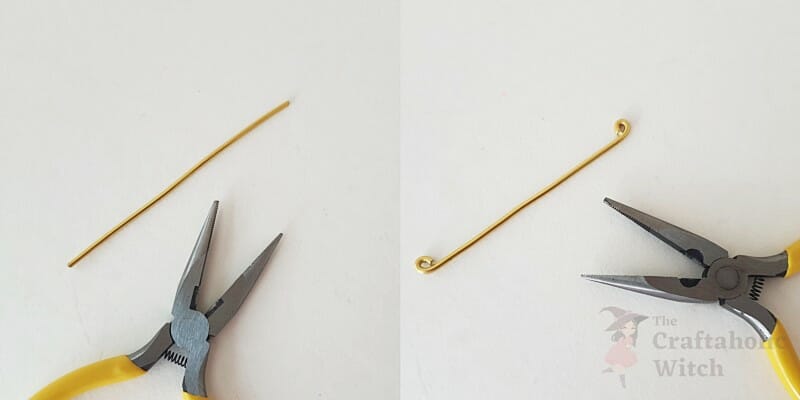
Measure and cut out a wire (the length of the wire would depend on the desired size of the earring frame); we’re using a 10 cm long wire.
Use the looping pliers to make 2 small loops at both open ends of the wire.
Step 2: Form the Frame and Prepare Strands
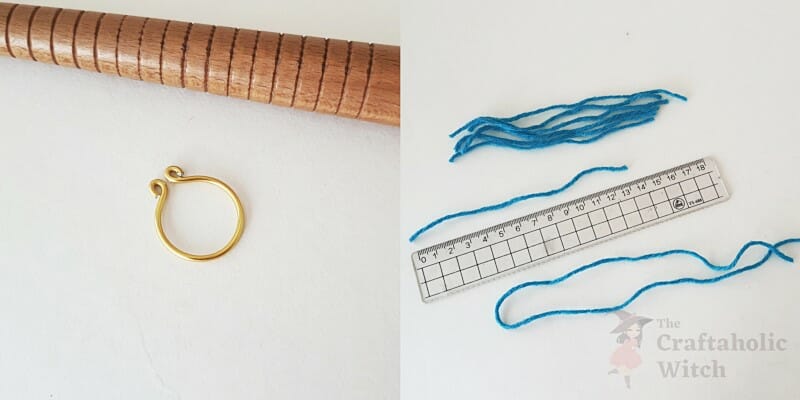
Use a round object (we’re using a mandrel) to form a round shape with the looped wire. The loops should be facing outside and have a 0.5cm distance between each other.
Measure and cut out yarn strands. It’s better to keep the strands long as we can trim them later. We’re using a total of 8 strands for these macrame earrings. We’re using 7 strands of 14cm length and 1 strand of 36cm length.
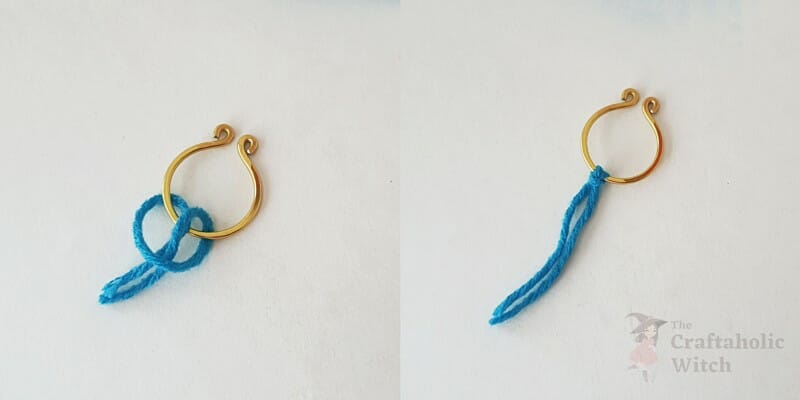
Step 3: Joining a Strand to the Frame 1
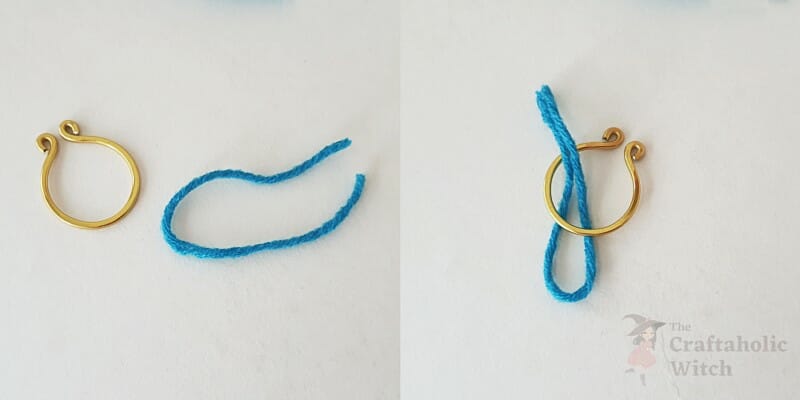
Take any one of the 14 cm strands and fold it in half.
Hold the closed end of the strand and take it around the earring frame from the top front and draw it back to the front from below.
Step 4: Joining a Strand to the Frame 2
Draw the open ends of the strand through the loop.
Pull the open ends as tightly as possible to secure the strand with the frame.
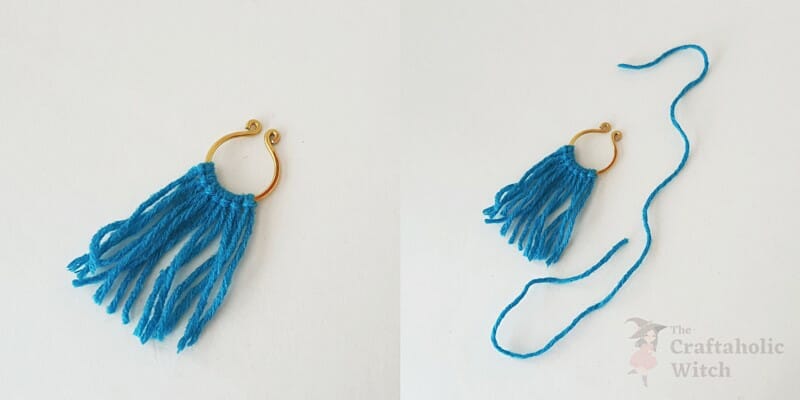
Step 5: Joining all Strands to the Frame
One by one join all of the 14cm strands to the earring frame.
Take the long strand and fold it in 2 parts (1:2).
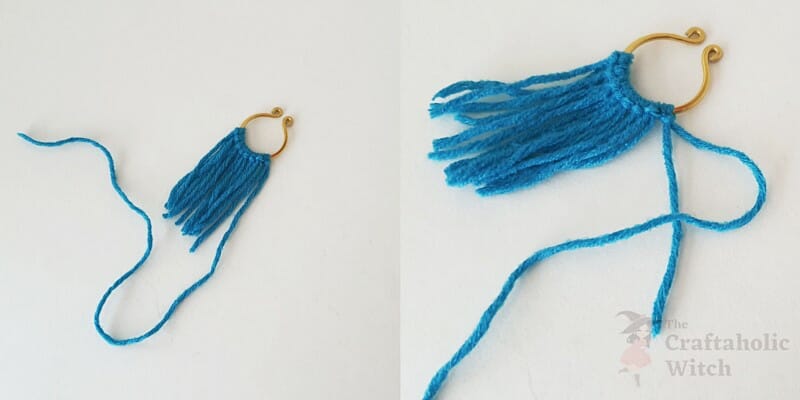
Step 6: Joining the Long Strand to the Frame
Join the long strand to the frame by keeping the short end aligned with the previously attached short (14cm) strands and keeping the longer end outside.
Separate the open ends of the long strand and bring the long end of the strand over the short end.
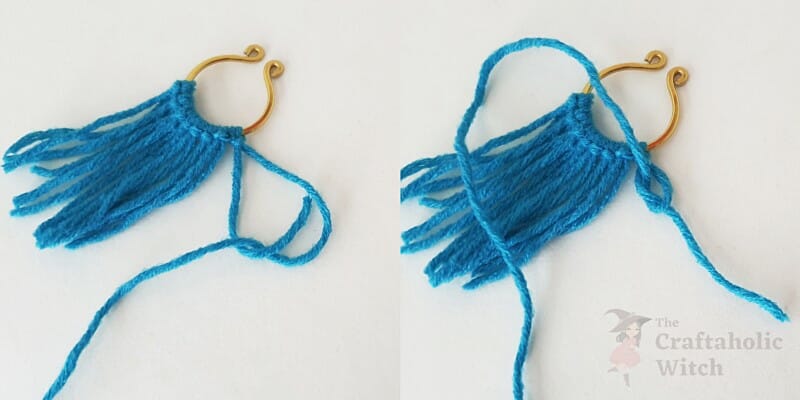
Step 7: Basic Macrame Knot
Now, bring the short end of the strand over the long end and draw it through the loop.
Pull the short end all the way through the loop.
Step 8: Bind a Basic Macrame Knot
Pull the short end as tightly (but firmly) as possible. Keep the long end inwards, with the other short strands.
Now, bring the short end over the long end.
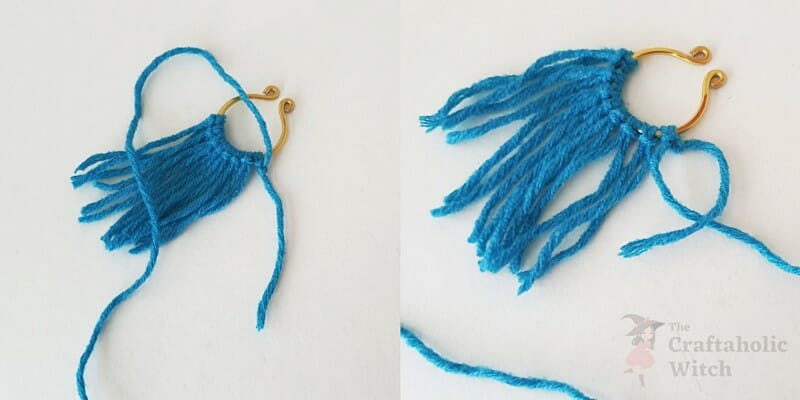
Step 9: Bind Another Basic Macrame Knot
Draw the short end through the loop (created by both short and long ends) from below.
Pull the short end all the way through. Again, keep the long end inside, with the short strands.
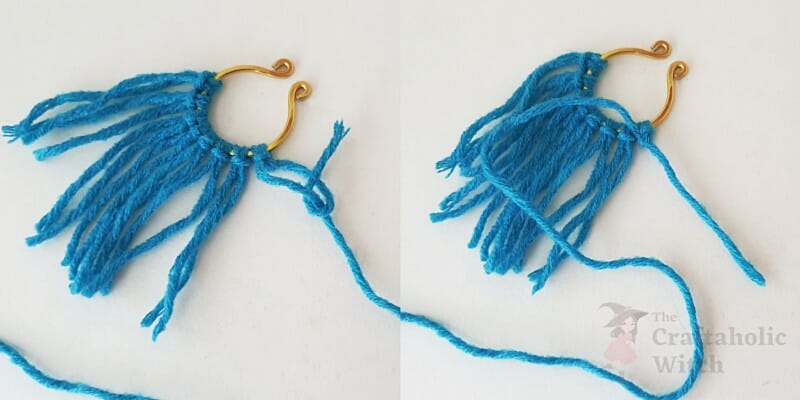
Step 10: Continue the Basic Macrame Knot
Let’s move to the next short strand. Bring the long end over the next short strand.
Bring the short end over the long end and draw it through the loop. Pull the short end all the way through the loop and tighten it.
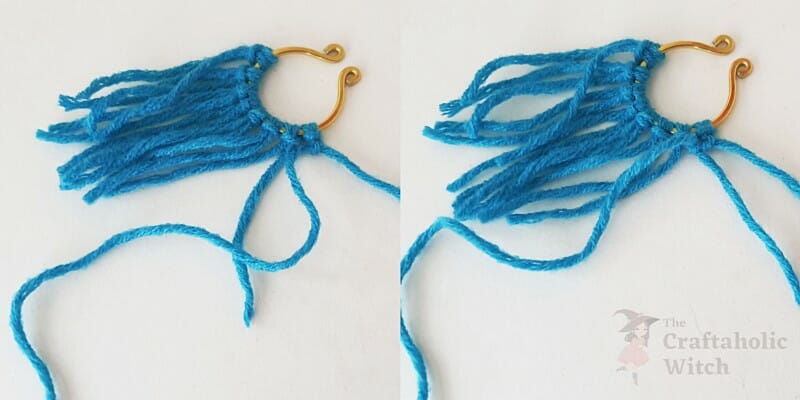
Step 11: Continue the Basic Macrame Knot
Bring the short strand over the long strand and then draw the short end through the loop (created by both short and long ends) from below.
Pull the strands all the way through. Again, always keep the long strand inside, with the short strands.

Step 12: Complete the Knots and Trim the End
Continue making the macramé knots till you reach the other end.
Once you’re done with the knots, use a pair of sharp scissors to trim the open ends of the strands and give them a nice and even end.
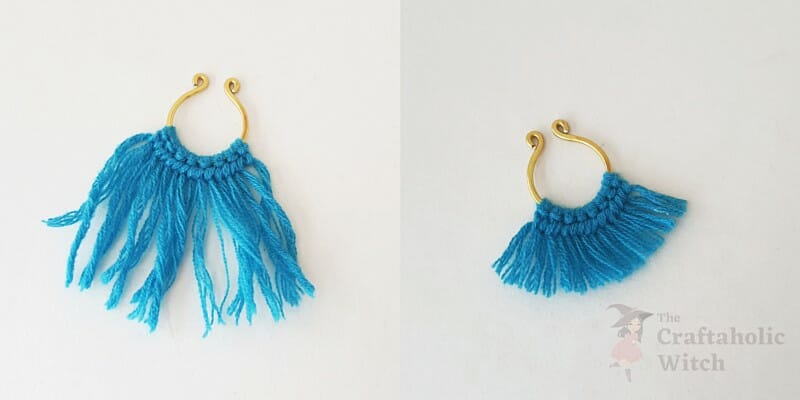
Step 13: Craft the Earring
Use the flat nose pliers to rotate the frame loops to 90 degrees.
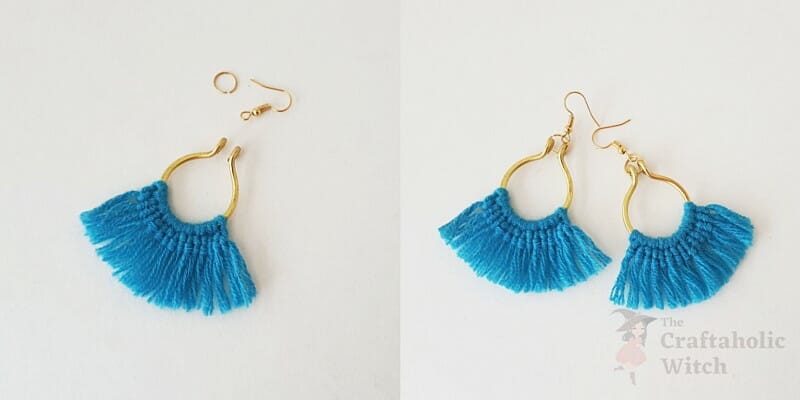
Attach a jump ring through the loops of the earring frame and then attach an earring hook through the jump ring. Close the jump ring to secure the hook. Similarly, craft the other pair of macrame earrings.
Video Tutorial to DIY Macrame Earrings: Make Your Own Beautiful Jewelry
Picture and written tutorials for macramé crafts can be confusing sometimes. But don’t worry at all; we have a detailed video tutorial for you! Check out the macramé earrings tutorial on our YouTube channel and hit the subscribe button for more fun craft projects.
Tips for Beginners to DIY Handmade Macrame Earrings
- If you’re a beginner, use a thick cord or string, or yarn for this project. Using twisted cotton cords is the best option.
- Keep extra length for each string because longer strings can be trimmed later but if they’re too short, it’s difficult to add length.
- Use cords or strings which have several strands twisted. They give a nice and fluffy finished look.
- Keep each knot tight and even. Loose knots won’t give a secure and nice finished look.
We hope you like this tutorial and enjoy the craft if you give it a try. Here are some of our other wire jewelry-making tutorials you may like:
- How to Make Beaded Bracelets
- How to Make Stud Earrings with Wire and Beads
- DIY Jewelry Recycled Box
- How to Make Simple Jewelry Charms Using Wire
- How to Make Hoop Earrings with Beads and Put Them On
We hope you liked our tutorial on making the Macrame earrings. You probably already know that macramé earrings are lightweight and very comfortable to wear. Some craft one/two pairs and you can wear them all day long.
We absolutely love seeing you re-create our projects; if you do craft one or two pairs of our macrame earrings, please tag us on Facebook or Instagram (use #thecraftaholicwitch) and show us how you’re styling with the beaded hoop earrings.
Happy Crafting!


