DIY Recycled Jewelry Box

From Tissue Paper Roll to Jewelry Box!
Every time I see a leftover tissue paper roll, I plan to make something but most of the time I end up making nothing; and somehow lose the tissue paper roll. This is so far one of the few things I’ve made out of tissue paper rolls. I’m really happy with how it turned out and super excited to share the tutorial!
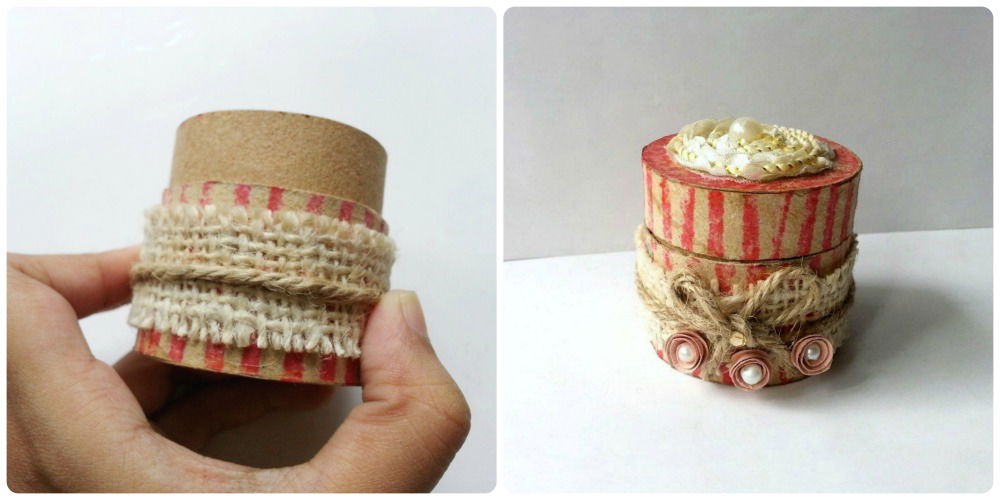
You can decorate the recycled box however you want to. I went for a simple vintage look. Have a look at the tutorial and hope you enjoy!
Supplies:
- Toilet paper roll
- Pencil and ruler
- X-acto knife and scissors
- Craft glue
- Burlap, twine, craft paper, beads etc -for decoration
Instructions:
 Step 1
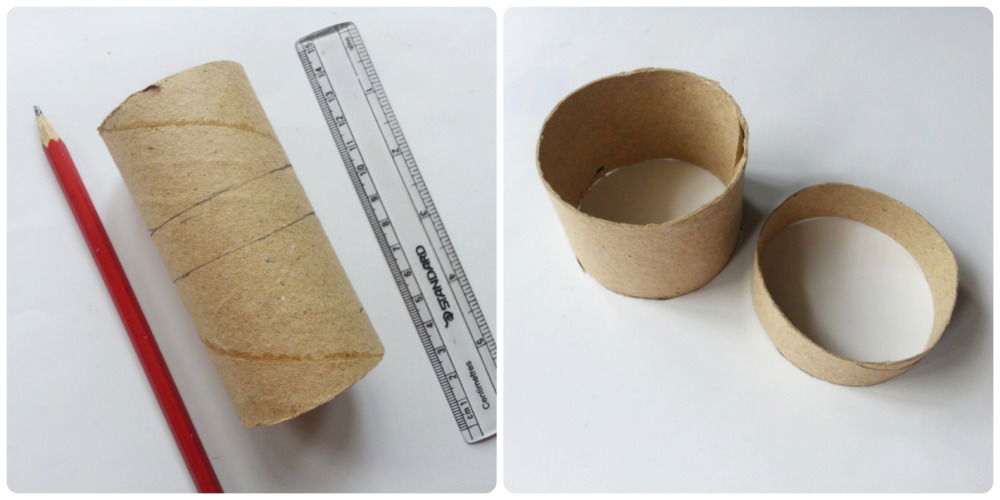
Select a sturdy toilet paper roll. Use a ruler and pencil to measure and mark the toilet paper roll for the box and the lid. Cut out the pieces using an x-acto knife. Try keeping the edges as neat as possible while cutting them.
 Step 2
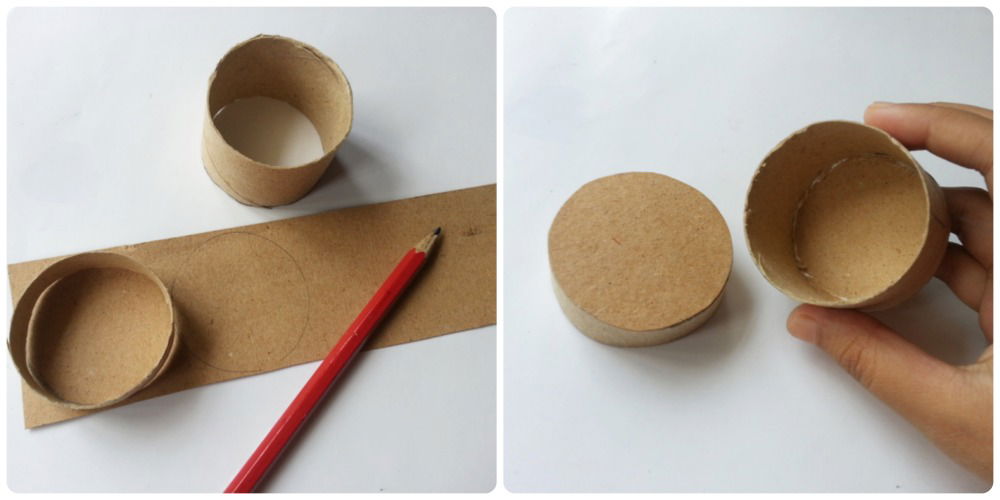
Place the cut-out rolls on a brown cardstock paper and trace their sides. Cut out the 2 circles from the brown cardstock paper nicely, one circle for each cut-out roll. Carefully glue the circles with the cut-out rolls. The closed end will be the bottom of the box and for the lid, closed end will be the top.
 Step 3
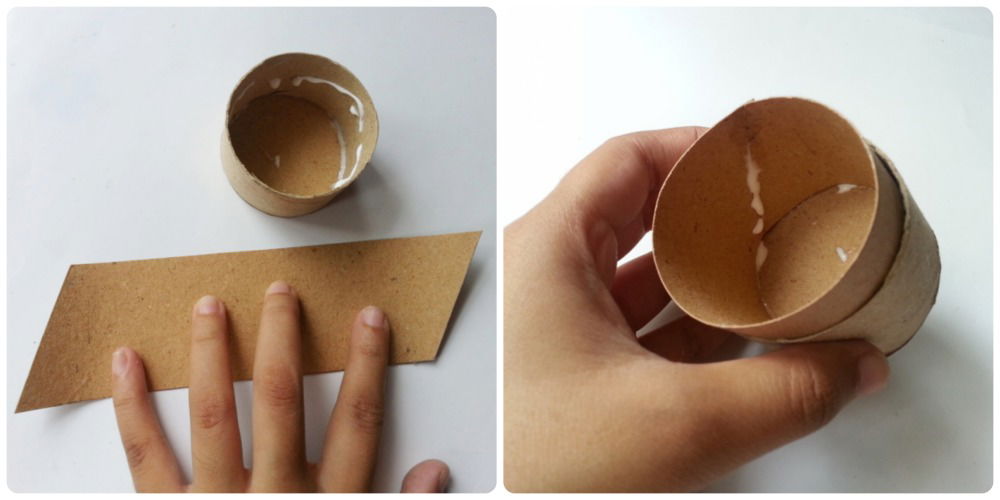
You will need to cut another long strip of brown cardstock paper. The width of this piece should be the sum of the box and lids’ height. Roll it and glue it inside the box as shown in the picture. Glue it neatly inside the box otherwise, the lid might not fit appropriately. Allow the glue to dry. Make sure to check if the lid fits.

Step 4
You can now decorate the box as you want. I stamped the box using red ink and then used burlap fabric, twine, paper flowers and some beads for the decoration.
Don’t forget to share!
Happy crafting!


