How to Make Beaded Bracelets with Adjustable Cord (2 Ways)

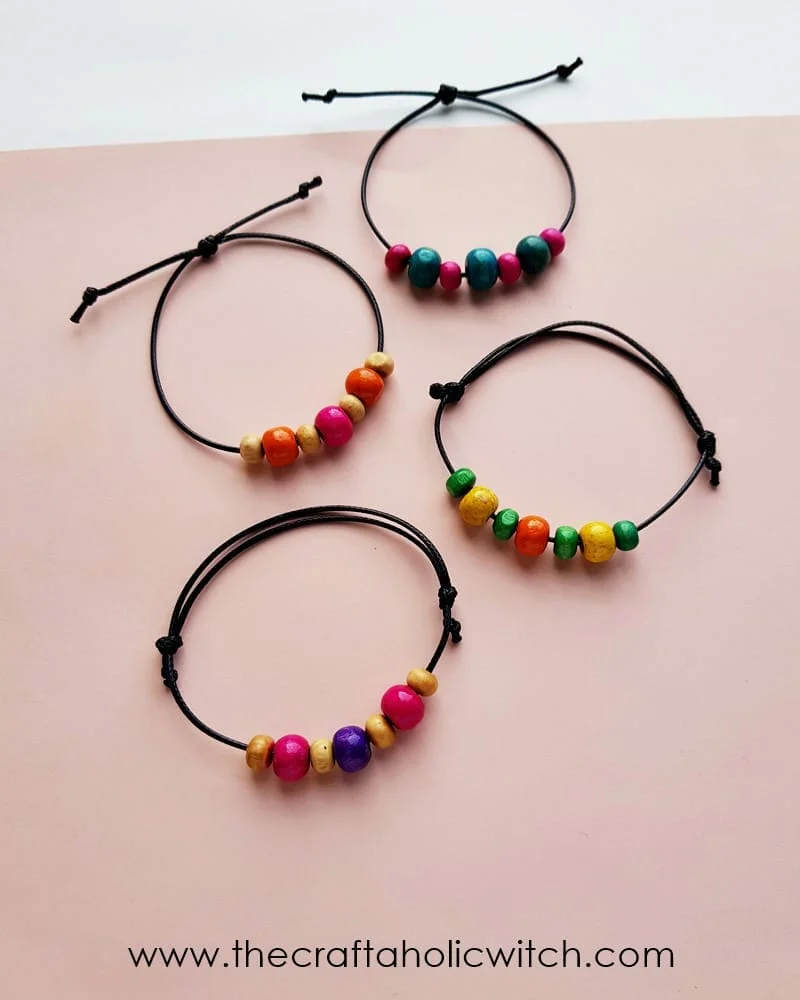
In this step-by-step (with video) tutorial, Learn how to make beaded bracelets along with 2 methods of tying adjustable sliding knots (both single and double knots).
Hello there, today we’re here with a simple, quick, and easy-to-make jewelry project, sliding knot bracelets. You’ll be surprised to see how easy and quick this craft is. You only need 2 materials and you’re good to go. Whether you want to learn how to make beaded bracelets or adjustable sliding knot bracelets, this tutorial can serve both purposes.
The cost of 2 or 4 bracelets won’t be much if we calculate approximately, because you will have 90% of the materials left even after crafting 4 bracelets. A bundle of 100 feet of waxed cord will cost around $10 and a package of 300 wooden beads will cost around $11. So, the cost of this project would be around $4 to $5. You can use the rest of the materials to make so many more crafts, so undoubtedly it’s a good investment. Besides, you can also sell these bracelets if you want to, they don’t cost much nor take much time to craft one.
Things You Will Need
Materials
Tools
- Ruler
- Scissors
- Lighter (optional)
How to Make Beaded Bracelets with Adjustable Sliding Knots
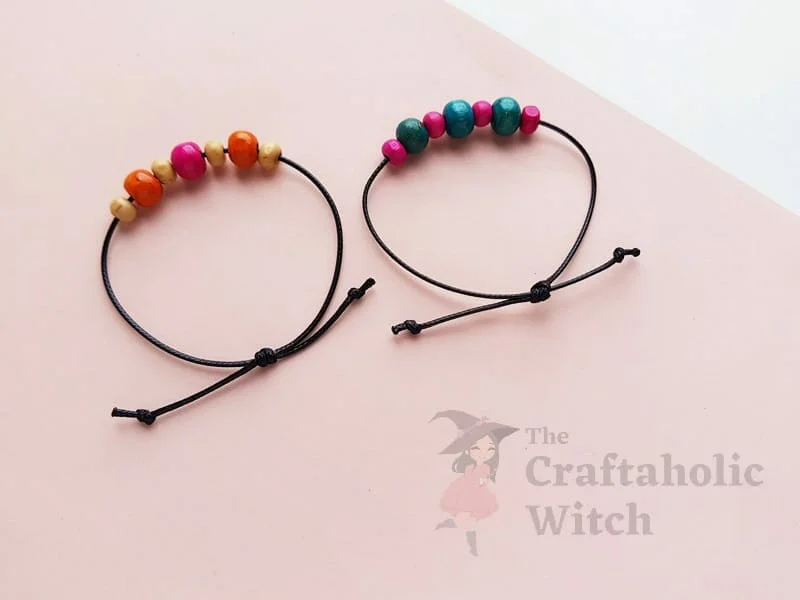
Two methods of making sliding knot bracelets with beads. In method one we demonstrated the way of tying a double knot and in method two you will learn how to tie a single knot that slides.
Method – 1: How to Make Adjustable Bracelets With Single Knot
This bracelet has only one adjustable bracelet knot. Follow the steps to make this one.
Step 1: Preparing the Cord and Beading
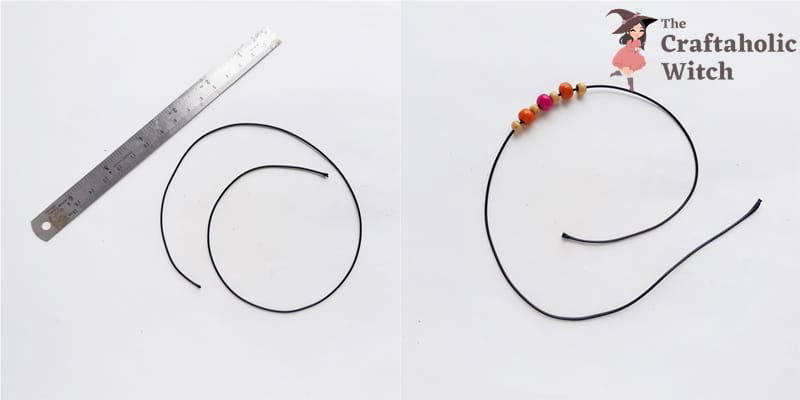
Take the cord bundle and wrap the cord around your wrist loosely 3 times. Measure and cut out the cord (2.5 or 3 times more than your wrist size). Select your wooden beads or any kind of beads which can be inserted into the cord. We’re using small and medium-sized colorful wooden beads. You can fill the cord (a little less than your wrist size’s length) with beads or you can use 5 or 6 beads as we did.
Step 2: Overlap the Open Ends
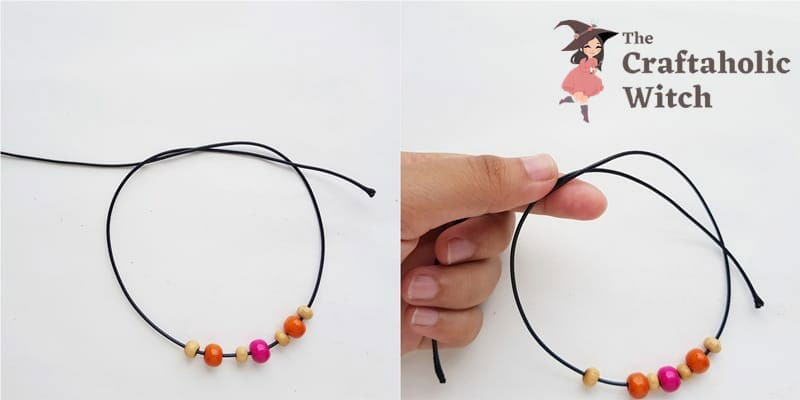
Form a ring by overlapping both, slightly bigger than your wrist size. Keep an even amount of length on both sides of the overlapped cord and hold the overlapped point firmly.
Step 3: Form a Loop Around the Finger Tip
Take any one of the open ends and circle it around your fingertip to form a loop. Draw the open end of the looped side under the main cord ring of the bracelet.
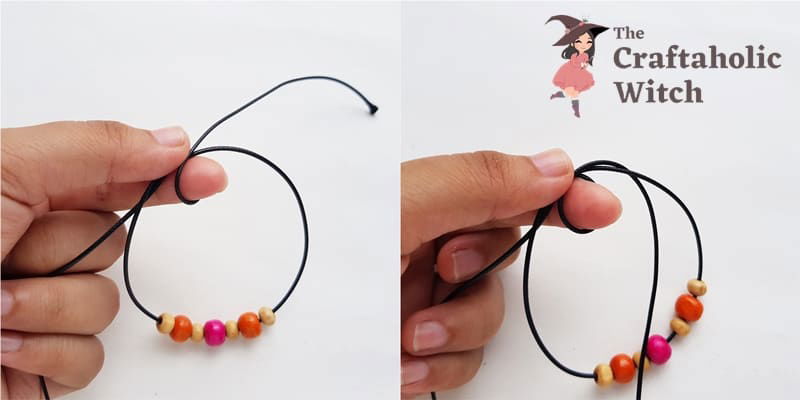
Step 4: Form the 2nd Loop and a Knot
Now, form another loop with the same side. This time, do not draw the open side under the main ring. Draw it through the loop, from left to right.
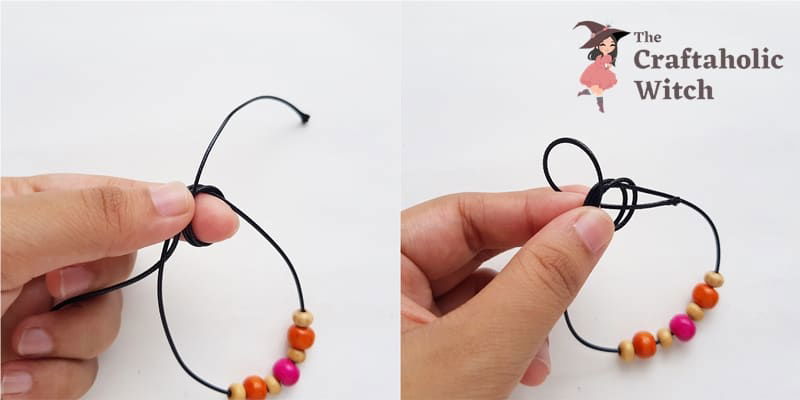
Step 5: Pull the Open Ends and Form the Sliding Knot
Pull both open ends carefully and tighten the knot neatly. Once the knot is tightened, you can check that one open end is adjustable, if you pull, it will slide. Tie knots near the open ends of the 2 sides to finish the bracelet craft.
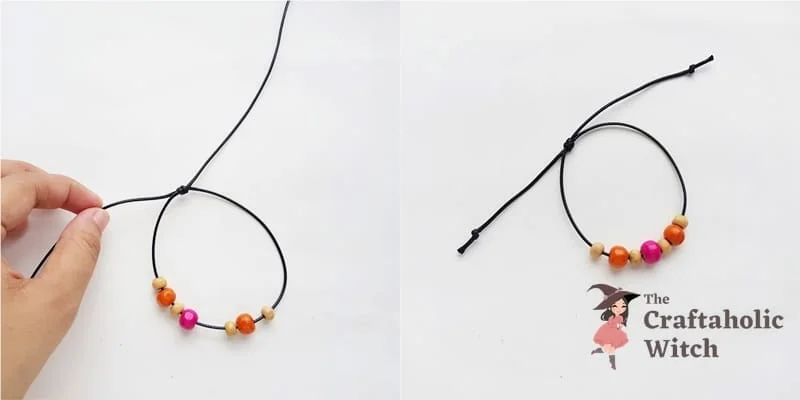
Method – 2: How to Make Adjustable Bracelet with Double Knot
Has two individual knots for sliding. Follow the steps to make this double knot adjustable bracelet.
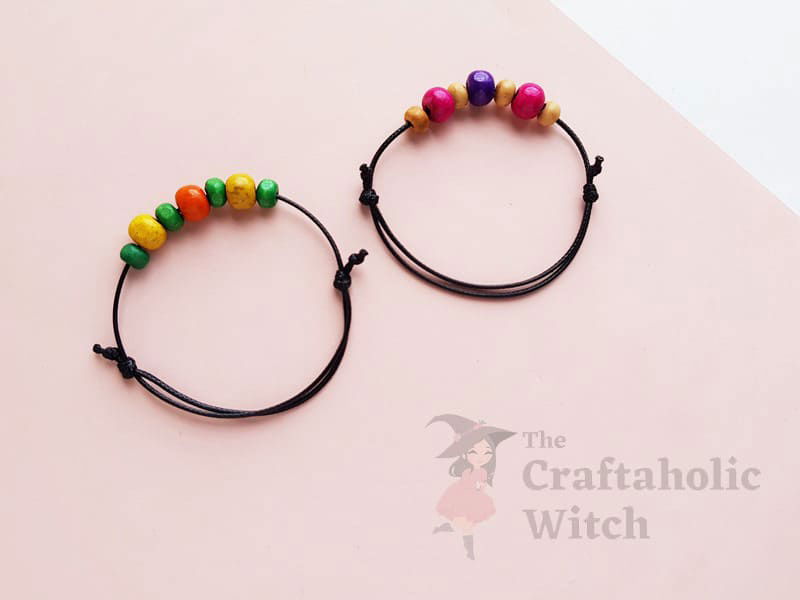
Step 1: Measuring Cord, Beading, and 1st Knot
Simply follow the first 2 steps of the first sliding knot bracelet tutorial. Measure and cut out the cord. Insert beads of your choice into the cord and bring the beads to the middle of the cord. Circle and draw the cord’s open ends on both sides. Form a ring, relatively bigger than your wrist size. This time, we will form the knot (same technique as the previous one) with an open end and its adjacent closed-end (right side).
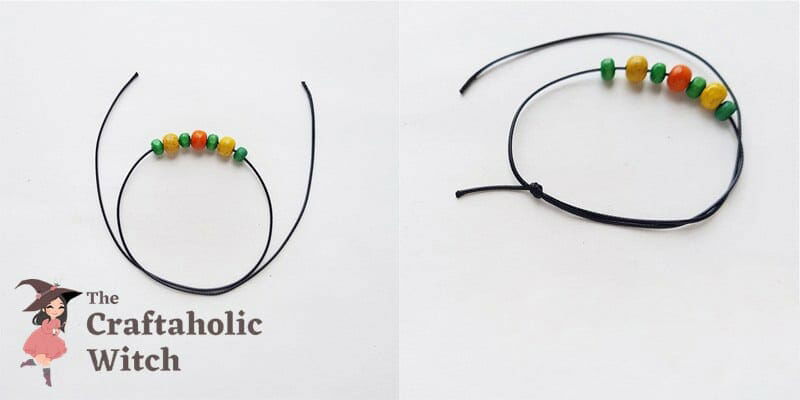
Step 2: The 2nd Knot
Now, use the other open end to form the 2nd knot with its adjacent closed-end (left side). You can trim the open ends if they’re too long and use a lighter to burn the open ends to secure the cord threads don’t wear out.
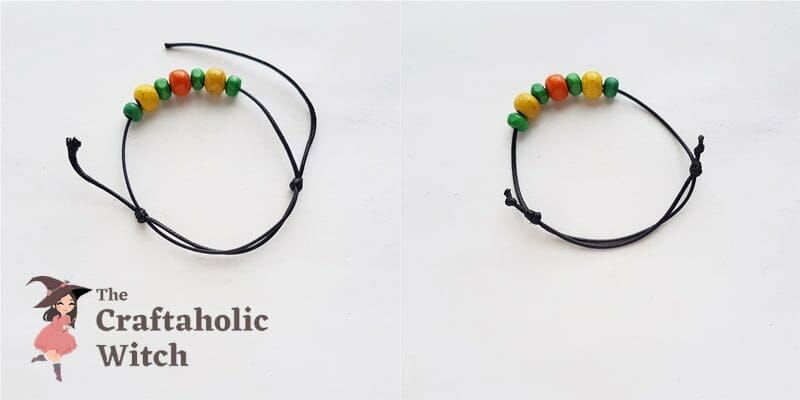
Watch Video Tutorial: How to Make Sliding Knot Bracelets with Beads
Having difficulty understanding the picture tutorial? No worries, you can also check out our video tutorial on how to make adjustable sliding knot bracelets. Don’t forget to hit the subscribe button and turn on the notification bell to stay updated.
Tips for Beginners
- Use waxed cord or any kind of smooth cord for a neat finishing and smooth slide.
- When measuring the cord, it’s better to keep an extra length as you can always cut off extra lengths but you won’t be able to add length if it’s too short.
- You will need to select beads that have big holes so that you can thread them into the cord nicely.
- Tie knots at the open ends after completing the bracelets, this will keep the open end strands of the cord secured from wearing off.
We hope you like this tutorial and enjoy the craft if you give it a try. Here are some of our other wire jewelry-making tutorials you may like:
Wire wrapping stones
How to Make Wire Ring
Wire wrapped bead pendant
Stud Earrings with Wire and Beads
Don’t forget to share your feedback in the comments below. Share pictures of your version of the beaded bracelet with us if you do give them a try. You can share your picture with hashtag #craftaholicwitch on Instagram or Facebook or just DM your picture to us on Instagram or Facebook page.


