How to Make Beautiful Paper Mache Bowls

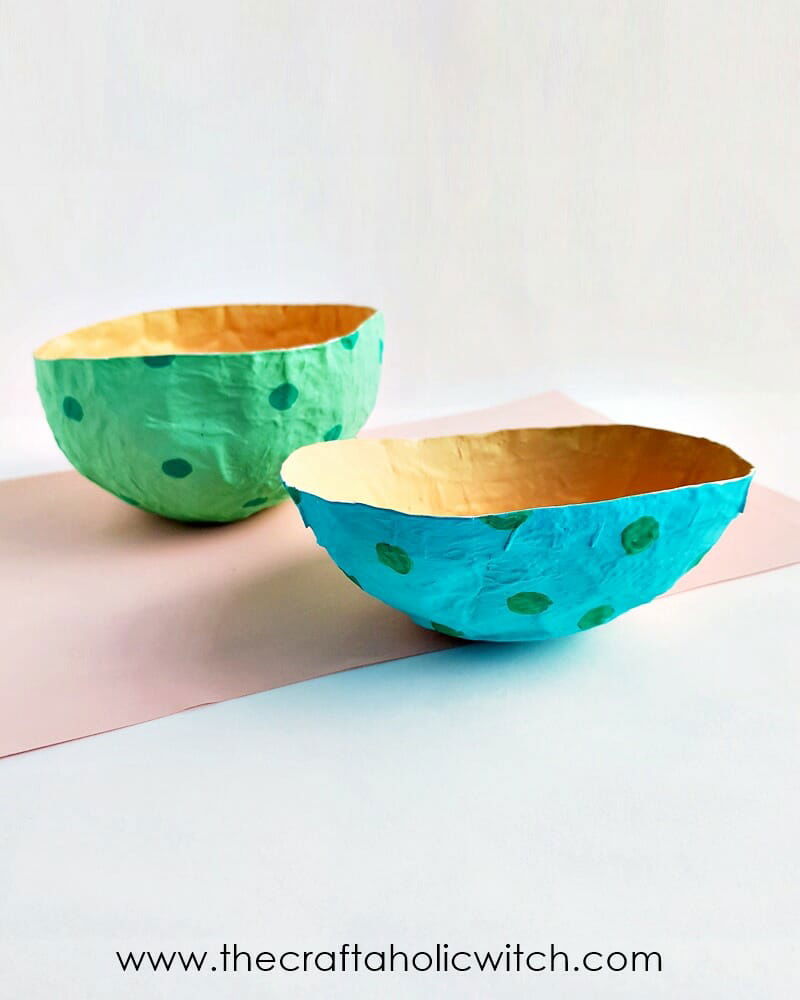
If you’re looking for a fun and green DIY project to try out for a weekend, then you’ve come to the right place! Today we’re sharing a super fun paper recycling project, DIY paper mache bowls. Learn how to make this amazing paper mache craft and make it at home.
These paper mache bowls can be a great project for kids as well. The best thing about this project is that it includes several skills practicing; recycling, papercraft, working with glue, and painting. A great project to engage kids as well as adults for a perfect craft therapy session.
We should mention to you that this DIY project is time-consuming but it is worth it of course! It takes about a day (maximum 2 days) to complete 1 bowl. But If you’re crafting more than 1 paper mache bowl in a day, they’ll take the same amount of time to dry and be complete. Guessing that you already have old newspapers and books at home, you’ll need to purchase acrylic paint, paintbrush, white glue, and balloons for this project; these will cost around $8 and can be found at any Hobby Lobby or local craft store.
Thing You’ll Need to Make Paper Mache Bowl
Materials
- Scrap paper (old newspaper, magazine, book pages, etc)
- Tissue paper/ kitchen napkin
- Balloon
Tools and Supplies
- White adhesive glue
- Scissors
- Paintbrush
- Acrylic paint
- Popsicle stick
How to make Paper Mache Bowl (Step by Step Instructions)
Step 1: Preparing the Paper and Base (Balloon)
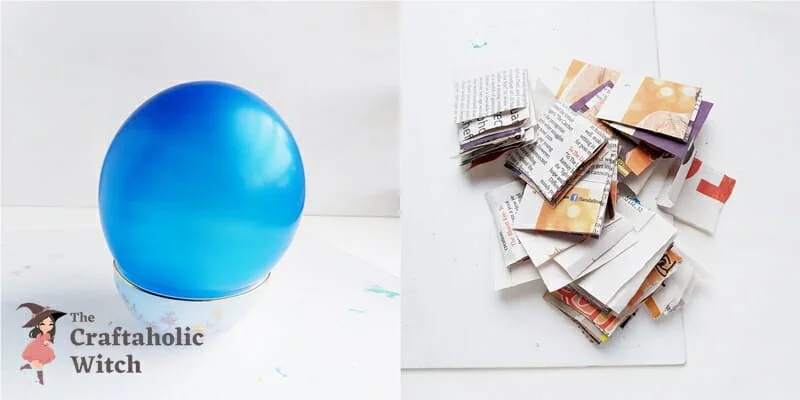
To get started, prepare the papers by cutting them into small square pieces (1.5 inches to 2.5 inches will do). If you can work with smaller pieces (less than 1 inch, that’s better but it might be time-consuming). Use a thick balloon and blow it into the size determines for the bowl. Place the balloon on something to keep its position firm and stable. We used a small bowl to place the balloon. Make sure to place the plain side (not the knotted side) of the balloon to the top side.
Step 2: Creating the First Layer of Paper
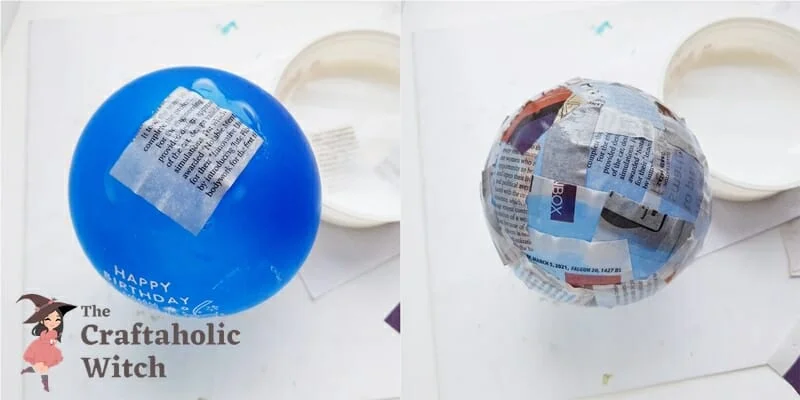
On another bowl or pot mix 60:40 white glue and water. Mix them really well. Take several pieces of paper and sink them into the glue-water mixture. carefully grab a wet paper piece and place it on the balloon. Use your fingertips to smoothen the paper with the surface of the balloon. We’re starting from the top side of the balloon.
Continue to soak the paper pieces into the glue-water mixture and then placing them on the balloon. While placing the papers on the balloon’s surface, remember the size of the bowl in mind. Or, you can use a marker to trace the bowl size on the balloon. The top end of the balloon we’re working on right now will be the bottom end of the bowl. This means that the line you’ll trace (somewhat along the middle of the balloon) will be the top edge of the bowl.
Continue to add papers to the balloon to form the first layer of the paper mache balloon.
Step 3: Creating Several Layers and the Last Layer
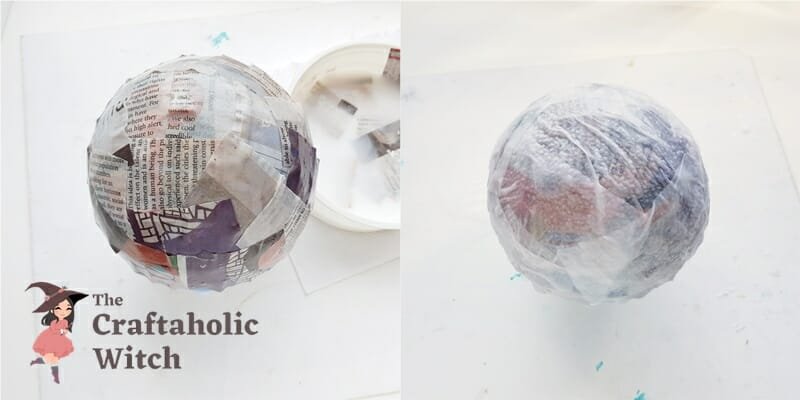
To give the paper mache bowl a more firm structure we will add several paper layers. We have decided to add 3 layers at last. You can notice that after adding the first paper layer, you can see light through the balloon, which means the layer is transparent. You can continue to add layers till the paper layers aren’t transparent anymore.
For the last layer, we’re using tissue paper to give the outer surface of the bowl a smoother look. Similarly, cut the tissue papers into pieces, dip them into the glue-water mixture and then place them on the balloon’s last paper layer. Once you’re done adding the tissue paper layer, allow the paper layers to dry overnight. Keep it in a dry place.
Step 4: Shaping the Edge of the Bowl
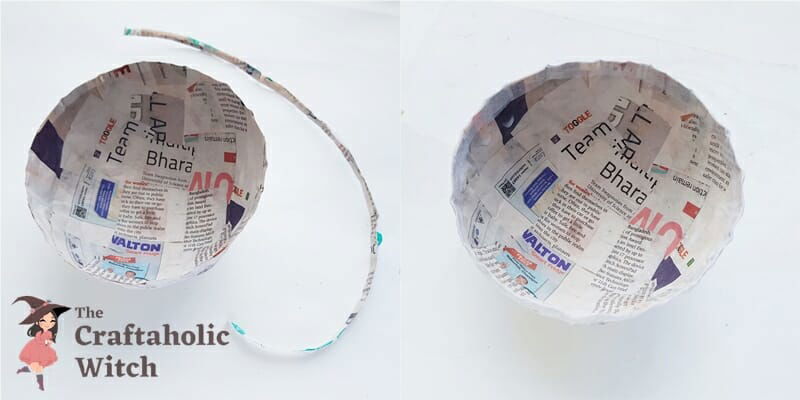
After a day or 2, the paper layers should become stiff and sturdy. Pop the balloon and take out the paper mache pattern carefully. Use a pair of sharp scissors to cut an even borderline around the top side of the paper mache bowl pattern.
Again, prepare thin pieces of tissue paper and dip them into a glue-water mixture. Apply the soaked tissue pieces around the top border of the paper mache bowl pattern. This will give the top end of the bowl a smoother finishing. Wait for the border tissue layers to dry completely before proceeding to the next step.
Step 5: Painting the Outer Surface of the Bowl
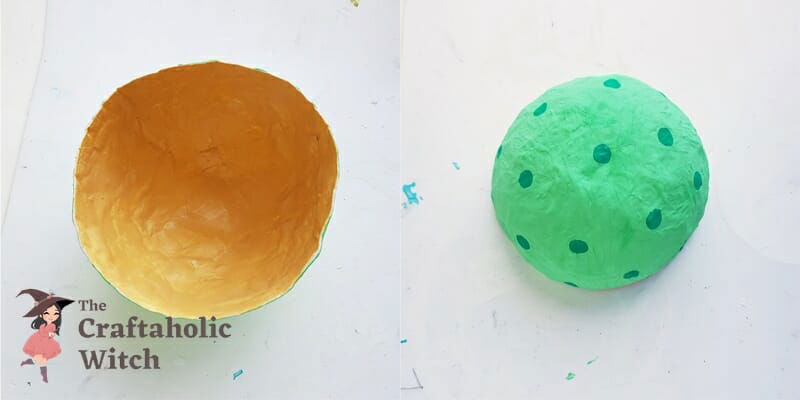
Once the border of the paper mache bowl is completely dry, prepare a thick batch of acrylic paint. Do not add any water to the paint. Apply a coat of white acrylic paint both on the inner and outer surface of the paper mache bowl. The white paint is applied as the base coat, allow it to dry completely.
Prepare any shade of acrylic paint of your choice. Apply a coat or 2 of the prepared acrylic paint. Allow the layer to dry.

Step 6: Painting the Inner Surface of the Bowl
Prepare a different or darker shade of paint to paint patterns on the paper mache bowl We simply added some green polka dots. We also painted the inner surface of the paper mache bowl with golden acrylic paint. But the painting part is entirely up to you, get creative and paint as you wish.
And of course, once you’re done painting, allow the paint to dry.
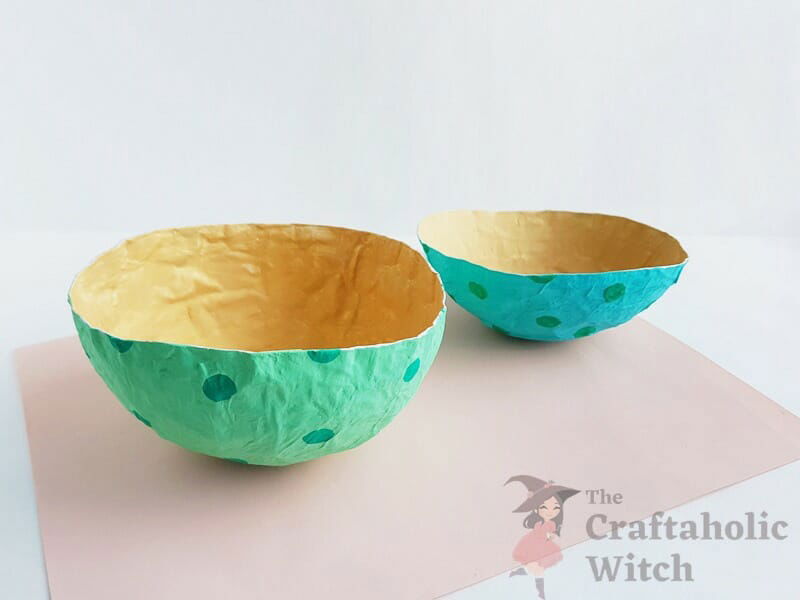
Done painting? Let it dry. These bowls may not be water-resistant but they are enough durable for all sorts of use. You can use them for dry snacks or keep craft supplies such as beads, wire, pompoms, jewelry findings, crayons, small objects, etc.
Tips for Beginners
Here are some tips if you’re having difficulty on how to make a paper mache bowl.
- It is better to check if the balloon is thick enough or leaks air. Blow up the balloon and wait for a few minutes before starting the craft.
- Keep old newspapers or cardstock paper on your work surface to protect it from glue and paint.
- Use thin papers, for example, newspapers, old book pages, etc. Try not to use cardstock papers.
- Cut the papers into small pieces of 1 inch to 2 inches but not more than that.
- The glue-water mixture must be 60:40 or 50:50.
- Allow the paper layers to dry completely before applying the paint.
- Use thick paint (do not add water to paint).
Don’t forget to share your feedback in the comments below. Share pictures of your version of the paper mache with us if you do give them a try. You can share your picture with hashtag #craftaholicwitch on Instagram or Facebook or just DM your picture to us on Instagram or Facebook page.
You May Also Like


