How to Make Pretty Quilled Paper Earrings

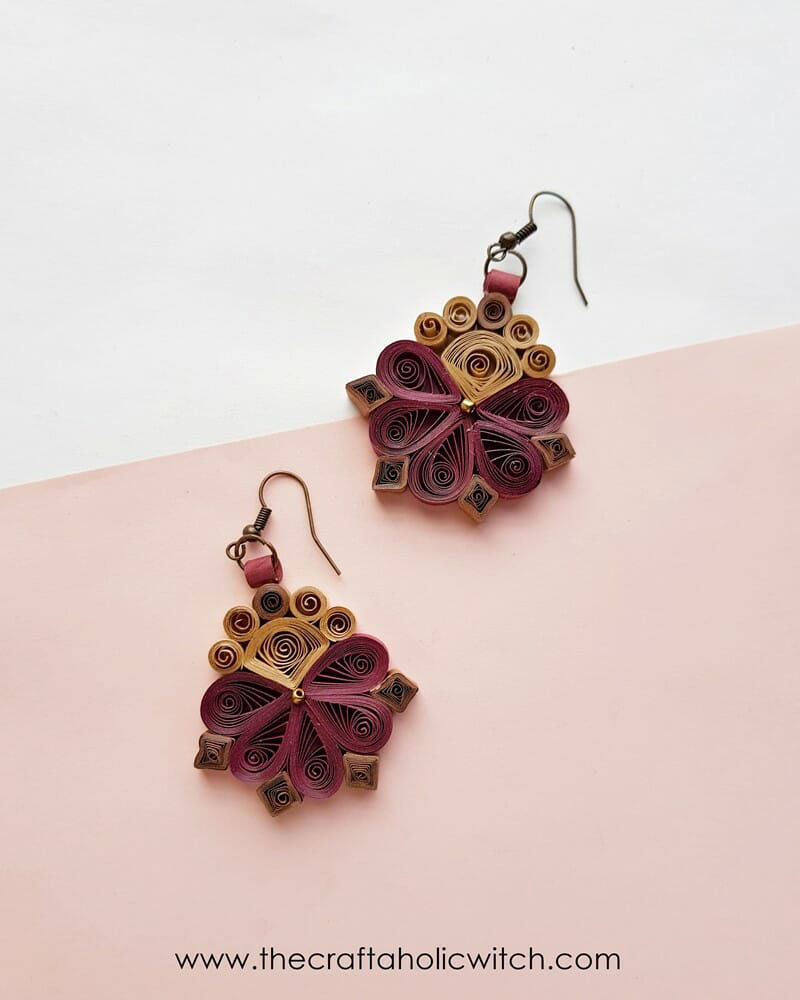
Want to try something fun this weekend? How about crafting a pair of quilled paper earrings? This might sound unusual, as we hardly wear paper earrings but we promise you that these quilled paper earrings can be a pretty addition to your jewelry collection as well as a great craft to practice some skills.
DIY earrings are very common among DIY projects but DIY paper earrings can be a little tricky when you’re using only paper as the main material. But, creativity is all about taking the risk and making something extraordinary out of the ordinary. By the end of our quilled paper earrings tutorial, you will learn how to make some basic quilled paper shapes and how to assemble them to create a nice pattern.
Depending on your skill and available supplies, the time and cost of these quilled paper earrings may vary. On average, a paper quilling kit costs around $25 but this project requires a few quilling papers strips, 2 jump rings, and 2 earring hooks; it shouldn’t cost more than $3 as you will get to have most of the materials left and you can reuse the tools for many future projects.
Things You’ll Need to Make Quilled Paper Earrings
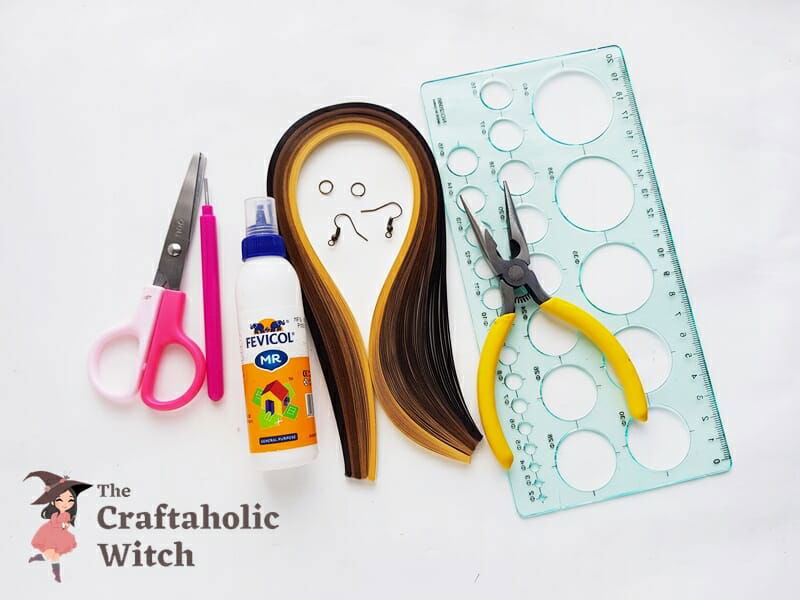
Materials
Tools
- Shaping tool
- Slotted tool
- Scissors
- Craft glue
- Craft pliers
How to Make Quilled Paper Earrings
Step 1: Making Triangular Teardrop Shape
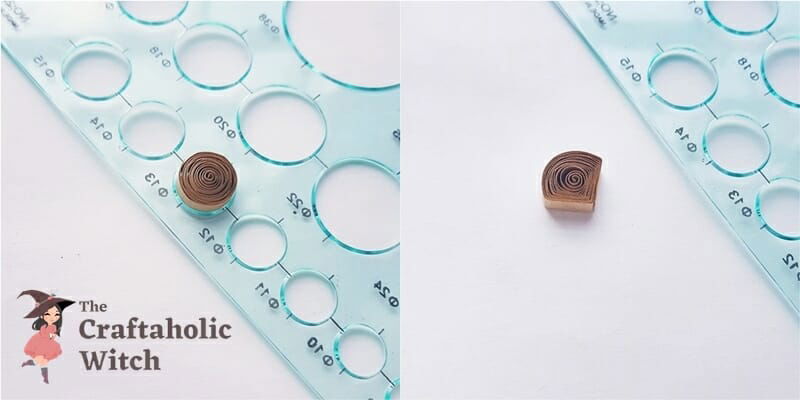
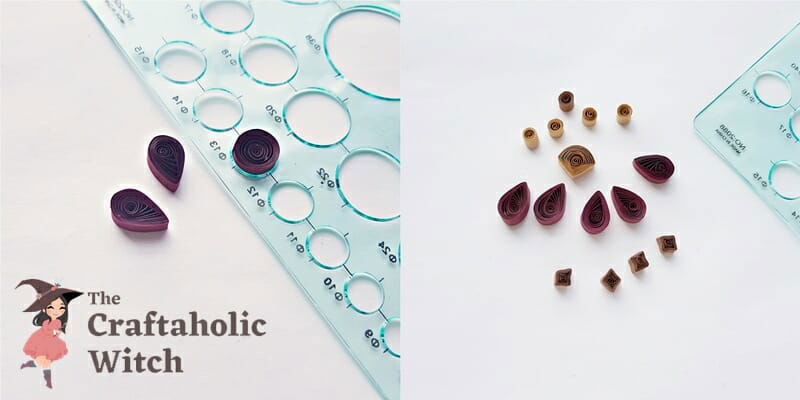
The first shape that we’ll make is not commonly used for paper quilling crafts, however, it’s very easy to make. Grab a 12 cm strip and form it into a loose coil with the help of the slotted quilling tool. Carefully get the coil out of the tool and then place it inside slot 13 of the shaping tool. Once the coiled paper stops to loosen up, take it out of the slot and press any one side to form a pointy edge. Now, press 2 more points on both sides of the first point; these 2 points can be opposite to one another. We will need only one shape of this pattern.
Step 2: Loose Coils and Square Shapes
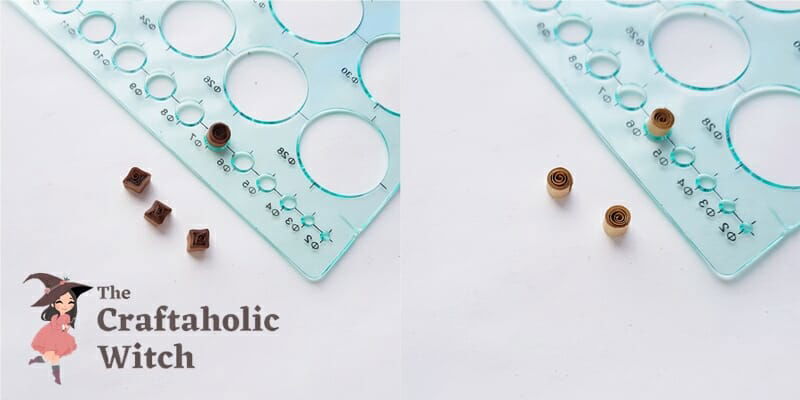
Use 4 cm strips to create 5 loose coils on slot 6 of the shaping tool and use 6 cm strips to create 4 quilled square shapes on slot 7 of the shaping tool.
Step 3: Making Teardrop Shapes
Use a 12 cm strip to create 5 teardrop shapes on slot 13 of the shaping tool. There, we have our basic shapes ready to craft the earring. Check if you have the following shapes ready, 5 teardrops, 5 loose coils, 4 squares and 1 triangular shape.
Step 4: Attaching the Teardrops and Square Shapes
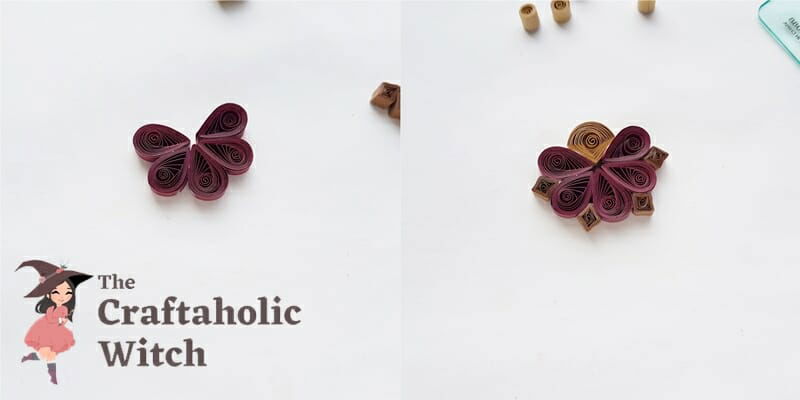
We are going to use white glue to join the quilled paper shapes together to create the earring base. firstly, grab the teardrop shapes and join them side by side with their pointy ends facing towards the center. Attach the triangular shape on the blank space of the attached teardrops, also keep the pointy end of the triangular shape facing towards the center. Attach the quilled small square shapes between the teardrop shapes, along their open sides.
Step 5: Attaching the Loose Coils
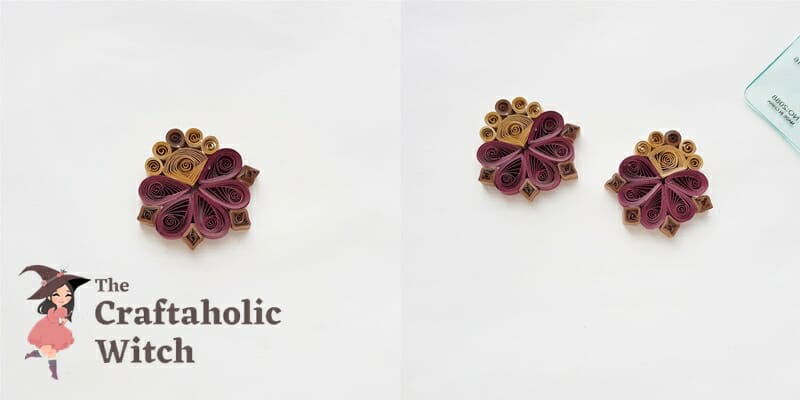
Now grab the quilled loose coils and attached them along the top side of the triangular shape. Try filling the top side of the triangular shape, if it requires less than 5 loose coils then keep it like that; if it requires more than 5 loose coils, create another one and fill the top side. Similarly, craft the other earring base.
Step 6: Attaching the Earring Hooks
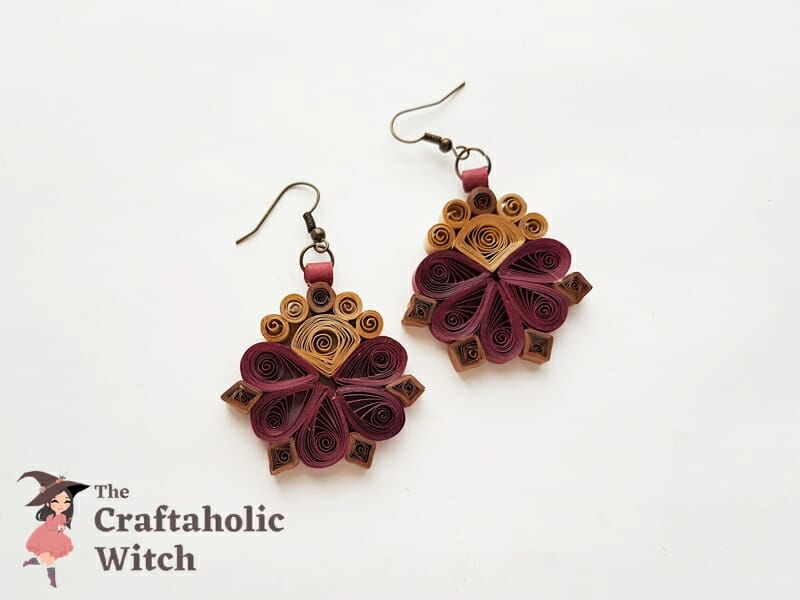
Use a thick strip to create a tight coil with a big hole in the center, we will need 2 of these. Attach the tight coil on the top side of the center loose coil but make sure to rotate the tight coil to a 90 degrees position. We need the tight coil’s holes faced left-and-right (not back and front like the rest of the shapes). Allow the glue to dry completely before proceeding to the next step of attaching earring findings.
Grab a jump ring and attach it with the earring pattern through the holes of the tight coil on top. Attach an earring hook with the jump ring to complete the earring. Similarly, complete the other pair.
Tips for Paper Quilling Projects (Quilled Paper Earrings)
Having difficulty with the quilled paper earrings? Here are some tips that can help you.
- If you’re trying paper quilling craft for the first time, we suggest you use a store-bought quilling strip set for better practice.
- Select strips that are thick and sturdy for this earring craft. Try not to select thin strips.
- Do not use hot glue as it works quickly. You will need to adjust each shape after placing them to make the pattern, so using white glue or craft glue is the best option.
- Use a ruler to measure the strips and the shaping tool to shape the quilled paper pieces.
- Apply a coat of clear nail polish to make earrings waterproof.
- Don’t be upset if the pattern doesn’t turn out well in your first attempt. Always keep practicing, the more you practice the better your skills will get.
You can mix and match different colored quilling strips to recreate our quilled paper earrings to give each pair a different look.
Hope you liked this quilled paper earring making tutorial. If you love making and wearing unique earrings, please check our DIY leather earrings and DIY see the shell earrings tutorial. You may also check this tutorial on making 2 different uncommon earrings. Hope you’ll like them too.
Don’t forget to share your feedback in the comments below. Share pictures of your version of the quilled paper earrings with us if you do give them a try. You can share your picture with hashtag #craftaholicwitch on Instagram or Facebook or just DM your picture to us on Instagram or Facebook page.
Happy Crafting!
Thank you!


Very helpful. I’m getting ready to start quilling for the first time. Reading your instructions put me a little more at ease. Thank you.
You are welcome 🙂