How to Make Easy Origami Rose in Bloom (Folding Instruction)
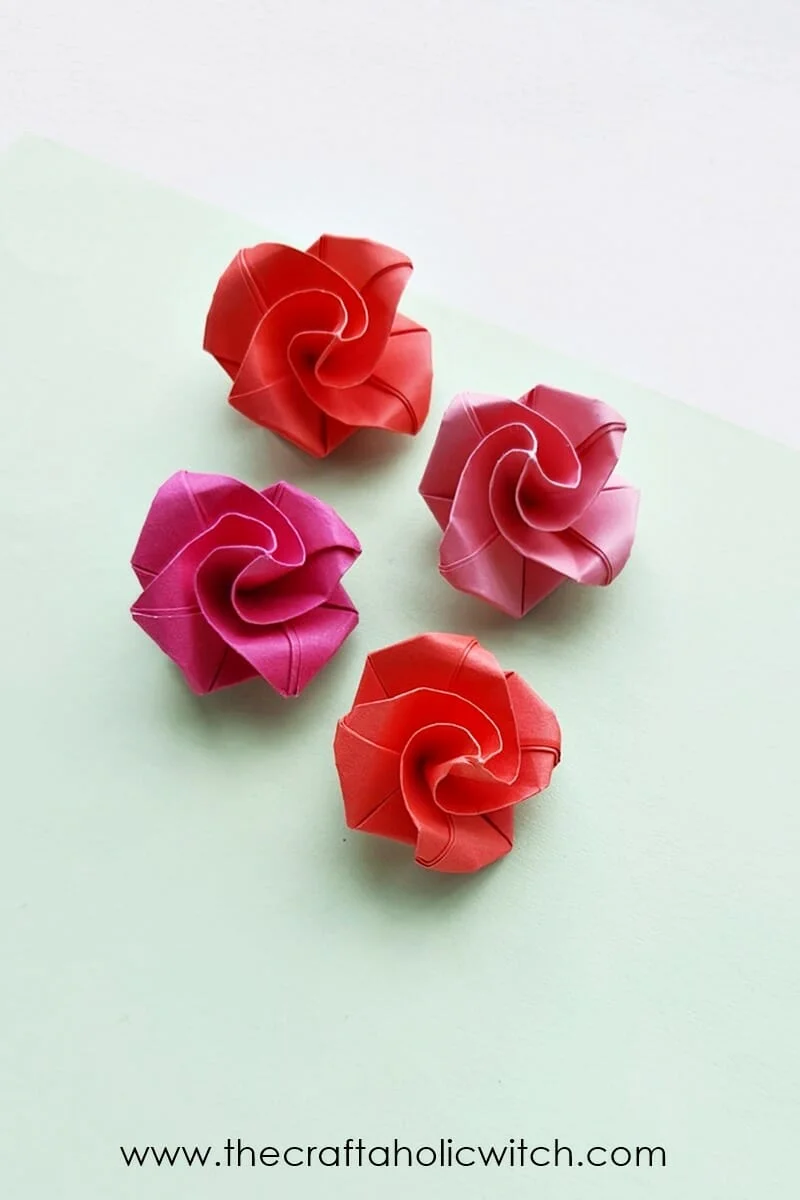
Want to make a pretty blooming origami rose out of a single sheet of paper? Learn how to make easy origami roses with our easy step-by-step tutorial. These easy-to-follow folding instructions are perfect for both beginners and kids. 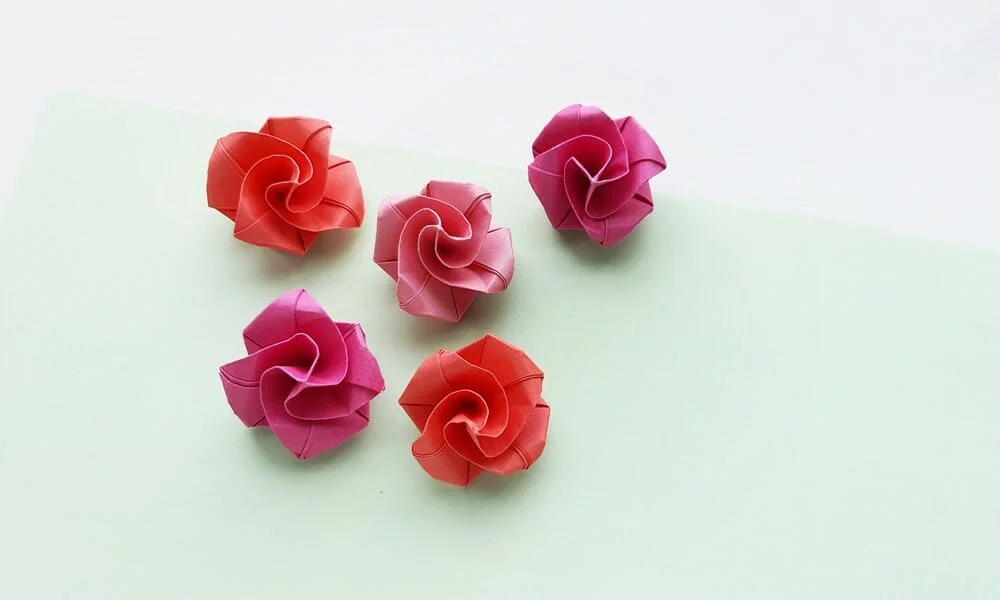
Have you noticed that we’ve posting lots of origami folding crafts lately? We absolutely love creating origami tutorials as they require fewer supplies. All you need is a piece of paper and you’re good to go. In todays tutorial we’ll show you how to make origami rose in bloom from a single sheet of paper. This craft doesn’t ven require glue.
You can always count on origami crafts if you’re looking for mini craft therapy sessions or a simple and fun activity to spend your free time. Origami crafts can be tricky sometimes, so we have tried our best to break down the origami rose instructions into easy-step-by-step instructions so that you can learn how to make origami rose even if you’re not an expert in origami folding.
About the time and cost of this project, there’s nothing much to say. It’ll take you only a few minutes to craft one and cost less than a dollar. All you need is a piece of paper and a few minutes to spare.
How to Make Origami Rose in Bloom
Materials
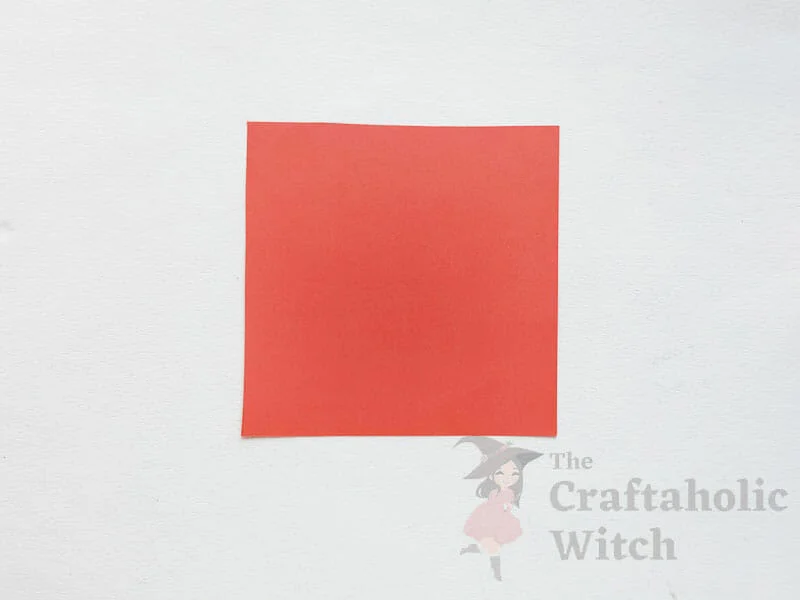
- Colored craft paper
- No tools required
But, in case you do not have a square sheet of paper, you will need a ruler and pencil to trace the square and a pair of scissors to cut out the square sheet.
Folding Instructions
Step 1: Base Creases
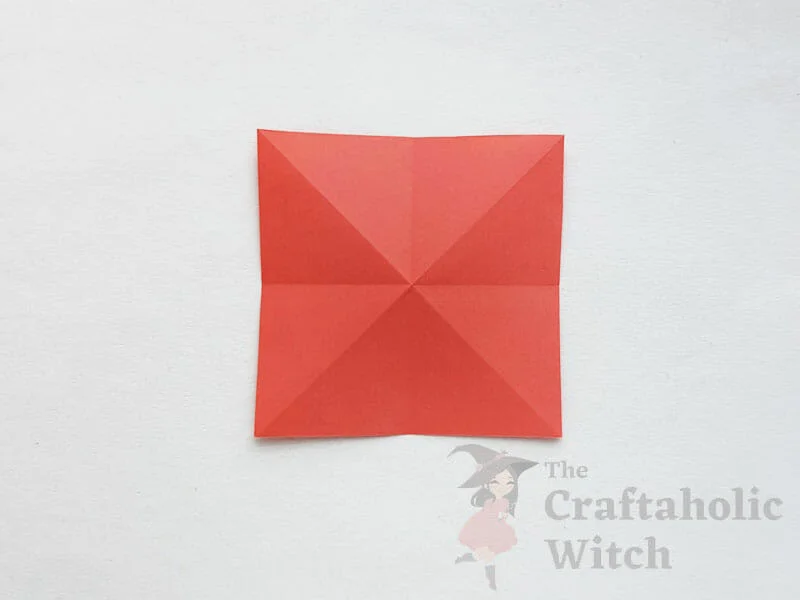
Take the square paper and fold the paper into half from both sides to create criss-cross creases. Flip the paper to the other side and fold the paper in half diagonally from both sides again to create diagonal criss-cross creases on the square paper.
Step 2: The Star Fold
Fold up the diagonal creases and fold the vertical-horizontal creases inwards, this will form a 4 point star pattern.
Step 3: Flattening the Star
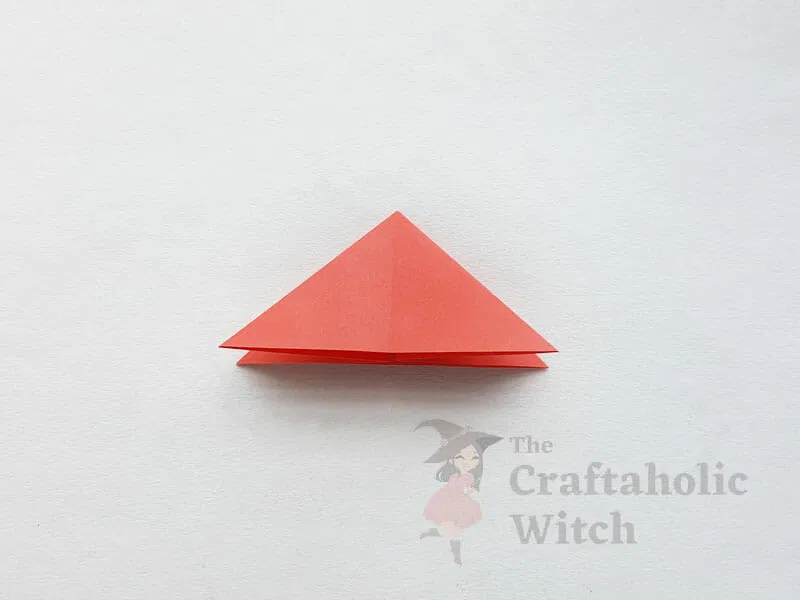
Join the adjacent parts of the 4 point star pattern and then flatten the pattern.
Step 4: Fold-Up Bottom Corners
Fold up the bottom corners and join them with the top corner of the current pattern (triangle).
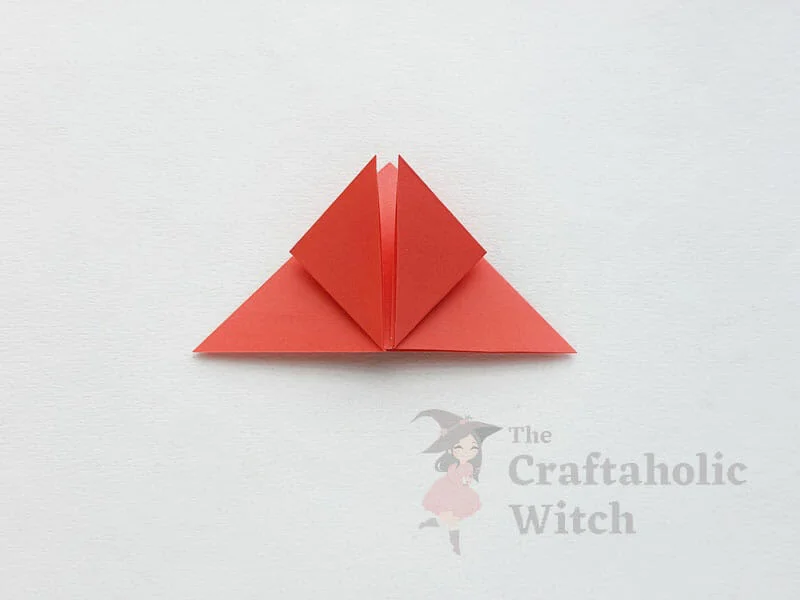
Step 5: Open Corner Pocket
The parts we folded up in the previous step should have pockets on the inner sides. Carefully open the pocket of any one of the sides.
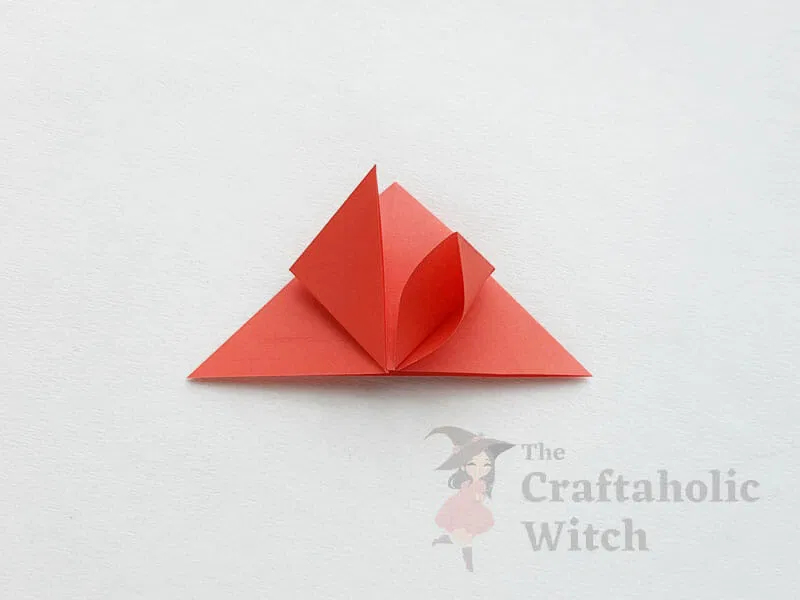
Step 6: Flatten the Corner
Open the pocket as much as you can and then join the corner (the top corner) with the bottom-middle part of teh current pattern. Flatten the pocket with the pattern and it’ll form a square part.
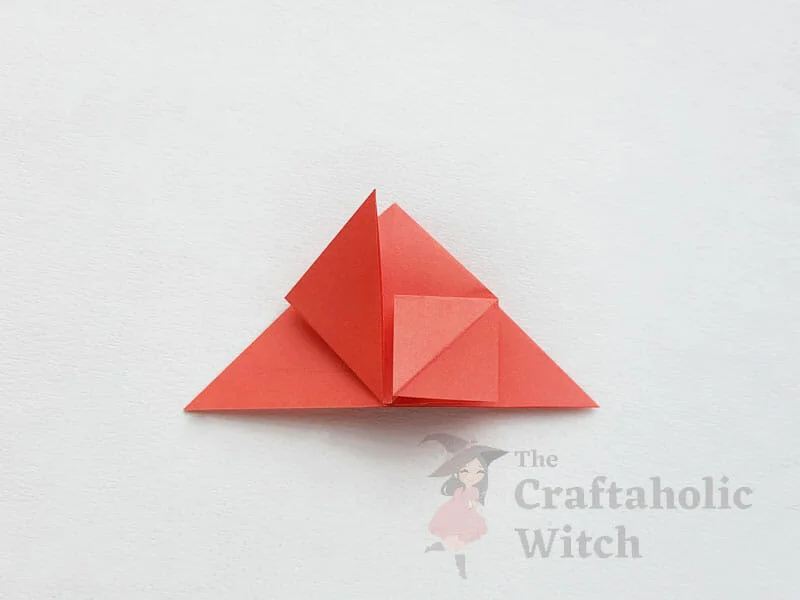
Step 7: Flatten the Other Side
Similarly, open the pocket and flatten it with the current pattern.
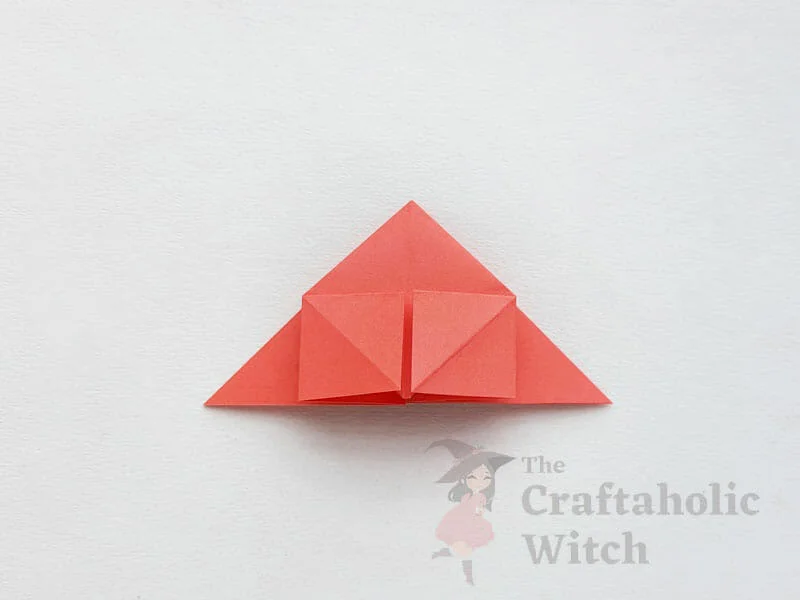
Step 8: Fold-Up 3 Inner Corners
Fold up and join the 2 inner-bottom corners to the opposite (diagionally) corners of each square parts. Half-fold and join the bottom corner of the middle part to its opposite corner.
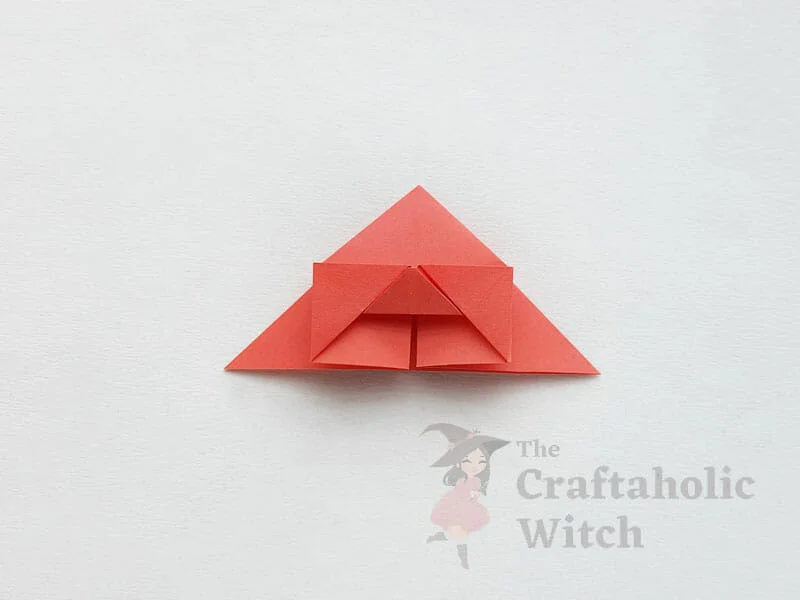
Step 9: Fold the Opposite Side
Turn the current pattern to the other side and similarly fold the other side.
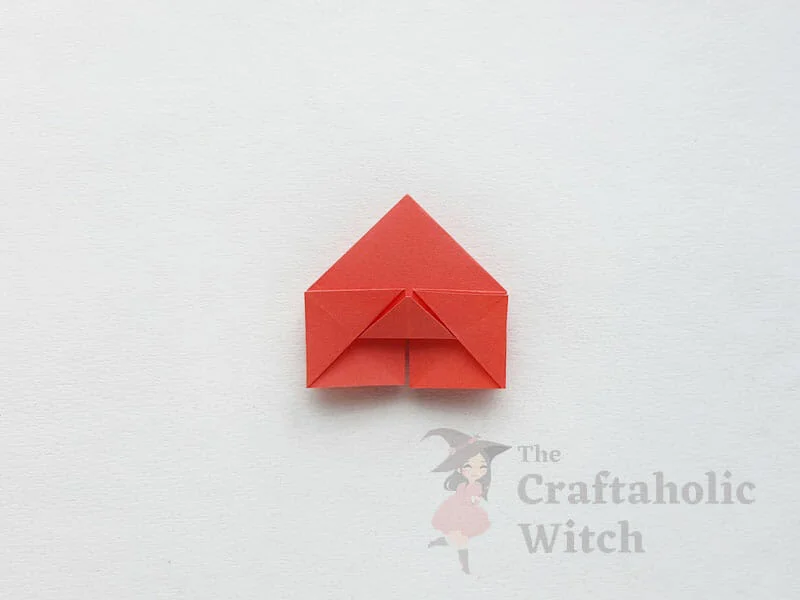
Step 10: Turn the Flaps
The current pattern should have 2 flaps on each side (left and right). Now simply flip and join the flaps with their opposite flap. To be more precise, join the top left flap with the top right flap and then join the bottom left flap with the bottom right flap.
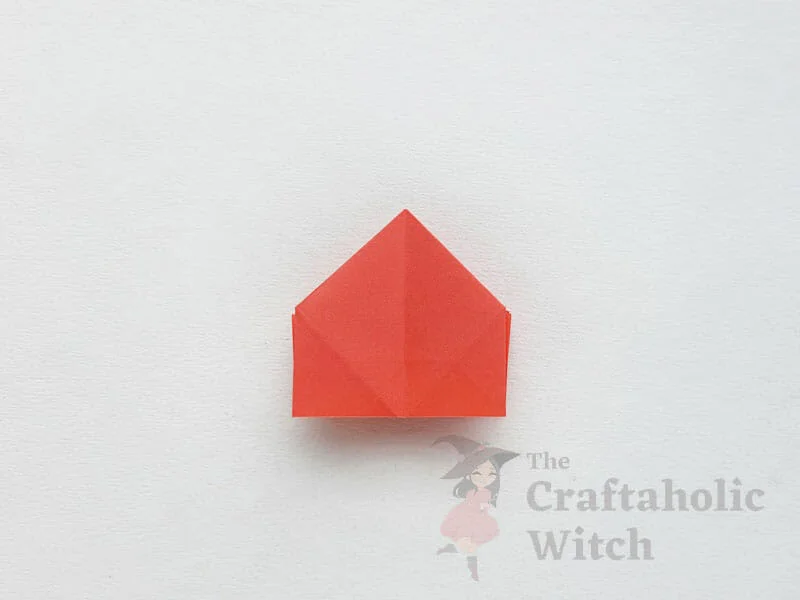
Step 11: Fold-In the Outer Corners
Fold the bottom side corners up.
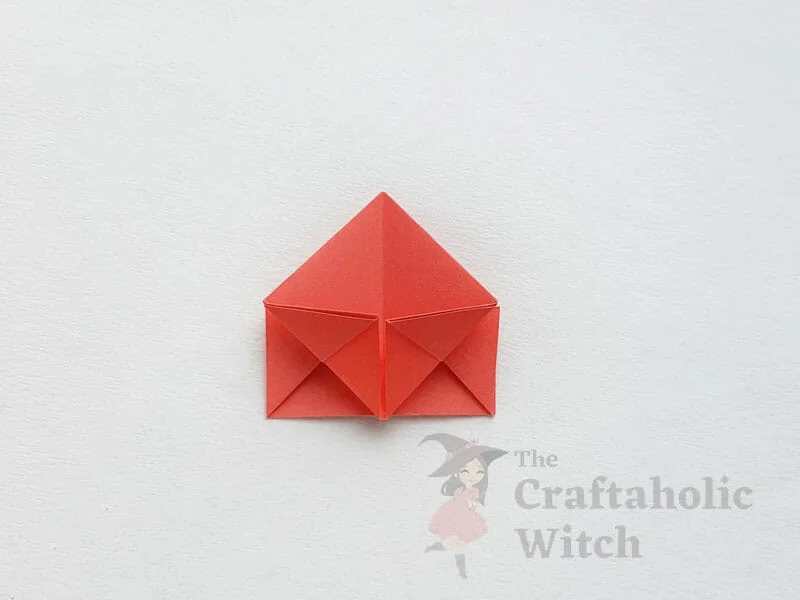
Step 12: Fold-Up the Bottom Half
Fold up the bottom corner of the middle part.
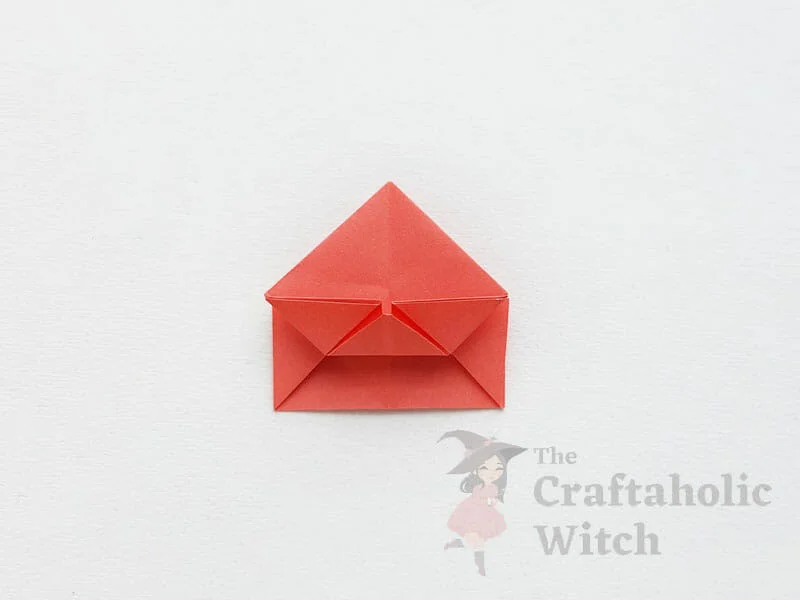
Step 13: Fold the Other Side
Now, turn the current pattern to the other side and similarly, make the 3 corner folds.
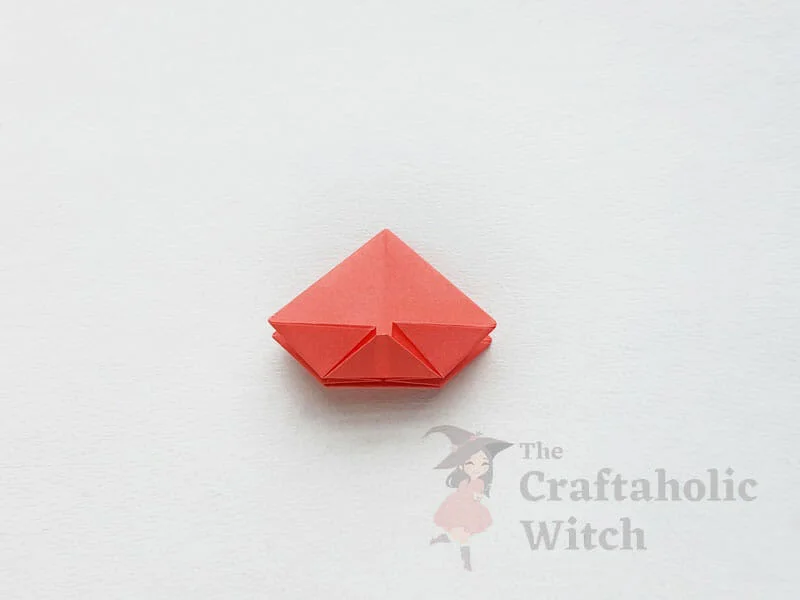
Step 14: The Bottom Side
Hold the current pattern in your hand and bring the bottom side to the front. carefully open the bottom side.
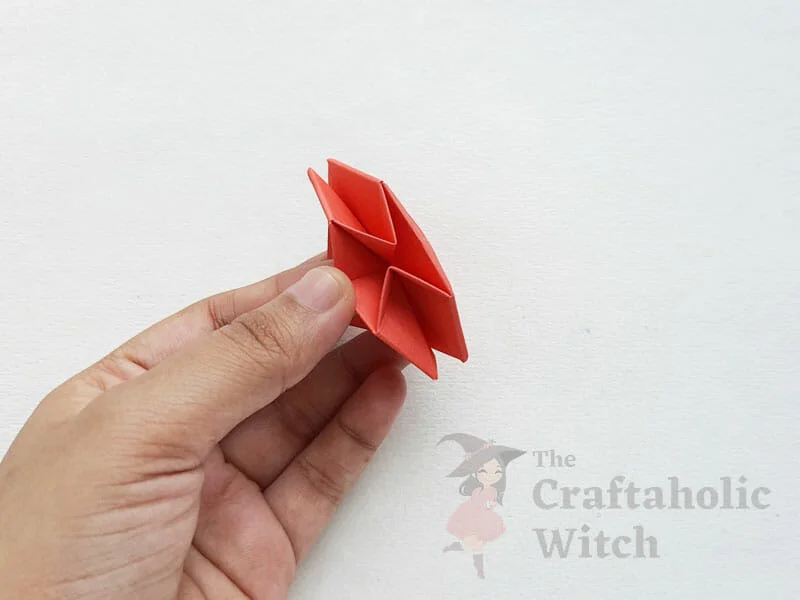
Step 15: Flatten the Bottom Side
Continue to open the bottom pattern until it is completely flat.
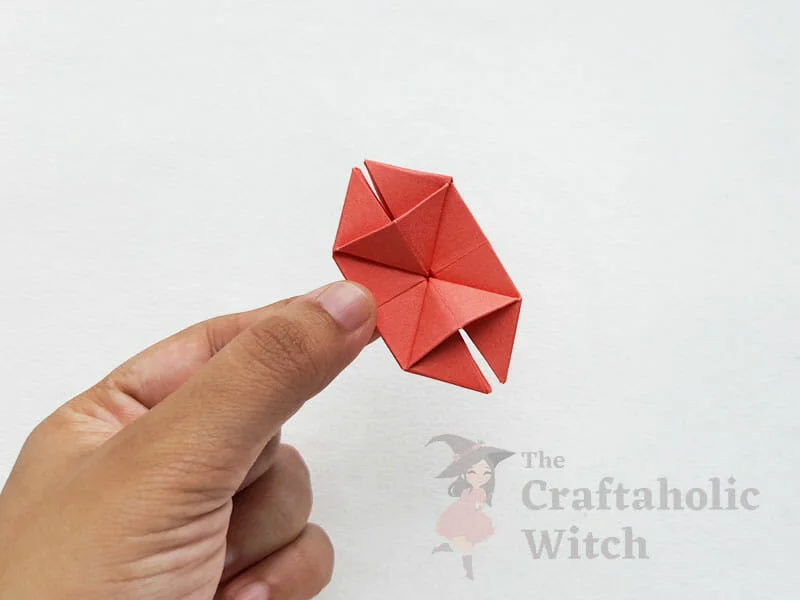
Step 16: Hold the Cross-Cross Pattern
Now, turn the pattern to the other side. This side should have a pinty criss-cross pattern. Place 1 finger between every 2 layers.
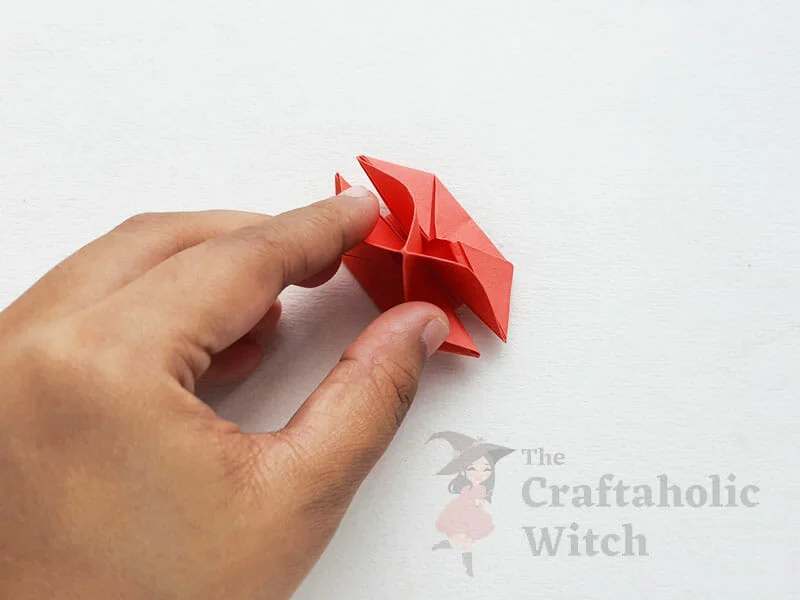
Step 17: Twist the Criss-Cross Pattern
Now carefully twist the pattern clock-wise. While twisting the pattern make sure to hold the flat bottom end of the pattern firmly with your other hand.
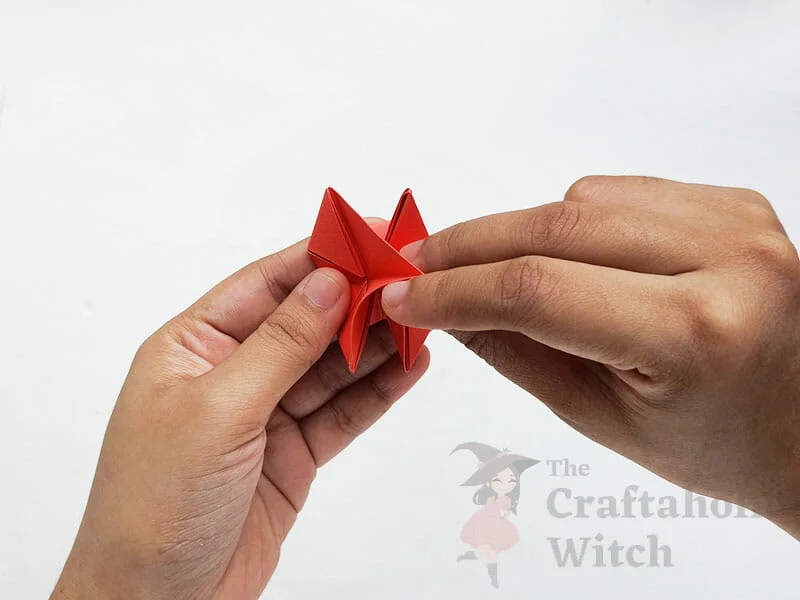
Step 18: Twist Until A Rose-Like Pattern is Formed
Keep twisting until the origami rose is in full bloom. Once twisted firmly, the twist usually stays like that. But after making the twist, it is safe to arrange the layers with teh tip of your fingers. Just make sure not to pull any part too hard.
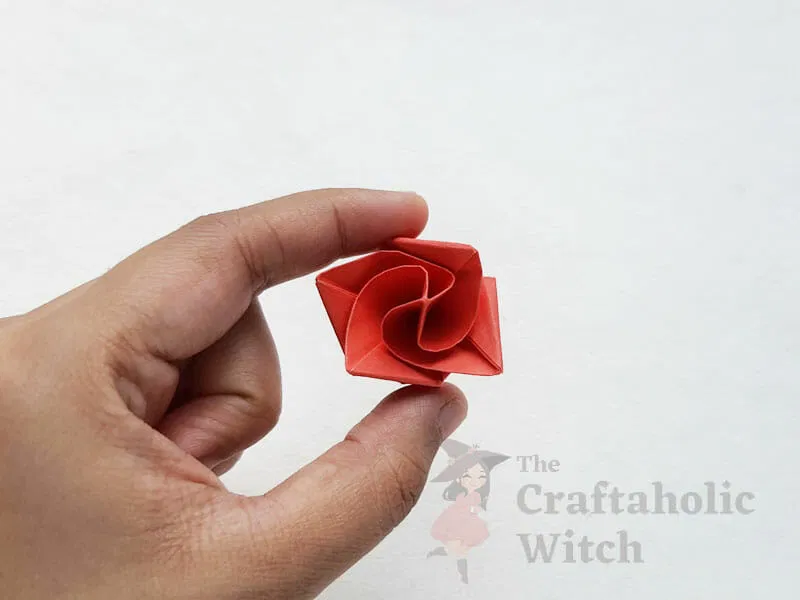
The first rose may not turn out to as nice, but that is totally fine. Grab a few more colored craft papers and practice making origami rose in bloom craft.
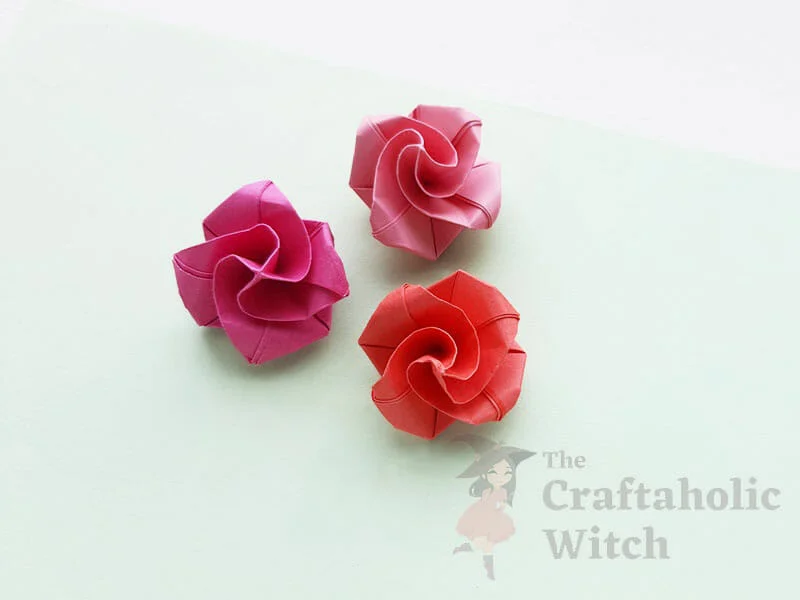
Origami Rose VIdeo Tutorial:
Folding Easy Origami Rose: Tips for Beginners
If you’re having difficulty crafting origami paper rose, you can check out these tips.
- Make sure to use a square paper for the origami rose-in-bloom craft.
- The initial half-folds (vertical-horizontal and diagonal) need to be done neatly.
- Making neat folds is the key to making the perfect origami craft.
- Twisting the criss-cross pattern at the end of the process is the tricky part, make sure not to twist too much or too hard, otherwise the paper might get torn from the center.
If you enjoy origami crafts, you can check out some of our origami craft tutorials on the blog, links have been given below.
- How to Fold Origami Maple Leaf
- How to Make Origami Bat
- How to Make Origami Leaves
- How to Make Origami Lotus
Did you know that origami folding technique is a great way for building and developing children’s motor skills and it is also great for adults looking for therapeutic craft sessions. We hope you liked our origami rose tutorial and enjoy crafting some yourself. If you re-create our origami rose, don’t forget to tag us on Facebook or Instagram (use #thecraftaholicwitch) and show us how you’re using or decorating them.
Happy Crafting!
Thank You



You lost me at step ten. I have no idea what that step is asking me to do.
Hello, so sorry for the confusion. I have updated the step’s written instructions, let me know if it’s clear now.
Step #10 is super confusing. I have no idea how to get past it.
No worries, you can check out our origami rose video tutorial from our YouTube channel.
This is great! Easy but elegant! wish it was a bit more detailed but after a few try’s its super easy!
Glad to know that! In case of confusion, you can check out our YouTube channel. Thanks!
I did it! its so pretty