3 Easy Ways of Folding Origami Envelopes (No-Glue) + Video
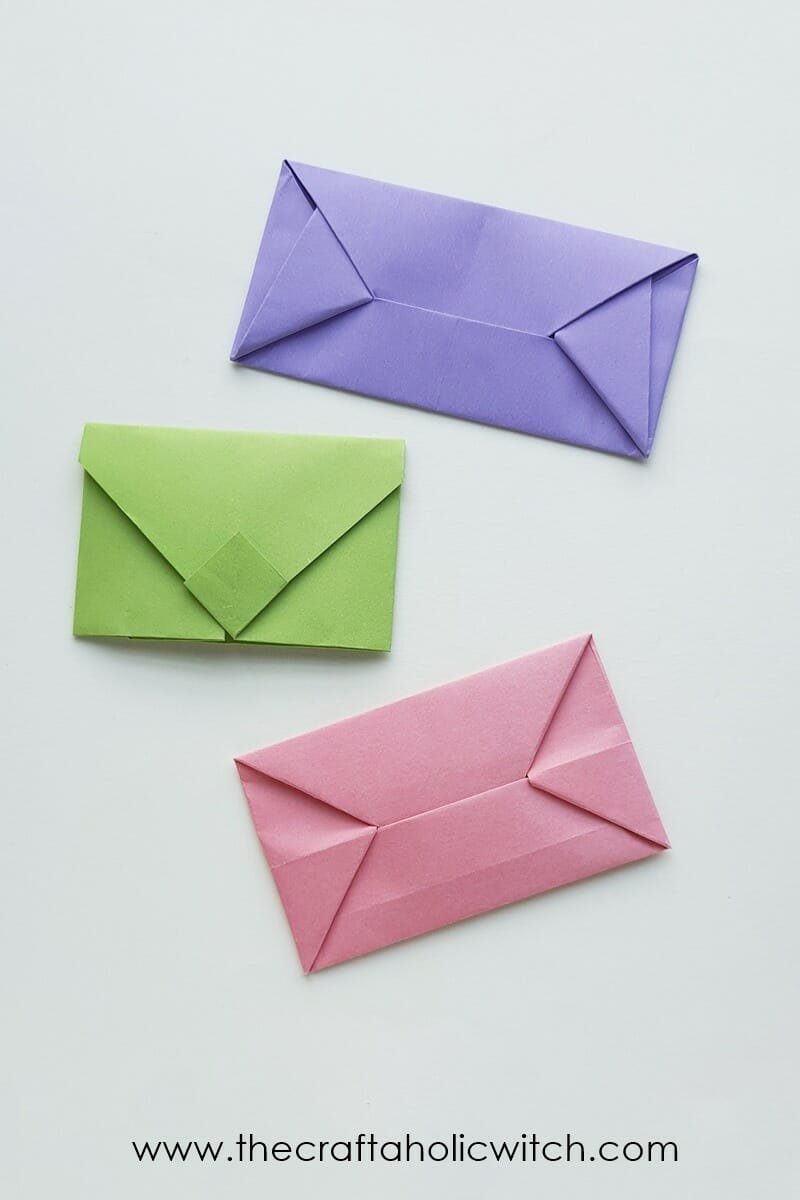
Do you want to learn how to make origami envelopes? In this article (with video), you will learn not one, but three ways to fold an envelope without using glue or tape. Enjoy
Yes, we are here with a fun and useful origami craft, origami envelopes. You can learn how to make origami envelopes in 3 different ways with our today’s tutorial. These are the quickest, low cost, and most useful origami crafts, no doubt about that. Even if you’re a beginner in origami folding, you can easily make these envelopes if you go through our tutorial only once.
The best thing about these 3 different origami envelopes is that they do not require any glue. You can securely close the envelope without craft glue. As for other tools, using a ruler, pencil, and scissors is actually optional. If you know the trick to preparing a square or a rectangle paper with free hands, then you won’t need any tools at all. Just a piece of paper is all you need.
I don’t know about you, but every time I need an envelope I can’t find any and have to search my entire house for one. Now that I know how to make origami envelopes in 3 different ways, also without glue, I won’t be struggling to look for them! These origami envelopes can be really useful and cute for gifts (letters, cards, money, etc.) during special or festive occasions such as Christmas, Halloween, Valentine’s day, birthdays, anniversaries, etc.
The cost for all 3 origami envelopes will cost less than a dollar. All 3 crafts do not require any other supplies, just a piece of paper and you’re good to go.
Things You’ll Need
Materials
- Colored craft paper
Tools
- Scissors
- Ruler
How to Fold Paper into Envelope [3 Technique]
Technique 1: Easy Origami Envelope Letterfold
Step 1:
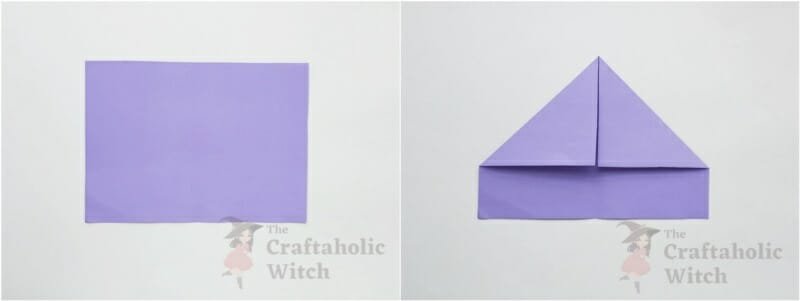
Take a rectangular colored craft paper. If necessary, use a pencil and ruler to measure the paper size and then cut it out. Place the paper on a flat surface. Fold the 2 top corners inside, diagonally and evenly.
Step 2:
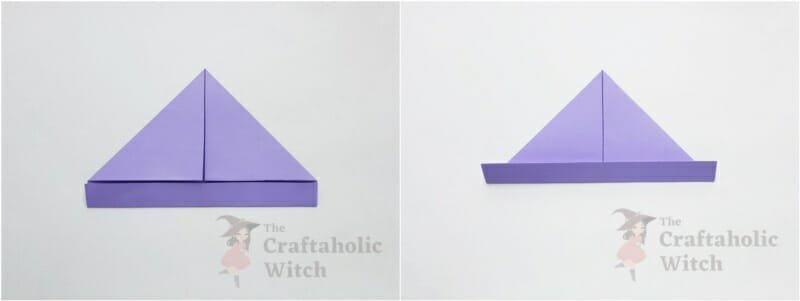
Now, fold the bottom side up and align it with the bottom side of the top folded parts. Fold the bottom side again, but this time fold it along the middle line of the top and bottom folded parts.
Step 3:
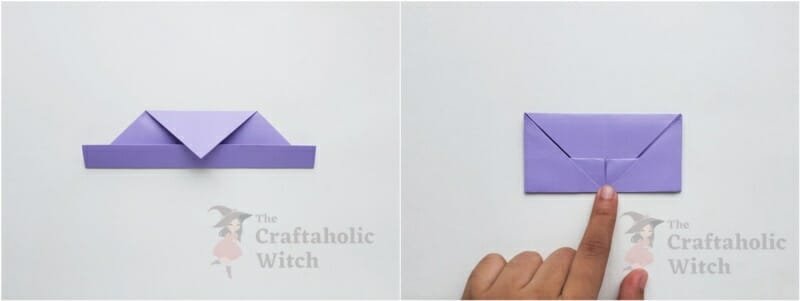
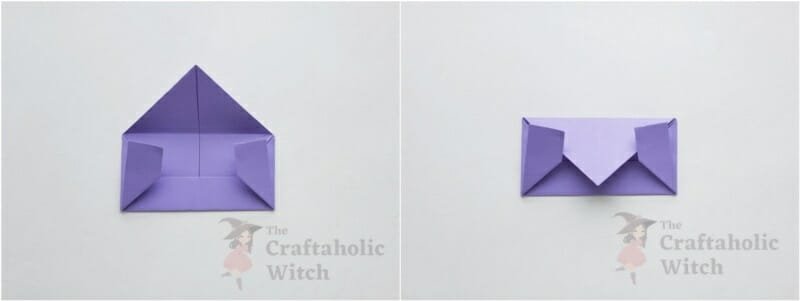
Fold and bring the top corner down. Join it with the bottom side of the current pattern. Fold both sides of the current pattern inside. The 2 corners of the top side should be the folding point for the sides.
Step 4:
Now, fold the sides upwards, to 45 degrees (more or less). Bring the top part of the envelope (the flap) down again.
Step 5:
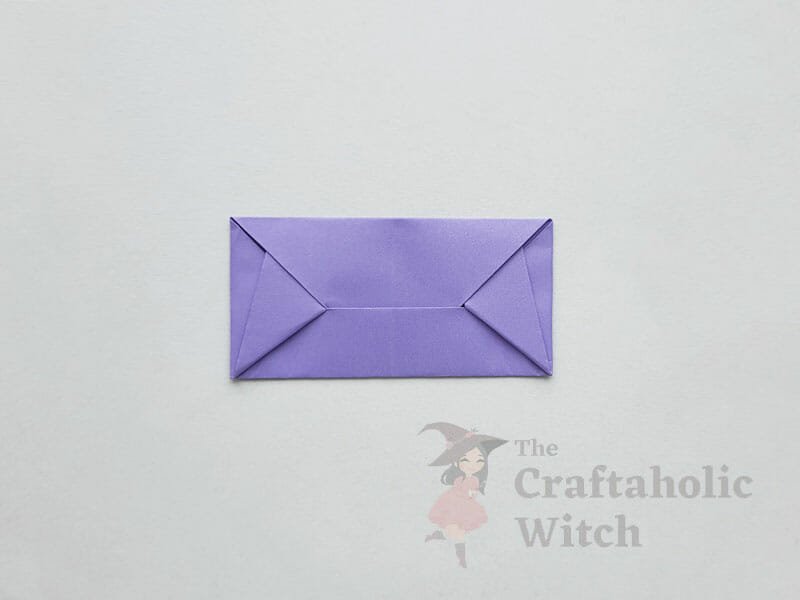
Insert the extra (top-open) parts of the sides below the flap to close the origami envelope. And our first origami envelope is complete.
Technique 2: Simple But Cute Origami Envelope
Step 1:
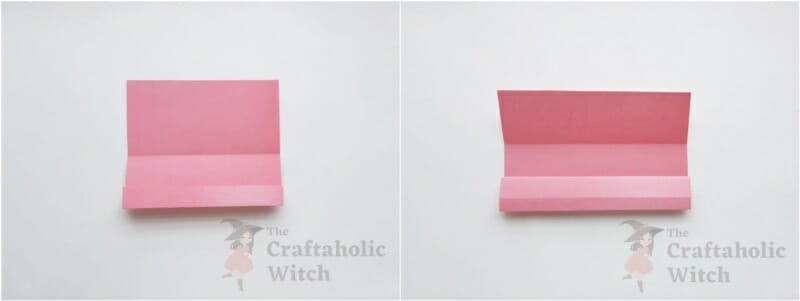
For the 2nd origami envelope, we need to prepare a piece of square paper. Fold the square paper in half and then unfold. Fold either side of the creased paper in half again and then unfold. Now, fold the outer edge of the 2nd half folded crease in half again but this time, do not unfold the last fold. Fold and bring the bottom side (folded side) to the 1st half folded crease and align them nicely.
Step 2:
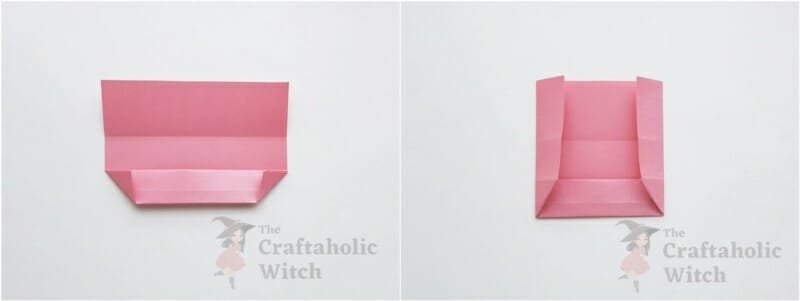
Fold the 2 corners of the bottom part of the current pattern. Use the bottom side of the corners as the folding point and fold both sides of the current pattern inside.
Step 3:
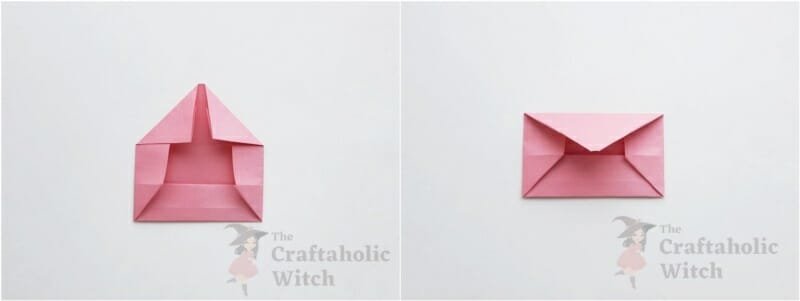
Fold the top corners of the current pattern inside, this is the flap of the envelope. Now fold the flap part inside, folding along the bottom side of the flap.
Step 4:
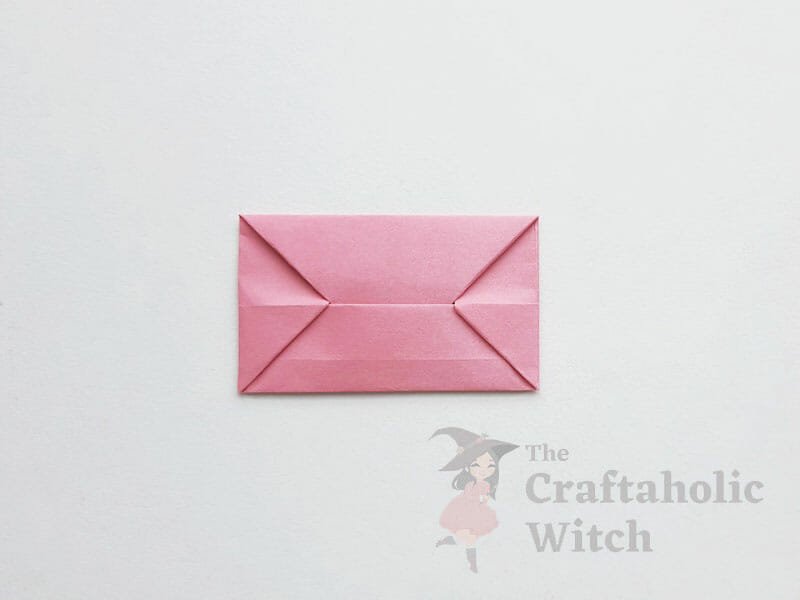
Insert the pointy open-end of the flap inside the bottom part to close the envelope. The 2nd envelope is ready and wasn’t that easy!
Technique 3: Origami Envalope with a Lock
Step 1:
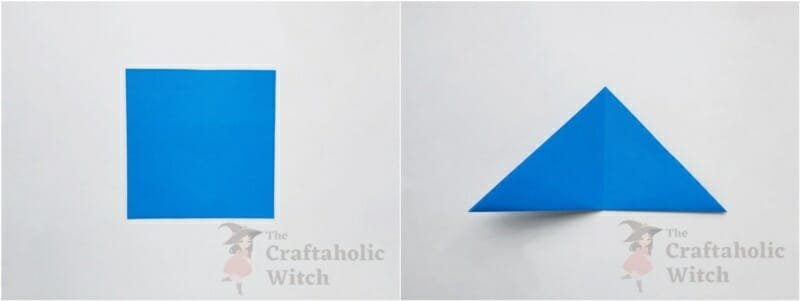
For the 3rd origami envelope, we need to prepare a square paper again. Fold the square in half, diagonally. Fold the triangle pattern in half and then unfold to create the crease.
Step 2:
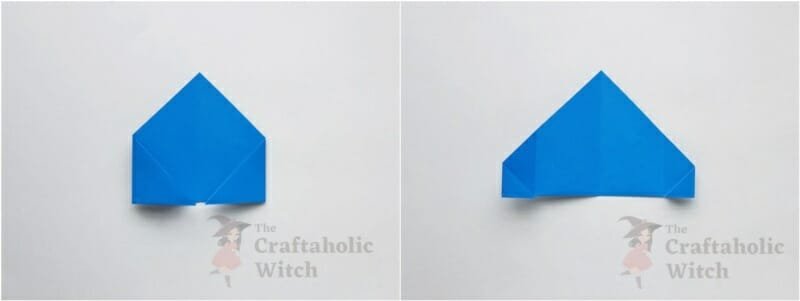
Fold the 2 bottom corners inside and join them in the middle. Unfold them. Now, fold and join the corners with the previously half-folded crease points.
Step 3:
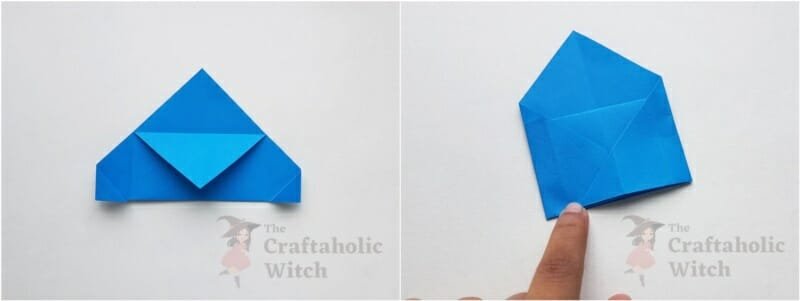
The top part of the current pattern has 2 layers; bring the front layer down and join it with the bottom side. Fold the sides inside and join them with the middle crease of the pattern. Unfold the corner of either one of the sides.
Step 4:
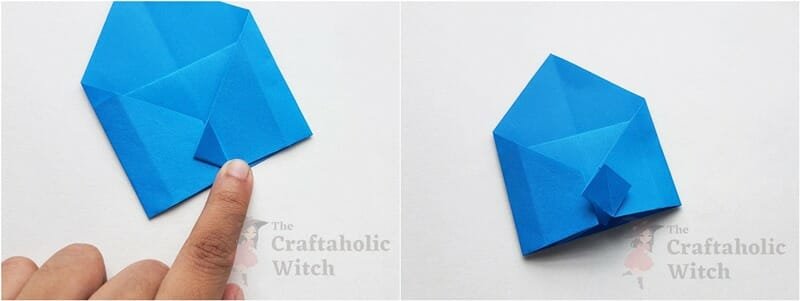
Fold the unfolded corner part in half by joining it with the middle crease of the envelope. Open the triangle part and bring out the folded layer inside the pattern. The square part should have an open side on the top.
Step 5:
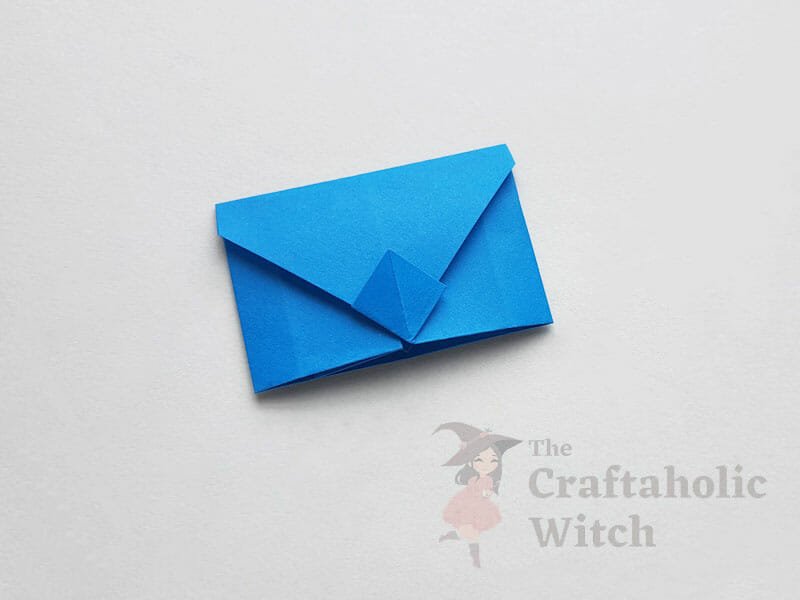
Fold the top corner of the flap part and join it with the bottom side of the envelope. Insert the corner of the flap inside the square part on the bottom to close the envelope.
Video Tutorial: How to Make An Envelope
Origami crafts can be tricky sometimes. If you’re having difficulty understanding our picture tutorial, you can check out our video tutorial as well. Don’t forget to subscribe to our YouTube channel while you’re there and turn on the notification bell to stay updated every time we post a new craft tutorial.
Envelope Folding: Tips for Beginners
Here are some tips if you’re having difficulty crafting origami envelopes.
- The initial base folds need to be done neatly.
- Making neat folds is the key to making the perfect origami craft.
Here are some of our origami craft tutorials that you may also like
- How to Fold Origami Maple Leaf
- How to Make Origami Bat
- How to Make Origami Leaves
- How to Make Origami Lotus
- How to Make Origami Butterfly
Origami projects are one of the best ways to build and develop a child’s motor skills and it is also great for adults looking for a therapeutic craft session. We really hope you like our origami envelope tutorial and enjoy crafting them yourself. If you do re-create our origami envelopes, please do tag us on Facebook or Instagram (use #thecraftaholicwitch) and show us how you’re using or decorating the origami envelopes.
Happy Crafting!
Thank You
.


hi i don’t how to make your envelopes
At first glance, origami may seem challenging. However, with a step-by-step guide and a video tutorial, you can master it in just a few attempts.