How to Make 3d Paper Christmas Trees (+ Video & Tips)
Paper Christmas trees are great for last-minute decor emergencies. In today’s tutorial, we will show you how to make 3d paper Christmas tree in a few minutes.
We’re almost done with our Christmas craft projects for this season, are you enjoying them? We really hope you are. Last week we shared 3 no-glue origami envelope crafting ideas and this week we’re here with another glue-free papercraft. Paper Christmas decors are great for last-minute decor emergencies. In today’s tutorial, we will show you how to make 3d paper Christmas tree in a few minutes.
You can use these 3d paper Christmas trees to make a Christmas centerpiece, Christmas tree garland, a mini Christmas scenery, and much more. You can also add them to gift boxes to add a little festive look to it.
Crafting 1 3d paper Christmas tree won’t require more than 5 minutes and it will cost less than a dollar. All you need is a sheet of square paper and a pair of scissors and you’re good to get started.
Things You’ll Need to Craft 3d Paper Christmas Tree
Materials
- Craft Paper
Tool
- A pair of scissors
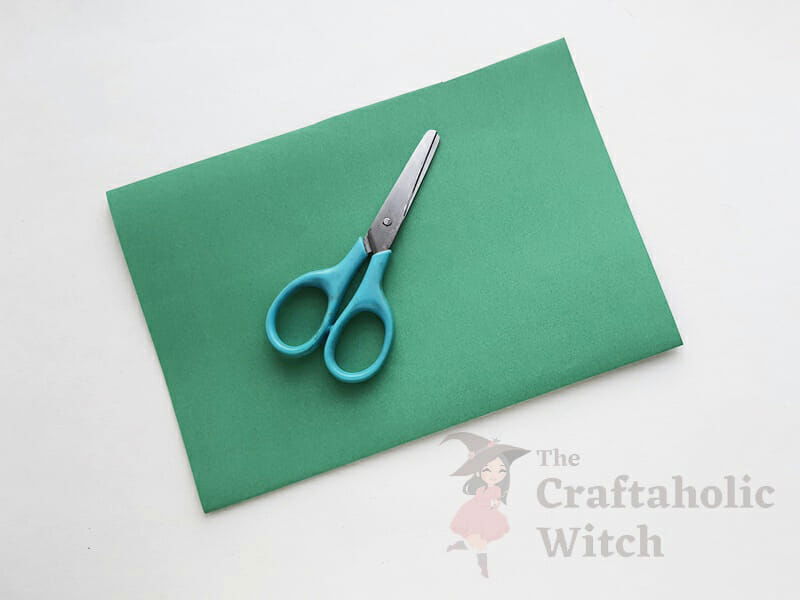
How to Make 3d Christmas Tree Out of Paper
Step 1: Base Creases
Prepare a piece of square paper. You can use plain colored craft paper or you can use printed paper, as you wish. Take the square paper and fold the paper in half diagonally, from both sides. Now, flip the paper to the other side and fold it in half horizontally and vertically.
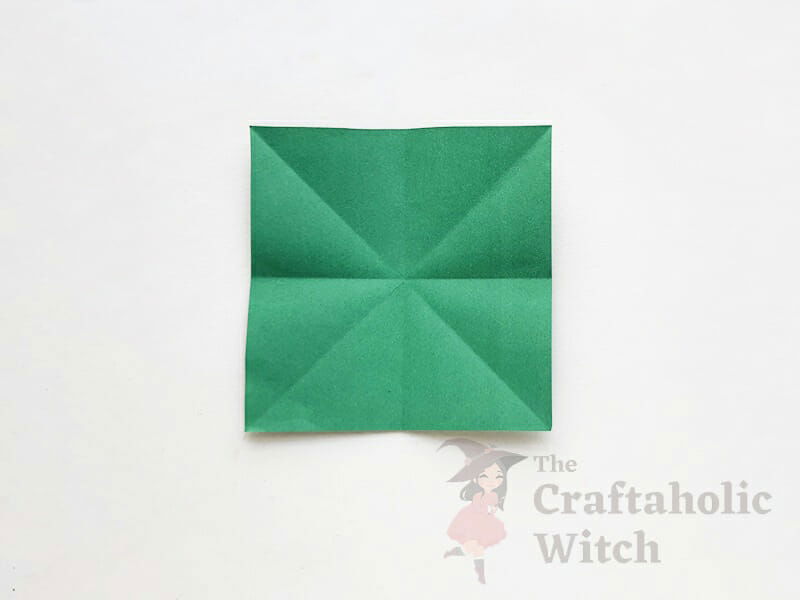
Step 2: Base Fold
Now, hold the creased paper and push the diagonal creases inwards and draw the vertical and horizontal creases outwards. Flatten the current paper and you’ll have a square pattern.
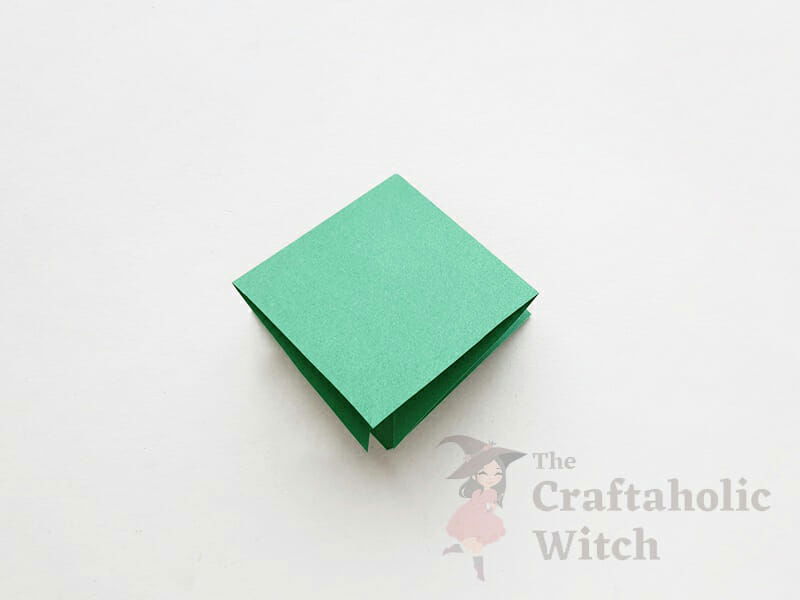
Step 3: Fold a Closed Side Inwards
The current square pattern should have 2 closed sides and 2 open sides. Fold the closed side inside and align it with the middle line of the current square (the line that divides the square in half diagonally.
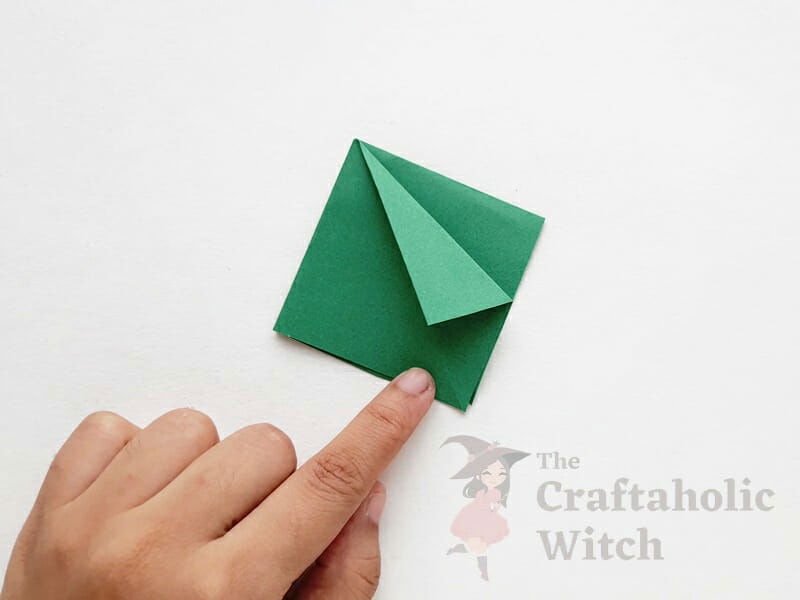
Step 4: Unfold the Last Fold
Unfold the fold that we just created in the previous step. This will leave creases on that particular part of the current paper pattern.
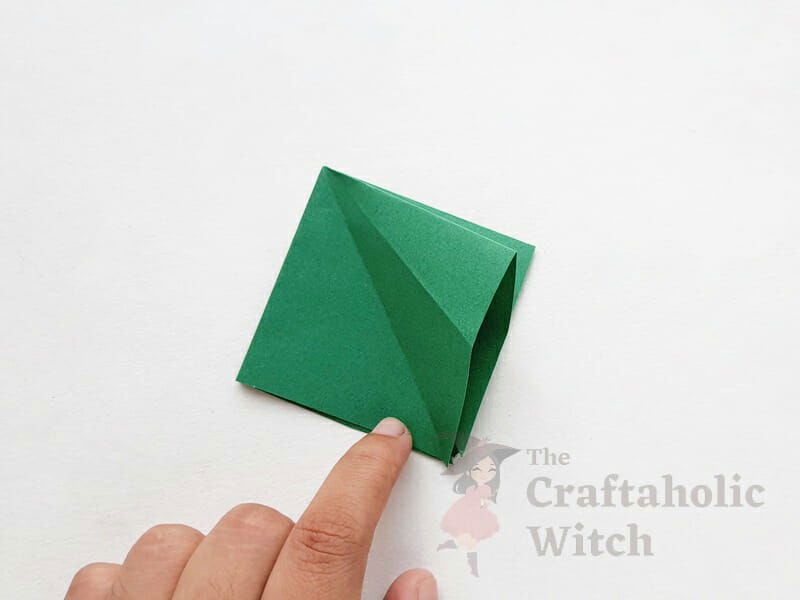
Step 5: Flatten the Side Layer
Flatten that part by bringing the side crease along the middle and the 2 new creases on both sides of it.
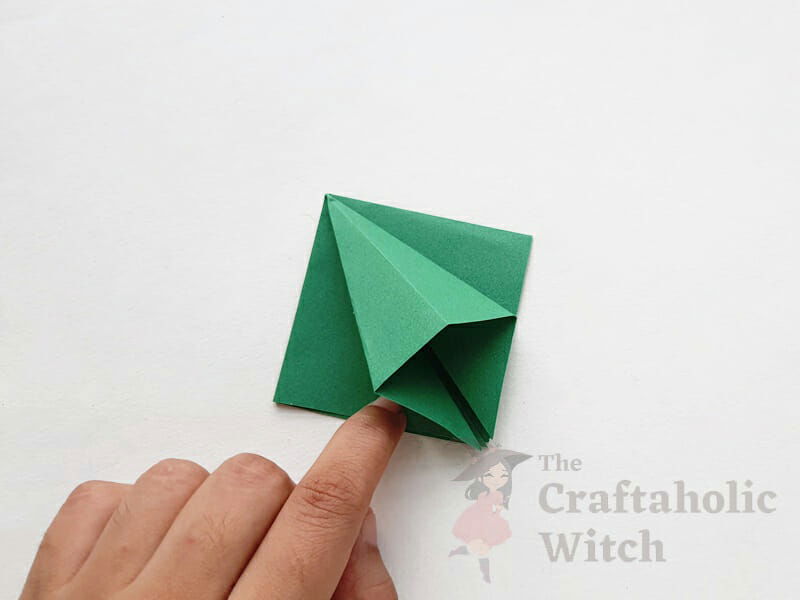
Step 6: Fold the Side Inside
Keeping the side crease (currently placed along the middle of the 2 new creases) as it is, fold the inner crease outside.
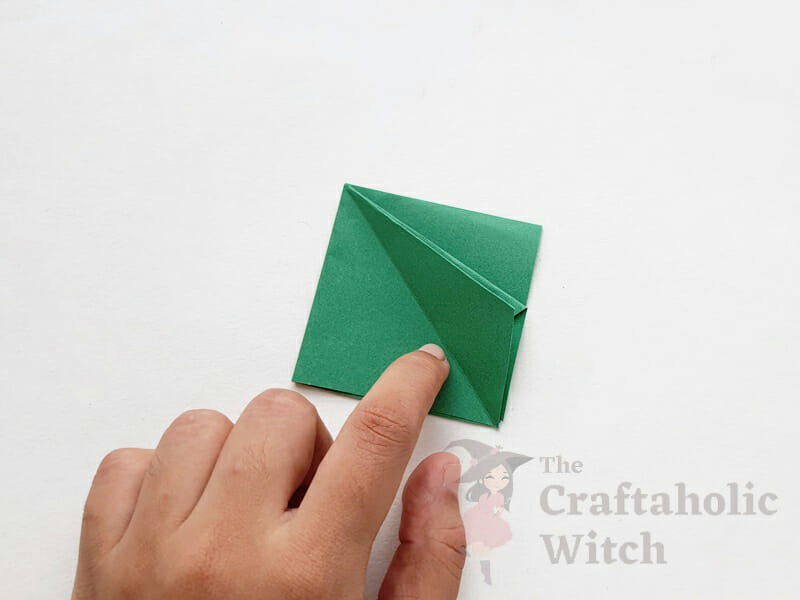
Step 7: Repeat Previous Steps
Similarly, create creases and fold the opposite part of the current side. Then, flip the pattern and do the same for that side as well.
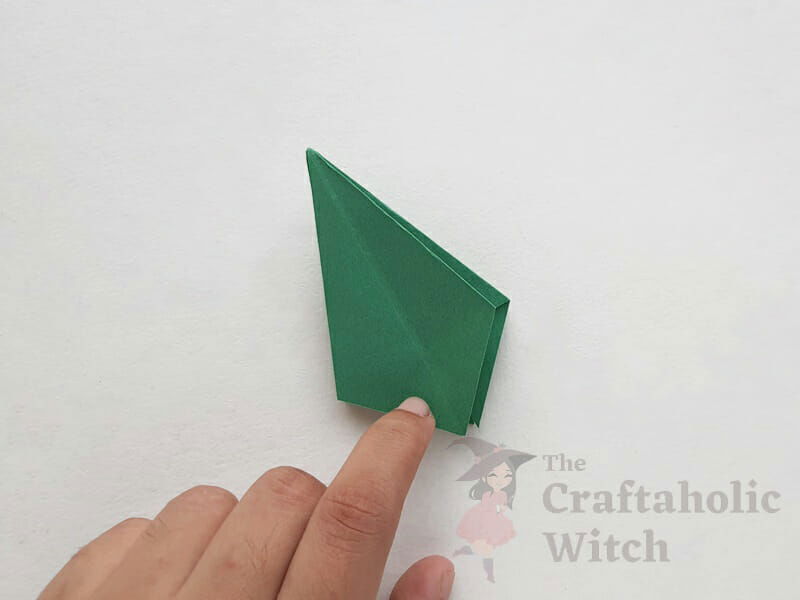
Step 8: Cut off Extra Open Ends
Use a pair of scissors to cut off the extra open sides of the current origami paper pattern. Notice that the current paper pattern will have a total of 8 layers, 4 layers on each side (left and right).
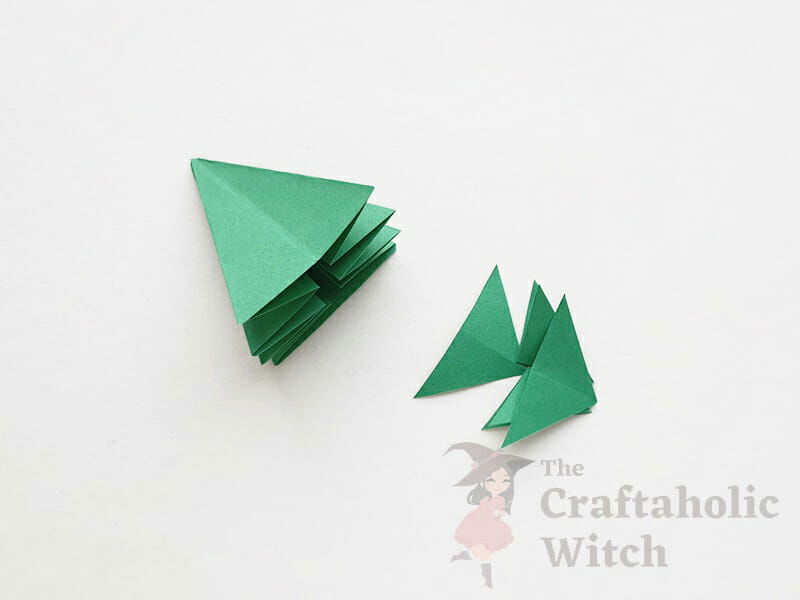
Step 9: Use Scissors to Cut 3 Slits Along the Sides
Keeping the layers as they are, 4 layers on each side; use scissors to cut 3 slits with an even distance between them on each side of the paper pattern.
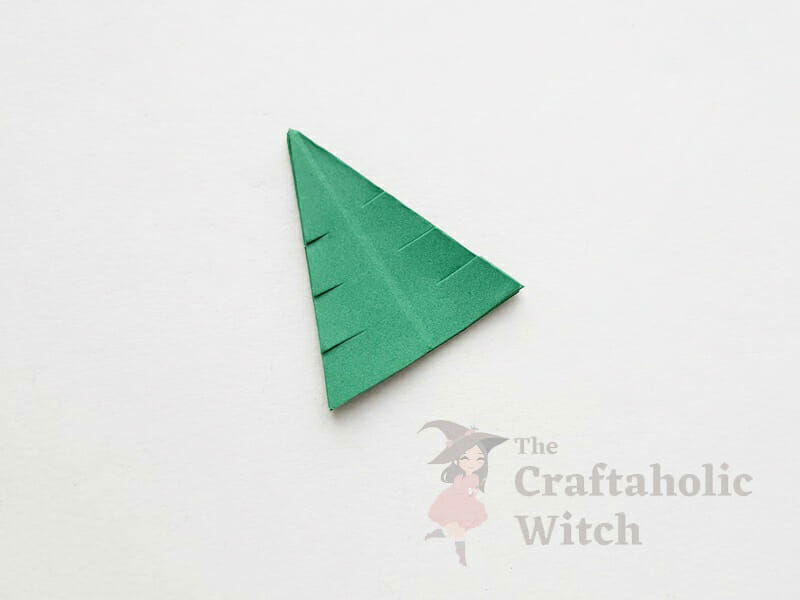
Step 10: Fold the Slitted Parts
Hold the 2nd part (from the top) of a layer. Fold the top side of the part to 45 degrees inwards. One by one fold the 2 other parts of the same layer.
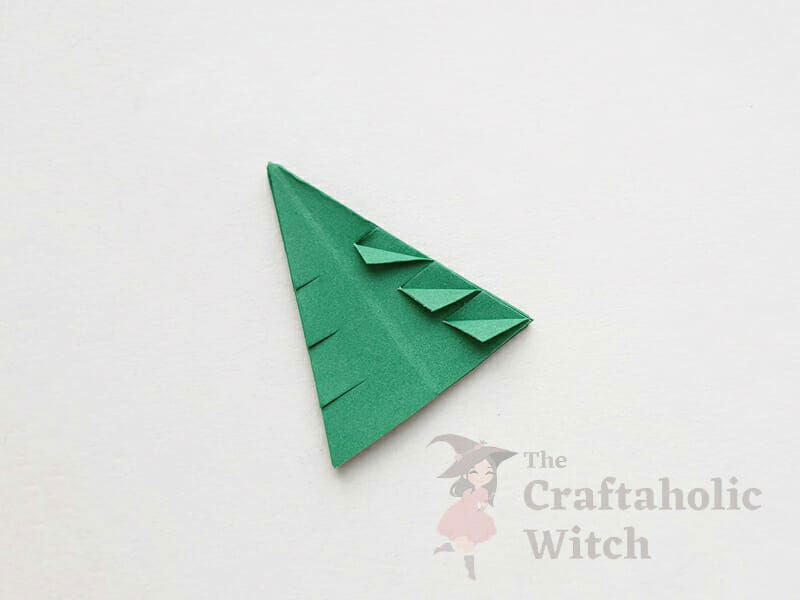
Step 11: Flip and Fold the Next Layer Parts
Now, flip the layer and work similarly with the next layer.
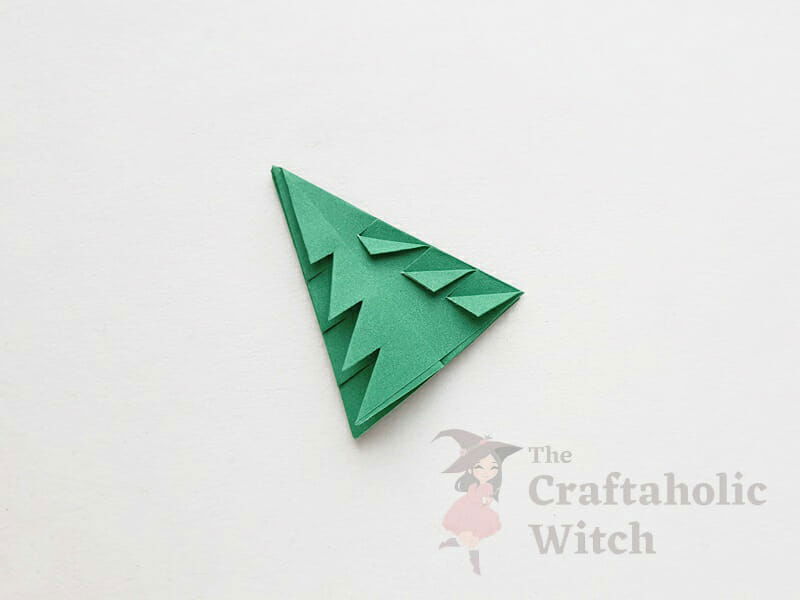
Step 12: Flip and Fold Parts
One by one, flip and fold all parts of all layers (a total of 8 layers with 3 parts on each).
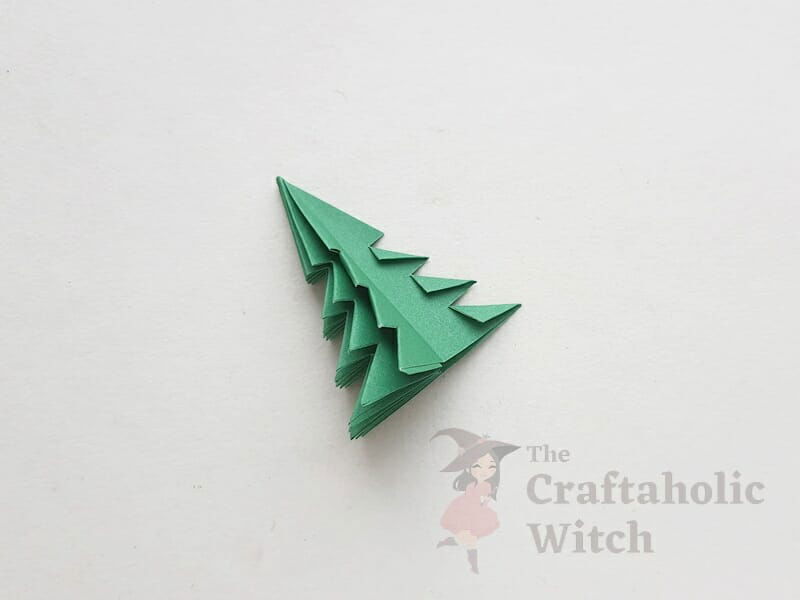
Step 13: Place 3d paper Christmas Tree on Standing Position
Your paper christmas tree is ready. Now them on Standing Position.

Watch Video Tutorial: DIY Paper Christmas Tree
Are you having difficulty understanding the picture tutorial of our 3d paper Christmas tree? No worries, you can also check out our video tutorial on how to make 3d paper Christmas trees. Don’t forget to hit the subscribe button and turn on the notification bell to stay updated.
3d Paper Christmas Tree Crafting: Tips for Beginners to Avoid Common Mistakes
Here are some tips if you’re having difficulty crafting the 3d paper Christmas tree.
- Make sure to use square paper to craft the 3d paper Christmas tree.
- The diagonal half-folds and the horizontal-vertical half-folds should be done neatly.
- Be careful while cutting the base slits, make sure not to cut too much.
- The slits should have at least a 1 cm and even gap between them.
- Fold the slitted parts to 45 degrees.
Here are some of our Christmas craft projects that you may also like, do spare a few minutes to check them out.
- Felt Christmas Tree Decor
- Gingerbread House Gift Bags
- How to make Snowflake Gift Bags
- How to Make Beaded Snowflake
Paper crafts are always popular and these 3d paper Christmas trees are worth crafting as you can use them for a number of other crafts. You can make a garland, centerpiece, mobile, or hanging decor, ornament, decorate gift boxes, and whatnot. We really hope you enjoyed watching our 3d paper Christmas tree tutorial and try to craft some yourself. If you craft these 3d paper snowflakes using different colored papers and use them to make something, please do share a picture with us or tag us on Facebook or Instagram (use #thecraftaholicwitch).
Happy Crafting!


