

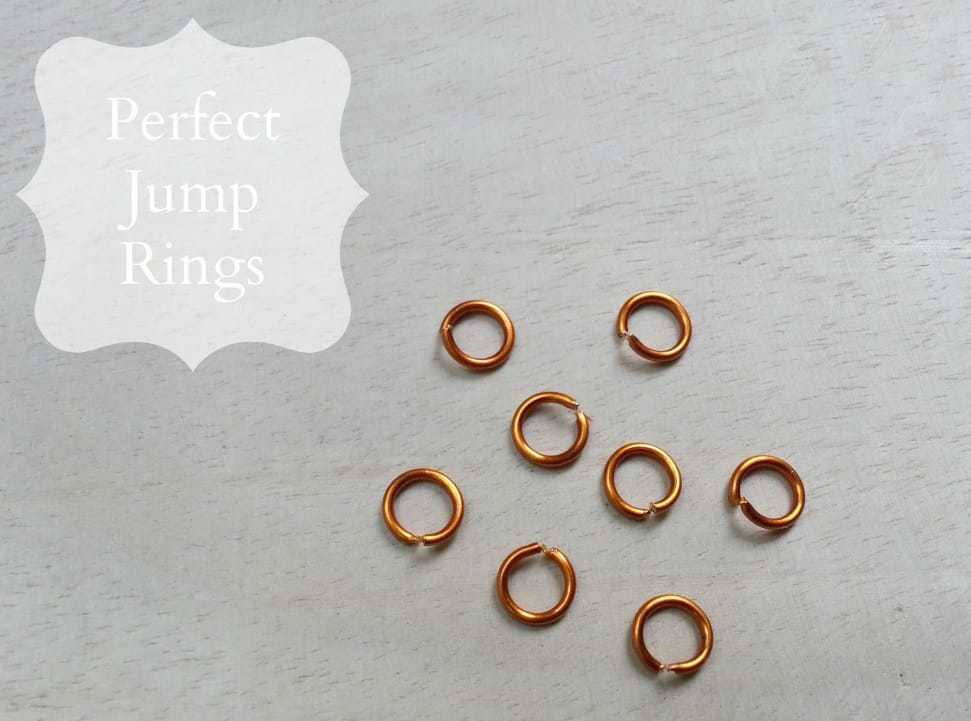
Jump rings are the quiet foundation of nearly every jewelry piece you will ever make. They connect earring hooks to drops, link chain to pendants, and hold charms on bracelets. They are one of the core building blocks of wire jewelry, and once you know how to make them yourself, you will reach for this skill constantly.
Making a batch takes about 15 minutes and just two tools: craft wire and round-nose pliers. Work through these 8 steps once and you will have a supply of uniform rings on hand whenever a project calls for them.
I use copper wire in this tutorial because it is affordable and forgiving while you are learning the technique. The same method works just as well with silver-filled or aluminum wire when you want to try something different.
Jump Rings at a Glance
- Difficulty: Beginner
- Time: 15 min
- Cost: Under $5
- Ages: 10+
- Best for: Wire jewelry, earring findings, jewelry repairs
Join Craft Challenge: Craft Your Calm
Make something that brings you a sense of peace, share a photo, and tell us your story. It's free to enter, open to everyone, and the entry with the most reactions takes home a $100 gift card. Takes five minutes to join.
Entries close August 30, 2026. No purchase necessary.
What You Need to Make Jump Rings
Materials
- 16-gauge craft wire for heavier, more structural links, or 18-gauge wire for lighter rings that suit most everyday jewelry projects. Copper is a great starting point because it is inexpensive and easy to work with.
Tools
- Round-nose (looping) pliers and cutting pliers. The looping pliers shape the coil and the cutting pliers snip the rings free. A matched set is the most convenient option.
Heads up: some of the supply links above are affiliate links. If you buy through them, Craftaholic Witch may earn a small commission at no extra cost to you. We only link supplies we would actually use ourselves.
Ask inside "Crafty Q&A" while you are making.
"Crafty Q&A" is free to join. Share your question, photo, or the exact step where you got stuck, and chat with other makers plus the Craftaholic Witch team. You can also join any discussion thread already happening inside the space.
How to Make Jump Rings
Step 1: Hold the Wire End Against the Pliers
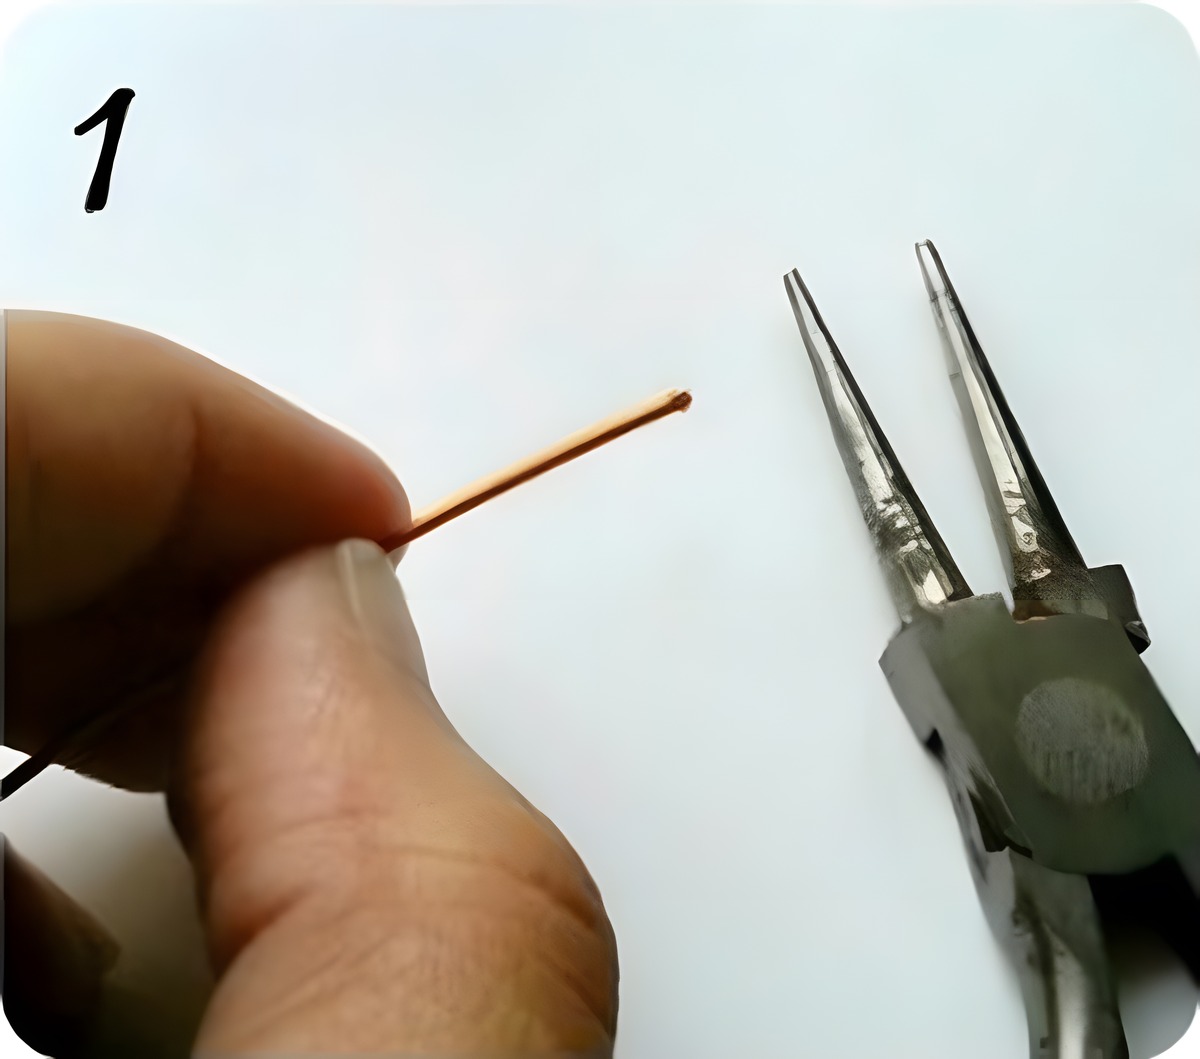
Start with the wire still on the spool rather than cutting a length first. Hold the end against the large barrel of your round-nose pliers and pin it in place with your thumb.
Step 2: Make the First Loop
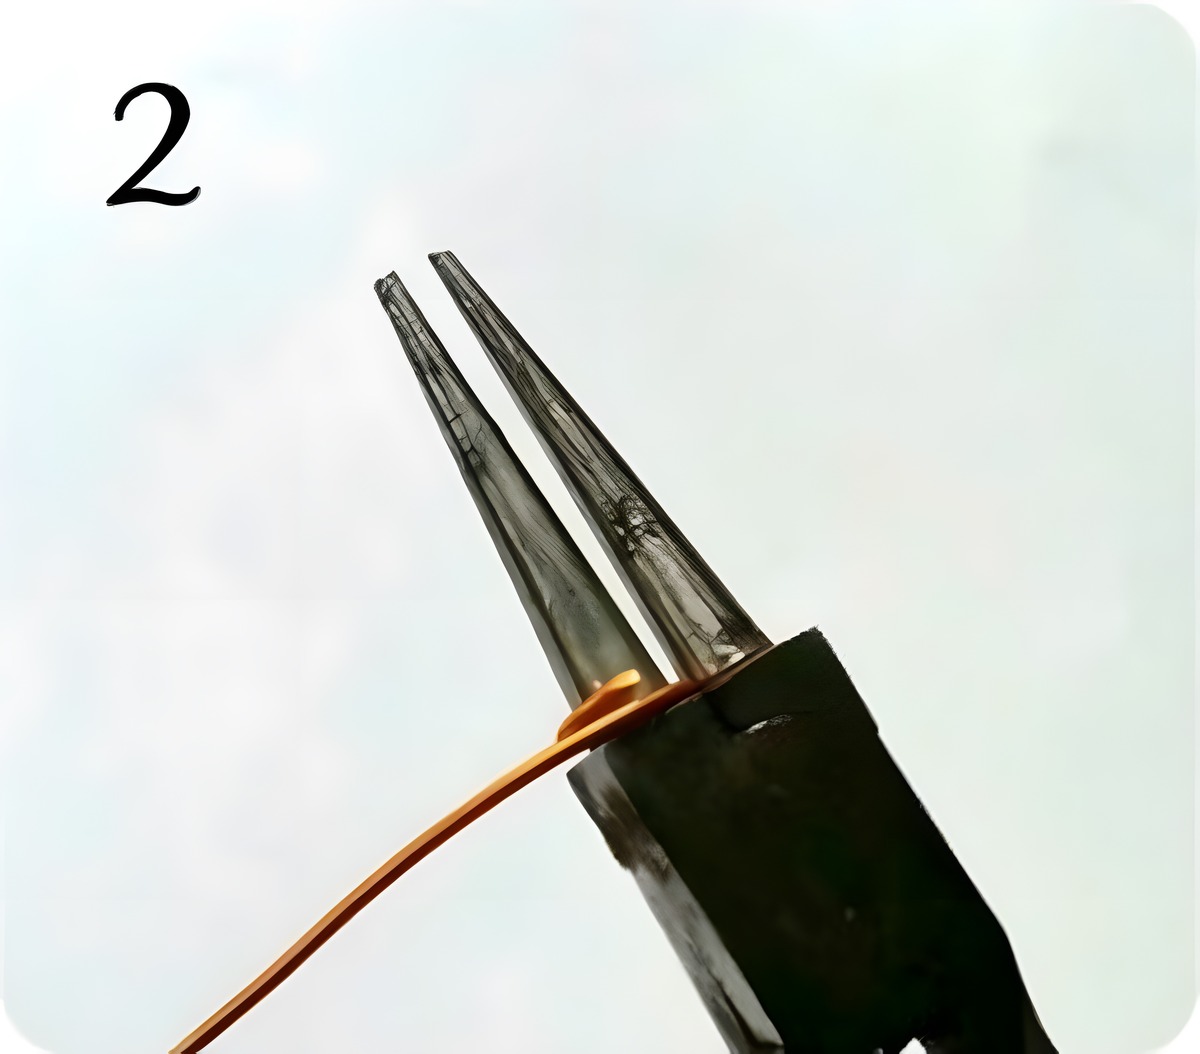
Bring the wire around the barrel and cross it over to complete the first loop. Keep the pliers steady in one hand and guide the wire with the other. Rotating the pliers rather than forcing the wire is the easiest way to build a tight, even coil.
Step 3: Continue Coiling Down the Barrel
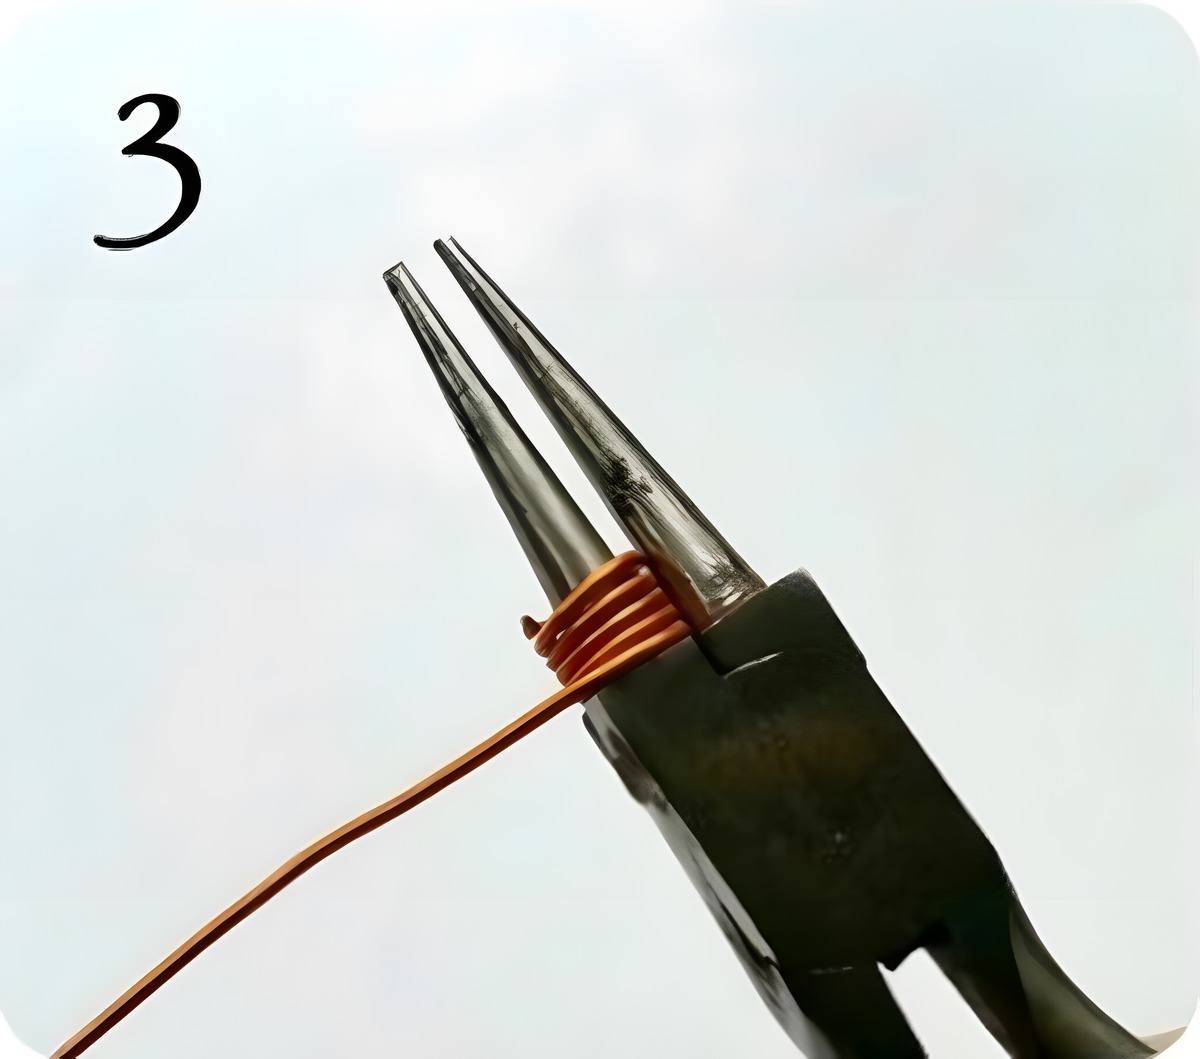
Wind the wire around the barrel, pushing each new coil snug against the previous one. Any gaps between coils mean uneven rings later. If a loop slips, ease it back into position before adding the next.
Step 4: Fill the Barrel
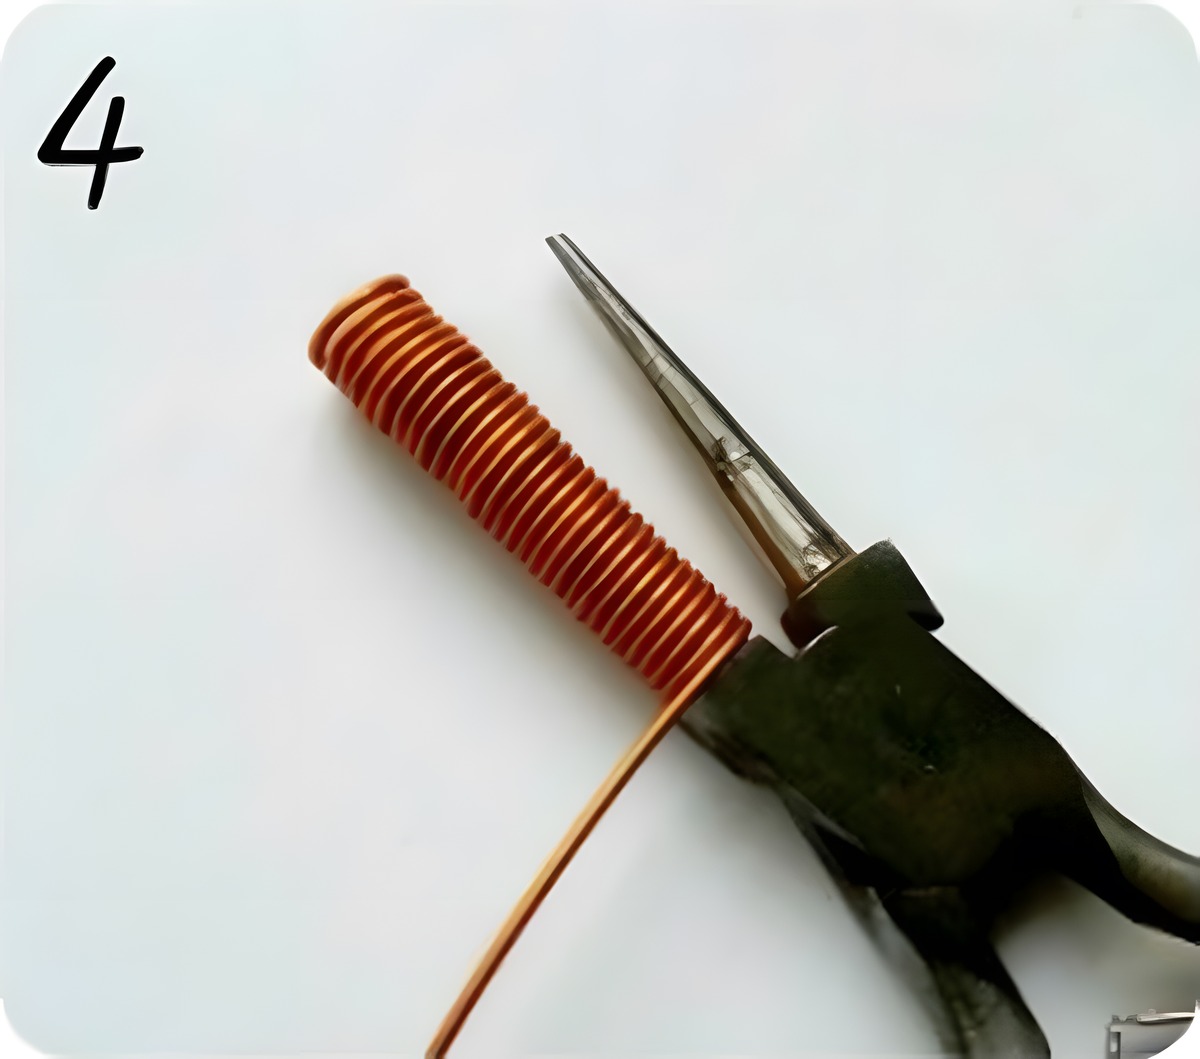
Keep winding until you cannot fit another loop without overcrowding the barrel. Depending on your wire gauge, that is roughly 10 to 15 coils. A tighter, more uniform coil gives you cleaner rings at the end, so take your time here.
Step 5: Cut the Coil Free from the Spool
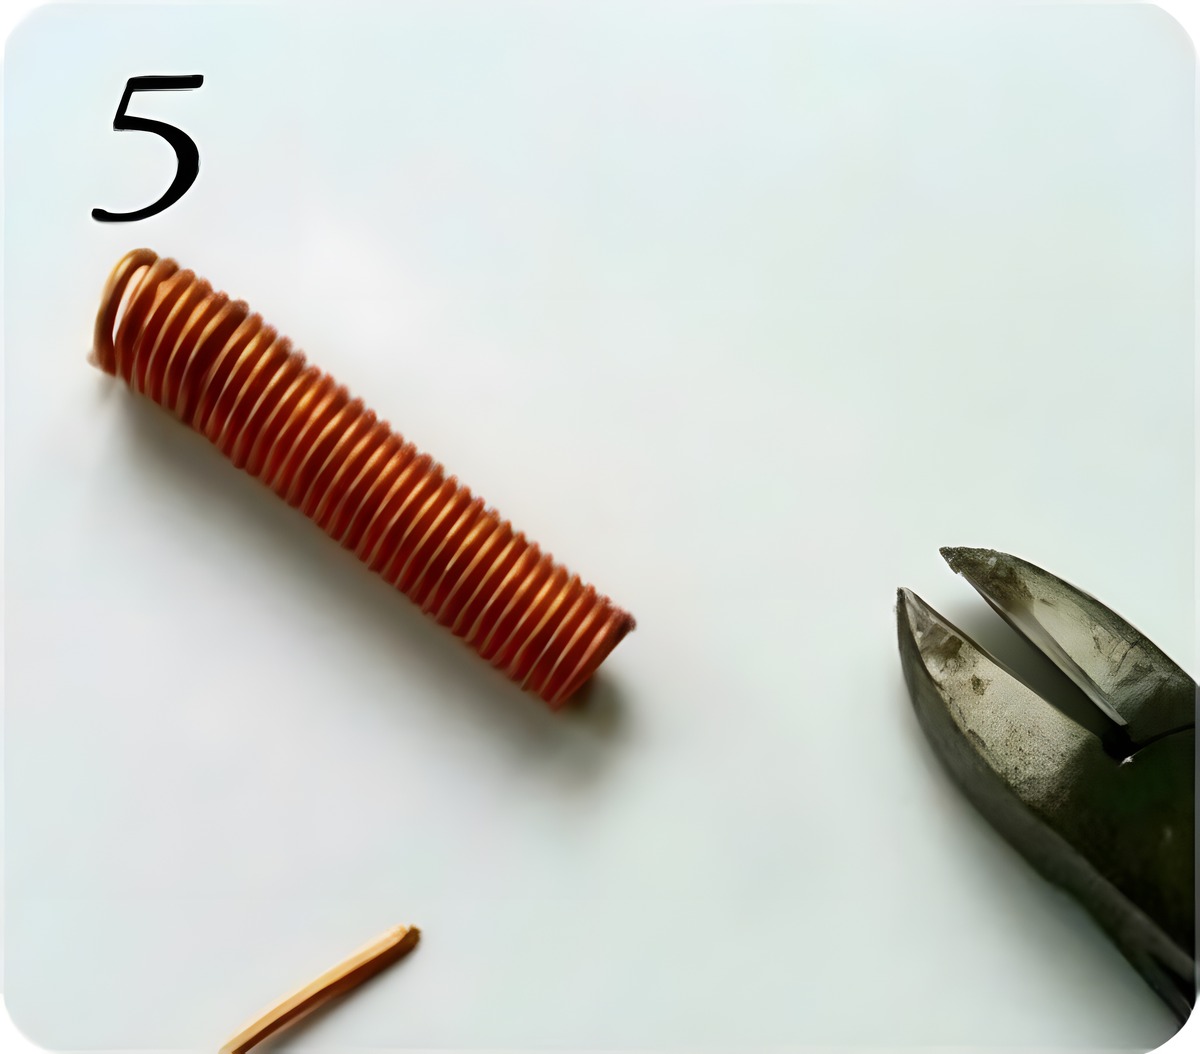
Slide the coil off the pliers and use your cutting pliers to snip it free from the wire spool. Trim any tail that sticks out past the first and last loop so you are left with a clean, even spring.
Step 6: Pull Out One Complete Circle
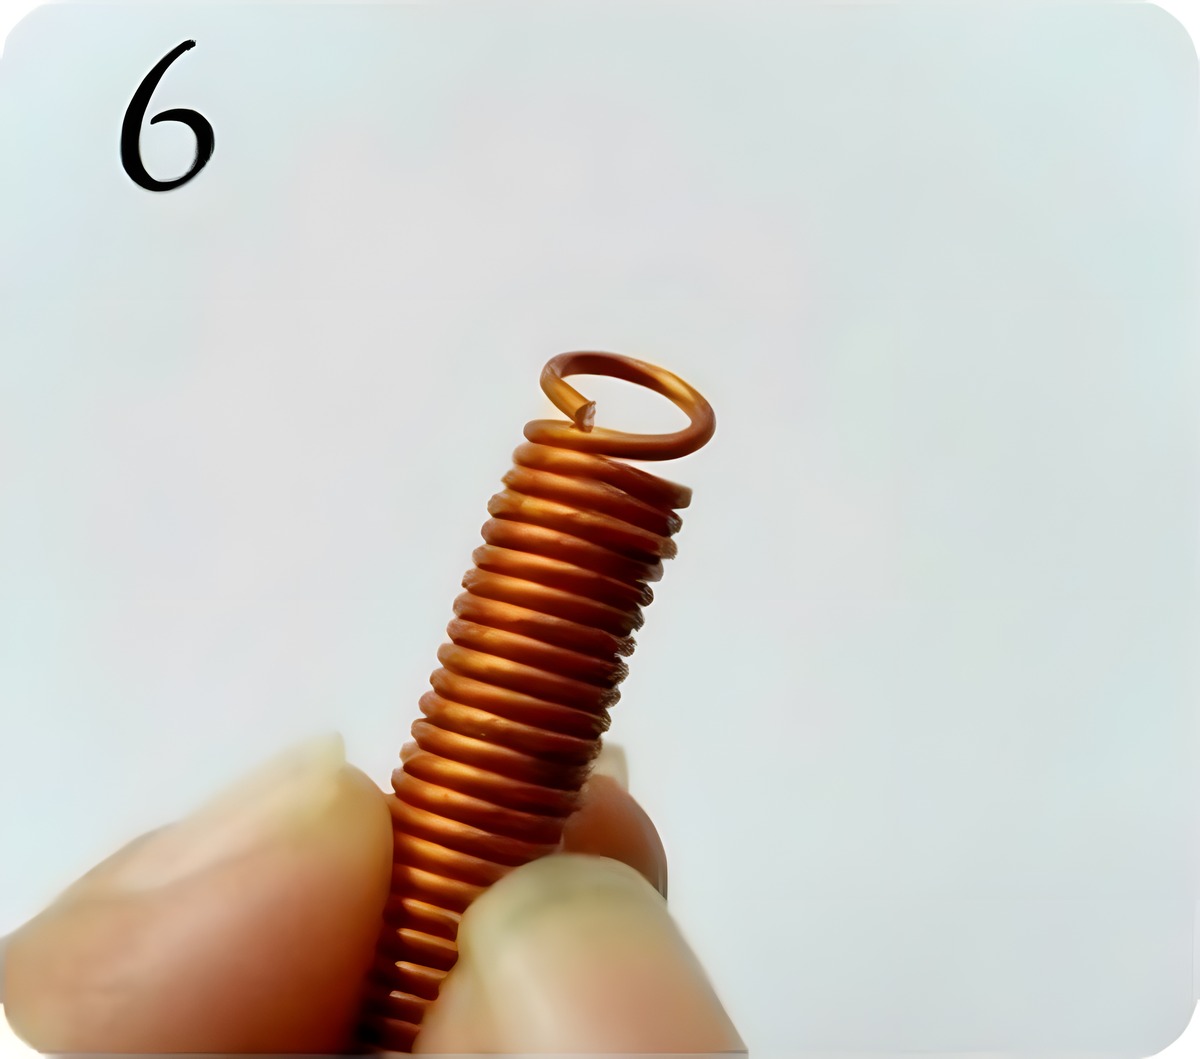
Hold the coil and ease one full circle away from the end. You want a complete loop with no overlap and no connection to the adjacent ring. If the circle still seems joined, work it apart gently rather than pulling hard.
Step 7: Cut the Ring Free
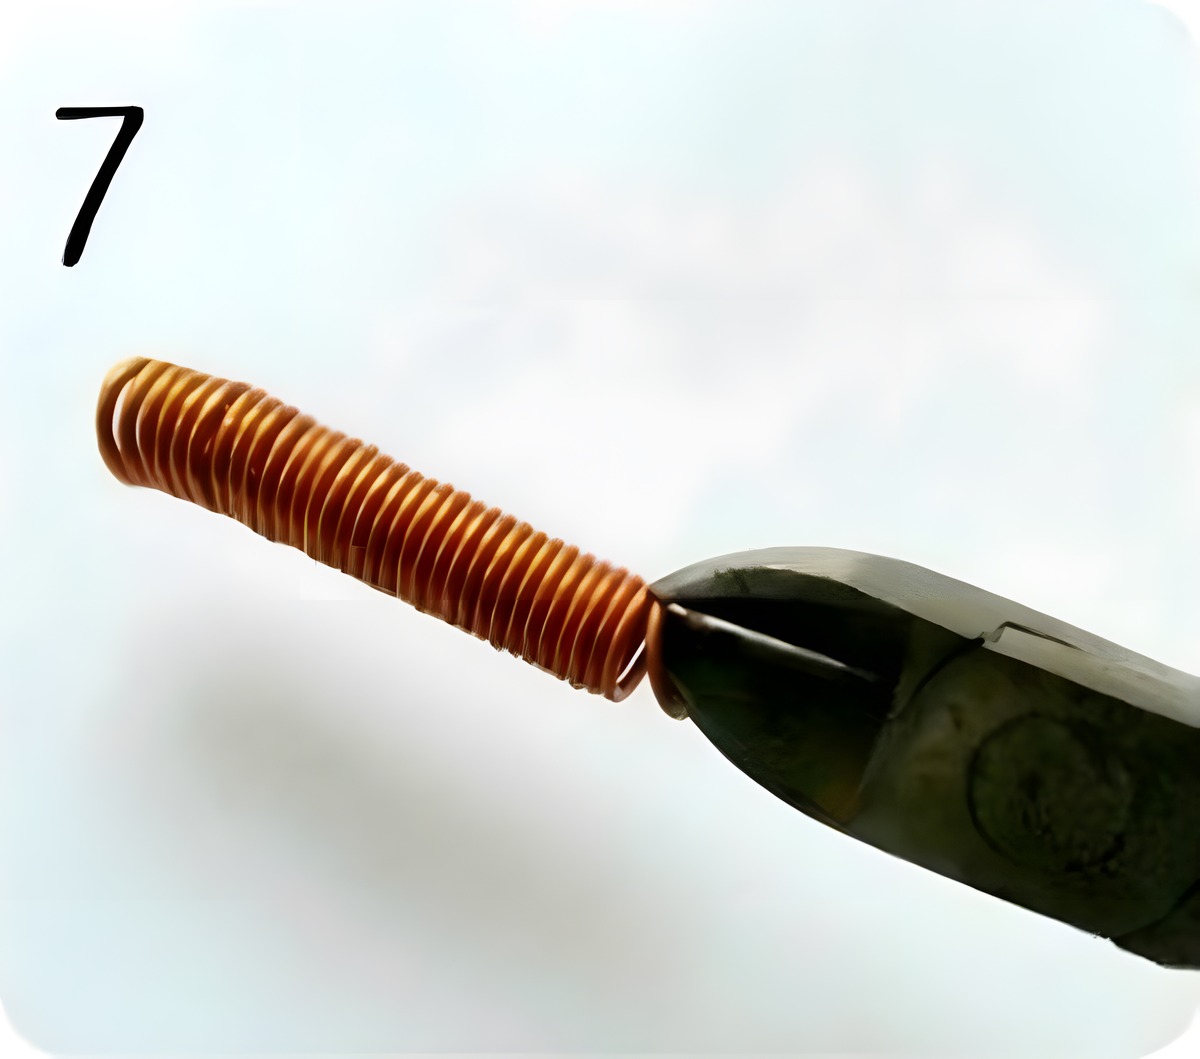
Position your cutting pliers where the circle meets the rest of the coil and snip through cleanly. Aim for a straight, perpendicular cut. An angled cut leaves a gap that is hard to close flush when you use the ring in a project.
Step 8: Repeat for the Rest of the Coil
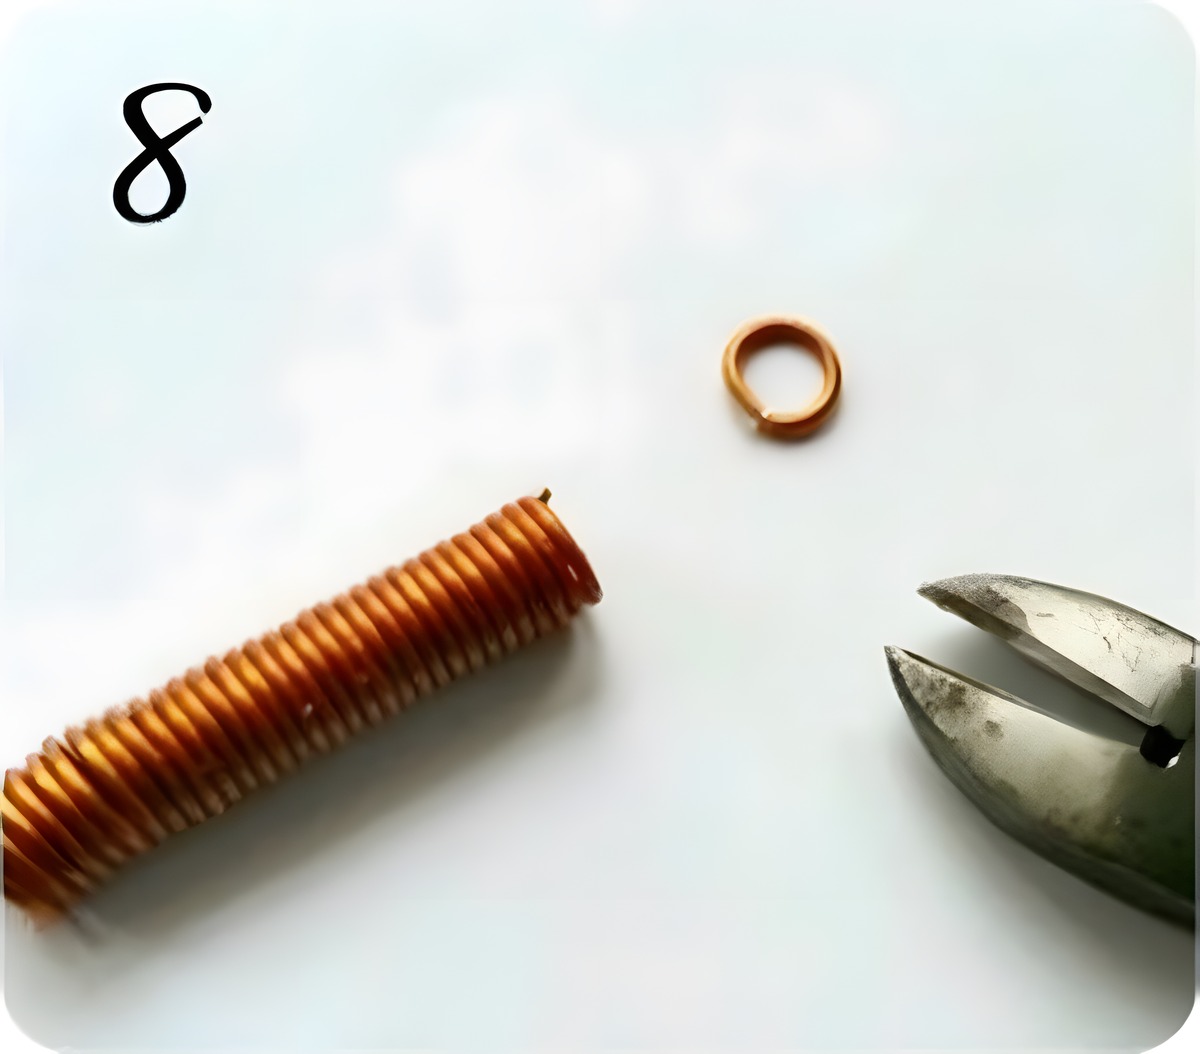
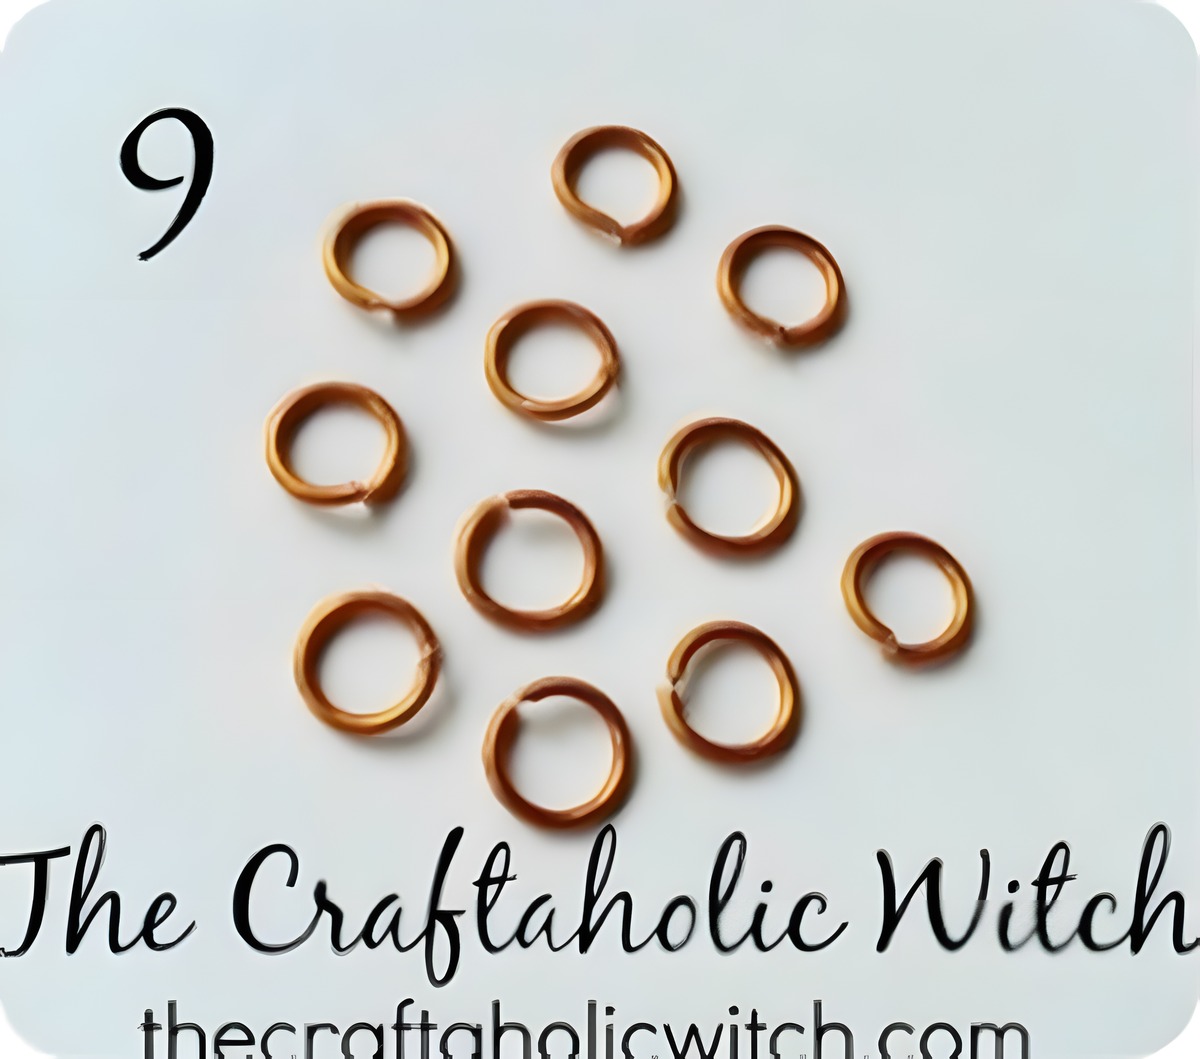
That is your first jump ring. Work through the rest of the coil the same way, easing out each complete circle and cutting it free. A full barrel typically gives you 10 or more rings in just a few minutes. These are the findings you will use to attach earring hooks, link charms, and assemble pieces like our wire charms tutorial.
Share it in "I Made It" and let us cheer you on.
Post your finished make in "I Made It" so the community can celebrate it with you. Cheer on other makers too. Each month, the most loved craft wins 1 year of Craftaholic Premium ($59)
Tips for Making Jump Rings
- Use two colors of wire and alternate which coil you cut rings from to make mixed-metal links for bracelets or earrings.
- Store your finished rings in a small lidded container sorted by gauge. Digging through a tangled pile mid-project wastes time.
- If your rings are hard to close flush, try 18-gauge instead of 16-gauge. Thinner wire is easier to manipulate with flat-nose pliers and closes more cleanly for most findings.
Frequently Asked Questions
What gauge wire is best for making jump rings?
18-gauge wire works for most jewelry projects. It is strong enough to hold its shape without being too stiff to open and close easily. Use 16-gauge when you need heavier, more structural links, or 20-gauge for very small, delicate rings that will not take much stress.
Can I make jump rings without round-nose pliers?
Yes. You can coil wire around any cylindrical object such as a wooden dowel, a thick pen, or a marker. The diameter of whatever you wrap around determines the ring size, so choose something close to what your project needs. Round-nose pliers give you more control because the tapered barrel lets you adjust the size precisely, but improvised tools work fine in a pinch.
How do I open and close a jump ring without distorting it?
Always open a jump ring sideways, not outward. Use two pairs of flat-nose pliers, one on each side of the gap, and twist one end toward you while holding the other still. Pulling the ring apart like a circle stretches it out of shape and makes it nearly impossible to close cleanly. The sideways twist keeps it round and snaps back shut neatly.
Why are my jump rings coming out uneven?
Uneven rings usually come from inconsistent coiling tension. Keep steady pressure on the wire as you wind, push each coil snug against the last, and hold the pliers in one position rather than shifting them between loops. The first coil or two on a new batch tend to be rougher. Trim and discard those rather than using them in a finished piece.
More Wire Jewelry Tutorials
- DIY Beaded Wire Ring
- How to Make Wire Charms: Swirly Style in 3 Steps
- How to Make Earring Hooks (Easy Step-by-Step Tutorial)
- How to Make a Caged Gemstone Ring
- DIY Beaded Wire Earrings
Share your jump rings in the I Made It space inside Craftaholic Community. The most-loved post each month wins a one year free Premium membership.
0 Comments
Join the conversation
Log in to your Craftaholic Community account to comment, ask questions, and cheer on fellow makers.
Log in to comment