How to Make a Dreamcatcher (Easy Instructions with Video)
Do you want to filter your bad dreams? Learn how to make a dreamcatcher with our step-by-step instructions and video tutorial.
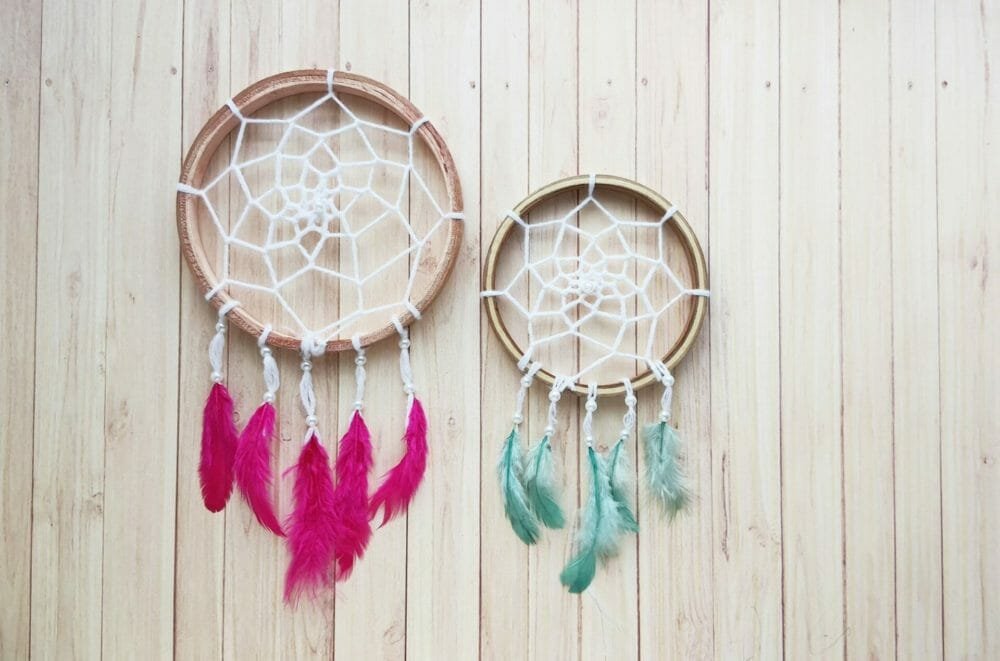
Hello Craftaholics, hope you all had a good week. We’re here with a home decor tutorial today; we’ll show you how to make a dreamcatcher. Who doesn’t love dreamcatcher, right? And wouldn’t it be great if you could make one yourself?
With the help of our DIY dreamcatcher tutorial, you can craft one in no time; all you need is some basic supplies and 30 minutes to spare.
The DIY dreamcatcher we’ll share in today’s tutorial is very beginner-friendly, and we have provided instructions to make the most basic dreamcatcher. Let’s check the list of supplies, gather them, and follow our tutorial to learn how to make a dreamcatcher.
The Fascinating Story of Dreamcatcher
Most of us probably know that dreamcatcher is a Native American cultural material. Dreamcatcher originated from the Ojibwe people (a native community of North America). The Ojibwas used dreamcatchers above the bed like a charm to protect people, especially children, from nightmares (Source)
Olden Native American storytellers speak of a woman called Asibaikaashi (the spider woman. She used to take care of all of the Ojibwe infants and adults. Over time it became difficult for her to reach out to every Ojibwe as they started to spread out. (Source)
So, the Ojibwe women started weaving magical webs from cordage and willow hoops, especially to protect the infants. These charms were hung above the children’s beds to catch any bad dreams or any form of harm. They were also hung above the beds of any person starting a new journey so that they remain on track.
Dreamcatchers eventually became widely accepted by many Native American communities during the60s and 70s as a result of the Pan-Indian movement. And today, it has probably reached all corners of the world as a result of globalization and internet culture.
How to Make a Dreamcatcher
Supplies Needed to Make a Dreamcatcher
Tools
- Scissors
- Tapestry needle
Materials
- Base hoop
- Yarn or string
- Beads
- Faux craft feathers
- Craft glue
Cost of Making a Basic Dreamcatcher
Considering that you already have craft glue and scissors at home, you will need to buy the rest of the supplies for today’s DIY dreamcatcher project.
A pack of around 60 craft feathers would cost $6, but you’ll need 5 to 10 feathers to recreate the dreamcatcher we made. A piece of any wooden hoop would cost around $3, and a bundle of white string would cost $5. 20 faux pearl beads won’t cost more than a dollar.
So on average, for a DIY dreamcatcher, you will need to invest $6 as you’ll have plenty of the supplies left after making a dreamcatcher or two.
Step by Step Instructions
Step 1: The Initial Knot
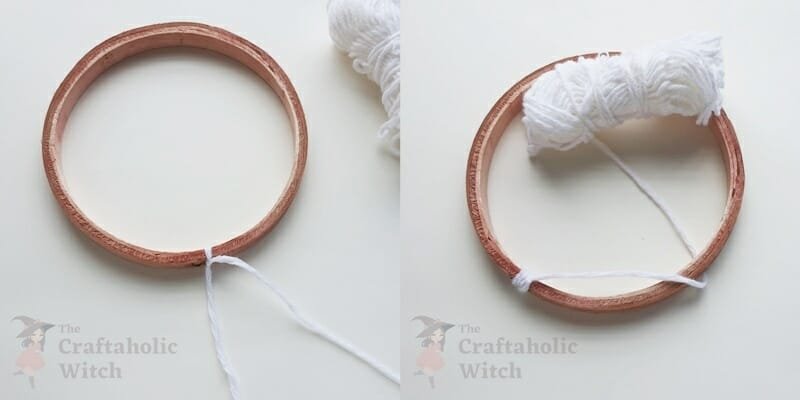
Take the hoop and the yarn or string bundle. Tie a tight knot around the hoop. The knot will be the starting point of the dreamcatcher web.
To make our first weave of the web, draw the string 2 inches away from the initial knot and draw the string out and then under and pull it inside the hoop.
Step 2: Starting the Web Weaving
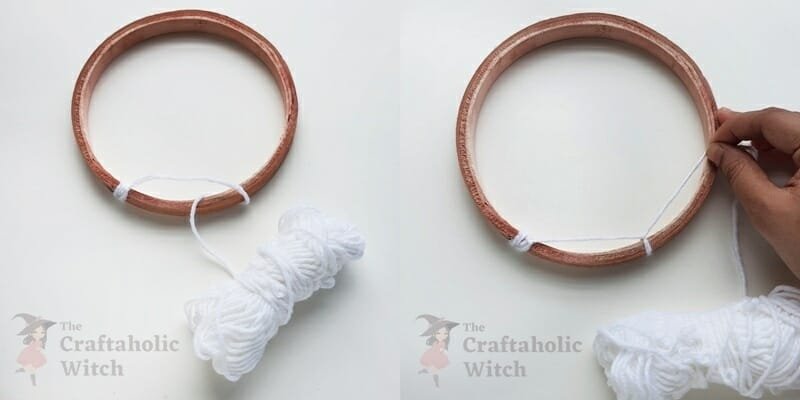
Draw the string bundle towards the hoop again but draw it under the 2-inches part of the string attached to the hoop. This means the string bundle should be placed between the hoop and the 2-inches string part.
Now pull the string towards the opposite direction of the initial knot and tighten the woven part as nicely. Draw the current yarn 2 inches away from the intersected twist.
Step 3: Completing the First Round of Web
Follow the previous step to weave the first round of the dreamcatcher web.
Continue to weave until reaching near the initial knot. Keep a small space between the last twist and the initial knot.
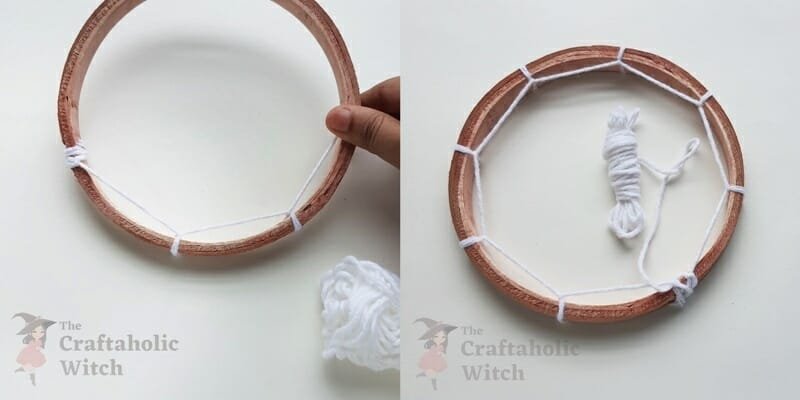
Step 4: Starting the 2nd Round of the Web
To start the 2nd round, draw the string under the first 2-inches part (of the round one) from inside.
Then, draw the string between the loop created by the 2-inches part and the last weave.
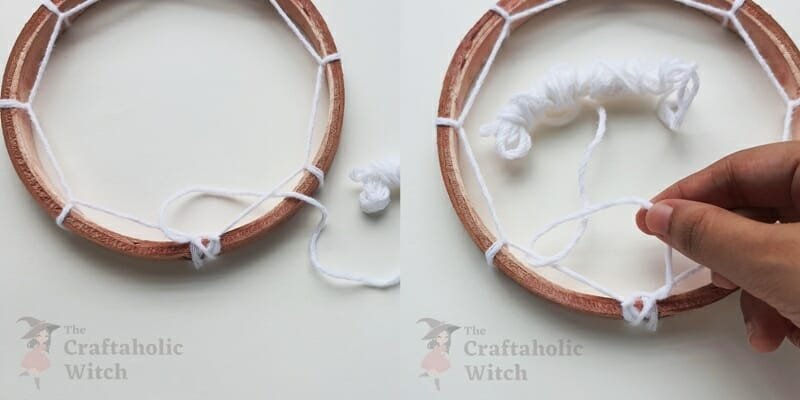
Step 5: Continue Round 2
Pull the string tightly, and this will form the first twist of the round two web weaving.
Continue to weave similarly in the same direction. Reach out to the next 2-inches part of round one.
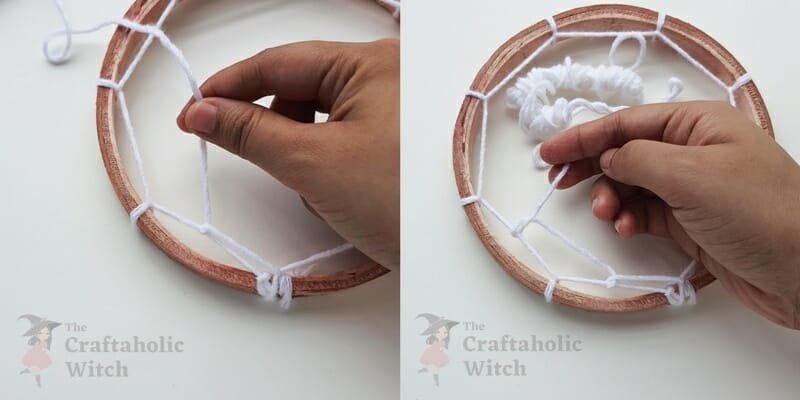
Step 6: Continue to Weave the Web
Done weaving round 2? Now, similarly, weave round 3. Simply weave the string around the webs of the previous round.
For each round, you will have to weave the current round’s string around its previous rounds’ webs.
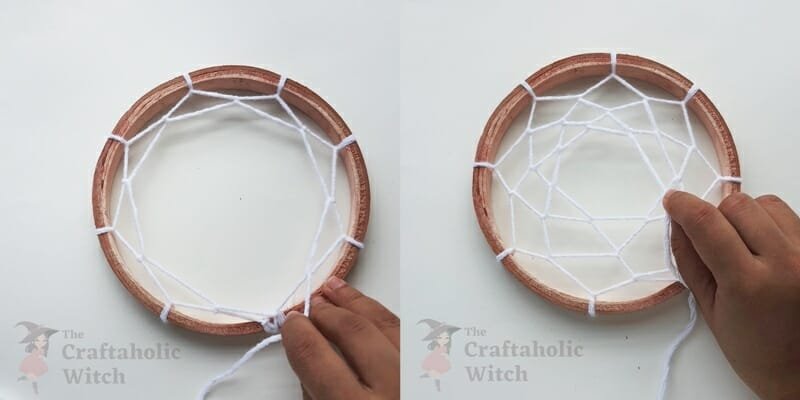
Step 7: Finish the Web and Add a Bead
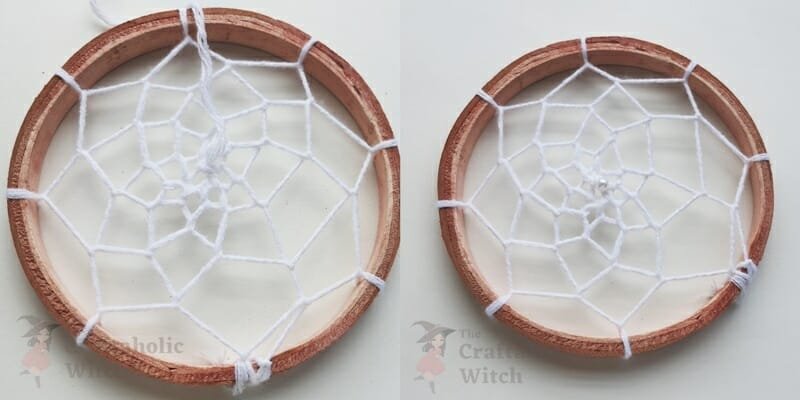
Keep moving towards the center and continue weaving until there is no space in the center. The center might seem a bit messy and confusing; for that, we can add a bead to give it a neat look.
Simply cut off the string from the bundle by keeping 2 or 3 inches extra at the open end. Insert a bead and then pull the remaining string to the backside of the web. Tie a knot or two, and then cut off extra string if necessary.
Step 8: Attaching the Yarn Hanging and Beads
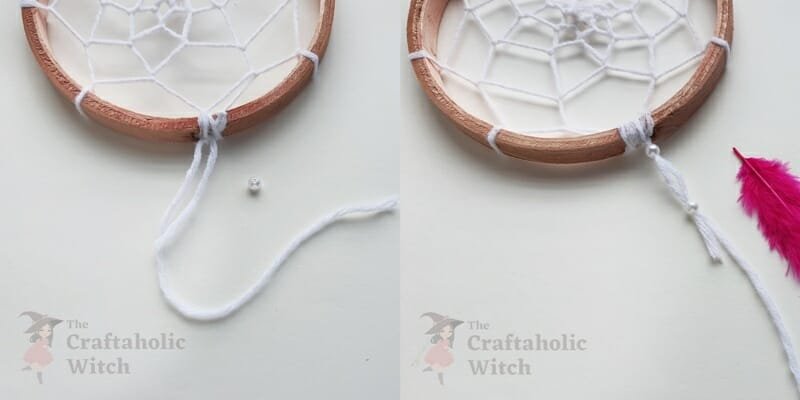
Let’s add the hanging parts now. Take a piece of string (double the required length). Tie the string around the hoop and keep both the open ends longer.
Insert a bead and push it all the way near the hoop and then add another bead an inch away from the first bead. Apply a drop of glue inside both beads’ holes to make sure that they are attached to the string nicely.
Step 9: Attaching the Feather
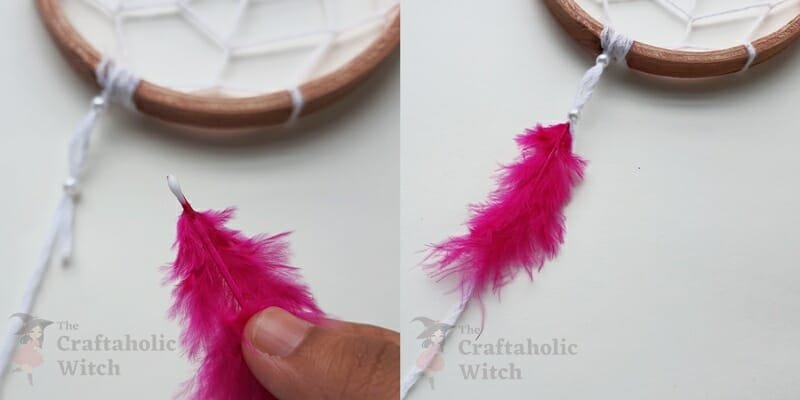
Take a craft feather and apply glue on its quill.
Insert the glued quill inside the hole of the last bead from outside.
Step 10: Add and Secure the Feathers
Turn the attached feather to the wring side. Keep an inch of the string on the backside of the feather and cut off the rest. Apply glue to attach the 1-inch remaining string with the feather on the backside.
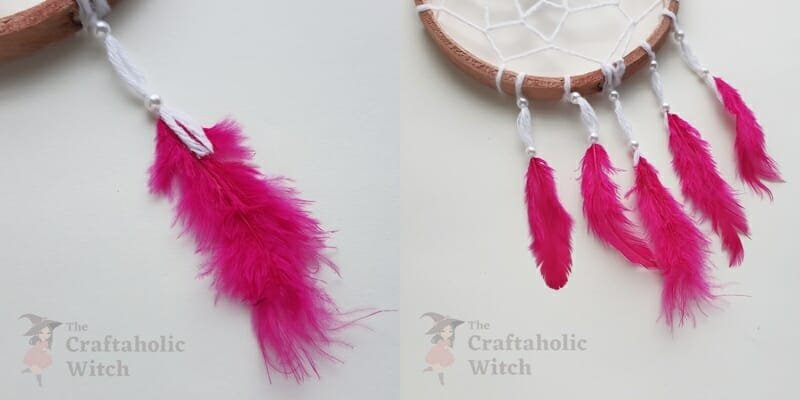
Similarly, add a few more hanging feather strings to the dreamcatcher hoop.
Step 11: And Done!
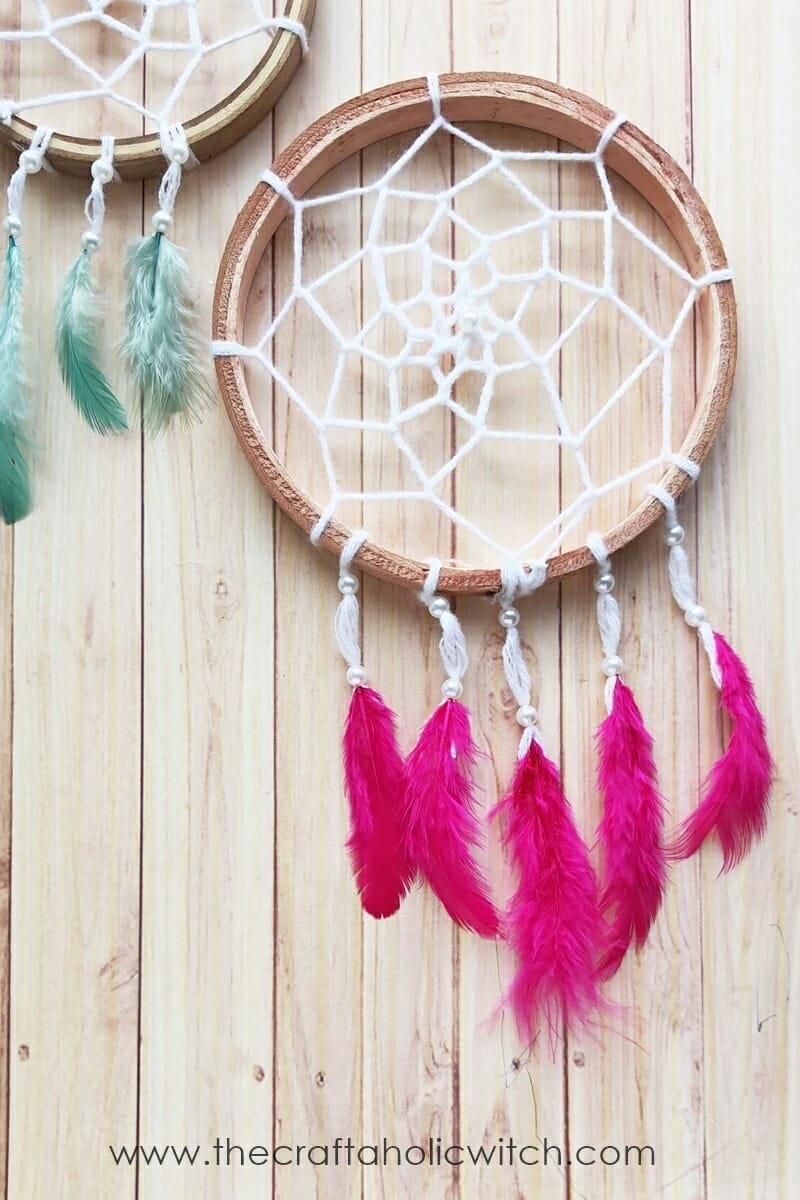
Make sure to secure the beads and the feathers with the string using craft glue. You can as many feathers as you like, just get creative with this part of the craft. And that’s it, now you know how to make a dreamcatcher!
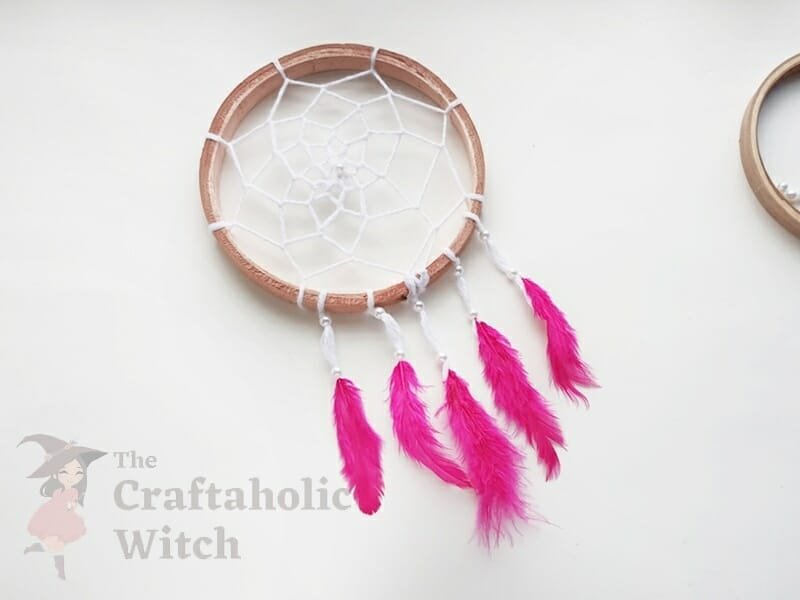
Video Tutorial: DIY Easy Dreamcatcher for Beginners
How to Make a Dreamcatcher: Tips for Beginners
Just in case you’re having difficulty with the DIY dreamcatcher project, here are some quick tips for you.
- If you’re crafting a dreamcatcher for the first time, select a smaller hoop. With the smaller hoop, you will face less difficulty weaving the web.
- Select string or yarn that is not stretchy or has low elasticity.
- When weaving, make sure to tighten the twisted part as much as you can.
- Use a needle to attach beads through the string if you have difficulty attaching the beads.
- Use craft glue to secure the beads with the string, and apply glue through the hole of the beads.
- Also, apply glue on the feather’s quill and on the backside to secure the open ends of the hanging string with the feather.
If you enjoyed our DIY dreamcatcher project, here are some of our DIY home decor tutorials that you may also like
- How to Make Sunflower Coasters
- How to Make Aster Flower Wreath
- How to Make a Storage Basket from Cardboard Box
- How to Make Cardstock Paper Luminaries
- How to make Recycled Vases
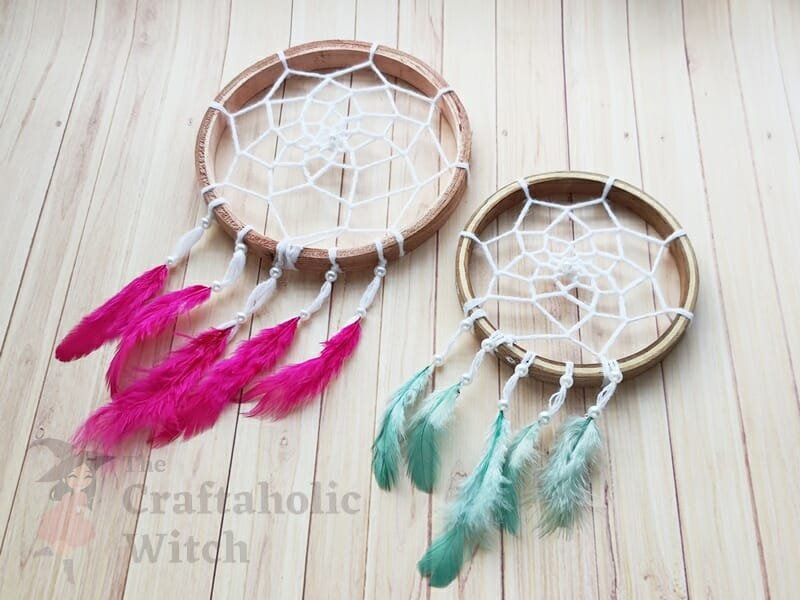
This DIY dreamcatcher pattern is the most basic dreamcatcher pattern. We tried to make it as beginner-friendly as possible. Once you learn how to make a dreamcatcher of a basic pattern, you can easily try and craft different patterns.
You can craft one for yourself, to brighten up an empty wall or corner of a room or you can gift one to a friend or a loved one. Use different colored strings and feathers for variation in patterns and designs.
Get creative and share a picture with us if you do craft one. If you re-create, please do tag us on Facebook or Instagram (use #thecraftaholicwitch).
Happy Crafting!

