How to Make Recycled Flower pots or Indoor Planters in 10 Munites
A 10-minute craft project that needs very few supplies (you may also recycle what you have). Learn how to make flower pots or cute little indoor planters that will brighten up the room.

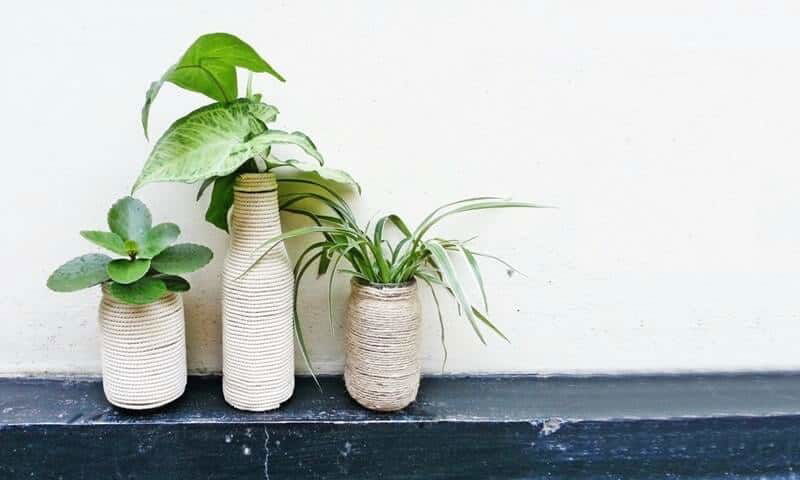
This DIY indoor planter project was totally unexpected! I’ve started indoor gardening and I was preparing pots for my plants. My plan was to paint glass jars and bottles but sadly I was having a hard time removing the labels from the jars. I had 2 twine bundles in my store (for who knows how long!). And snap! decided to wrap the jars with twine and tada! Loved how they turned out. These are very easy to make and I had a lot of jars and bottles. So, I made a few. Now, I’m using some of those as flower pots and some as indoor planters.
DIY Flower Pots or Indoor Planters with Recycled Bottle or Jar
Who doesn’t love green plants or fresh flowers on sight? A beautifully made flower pot or indoor planter could only add to its beauty. I have tried making planters out of many different materials, like this concrete planter or the Pokémon planter. By far these flower pots or planters are the easiest, and as you can see they look pretty elegant too.
Most of us throw away countless bottles or jars each week. That ends up polluting our environment. Why not create some amazing crafts using them? A true plant lover may even consider turning a corner of their life into a mini garden, as these plant or flower pots cost practically nothing.
If you are a mom, you can even consider involving your kids in the recycling project and teaching them how to make flower pots, how to turn something unusable into beautiful home decor.

Check out the tutorial!
How to Make Flower Pots or Cute Indoor Planters
Supplies
- Glass jar or bottle
- Twine -of any kind
- Craft glue
- Scissors
Instructions
Step 1: Prepare The Materials
Get your materials ready. You need a clean glass jar or bottle. Don’t worry if you’re unable to get rid of the jar or bottle label, we’ll cover them anyway. Select your twine, I had 2 types, one was rustic and the other one was quite smooth.
Step 2: Wrap the Jar with Twine
Prepare the twine, making sure there are no tangles on the twine bundle. Let’s start from the top. Apply craft glue around the jar’s finish and start wrapping the twine around the glued part. Wrap the twine nice and evenly without keeping any gaps between each wrap.

Step 3: Wrap till the Bottom and Glue the Ends
Continue to wrap the twine around the jar until reaching the bottom end. Apply glue on the jar every time before wrapping twine around that particular part. You can also apply glue on the top and bottom, leaving the middle part but I think it’s better to glue the whole thing. After reaching the bottom end apply some extra glue at that end and cut off extra twine.
Step 4: Finish Making the Craft
You are done crafting! Now is the time to decorate the crafts with beautiful colors or patterns. I like the rustic look of the twine. So, I kept them as they are. If you’re like me, you can keep them as is or you can make them colorful to your liking.
Hope you liked our DIY indoor planters or how to make flower pots tutorial. Please share the pictures of your version of the craft and let us know if you are using them as flower pots or indoor planters.You can share your picture with hashtag #craftaholicwitch or just DM your picture to us on Instagram.
Happy Crafting!

Enjoy!


