

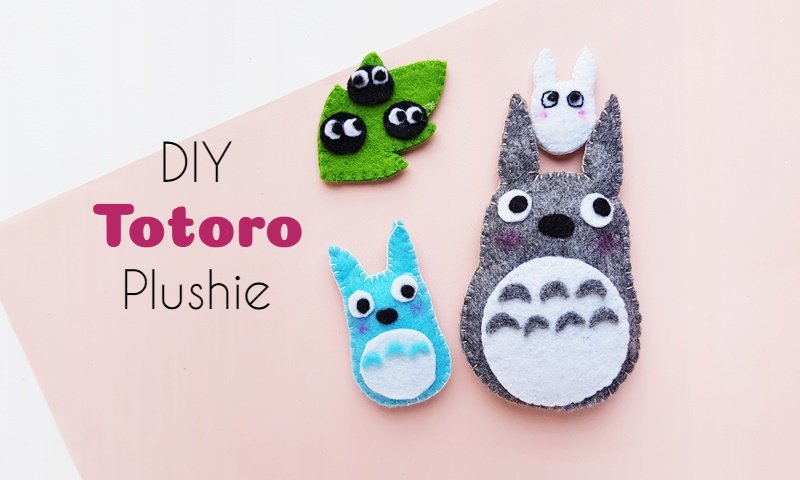
A felt Totoro plush is one of the sweetest ways to bring a bit of Studio Ghibli onto your desk, and this pattern gives you the whole crew in one sitting: the big grey Totoro, the two mini Totoros, and the little soot ball sprites on their leaf. If you have ever wanted a Totoro of your own, this is the friendliest place to start.
It is a genuine beginner project. Most of it is gluing flat felt shapes together, with just a little hand stitching to close the body, so you do not need a sewing machine or any real sewing experience. A pack of felt scraps, a needle, and an evening are about all it takes. If you like collecting soft toys like this, it sits right alongside my stuffed animal plush patterns roundup.
By the end you will have a palm-sized Totoro that stands up on a shelf, tucks into a bag as a little gift, or becomes the first of a whole felt Ghibli family. Let me show you how I made mine.
Felt Totoro Plush at a Glance
- Difficulty: Beginner
- Time: About 1 hour for the big Totoro, a little less for each smaller one
- Cost: Under $5 if you already have felt scraps
- Ages: 10 and up, with an adult helping younger crafters near the hot glue and needle
- Best for: Studio Ghibli fans, kids’ room decor, and quick handmade gifts
Join Craft Challenge: Craft Your Calm
Make something that brings you a sense of peace, share a photo, and tell us your story. It's free to enter, open to everyone, and the entry with the most reactions takes home a $100 gift card. Takes five minutes to join.
Entries close August 30, 2026. No purchase necessary.
What You Need to Make a Felt Totoro Plush
Materials
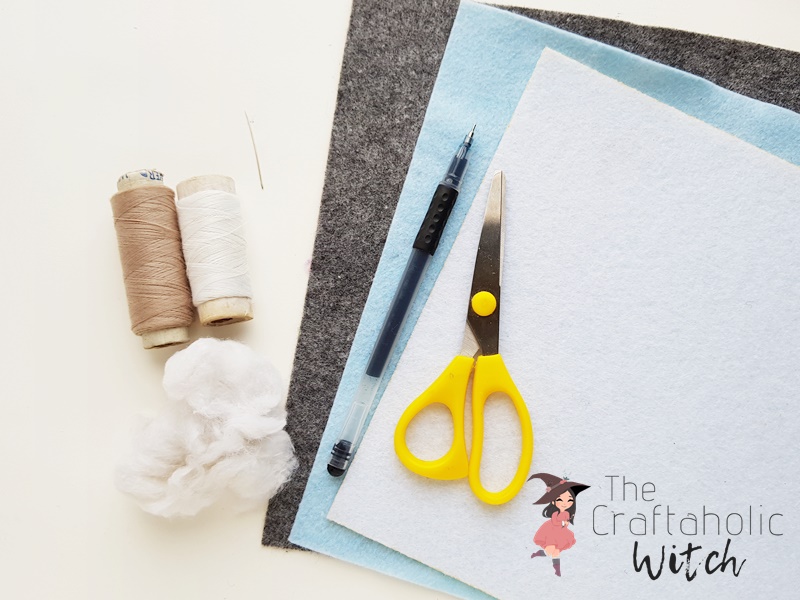
- Felt in grey, light blue, white, green, and black. Grey is the big Totoro, light blue the medium one, white the smallest, green the leaf, and black the soot balls and eyes. Craft felt around 1 to 2mm holds the shape best.
- Polyester stuffing (or cotton). Just enough to make Totoro plump. Polyester fluffs up more evenly than cotton wool, which can clump.
- Matching thread. Grey or a neutral colour so the body seam disappears into the felt.
Tools
- Gel pen or fabric marker. A gel pen shows up clearly on light felt and wipes off dark felt. Trace on the inner side so no line shows on the finished plush.
- Sharp scissors. Small, pointed scissors let you cut clean curves on the ears and the little chevron markings.
- Hand-sewing needle. For the running or blanket stitch that closes the body.
- Hot glue gun. The fastest way to fix the flat felt details in place before you stitch.
Get the Felt Totoro Plush Pattern
This project uses a printable pattern with every piece sized and ready to trace: the big Totoro, both mini Totoros, the soot ball sprites, and the leaf. Grab the Felt Totoro plush pattern in the shop and print it at 100% with no scaling so the pieces come out the intended size.
Ask inside "Crafty Q&A" while you are making.
"Crafty Q&A" is free to join. Share your question, photo, or the exact step where you got stuck, and chat with other makers plus the Craftaholic Witch team. You can also join any discussion thread already happening inside the space.
How to Make a Felt Totoro Plush
Step 1: Trace the Pattern Pieces onto Felt

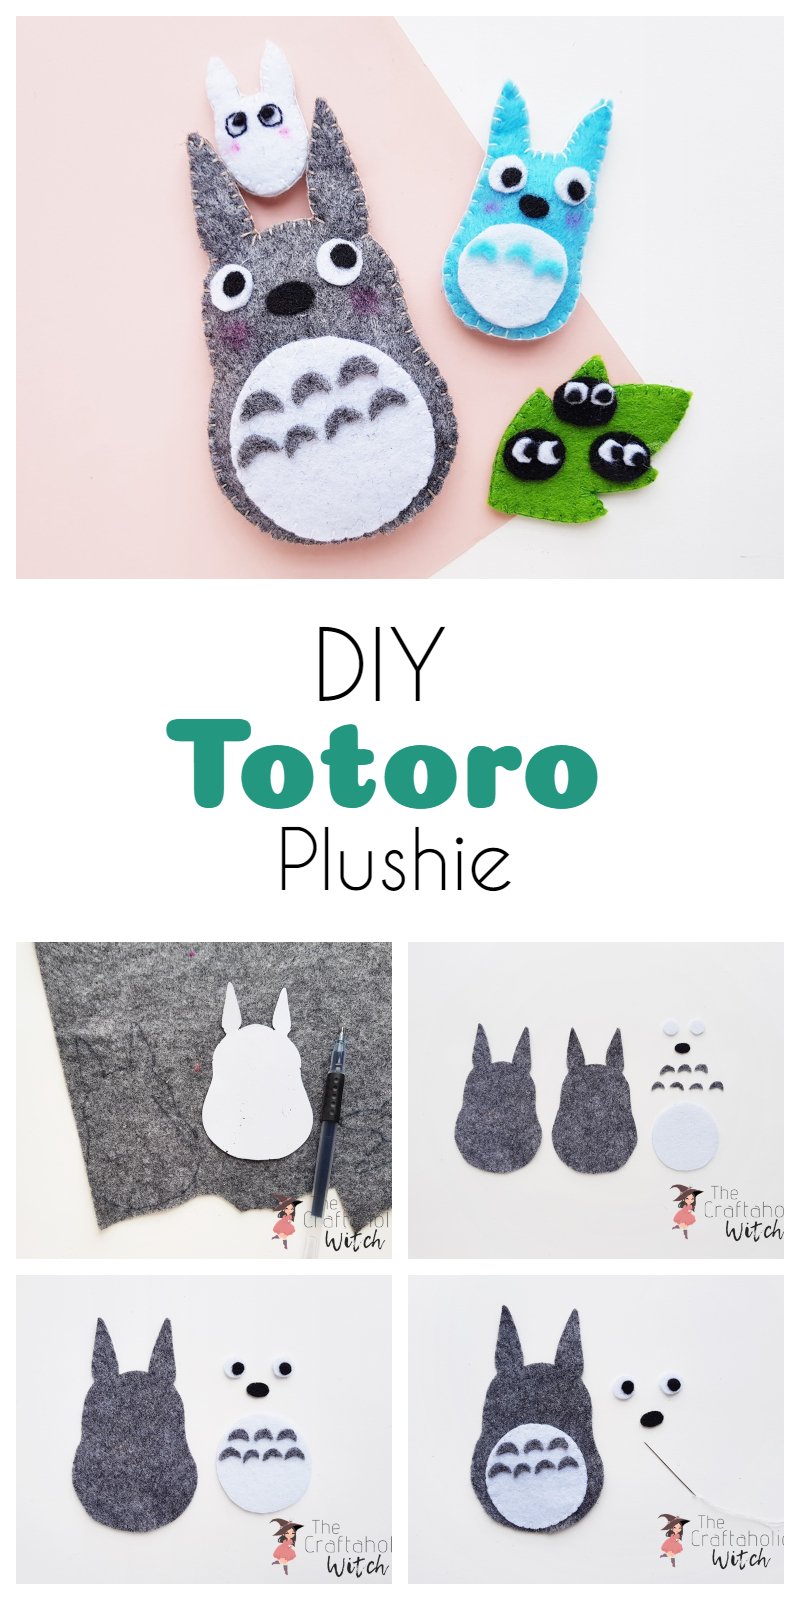
Cut out the paper pattern pieces and lay each one on the felt colour it calls for: grey for the big Totoro, light blue for the medium one, white for the smallest, green for the leaf, and black for the soot balls and eyes. Trace around every piece with your gel pen or fabric marker. Trace on the side of the felt you want facing inward, so any stray line ends up hidden inside the finished plush.
Step 2: Cut Out Every Piece
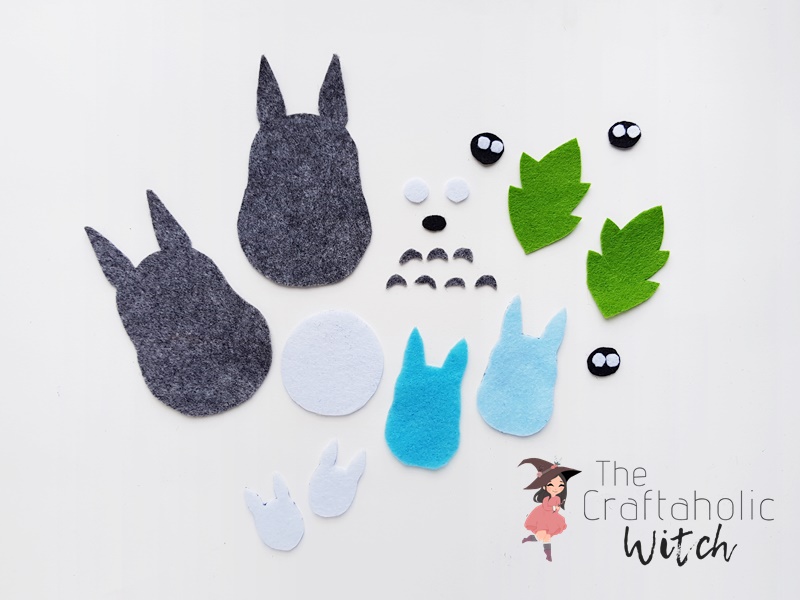
Cut just inside your traced line so no ink shows on the finished edge. Take your time on the ears and the little chevron markings, since those small curves are what make Totoro read as Totoro. Keep pairs together as you cut, front and back body, both ears, so nothing wanders off.
Step 3: Glue on the Belly, Chevrons, and Eyes
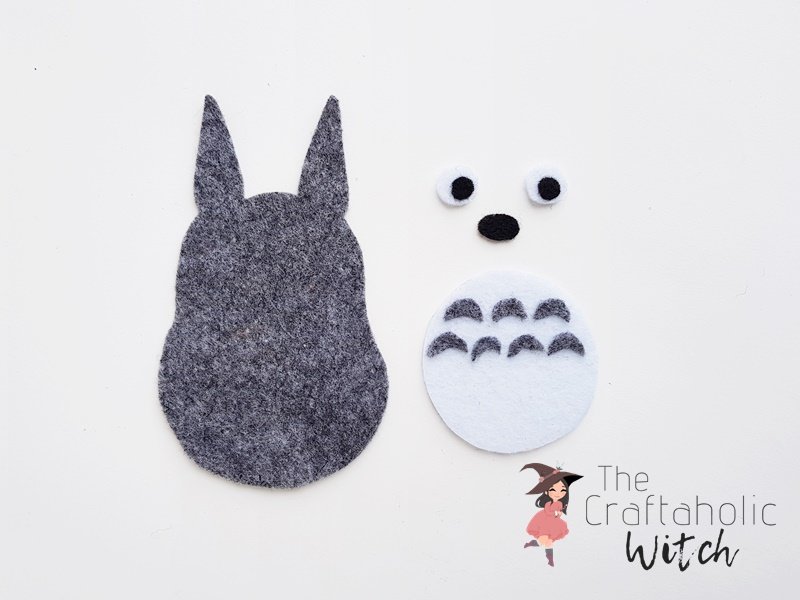
Build up Totoro’s front before you sew anything. Glue the white belly oval down first, then the grey chevron markings across it, then the white eyes with their black centres. A single dot of hot glue on each small piece is plenty. You can stitch these instead if you prefer, but glue keeps the flat shapes crisp and flat against the body.
Tip: press each piece down for a second or two so the glue grabs before it cools, especially the tiny eyes that like to shift.
Step 4: Stitch the Belly Panel for a Neater Finish
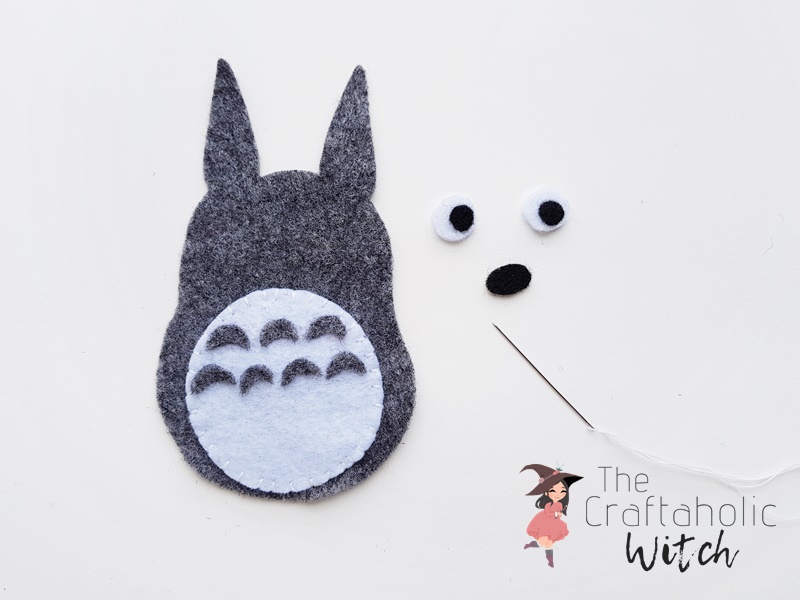
Once the belly is decorated, stitch that white panel onto the front body piece with a small running stitch or a flat blanket stitch around its edge. This locks it down so the glued details cannot peel away later. Keep the stitches even and close to the edge of the panel for a tidy line.
Step 5: Add the Face and Sew the Body Closed
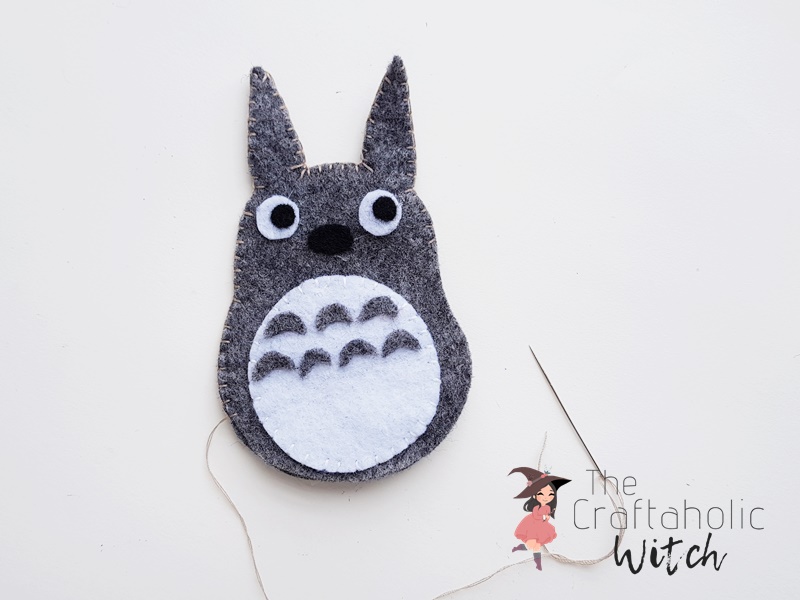
Fix the nose in place between the eyes, then hold the front and back body pieces together with the decorated side facing out. Stitch around the outside with a blanket stitch, working up and over the ears and down the sides. Go slowly around the ear points so the curve stays sharp instead of bunching.
Step 6: Stuff Totoro Through the Gap
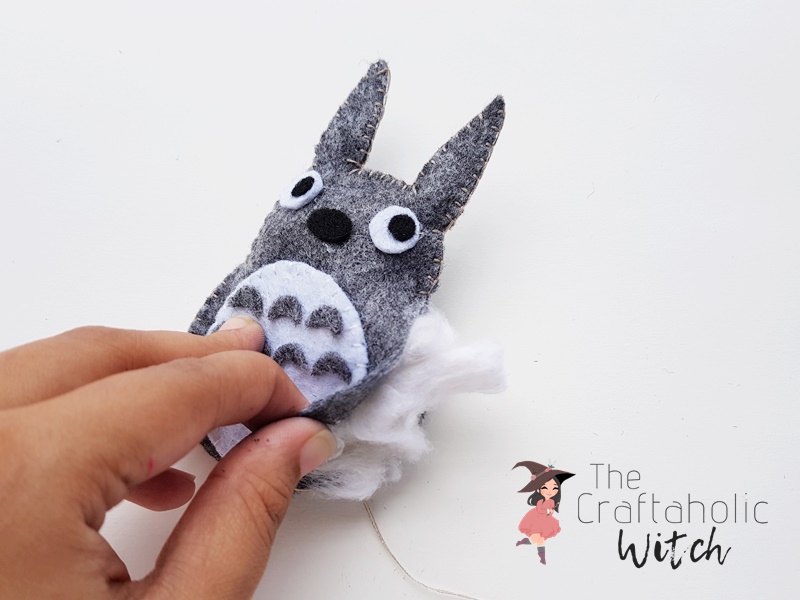
As you come back around to where you started, stop and leave a gap about two fingers wide. Push small pinches of stuffing in at a time, working it into the ears and the base first so Totoro stays plump right to the edges. You are aiming for firm but still squishy, not packed rock hard.
Step 7: Stitch the Opening Shut
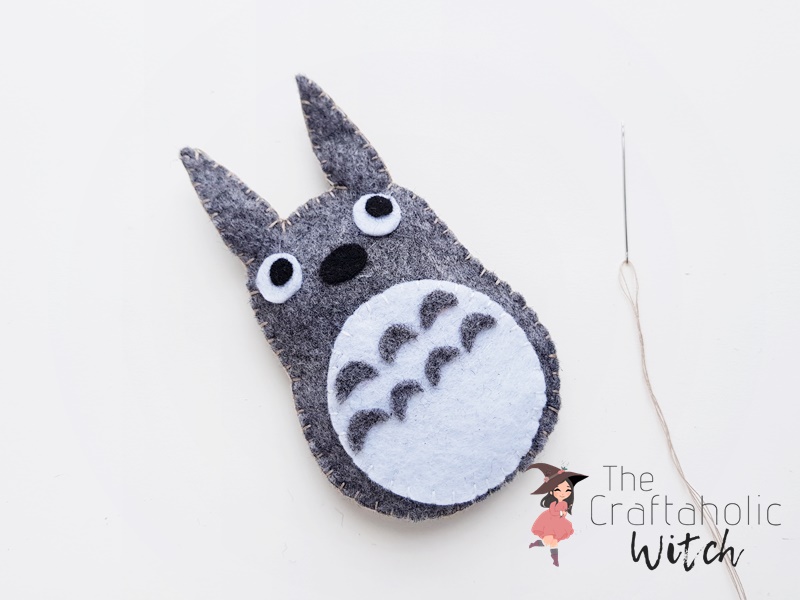
Tuck the last of the stuffing away from the opening, then close the gap with the same stitch you used around the body so the seam looks continuous. Pull the thread snug, knot it off, and bury the tail inside the plush to hide the end.
Step 8: Make the Soot Ball Sprites
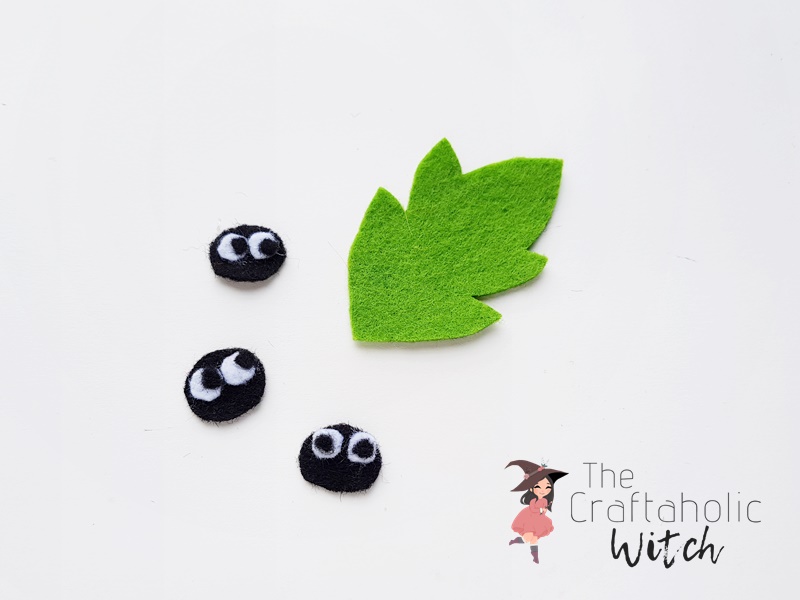
The soot sprites are the easiest part of the whole set. Glue the small black felt circles into fuzzy little bodies, then add the tiny white eyes and set them on the green leaf. The medium and small Totoros come together exactly like the big one, just with fewer belly markings, so once you have made one you can make the whole My Neighbor Totoro family.
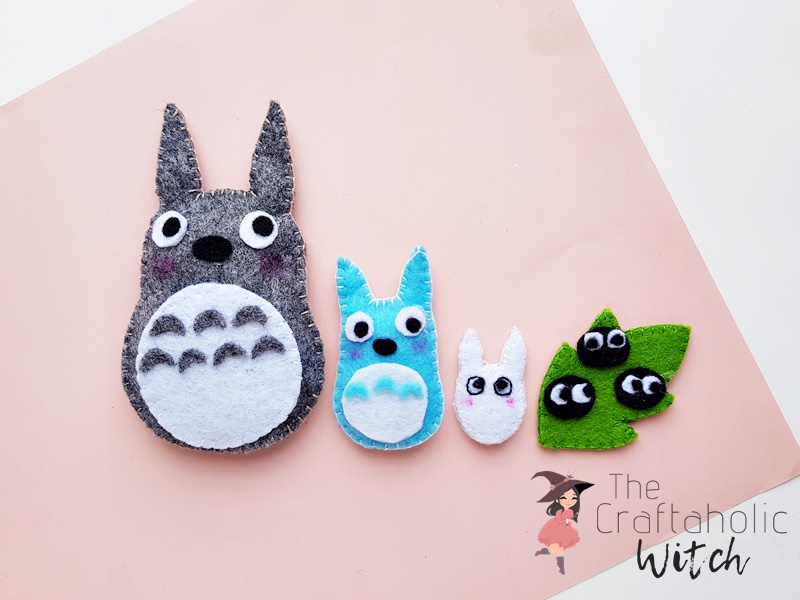
Share it in "I Made It" and let us cheer you on.
Post your finished make in "I Made It" so the community can celebrate it with you. Cheer on other makers too. Each month, the most loved craft wins 1 year of Craftaholic Premium ($59)
Tips for Your Felt Totoro Plush
- Scale the pattern up or down before printing to make a large huggable Totoro or a tiny keychain-sized one.
- Swap the grey for dusty blue or soft white felt to make Totoro in his other on-screen colours.
- Add a small ribbon loop to the back seam in Step 5 to turn any of them into an ornament or bag charm.
Frequently Asked Questions
Is this felt Totoro plush good for beginners?
Yes, it is a true beginner project. Most of it is gluing flat felt shapes together, with only a simple running or blanket stitch to close the body. There is no sewing machine involved, and you can finish the main Totoro in about an hour.
What kind of felt works best for a Totoro plush?
Craft felt around 1 to 2mm thick holds Totoro’s rounded shape best and cuts cleanly. Wool-blend felt looks softer and richer if you want a nicer finish, while cheap acrylic felt works fine for a first try. Avoid very thin felt, which curls at the edges and struggles to hold stuffing.
How big is the finished Totoro plush?
At the pattern’s printed size the big Totoro is about palm-sized, and the two mini Totoros are smaller still. Because it is a printable pattern, you can enlarge it before printing for a bigger cuddly version, or shrink it for a keychain charm.
Can I glue the whole thing instead of sewing it?
You can glue almost all of the flat details, and the tutorial uses glue for the belly, eyes, and soot balls. The body seam holds up far better with a few stitches, though, since hot glue alone tends to pop open once the plush gets squished and hugged.
Do I need the pattern, or can I freehand it?
You can freehand the shapes, but the printable pattern keeps Totoro’s ears and body symmetrical, which is where most of his charm lives. Tracing the pieces also makes the front and back match so the plush sits flat when you sew it together.
More Plushies and Soft Toys Tutorials
- Browse all Plushies and Soft Toys tutorials
- How to Make a Stitched Felt Owl Plush
- DIY Felt Llama Plush
- How to Make a Stuffed Dinosaur Plushie
- How to Make a Felt BFF Bunny Plush
Made your own Totoro? Share your felt Totoro plush in the I Made It space inside Craftaholic Community. The most-loved post each month wins a one year free Premium membership.
0 Comments
Join the conversation
Log in to your Craftaholic Community account to comment, ask questions, and cheer on fellow makers.
Log in to comment