

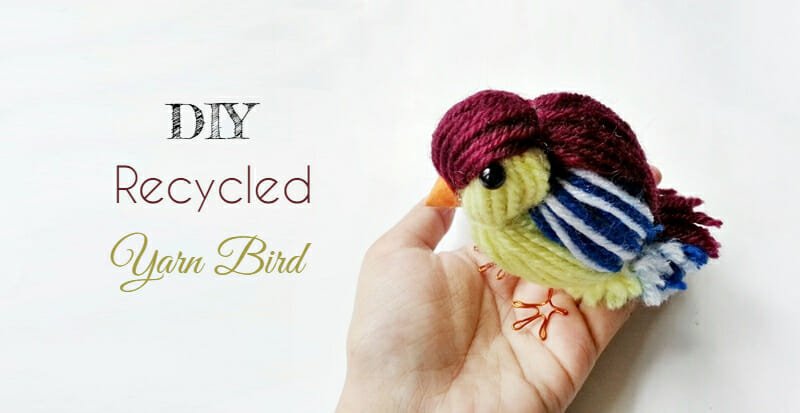
Yarn birds are one of those crafts that look trickier than they are. You’re basically building a tiny stuffed bird from folded yarn bundles, a crumpled paper ball, and a bit of wire, and the whole thing comes together in about an hour. I made my first one years ago and got it right on the very first try, which tells you how forgiving this project is.
It’s also a great way to use up leftover yarn. You only need small amounts of 2 to 3 colors, so whatever’s been sitting in your stash works perfectly. The finished bird makes a sweet shelf decoration or a handmade gift, and if you make a few in different color combinations, they look lovely grouped together.
Yarn Bird Craft at a Glance
- Difficulty: Beginner
- Time: About 1 hour
- Cost: Under $5
- Ages: 8 and up
- Best for: Home decor, handmade gifts, using up leftover yarn

Join Craft Challenge: Craft Your Calm
Make something that brings you a sense of peace, share a photo, and tell us your story. It's free to enter, open to everyone, and the entry with the most reactions takes home a $100 gift card. Takes five minutes to join.
Entries close August 30, 2026. No purchase necessary.
What You Need to Make a Yarn Bird Craft
Materials
- Yarn in 2 to 3 colors — leftover scraps work great. Use a dark color for the body and head, a lighter color for the chest, and a mixed or contrasting color for the wings.
- Cardstock paper — 3 pieces, each about 4-5 cm wide: two cut to 9 cm long, one cut to 12 cm long.
- Scrap paper — half an A4 sheet, crumpled into a tight ball, to stuff the body.
- Orange cardstock — a small scrap for rolling into the beak cone.
- Black beads, 2 — small round beads about 4-5 mm diameter for the eyes.
Tools
- Scissors — sharp enough to cut cleanly through multiple yarn strands in one go.
- Pencil and ruler — for measuring and cutting the cardstock strips to size.
- Needle and thread — in a color matching your body yarn, for attaching the bead eyes.
- Craft glue — to secure the beak cone.
- Craft wire and pliers — a light gauge wire (around 22 gauge) bends easily for the legs. Round-nose pliers help shape the foot curls.
Ask inside "Crafty Q&A" while you are making.
"Crafty Q&A" is free to join. Share your question, photo, or the exact step where you got stuck, and chat with other makers plus the Craftaholic Witch team. You can also join any discussion thread already happening inside the space.
How to Make a Yarn Bird Craft
A quick note before you start: each cardstock strip gets a specific yarn color, and keeping them separate matters. The 12 cm strip gets dark yarn (the bird’s back and head). One 9 cm strip gets light yarn (the chest). The remaining 9 cm strip gets the mixed or wing-color yarn. Keep the three groups distinct as you work through the steps.
Step 1: Cut and Wrap the Cardstock Templates
Cut your cardstock into 3 strips: two at 9 cm long and one at 12 cm long, all roughly 4-5 cm wide. Wrap each strip lengthwise with its assigned yarn color, going back and forth along the length until you have about 1 cm of yarn thickness built up on each side. The wrapping is the slowest part of the project, but don’t rush it — a thinner bundle gives you a scrawny bird, and a well-wrapped bundle makes the body satisfyingly round.
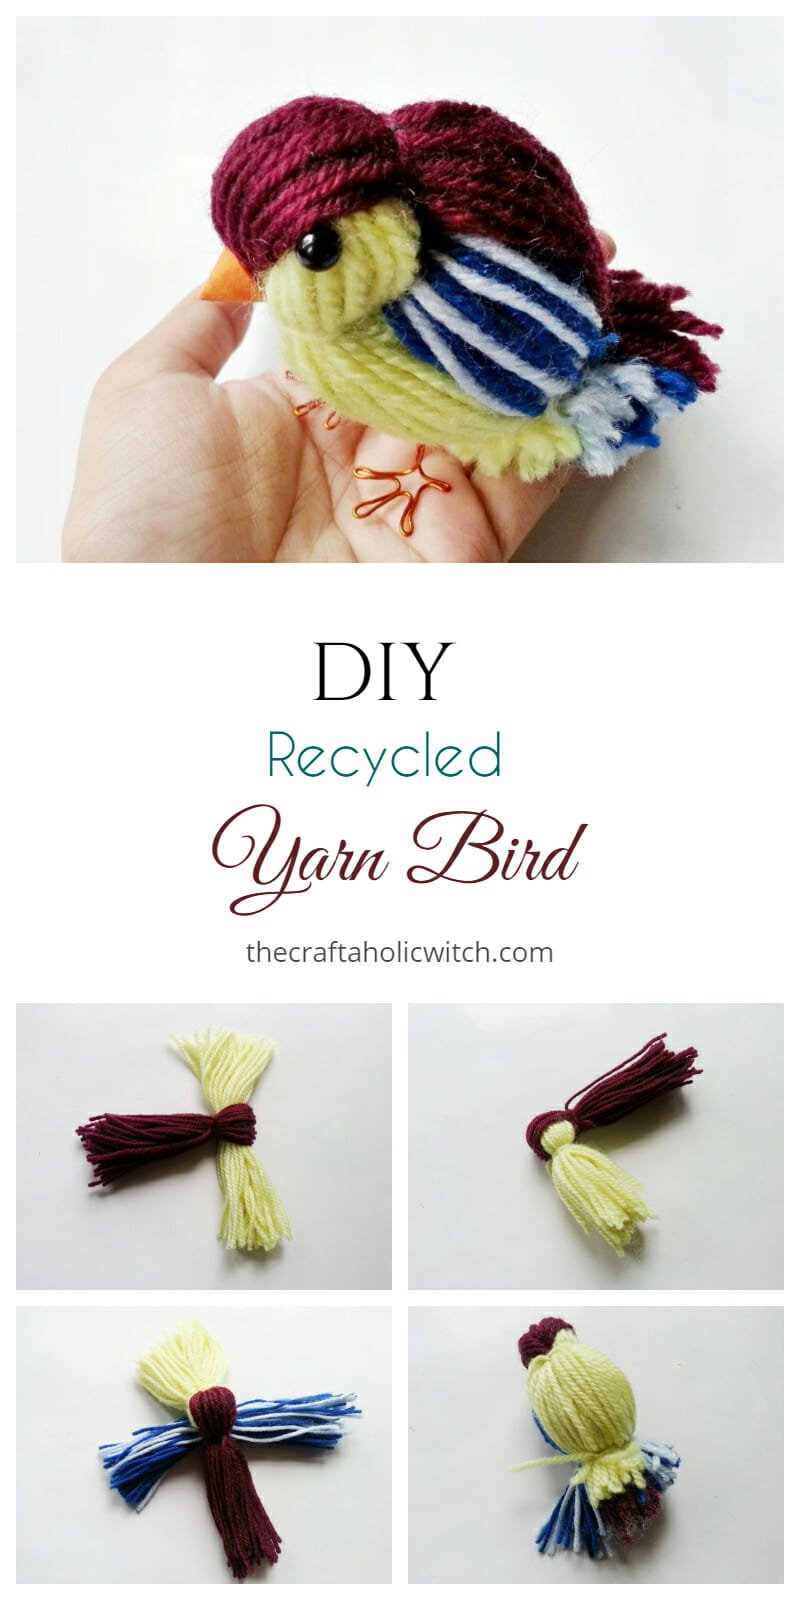
Once you’re satisfied with the thickness, hold the yarn firmly against the cardstock and cut straight across one short end. This releases all the loops into a flat bundle of strands roughly twice the length of the cardstock. You’ll have one 24 cm dark bundle, one 18 cm light bundle, and one 18 cm mixed bundle.
Step 2: Form the Head and Body
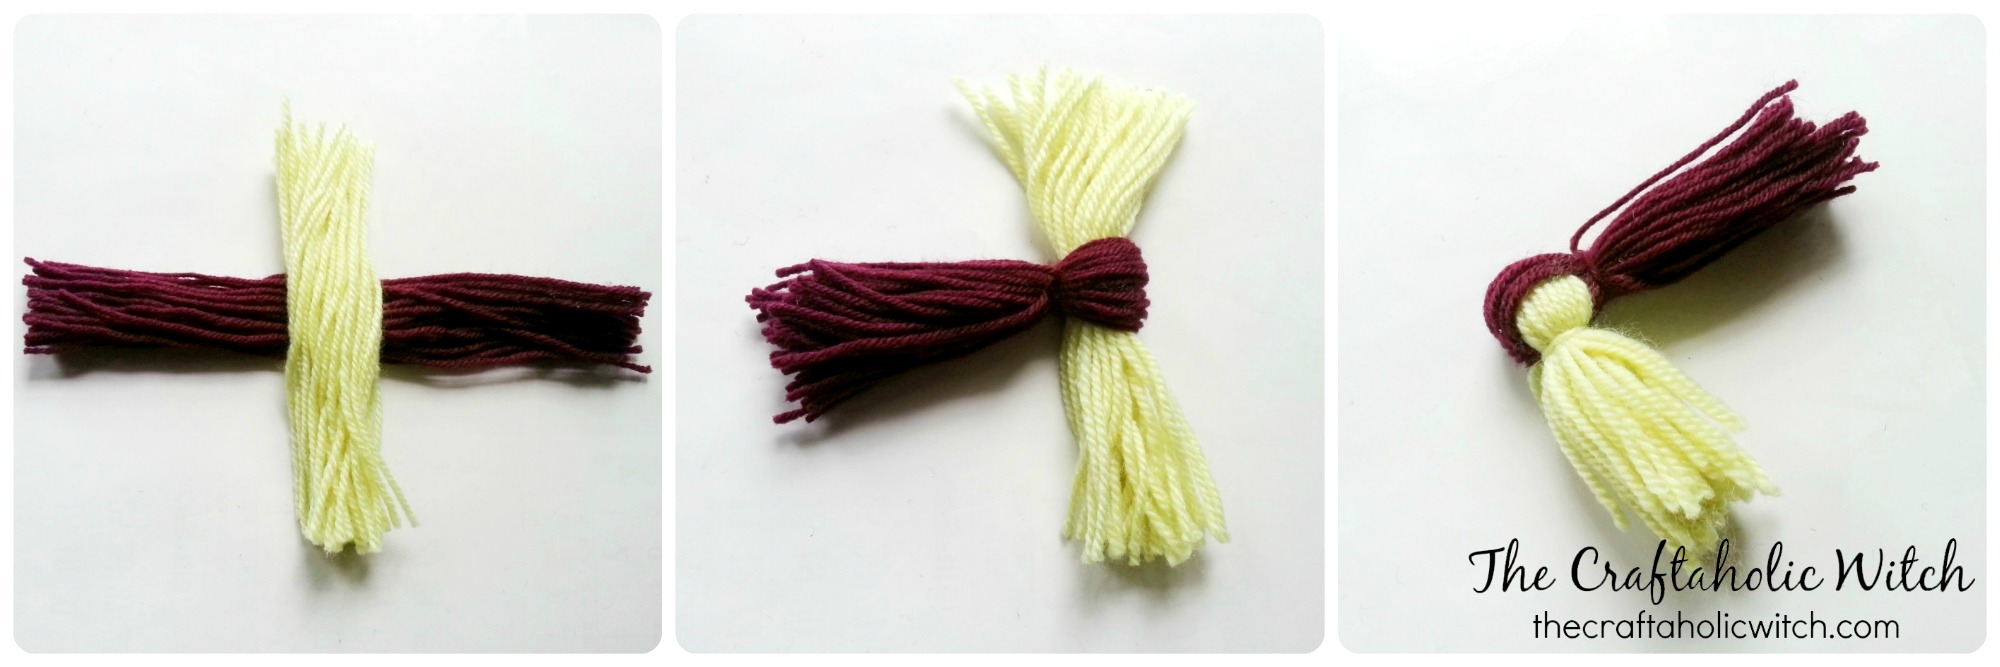
Lay the 24 cm dark bundle flat on your work surface. Place the 18 cm light bundle directly across the center at a right angle, forming a cross. The crossing point will sit at the back of the bird’s neck.
Fold the dark bundle in half at the crossing point, bringing both ends down so the light bundle is sandwiched in the fold. Take a short strand of dark yarn and tie it tightly right at the fold, snug against the light bundle — that knot is the neck. Fold the light bundle in half the same way and tie it firmly with a light-colored strand. When both bundles are tied, check that the cut ends are roughly level. If one side is noticeably longer, re-tie it closer to the fold.
Step 3: Add the Wings and Stuff the Body
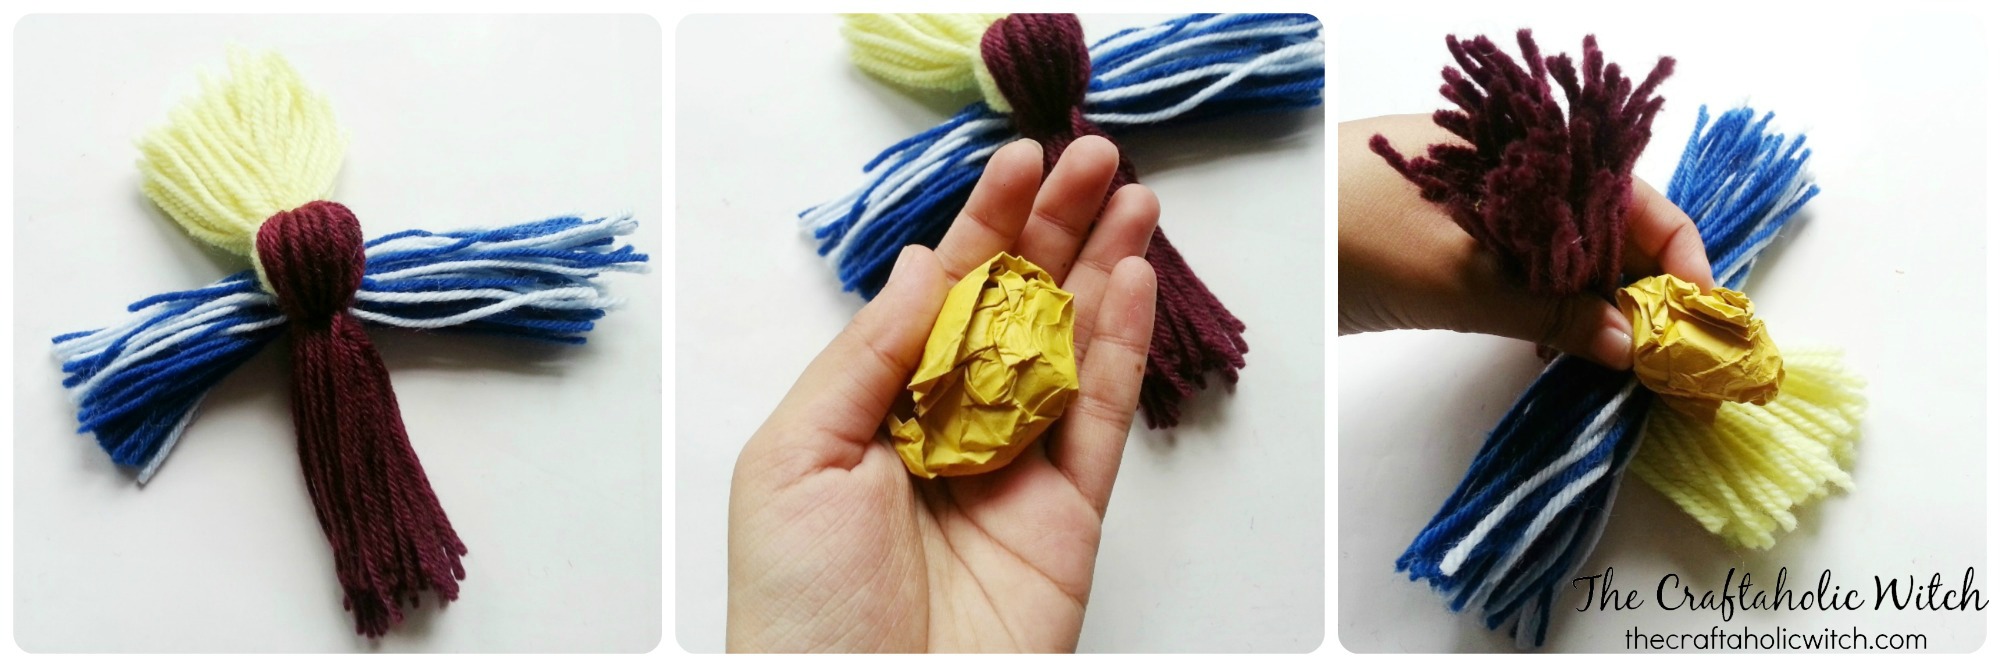
Slide the mixed-color bundle underneath the tied section from Step 2, positioning it so the folded loop ends of the head and body bundles point upward. The wing bundle lies flat across the middle like a horizontal bar.
Crumple half a sheet of A4 paper into a tight ball. Squeeze it down until it’s roughly the size you want the finished bird’s body to be. Tuck the ball between the three yarn groups, pushing it upward into the nest of yarn so it’s held firmly on all sides. How firmly you pack it determines how round the bird looks once tied.
Step 4: Gather and Tie the Tail
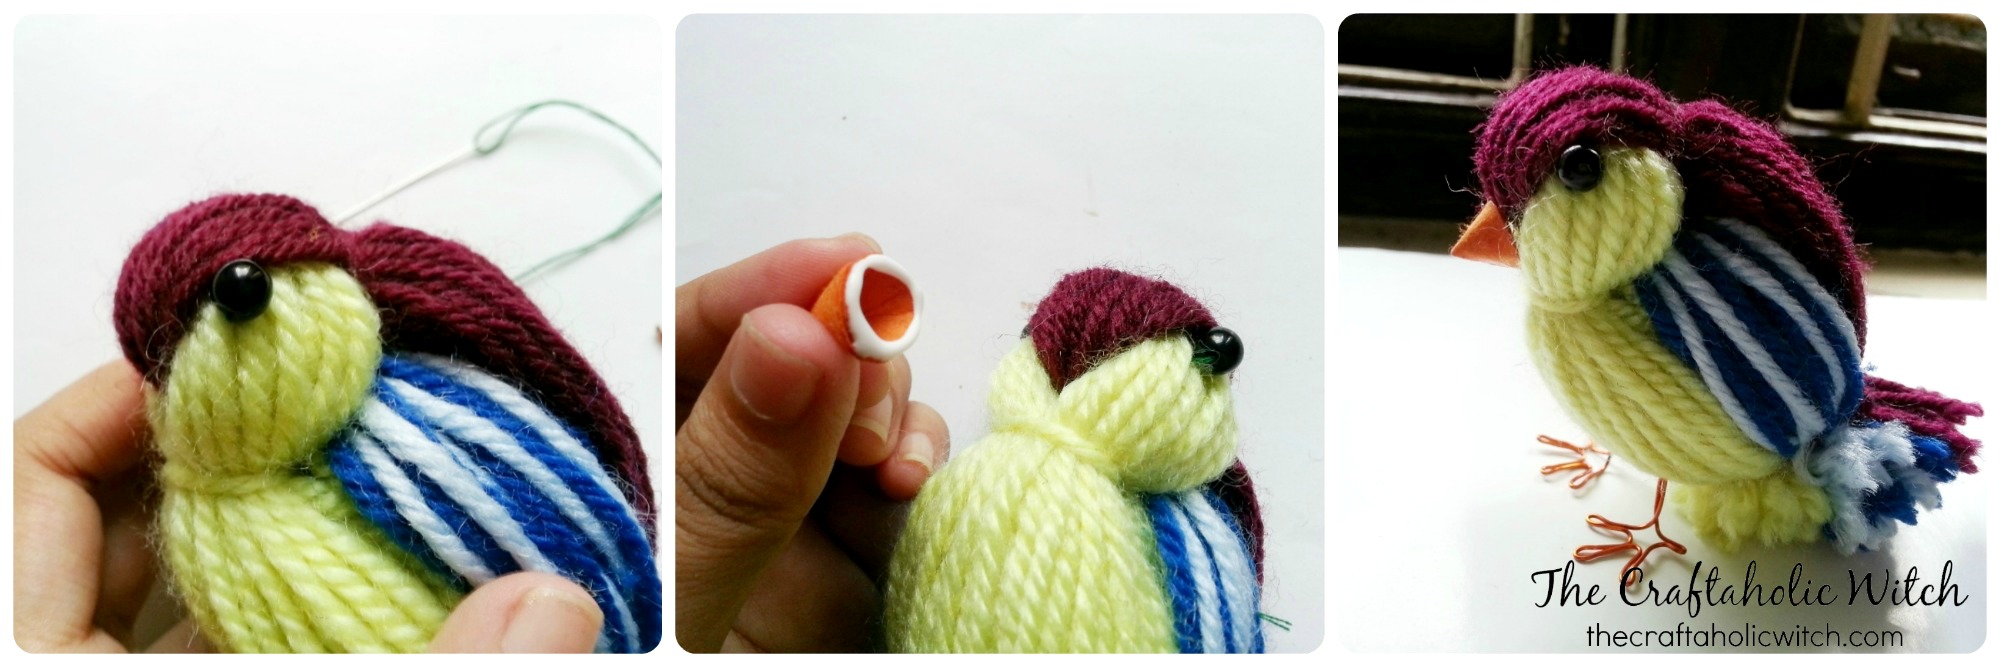
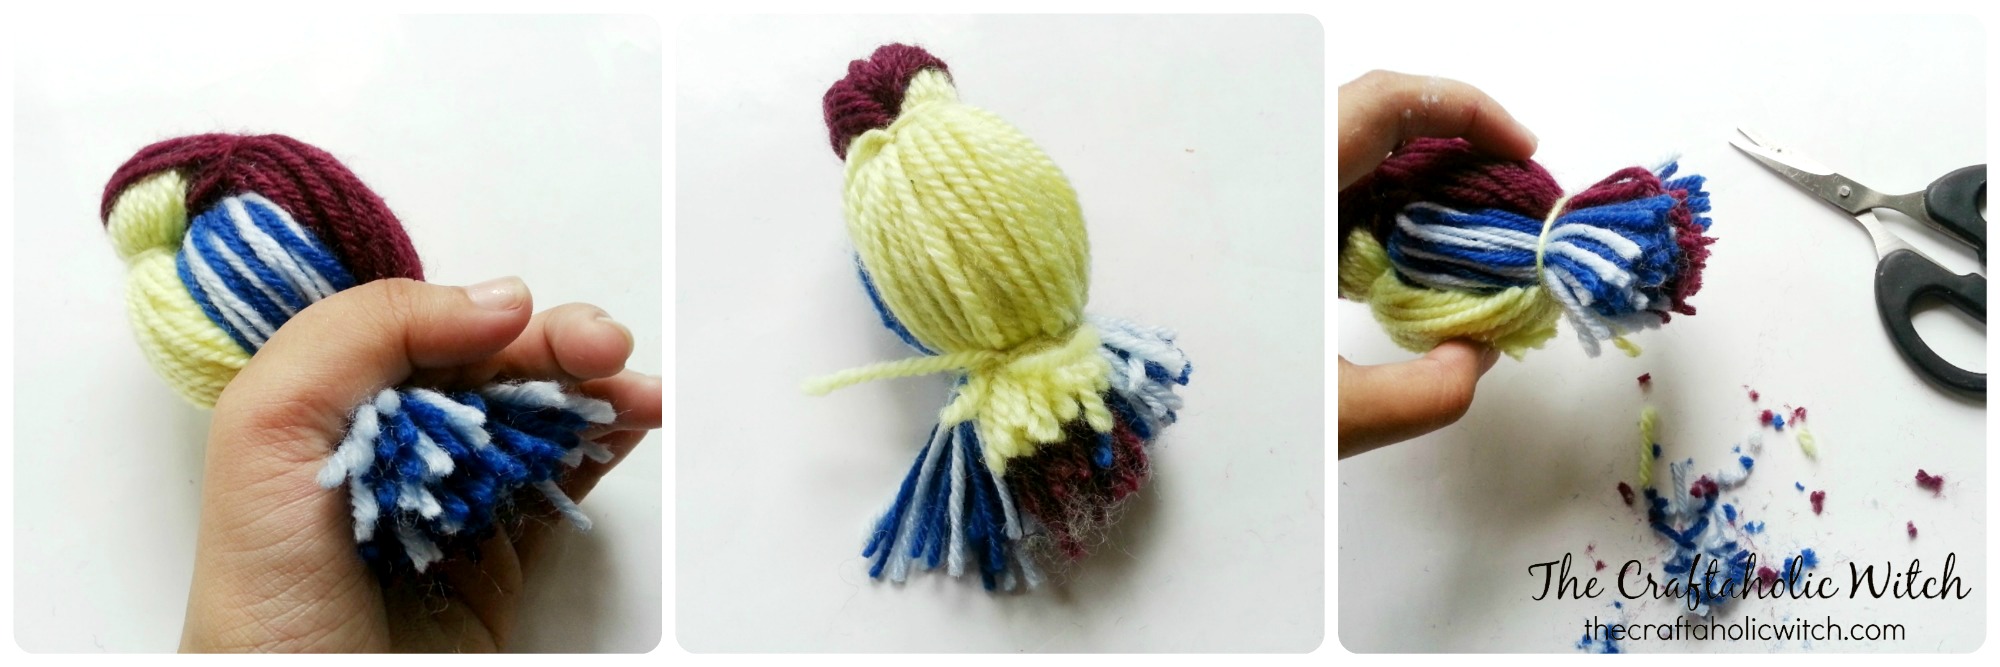
Bring all the loose strand ends downward and gather them together firmly below the paper ball. As you pull, the paper presses against the surrounding yarn and the body rounds out — so pull with some intention here. Wrap a short yarn strand around all the gathered ends and tie it in a firm double knot. Tug the knot to test it; if it slides at all, re-tie.
Trim the tail ends level with scissors. Leaving about 2-3 cm gives the bird a small fanned tail; trimming shorter makes a neater, rounder silhouette. Either looks good.
Step 5: Add Eyes, Beak, and Legs
Thread your needle and pass it through the head area to anchor it, then slide a black bead onto the needle and stitch it back through the yarn so the bead sits flush against the surface. Knot the thread on the inside so it can’t slip. Repeat on the opposite side, making sure both eyes land at the same height.
For the beak, cut a small semicircle from orange cardstock and roll it into a narrow cone, overlapping the edges and holding them with a dab of glue. Let it set for a minute, then glue the beak onto the head between the two eyes. Press it lightly for 30 seconds so it bonds before you let go.
Cut two equal lengths of craft wire for the legs. Bend each piece roughly in the center to angle downward, then curl the lower ends to form two toes on each foot. At the top, use your pliers to curl the wire ends into small hooks. Push each hook up through the lower body yarn until it catches and holds. Stand the bird up and adjust the leg angles until it balances. If it tips forward, nudge both legs back by about 1 cm.
Share it in "I Made It" and let us cheer you on.
Post your finished make in "I Made It" so the community can celebrate it with you. Cheer on other makers too. Each month, the most loved craft wins 1 year of Craftaholic Premium ($59)
Tips for Your Yarn Bird Craft
- Three distinct tones (dark body, light chest, variegated or patterned wings) give the most realistic bird look. The tonal contrast is what makes the shape read as a bird rather than just a yarn ball.
- If the bird keeps tipping forward, pull the legs out and re-insert them about 1 cm further back through the body.
- Making several at once? Cut all three cardstock templates in a batch first, then run through the wrapping, folding, and tying steps assembly-line style across all of them before moving on to finishing.
Frequently Asked Questions
What type of yarn works best for a yarn bird craft?
Medium-weight yarn such as worsted or DK gives the best results. Acrylic and wool-blend yarns hold their shape once tied and don’t slip. Avoid very slippery fibers like silk or bamboo — they loosen when you tie the bundles and the bird loses its shape. Thicker yarn gives a plumper body; thinner yarn produces a more compact, detailed bird.
How do I make the yarn bird stand up on its own?
Thread the wire legs through the lower body roughly at the bird’s center of gravity, then bend the toe ends outward into a wide V shape for a broad base. Wide feet are far more stable than narrow ones. If it still tips forward, pull the legs out and re-insert them about 1 cm further back.
Can kids make this yarn bird craft?
Yes, it’s a good one for kids 8 and up. The yarn wrapping and tying steps are very kid-friendly, and choosing their own color combinations keeps them engaged. The wire leg bending does need adult help — bending craft wire with pliers takes more grip than most younger kids have, and the wire ends can be sharp.
How long does it take to make a yarn bird?
About an hour for one bird. The yarn wrapping takes the longest — around 20-30 minutes if you wrap the bundles thoroughly. The finishing steps (eyes, beak, legs) add another 15-20 minutes. It’s a comfortable single-sitting project.
Can I make the yarn bird without wire legs?
Yes. Without legs it won’t stand on its own, but it makes a lovely hanging ornament instead. Before you glue the beak, thread a loop of matching yarn through the top of the head and knot it off. Hang the bird from a branch, curtain rod, wreath, or Christmas tree. Sizing the body down slightly makes it work even better as an ornament.
More Yarn and Home Decor Crafts
- How to Make a Macrame Rainbow Wall Hanging
- How to Make a Gnome for Beginners
- How to Make Recycled Flower Pots from Twine-Wrapped Jars
- How to Make a Last-Minute Fall Wreath from Cardboard
Share your finished yarn bird in the I Made It space inside Craftaholic Community. The most-loved post each month wins a one year free Premium membership.
0 Comments
Join the conversation
Log in to your Craftaholic Community account to comment, ask questions, and cheer on fellow makers.
Log in to comment