How to Wire Wrap a Bead & Make Pendant (Herringbone Wrap)

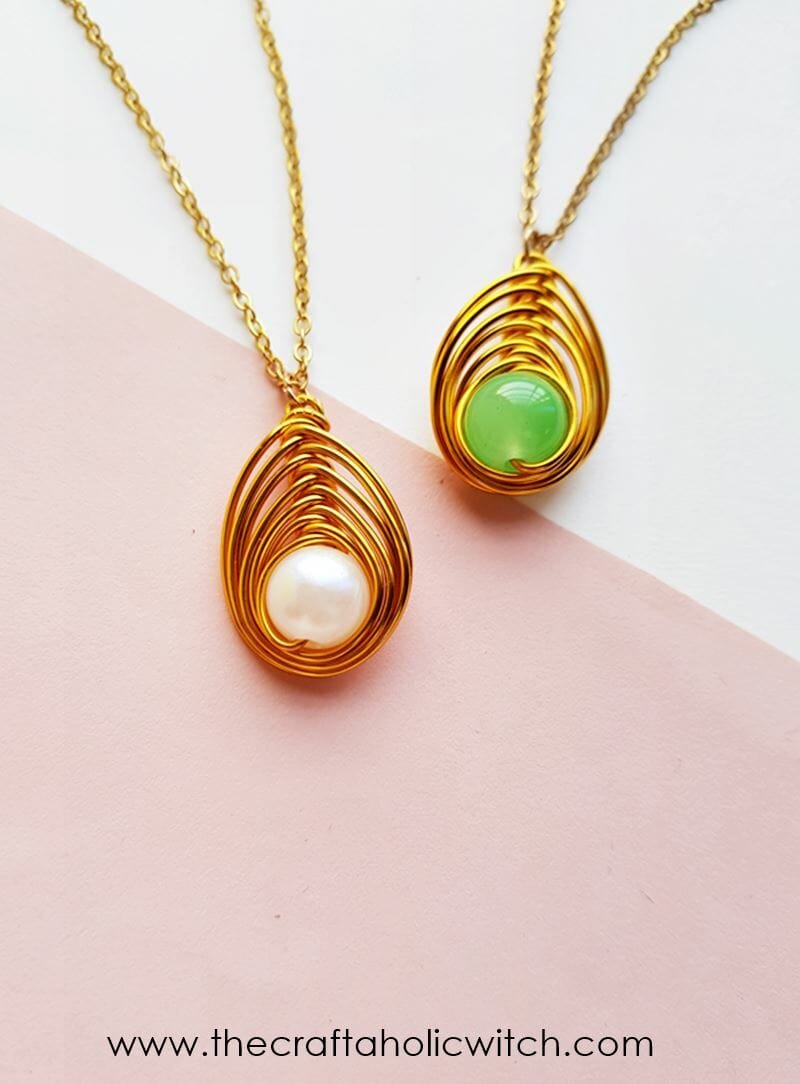
Wire-wrapped bead jewelry pieces are gorgeous and the best thing about it is that you can come up with hundreds of pattern ideas once you give it a try. If you can learn to wrap a bead with wire nicely, you can use it as so many things, a pendant, earrings, charms, and so on. So why not learn and master a new skill to your list of creative activities. In this DIY Jewelry tutorial, we will show you how to wire wrap a bead following the Herringbone wrap technique and then we will make a beautiful pendant necklace using the wire wrapped bead.
Herringbone Wire Wrapping Technique
Wire wrapping techniques are fascinating and the herringbone is supposedly one of the easiest among the beautiful patterns. It’s easy in the sense that it requires a few important steps and the whole process includes the repetition of the same steps.
Things You Will Need
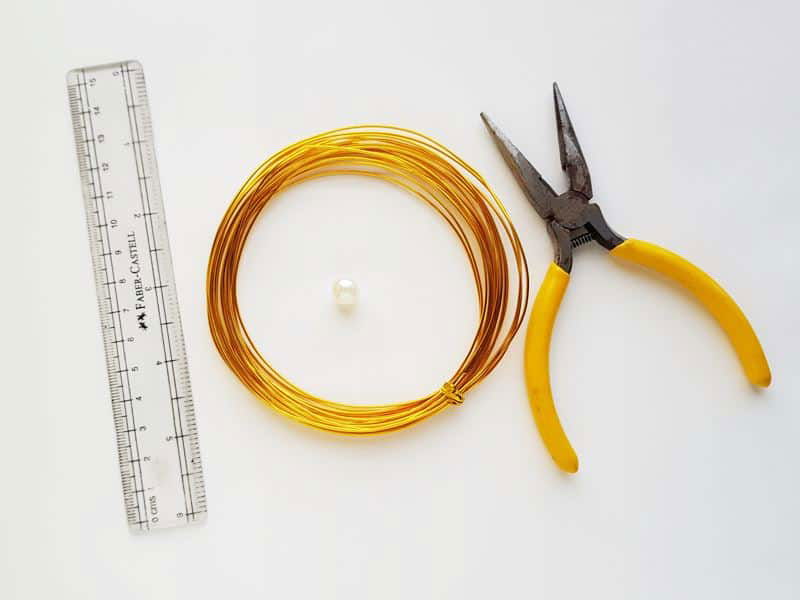
Tools
- Craft pliers – cutting, looping, and flat nose
- Ruler
Materials
- Craft wire – 18 or 20 gauge
- Chain or string (if you want to use it as a pendant)
- Jump ring (optional)
- Bead – 1cm
Instructions
The tutorial is divided into two parts. At first, we showed how to wire wrap a bead following the Herringbone technique. Then we will show how can you make a beautiful pendant neckless using it.
How to Wire Wrap a Bead (Herringbone)
Step 1: Measure and Cut Wire
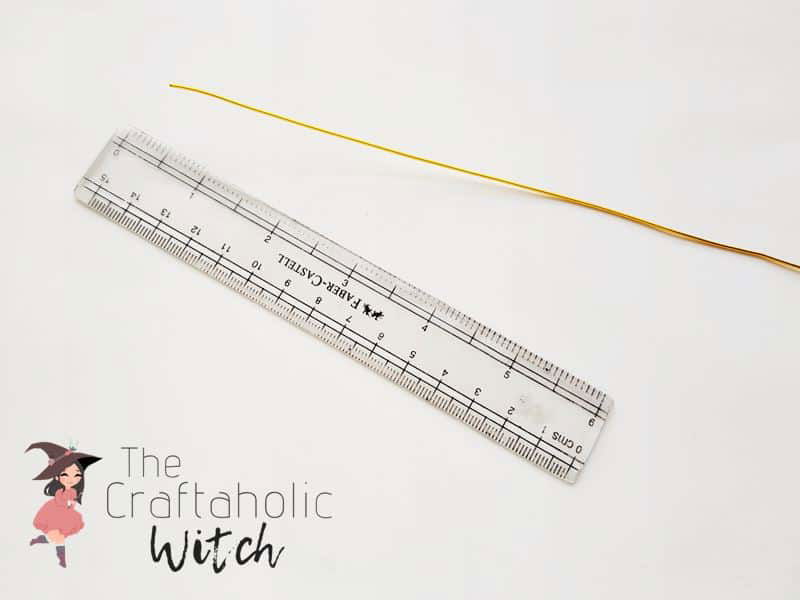
Measure and cut out 15 or 16 inches long piece of wire if you are also using a 1 cm round bead. For larger bead you will need to add extra few inches to the wire, so make sure to keep that in mind.
Step 2: Create a Small Loop
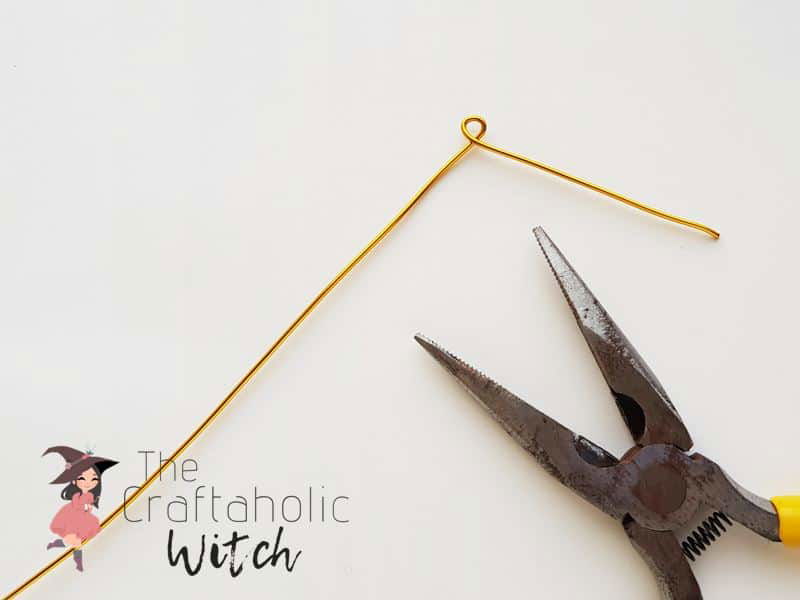
Leave 3 inches of the wire from an end and then create a small loop, see picture for clear instruction.
Step 3: Coil the 2 Inches Wire
Hold the loop with the looping wire firmly and coil the 3 inches wire below the loop and around the straight wire. Coil the 3 inches wire eveny and tightly.
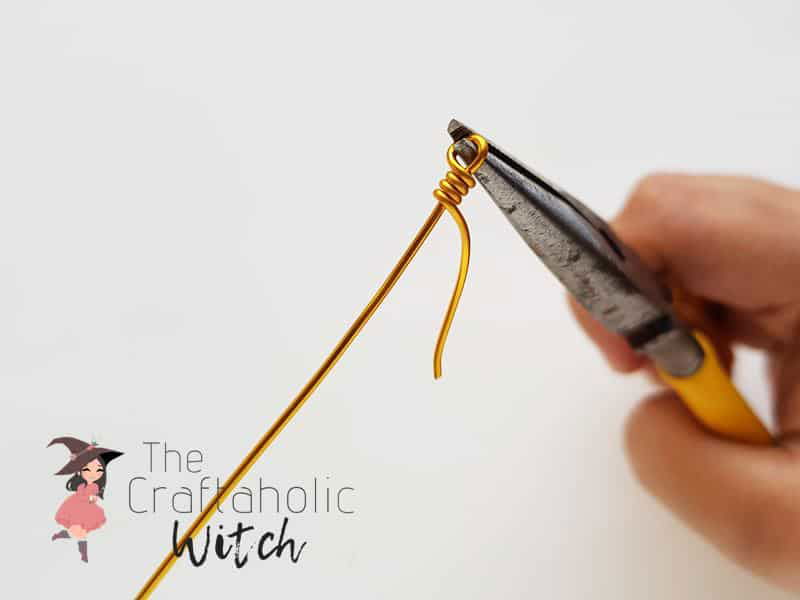
Step 4: Insert the Bead
Done coiling the 3 inches wire? Now grab a bead and insert it into the wire from its open end. Push the bead all the way to the coiled part.
Step 5: The First Wrap
Hold the bead firmly in its position and draw the wire from a side of the bead, drawing it from the bottom and towards the top, near the coiled part.
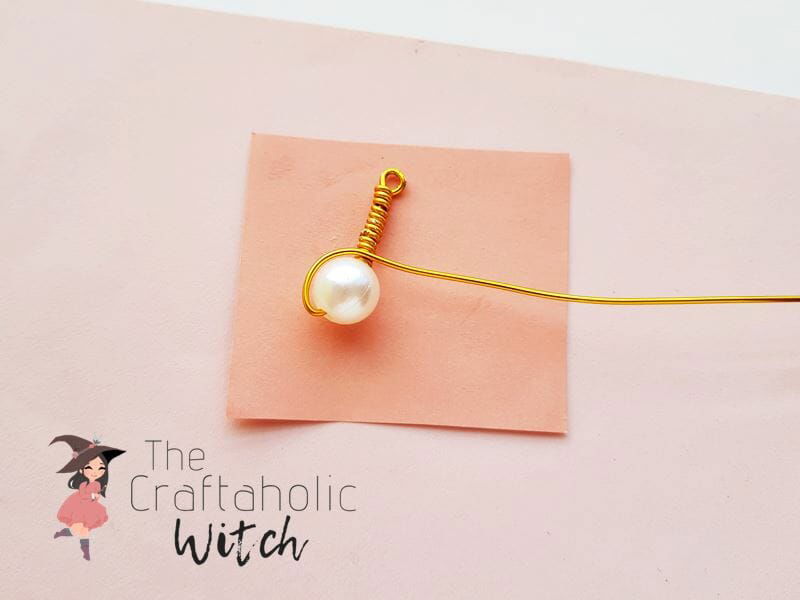
Step 6: Coil Around Top Base
Coil the open-end wire around the coiled part once. Make sure that the coiling is tight and the wire remains on a side of the bead.
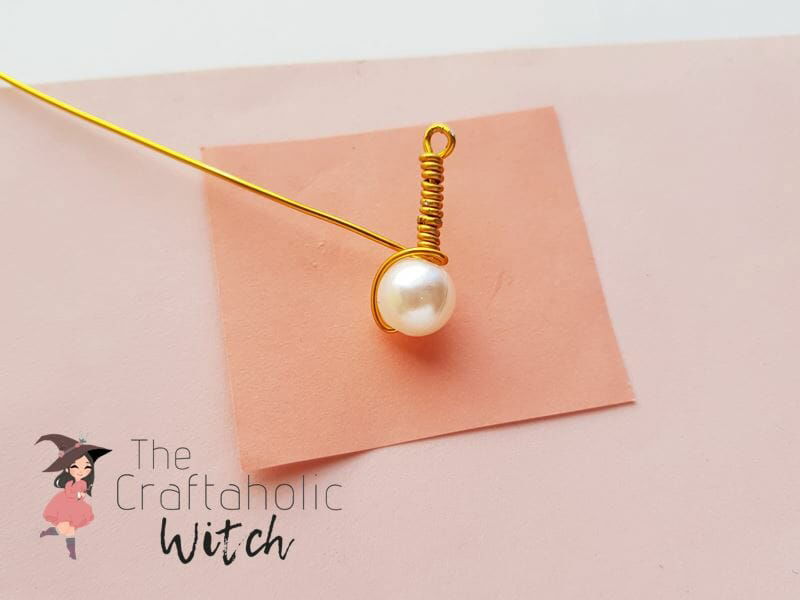
Step 7: Bring Wire to Opposite Side
After coiling the open end wire draw it to the opposite side of its initial position. More precisely, draw the wire from left to right (or if you start from the right, you will need to bring the wire to the left).
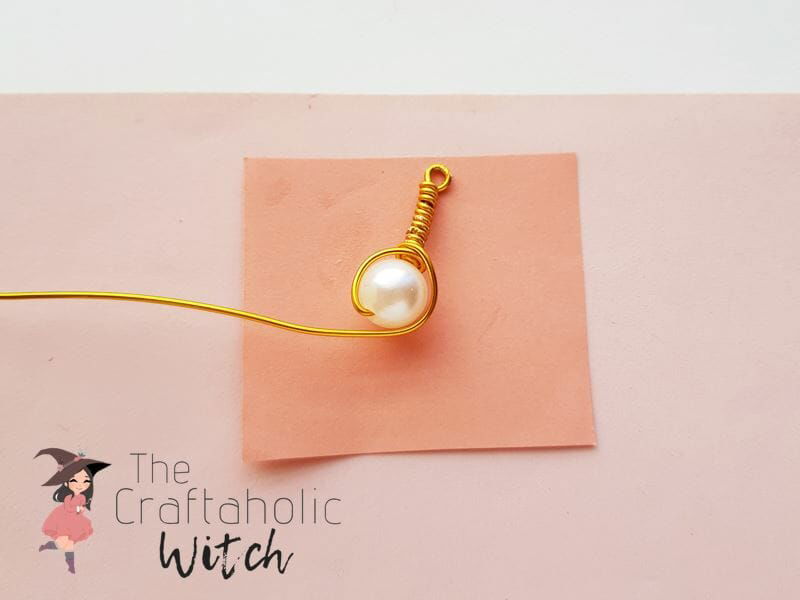
Step 8: Wrap the Bead and Return to the Previous Side
Draw and circle the wire around the bead and then bringing the wire back to the coiled part.
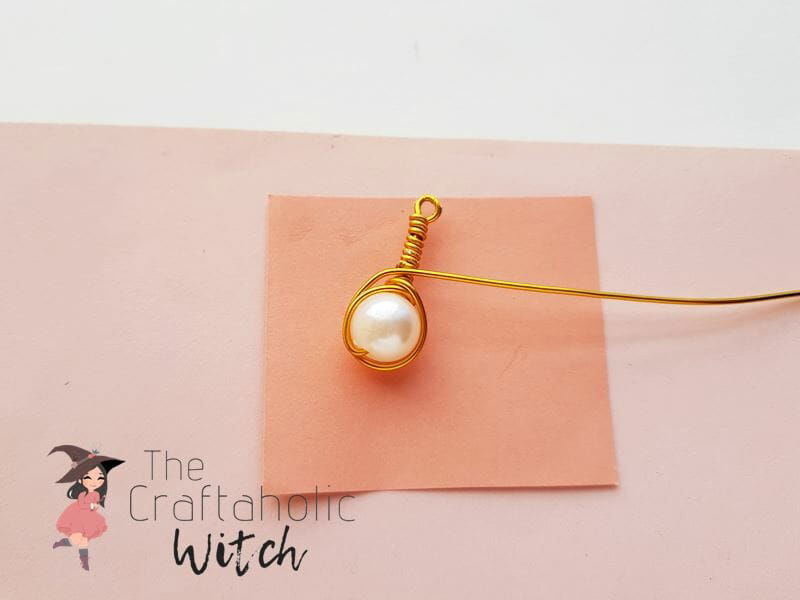
Step 9: Repeat Previous Steps
Coil the wire around the coiled part again like we did previously. Bring the wire to the other side again.
Step 10: Keep the Bottom Wrapping Flat
This is the bottom side of the wrapped bead. Try to keep the wire wrappings as flat and neat as possible on the bottom side.
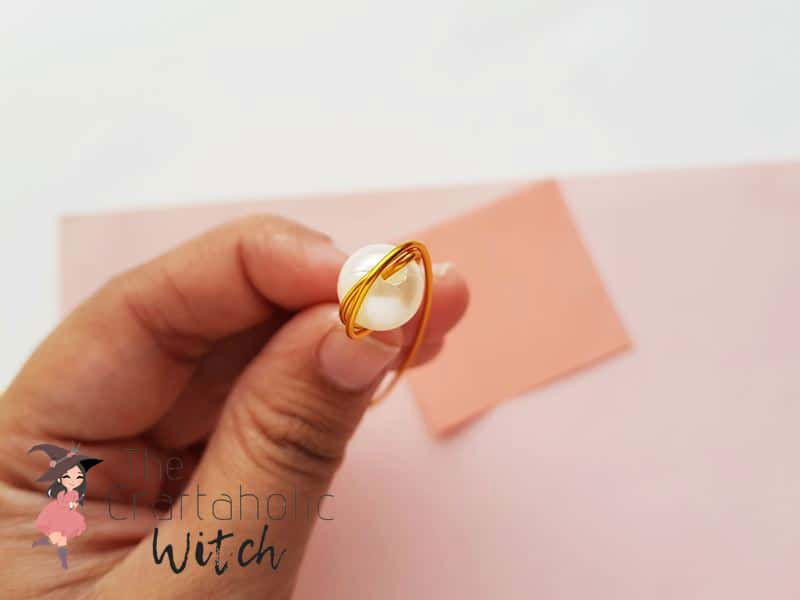
Step 11: Continue Until the Wire Ends
Repeat the previous steps of wire wrapping until the wire reaches an inch or half at its open end. The wire should remain on the top side of the bead, right below the loop that we created in step 2.
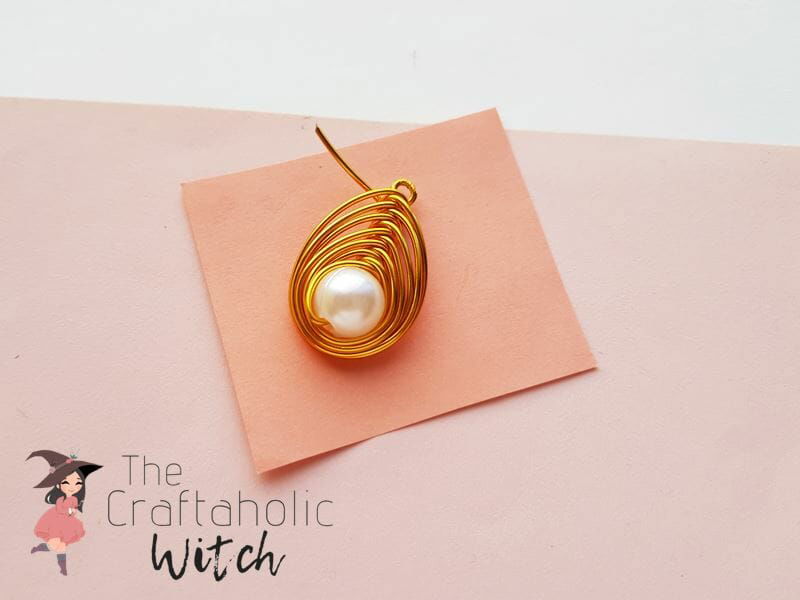
Step 12: Coil the Remaining Wire
Coil the end wire around below the loop. Use flat-nose pliers to flatten the end coil neatly. You can either use a jump ring or you can directly use the wire-wrapped bead as a charm or accessory.
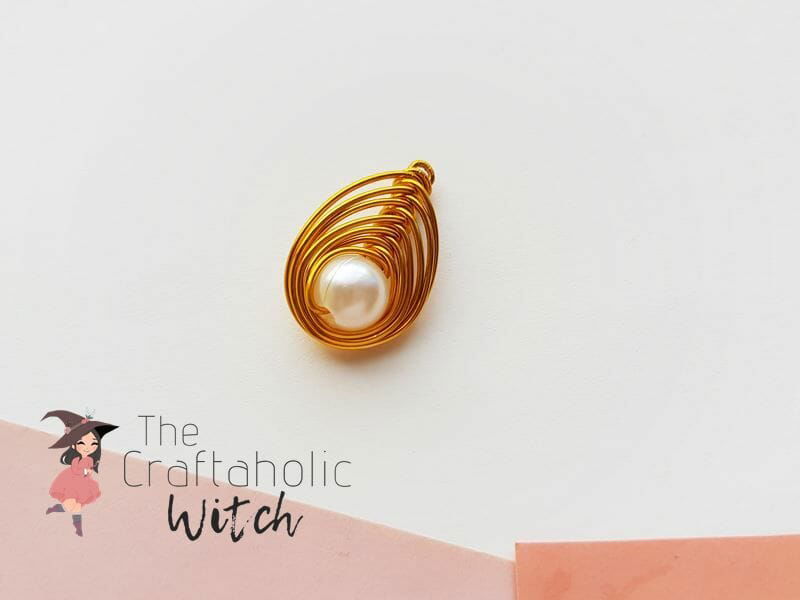
Making Wire Wrapped Bead Pendant
Simply insert the herringbone wrapped bead into a chain through its top loop. You can also craft earrings or charms with them.
You can use different coloured wires and different types of beads to bring variation in the design. Mix and match different colours to craft some pretty herringbone jewellery pieces.
Video Tutorial on Herringbone Wire Wrapping Beading
We also have a video tutorial of the herringbone wire wrapping, you can check it out in case you have difficulty understanding any step.
Tips for Beginners
If you’re a beginner in wire wrapping here are some tips to follow,
- For wire wrapping projects use wire that is easily bendable.
- Always measure and cut wire before starting to craft because you won’t be able to add wire later.
- The measurement of wire would depend on the size of the bead you’re using. The bigger the bead the longer the wire should be.
- You might need to go for several attempts before crafting one perfectly so don’t feel frustrated about that.
- And last but not least, keep practicing, the more you practice the better your skills will get.
We really hope you enjoy this craft and don’t forget to leave feedback in the comments. And if you make this beautiful pendant share photos of your version with us. You can share your picture with hashtag #craftaholicwitch or just DM your picture to us on Instagram.
Happy Crafting!
Thank you!


