How to Make Beaded Necklaces (3 Designs with Full Tutorials)
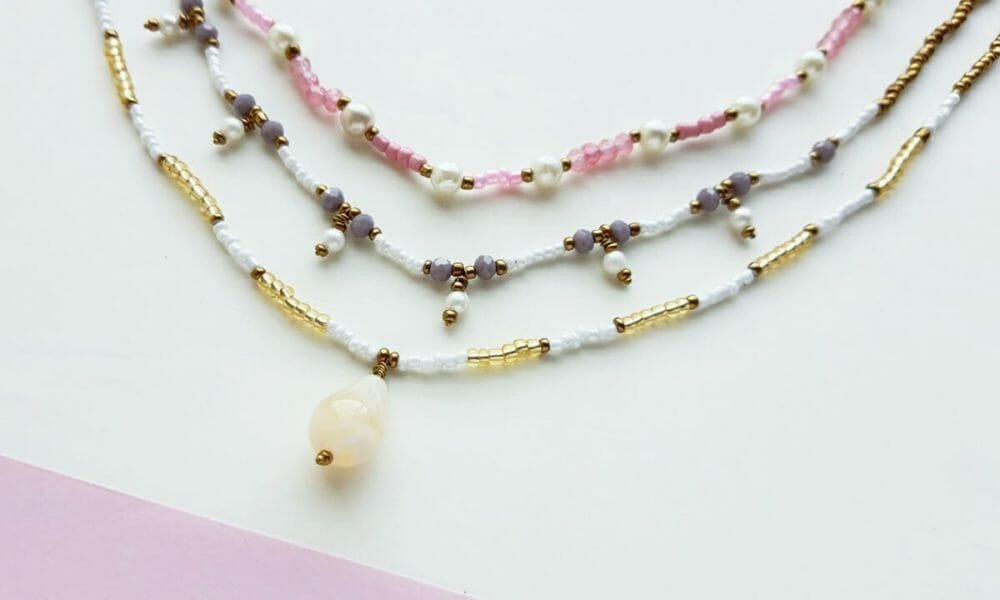
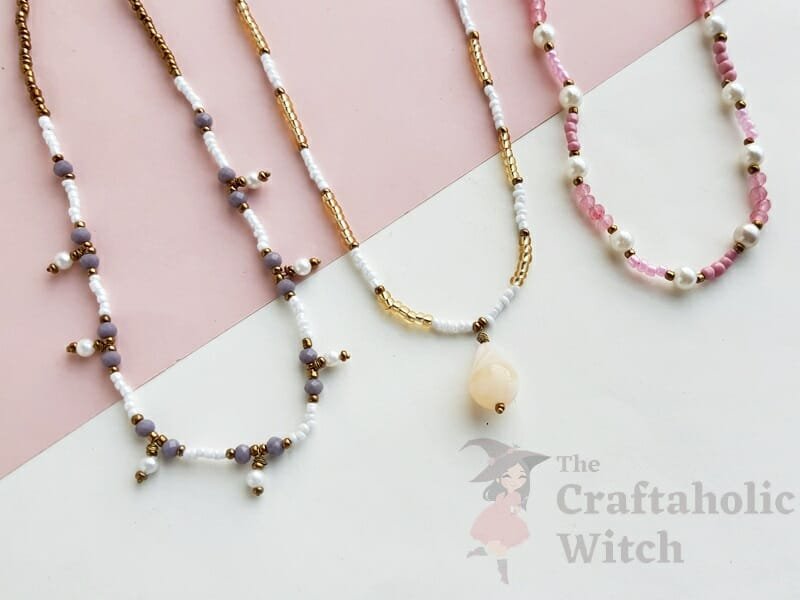
In this article, we’ll show you how to make beaded necklaces of 3 different designs. These necklaces are very easy to make and everyone can make them following our tutorial.
We are excited to share a necklace-making tutorial after a long time. you know what, I loved crafting ever since I was a kid and crafting or repairing any beaded item was my favorite thing to do! As I didn’t have basic jewelry supplies, I used regular cotton thread bundles to thread beads; so that’s why I decided to re-create my childhood beaded necklaces.
Today’s beaded necklace tutorial includes 3 different designs and they require basic jewelry-making supplies only. The most difficult part of the regular beaded necklace-making process is attaching the closure, so I tried to simplify the closure attaching step as much as possible. It’s an easy tutorial and beginners can do it by following our instructions.
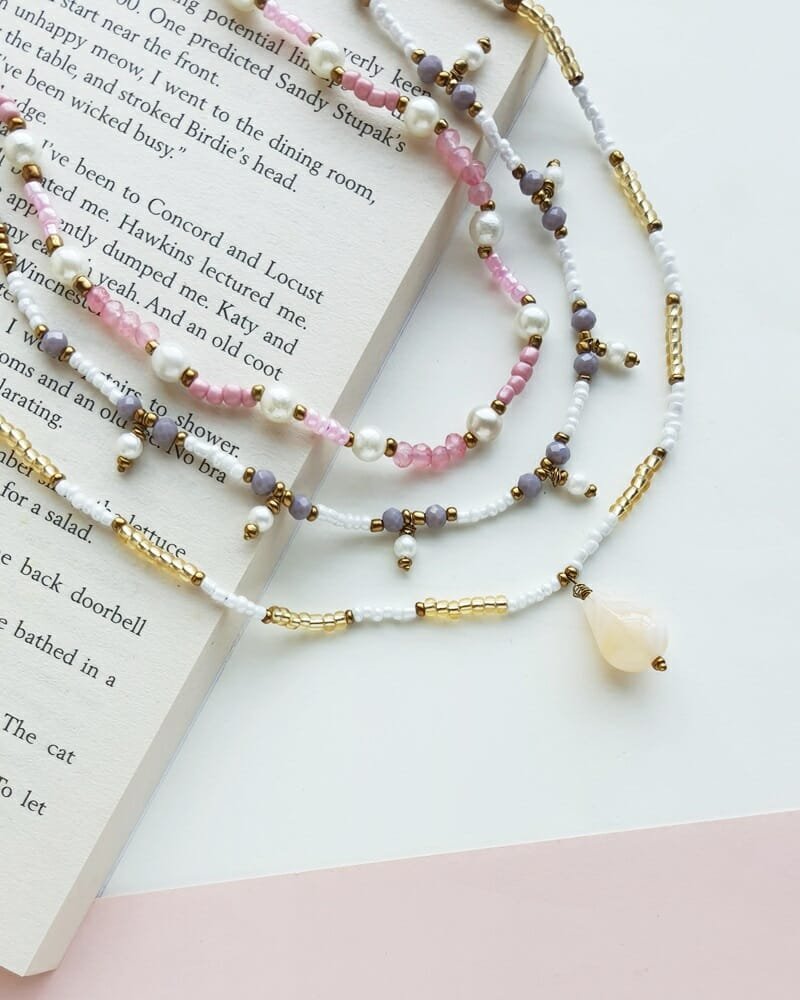
Here is a video of all 3 of our homemade beaded necklaces. Have a look.
If you have different colors, types, and sizes of jewelry beads, you can come up with so many different designs for beaded necklaces. Once you learn the basic steps of making beaded necklaces, you can craft any kind of necklace as you wish, for instance, beaded boho necklaces, simple or minimal beaded necklaces, double-layered beaded necklaces,
For each necklace, you might need 20 minutes to 30 minutes, depending on your jewelry making and beading skill. If you have a beginner’s jewelry-making kit, you craft these 3 necklaces easily. Even after crafting 3 necklaces, you should have supplies left in the kit. The jewelry-making kit shouldn’t be more than $20.
What You Need to Make a Beaded Necklace
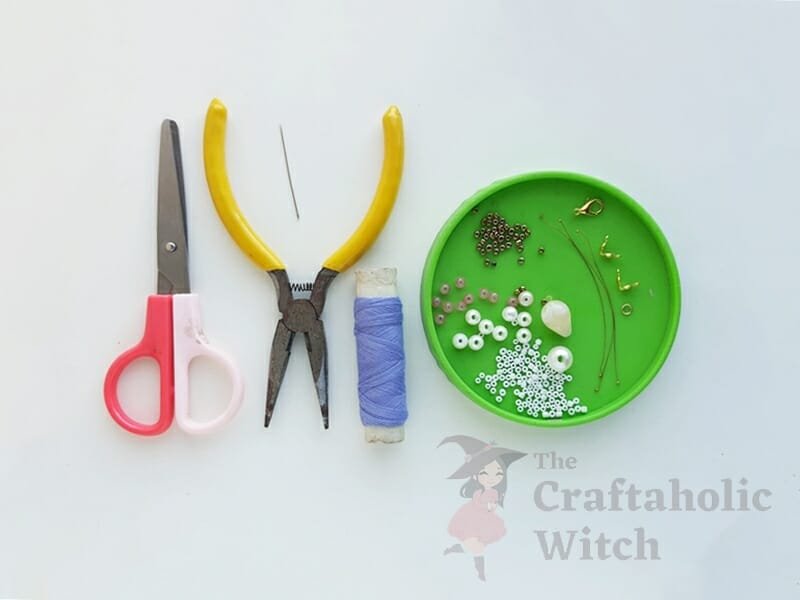
Materials
- Seed beads
- Teardrop bead
- Thread – You can use regular embroidery floss
- Lobster claw closure
- Beads of different sizes
- Headpins
- Bead tips or bead clamps
- Jump rings
Tools
- Needle
- Scissors
- Craft pliers
How to Make Beaded Necklaces
Instructions: Beaded Necklace Design 1
Step 1: Preparing Thread and Adding Bead Tip
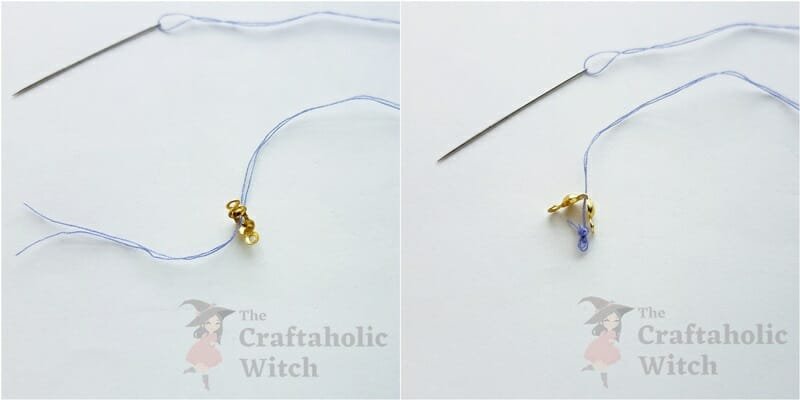
Prepare thread with a needle. If you’re using regular cotton thread, then use 2 strands. Insert a bead tip or a bead clamp through the thread, keeping the loop parts facing outwards. Tie a knot on the open end of the thread, making sure that the knot is bigger than the hole on the bead tip.
Step 2: Attaching the 1st Bead Tip
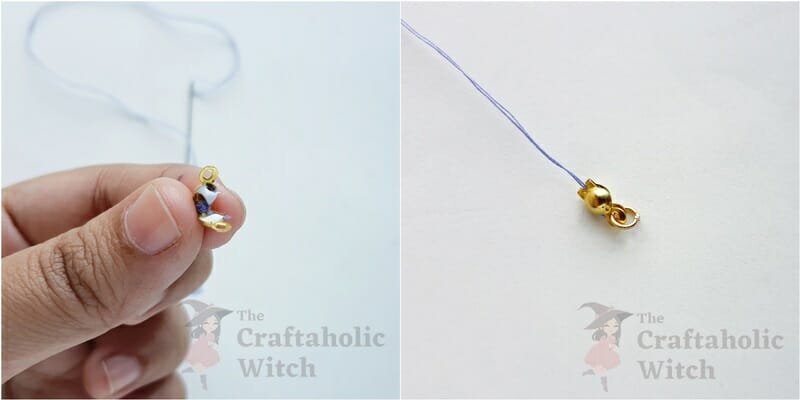
Bring the cap parts of the bead tip towards the knot and place the knot inside the caps. Apply a small amount of glue on the knot and then close the caps of the bead tip. Insert a jump ring through the loop of the bead tip. Now, this side of the necklace is secure for beading.
Step 3: Beading and Securing the Last Bead
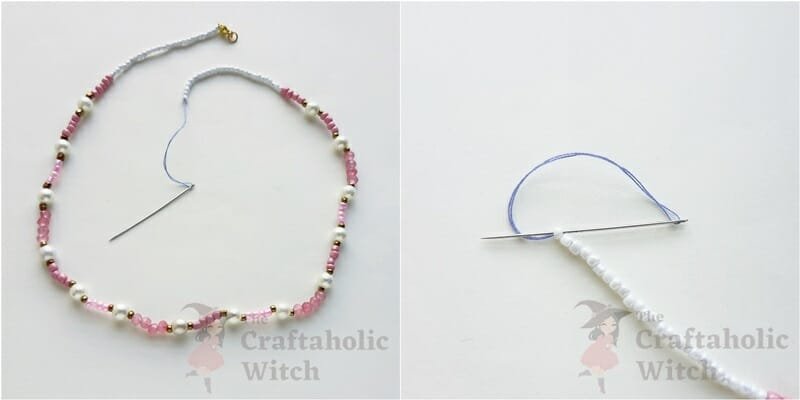
For the first necklace design, we’re using different colored seed beads and small faux pearl beads. You can add a small faux pearl bead after beading several seed beads and continue to do so until reaching the required length of the necklace. Remember to keep 3 inches extra on the open end of the thread after you’re done beading.
Push all the beads inwards, making sure that beading is nice and even. Insert the needle through the other end of the last bead. Pull the needle all the way through. This will secure the last bead and hence, secure the beading.
Step 4: Completing the Closure
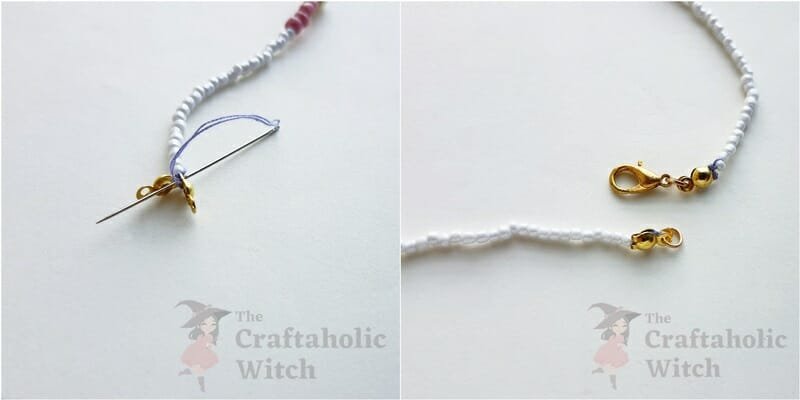
Now, insert the 2nd bead tip through the thread and thread the bead tip through its other end twice to attach it with the beaded string. Tie several knots at the open end, using the remaining amount of the strand.
Now close this bead tip like we closed the 1st one. Attach a lobster claw hook with the bead tip through a jump ring to complete the closure of the beaded necklace. And, the first beaded necklace is complete.
Instructions: Beaded Necklace Design 2
Step 1: Selecting Beads for the Locket Part
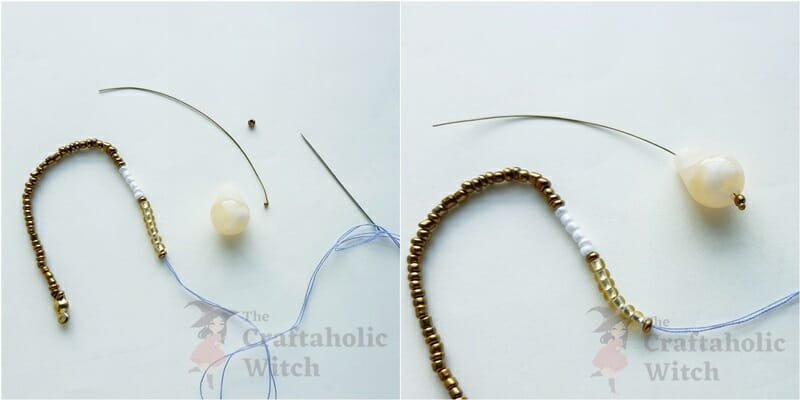
For this necklace, we’ll add a bead pendant in the middle. Prepare your beading thread with 2 strands and attach a bead tip as we did before. Reach halfway through the necklace’s length and then stop beading. Now, take a headpin and insert a seed bead into it. Push the seed bead all the way to the head part of the headpin. Insert a teardrop-shaped bead into the headpin (or any shape you want).
Step 2: Securing the Locket Bead
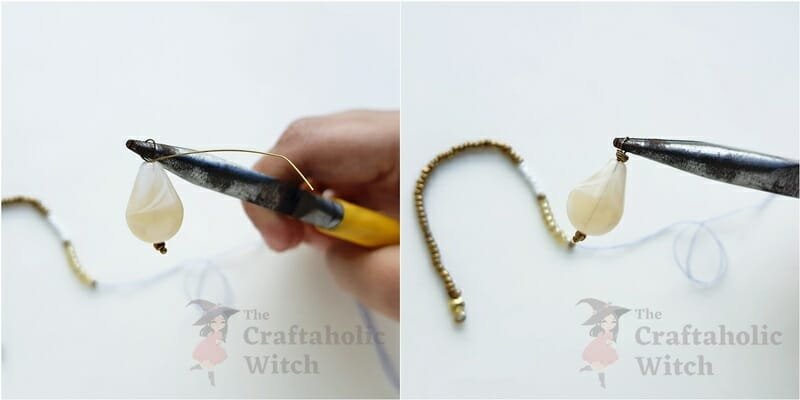
Take looping pliers and create a small loop at the open end of the headpin, adjacent to the inserted bead’s end. Now, carefully coil the remaining wire below the loop to secure the bead. The beaded pendant is ready.
Step 3: Beading and Completing the Necklace
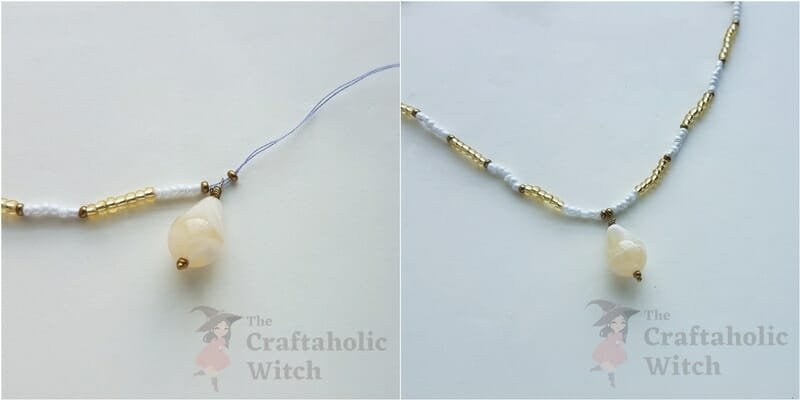
Insert the loop part of the beaded pendant through the thread (the half-beaded necklace). Then, fill the rest of the necklace with beads. After you’re done beading, attach the closure as we did before.
Instructions: Beaded Neckless Design 3
Step 1: Selecting Beads for the Locket Part
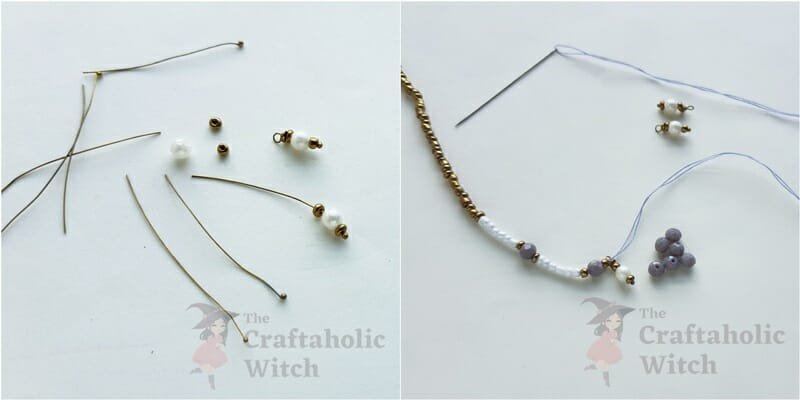
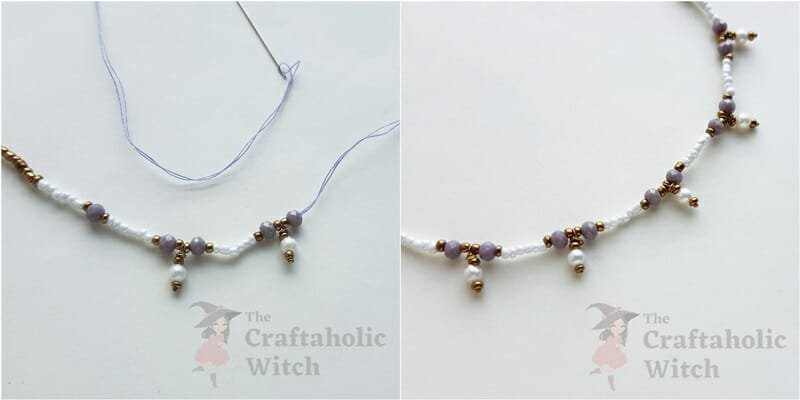
For the 3rd design, we need seed beads and small-sized (2 or 3 times bigger than the seed beads). round beads, and crystal beads. Prepare beading thread, attach bead tip and then bead one-third of the necklace. Prepare the round small-sized beads with headpins like we prepared the pendant for the 2nd design.
Step 2: Beading the Necklace
We will add these beaded headpins along the middle part of the necklace. I attached a few seed beads between every 2 beaded headpins.
Once you’re done adding the beaded headpins, bead the last one-third of the necklace with just seed beads and then add the closure to complete the beaded necklace.
Questions You Might Have about Making Beaded Necklaces
1. Can I use other kinds of clasp instead of the lobster claw?
Yes, you can use any kind of clasps instead of a lobster claw. A lobster claw is generally used as a necklace closure because it is easier to open and close compared to other kinds of clasps. However, as long as a clasp has a loop at its closed-end, you can use them for closure instead of the lobster claw.
2. Can I make it with a cord?
Yes, if the cord is thin and the selected beads can be threaded into the cord. If you’re using a cord, you might need to select beads with bigger holes.
3. Do you need crimping pliers for this project?
No, you won’t need crimping pliers to make these beaded necklaces.
4. How do you crimp beads with regular pliers?
You can use flat nose pliers or needle-nose pliers to crimp beads as well.
5. What string is best for these beaded necklaces?
Silk thread and nylon thread are great for beading pearl beads, seed beads, and stone beads. Since we’re using small beads for these necklaces, the best option would be silk thread or nylon thread.
6. How do you make an endless necklace?
After you’re done beading the necklace, tie a knot with both open ends of the beaded necklace. Tie 2 knots and this should leave the 2 open ends facing opposite to each other.
Now, take any one of the open ends and bead across 4 or more beads along the side the open end is directed. Similarly, bead across the other open end towards the other side.
After crossing more than 4 beads on both sides, if the thread remains, you can cut them using scissors.
7. How do you finish a beaded necklace?
You can either make an endless beaded necklace by beading a longer necklace, which can go through your head. Or, you can attach closure on both open ends as we did.
Beaded Necklace Making: Tips for Beginners
Here are some tips in case you’re having difficulty making the beaded necklaces.
- If you don’t have beading threads or floss, you can use regular cotton threads; just make sure to use at least 2 strands of the cotton thread.
- If you don’t have supplies for the closure, you can make the necklace big enough so that you can put it on through your head; in that case, the necklace won’t require closure.
- If you’re using regular cotton threads, it’s better not to use heavy and large beads. Select small and light beads.
- Beading seed beads can be tricky sometimes. Select a very thin needle to thread the seed beads.
Here are some of our beaded jewelry craft tutorials that you may also like
- How to Make Beaded Festive Earrings
- How to Make Beaded Bobby Pins
- How to Make Beaded Charms
- How to Make Mixed Beaded Bracelets
These are only 3 designs that we’re sharing but we’re sure you can come up with many more designs. If you’re a beginner at making beaded necklaces making, we’re hopeful that this tutorial can guide you towards the basics of beading necklaces at home.
We would absolutely love to see your re-creation of any one of these necklaces; if you do craft one or two, please do tag us on Facebook or Instagram (use #thecraftaholicwitch) and show us how you’re styling with the beaded necklaces.
Happy Crafting!

