


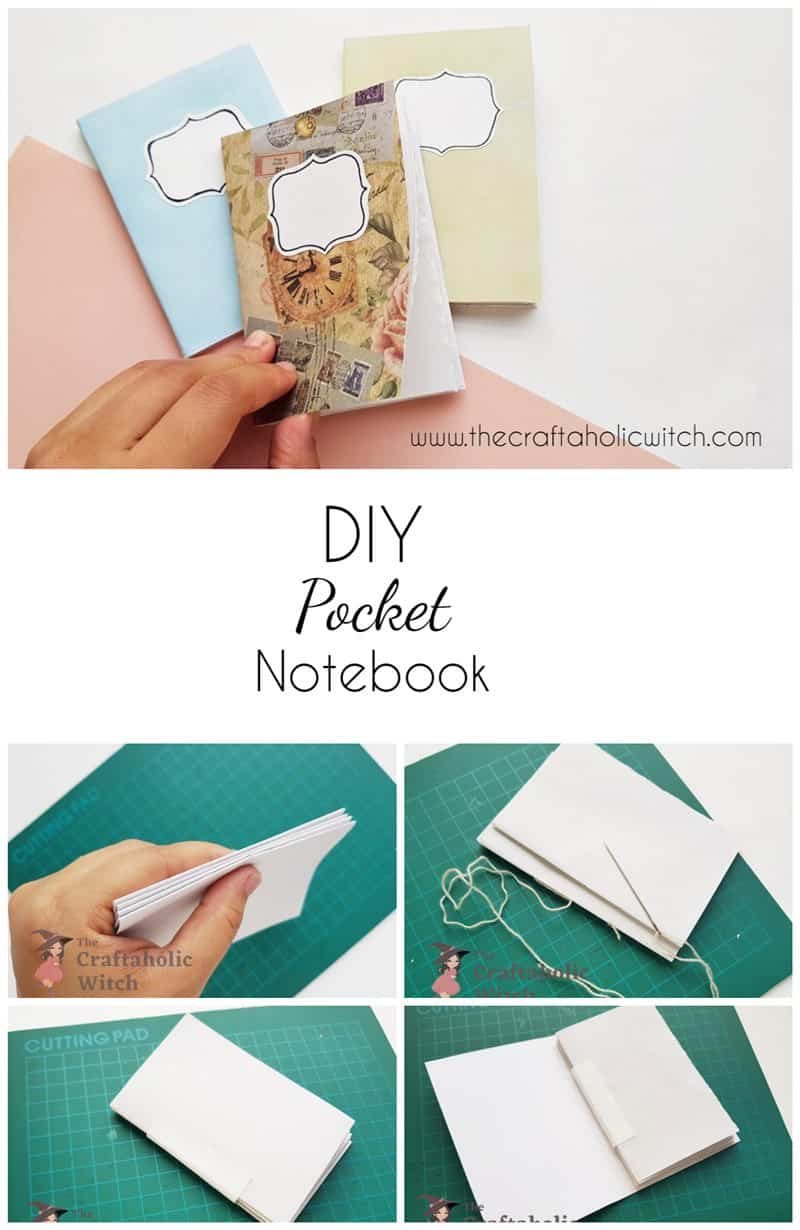
Those stacks of loose paper that pile up near the printer, or the odd sheets left over from a craft project, can become a pocket notebook you’ll actually use. This scrap paper notebook uses simple pamphlet-stitch binding, takes about 30 minutes, and costs almost nothing if you’re working with paper you already have.
It’s also a genuinely good classroom project for teaching recycling. Walking kids through each step shows them that paper headed for the bin can have a second life as something functional, and the binding technique gives them a real bookmaking skill to take home.
DIY Notebook at a Glance
- Difficulty: Beginner
- Time: 30 minutes
- Cost: Under $2 (free if you use scrap paper on hand)
- Ages: 10+ independently, 7-9 with adult help on the needle and knife steps
- Best for: Upcycling loose paper, classroom recycling lessons, pocket notebooks for lists and doodles
Join Craft Challenge: Craft Your Calm
Make something that brings you a sense of peace, share a photo, and tell us your story. It's free to enter, open to everyone, and the entry with the most reactions takes home a $100 gift card. Takes five minutes to join.
Entries close August 30, 2026. No purchase necessary.
What You Need to Make a DIY Notebook
Materials
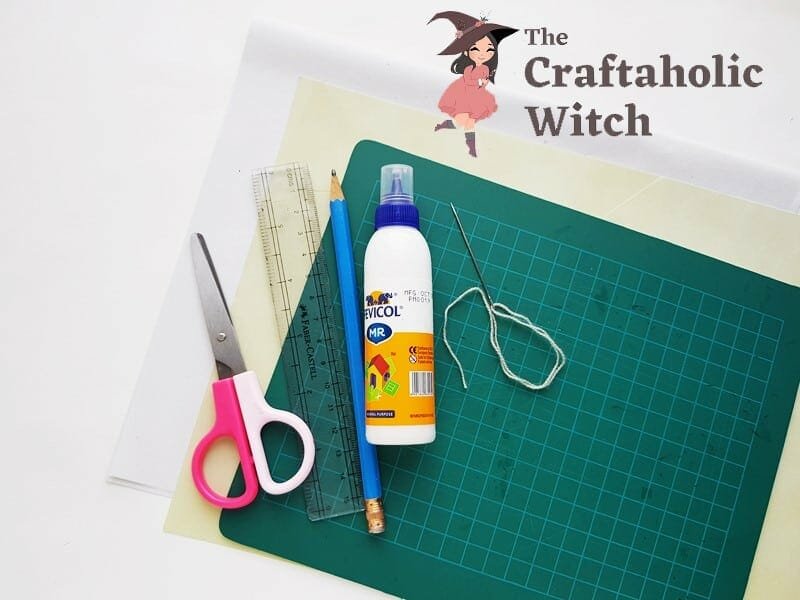
- Scrap paper or loose paper – any paper you’d normally recycle works; aim to have all sheets cut to the same size. New paper is fine too if you don’t have scraps.
- Cardstock paper – for the cover; regular cardstock holds its shape well. A patterned scrapbook sheet makes the cover more interesting.
Tools
- Pencil – for marking stitch points and cutting lines
- Ruler – to keep measurements consistent across all sheets
- Tapestry needle – the large eye makes threading binding thread much easier than a regular sewing needle
- Binding thread – waxed linen or strong craft thread holds the signatures together without fraying
- Scissors
- White adhesive glue – PVA or school glue works well
- Paintbrush – for spreading glue evenly on the spine and end pages
- Cutting mat – protects your table when scoring the cover with an X-acto knife
- X-acto knife – for a clean score on the cover spine
Heads up: some of the supply links above are affiliate links. If you buy through them, Craftaholic Witch may earn a small commission at no extra cost to you. We only link supplies we would actually use ourselves.
Ask inside "Crafty Q&A" while you are making.
"Crafty Q&A" is free to join. Share your question, photo, or the exact step where you got stuck, and chat with other makers plus the Craftaholic Witch team. You can also join any discussion thread already happening inside the space.
How to Make a Notebook from Scrap Paper
Step 1: Cut and Prepare the Pages

Decide on your notebook dimensions and cut each sheet to the required length and twice the finished width. You’ll fold each one in half, so the cut width needs to account for that doubling. Having every sheet exactly the same size matters here because even a few millimeters of variation makes the signatures hard to align cleanly in the next step.
Step 2: Group the Pages into Signatures

Take 4 sheets and fold them together in half widthwise. This folded group is called a signature. For this notebook I made 4 signatures of 4 sheets each, which gives you 64 writing pages in total. You can add more signatures if you want something thicker, just remember that each extra signature adds a little more spine width, which you’ll need to account for when cutting the cover.
Step 3: Mark the Stitching Points
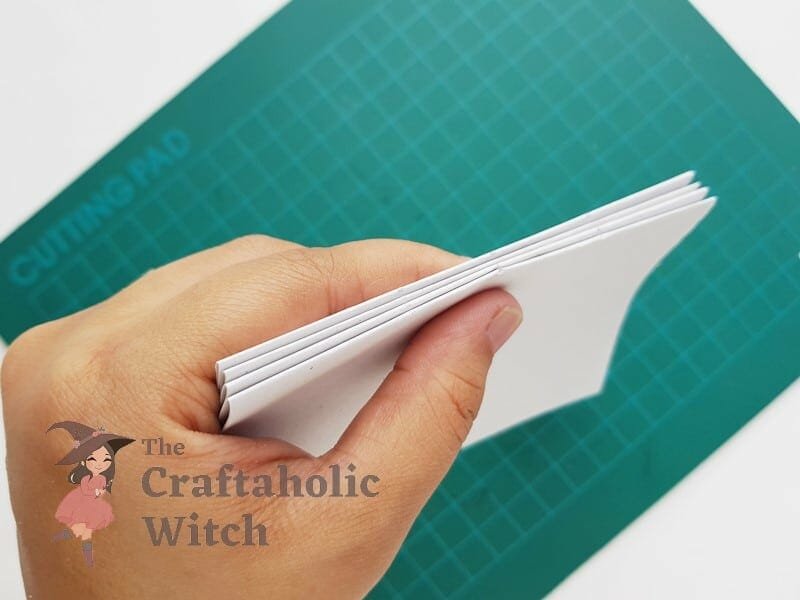
Hold all 4 signatures together with their closed folds aligned. Use your ruler and pencil to mark 3 stitching points along the closed ends, centered in the middle of the spine with a 1-inch gap between each point. Mark through all the signatures together so every hole lands at the same spot across all 4 groups. This is what keeps the binding even.
Step 4: Stitch the First Signature

Thread your tapestry needle with a good length of binding thread and tie a knot at the open end. Take the first signature and push the needle through a marked hole from the outside, bringing it in toward the fold. Work a running stitch through the remaining holes, then bring the needle back out through the last hole you came from. The knot at the tail stops the thread pulling through.
Step 5: Attach the Second Signature
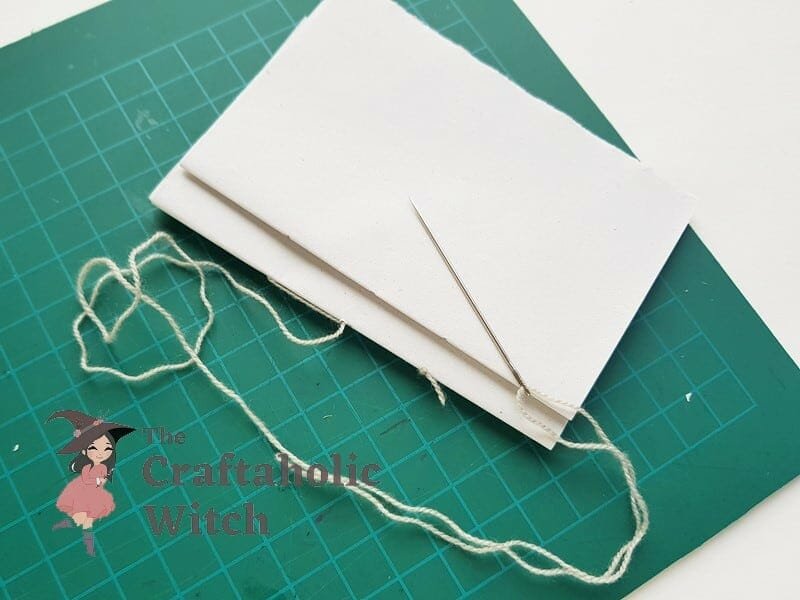
Place the second signature against the stitched one with the holes lined up. Push the needle through the corresponding hole on the new signature and do a running stitch. When you reach each exit point, loop the thread through the visible stitches from the first signature before moving on. This pulls the two together. Keep the tension firm but not so tight that the paper tears along the holes.
Step 6: Stitch the Remaining Signatures
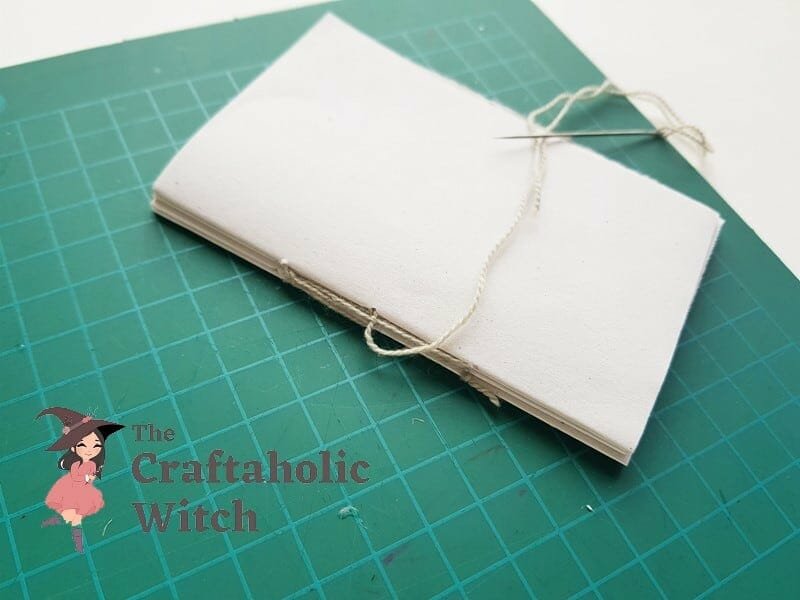
Add signatures 3 and 4 the same way, each one stitched to the growing group. Once all 4 are joined, run the needle through the outside stitches and tie a finishing knot. Trim the extra thread close to the knot. You now have a solid text block held together entirely by the thread binding.
Step 7: Reinforce the Spine
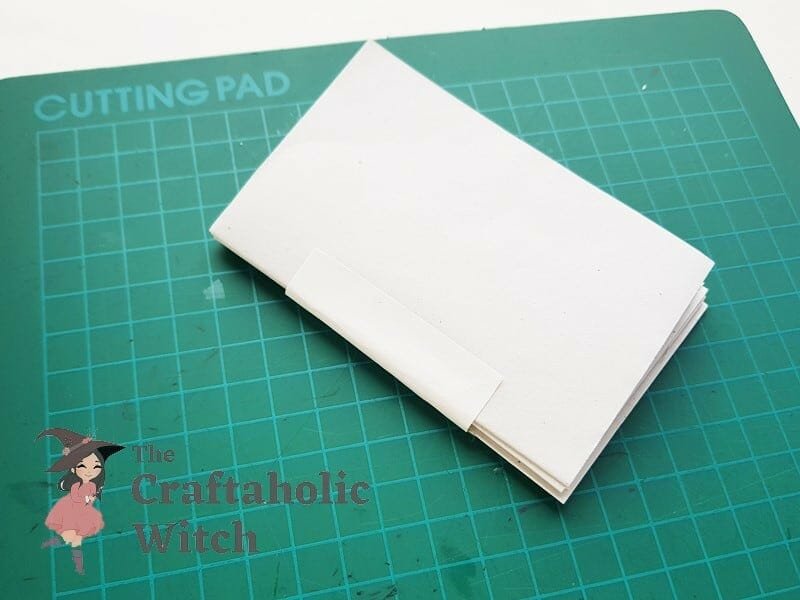
Cut a small strip of paper and coat one side entirely with glue. Wrap it tightly around the closed spine of the text block, covering all the stitching. Press it flat and let it dry fully before moving on. This strip locks the signatures in position so they won’t shift when the cover goes on.
Step 8: Cut and Score the Cover
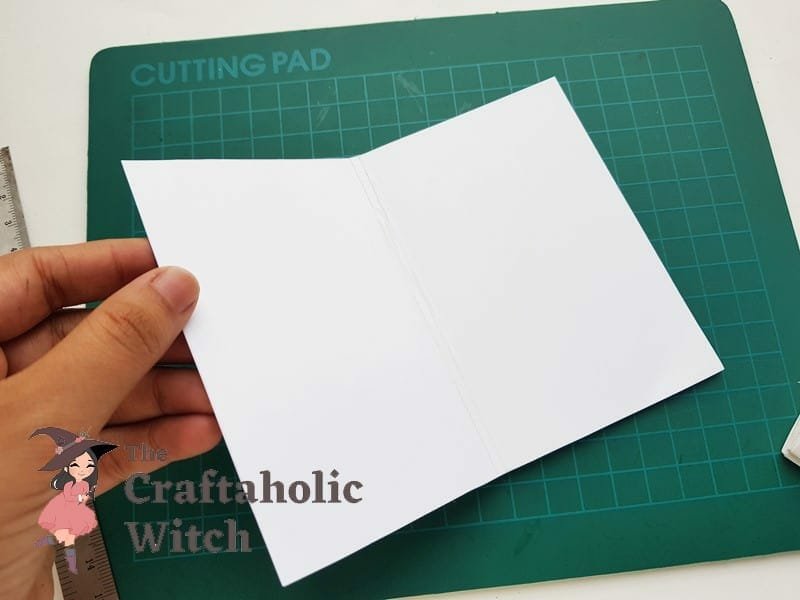
Measure and cut the cover from cardstock. Make it about 0.5 cm longer than the text block, and wide enough to cover both front and back faces plus the spine width (which shouldn’t be more than about 1 cm for this size notebook). Mark 2 lines where the spine sits. Run the back edge of your X-acto knife along those 2 lines to score them without cutting through. This scored channel is the back strap and is what lets the cover fold cleanly over the spine.
Step 9: Attach the Cover

Apply glue along the back strap area between the two scored lines and spread it evenly with your brush. Press the closed spine of the text block into that glued channel. Close the cover over the text block and press along the spine for a full minute. The text block should sit centered with a small, even overhang at the top and bottom edges.
Step 10: Glue the End Pages to the Cover

Open the cover and apply glue to the entire front face of the first page. Press it flat against the inside of the front cover. Repeat with the last page and the inside of the back cover. These become your end papers, hiding the back strap and making the inside look clean. Close the notebook and press it flat under a heavy book while the glue dries.
Share it in "I Made It" and let us cheer you on.
Post your finished make in "I Made It" so the community can celebrate it with you. Cheer on other makers too. Each month, the most loved craft wins 1 year of Craftaholic Premium ($59)
Tips for Your DIY Notebook
- Cut all sheets to exactly the same size before you start. Even a 2 mm difference makes the signatures frustratingly hard to align when you mark the stitch holes.
- Use patterned or colored cardstock for the cover. Leftover scrapbook paper works perfectly and gives each notebook a different look.
- If you’re making these in a classroom, prepare the signature stacks in advance so students can jump straight to the stitching step.
- Once the notebook is full, the pages can be used to make recycled paper if you have a papermaking setup, so the material cycle keeps going.
Video Tutorial: How to Make a Notebook from Scrap Paper
If any of the stitching or cover steps are tricky to follow from photos, the video below walks through the whole process.

Frequently Asked Questions
Can I use any kind of paper for the pages?
Yes. Any paper you’d normally write or sketch on works: printer paper, one-sided used paper, scrap sheets from failed print jobs, or even kraft paper. Avoid glossy paper like magazine pages because ink doesn’t absorb well and it’s harder to stitch through. All sheets should be cut to the same size before you start grouping them into signatures.
Is this a good project for kids or a classroom recycling lesson?
It’s one of the best hands-on recycling projects I’ve tried in a classroom setting. Kids 10 and up can work through most steps on their own; 7-9 year olds need adult supervision for the X-acto knife and needle steps. The project works well in an environmental studies or art class because every part of the notebook comes from materials that would otherwise be discarded, and you finish with something genuinely useful. That combination makes the recycling lesson stick.
How many pages does this notebook have?
With 4 signatures of 4 sheets each, you get 64 pages total. Each folded sheet makes 4 pages once the notebook is assembled. If you want a thicker book, add more signatures; each extra signature adds roughly 16 pages and a little more spine width, so adjust your cover measurements accordingly.
What size does this notebook come out to?
It’s a pocket notebook, sized entirely by how you cut your sheets. Half of a standard A5 sheet (roughly 10.5 x 7.4 cm) makes a handy pocket size. Cut larger sheets if you want something closer to a standard A5 journal. The binding process stays the same regardless of the size you choose.
Can I decorate the cardstock cover?
Yes. Use patterned cardstock, stamp it, paint it, or cover it with washi tape before assembly. If you want to paint after assembly, do it before attaching the end pages so the cover can dry flat without warping the text block. Acrylic and watercolor both work well on cardstock.
More Paper Craft Tutorials
- How to Make Recycled Paper at Home
- DIY Notebook Cover for Beginners
- Recycled Paper Basket Weaving
- DIY Recycled Pumpkin Box
Share your notebook in the I Made It space inside Craftaholic Community. The most-loved post each month wins a one year free Premium membership.
0 Comments
Join the conversation
Log in to your Craftaholic Community account to comment, ask questions, and cheer on fellow makers.
Log in to comment