

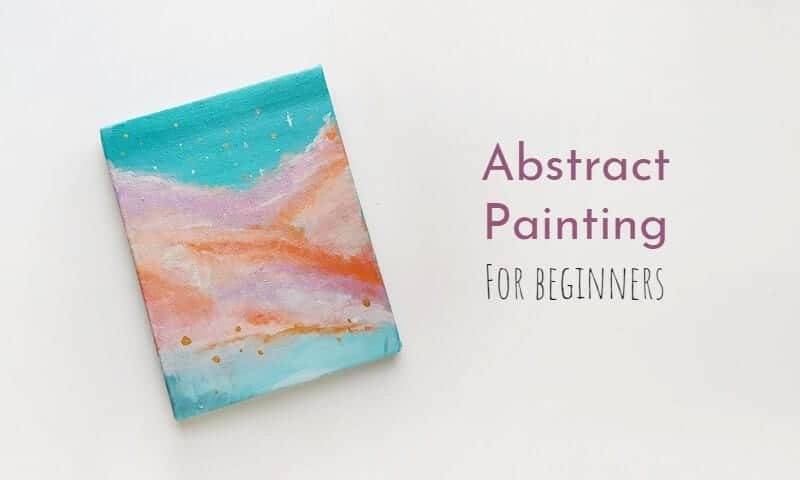
This is the very first painting I ever made, a simple blue-to-pink ombre canvas with a scatter of gold on top, and it’s proof that you don’t need any drawing skill or fancy technique to end up with something worth hanging on your wall.
I learned this one method and have reused it in a dozen little ways since: blend a few shades of one color into a soft gradient, then layer a couple more colors on top in loose, cloud-like shapes. It’s forgiving, it’s genuinely fun to mix the paint, and every “mistake” mostly just becomes part of the texture.
Grab a canvas, four or five shades of acrylic paint, and about an hour of free time (plus a few hours for it to dry), and you’ll have your own easy home decor piece ready to hang as wall art or gift by the end of the day.
Abstract Acrylic Painting at a Glance
- Difficulty: Beginner
- Time: 45-60 minutes active painting, plus 2-3 hours to dry
- Cost: Under $20
- Ages: 8+ (great for teens and adults too)
- Best for: First canvas paintings and easy handmade wall art

What You Need to Paint an Abstract Acrylic Painting
Materials
- Acrylic paint in several shades: at least 4 blues for the ombre base, plus white, mint green, peachy pink, orange, and gold for the clouds and splatter.
- Canvas (any size). A small canvas keeps your first painting low pressure and quick to finish.
Tools
- Flat paintbrushes in a couple of sizes. Flat brushes lay down even bands of color for the ombre and cloud layers.
- Paint palette or tray, for mixing and holding each shade while you work.
- A cup of water, for rinsing your brush clean between colors.
- A small sponge, for smudging and softening the overlapped color transitions.
- An old toothbrush, for splattering the gold paint in the final step.
Heads up: some of the supply links above are affiliate links. If you buy through them, Craftaholic Witch may earn a small commission at no extra cost to you. We only link supplies we would actually use ourselves.

Free Autumn Bucket List + Printable Journal Pack
Everything you need for a cozy autumn, ready to print at home. Join the community for free and download it in one click.
- 13-page printable PDF
- 18 stickers and 6 bookmarks
- Journal pages and recipe cards
- Phone and computer wallpapers
How to Paint an Abstract Acrylic Painting
Step 1: Prepare Your Blues and Paint the First Layer

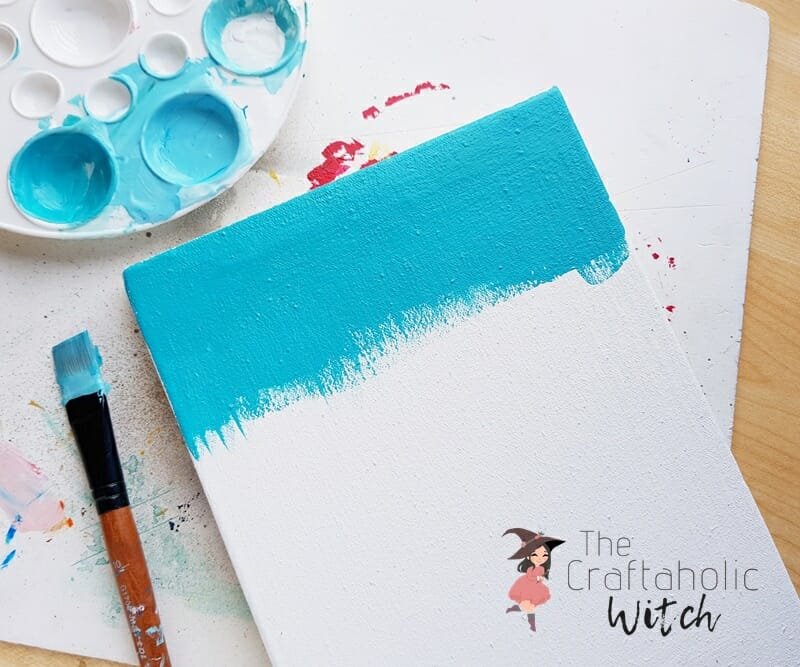
Squeeze out four or more shades of blue on your palette, each one a little deeper than the last. Starting at the top of the canvas, paint a band of the darkest shade across the width, using the full length of your brush so the coverage stays even.
Don’t worry about a perfectly straight line here. The next layer will blend right into this one.
Step 2: Build the Blue Ombre Downward
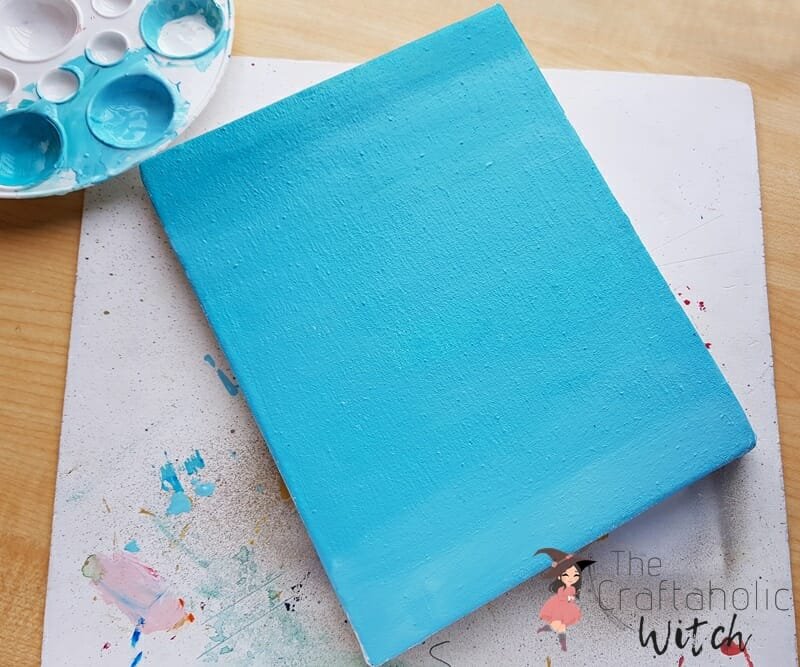
Rinse your brush in the water cup, then pick up the next lightest shade of blue and paint a band just below the first one, overlapping the two by about a centimeter. Keep working down the canvas this way, shade by shade.
The overlap is what creates the gradient, so don’t rinse your brush too clean between shades. A little bit of the previous color mixing in at the seam is exactly what you want.
Step 3: Complete the Base Ombre
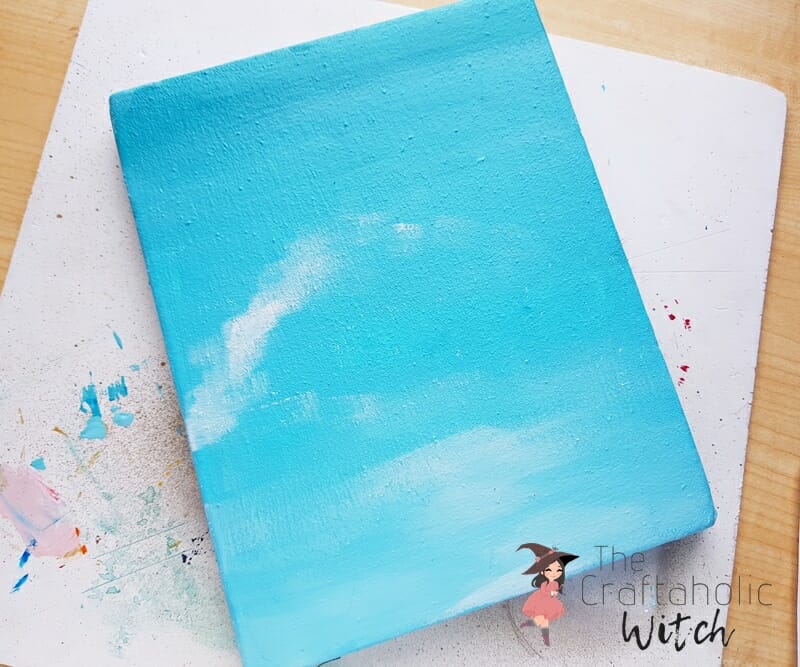
Keep adding progressively lighter (or deeper, depending on which direction you’re working) shades of blue until the whole canvas is covered. This ombre is the base every other layer sits on top of, so take your time getting it smooth.
If your bands look a little uneven, that’s completely normal for a first try. You’ll get a feel for the blending pressure the more you practice, and the cloud layers coming up will soften a lot of it anyway.
Step 4: Paint Scattered Clouds
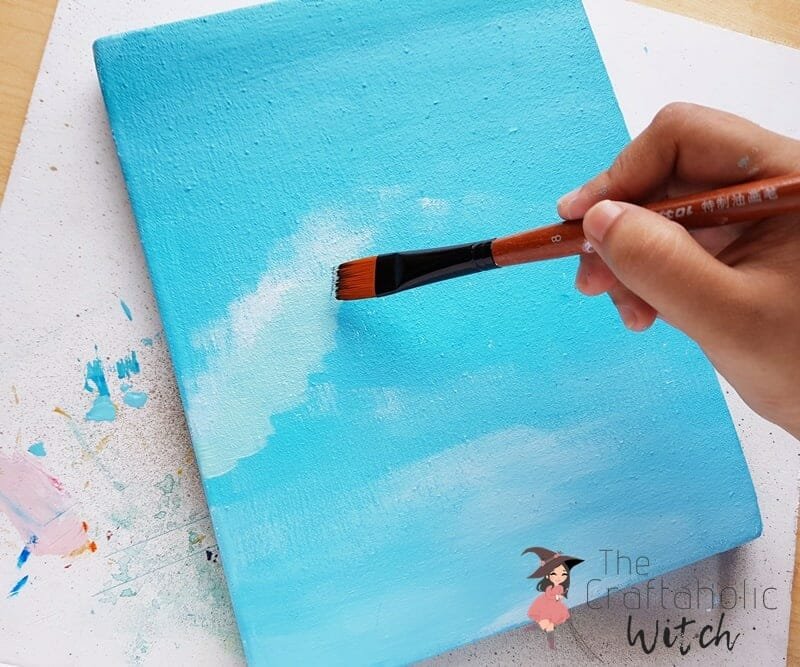
Once your base is dry to the touch, load a flat brush with white paint and sweep it diagonally across the top portion of the canvas in loose, scattered strokes, like wispy clouds drifting down and to one side.
Step 5: Add a Mint Shade to the Clouds
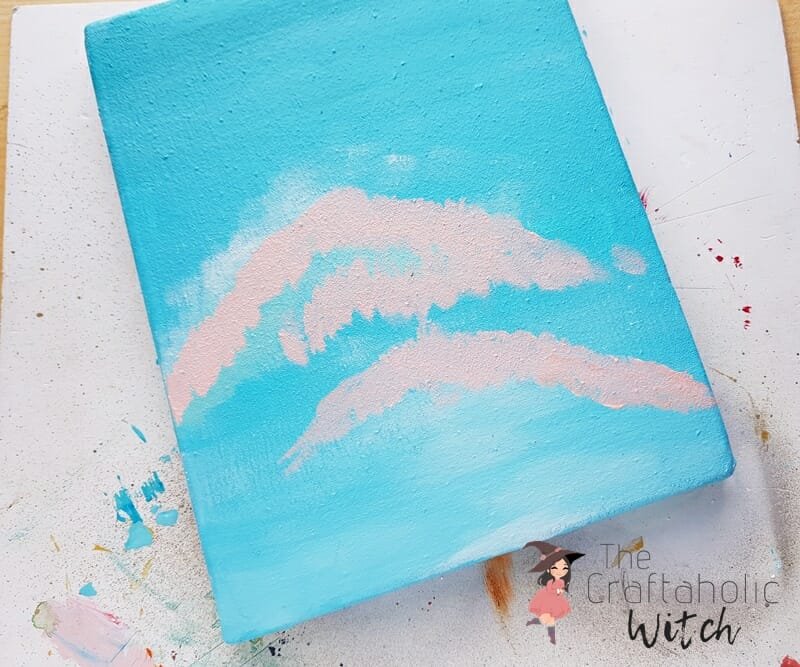
Mix a deep mint shade (about 50% white, 30% blue, 20% green) and paint another scattered cloud layer just below the white one, letting the two overlap. This is where the piece starts to feel dimensional instead of flat.
Step 6: Layer In a Peachy Pink Shade
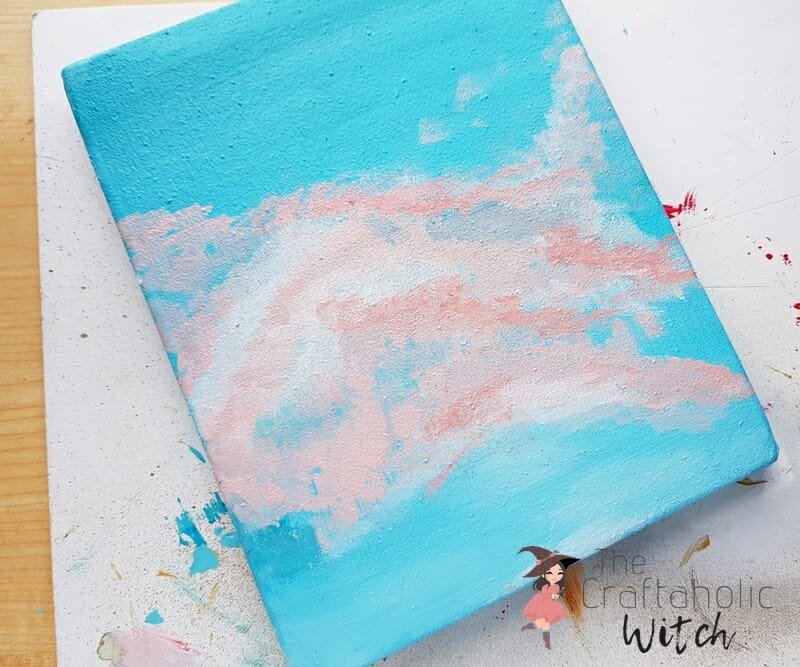
Mix a deep peachy pink and paint it in randomly, overlapping and sitting beside the mint and white you’ve already laid down. Don’t aim for symmetry here, uneven and scattered is exactly the look you’re going for.
Step 7: Keep Building the Cloud Colors
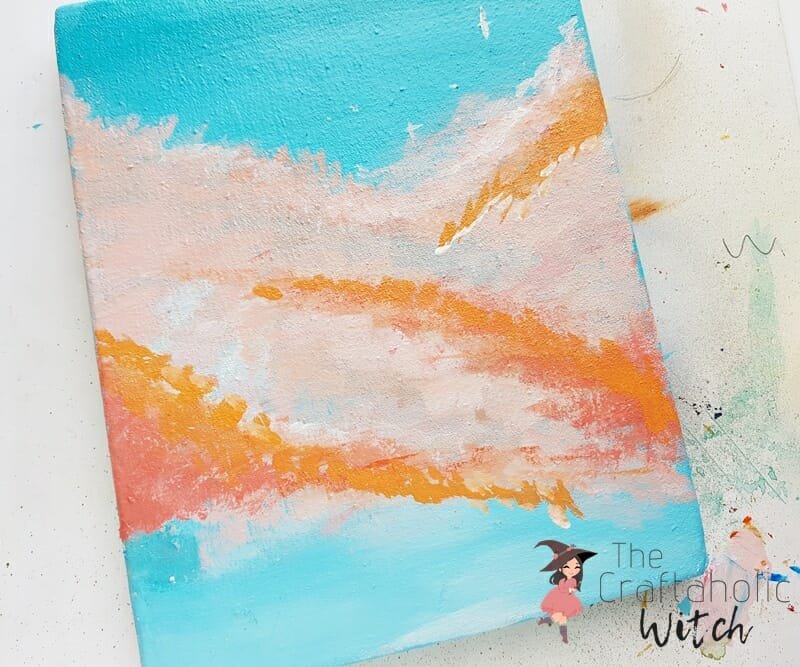
Keep adding small amounts of peach, pink, and mint wherever the canvas still looks a little bare. This step is mostly about filling gaps and building texture, so work loosely and trust your eye over any rule.
Step 8: Add a Darker Orange-Peach Shade

Mix a darker orange-peach (about 40% orange, 30% pink, 30% white) and add it in a few key spots to give the cloud layer some depth. This is your first darker shade after several light ones, and it’s what keeps the piece from looking washed out.
Step 9: Smudge the Overlapped Colors Together
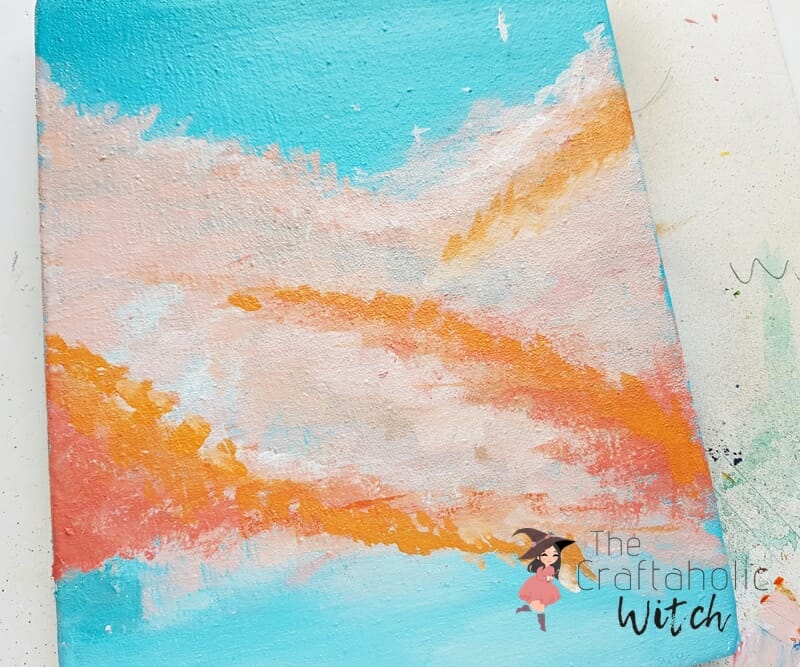
Dab a small sponge lightly over every spot where two colors meet, tapping gently rather than rubbing. Keep going until the transitions look soft instead of blocky.
Wipe the sponge on a paper towel between colors so you’re not dragging one shade into somewhere it doesn’t belong.
Step 10: Let the Paint Dry Completely
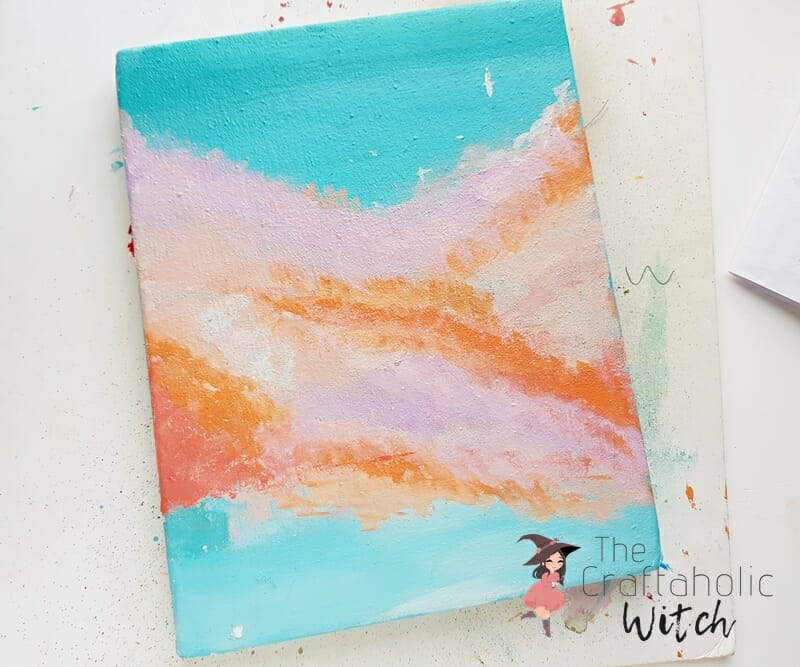
Set the canvas somewhere flat and out of the way, and let it dry completely before moving on. With this many layers, that usually takes a few hours, so this is a good stopping point if you need one.
Step 11: Splatter Gold Paint for the Finishing Touch
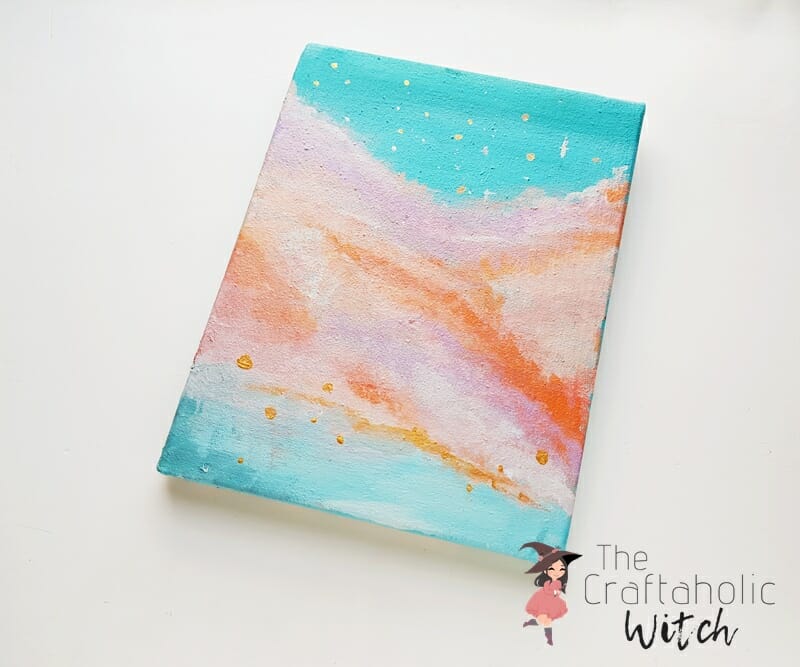
Dip an old toothbrush lightly into gold paint, then run your thumb across the bristles to flick fine gold speckles over the dry canvas. Keep it light and sparing; a little gold goes a long way here.
Warning: splattered paint travels further than you’d expect. Cover your work surface and wear something you don’t mind getting speckled before you start flicking.
Let the gold dry completely before you frame it or hang it up. And that’s it, your first abstract acrylic painting is done.
If you enjoyed layering these colors, my tutorial on how to paint roses in acrylic is a natural next project once this one is dry. I’d love to see how yours turns out, share a photo with the hashtag #craftaholicwitch on Instagram or Facebook.
Share it in "I Made It" and let us cheer you on.
Post your finished make in "I Made It" so the community can celebrate it with you. Cheer on other makers too. Each month, the most loved craft wins 1 year of Craftaholic Premium ($59)
Frequently Asked Questions
How do I start an abstract painting if I don’t know what to paint?
Start with a color story instead of a picture in your head. Pick 3 to 4 shades of one color family, like the blues here, and just start layering them in loose bands or shapes. Abstract painting doesn’t need a plan, the blending happens as you go, and most “mistakes” end up becoming the most interesting part of the piece.
How long does acrylic paint take to dry?
A layer this thick usually needs a few hours to dry completely before you add details like the gold splatter. Thin layers dry much faster, sometimes in under an hour, so if you’re short on time, thin your paint slightly with water and let each color dry before adding the next.
Can I use different colors instead of blue and pink?
Yes, the ombre and cloud technique works with any palette you like. Pick one deep base color for the ombre background and two or three lighter accent shades for the clouds, sunset oranges and yellows or purples and greens both work beautifully.
Do I need an expensive canvas to try this?
No, a small, inexpensive canvas from any craft store works perfectly for your first attempt. Starting small keeps the cost and the pressure low, and you can always size up once you’re comfortable with the blending technique.
How do I display or frame a finished abstract painting?
Most stretched canvases are ready to hang as soon as they’re dry, no frame needed, just add a sawtooth hanger or a wire to the back. If you’d rather frame it, look for a simple floating frame that shows off the painted edges.
More Home Decor Tutorials
Share your finished painting in the I Made It space inside Craftaholic Community. The most-loved post each month wins a one year free Premium membership.