

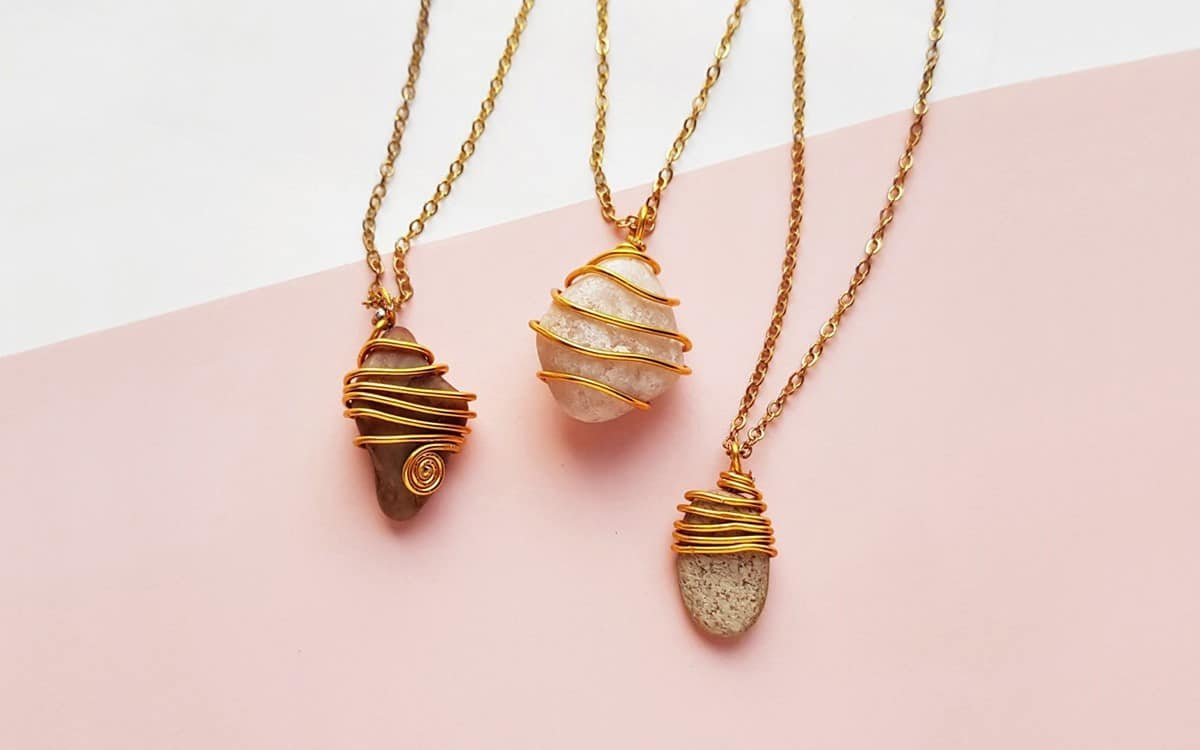
In wire jewelry making, having a hole in the stone makes everything easier. It gives the wire a secure point to hold onto, making it much simpler to create a strong, beautiful design.
But what if your stone doesn’t have a hole? Most of the prettiest pebbles, crystals, and gemstones don’t. Drilling one yourself requires special tools and can easily damage the stone.
Fortunately, you don’t need to drill it at all.
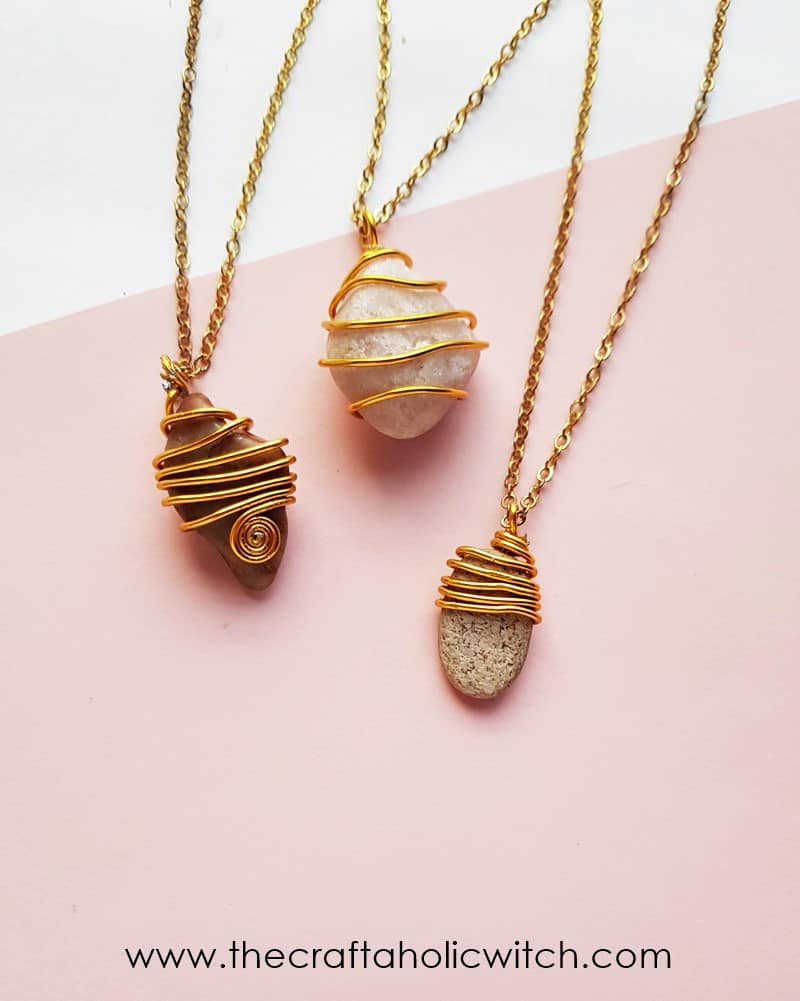
In this tutorial, I’ll show you three techniques to wire wrap stones without drilling. The first technique is perfect for beginners, while the other two are better suited for intermediate crafters who want more decorative and secure wraps.
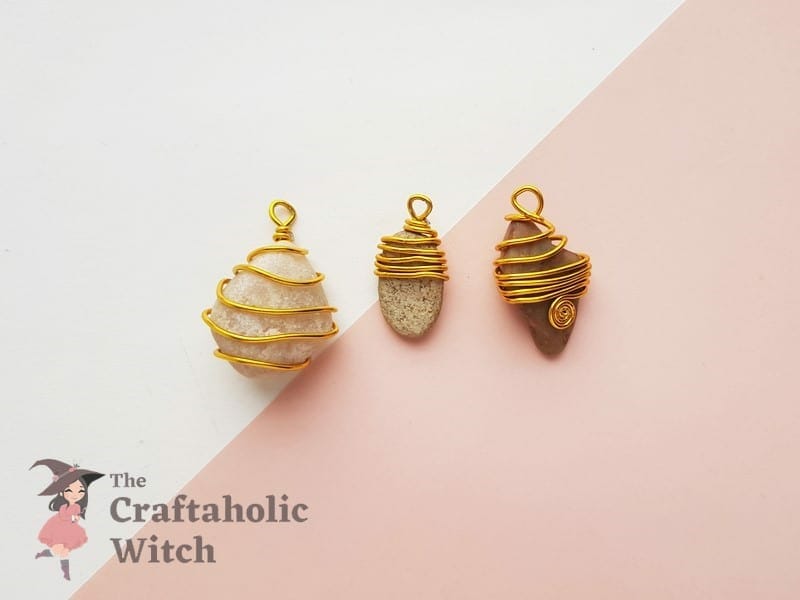
For this project, I chose natural pebbles from my garden and turned them into pendants. However, these same techniques work with almost any flat stone, including polished gemstones, crystals, and beach pebbles. Once you learn the basics, you can use them to create all kinds of wire-wrapped jewelry, from necklaces and earrings to keychains, ring, and decorative ornaments.
Wire Wrapped Stone Pendant at a Glance
- Difficulty: Beginner
- Time: 15 min per pendant (45 min for all three)
- Cost: Under $10 for wire and pliers (stones are free from outside)
- Ages: 12+
- Best for: Gifts, wearable jewelry, first wire project
Join Craft Challenge: Craft Your Calm
Make something that brings you a sense of peace, share a photo, and tell us your story. It's free to enter, open to everyone, and the entry with the most reactions takes home a $100 gift card. Takes five minutes to join.
Entries close August 30, 2026. No purchase necessary.
What You Need to Make a Wire Wrapped Stone Pendant
Materials
- Stones or pebbles: flat ovals and rounded rectangles wrap the most cleanly; collect them from outside or pick up decorative craft stones from a hobby store
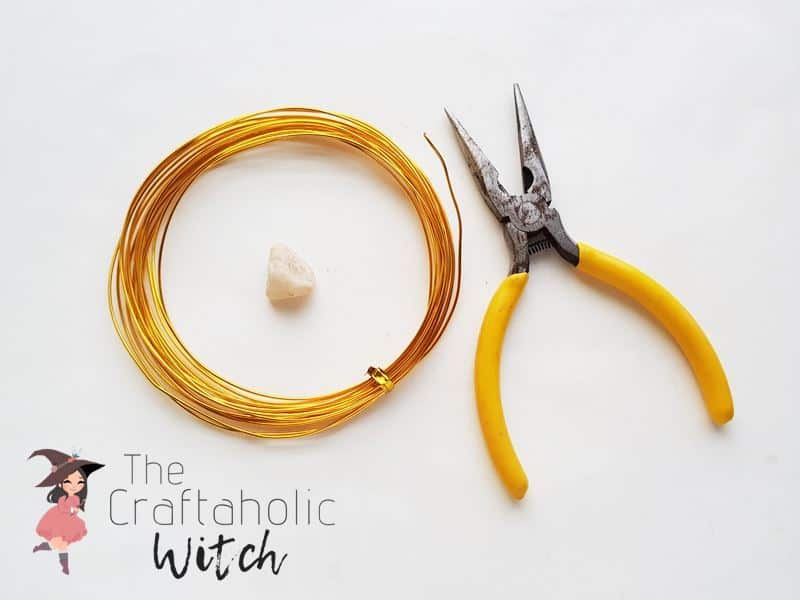
- 20-gauge jewelry wire: soft enough to bend by hand but stiff enough to hold its shape once wrapped; copper wire is the best for practicing since it is inexpensive
Tools
- Round-nose pliers: for forming the loop at the top of each pendant
- Flat-nose pliers: for flattening and tightening coils
- Cutting pliers: for trimming the wire cleanly at the end
Ask inside "Crafty Q&A" while you are making.
"Crafty Q&A" is free to join. Share your question, photo, or the exact step where you got stuck, and chat with other makers plus the Craftaholic Witch team. You can also join any discussion thread already happening inside the space.
How to Wire Wrap Stones and Make a Pendant
The three techniques below each produce a different look from the same wire and stone. Try all three in one sitting to find which wrapping style you like best.
Technique 1: The Full Wrap
This is the classic full wrap: continuous, adjacent coils that encircle a flat oval pebble from the midpoint up to the top loop. The result looks neat and structured.
Step 1: Form the Loop and Set It Against the Pebble
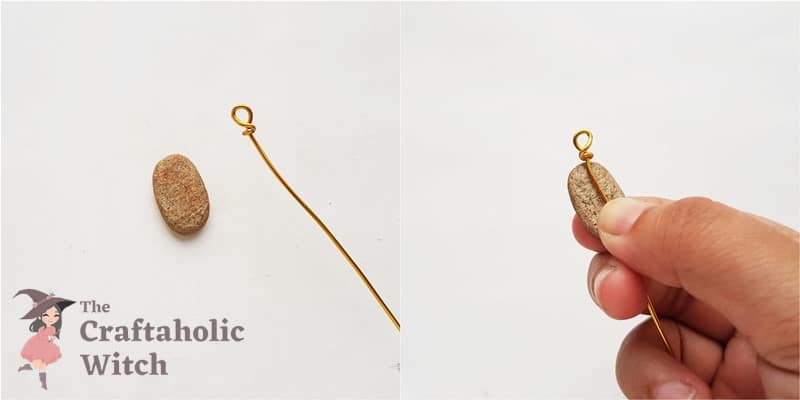
Use the round-nose pliers to form a small, tight loop at one end of the wire. Hold the loop in place and coil the tail around the wire band below it, 2 full rotations. That coil locks the loop so it does not spin later.
Hold the flat oval pebble against the wire with the loop sitting just above the pebble’s top edge and the wire running down the center of its face. Keep it snug while you move to the next step.
Step 2: Bend at the Midpoint and Start Wrapping Upward
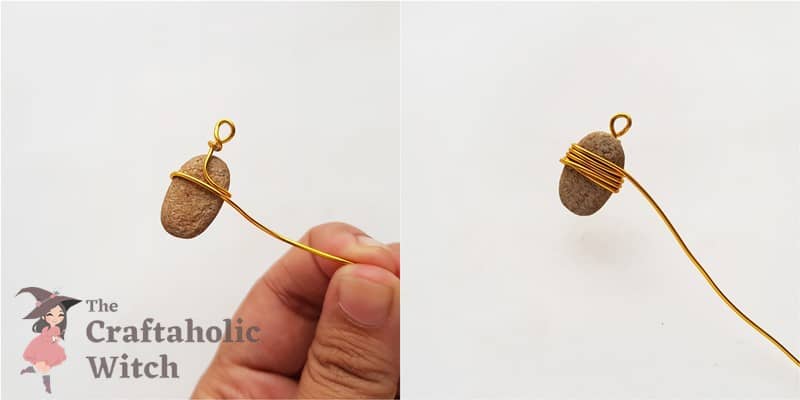
Bend the wire sharply to 90 degrees at the halfway point of the pebble’s length. Wrap that section all the way around the pebble’s width until it meets the wire running along the center face, creating a horizontal band around the middle of the stone.
From there, begin coiling the wire upward. Start just below the horizontal band with your first coil sitting right against it and no gap between them.
Step 3: Wrap to the Top, Coil Below the Loop, and Flatten
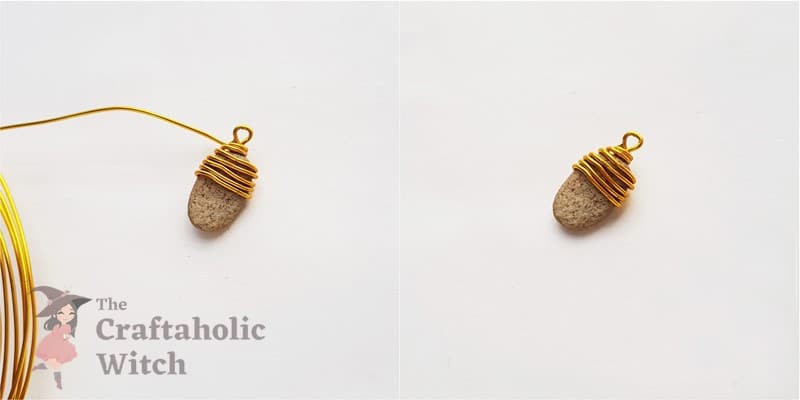
Coil the wire upward in even, adjacent wraps with no visible gaps. When you reach the loop, coil the wire tightly around the wire band below it 2 to 3 times, then cut the tail close.
Use the flat-nose pliers to press the coiled end flat against the band. Run a finger over it to check for any sharp point before you wear the finished piece.
Technique 2: The Twirl Wrap
This technique starts with a small wire spiral on the face of the stone rather than a loop at the top. It is a simplified, single-spiral take on the spiral cage style, not the full two-sided cage. Choose a stone that is wider in the middle and narrower at both ends. That natural waist gives the wire a grip point and keeps the spiral from sliding.
Step 1: Twist a Small Spiral at the Wire End and Center It on the Stone
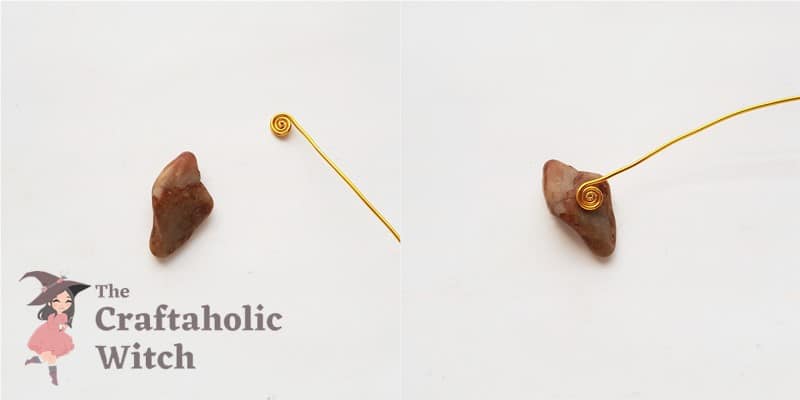
Coil the wire into a tight, compact spiral at one end, 3 to 4 circles. Keep it small. A bigger spiral shifts around once the wire is under tension.
Lay the spiral flat against the widest part of the stone’s face, roughly centered. This is the decorative focal point of the finished pendant, so take a moment to place it where you want it to sit.
Step 2: Hold the Spiral and Wrap the Wire to the Narrow End
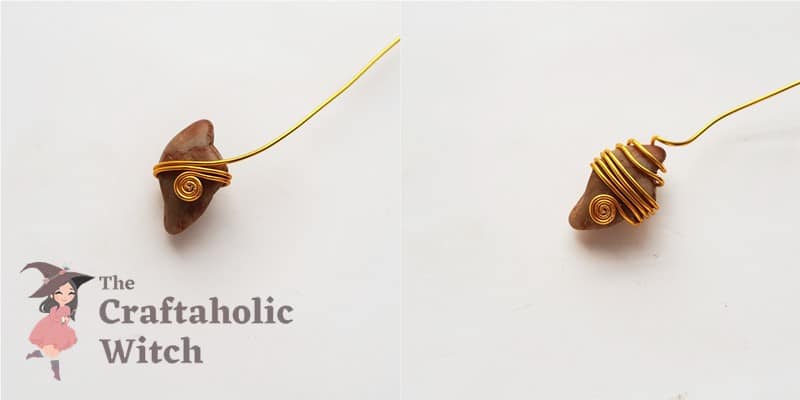
Pinch the spiral firmly against the stone with one hand and wrap the remaining wire around the pebble with the other, moving toward one of the narrow ends. Follow the stone’s contour rather than pulling straight across.
Keep wrapping until the wire reaches the narrow tip. Your grip on the spiral side is what keeps it centered, so do not let it shift while you wrap.
Step 3: Cut Leaving 3-4 cm, Form the Loop, and Coil the Tail
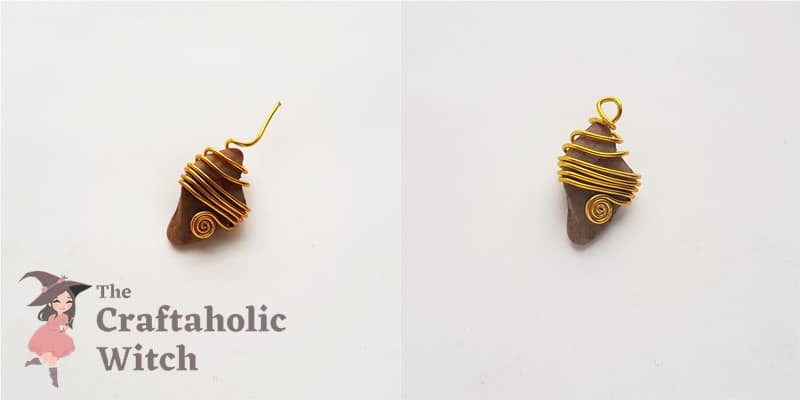
Cut the wire about 3-4 cm past the narrow end of the stone. Use that extra length to form a small loop with the round-nose pliers, then coil the remaining tail around the wire just below the loop. This becomes the hanging point for the chain.
Optional: lay the pendant face-down on a hard surface and tap the spiral gently with a hammer to press it flush against the stone for a more polished finish.
Technique 3: The Spaced Wrap
This technique uses the same loop-and-coil start as Technique 1 but spaces the wraps apart evenly for an open, ladder-like look. A basic oval or rounded stone works well.
Step 1: Form the Loop, Coil the Base, and Mark the Stone’s Full Length
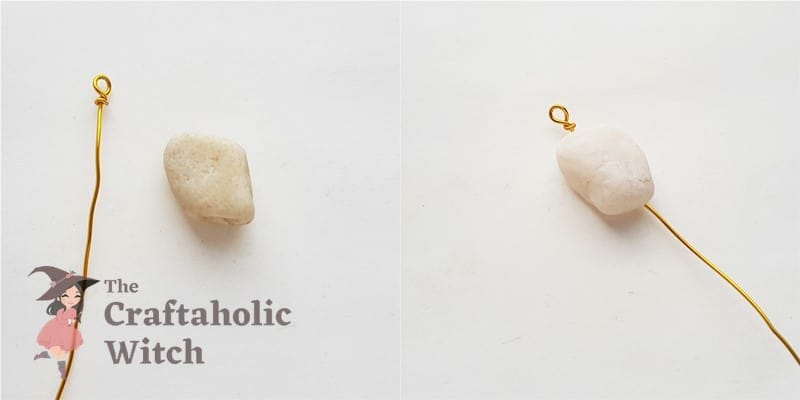
Form a loop and coil the tail 2 to 3 times below it, exactly as in Technique 1. Hold the stone against the wire with the loop sitting above the stone’s top edge, and mark where the bottom of the stone falls on the wire.
That marked point is where the bottom anchor bend goes. Getting it right here means the wrap sits level on the finished pendant.
Step 2: Bend at the Mark and Begin Wrapping Up the Stone
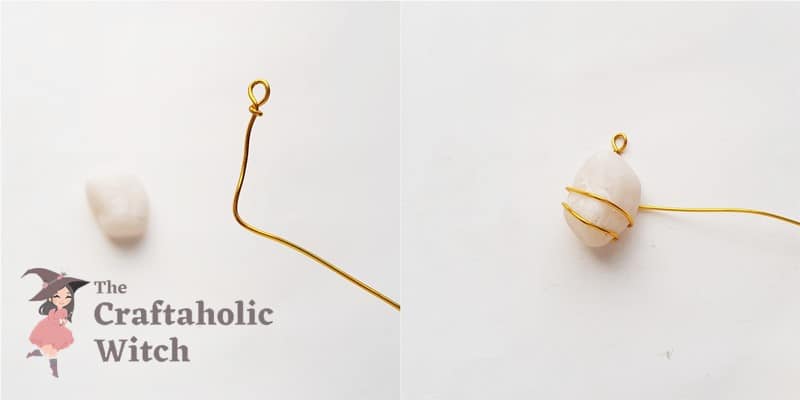
Bend the wire to 90 degrees at the marked point. Seat the stone between the bent anchor at the bottom and the loop at the top, holding both in place with one hand.
Begin wrapping the wire upward. Unlike Technique 1, leave a small, even gap between each wrap rather than coiling adjacently. The spacing is what gives this design its open look.
Step 3: Keep the Gaps Even, Coil Below the Loop, and Trim
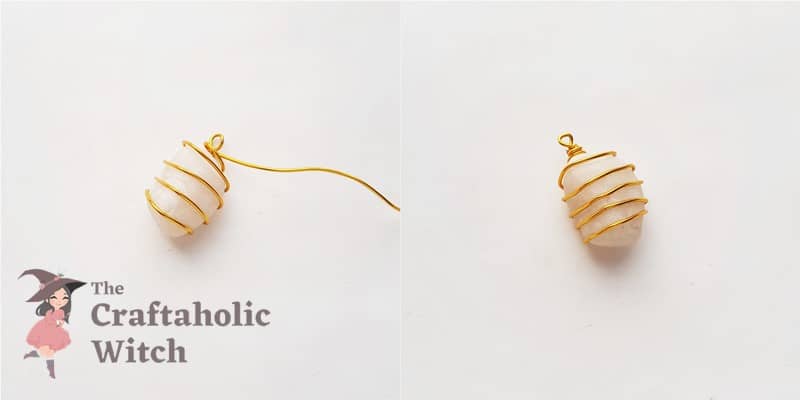
Continue wrapping upward, keeping the spacing consistent. The gaps do not need to be measured precisely, but noticeable unevenness shows in the finished piece, so eyeball them as you go and adjust before moving to the next wrap.
When you reach the loop, coil the wire around the wire band below it 2 to 3 times, then cut the tail close. Use the flat-nose pliers to tuck any sharp end flat against the coil.
Finish the Pendant: Thread a Chain Through the Loop
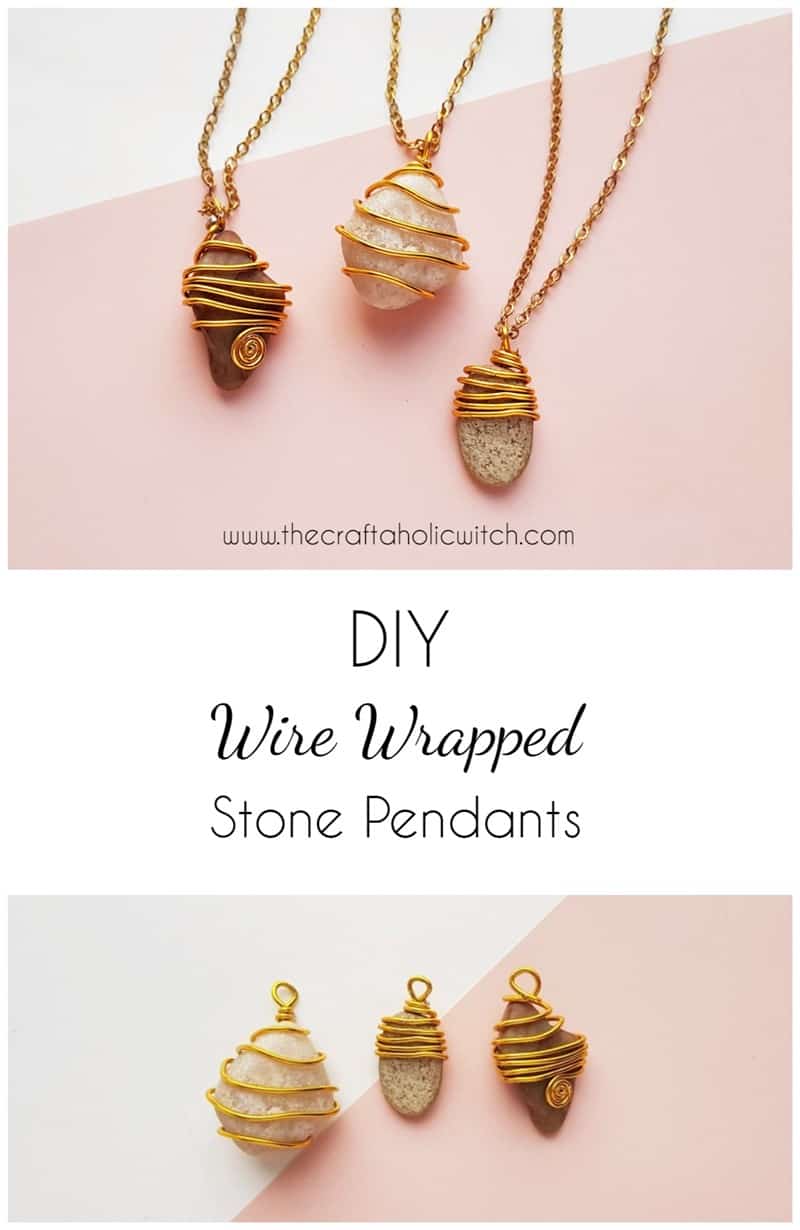
Thread a jewelry chain through the loop to complete the pendant. A simple cable chain in silver or gold tone suits all three styles. A leather cord works well too if you want a more natural, earthy look.
Share it in "I Made It" and let us cheer you on.
Post your finished make in "I Made It" so the community can celebrate it with you. Cheer on other makers too. Each month, the most loved craft wins 1 year of Craftaholic Premium ($59)
Tips for Wire Wrapping Stones
- Cut your wire longer than you think you need. Running short mid-wrap means starting over; any excess trims easily at the end.
- Copper wire is the best material to practice on. It bends smoothly, is inexpensive, and the hand movements are exactly the same as silver or gold-filled wire.
- If the wrap loosens after you finish, use flat-nose pliers to gently re-tighten the coil below the loop without distorting the rest of the wrap.
- Odd-shaped stones work well for Technique 2. Look for anything noticeably wider at the middle than at both ends so the wire has a natural waist to grip.
Watch: How to Wire Wrap Stones and Make a Pendant
If any step is tricky to picture from photos alone, this 3-minute video walks through all three techniques in real time.
Frequently Asked Questions
What gauge wire is best for wrapping stones?
20-gauge is the best starting point: easy to bend by hand but stiff enough to hold its shape once wrapped. 18-gauge works if you want a chunkier, more sculptural look. Go thinner than 22-gauge and the wraps tend to loosen with wear.
Does the stone need to have a hole?
No. Wire wrapping cradles the stone from the outside, so you never need to drill. Any undrilled pebble or decorative stone works. Avoid stones that are perfectly round and very smooth, since the wire will slide around without a natural edge to grip.
What pliers do I need for wire wrapping?
Three types cover everything in this tutorial: round-nose pliers for forming loops, flat-nose pliers for flattening and tightening coils, and cutting pliers for trimming the wire cleanly. A basic 3-piece jewelry plier set handles all of it.
Which stone shapes work best for each technique?
Flat ovals and rounded rectangles suit Techniques 1 and 3 because the wire lies stable on a broad face. For Technique 2, look for a stone that is noticeably wider in the middle and narrower at both ends so the spiral has a stable seat and the wire grips naturally at the waist.
Can I use wire other than silver or copper?
Yes. Copper is the most forgiving to learn on and the cheapest to practice with. Gold-filled wire gives a nicer finish for pieces you plan to gift or sell. Avoid painted craft wire for jewelry you will actually wear, since the coating chips off with regular use.
More Wire Jewelry Tutorials
Share your wire-wrapped stone pendant in the I Made It space inside Craftaholic Community. The most-loved post each month wins a one year free Premium membership.
2 Comments
Loved it! So much fun making it and wearing it!
We are glad that you loved the tutorial. We would love to see your version of the craft 🙂 Plz, post it to Instagram with #craftaholicwitch and don’t forget to tag us 🙂
Join the conversation
Log in to your Craftaholic Community account to comment, ask questions, and cheer on fellow makers.
Log in to comment