How to Make Origami Pumpkins (Folding Instructions + Video)
Learn how to make origami pumpkins, a perfect Autumn craft or a cute Halloween craft that you can use as wall decor, photography props and so on.
Hello, craftaholics! Is it too early to start Fall or Halloween crafts? Well, we think it’s never too late or too early to craft seasonal decors and props, so here we are with the tutorial on how to make origami pumpkins!
I know there are many out there who are obsessed with Autumn crafts and decors. This origami pumpkin is a perfect Halloween origami as well as a perfect Autumn pumpkin craft. You can use this 3d paper pumpkin as photography props, center decor for a table, or craft a garland.
Before you get started, you should know that this origami pumpkin craft isn’t a beginner project; the difficulty level is intermediate. f this is your first attempt, it might require around 30 minutes to complete a pumpkin pattern. Once you get handy with the steps, it’ll take less than 10 minutes.
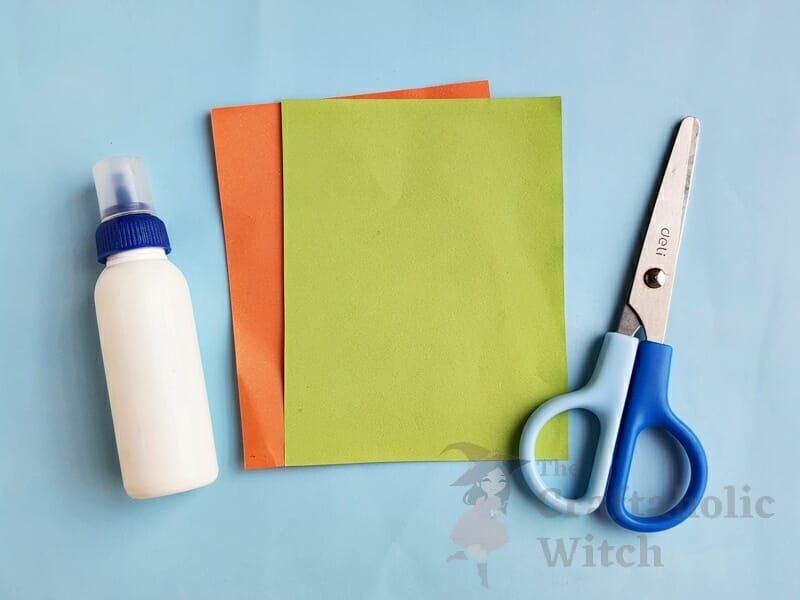
The cost of 1 origami pumpkin is less than a dollar. You will need 1 orange colored A4 sheet for the pumpkin and a small amount of green craft paper to complete one.
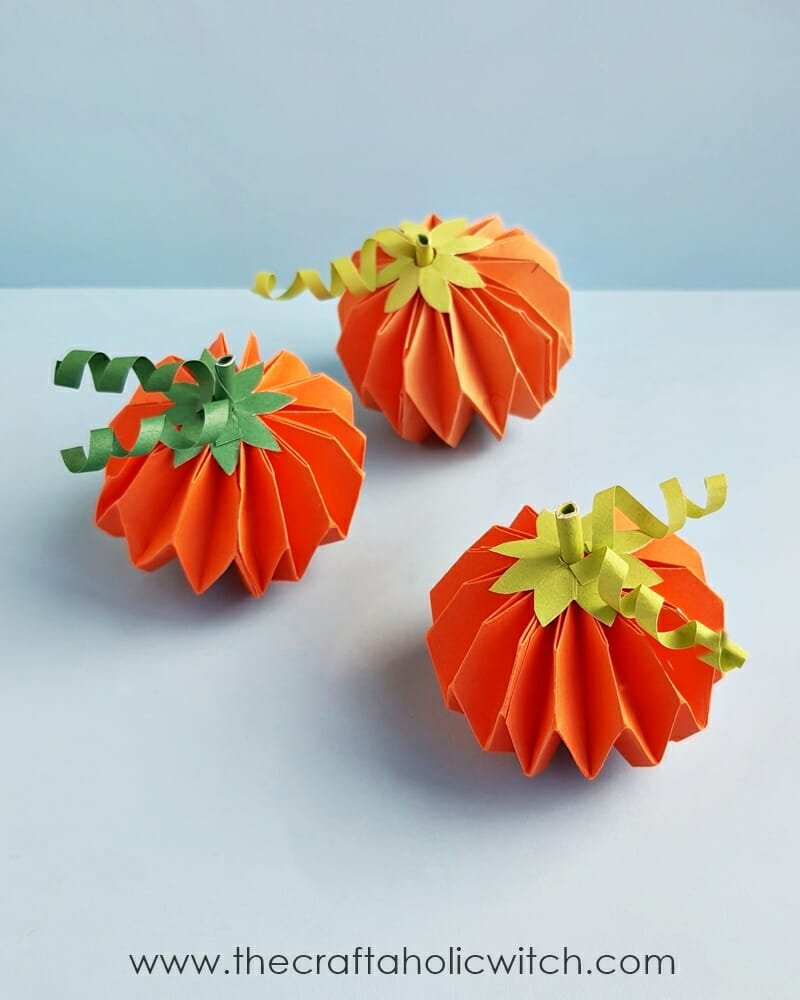
How to Make an Origami Pumpkin
List of Supplies
Tools
- A pair of scissors
- Quilling tool – optional
Materials
- Colored craft papers
- Craft glue
Origami Pumpkin Folding Instructions
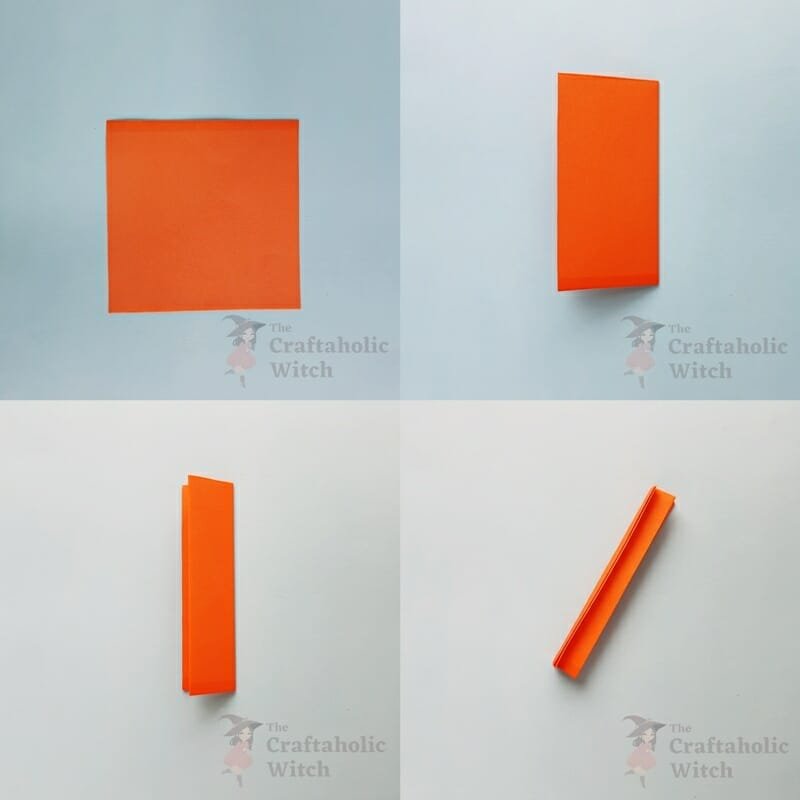
Step 1: Base Half Foldings
Take a piece of square paper and fold it in half.
Fold the paper in half again for the second time and then fold it in half one more time.
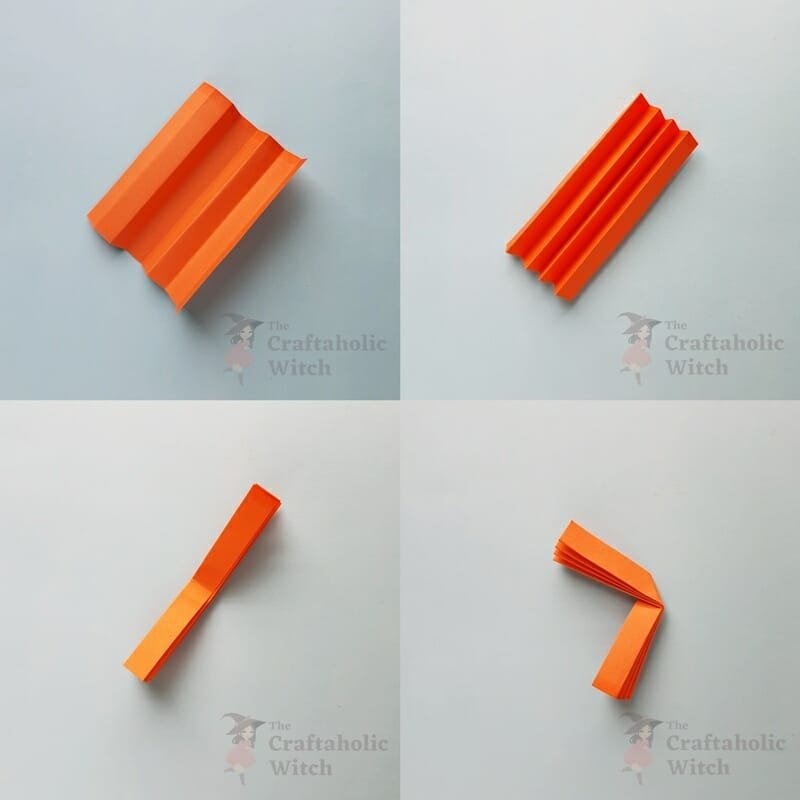
Step 2: Accordion Folding & Forming Zigzag Crease
Unfold the half folds done in the previous step. Use the creases to d accordion folds on the square paper.
Measure and mark the middle point of the accordion-folded paper. Create a 90-degree (or slightly more) fold from the middle point. Press the folded end firmly to leave visible creases.
Step 3: Middle (First) Zigzag Folds
Unfold the 90-degree fold. Create folds along the zigzag creases.
Now, fold and keep the zigzag part upwards. Keeping the zigzag folds along the middle, fold one side of the accordion creases downwards and the other side of the same crease upwards. Fo the next accordion crease, do the opposite and repeat the process until covering all creases.
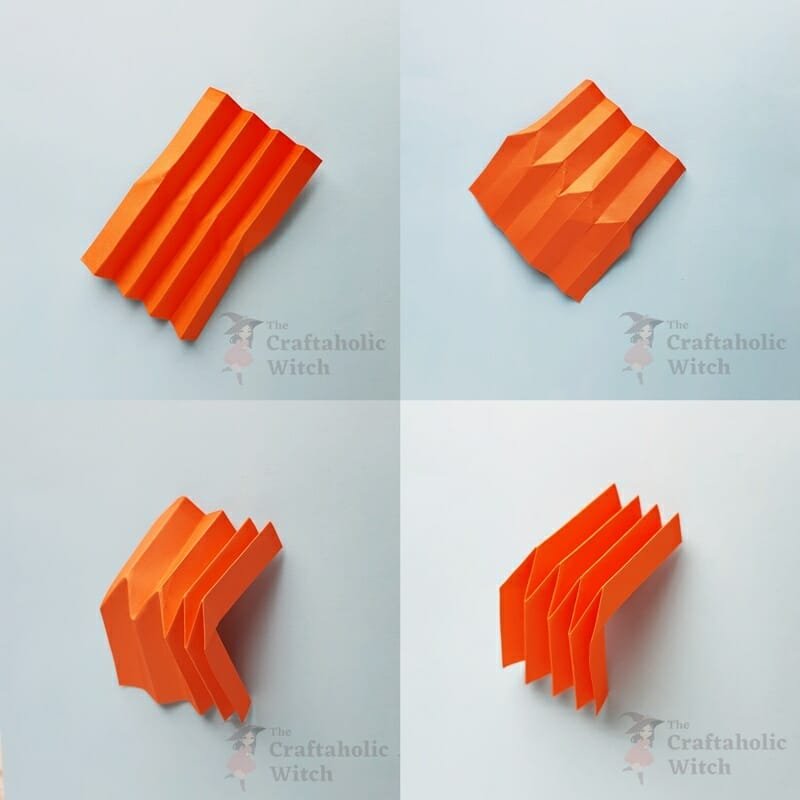
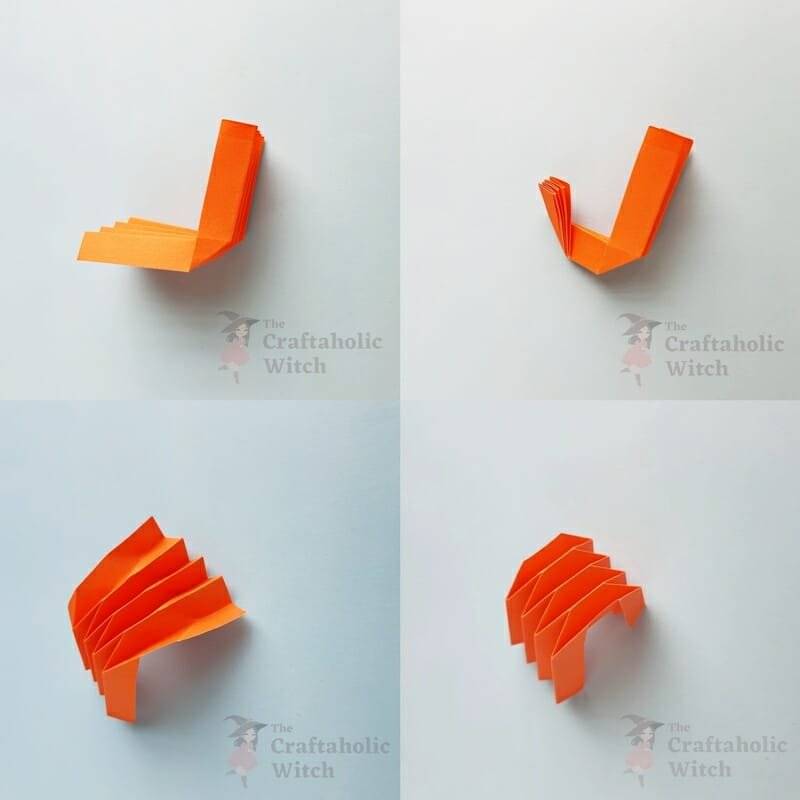
Step 4: Second Zigzag Folds
Let’s work on the second zigzag crease and folds. Leave an inch from the middle part and then fold the pattern in the same direction but slightly more than 90-degree. Again, press the folded part firmly to leave visible creases.
Once again, unfold, and fold up the zigzag creases and then fold them like the first zigzag line, in the same direction as the first one.
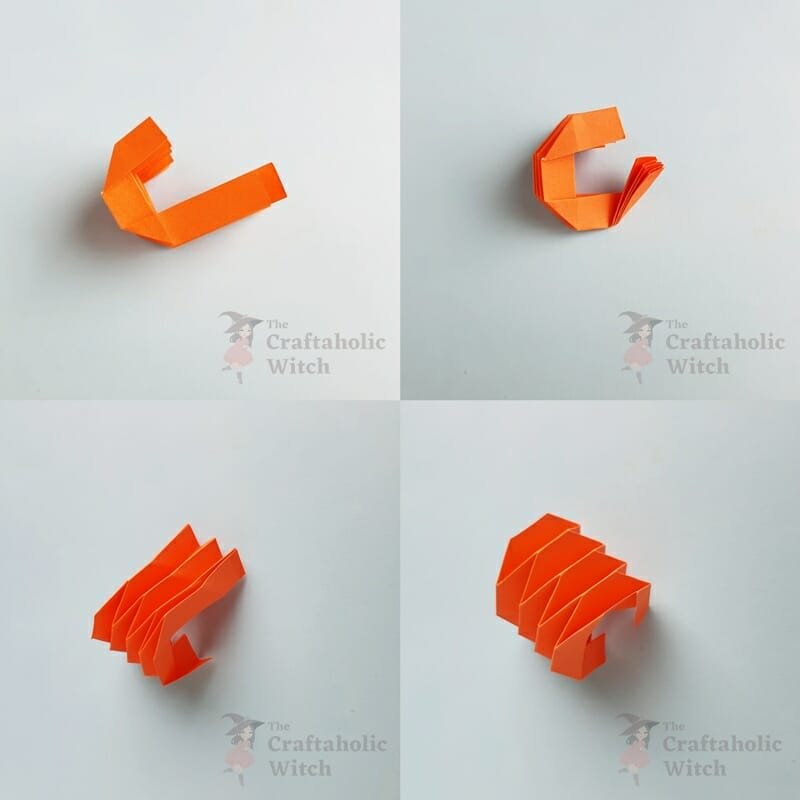
Step 5: Third (Last) Zigzag Folds
Now, we will create zigzag creases on the other side of the pattern.
Follow the same process to create zigzag creases and folds on this side as well. This part also should be directed to the same side.
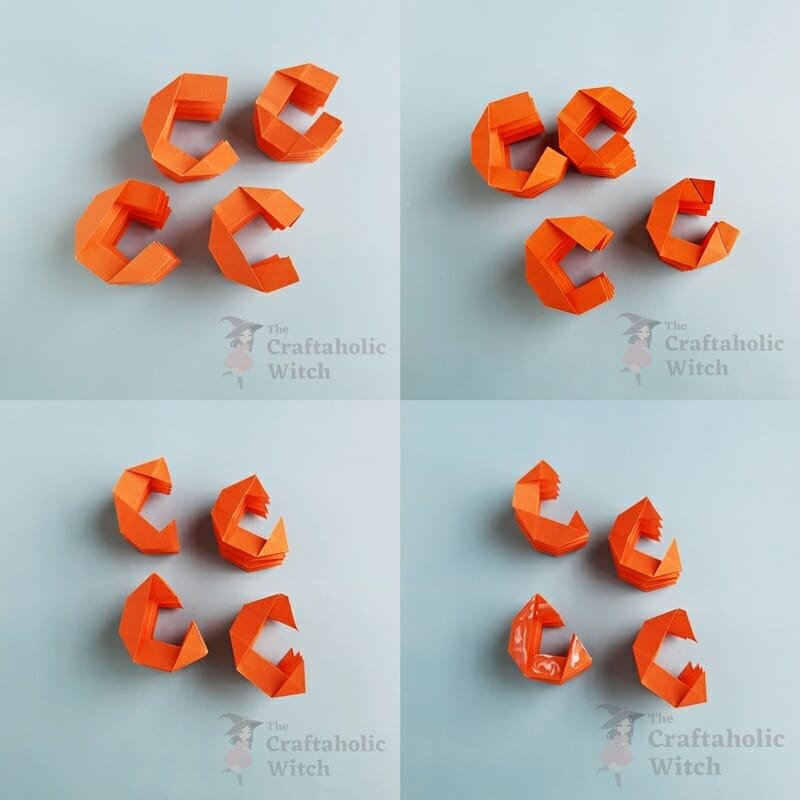
Step 6: Attaching the Folded Pieces
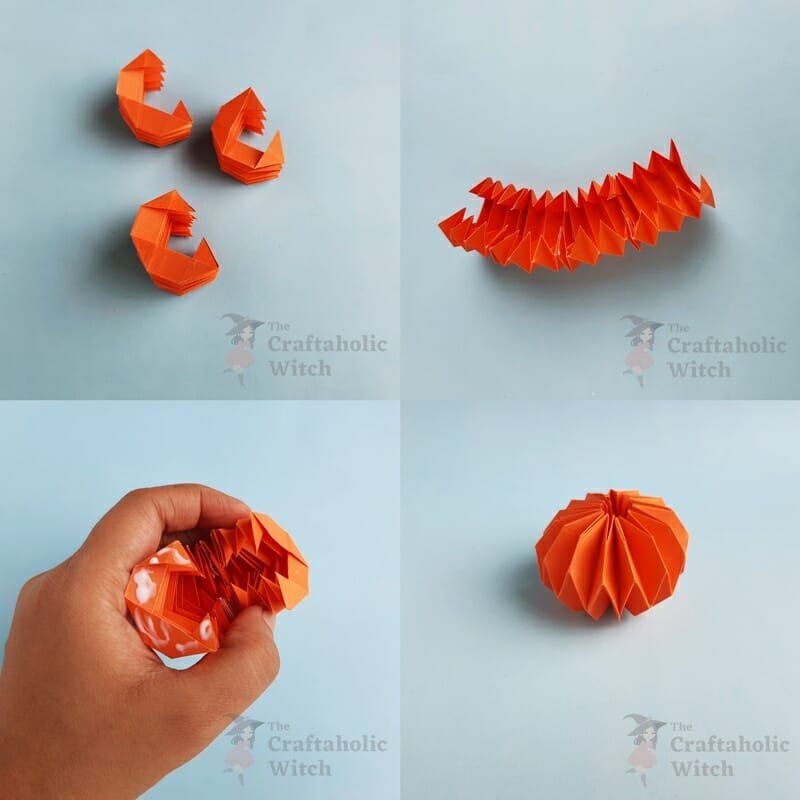
Similarly, craft 3 more pieces; we need a total of 4 of these to make the origami pumpkin. Notice the marked straight lines on a piece; cut off the extra parts from the outer sides of the patterns.
Take any one of the prepared patterns and apply glue on either side of it.
Step 7: Forming the 3d Pumpkin Pattern
Take another piece and place it on the glued side of the first piece. One by one attach the 4 pieces together.
Now, apply glue to any open end of the chain and join it with the other open end. This will form a ball-like shape. Hold the glued ends for a while to make sure that they are joined nicely.
Step 8: Adding the Green Parts
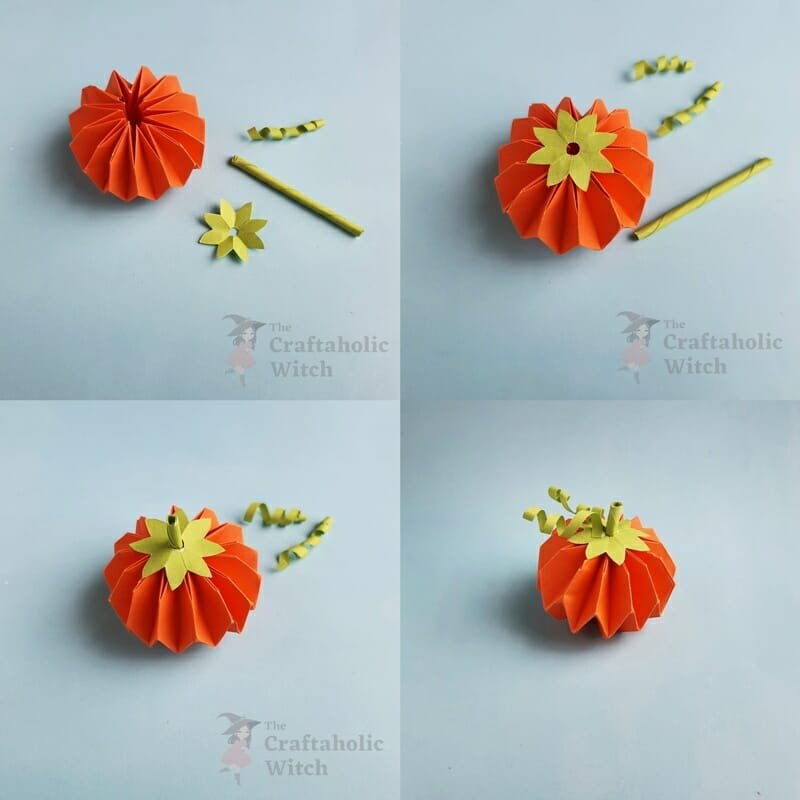
Prepare the green parts, the stem, the stem base, and the vine. Attach the stem base on the top center part of the origami pumpkin.
Then insert the stem into its hole and push the stem all the way inside the center of the 3d pumpkin. Attach the vine at last to complete the origami pumpkin pattern.
Video Tutorial: How to Make a 3d Pumpkin out of Paper
It often seems complicated to recreate an origami craft by reading written instructions. So, we have made a video on how to fold origami pumpkins. I hope it will help you. Please dont forget to subscribe to our youtube channel if you like our video.
Folding Origami Pumpkins: Tips for Beginners
Here are some tips if you’re having difficulty crafting origami pumpkins.
- Use 4 pieces of square paper for 1 3d pumpkin pattern
- The initial base folds need to be done neatly.
- Make sure to create the zigzag creases neatly.
- Follow the zigzag creases to make the zigzag folds.
- Use the first folded piece to measure the folds of the next 3 pieces; this will help keep all 4 pieces similar.
- Use a quilling tool to make the vine and the stem patterns if you’re not good at crafting the patterns free hand.
Here are some of our origami craft tutorials that you may also like
- How to Fold Origami Maple Leaf
- How to Make Origami Bat
- How to Make Origami Leaves
- How to Make Origami Lotus
- How to Make Origami Butterfly
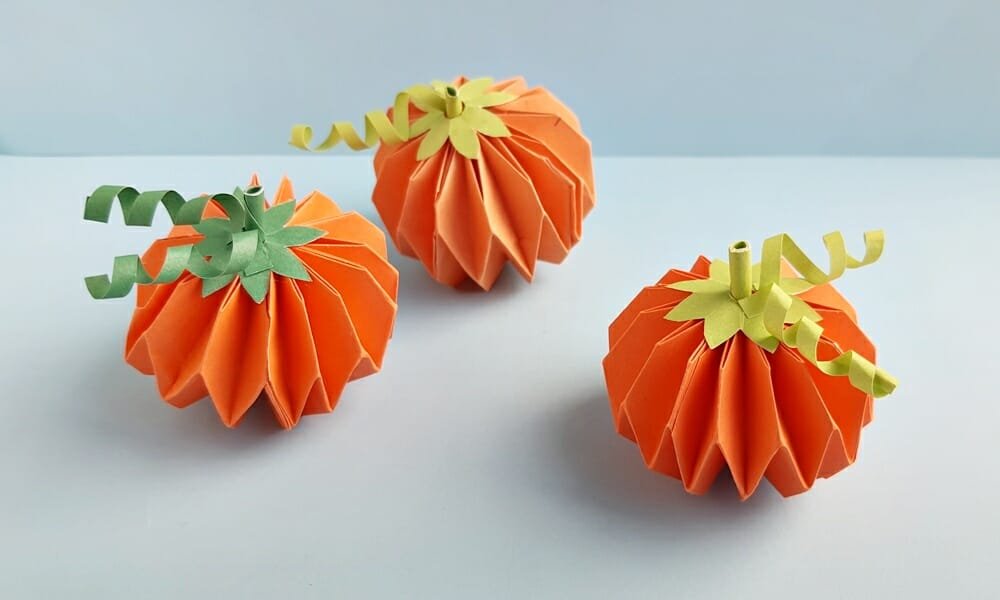
We absolutely love doing origami crafts and it’s always a pleasure to share the tutorial with you all. We’re very happy with how the origami pumpkin turned out. You can craft this origami pumpkin into any size you prefer and decorate them in so many different ways and for different occasions. Whether it’s Halloween or Autumn, these 3d paper pumpkins are surely perfect for both seasons. We really hope you enjoyed the origami pumpkin tutorial and would give it a try. If you do craft one or two, please tag us on Facebook or Instagram (use #thecraftaholicwitch) and show us how you’re using or decorating the origami pumpkins.
Happy Crafting!




This is a great tutorial! I’m going to try this out this weekend!