

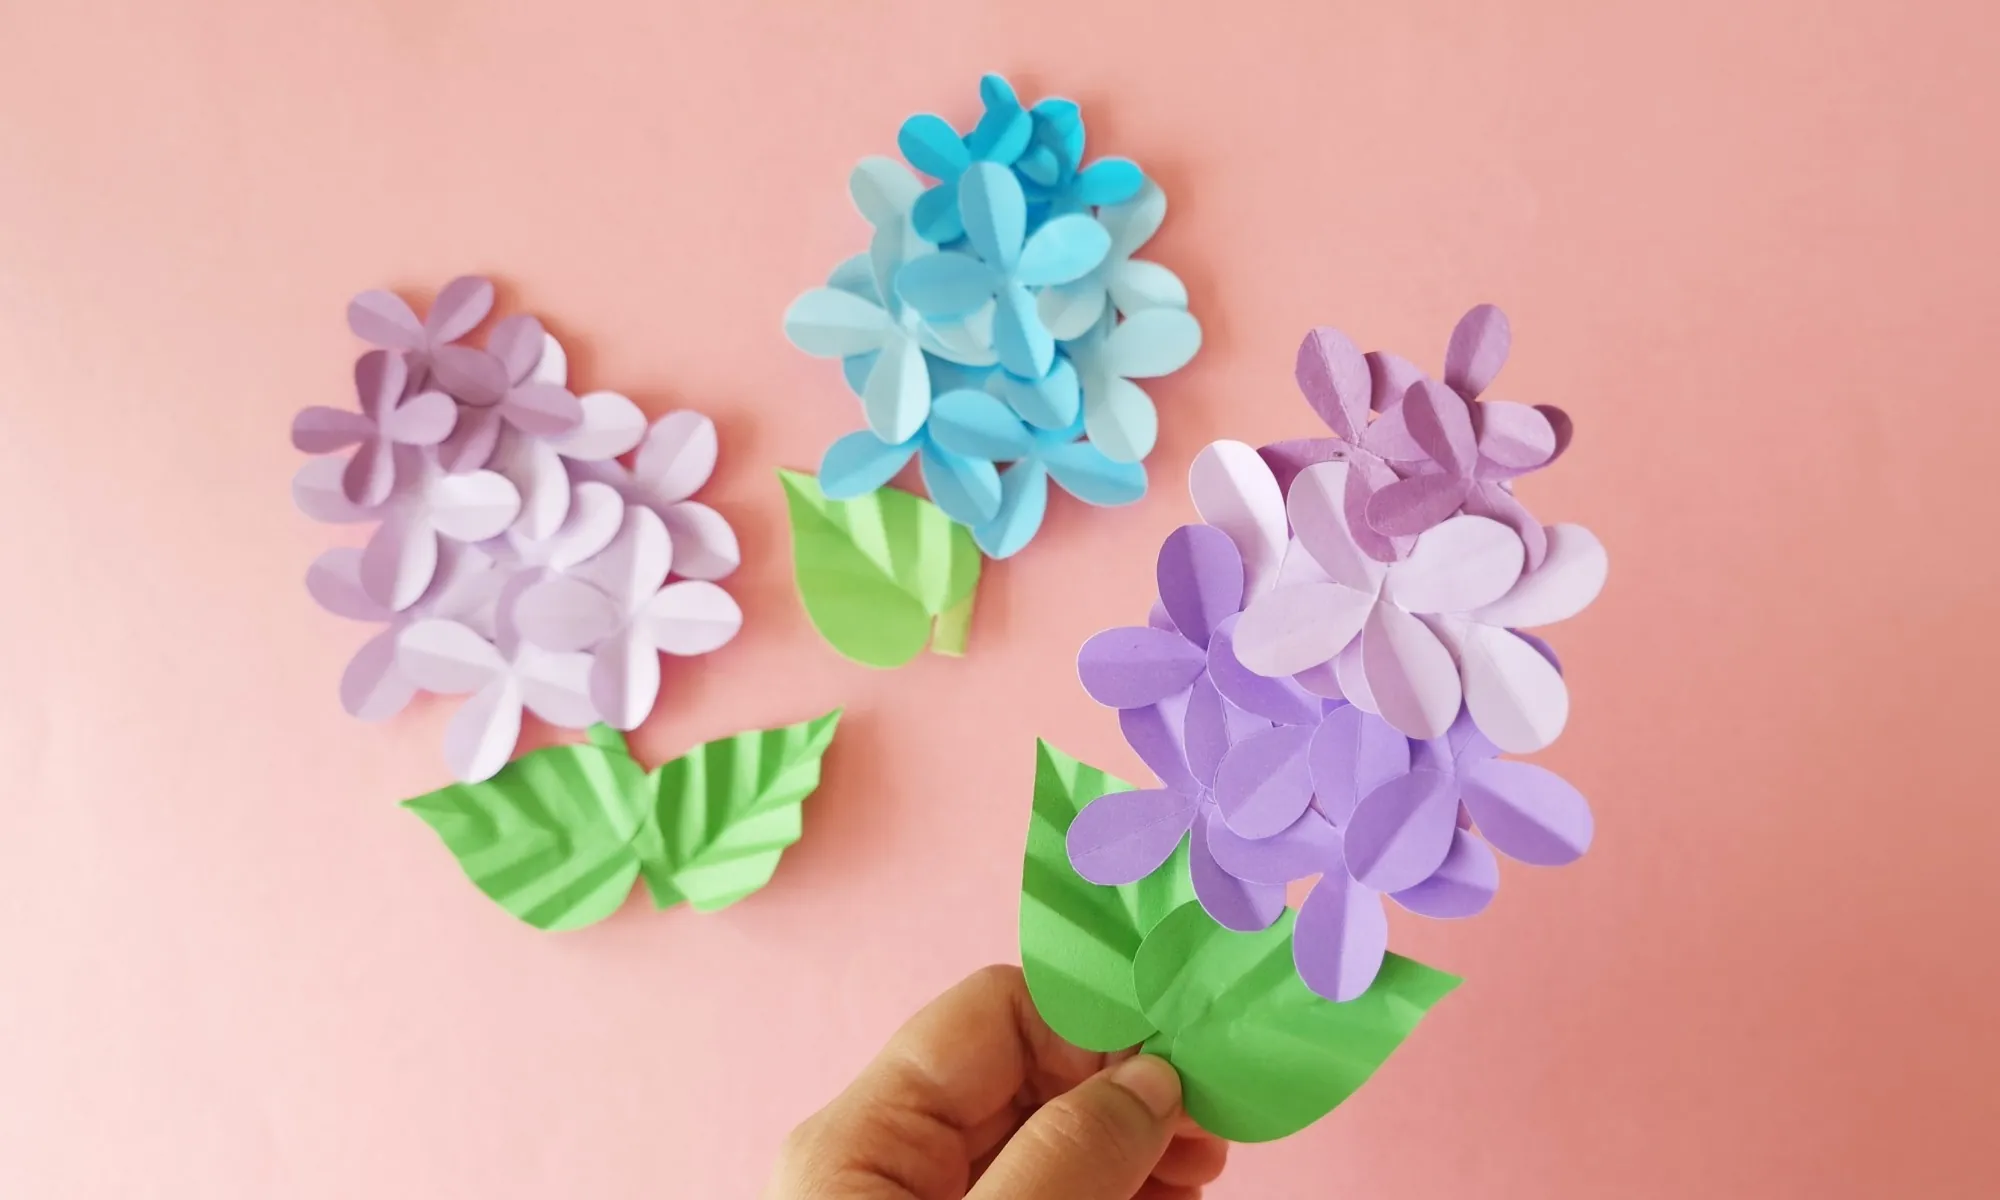
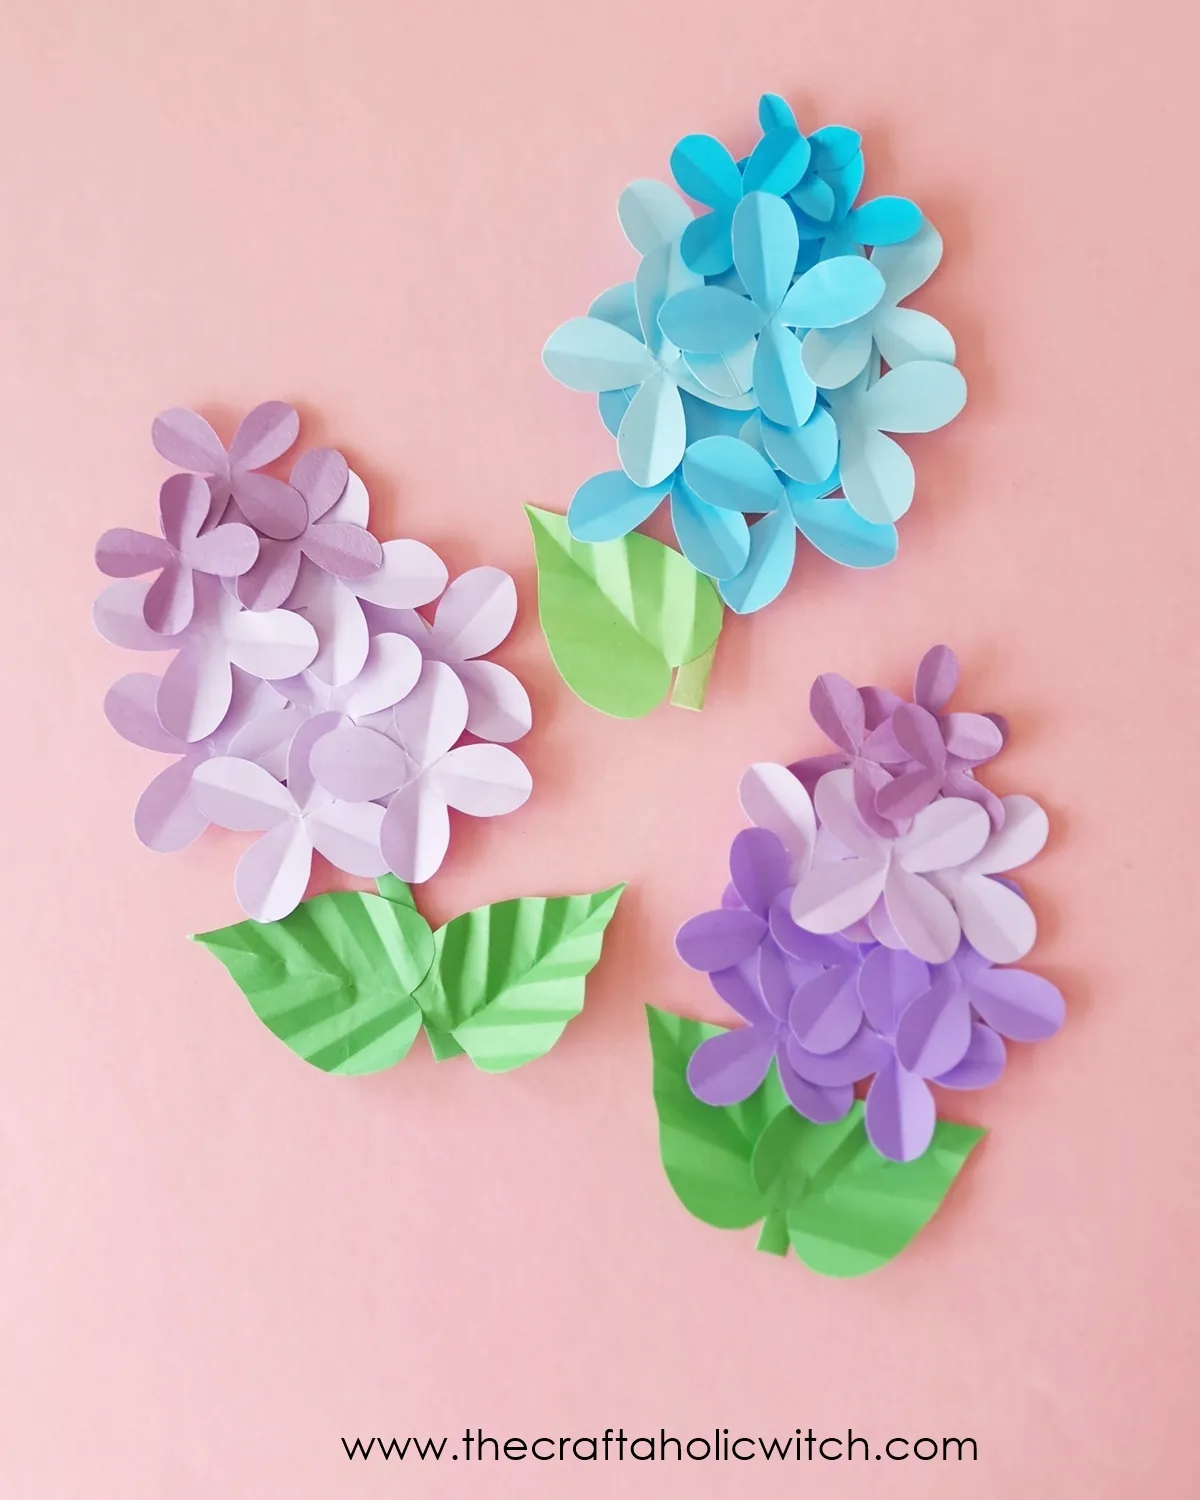
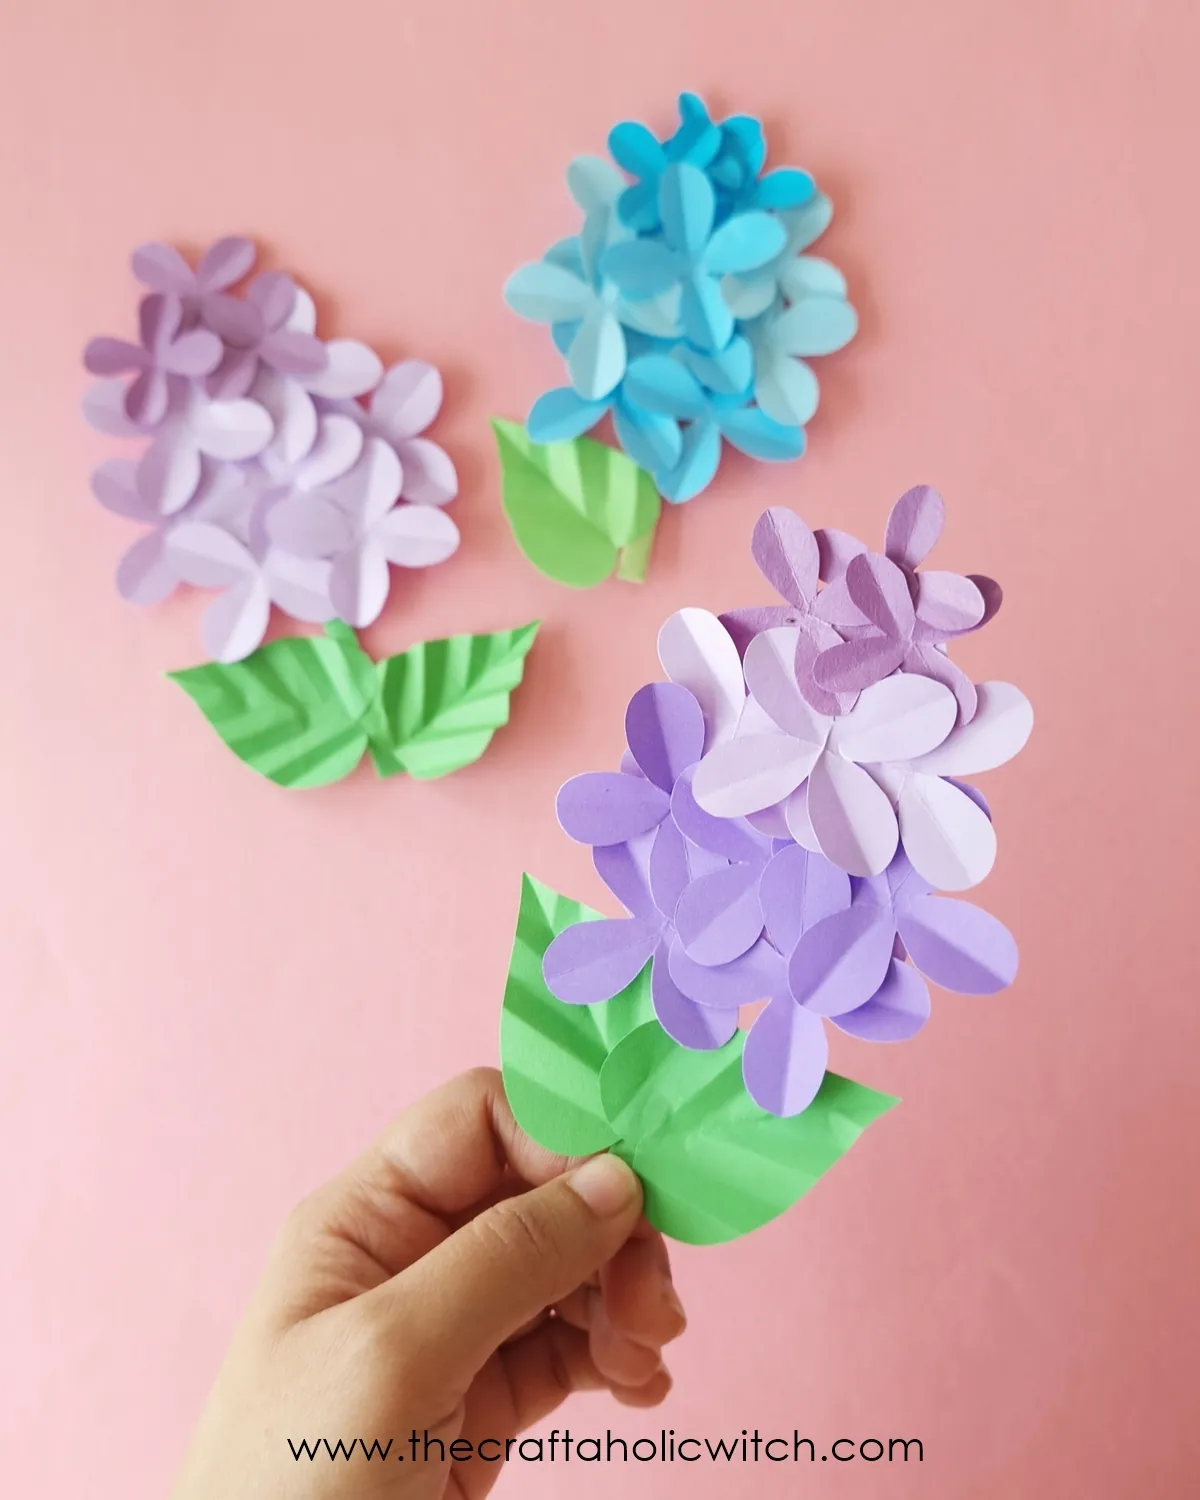
These paper lilac flowers are a lovely next project if you already enjoyed making paper lilies and want another bloom with soft layered petals. The finished flower keeps the clustered lilac look, but the build stays simple enough for a relaxed craft session at home.
You only need a few sheets of craft paper, scissors, glue, and the printable template to make one stem in about 30 to 45 minutes. Once finished, the flower works beautifully in handmade bouquets, gift toppers, spring decor, and other paper flower displays that you can keep for a long time.
Paper Lilac Flowers at a Glance
- Difficulty: Beginner
- Time: 30-45 minutes
- Cost: Under $2
- Ages: 10+ with supervision
- Best for: Paper bouquets, handmade cards, desk decor, and spring craft displays
Join Craft Challenge: Craft Your Calm
Make something that brings you a sense of peace, share a photo, and tell us your story. It's free to enter, open to everyone, and the entry with the most reactions takes home a $100 gift card. Takes five minutes to join.
Entries close August 30, 2026. No purchase necessary.
What You Need to Make Paper Lilac Flowers
Materials
- Green craft paper for the leaf and rolled stem, because lighter paper is easier to fold into soft leaf veins and a neat stem.
- Three shades of purple craft paper for the flower petals, so the finished bloom has a natural layered look instead of one flat color.
- Printable template for the flower base, leaf, and petal guides, especially helpful if you want the layers to stay even.
- Craft glue, used in small amounts so the petals stay crisp instead of wrinkling.
Tools
- Pencil for tracing the template shapes cleanly onto each paper color
- Sharp scissors for the petal curves, leaf edges, and small trimming work
You can use the printable template from our community: paper lilac flower craft template.
Ask inside "Crafty Q&A" while you are making.
"Crafty Q&A" is free to join. Share your question, photo, or the exact step where you got stuck, and chat with other makers plus the Craftaholic Witch team. You can also join any discussion thread already happening inside the space.
How to Make Paper Lilac Flowers
Step 1: Prepare the Template Pieces and Cut the Paper Parts
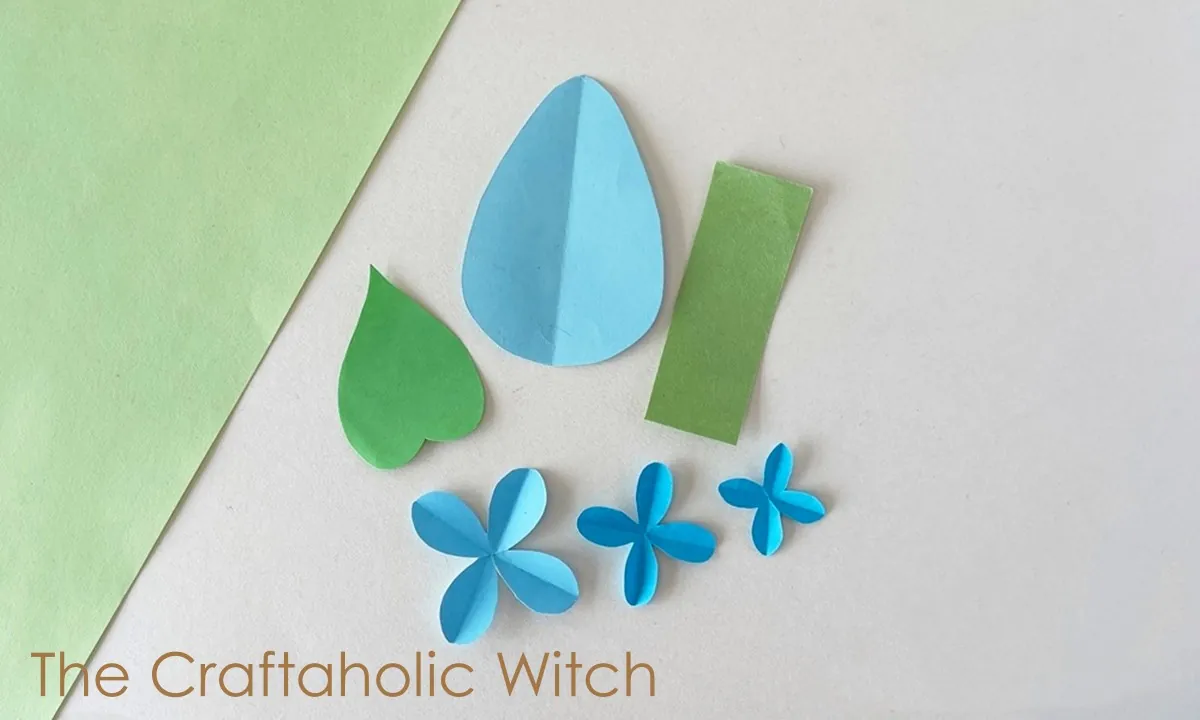
Use green paper for the leaf and stem pieces, then choose three purple shades for the petals. Trace the template onto the selected papers and cut out the base, leaf, stem strip, and petal pieces neatly before moving on.
If you prefer to build the petals without a printed guide, you can follow the next few steps to make them from folded paper squares instead.
Step 2: Fold the Light-Purple Square Diagonally
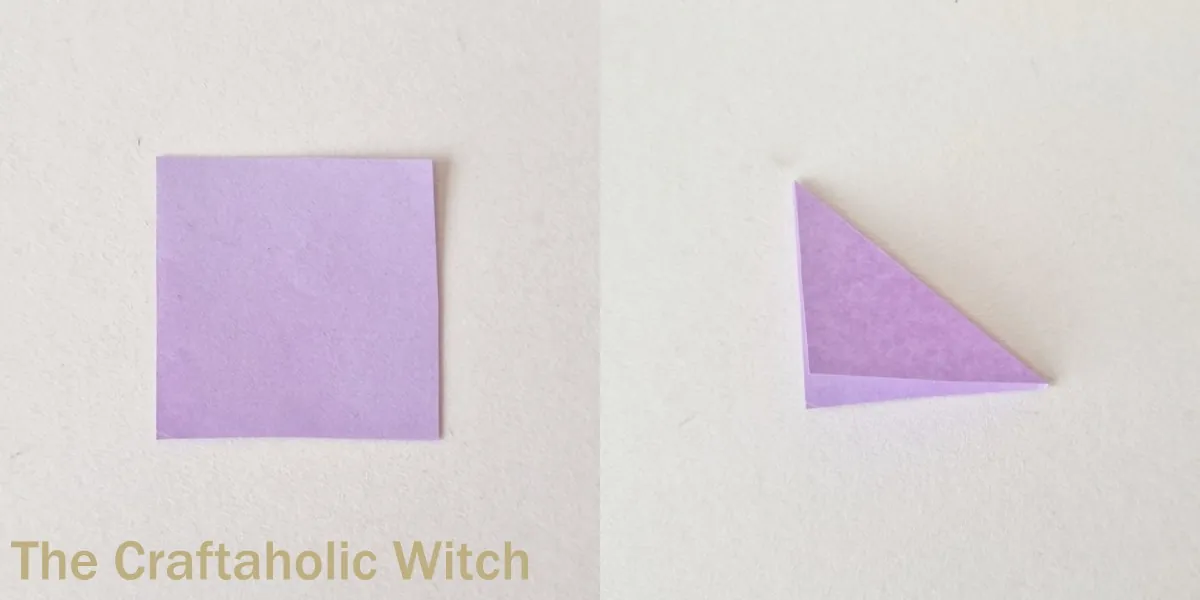
Cut a 6 cm by 6 cm square from the lightest purple paper and fold it in half diagonally to make a triangle. Keep the point aligned as you fold so the petal layers open evenly later.
Step 3: Fold Again and Sketch the Rounded Petal Edge
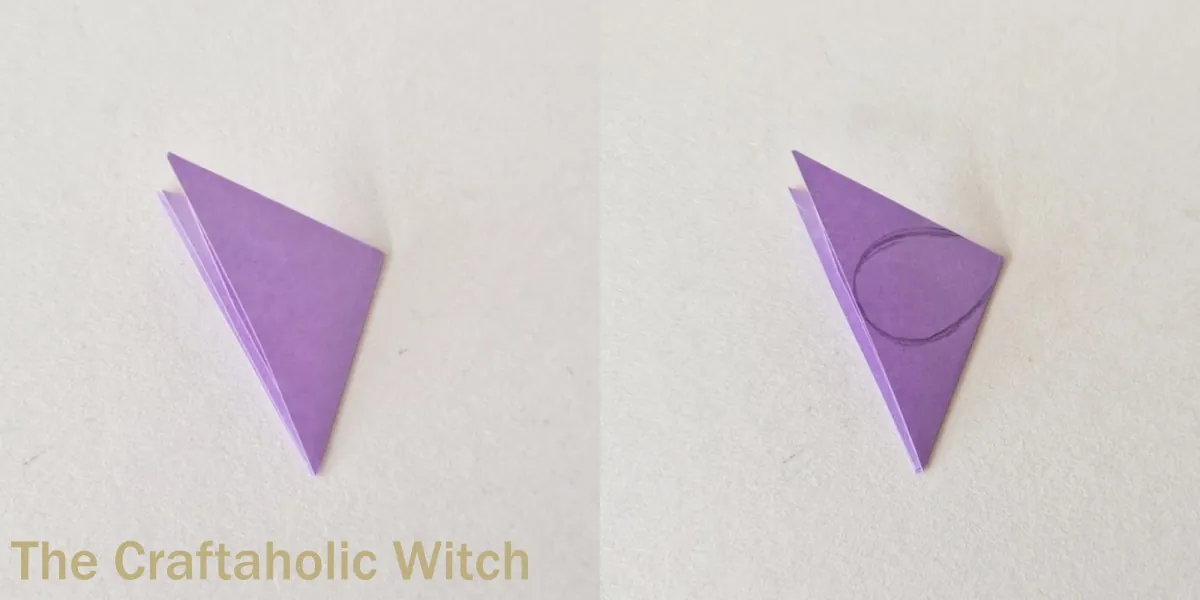
Fold the triangle in half one more time, then draw a soft rounded petal curve across the open side. The narrow closed corner becomes the center of the flower piece, so leave that point intact.
Step 4: Cut the Petal Shape and Crease the Folded Piece
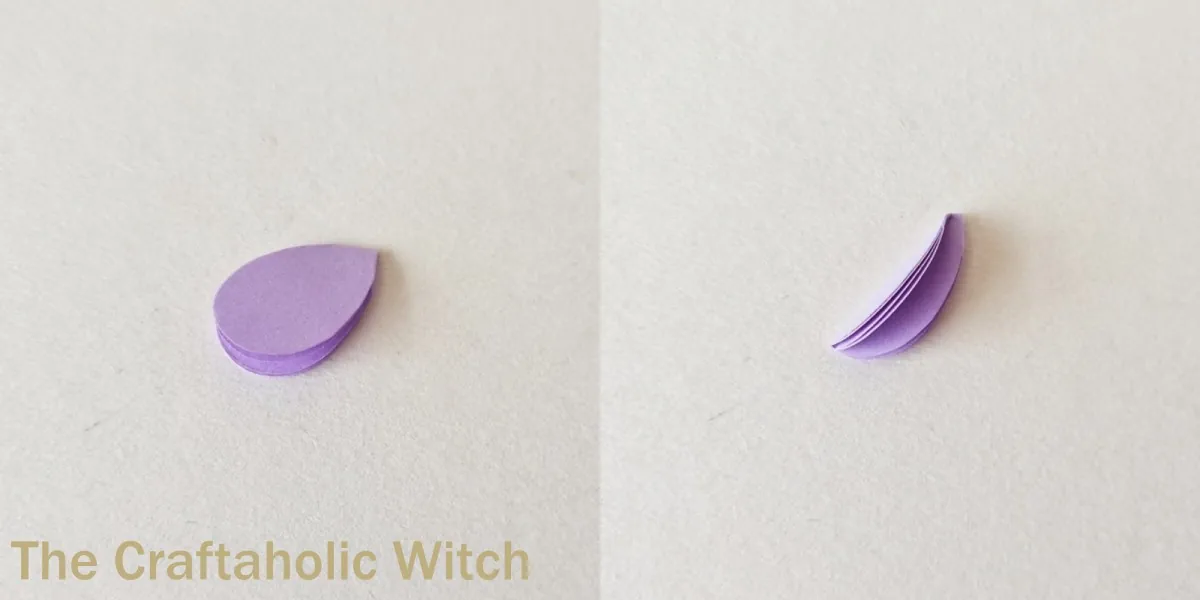
Cut along the rounded line, keeping the folded layers together, then press a light center crease through the stacked shape before opening it. A clean cut here gives the petals a softer finish once they spread out.
Step 5: Open the Petals and Make the Full Set
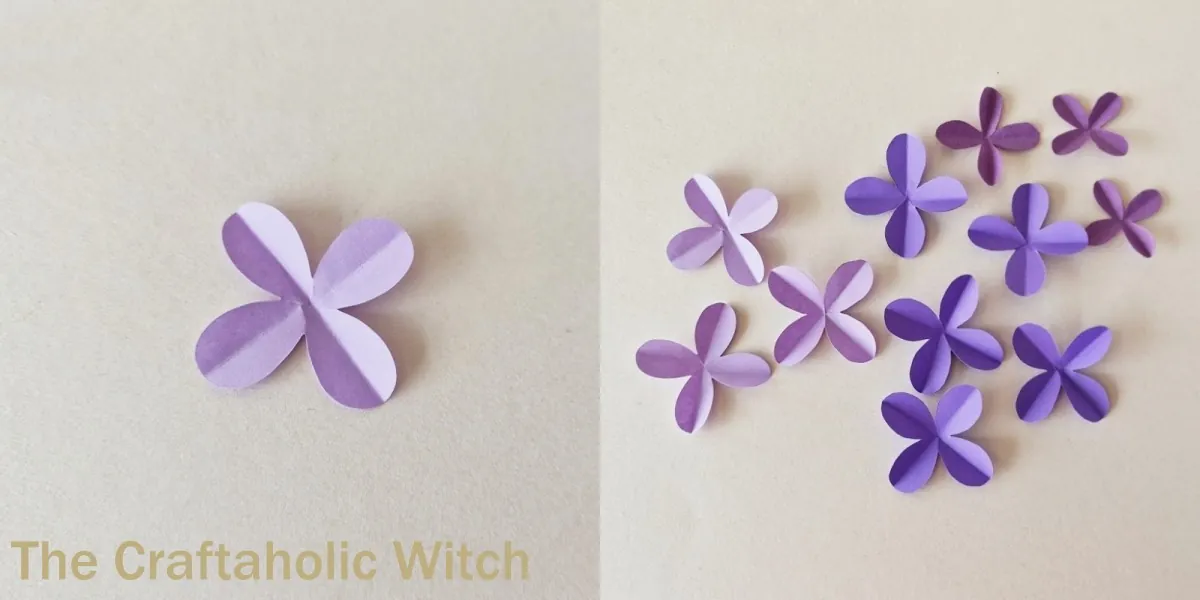
Unfold the cut piece to reveal the first flower layer, then repeat the same process to make more petals in medium and dark purple shades. The larger petals belong near the base, while the smaller darker petals fill the top section.
Step 6: Glue the First Large Petal onto the Flower Base
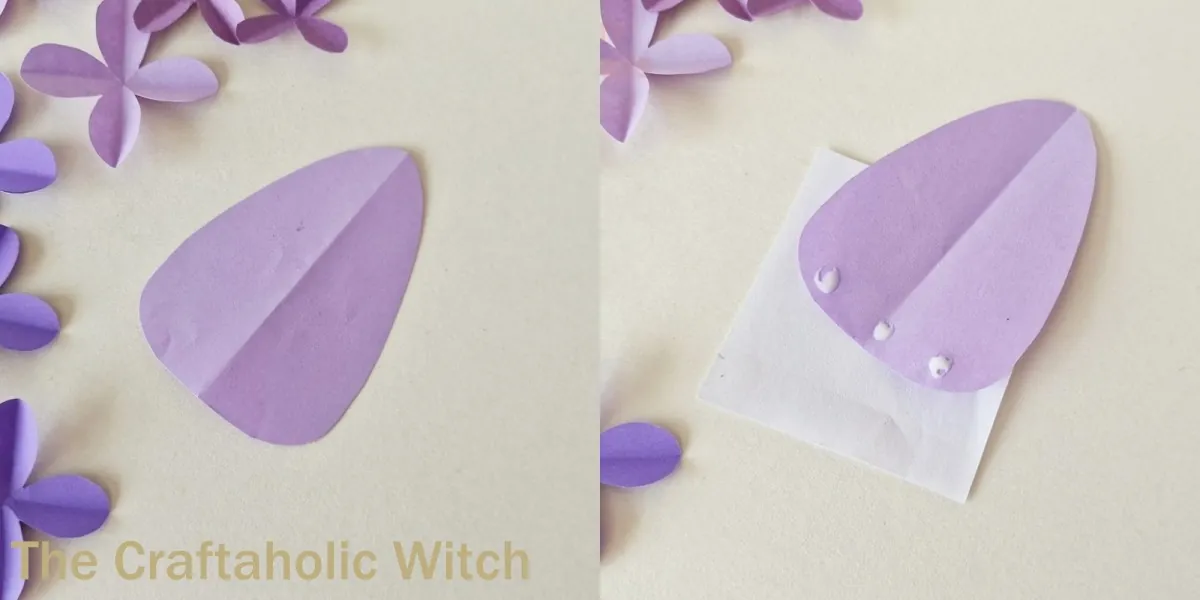
Place the lilac flower base on your table and add a small amount of glue to the wider lower section. Start with one large petal so you can check the angle before covering the rest of the base.
Step 7: Cover the Bottom Section with the Largest Petals
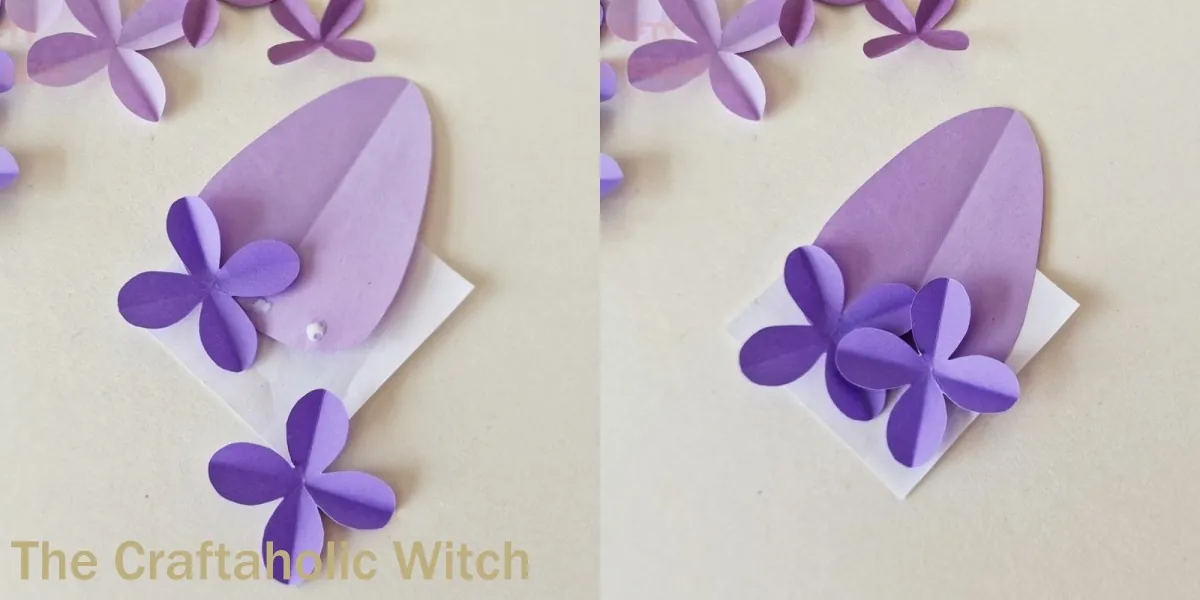
Keep attaching the large petals around the lower part of the base, overlapping them slightly as you go. You are aiming for full coverage without hiding the shape of each individual petal.
Step 8: Build Up the Middle and Top with Medium and Small Petals
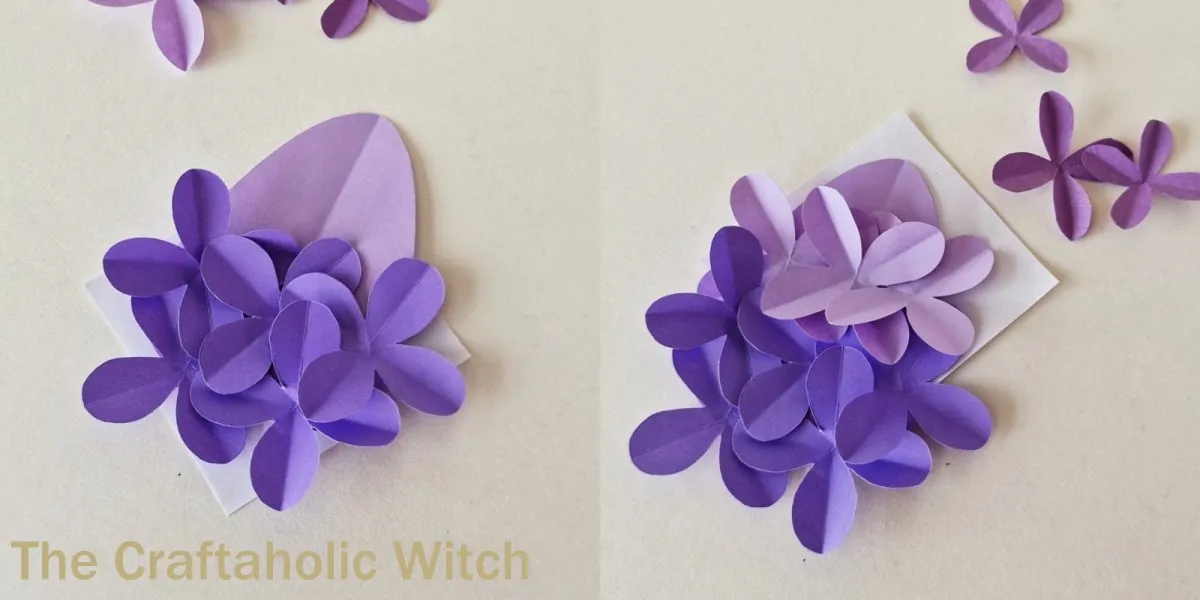
Apply more glue above the first layer and continue with the medium petals, then finish with the smallest dark-purple petals near the top. The flower should look fuller as it rises, with the darkest petals tucked into the upper cluster.
Step 9: Fold the Leaf Veins and Attach the Stem
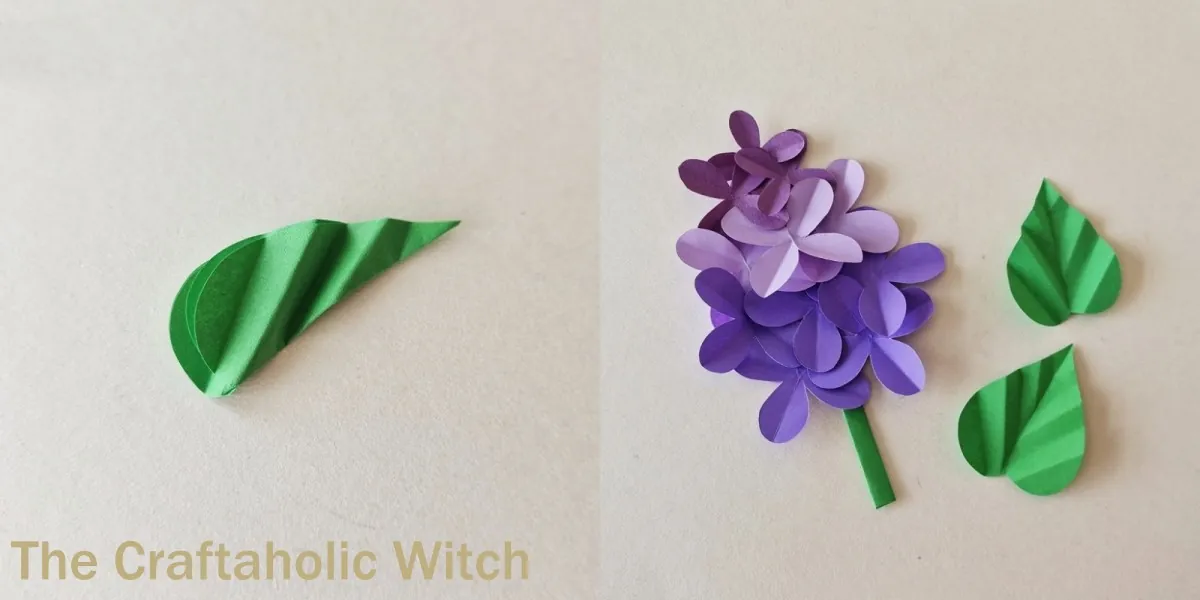
Fold the leaf in half lengthwise, then add a few soft diagonal folds to create simple vein details before opening it again. Roll or fold the green stem strip into a narrow stem shape, glue it closed, and attach the finished flower head to the top.
Step 10: Glue on the Leaf to Finish the Flower
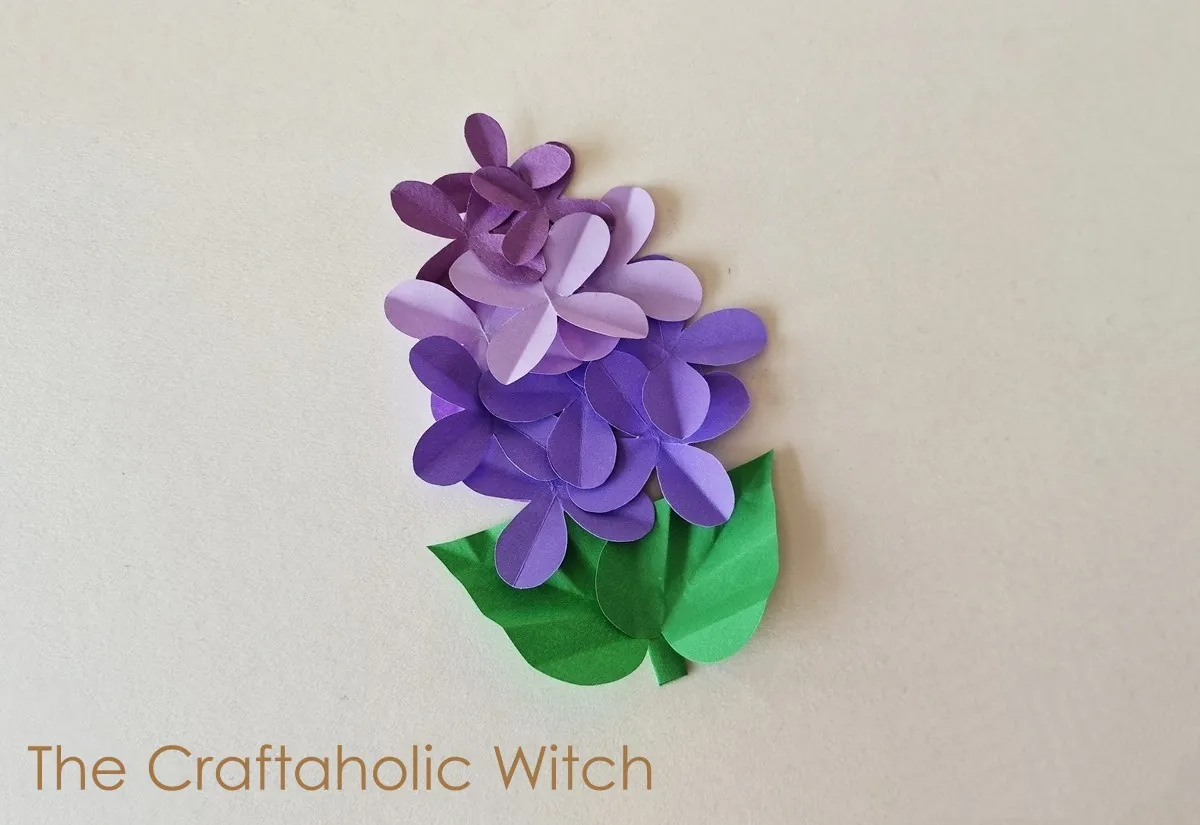
Attach the leaf to the stem and let the glue dry for a minute before handling the flower too much. Once the leaf sits neatly against the stem, your paper lilac flower is ready to display.
Share it in "I Made It" and let us cheer you on.
Post your finished make in "I Made It" so the community can celebrate it with you. Cheer on other makers too. Each month, the most loved craft wins 1 year of Craftaholic Premium ($59)
Tips for Better Paper Lilac Flowers
- Use lightweight craft paper instead of thick cardstock. Thin paper folds and layers more naturally for this clustered flower shape.
- Keep the glue close to the petal bases. Too much glue near the tips makes the bloom look flat.
- Work from the lightest and largest petals upward. That color shift helps the flower read more like a real lilac cluster.
- Fold the leaf veins gently. Strong creases can make the leaf look stiff instead of soft.
Video Tutorial
Paper Lilac Flower FAQ
Can I make paper lilac flowers without the template?
Yes, you can make them without the template if you are comfortable cutting repeated petal shapes by hand. The template just makes the layers more even and speeds up the prep work.
What kind of paper works best for paper lilac flowers?
Lightweight craft paper works best because it folds cleanly and sits nicely in layered clusters. Very thick cardstock makes the petals look bulky and is harder to glue around the curved base.
How do I make the lilac cluster look fuller?
Use at least three petal sizes or shades and overlap them slightly from bottom to top. The flower looks fullest when the largest petals stay low and the smallest petals concentrate near the top.
What can I use these paper lilac flowers for?
These flowers work well in handmade bouquets, gift toppers, spring wreaths, greeting cards, and desk decor. You can also make several stems in different shades to build a fuller paper flower arrangement.
More Paper Flower Tutorials
- How to Make Paper Hyacinth Flowers from Tissue Paper
- How to Craft Paper Tulips
- How to Make Pretty Paper Lilies
- How to Make Paper Daisy Flowers
- How to Make Paper Roses
If you make this project, join the Craftaholic Community and share your version there. It is a nice place to compare color choices, bouquet ideas, and other paper flower projects.
0 Comments
Join the conversation
Log in to your Craftaholic Community account to comment, ask questions, and cheer on fellow makers.
Log in to comment