


A beaded snowflake ornament earns its spot on the tree the moment the light catches its crystal points, and restringing the same piece onto a chain turns it into a pendant just as easily.
This one is a wire-and-bead build: you thread pearl and crystal beads onto 26-gauge craft wire and twist the ends to lock each arm in place. Budget about 30 to 40 minutes once you’ve made your first one, and a single supply run of around $23 in wire and beads makes 20 or more snowflakes, so the per-piece cost drops fast.
This is a fun weekend pick from our jewelry making tutorials, and it’s one I keep coming back to for the Christmas craft lineup because the beads and wire keep well in a drawer between projects.
Beaded Snowflake Ornament at a Glance
- Difficulty: Intermediate
- Time: 30-40 minutes
- Cost: About $1 per snowflake ($23 supply run makes 20+)
- Ages: 10+ with an adult for the wire cutting
- Best for: Christmas ornaments and quick-swap pendants

What You Need to Make a Beaded Snowflake Ornament
Materials
- Faux pearl beads (2 sizes), for the ring, the arms, and the gaps between them
- Crystal beads, for the sparkly accent between each arm
- Craft wire, 26 gauge, flexible enough to bend into tight loops but sturdy enough to hold the snowflake’s shape
- A jump ring, for hanging the finished piece from the tree or a chain
Tools
- Scissors, for trimming the wire tail
- Pliers (optional), for opening the jump ring more easily than fingernails alone
Heads up: some of the supply links above are affiliate links. If you buy through them, Craftaholic Witch may earn a small commission at no extra cost to you. We only link supplies we would actually use ourselves.









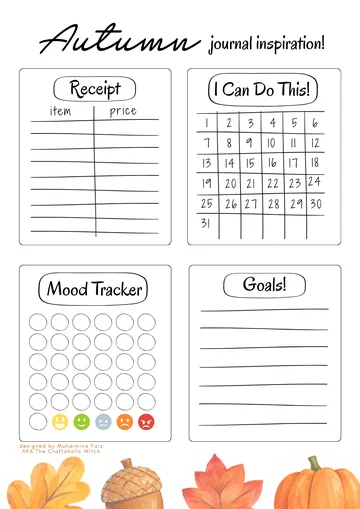
Free Autumn Bucket List + Printable Journal Pack
Everything you need for a cozy autumn, ready to print at home. Join the community for free and download it in one click.
- 13-page printable PDF
- 18 stickers and 6 bookmarks
- Journal pages and recipe cards
- Phone and computer wallpapers
Watch How to Make a Beaded Snowflake Ornament
The video walks through threading the beads and twisting the wire in real time, which is the fastest way to see how the arms lock into place before you start your own.
Step-by-Step Instructions
Step 1: Cut Your Wire and Thread the First 6 Beads

Cut a 24-inch length of 26-gauge wire and thread on 6 large pearl beads. Slide them down until they sit 3 to 4 inches from one end, leaving that short tail free for the twist in the next step.
Step 2: Close the Beads Into a Ring and Twist the Tail

Thread the long end of the wire back through the bead nearest that first end, so the 6 beads pull into a closed ring. Bring the short tail up alongside the long wire and twist the two together 2 or 3 times, close against the ring, so it can’t loosen as you build the arms.
Step 3: Thread the Beads for the First Arm

Thread 1 large pearl bead and 3 small pearl beads onto the working wire and slide them down snug against the ring. This four-bead run becomes the first point of the snowflake.
Step 4: Loop Back Through to Lock the First Arm

Pass the wire back through the large bead you just added, then out through the neighboring bead on the ring. Pull firmly, not just snug, or the arm ends up loose and lopsided once all six are in place.
Step 5: Repeat to Build the Remaining Five Arms

Repeat steps 3 and 4 around the ring: thread a large bead and 3 small beads, loop back through the large bead and the next ring bead, and pull tight. Once all 6 arms are formed, thread the wire through the large bead of the arm you just finished so you’re ready to start filling the gaps between them.
Step 6: Add a Crystal Bead Between Two Arms

Thread one crystal bead onto the wire. This fills the gap between the arm you just came from and the next one, and it’s what gives the finished snowflake its sparkle.
Step 7: Anchor the Crystal Bead to the Next Arm

Pass the wire through the large bead of the neighboring arm, pulling until the crystal bead sits centered in the gap. It doesn’t matter whether you work clockwise or counterclockwise, just stay consistent for the rest of the snowflake.
Step 8: Fill the Remaining Gaps With Crystal Beads

Repeat steps 6 and 7 around the snowflake, adding one crystal bead between each pair of arms until all 6 gaps are filled and you’re back where you started.
Step 9: Coil the Wire and Attach a Jump Ring

Pull the working wire snug, then coil it 3 or 4 times around the nearest section of wire on the snowflake itself and trim the extra with scissors so no sharp tail is left sticking out. Open a jump ring (see our guide to making your own jump rings if you don’t have any on hand) and hook it through one of the outer beads so you have somewhere to hang the finished piece.
Share it in "I Made It" and let us cheer you on.
Post your finished make in "I Made It" so the community can celebrate it with you. Cheer on other makers too. Each month, the most loved craft wins 1 year of Craftaholic Premium ($59)
Tips for Beaded Snowflake Ornaments
- Use round beads over faceted ones for a smoother, more even snowflake, and size your crystal bead so it just fills the gap between two arms.
- No wire on hand? Clear plastic beading thread works too, though 18 to 20 gauge memory wire holds the arms’ shape best if you want the snowflake to keep its form on its own.
- Once the season’s over, restring 3 or 4 finished snowflakes into a beaded necklace instead of packing them all away.
- Store finished snowflakes flat in a shallow tin lined with tissue paper so the arms don’t get bent out of shape between Christmases.

Frequently Asked Questions
How long does it take to make one beaded snowflake ornament?
Once you’ve made your first one, a beaded snowflake ornament takes about 30 to 40 minutes from cutting the wire to attaching the jump ring. Your very first one will likely take longer while you get used to twisting the wire tightly enough to hold its shape.
Can I make a bigger beaded snowflake for a tree topper?
Yes, cut a longer starting wire (around 36 inches instead of 24) and thread larger beads for the ring and arms so the whole piece grows proportionally. Switching to 20-gauge wire instead of 26-gauge also helps a tree-topper-sized snowflake hold its shape under the extra weight of the bigger beads.
Can I use plastic or acrylic beads instead of glass crystal beads?
Yes, and it’s a good swap if the ornament will hang somewhere kids or pets can reach it. Acrylic beads won’t catch the light quite as sharply as faceted glass crystal beads, but they’re lighter, cheaper, and won’t shatter if the ornament gets knocked off the tree.
Is this a good first beading project, or should I have experience first?
It’s a reasonable first wire-and-bead project, though the twisting in step 2 is the one part that takes a little practice to get tight. If you’ve never worked with craft wire before, expect your first snowflake to look a little looser than the ones in the photos, and it’ll tighten up by the second or third try.
How is a beaded snowflake different from a paper or origami snowflake?
A beaded snowflake is a permanent, reusable piece made from wire and beads, so it goes back in the ornament box year after year or gets restrung as jewelry, while a paper snowflake is a one-season decoration that creases and tears with handling. The beaded version costs a little more upfront but survives storage far better.
More Jewelry Making Tutorials
Share your beaded snowflake ornament in the I Made It space inside Craftaholic Community. The most-loved post each month wins a one year free Premium membership.
0 Comments
Join the conversation
Log in to your Craftaholic Community account to comment, ask questions, and cheer on fellow makers.
Log in to comment