

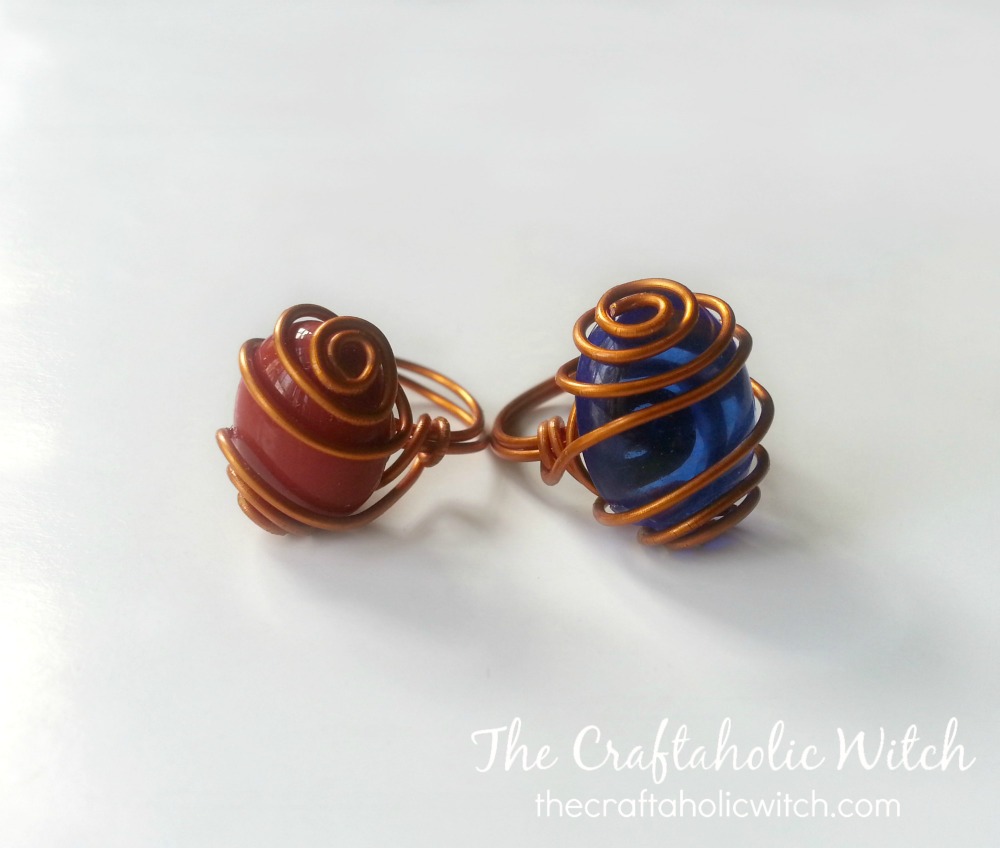
That little dish of tumbled stones and odd beads you never used? One of them is about to become a ring you actually wear. A caged gemstone ring holds the stone inside a hand-shaped wire cage, so there is no glue, no soldering, and no drilled holes anywhere in it.
I reach for this one when I want a finished piece fast. You need about 20 inches of 18-gauge wire, one flat-backed stone, and roughly 30 minutes. If you have wrapped a bead before you are already ahead, and if you have not, this is a gentle place to start. It uses the same no-solder approach as my beaded wire ring, just built around a single stone instead of beads.
By the end you have a one-of-a-kind ring to keep, stack with others, or wrap up as a gift, made from a stone that was otherwise sitting in a drawer.
Caged Gemstone Ring at a Glance
- Difficulty: Beginner
- Time: 20-30 minutes
- Cost: Under $5
- Ages: 12 and up
- Best for: Using up leftover stones and beads
Join Craft Challenge: Craft Your Calm
Make something that brings you a sense of peace, share a photo, and tell us your story. It's free to enter, open to everyone, and the entry with the most reactions takes home a $100 gift card. Takes five minutes to join.
Entries close August 30, 2026. No purchase necessary.
What You Need to Make a Caged Gemstone Ring
This is a two-material project, so the details matter. Here is exactly what to reach for and why.
Materials
- 18-gauge craft wire, at least 20 inches. This gauge holds the stone and keeps the band from bending out of shape, yet it is still soft enough to swirl by hand. Copper or aluminum craft wire is easiest to work with, so save silver-plated wire for once you have the technique down. Cut it long, since you coil from the middle outward and it goes fast.
- An oval, flat-backed gemstone. A flat or slightly domed back lets the stone sit level on the base instead of rolling. Tumbled stones, cabochons, and leftover flat-backed beads all work. Skip perfectly round or glassy stones for your first try, since the cage has less to grip.
Tools
- Flat nose pliers. You need these to press the base flat and to tuck the cut wire ends so they do not scratch your finger. Round nose pliers are optional, but they help if you want tidier swirls.
- A ring mandrel. This shapes the band to a true ring size. No mandrel? A thick marker, a wooden dowel, or a lip balm tube in the right diameter all stand in fine.
Ask inside "Crafty Q&A" while you are making.
"Crafty Q&A" is free to join. Share your question, photo, or the exact step where you got stuck, and chat with other makers plus the Craftaholic Witch team. You can also join any discussion thread already happening inside the space.
How to Make a Caged Gemstone Ring, Step by Step
Step 1: Coil the Wire Around the Mandrel to Form the Band
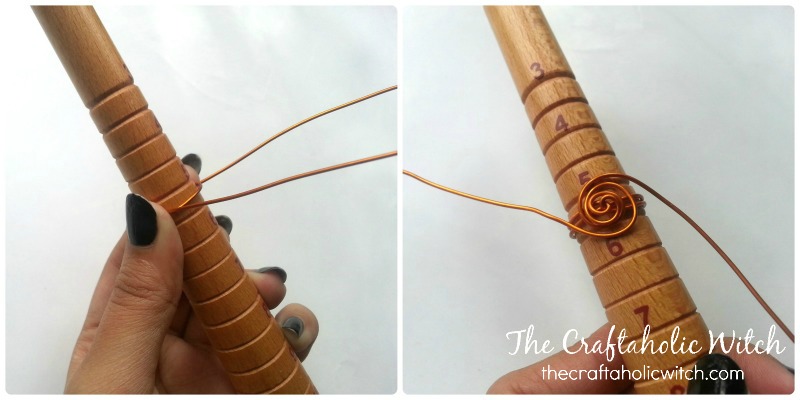
Find the center of your 20-inch wire and wrap it around the mandrel twice, positioning it one size larger than your finished ring size. Keep an equal length of wire on each side of the center.
Now coil each tail counter-clockwise around the band a couple of times to build a small base at the top. You will see a neat wrapped band forming with two wire tails pointing up from the same spot.
Tip: Wrap one size larger than you want. Caging the stone pulls the band in slightly, so a size 8 band settles closer to a size 7.
Step 2: Flatten the Base and Wrap the Band to Lock It
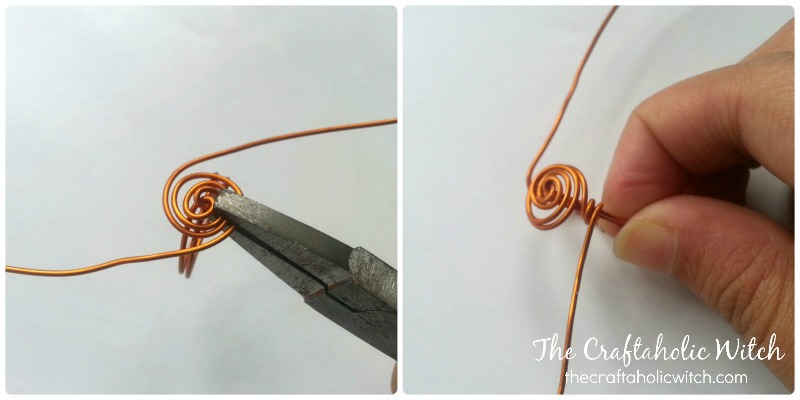
Press the coiled base flat with your flat nose pliers so the stone has a level platform to rest on. A flat base is what keeps the stone from tipping later.
Then coil each wire two to three times around the ring band on both sides of the base. When the band feels firm and no longer slides on the mandrel, it is locked in.
Step 3: Set the Stone on the Base and Hold It in Place
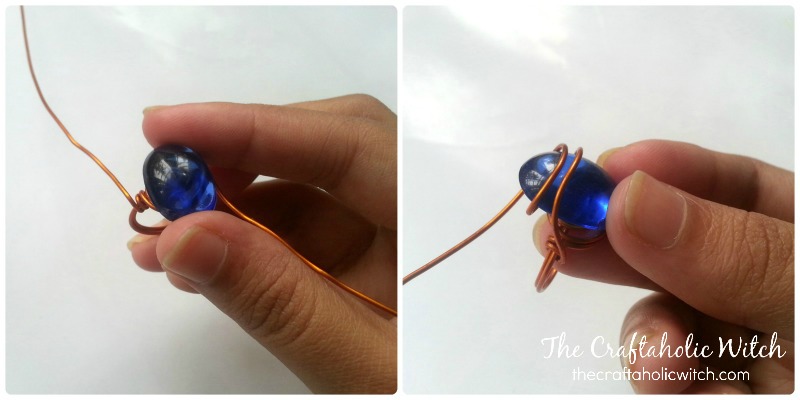
Place your oval stone flat-side down on the base and hold it firmly with one hand. The two wire tails should sit on opposite sides of the stone, ready to cross over the top.
Keep steady pressure here. The stone should not shift while you make the first wraps in the next step.
Step 4: Cage the Stone by Wrapping From the Middle
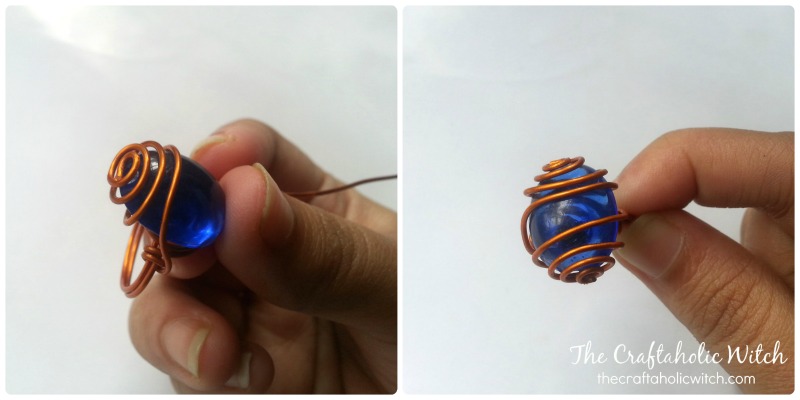
Bring one wire tail up and across the middle of the stone, then wrap it around two to three times to start building the cage. Work from the middle out so the stone stays centered.
Keep the wire snug against the stone, but not so tight that it covers the gem. You want the stone held and still visible.
Warning: If the stone slips out, you are wrapping too high or too loose. Cross the wire over the widest part of the stone and add one more wrap before moving on.
Step 5: Add the Swirls and Trim the Excess Wire
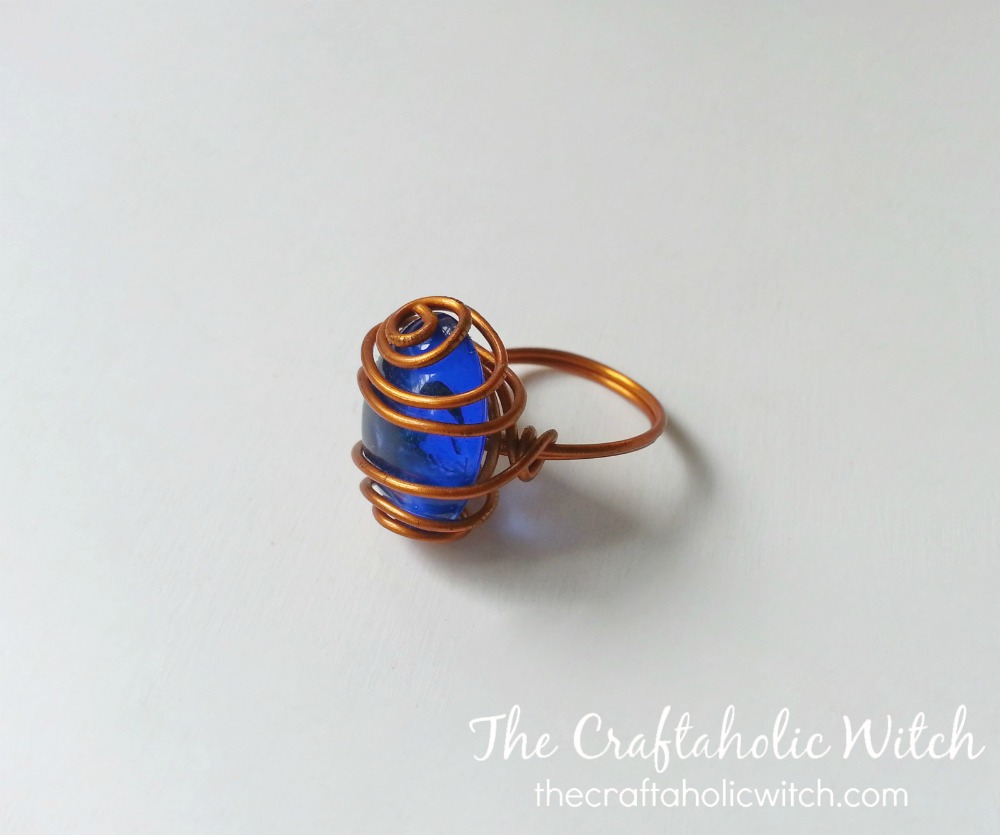
Curl the leftover wire into loose swirls across the stone and along the band, the same move as my swirly wire charms. Loose swirls look intentional and pretty, while tight ones look cramped, so give them room.
Trim the excess wire and tuck the cut end down against the band with your pliers so it will not scratch. Repeat the wrap and swirl on the other side, and your ring is done.
Note: Run a fingertip around the inside of the band. If you feel any sharp end, press it flat before you wear it.
Share it in "I Made It" and let us cheer you on.
Post your finished make in "I Made It" so the community can celebrate it with you. Cheer on other makers too. Each month, the most loved craft wins 1 year of Craftaholic Premium ($59)
Tips for a Cleaner Wire Wrapped Ring
- Match the wire to the stone. A heavier stone needs the firm 18-gauge cage. For a small, light stone you can drop to 20 gauge for finer swirls that still hold.
- Work-harden the band. Once it is wrapped, gently roll the band on the mandrel or press it with pliers. This stiffens soft wire so the ring keeps its shape with everyday wear.
- Try a cluster. Swap the single stone for two or three small stones set in a row, then cage and swirl them together for a chunkier statement ring using the same steps.
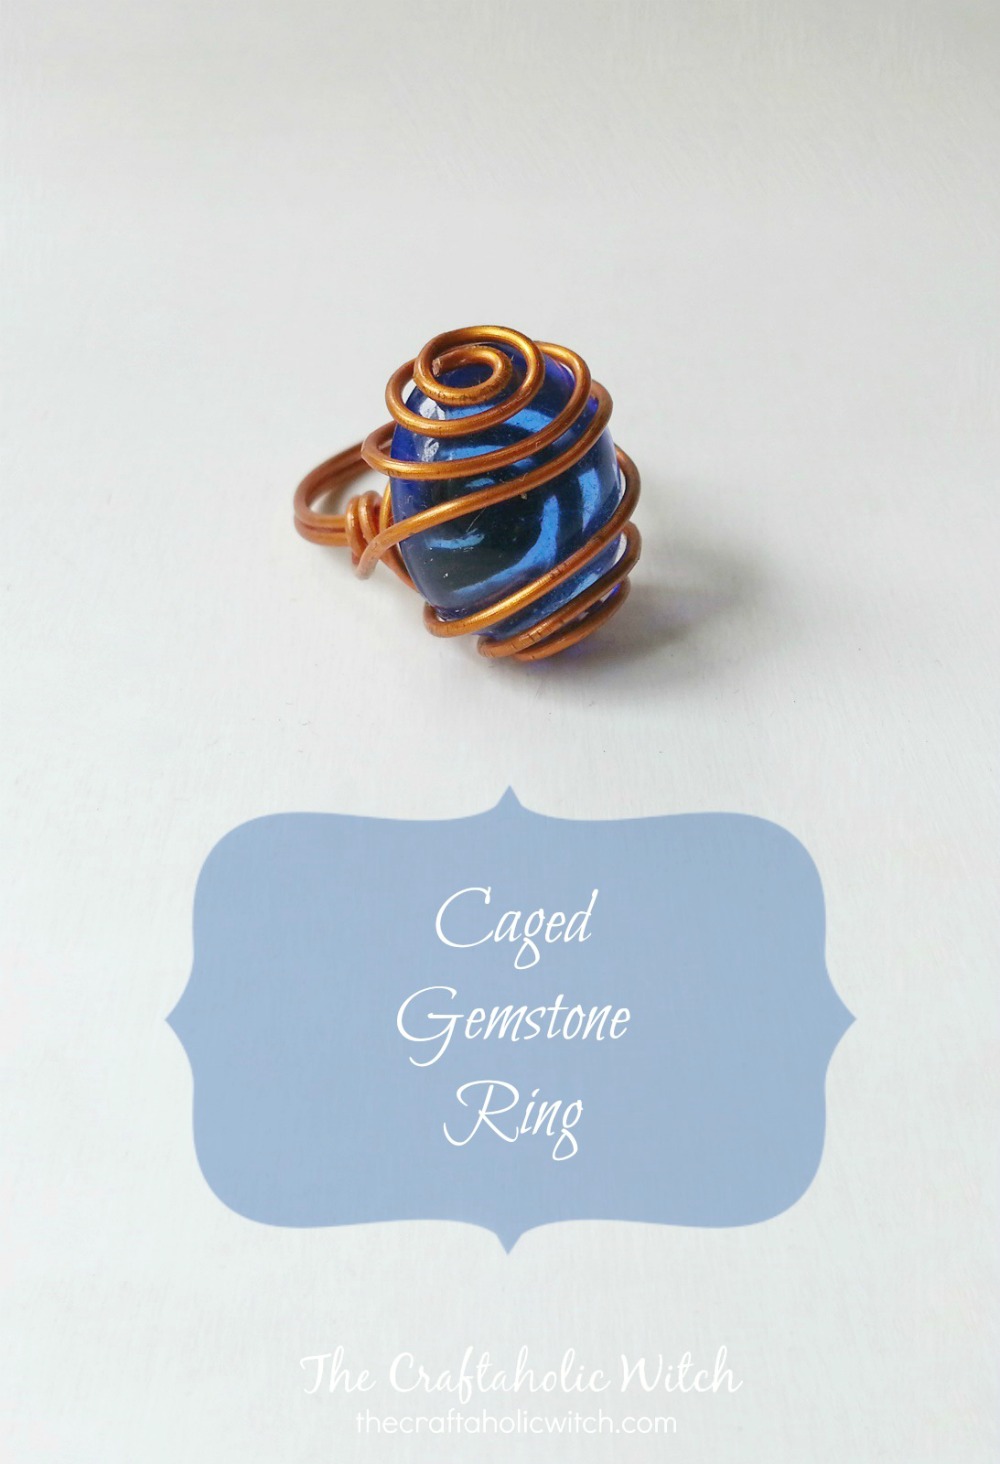
Caged Gemstone Ring FAQ
What gauge wire is best for a caged gemstone ring?
Use 18-gauge craft wire for this ring. It is firm enough to hold the stone securely and keep the band its shape, but still soft enough to bend and swirl by hand. Thinner wire like 20 or 22 gauge works for delicate swirls but will not hold a heavier stone as well.
What kind of stone works for a wire wrapped ring?
An oval stone with a flat or gently domed back works best because it sits steadily on the coiled base. Tumbled stones, cabochons, and leftover beads with a flat side all work. Avoid perfectly round or slippery stones, since the wire cage has less to grip and the stone can slide out.
My wire keeps slipping off the stone. How do I keep the cage tight?
Hold the stone down firmly against the base while you wrap, and start your first wrap across the widest part of the stone. Make two or three full wraps before adding swirls so the cage has enough contact to grip. If it still slips, add one more crossing wire over the top to lock it in place.
Do I need a ring mandrel, or can I use something at home?
You do not need a proper mandrel. A thick marker, a wooden dowel, or a lip balm tube in the right diameter all work to shape the band. Just match the object to one size larger than your finished ring size, since the wrapping tightens the band slightly.
How do I make the ring the right size?
Wrap the band one full size larger than the size you want, because coiling and caging the wire pulls the band in a little. If the finished ring is too big, gently squeeze the band with pliers, and if it is too small, roll it back on the mandrel to open it up.
More Jewelry Tutorials to Try
- How to Make Jump Rings for Jewelry
- How to Make a Colorful Gemstone Necklace
- How to Make Hoop Earrings with Beads
- How to Make a Hand Chain
Share your caged gemstone ring in the I Made It space inside Craftaholic Community. The most-loved post each month wins a one year free Premium membership.
0 Comments
Join the conversation
Log in to your Craftaholic Community account to comment, ask questions, and cheer on fellow makers.
Log in to comment