

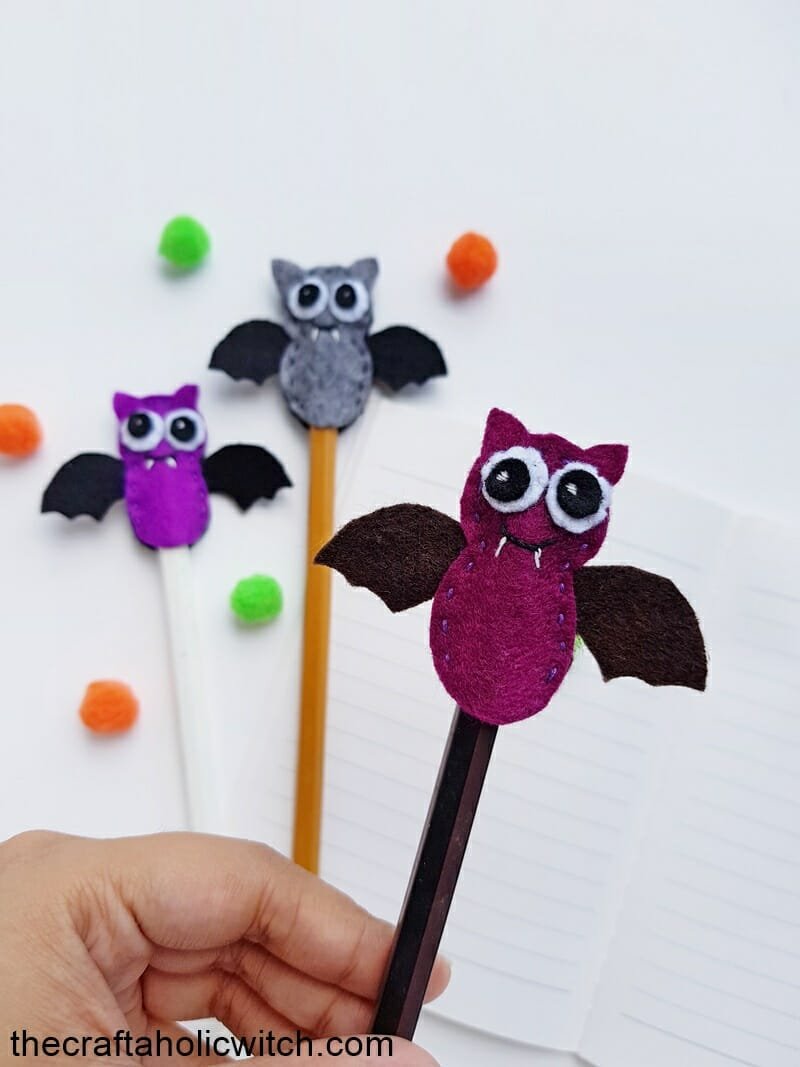
Nothing says Halloween like a bat. Every year when I start planning Halloween crafts, bats are the first thing that come to mind. These felt bat pencil toppers are the kind of thing I hand out to trick-or-treaters along with the candy, or a teacher can stitch up a batch for the whole class.
Each one gets its shape from two-tone felt: dark wings, a lighter body, tiny white fangs, and stitched eyes. It costs under $5 in felt scraps, and you can hand-stitch one in about 15 to 20 minutes without a sewing machine.
This is one of our DIY pencil topper tutorials, right alongside a matching Felt Monster Pencil Topper if your kid wants a grin instead of fangs. Both connect back to our plushie and felt sewing tutorials if you’re after more quick felt projects.
Felt Bat Pencil Toppers at a Glance
- Difficulty: Beginner
- Time: 15 to 20 minutes
- Cost: Under $5 in felt scraps
- Ages: 6 and up, with adult help for stitching
- Best for: Halloween goody bags and classroom treats
Join Craft Challenge: Craft Your Calm
Make something that brings you a sense of peace, share a photo, and tell us your story. It's free to enter, open to everyone, and the entry with the most reactions takes home a $100 gift card. Takes five minutes to join.
Entries close August 30, 2026. No purchase necessary.
What You Need to Make Felt Bat Pencil Toppers
Materials
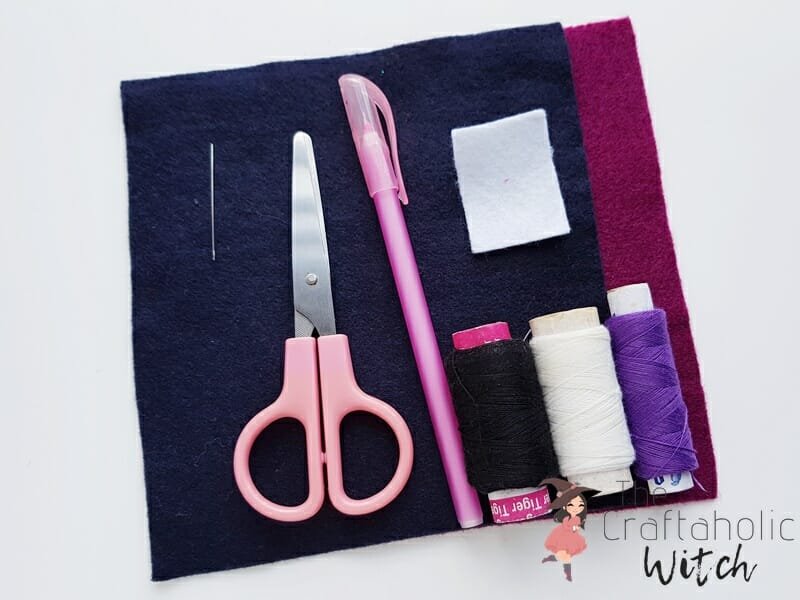
- Felt fabric in a dark color (black or burgundy) for the wings and body, plus small black and white scraps for the eyes. The dark shade is what gives the bat its silhouette.
- Matching thread in black and your body color, for the eyes, mouth, and the seam that closes the topper.
Tools
- Fabric marker, for tracing the wing, body, and eye pieces.
- A hand-sewing needle.
- Small sharp scissors, for cutting the pointed wing tips cleanly.
Ask inside "Crafty Q&A" while you are making.
"Crafty Q&A" is free to join. Share your question, photo, or the exact step where you got stuck, and chat with other makers plus the Craftaholic Witch team. You can also join any discussion thread already happening inside the space.
How to Make Felt Bat Pencil Toppers
Step 1: Cut the Felt Pieces
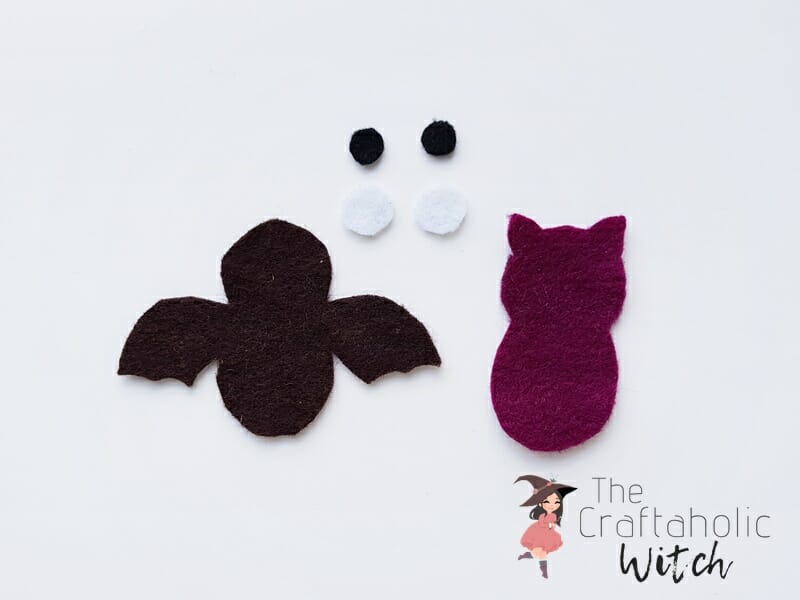
Pick two felt colors for this one. I like black for the wings and burgundy for the front body, with small black and white scraps for the eyes. Trace the template pieces onto your chosen felts and cut them out with small sharp scissors so the pointed wing tips stay crisp instead of rounding off.
Step 2: Position the Eyes

Stack a small black circle on a bigger white circle and set the pair near the top of the front body piece, right where the bat’s head will be. Thread your needle before you line everything up so you’re not fumbling with it once the pieces are in place.
Step 3: Stitch the Eyes in Place
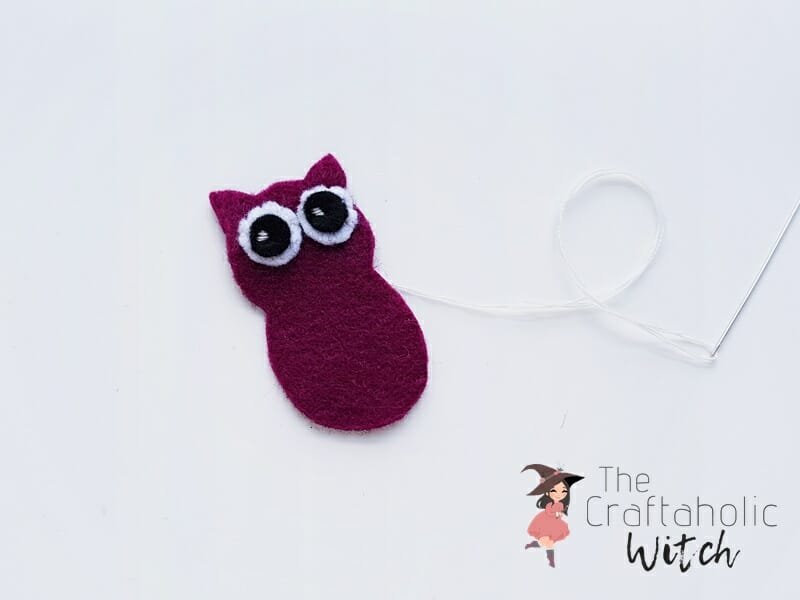
Stitch around the edges of both eye circles to secure them to the front body piece. A simple stitch straight around each circle is all it takes here, nothing fancier.
Step 4: Add the Mouth and Fangs
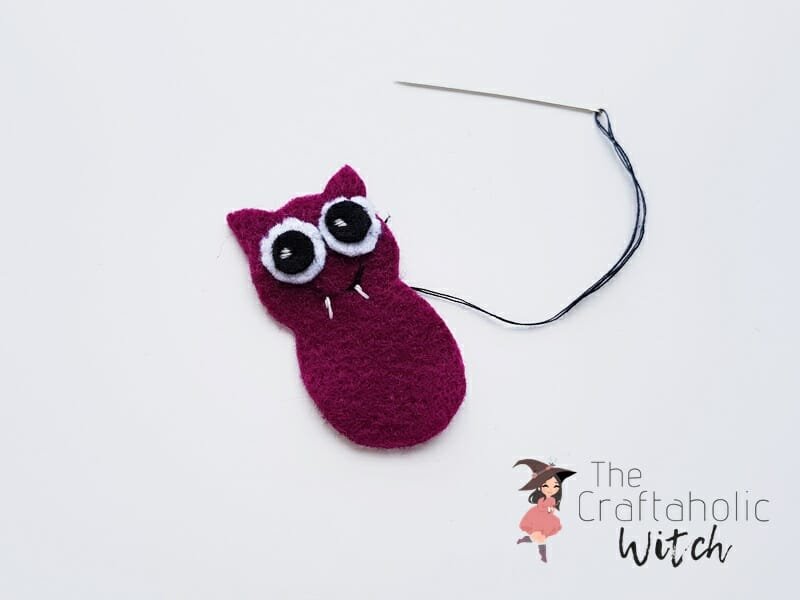
Below the eyes, stitch a black mouth line, then add two small white fangs hanging from it. This is the detail that makes the face read as a bat from across a classroom, so take your time getting the fangs even.
Step 5: Lay Out the Wings
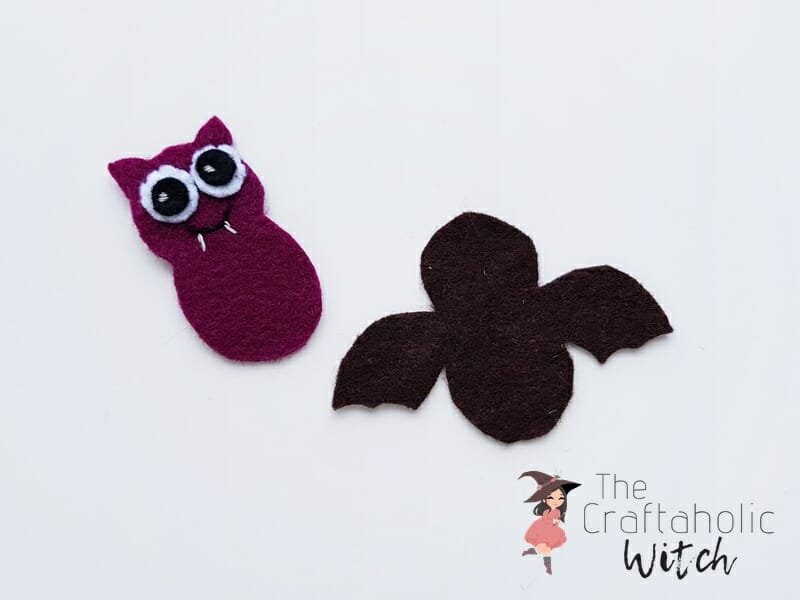
Once you’re happy with the front face, set the wings piece flat on your work surface. This is what the front body sits on top of in the next step.
Step 6: Stitch the Body to the Wings
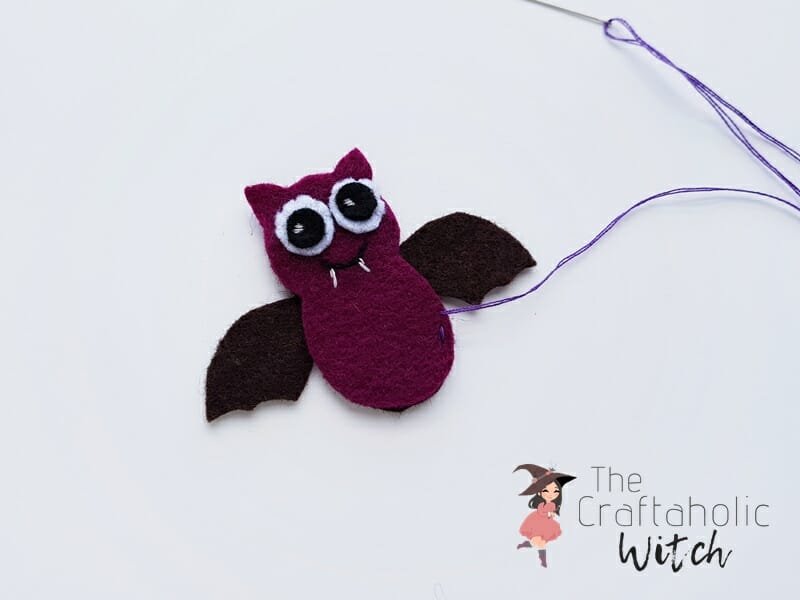
Center the front body piece on the wings and thread your needle with a color that matches it. Start stitching from one side and work up toward the top, tacking the body down as you go.
Step 7: Finish Stitching, Leaving a Gap for the Pencil
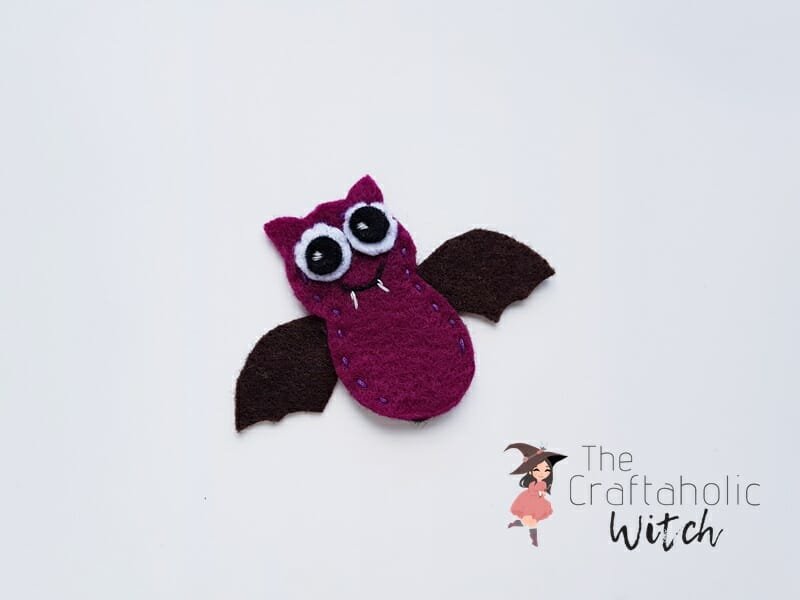
Continue stitching all the way around from the top to the other side, but stop a small gap short at the bottom. That opening is what lets a pencil slide inside once it’s finished. Tie off with a knot or two and trim the extra thread.
Step 8: Make a Few More
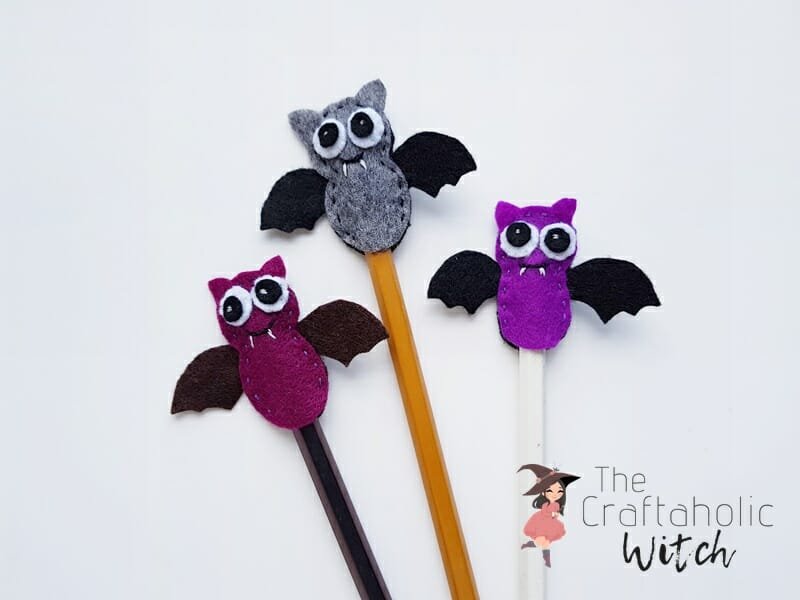
Grab a few more colors of felt and repeat the process. A little colony of bats looks great lined up on a desk.
Share it in "I Made It" and let us cheer you on.
Post your finished make in "I Made It" so the community can celebrate it with you. Cheer on other makers too. Each month, the most loved craft wins 1 year of Craftaholic Premium ($59)
Tips for Felt Bat Pencil Toppers
- Cut a few color pairs of wings and bodies before you start sewing, so you can batch several bats in one sitting.
- Trim the wing tips as sharp as your scissors allow. Pointed tips are what read as a bat instead of a blob from across the room.
- Pin or clip the wings in place between the two body layers before you start stitching, so they don’t shift while you sew.
- Want a bigger, stuffed version instead of a topper? My bat plush pattern uses the same basic shapes at a larger, stuffable scale.
Frequently Asked Questions
Do I need a sewing machine to make a felt bat pencil topper?
No. Every seam here is hand-stitched with a basic running stitch or blanket stitch, and if you’d rather skip the needle entirely, fabric glue holds felt together just as well for a no-sew version.
What can I use instead of felt for the wings?
Craft foam is the closest substitute if you’re out of felt, though the wing tips won’t hold as sharp a point. Felt is worth sticking with when you can, since it cuts clean and doesn’t fray at the edges.
How long does it take to make one bat pencil topper?
Once your pieces are cut, stitching one together takes about 15 to 20 minutes. The first one takes a little longer while you get used to the shape, and each one after that goes faster.
Will the pencil topper fit a thicker marker or pen?
Yes, felt has enough stretch to fit most standard pencils, pens, and slim markers. For anything noticeably thicker, leave a slightly wider gap open at the bottom when you finish the seam.
How do I keep the wings from getting bent or creased?
Store finished toppers in a pencil case rather than loose in a bag or drawer. Felt holds its shape well on its own, but the thin wing tips can crease if something heavy sits on top of them.
Can I make this without a printable template?
Yes. Use the step photos as your guide for size and shape and freehand the wings, body, and eye circles straight onto the felt, the proportions don’t need to be exact for the topper to work. If you’d rather skip fabric altogether, our flapping paper bat tutorial makes a similar shape out of cardstock instead.
More Pencil Topper Tutorials
Share your finished bat pencil topper in the I Made It space inside Craftaholic Community. The most-loved post each month wins a one year free Premium membership.
0 Comments
Join the conversation
Log in to your Craftaholic Community account to comment, ask questions, and cheer on fellow makers.
Log in to comment