

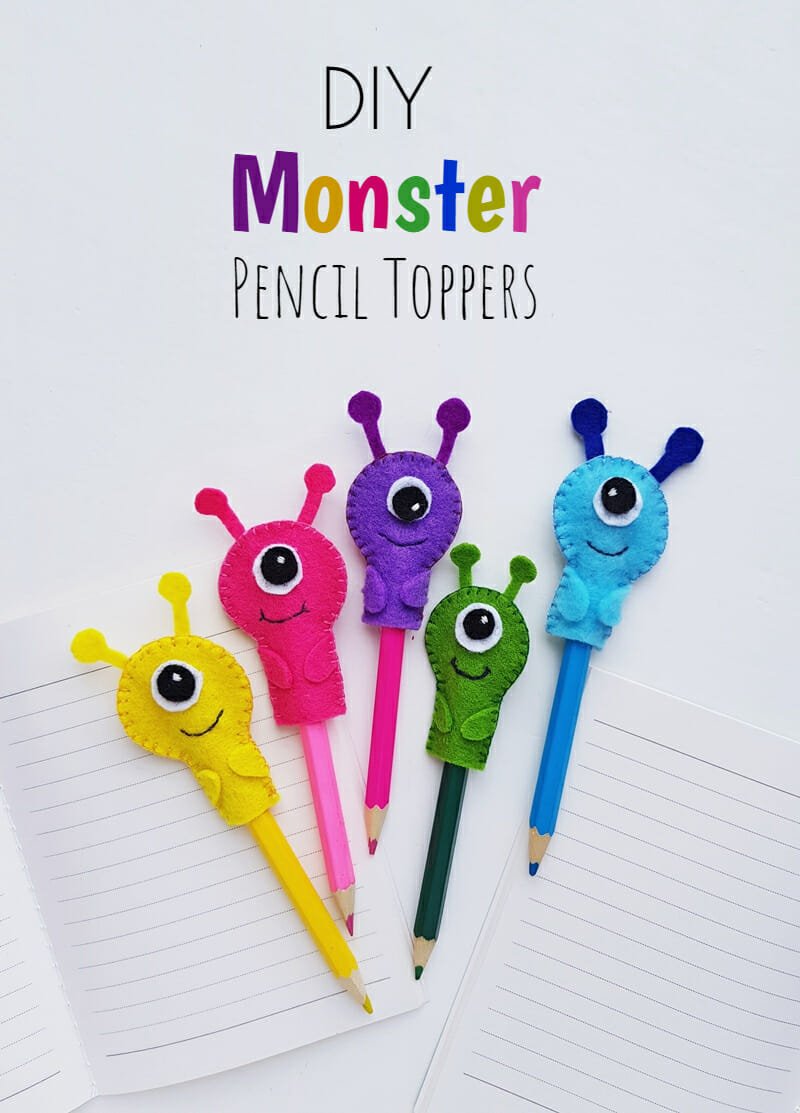
Kids aren’t scared of monsters the way we were as kids. Now they’re just funny, big-eyed, the kind of thing they’d actually bring to school. This felt monster pencil topper is exactly that: a stitched eye, a curved grin, two floppy antennas, under $5 in felt scraps and about 15 to 20 minutes of hand-sewing.
It’s a genuinely good Halloween craft to make together. Kids can handle the cutting and gluing themselves, and what they end up with is something they’ll want to show off at school, not just something Mom made.
This is one of our DIY pencil topper tutorials, right alongside a matching Felt Bat Pencil Topper if your kid wants fangs instead of a grin. Once you’re both hooked on felt, our plushie and felt sewing tutorials have plenty more quick projects to work through together.
Monster Pencil Toppers at a Glance
- Difficulty: Beginner
- Time: 15 to 20 minutes
- Cost: Under $5 in felt scraps
- Ages: 6 and up, with adult help for stitching
- Best for: Halloween goody bags and classroom treats
Join Craft Challenge: Craft Your Calm
Make something that brings you a sense of peace, share a photo, and tell us your story. It's free to enter, open to everyone, and the entry with the most reactions takes home a $100 gift card. Takes five minutes to join.
Entries close August 30, 2026. No purchase necessary.
What You Need to Make Monster Pencil Toppers
Materials
- Felt fabric in yellow or any color you like for the body, plus small black and white scraps for the eye. Felt holds its shape at the cut edges without fraying, so there’s no hemming to worry about.
- Matching sewing thread in black and white, for the eye details and the seam that closes the topper.
Tools
- Fabric marker or pencil, for tracing the template pieces before you cut.
- Small sharp scissors, for clean edges around the narrow antennas and hands.
- A hand-sewing needle. Any standard size works fine on felt this thick.
Free Monster Pencil Topper Template
Grab the free template from our Craftaholic Community before you start cutting. It includes all six pattern pieces: two bases, two hands, two antennas, and the two eye circles.
Ask inside "Crafty Q&A" while you are making.
"Crafty Q&A" is free to join. Share your question, photo, or the exact step where you got stuck, and chat with other makers plus the Craftaholic Witch team. You can also join any discussion thread already happening inside the space.
How to Make Monster Pencil Toppers
Step 1: Cut Out the Felt Pieces
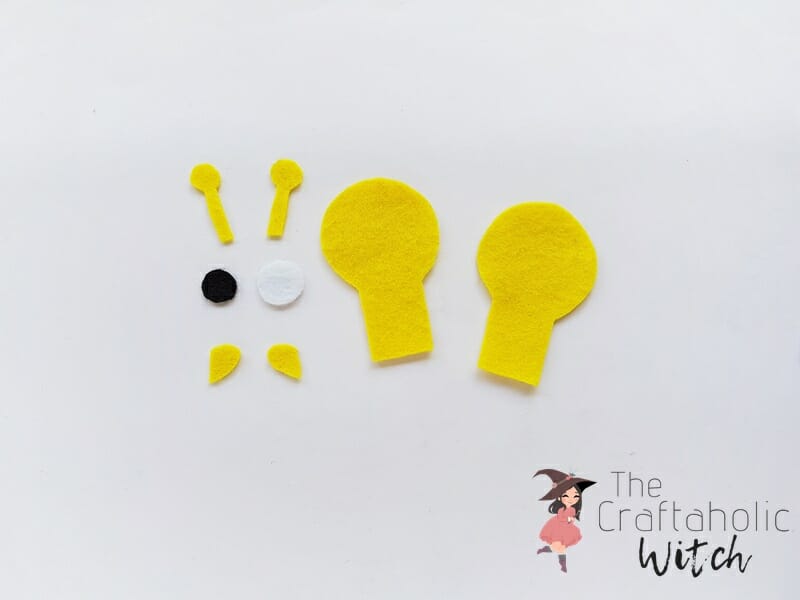
Pick felt in whatever color you want for the monster’s body, but keep the eye pieces to black and white so the pupil actually stands out against the face. Trace the template pieces onto your felt and cut two body bases, two hands, one small and one big circle for the eye, and two antennas.
The antennas are the fiddly part since they’re so narrow. Go slow and cut with just the tip of your scissors instead of trying to take the whole shape in one pass, or the point tends to round off.
Step 2: Stitch the Eye Onto One Base
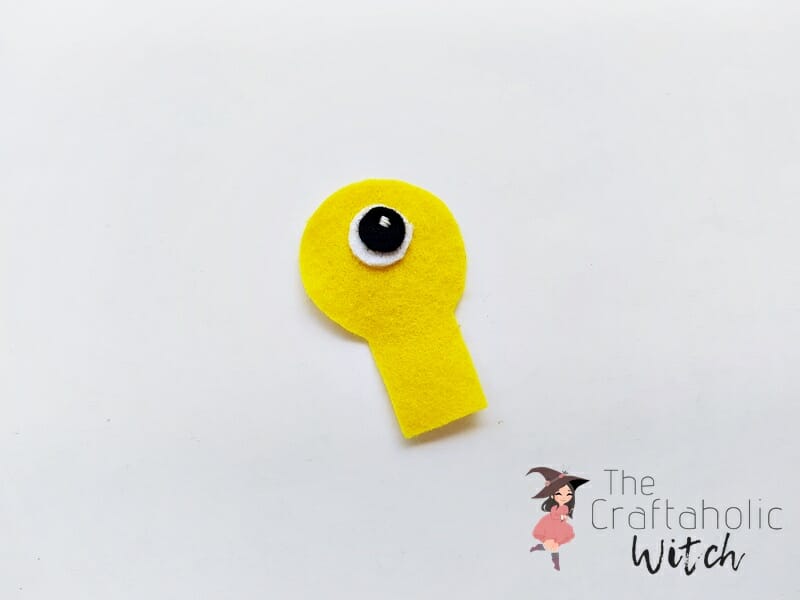
Center the small black circle on the big white circle, then set both on the rounded top of one base piece. This one becomes the monster’s front. Thread a needle with white and stitch the white circle down through all three layers first, then switch to black and stitch around the black circle the same way.
Set this piece aside as the front and leave the second base plain. It becomes the back.
Step 3: Add the Smile, Antennas, and Hands
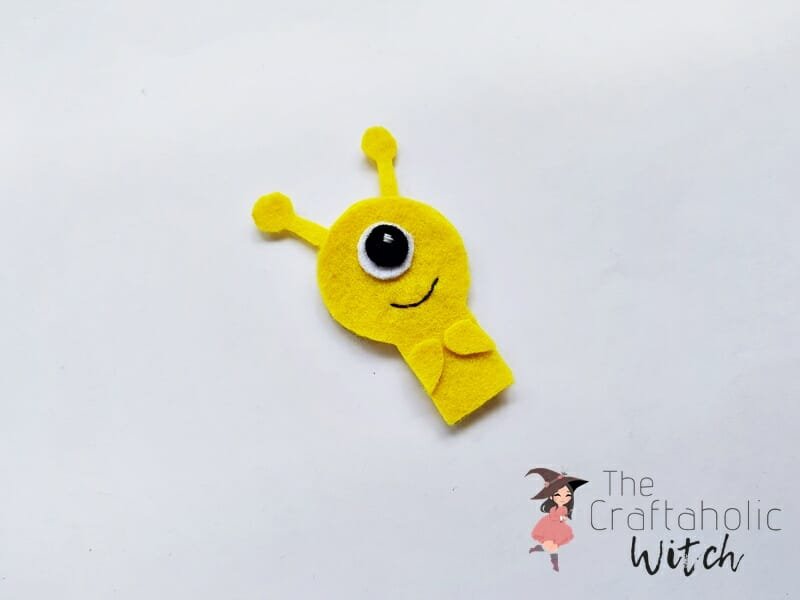
With black thread, stitch a small curved smile just below the eye on the front piece. Lay the plain back piece flat and place the two antennas along its top edge, overlapping the base by about a centimeter on each side so the seam catches them later.
Slide the straight edge of each hand piece along the sides of the front base, one hand per side, so they’re ready to be caught in the same seam.
Step 4: Layer the Front and Back Pieces
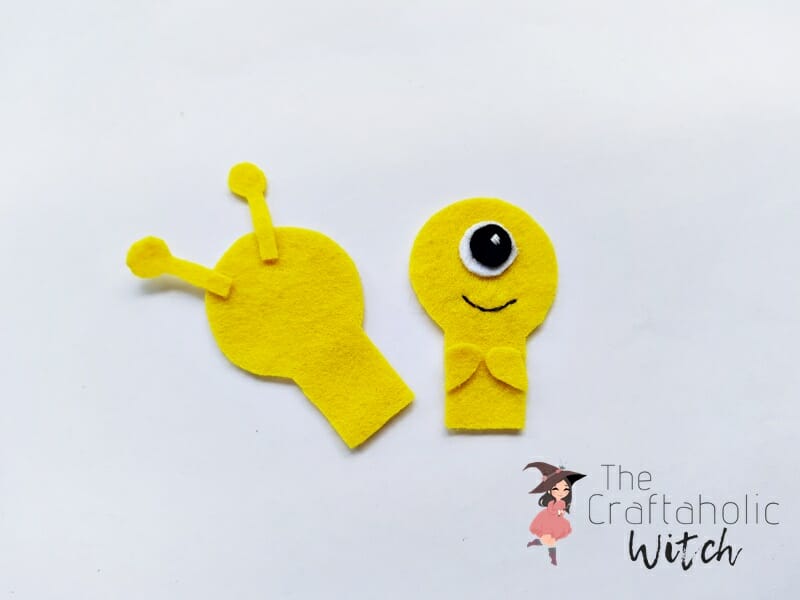
Stack the front piece, the one with the eye, smile, and hands, directly on top of the plain back piece, sandwiching the antennas between the two layers at the top. Line up the edges as closely as you can, since any gap here shows once you start stitching around the outside.
Thread a needle with a color that matches the felt so the seam blends in rather than standing out.
Step 5: Stitch Around the Edges
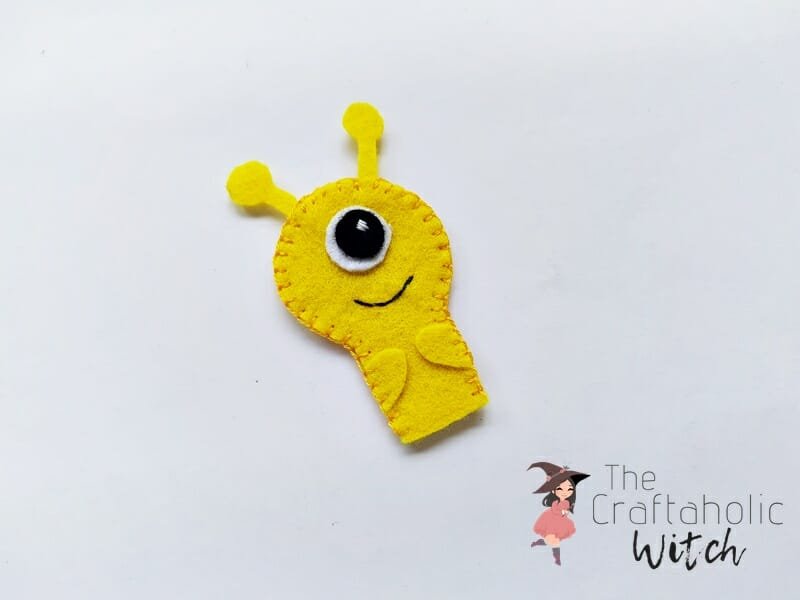
Work a blanket stitch, or whatever hand stitch you’re most comfortable with, around the sides of the two layered bases, leaving the bottom open so a pencil can slide in later. Start on one side, stitch up and over the top, then come back down the other. Finish with a couple of knots and trim the thread close to the felt.
Once it’s done, grab another color of felt and make a few more. A little crowd of monsters in different shades looks great lined up on a desk.
Share it in "I Made It" and let us cheer you on.
Post your finished make in "I Made It" so the community can celebrate it with you. Cheer on other makers too. Each month, the most loved craft wins 1 year of Craftaholic Premium ($59)
Tips for Monster Pencil Toppers
- Cut a few different felt colors’ worth of pieces before you sit down to sew, so you’re not stopping mid-project to trace and cut again.
- A small dot of fabric glue at the base of each antenna keeps it standing up if you want extra hold beyond the stitch.
- Make a whole batch in different color combinations for a Halloween classroom set. No two monsters end up looking quite the same.
- Want more spooky felt makes for Halloween? Browse 12 Spooky Felt and Plush Halloween Crafts for more patterns like this one.
Frequently Asked Questions
Do I need to know how to sew to make a felt monster pencil topper?
No. A basic running stitch or blanket stitch is all this pattern needs, and both are easy to pick up even if you’ve never sewn before. If you’d rather skip the needle, fabric glue holds felt together just as well for a no-sew version.
What can I use instead of felt?
Craft foam works if you’re out of felt, though it won’t fold or drape quite the same way around a pencil. Felt is worth sticking with when you can, it’s inexpensive and holds a stitch without fraying at the edges.
How long does it take to make one monster pencil topper?
Once the pieces are cut, stitching one together takes about 15 to 20 minutes. Cutting the template pieces the first time adds a bit more, but goes faster once you’ve made a few.
Will the pencil topper fit a thicker marker or pen?
Yes, felt has enough stretch to fit most standard pencils, pens, and slim markers. If you’re topping something noticeably thicker, leave a slightly wider gap open at the bottom when you stitch the final seam.
How do I keep the antennas from bending or getting crushed?
Store finished toppers in a pencil case instead of loose in a bag or drawer. Felt holds its shape well, but the thin antennas can crease if something heavy sits on top of them.
Can I make a monster pencil topper without felt or sewing?
You can trace a similar monster shape onto card stock or foam and glue the pieces together instead of stitching them. For more no-sew Halloween ideas, our 20 Easy Halloween Paper Crafts for Kids roundup has plenty of options that skip fabric entirely.
More Pencil Topper Tutorials
Share your finished monster pencil topper in the I Made It space inside Craftaholic Community. The most-loved post each month wins a one year free Premium membership.
0 Comments
Join the conversation
Log in to your Craftaholic Community account to comment, ask questions, and cheer on fellow makers.
Log in to comment