

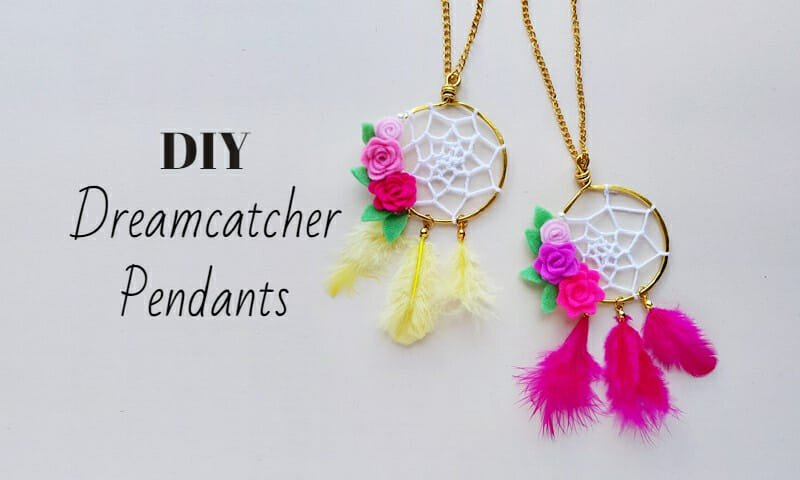
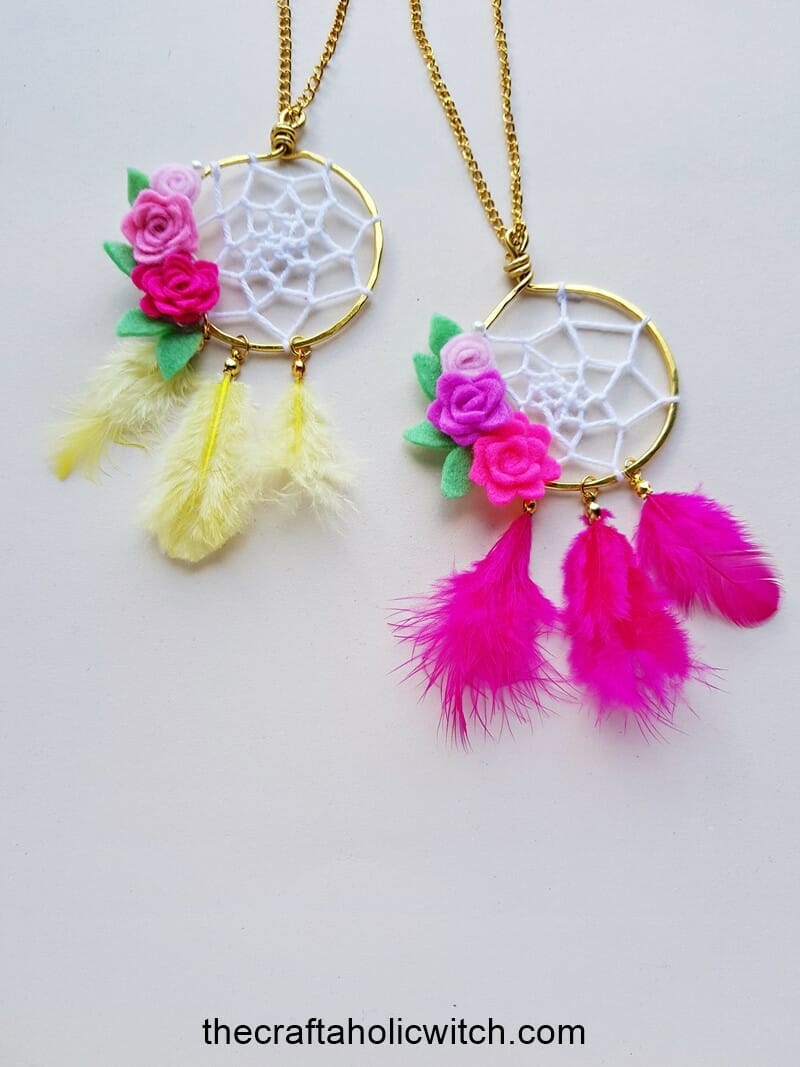
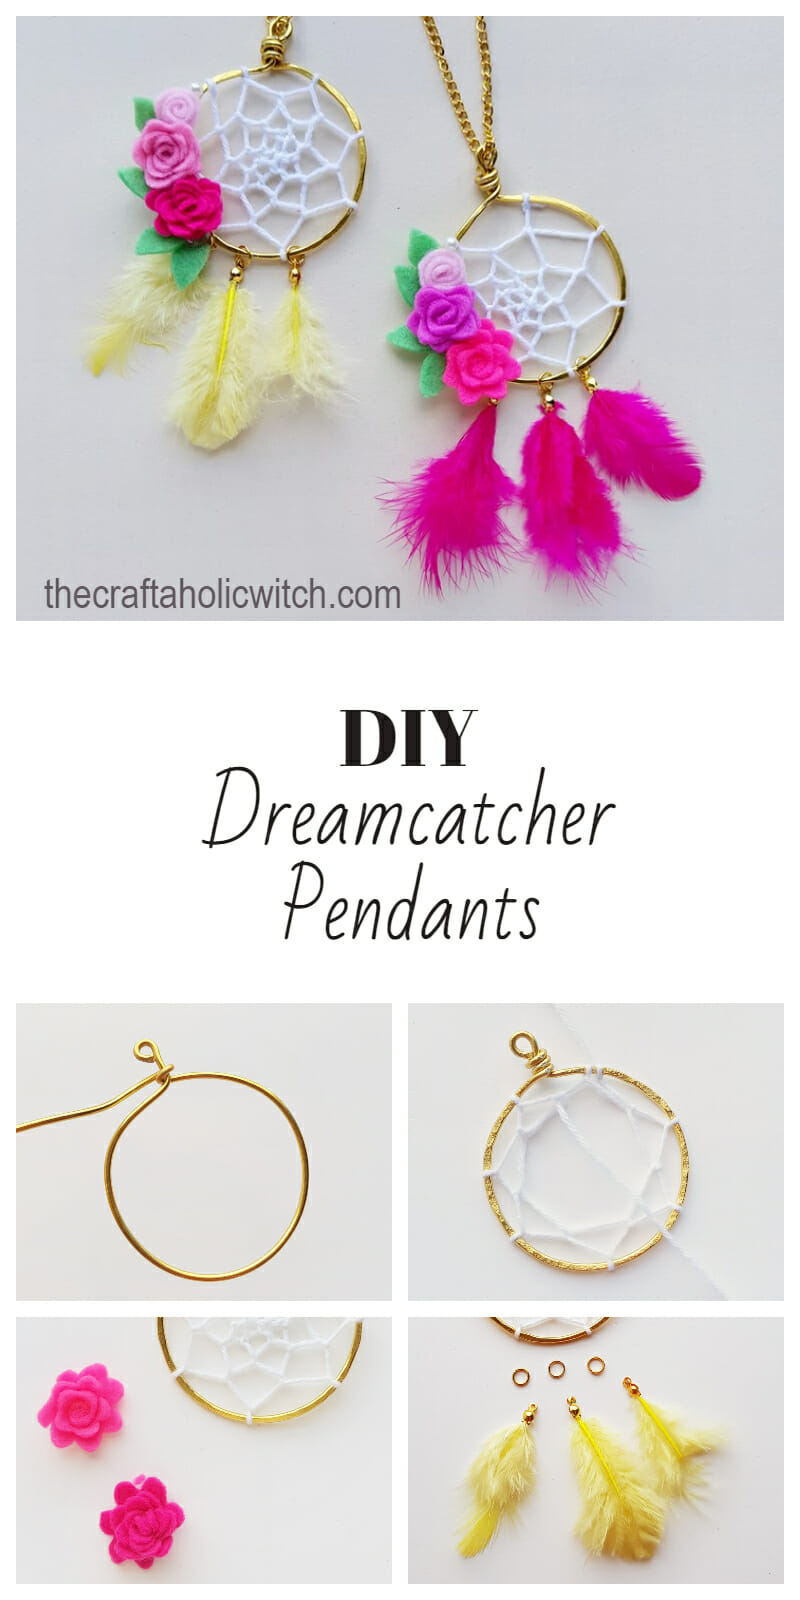
You can shape a coiled loop of gold craft wire into a DIY dreamcatcher pendant with a woven yarn web, rolled felt roses, and dangling feathers in about an hour, no soldering or drilling required.
This one sits at intermediate rather than beginner, mostly because of the yarn web. Once you get the hang of wrapping each spoke around the last one instead of the wire, it goes fast, but your first pendant usually takes a slow, patient hour: about 20 minutes to shape and hammer the wire base, 20 to 30 minutes to weave the web, and 15 to 20 minutes for the felt roses and feathers.
When it’s done, you get a lightweight, one-of-a-kind pendant you can hang from a chain or cord. I made mine in two color palettes, soft pink roses with yellow feathers and hot pink roses with matching feathers, and it’s an easy one to repeat as a gift or to add to your own jewelry making projects alongside our other necklace and pendant tutorials.
DIY Dreamcatcher Pendant at a Glance
- Difficulty: Intermediate
- Time: 45-75 minutes
- Cost: Under $5
- Ages: 10+ with adult help for the wire hammering and hot glue
- Best for: Gifting, boho jewelry fans, and practicing wire-wrapping and yarn-weaving skills
Join Craft Challenge: Craft Your Calm
Make something that brings you a sense of peace, share a photo, and tell us your story. It's free to enter, open to everyone, and the entry with the most reactions takes home a $100 gift card. Takes five minutes to join.
Entries close August 30, 2026. No purchase necessary.
What You Need to Make a Dreamcatcher Pendant
Materials
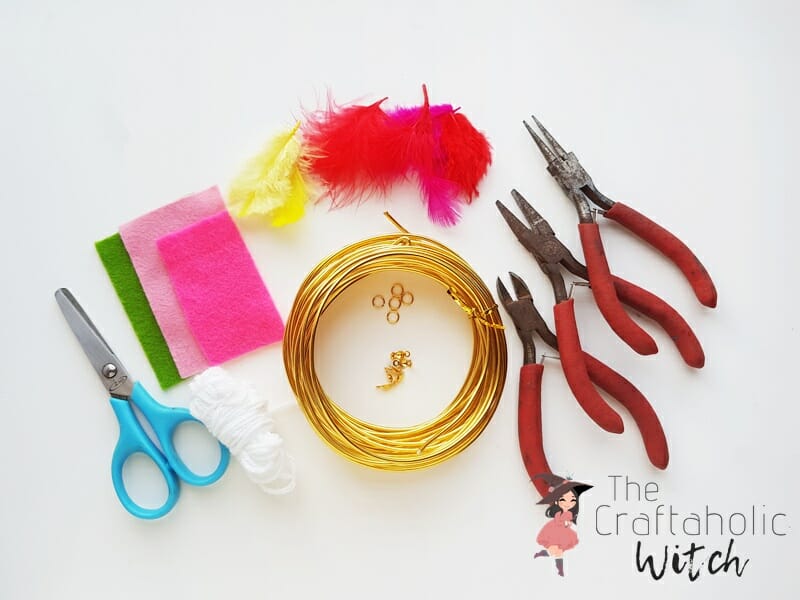
- 16-gauge craft wire (14-gauge works too if you want a heavier band) – forms the round base you’ll coil, hammer, and wrap the yarn around.
- Yarn, one or two colors – wrapped in layers to build the woven web; a smooth worsted-weight yarn wraps the most evenly, but any leftover yarn from your stash works.
- Felt fabric, 2-3 colors – rolled into little spiral roses and cut into leaves; wool-blend felt holds a tighter roll than thin acrylic craft felt.
- Jump rings – connect each feather’s bead tip to the finished wire band.
- Bead tips – cap the hollow shaft of each craft feather so it has a clean loop to hang from.
- Colorful craft feathers, a few – the dangling accents below the woven web; synthetic craft feathers hold their color and shape better than natural ones.
Tools
- Round-nose or looping pliers – shape the small starting loop and coil the wire ends without kinking them.
- Scissors – trim yarn ends, felt shapes, and excess wire cleanly.
- Jewelry hammer or a rubber mallet – flattens and textures the round wire band so it lies smooth and comfortable against your skin.
- Hot glue gun – secures the base of each rolled felt rose; swap in a needle and thread if you’d rather stitch it instead.
Ask inside "Crafty Q&A" while you are making.
"Crafty Q&A" is free to join. Share your question, photo, or the exact step where you got stuck, and chat with other makers plus the Craftaholic Witch team. You can also join any discussion thread already happening inside the space.
How to Make a Dreamcatcher Pendant
Step 1: Bend the Wire Into a Loop and Round Base
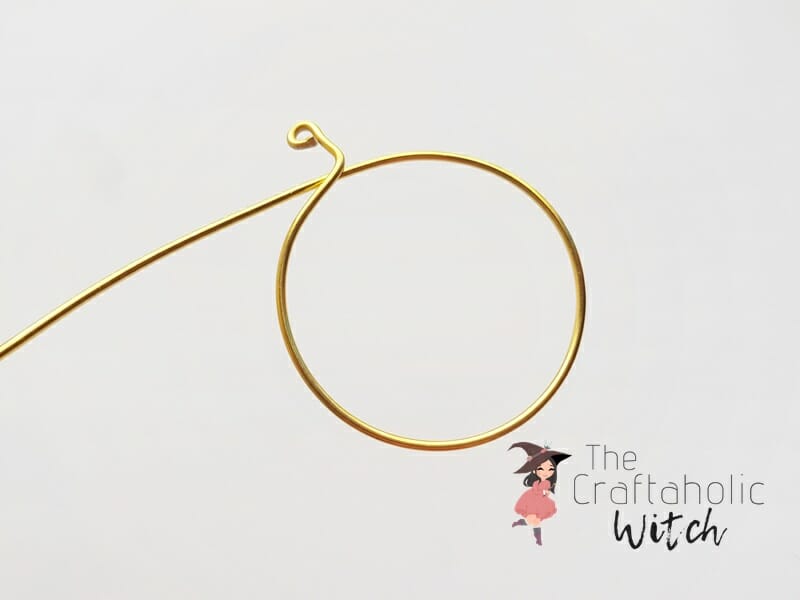
Hold a length of 16-gauge craft wire without cutting it from the spool yet. Use round-nose pliers to bend a small loop at the very end, leave about 1 cm of straight wire below it, then bend that 1 cm section to a 90-degree angle. From there, curve the rest of the wire into a round base, any size you like, keeping the loop and the bent tail free.
If you’ve never shaped a loop at the end of craft wire before, our wire-loop stud earring tutorial walks through the same basic bend on a smaller scale.
Step 2: Coil the Wire End to Lock the Base
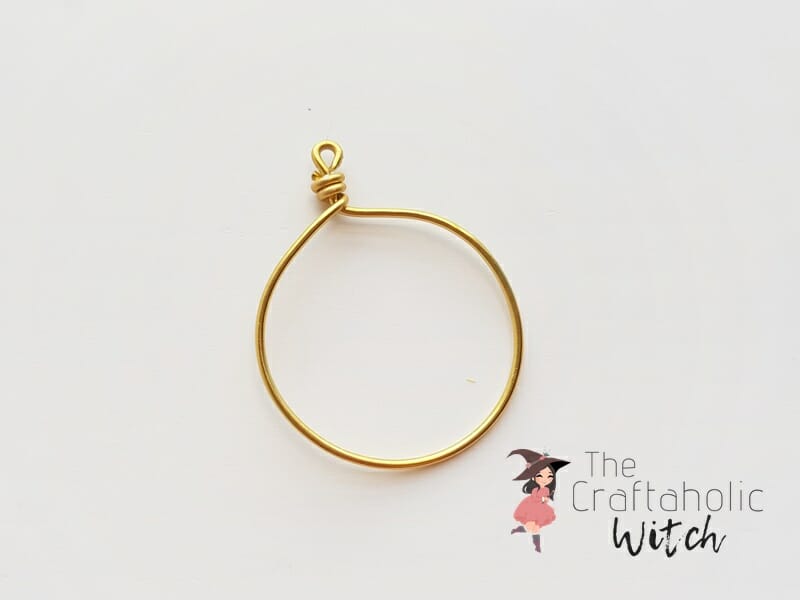
Once the base is round, wrap the open end of the wire around that 1 cm bent tail below the loop, coiling it a few times to lock the circle shut. Snip off whatever wire is left over from the spool. The coil doesn’t need to look neat, it just has to hold the loop firmly in place.
Step 3: Hammer the Band and Tie On the Yarn
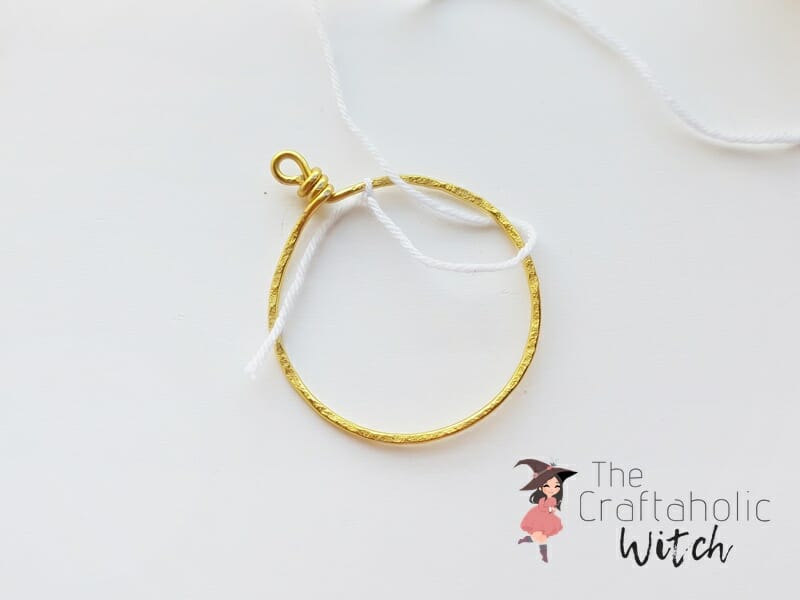
Hammer the round band lightly and evenly all the way around. This flattens and textures the wire so it catches the light and sits smoothly once it’s strung on a chain. Pick a yarn color for the web (white gives the most classic dreamcatcher look) and tie one end around the band, close to the loop and coil. Wrap it around the band once and pull the working thread through the loop that forms between the yarn and the wire, the same anchor knot used on a full-size dreamcatcher.
Step 4: Pull the First Wrap Tight
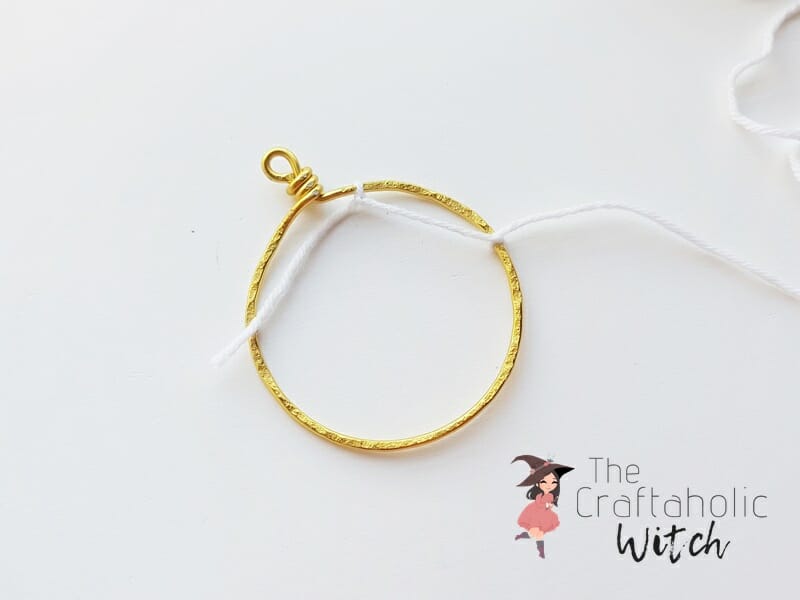
Pull the yarn snug against the band so this first wrap sits tight and doesn’t slide. A loose anchor knot here will work itself loose as you weave the rest of the web, so give it a firm tug before moving on.
Step 5: Keep Wrapping Around the Band
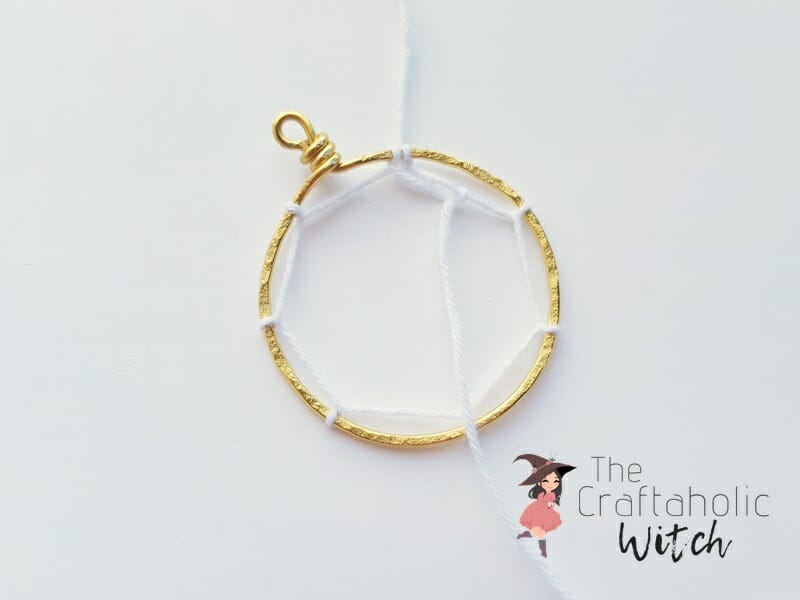
Carry the yarn across to a new point on the band, wrap it around once, and pull tight again. Repeat this all the way around, spacing each new anchor point evenly, until you’re back near your first knot. You’ll end up with a rough spoke pattern crossing the ring, which is the base the woven web builds on.
Step 6: Start the Second Layer of the Web

For the second round, stop wrapping around the wire band itself and start wrapping the yarn around the previous layer’s threads instead, at the point where two spokes cross. This is what pulls the pattern inward into a proper web instead of a flat wheel.
Step 7: Weave to the Center and Knot Off
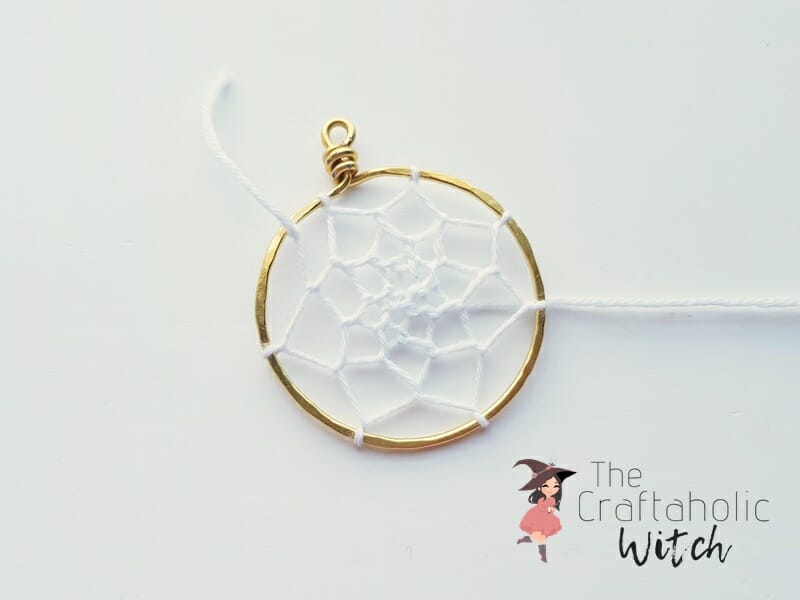
Keep repeating that same wrap at each crossing point, one ring closer to the center every pass. The gaps between threads shrink each time around. When the opening in the middle is down to a tiny hole, tie a tight knot and trim the extra yarn close to the knot so it doesn’t show.
Step 8: Roll Felt Roses and Cut Leaves
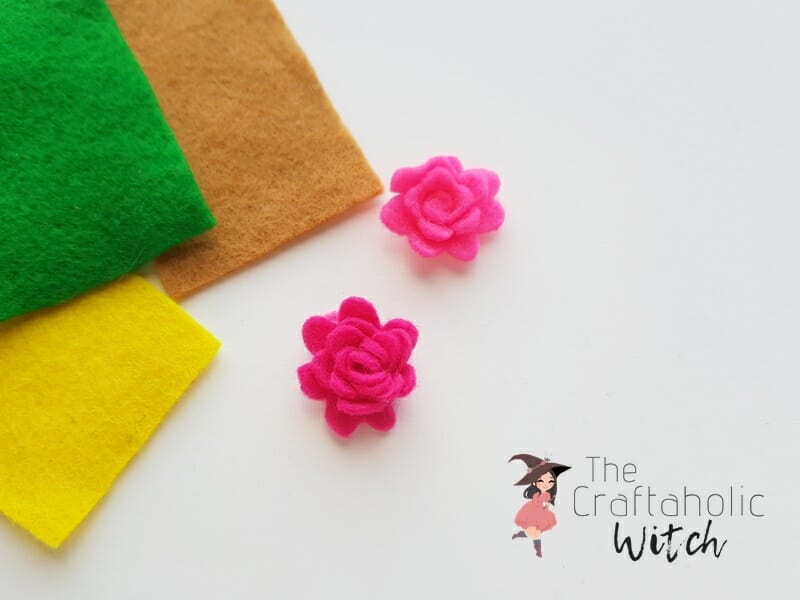
Cut a spiral out of colored felt (a rounded outer edge is easiest, but a scalloped edge gives the rolled rose a ruffled look). Starting from the outer end, roll the spiral inward toward the center, keeping the roll snug as you go. A dab of hot glue on the base holds the roll shut; a few stitches through the base work just as well if you’d rather not use glue. Make two or three roses this way, one shade per rose or a gradient across a few shades.
Step 9: Attach Bead Tips to the Feathers
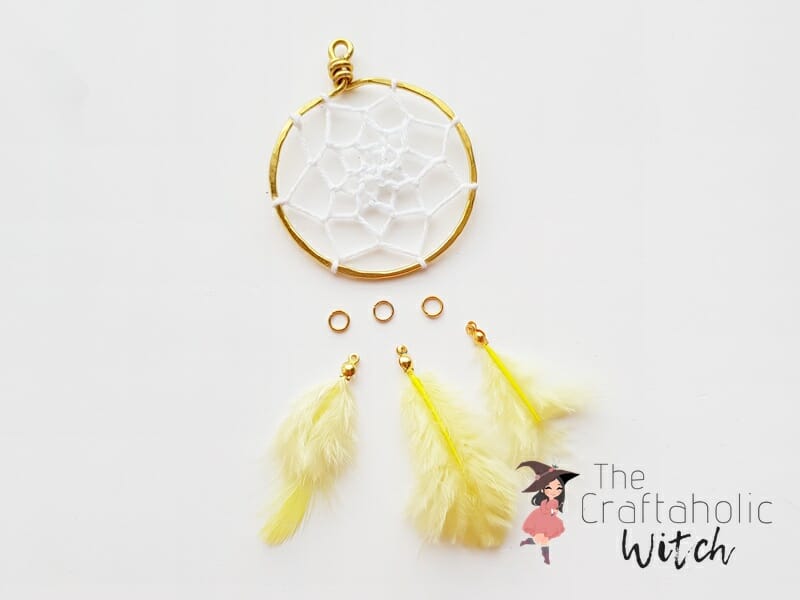
Slide a bead tip onto the hollow shaft of a craft feather so the loop end sits at the top, and repeat for two or three more feathers. Open a jump ring for each one (twist it sideways rather than pulling it straight apart, so it closes back into a perfect circle) and set them aside. You’ll use them to hang the feathers from the band in the next step.
Step 10: Attach the Roses, Leaves, and Feathers
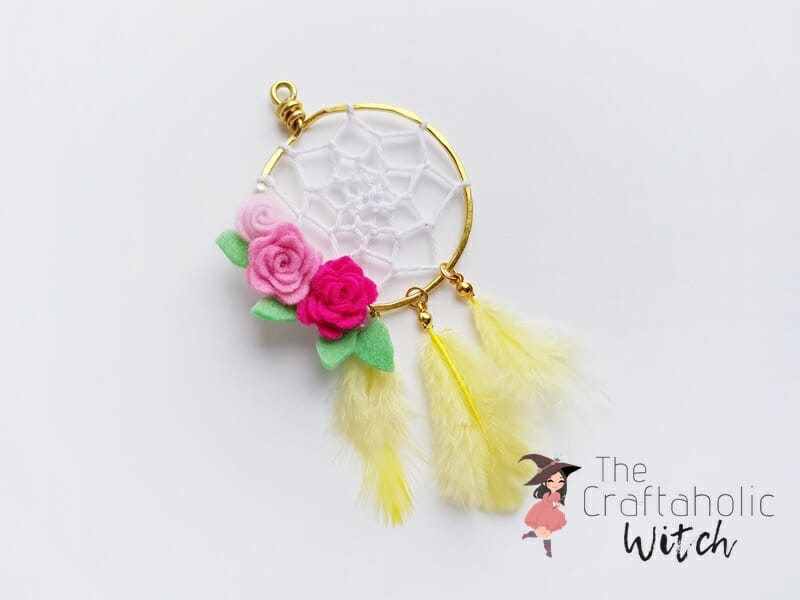
Glue or stitch the felt roses onto the band next to the woven web, then tuck a couple of felt leaves in between them. Attach the jump ring on each feather’s bead tip to the wire band, letting the feathers hang just below the roses. Add a jewelry chain or cord, and the pendant is ready to wear.
Share it in "I Made It" and let us cheer you on.
Post your finished make in "I Made It" so the community can celebrate it with you. Cheer on other makers too. Each month, the most loved craft wins 1 year of Craftaholic Premium ($59)
Tips for Your DIY Dreamcatcher Pendant
- Swap the feather and felt-rose colors to match the occasion. I made one version with soft pink roses and yellow feathers, and a second with hot pink roses and matching feathers, and both use the exact same steps.
- A smaller round base makes a dainty pendant; a larger one reads more like a boho statement piece. Either way, keep the loop and bent tail the same length so the coil still locks shut.
- If the yarn web loosens after a lot of wear, add a dot of clear-drying glue at the center knot so it holds its shape.
- Store the pendant flat in a small box between wears so the feathers and felt roses keep their shape.
Frequently Asked Questions
What do you need to make a dreamcatcher pendant?
You need 16-gauge craft wire, yarn, a few colors of felt, craft feathers, jump rings, and bead tips, plus round-nose pliers, scissors, a small hammer, and hot glue. Everything on the list is inexpensive and easy to find at a craft store, and most of it comes in small enough quantities that leftover scraps from other jewelry projects work fine.
Is this dreamcatcher pendant beginner-friendly?
It’s rated intermediate, mainly for the yarn web. Shaping the wire loop and base is simple even for a first-timer, but weaving the web, wrapping each new pass around the previous thread instead of the wire, takes a slow first try before it clicks. If you’ve never made a dreamcatcher before, budget extra time for that one step and the rest goes quickly.
How long does it take to make a dreamcatcher pendant?
Plan on 45 to 75 minutes total: about 20 minutes to shape and hammer the wire base, 20 to 30 minutes to weave the yarn web, and 15 to 20 minutes to roll the felt roses and attach the feathers. The web is the part most likely to slow you down the first time.
Will the yarn web come loose over time?
It can loosen a little with regular wear, since the whole web relies on friction at each wrapped crossing point. A small dot of clear-drying glue on the center knot when you finish weaving keeps it from slipping, and it’s invisible once it dries.
What do dreamcatcher colors and feathers symbolize?
Traditionally, white yarn and light feathers stand for good dreams passing through, while the web itself is meant to catch anything bad before it reaches you. There’s no rule for a handmade pendant, though. I’ve made this same design in soft pastels and in bright hot pink, and either way it reads as a pretty boho accessory.
More Jewelry Making Tutorials
- How to wire wrap a stone into a pendant, three techniques with no drilling.
- How to make beaded necklaces in three skill-building designs.
- How to make a wire heart necklace, a beginner-friendly wire project.
Share your dreamcatcher pendant in the I Made It space inside Craftaholic Community. The most-loved post each month wins a one year free Premium membership.