

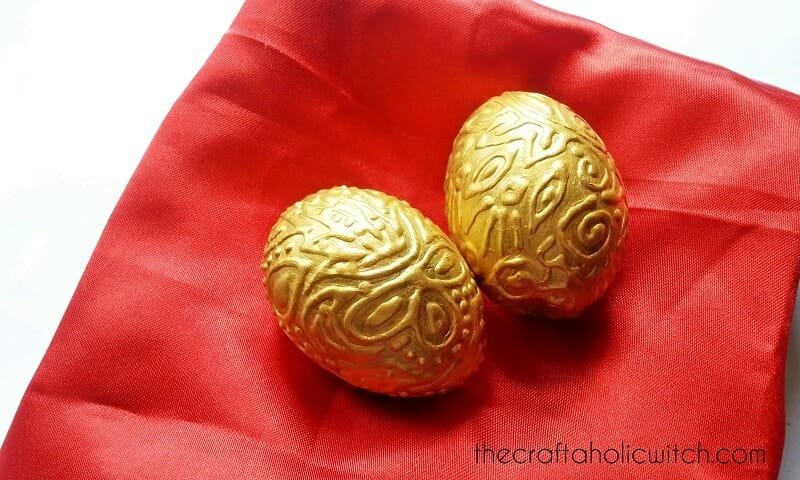
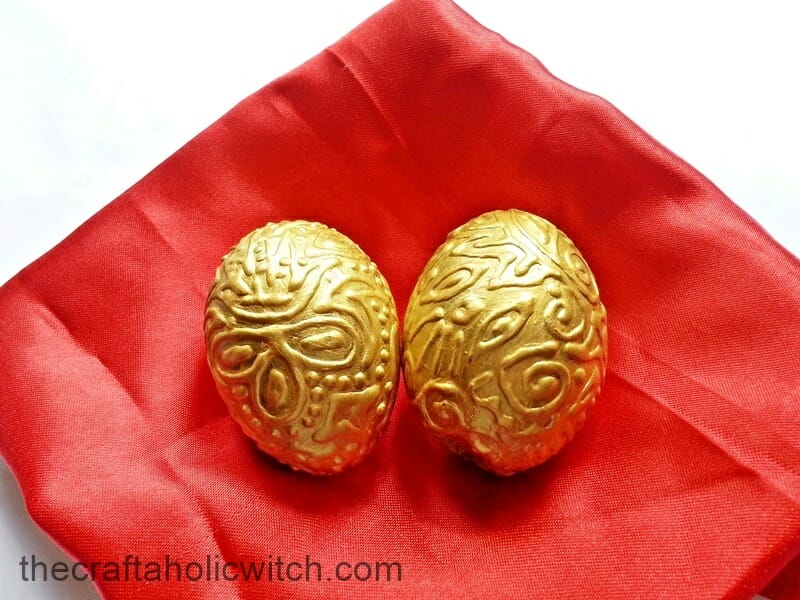
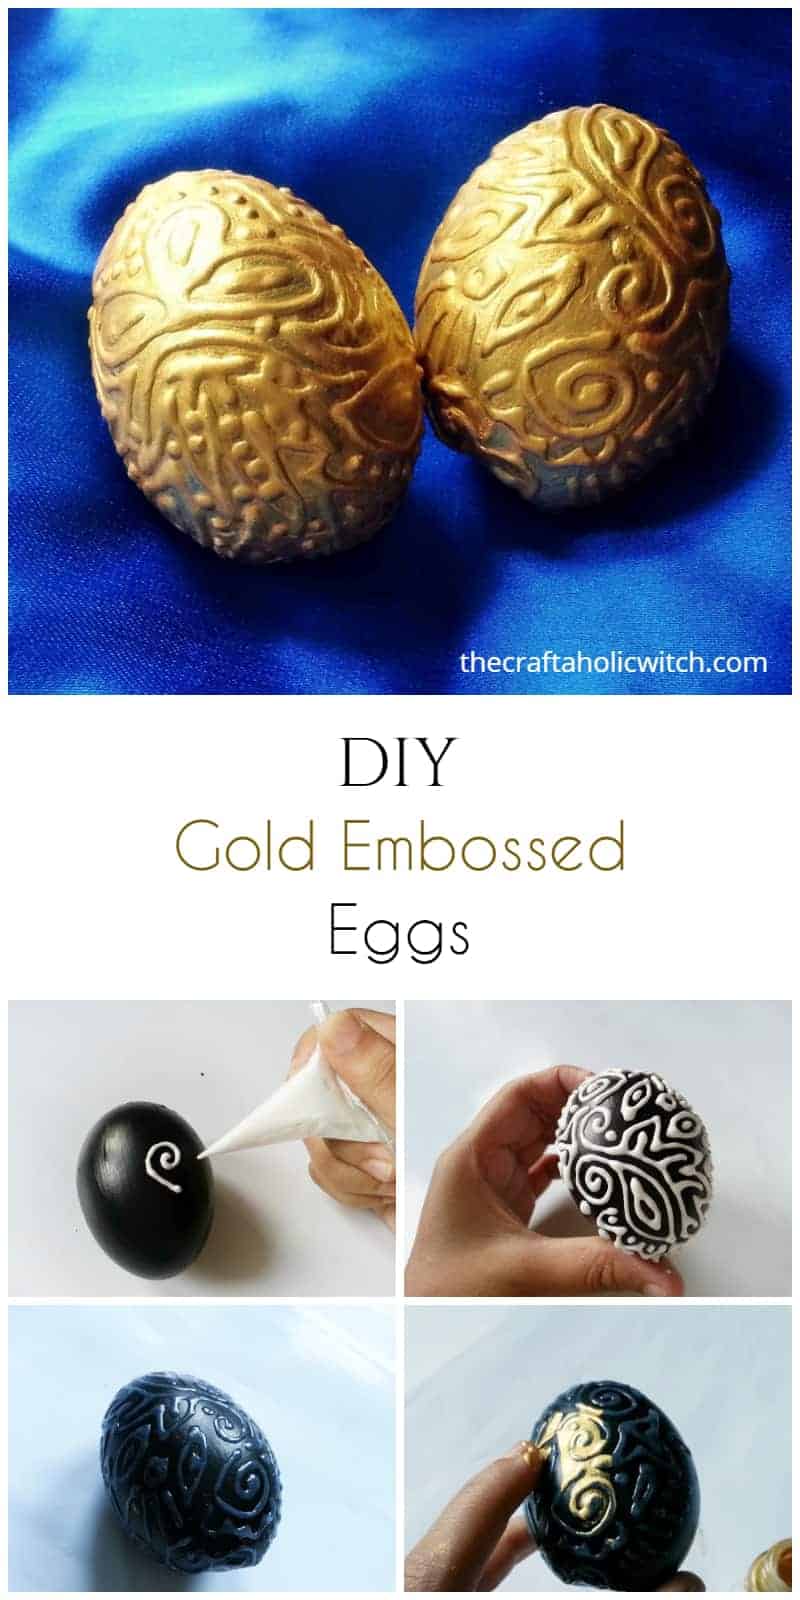
The result is an egg that looks like it came from a boutique gift shop, not your kitchen table. Gold embossed Easter eggs are one of those projects where the gap between “looks hard” and “actually is” turns out to be genuinely satisfying to close.
The technique is simple: pipe a raised design onto a black-painted egg with craft glue, let it set, then dab gold fabric paint over the surface. You need about 30 to 40 minutes of hands-on work, with drying time between steps adding up to a couple of hours total.
These make beautiful Easter table decor, a handmade gift that looks far more considered than it was to make, or something to keep for years if you use blown real eggs. They are also a great addition to any of the Easter craft projects you might already be planning.
Gold Embossed Easter Eggs at a Glance
- Difficulty: Beginner
- Time: 1-2 hours (plus drying time between steps)
- Cost: Under $5 if you have black acrylic paint
- Ages: 10 and up (younger kids can help with the gold paint step)
- Best for: Easter table decor, handmade gifts, spring centerpieces
Join Craft Challenge: Craft Your Calm
Make something that brings you a sense of peace, share a photo, and tell us your story. It's free to enter, open to everyone, and the entry with the most reactions takes home a $100 gift card. Takes five minutes to join.
Entries close August 30, 2026. No purchase necessary.
What You Need to Make Gold Embossed Easter Eggs
Materials
- Egg (real egg or plastic egg; real eggs give you the best weight and the glue bonds well to eggshell, but plastic eggs skip the prep step entirely and are a good choice for kids)
- Black acrylic paint or black fabric paint, because the dark base is what makes the gold pop
- Gold fabric paint (not standard acrylic; fabric paint is thicker and gives a richer, more metallic finish)
- Small piece of craft paper, only needed for real eggs, to patch the drainage hole after blowing out the egg
Tools
- Craft glue tube or piping cone (a squeeze tube with a fine nozzle gives you the most control over the design lines)
- Paint brush, for applying the black base coat
- Bottle cap or small stand to hold the egg steady while the glue and paint dry between coats
Ask inside "Crafty Q&A" while you are making.
"Crafty Q&A" is free to join. Share your question, photo, or the exact step where you got stuck, and chat with other makers plus the Craftaholic Witch team. You can also join any discussion thread already happening inside the space.
How to Make Gold Embossed Easter Eggs
Step 1: Prepare the Egg
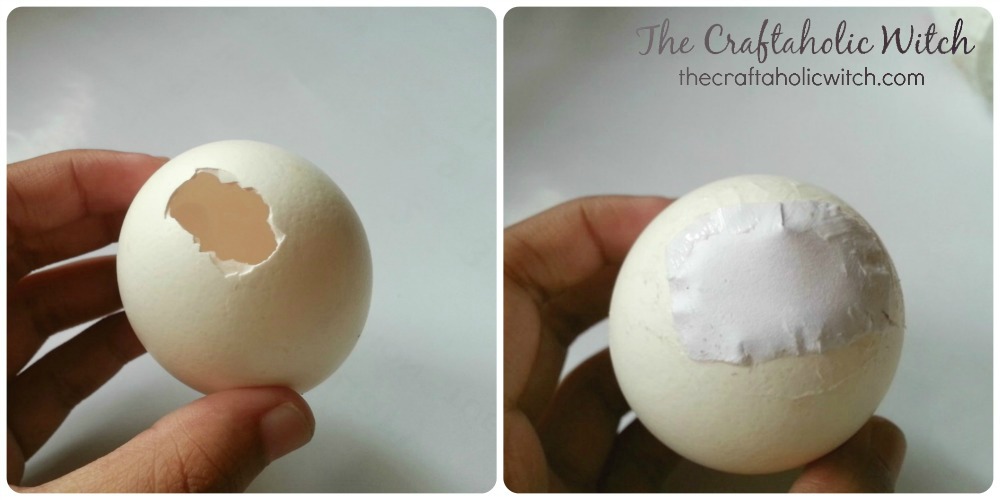
If you are using a plastic egg, skip straight to Step 2. For real eggs, carefully poke a small hole in the wide end with a pin or needle, then tilt the egg over a bowl and blow out or drain the contents. Rinse the inside with clean water and leave it to dry completely before you touch it with paint or glue.
Once the inside is dry, cut a small circle of craft paper, dab craft glue around the hole, and press the patch flat over it. Let it dry fully. If the edges lift, run a second bead of glue around the perimeter and press again before moving on.
Step 2: Paint the Egg Black

A solid, even black coat is what makes the gold look rich rather than muddy, so take your time here. Paint one half of the egg, set it on a bottle cap to dry for 20 to 30 minutes, then rotate and finish the other half. One confident coat usually covers well; thin, hesitant strokes tend to leave streaks.
The egg must be completely dry, not just surface-dry, before you move to the next step. Touch it lightly. Any tackiness means the glue will sink into the paint instead of sitting on top.
Step 3: Pipe Your Design in Craft Glue
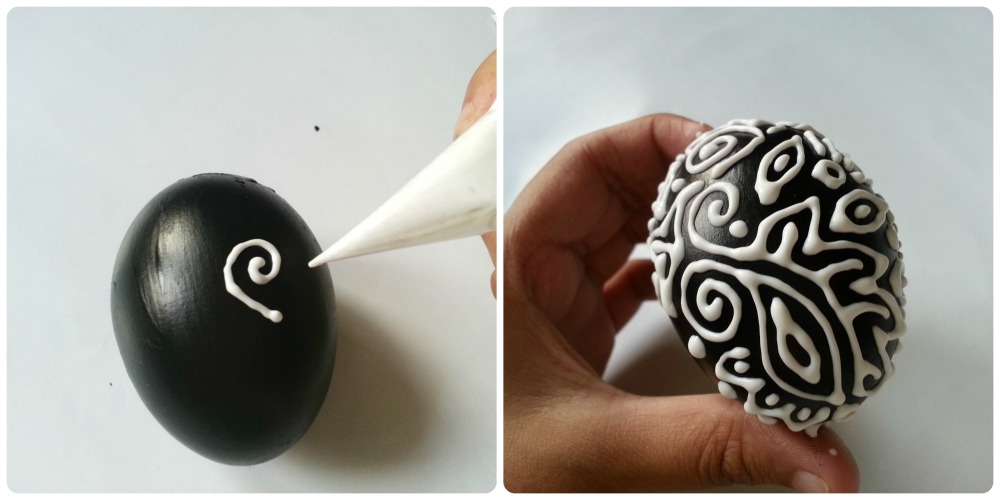
Hold the glue tube like a pen and move slowly, pressing gently and evenly at the base. Simple designs work far better than complex ones: a few geometric lines, repeating dots, or a loose floral pattern. Dense, tangled designs tend to bleed together once the gold paint sits on top.
Work only half the egg at a time. Rest it on the bottle cap while that side dries, then flip and complete the other half. The glue looks translucent and slightly glossy when wet and shifts to an opaque, raised line as it sets.
Tip: Sketch your pattern on paper first if you want a consistent design across a batch of eggs. Two minutes of planning makes a noticeable difference when you are working around a curved surface.
Step 4: Wait for the Glue to Set Completely
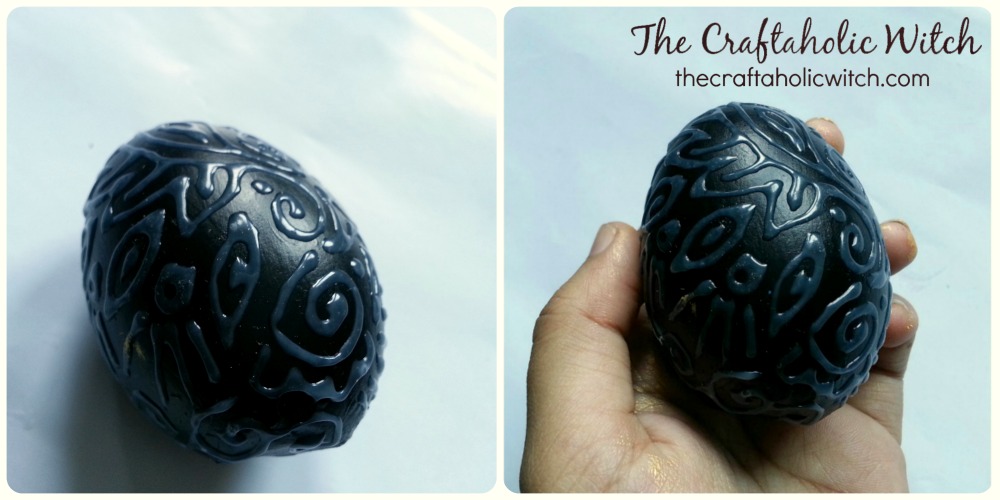
This is the step most people rush, and it is the one that determines whether the gold looks clean or smeared. Gold paint applied to even slightly tacky glue drags the lines out of shape. Give each side at least 30 to 45 minutes, longer in humid weather.
The glue is ready when the lines look slightly matte and feel firm to a very gentle touch at the edge. The photo above shows what fully set glue looks like: opaque white lines with a clean, raised edge, not the shiny, translucent look of wet glue.
Step 5: Apply the Gold Fabric Paint
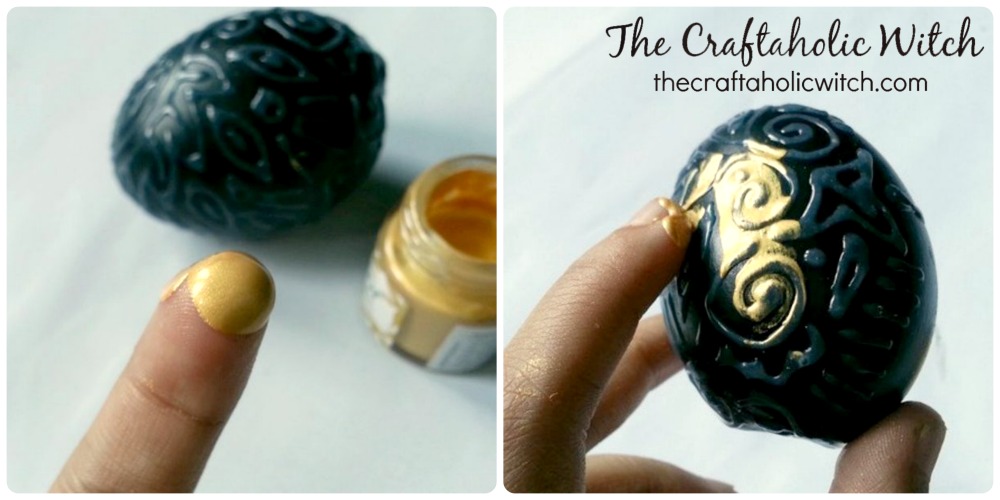
Use gold fabric paint here, not acrylic. Fabric paint is thicker and gives the raised lines a metallic sheen that acrylic paint tends to flatten and dull.
Dab a small amount of paint onto your fingertip and press lightly across the raised design, catching the tops of the glue lines without filling in the recesses between them. Work in two halves again so you are never pressing on wet paint. Let the first coat dry, then add a second coat for a deeper, richer gold. Your eggs are done once the final coat is fully dry.
Share it in "I Made It" and let us cheer you on.
Post your finished make in "I Made It" so the community can celebrate it with you. Cheer on other makers too. Each month, the most loved craft wins 1 year of Craftaholic Premium ($59)
Tips for Gold Embossed Easter Eggs
- Space your glue lines at least 5 mm apart. Lines closer than that fill in and lose definition once the gold paint goes over them.
- If a glue line smudges while still wet, leave it alone. Let it dry fully, then use a toothpick to gently lift and trim the smear before adding gold paint.
- Blown real eggs keep for years stored in a tissue-lined box. Plastic eggs are more durable if children will be handling them often.
Frequently Asked Questions
Can I use plastic Easter eggs instead of real eggs?
Yes, plastic eggs work well and skip the draining step entirely. The glue bonds slightly less firmly to plastic than to eggshell, so press your design lines down with the nozzle tip as you pipe them and give the glue a little extra drying time before adding gold paint. They are a good choice for kids’ projects or for eggs that will be handled a lot.
What type of craft glue works best for the raised design?
A PVA-based craft glue in a squeeze tube with a fine nozzle gives the cleanest lines. The glue needs to be thick enough to hold its shape when piped. Runny white glue spreads and loses the raised edge. A gel-consistency craft glue or a dedicated dimensional fabric paint both work well if your regular glue is on the thin side.
Why does my gold paint look patchy or dull?
The most common cause is applying the gold before the glue is fully dry, which lets the paint sink rather than sit on top of the raised surface. A second coat of gold fabric paint, applied once the first coat is dry, usually fixes a patchy result. Also make sure you are using fabric paint and not standard acrylic for the gold coat. Acrylic dries flatter and thinner, and the metallic effect is noticeably weaker.
How long do gold embossed Easter eggs take to make?
Hands-on time is about 30 to 40 minutes across the painting and gluing stages. The drying time between steps adds up to roughly 1.5 to 2 hours total. Plan for an afternoon project rather than a quick sit-down, and the wait between stages is mostly hands-off.
More Easter Craft Tutorials
- Easy Origami Easter Egg Tutorial (Video and Step-by-Step Breakdown)
- How to Make a Felt Easter Egg Pouch (With Free Template)
- Create Egg Shell Planters
- How to Make an Easter Paper Garland (Free Printable Template)
- Easy Easter Rabbit Ear Hat Craft for Kids
Made a set of these? Share a photo in the Craftaholic Community. I love seeing how the designs turn out.
2 Comments
Join the conversation
Log in to your Craftaholic Community account to comment, ask questions, and cheer on fellow makers.
Log in to comment