

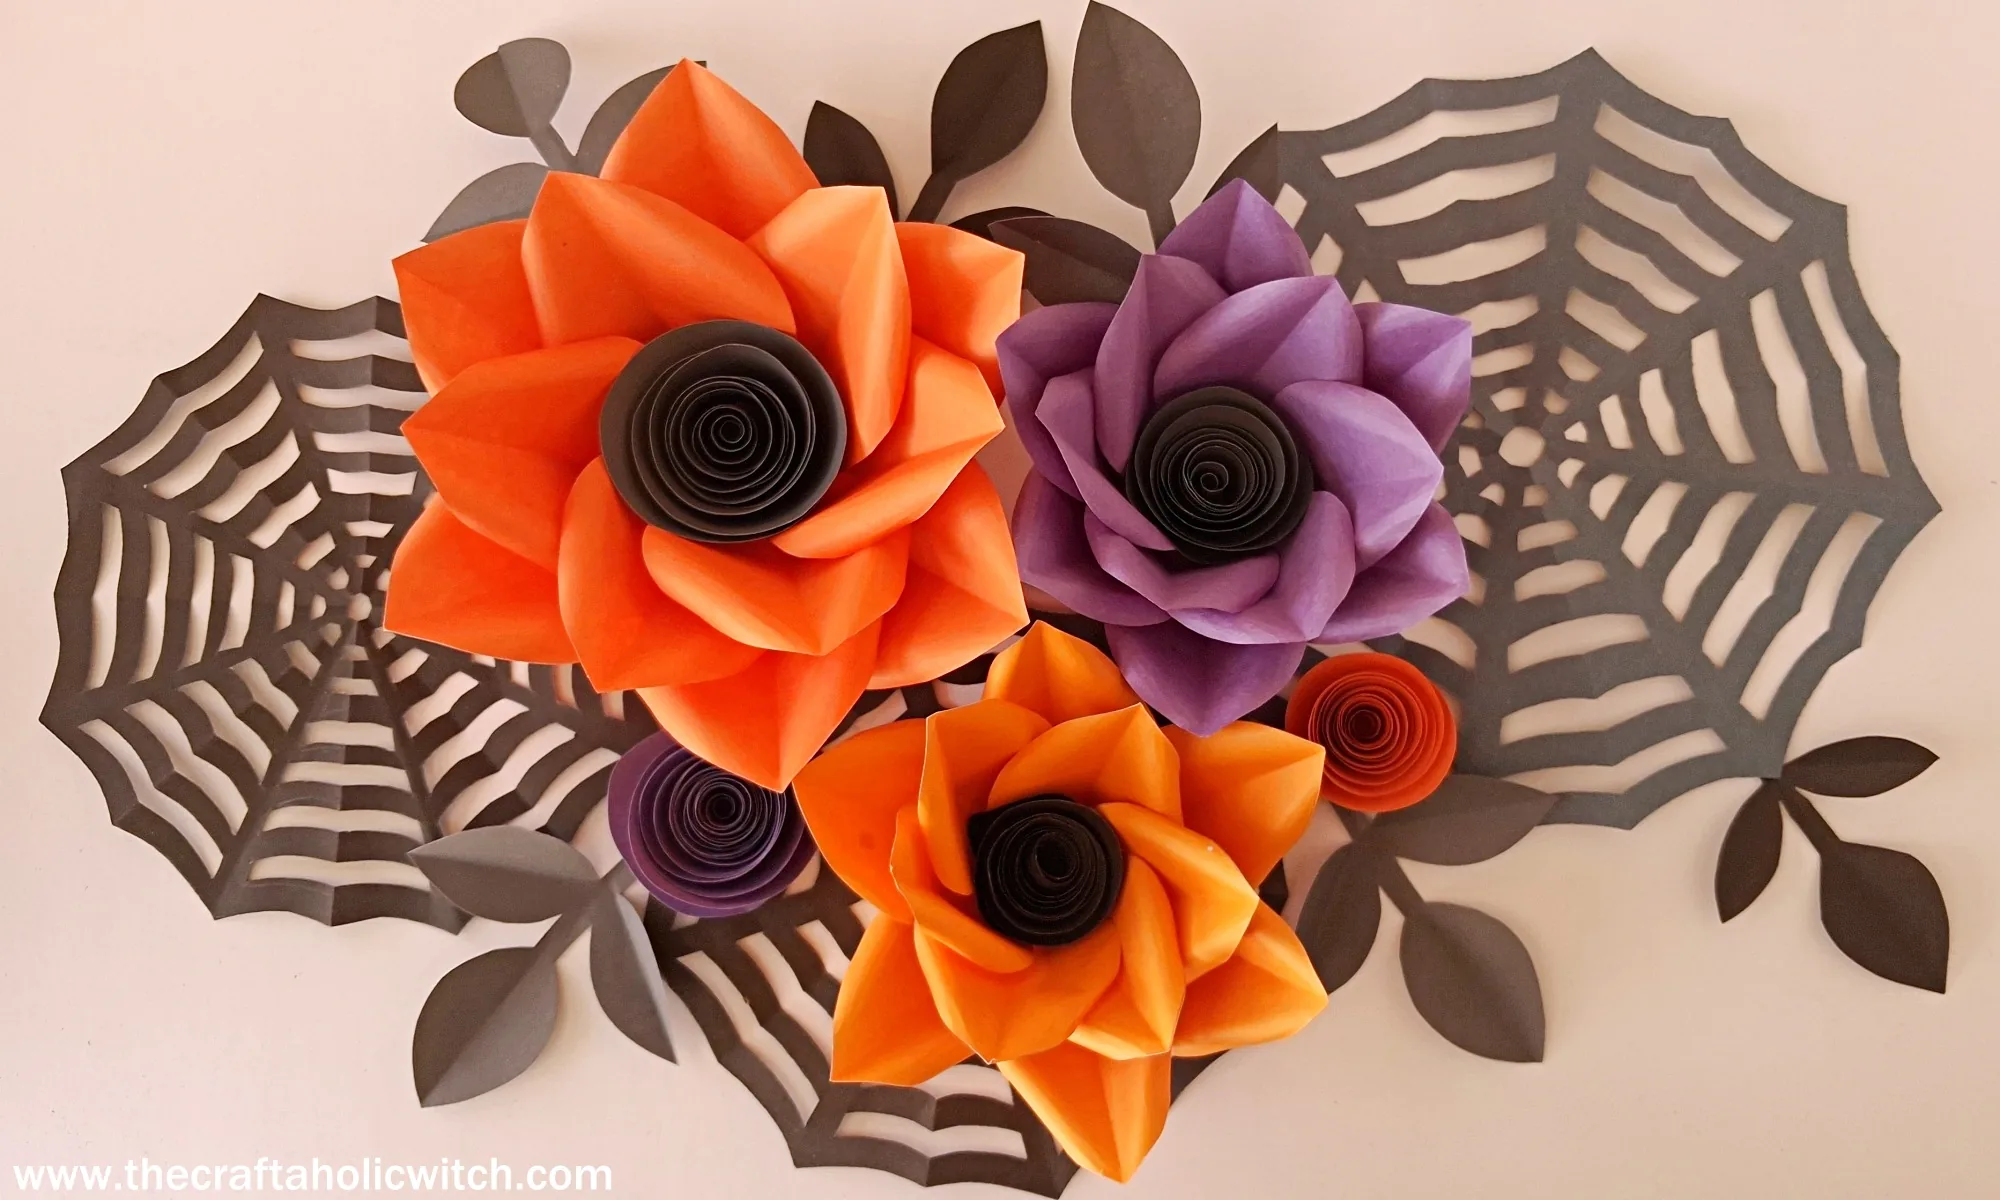
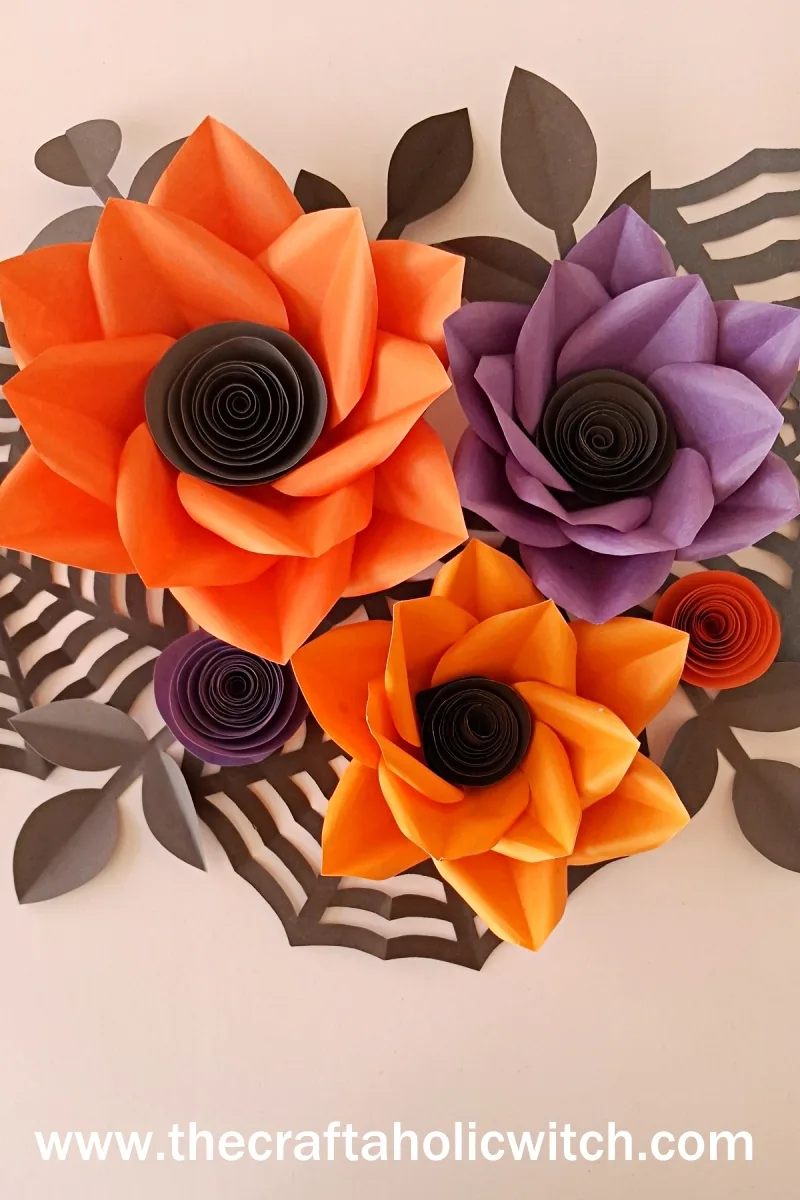
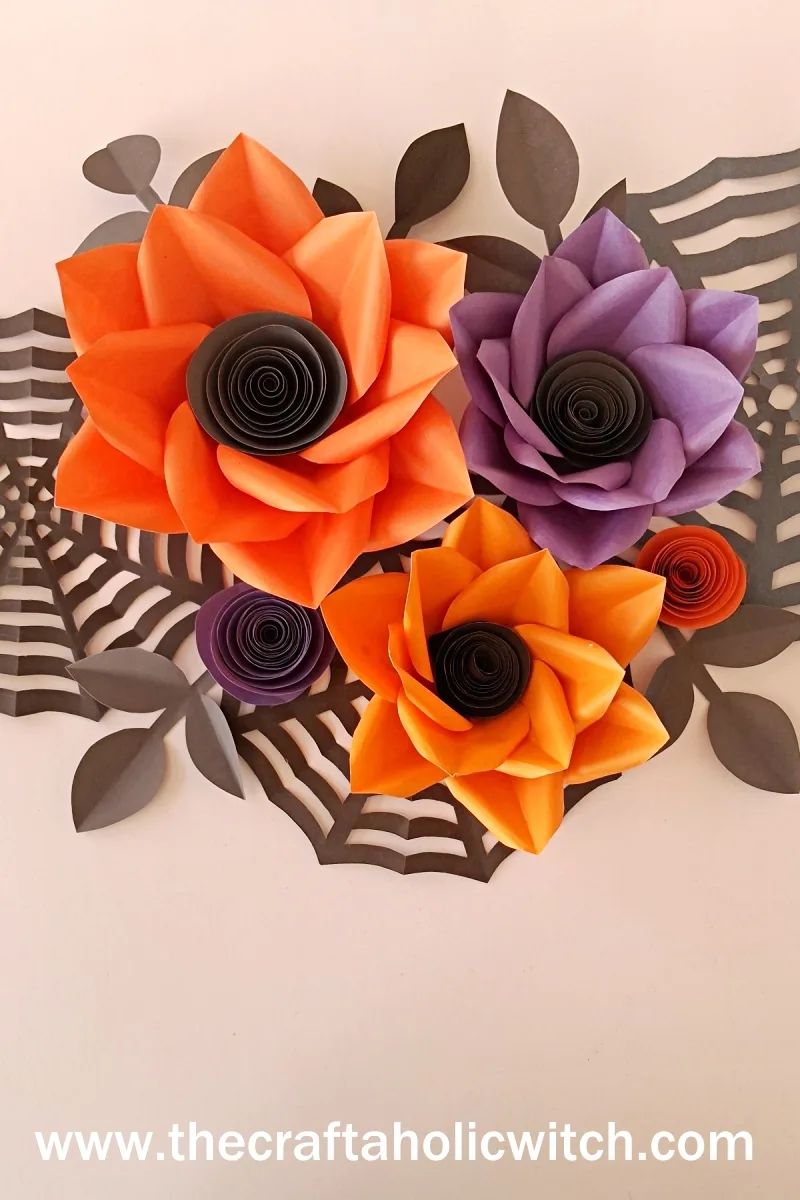
The bare wall behind the Halloween table is usually the hardest part to decorate. I think flat cutouts taped up in a row look like a classroom bulletin board, and the plastic backdrops from the store don’t fill the space very well. A wall like that needs something big with some depth to it, so I made this Halloween flower wall art out of large layered paper flowers on top of black spider webs.
It takes about 2 to 3 hours. You’ll make big cardstock flowers and a few spider webs cut from folded paper, then tuck leaf branches in around them. After that it all gets glued straight onto the wall, or onto a sheet of base paper first if you’d rather leave the wall alone.
This one is part of our Halloween craft tutorials, so if the party needs more than a wall, that’s the place to start. And if you like 3D paper pieces, there are more in Paper Decor & 3D Crafts.
Halloween Flower Wall Art at a Glance
- Difficulty: Beginner
- Time: 2 to 3 hours
- Cost: Under $10 in supplies, plus the template
- Ages: 10+
- Best for: A Halloween party wall, mantel or photo corner
What You Need to Make Halloween Flower Wall Art
Materials
- Medium-weight colored cardstock for the petals, spiral centers and leaves. It holds a curl and a cupped shape where thin paper goes limp. The photos use orange and purple for the flowers and black for the centers and leaves.
- Square paper, at least 8×8 inches, for each spider web. Each web is cut from one folded square, and the ones in the photos are black.
- Cardboard sheet for the flower bases. It’s stiff enough to hold a ring of petals.
- Printed template cutouts for the petal, leaf branch, spiral and flower base shapes you trace.
- Craft glue for every join, from the petal slits to the wall.
- A large sheet of base paper (optional) if you’d rather build the display on paper than directly on the wall.
Tools
- Pencil for tracing the shapes and drawing the web lines.
- Sharp scissors for the petals, the leaves and the web, where you cut through 8 folded layers at once.
- A thin round rod for curling the petal edges. I use the back end of a big crochet hook.
- Quilling tool (optional) for coiling the spiral if your fingers struggle with it.
The template has the flower, spiral, base and leaf branch shapes you trace in Step 1. The Halloween Flower Wall Art Template is available in our shop.
Ask inside "Crafty Q&A" while you are making.
"Crafty Q&A" is free to join. Share your question, photo, or the exact step where you got stuck, and chat with other makers plus the Craftaholic Witch team. You can also join any discussion thread already happening inside the space.
How to Make Halloween Flower Wall Art
Cut Out the Template Pieces
Step 1: Trace and Cut Every Template Piece
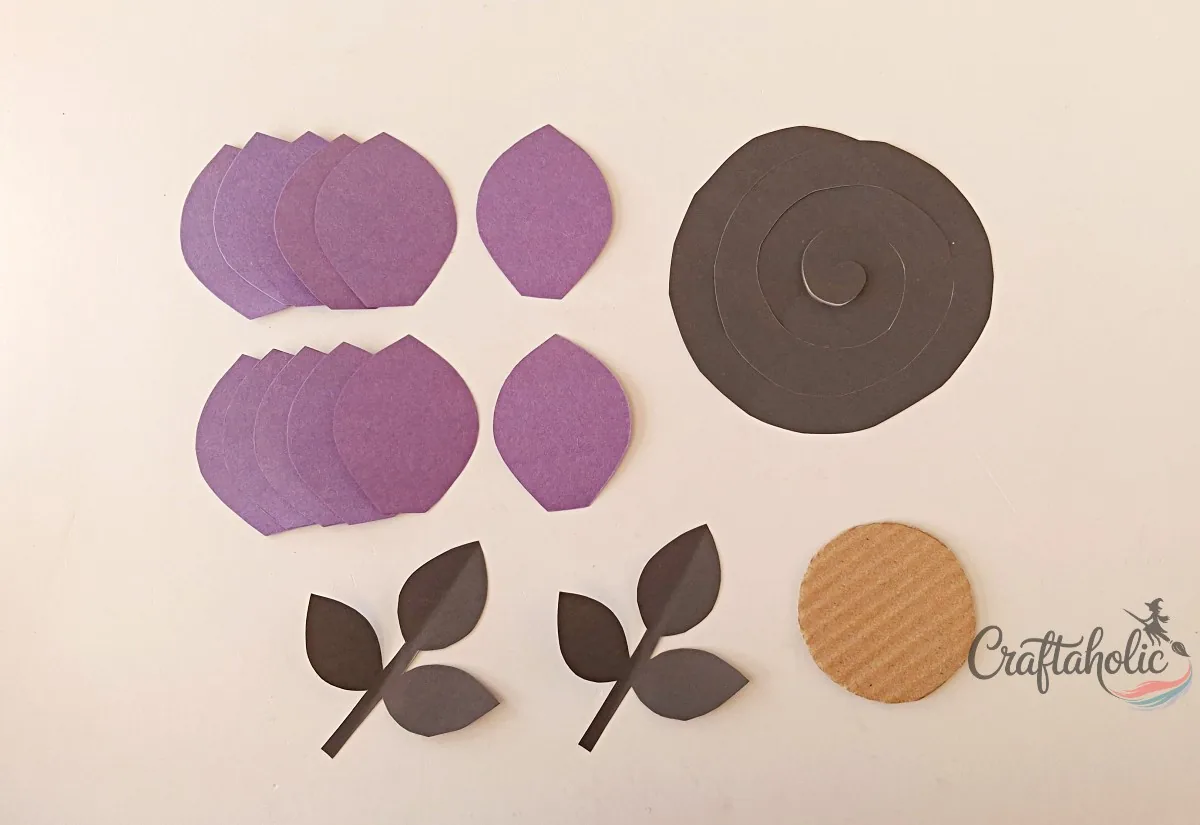
Choose your cardstock colors first, since they set the mood of the whole wall. Trace the petals, the three-leaf branch and the spiral onto the cardstock, trace the big flower base onto the cardboard, and cut everything out with sharp scissors. Each flower takes 12 petals, one spiral and one base, so cut a full set for every flower you plan to make.
Tip: Stay with medium-weight cardstock. Thin or regular craft paper goes soft once it’s curled and glued, and the finished flowers come out less sturdy.
How to Make the Paper Flower
Each flower is a coiled spiral in the middle and 12 curled petals glued around a cardboard base, and you build the center first.
Step 2: Coil the Spiral From the Outside In
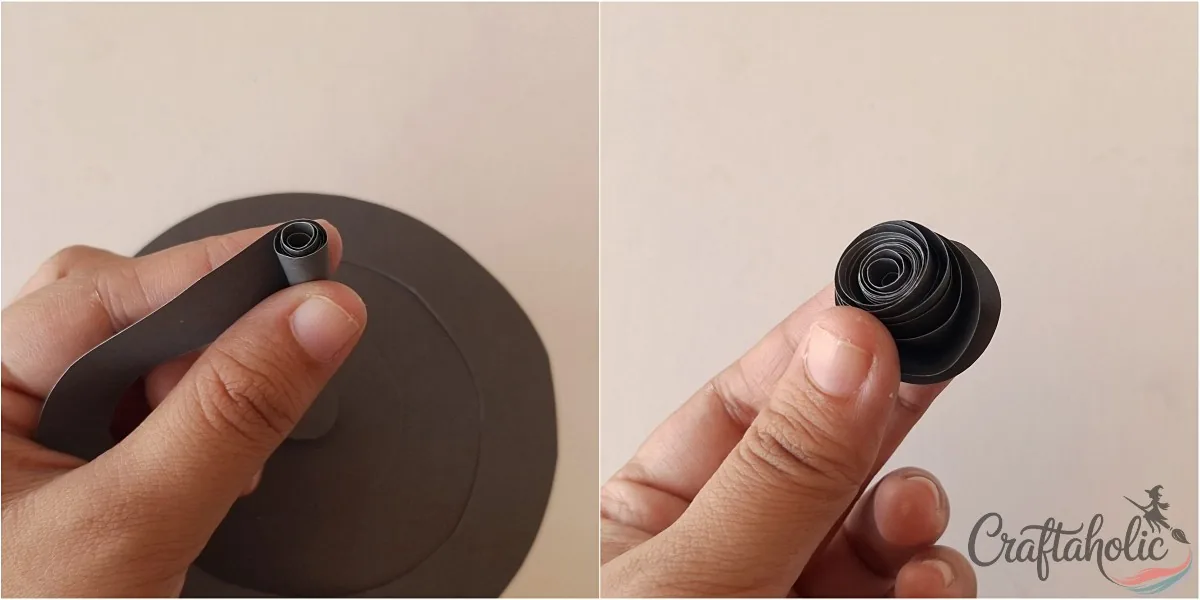
Start at the outer edge of the spiral cutout and roll it inward. Keep the coil tight and even as you work toward the middle.
Tip: If your fingers fight the coil, a quilling tool grips the paper for you.
Step 3: Glue the Center and Let the Coil Loosen
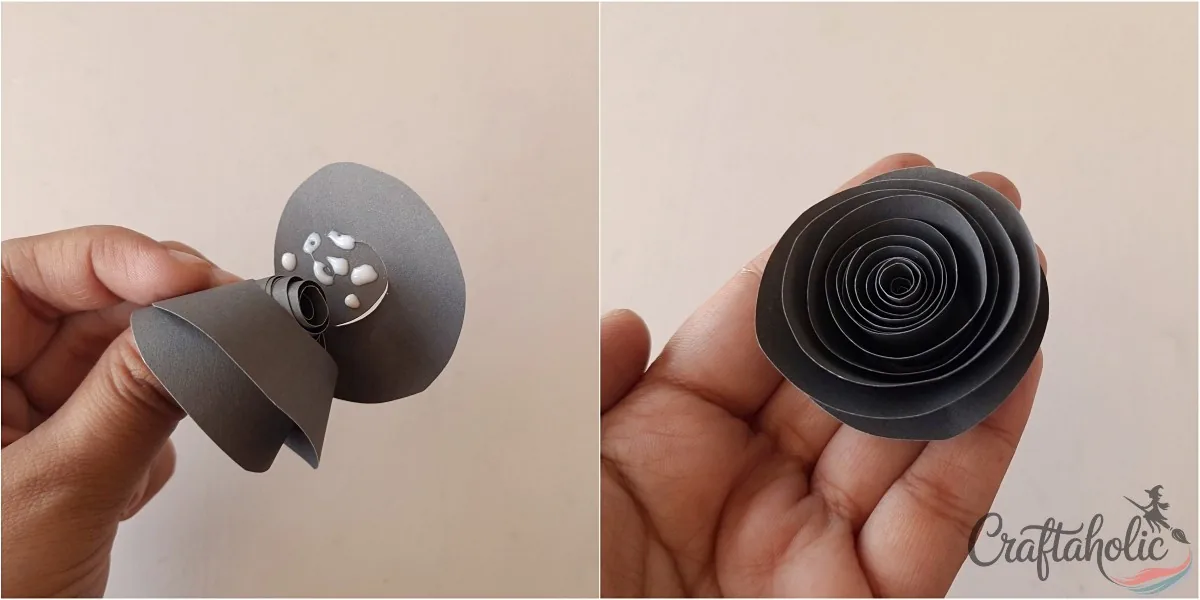
When the coil reaches the middle of the cutout, put glue on that center part. Let the coil relax a little, then press it down onto the glue.
Tip: Hold it in place for 10-15 seconds so it sets neatly on the center.
Step 4: Snip a Small Slit in a Petal
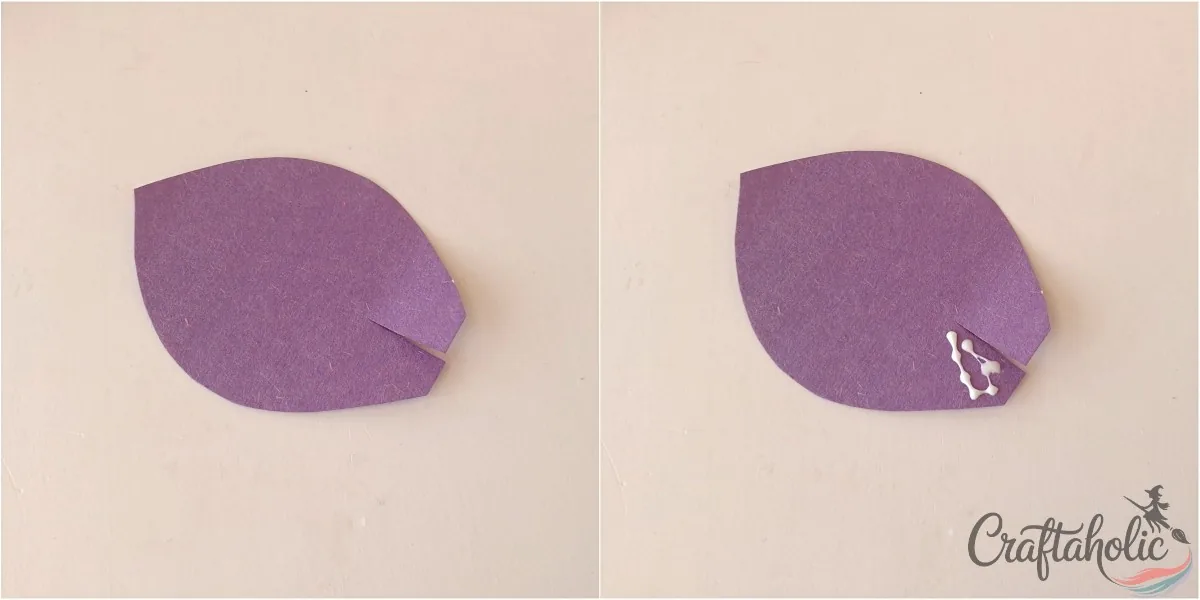
Take one petal and cut a slit about 1 cm long into the bottom-middle. Dab glue along one side of the slit.
Step 5: Overlap the Slit to Cup the Petal
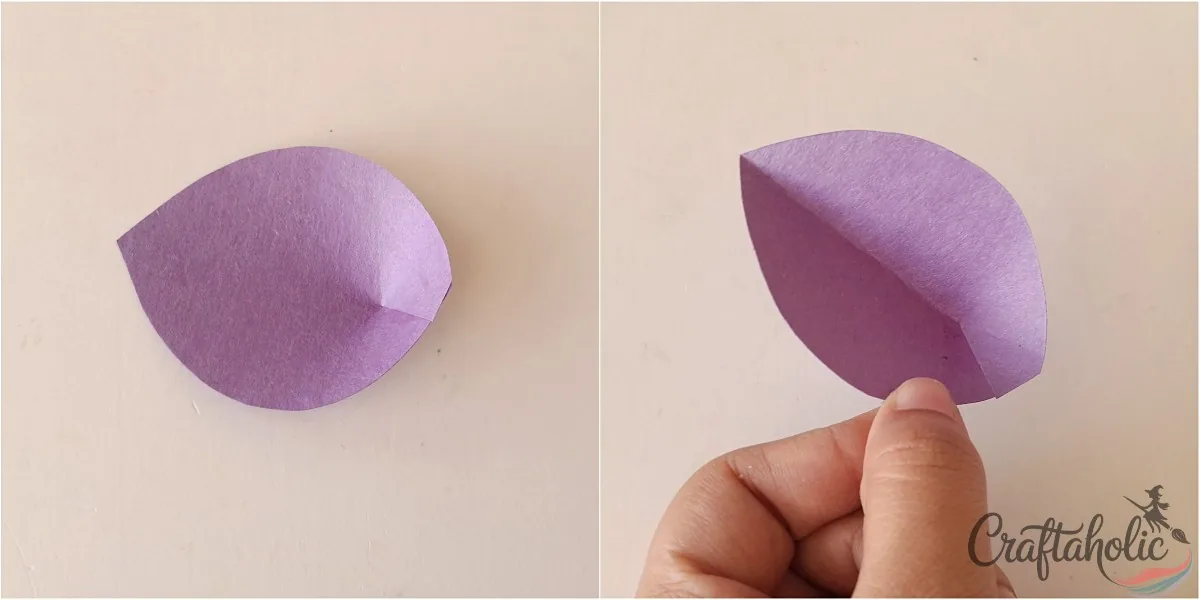
Slide one side of the slit over the other and press them together on the glue. The petal pulls into a shallow cup, and that cup is where the 3D shape comes from.
Step 6: Curl the Petal Edges Around a Thin Rod
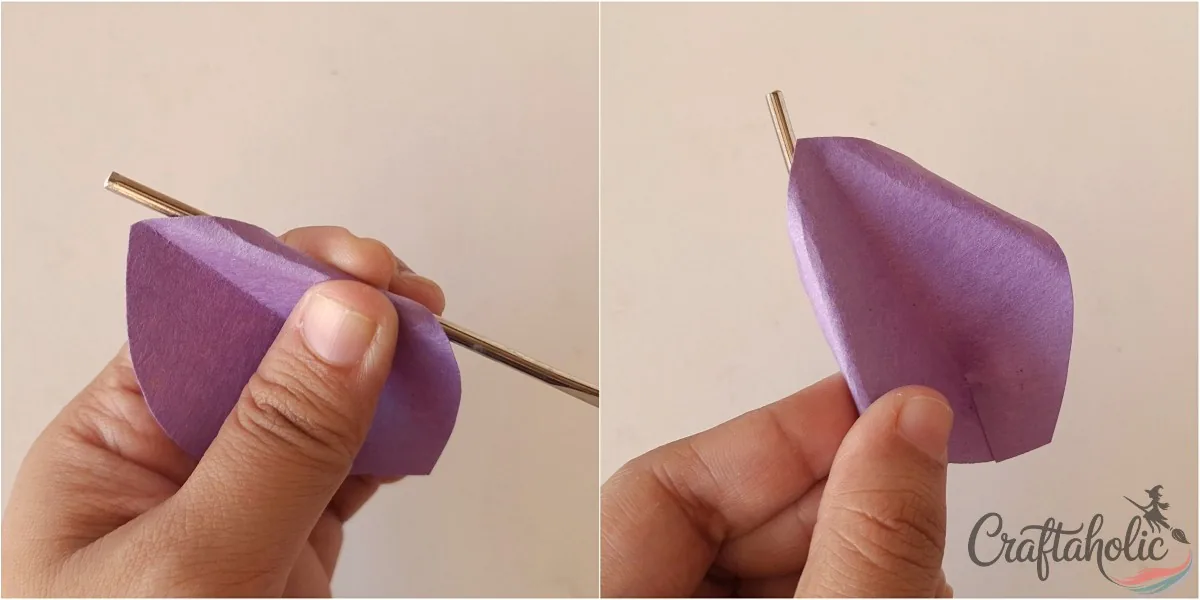
Roll the side edges of the petal around something thin and round. I use the back end of a big crochet hook. The curled edges are what make a petal look real instead of like flat paper.
Step 7: Make 12 Petals for One Flower
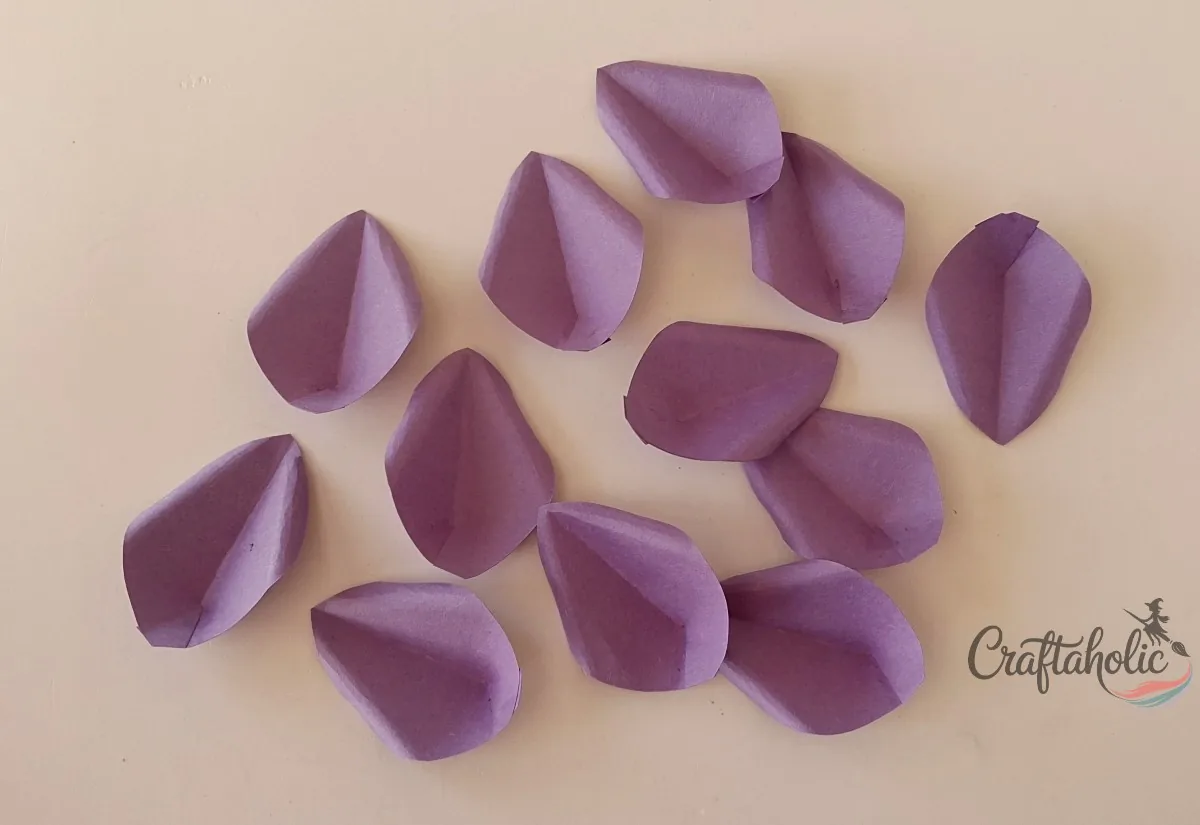
Repeat Steps 4 to 6 on the rest of the petals until you have 12 for the flower. Once they’re all done you should have a pile of small cupped petals that closely match each other.
Step 8: Glue Around the Edge of the Cardboard Base
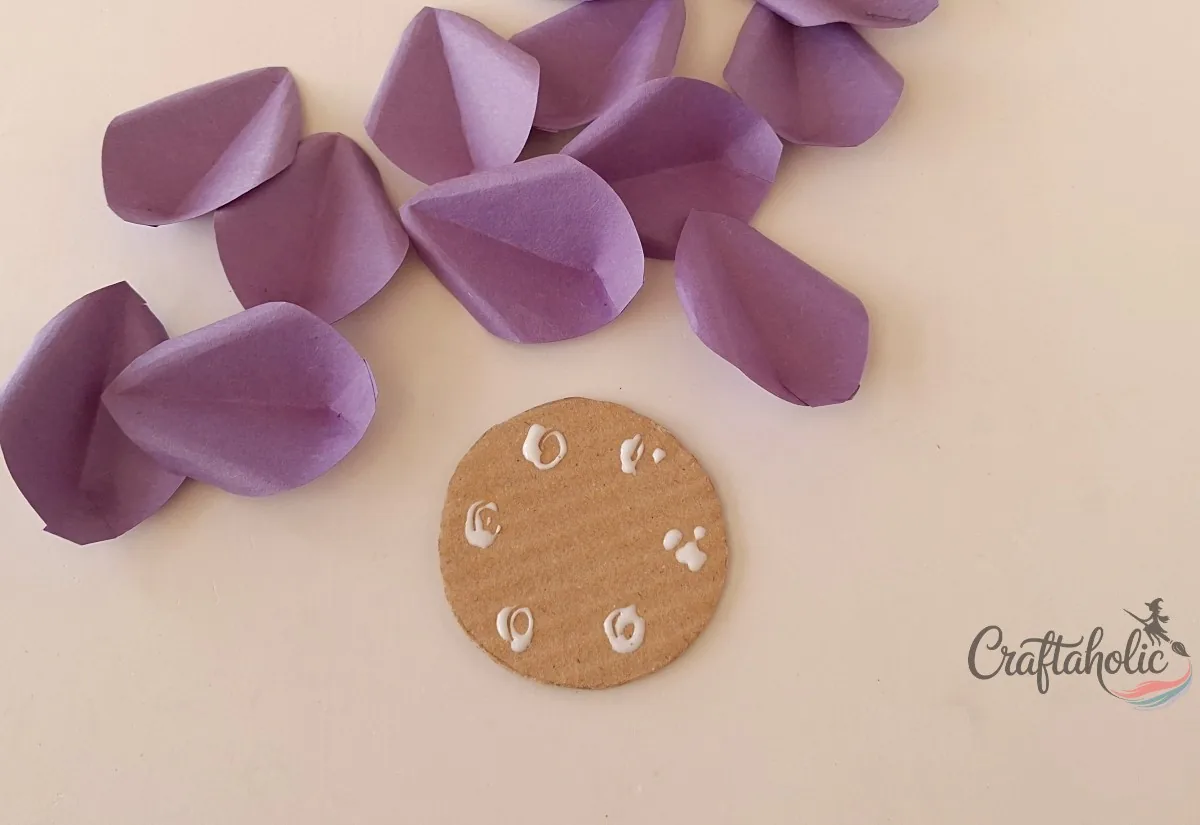
Lay the cardboard base flat and put glue around its side. The first ring of 6 petals goes here, so spread the glue all the way round.
Step 9: Press On the 6 Outer Petals
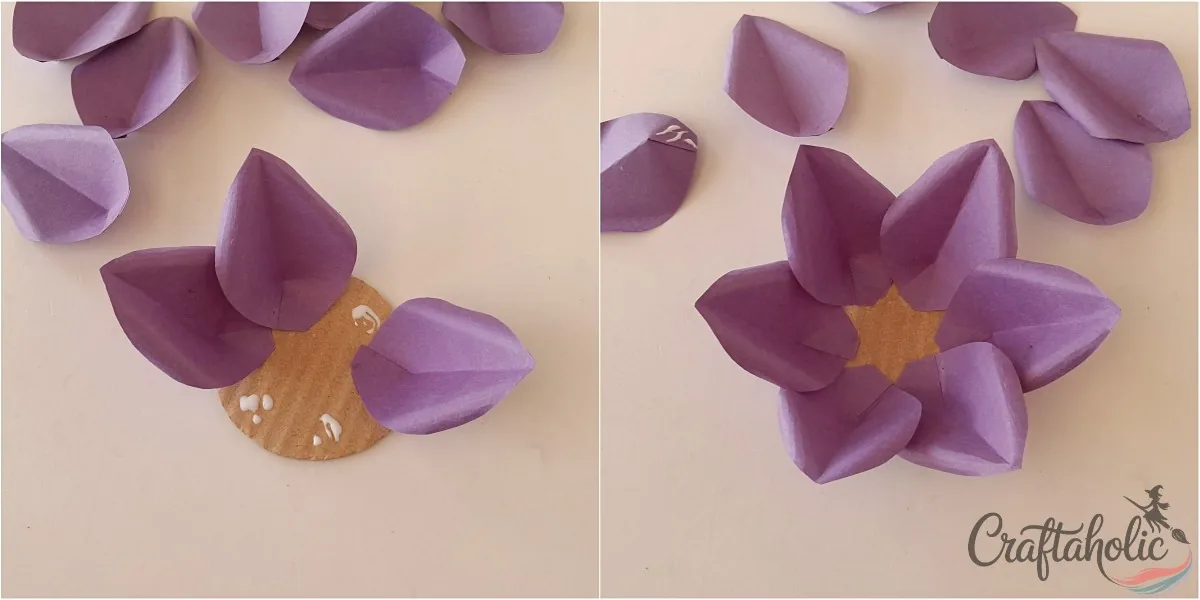
Attach the 6 outer petals one at a time, leaving even gaps between them so the ring looks like the points of a star. Set each petal in place before you press down hard, so the gaps stay even.
Step 10: Add the Inner Petals and the Spiral Center
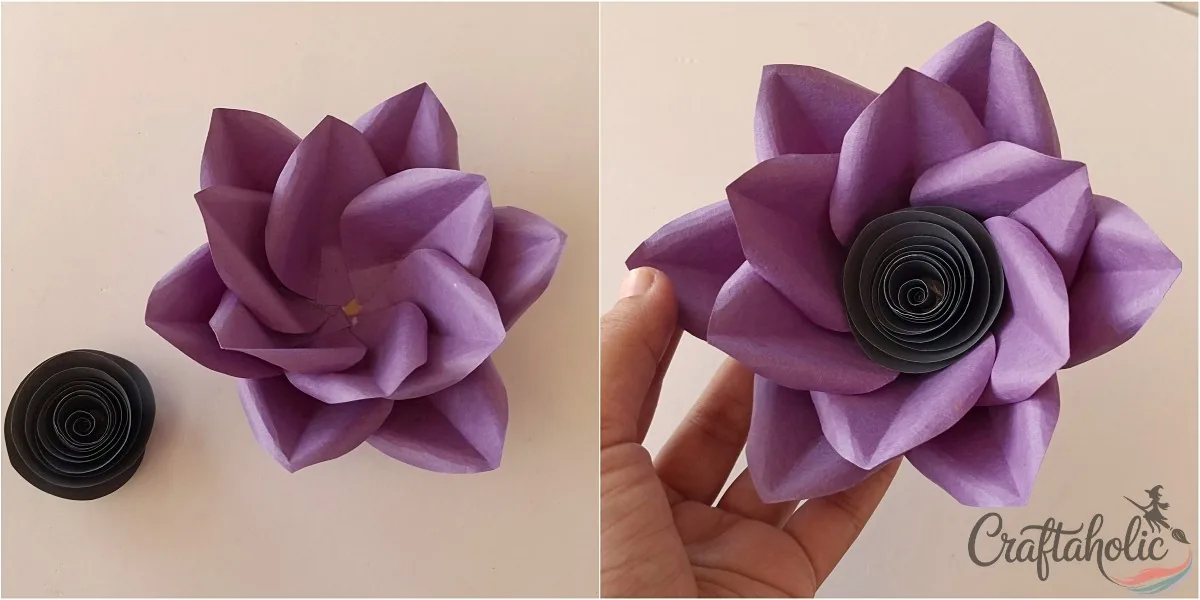
Glue the 6 inner petals to the base, then set the spiral center into the middle. Leave the flower to dry while you make the rest of the wall pieces.
How to Make the Leaf Branch
Step 11: Stiffen the Leaf Branch With a Folded Strip
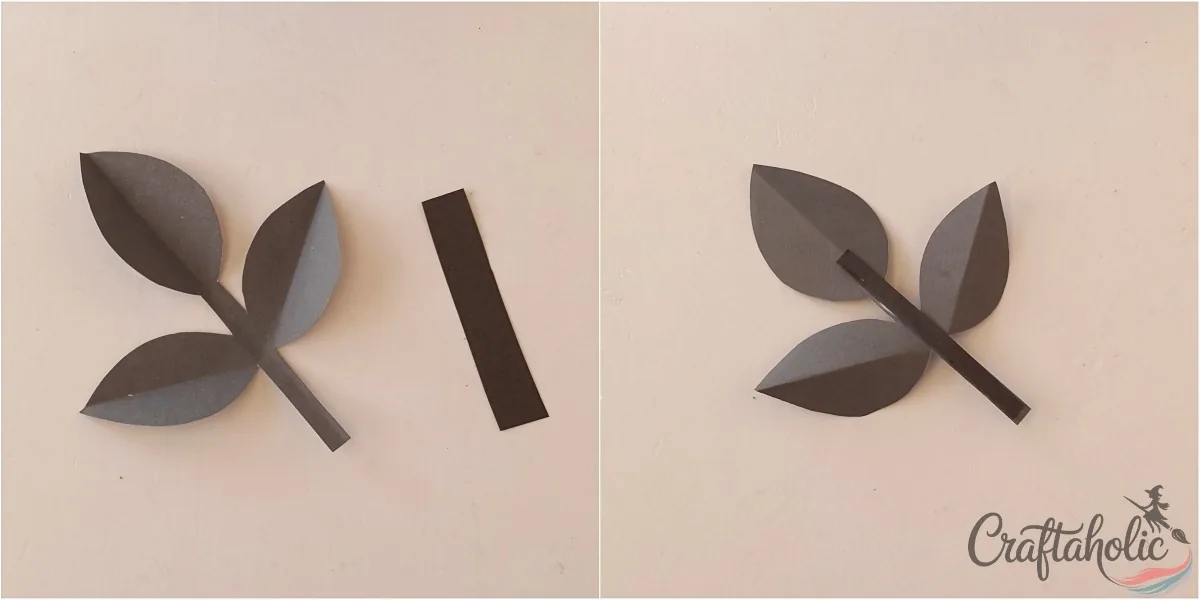
Cut a thin strip of paper and fold it over on itself to make it thicker. Glue it along the middle of the branch’s base. The extra layer gives the branch a sturdier finish.
How to Make the Paper Spider Webs
Each web is cut from a folded square of black paper, the same idea as a paper snowflake: you cut one small wedge and the folds repeat it all the way around.
Step 12: Fold a Square in Half Diagonally
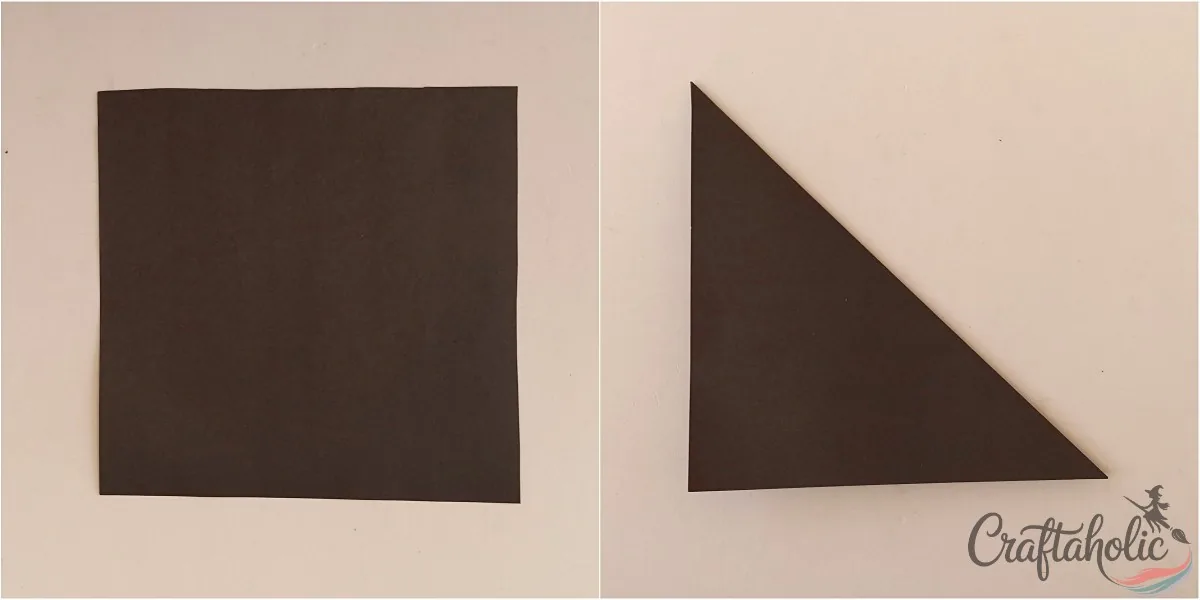
Take a square of paper, at least 8×8 inches, and fold it in half diagonally so you have a triangle.
Tip: The bigger the square, the bigger the web.
Step 13: Fold the Triangle in Half Twice More
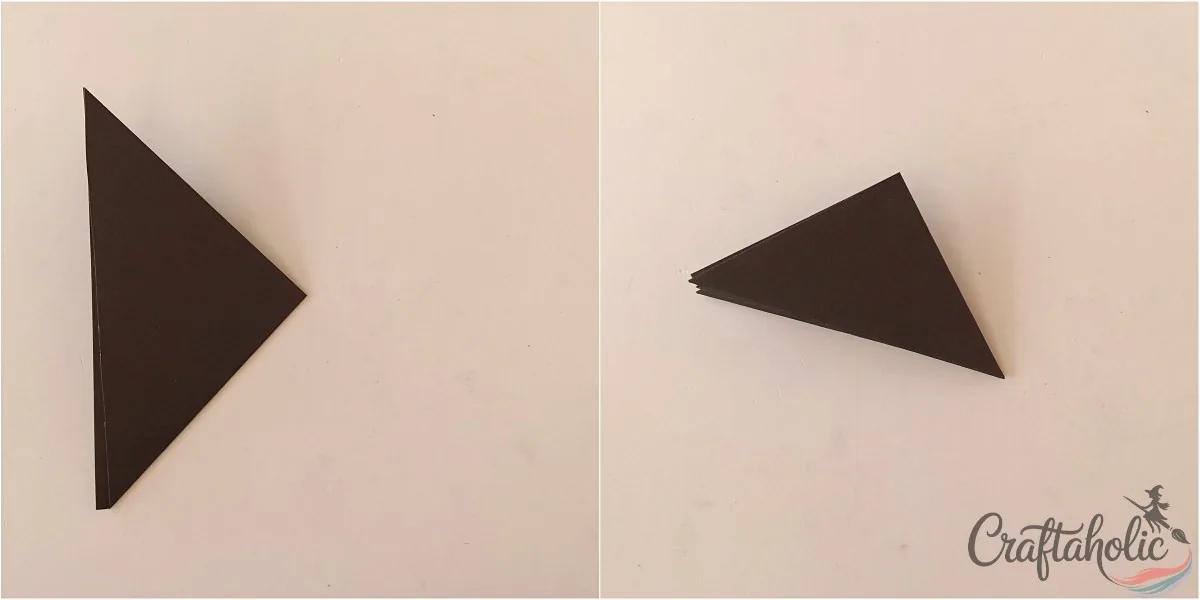
Fold the triangle in half, then fold that in half again. That makes three folds in total and leaves you with a small, thick wedge.
Step 14: Draw the Web Lines on the Wedge
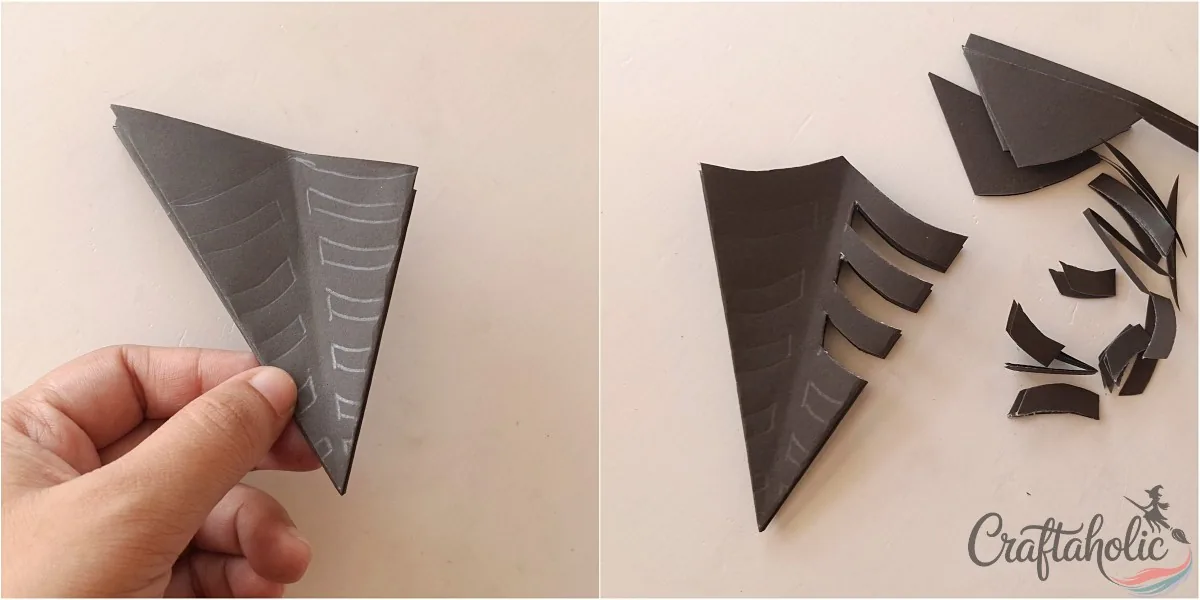
Use a pencil to draw the web pattern onto the folded wedge, copying the lines you see in the photo.
Step 15: Cut Along the Lines, Then Unfold
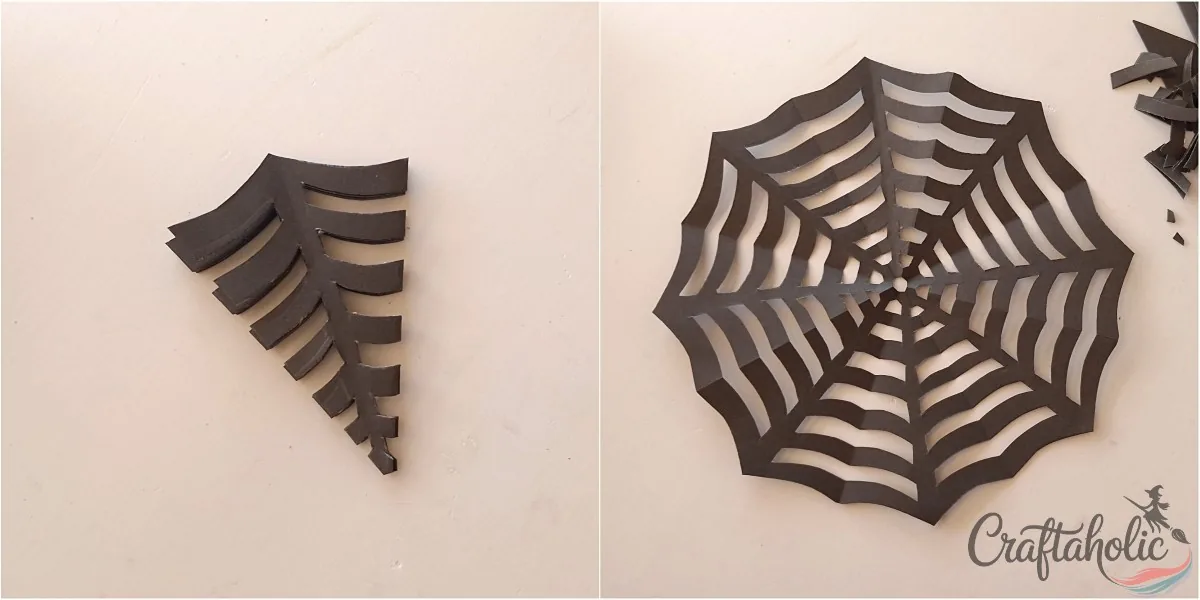
Cut out the traced pattern with sharp scissors. You’re cutting through 8 layers at once, so dull blades will chew the paper. When you’re done cutting, unfold the wedge and the whole web appears.
Step 16: Make One or Two More Webs in Different Sizes
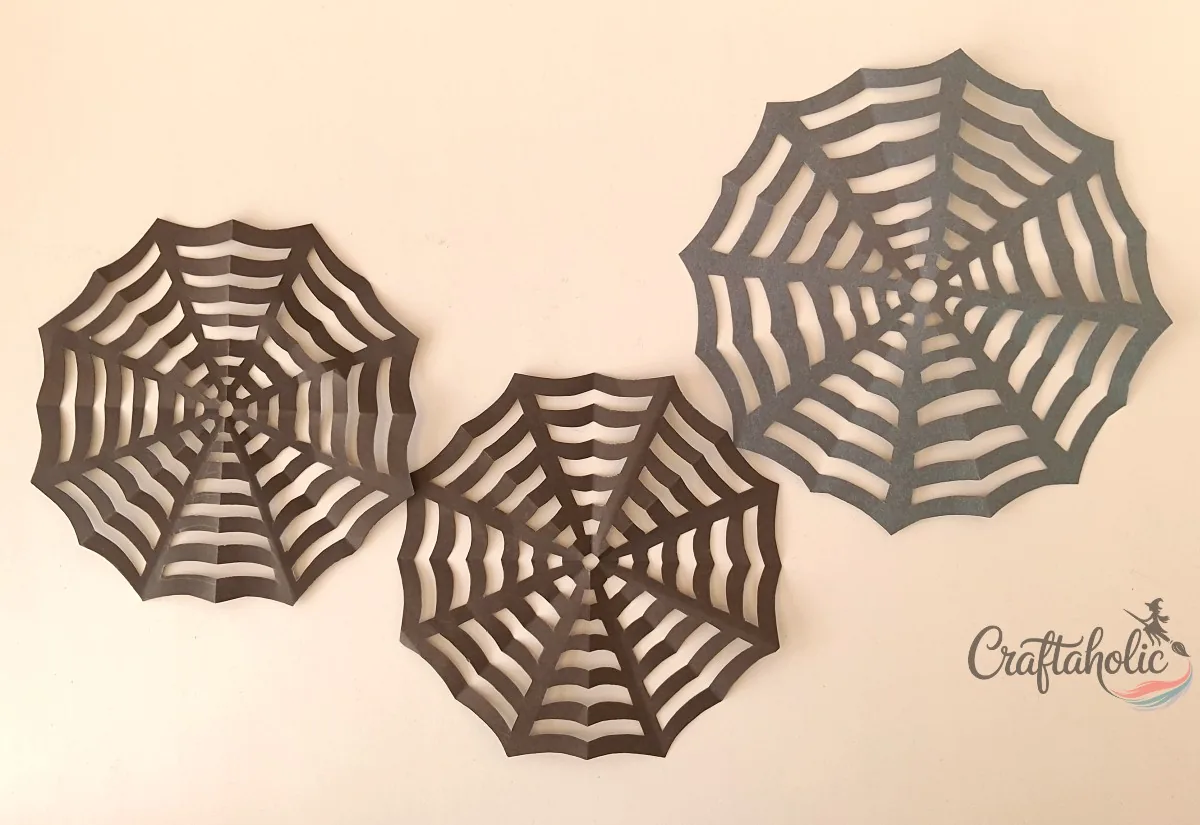
Run through Steps 12 to 15 again for one or two more webs, starting each from a different size of square so they vary on the wall.
How to Put the Wall Art Together
Step 17: Put the Webs Up First, Then the Big Flower
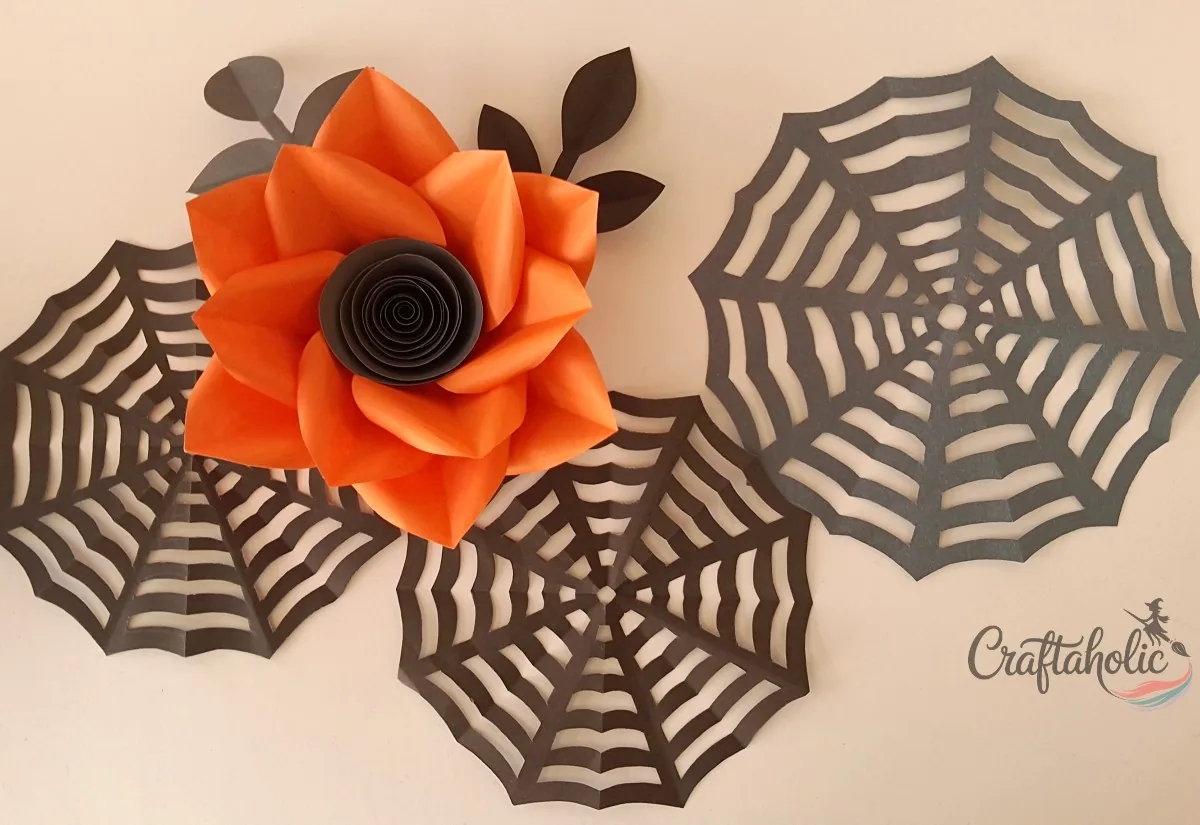
You can build the display on a sheet of base paper or attach everything to the wall directly. Attach the spider webs first, since everything else sits on top of them. Then place and glue the big paper flower, and tuck the leaf branches in around the flower and the webs.
Step 18: Fill the Gaps and Finish the Wall
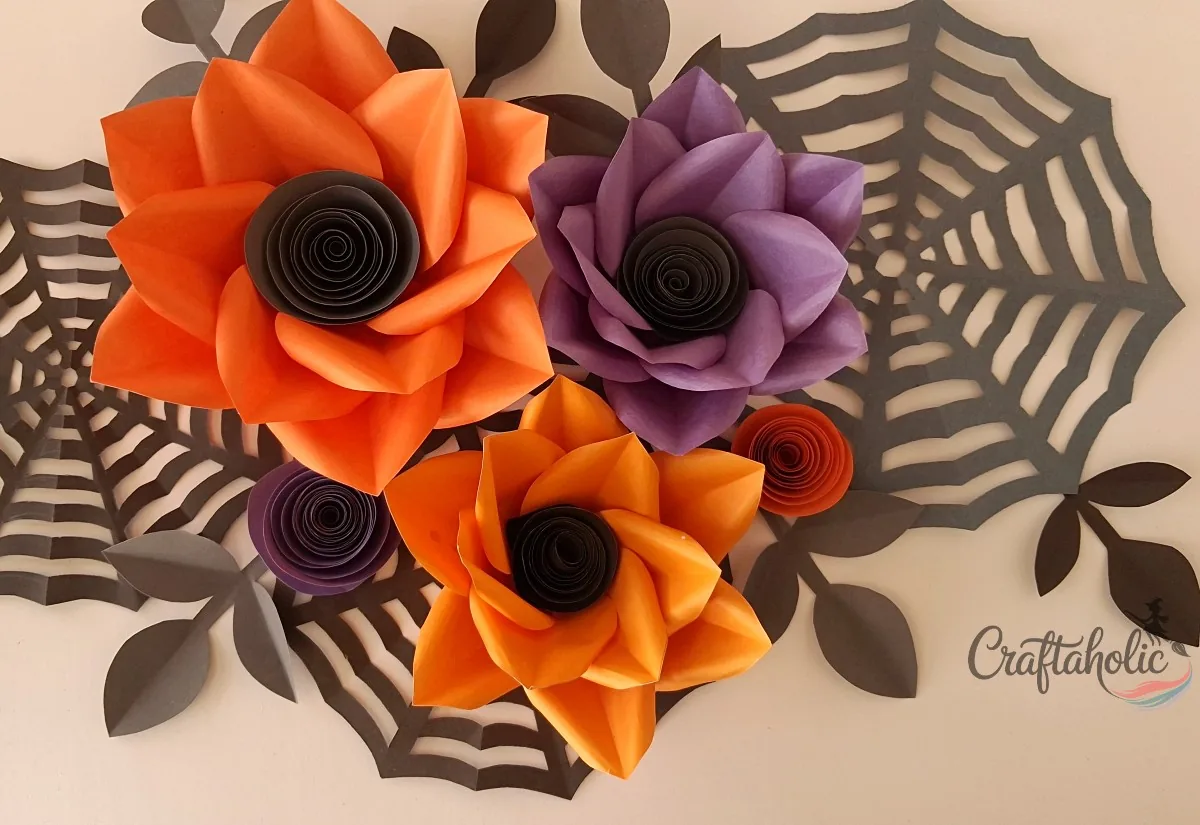
Arrange and glue the rest of the flowers around the big one. Fill any gaps with spiral flowers and leaves if you like, and the wall art is complete.
Share it in "I Made It" and let us cheer you on.
Post your finished make in "I Made It" so the community can celebrate it with you. Cheer on other makers too. Each month, the most loved craft wins 1 year of Craftaholic Premium ($59)
Tips for Halloween Flower Wall Art
- Change the colors to change the mood. Orange and purple over black webs is the party version, and black flowers with a single deep red one looks moodier.
- For a smaller spot like a shelf or a door, make one flower and one web instead of a full cluster. For a bigger flower, print the template larger and keep every piece at the same scale so the petals still fit the base.
Frequently Asked Questions
Can I use regular printer paper instead of cardstock?
Not for the flowers. Regular paper is too thin to hold a curl, so the petals sag once they’re glued and the finished flower looks limp. Use medium-weight cardstock for the petals, spiral centers and leaf branches, since it keeps its cupped shape and stays sturdy on the wall.
How long does Halloween flower wall art take to make?
Plan on 2 to 3 hours for a display like the one in the photos. The petals take the longest, since every flower has 12 and each one needs its own slit and curl. The webs and leaf branches are quicker.
Can I put the paper flowers straight on the wall?
Yes, you can glue everything directly to the wall, starting with the webs and finishing with the flowers. If you’d rather not put glue on your paint, build the whole display on a large sheet of base paper instead and put that up as one piece.
Can I make the pieces ahead of a Halloween party?
Yes. Every piece is made separately and they only come together when you assemble the wall, so you can make them over a few evenings and put the display up on the day. Keep the flowers in a box with nothing stacked on top so the petals hold their shape.
More Paper Crafts Tutorials
Want more paper projects? Browse all our Paper Crafts tutorials, or try one of these next.
- 3D Halloween Shadow Box: Layered Paper Art (No Cricut) for another layered Halloween piece for the wall
- How to Make a Paper Marigold Flower That Looks Real to add a realistic orange bloom to your display
- How to Make an Origami Spider (Easy Step-by-Step + Video) to put a spider on those webs
Share your Halloween flower wall art in the I Made It space inside Craftaholic Community. The most-loved post each month wins a one year free Premium membership.
0 Comments
Join the conversation
Log in to your Craftaholic Community account to comment, ask questions, and cheer on fellow makers.
Log in to comment