

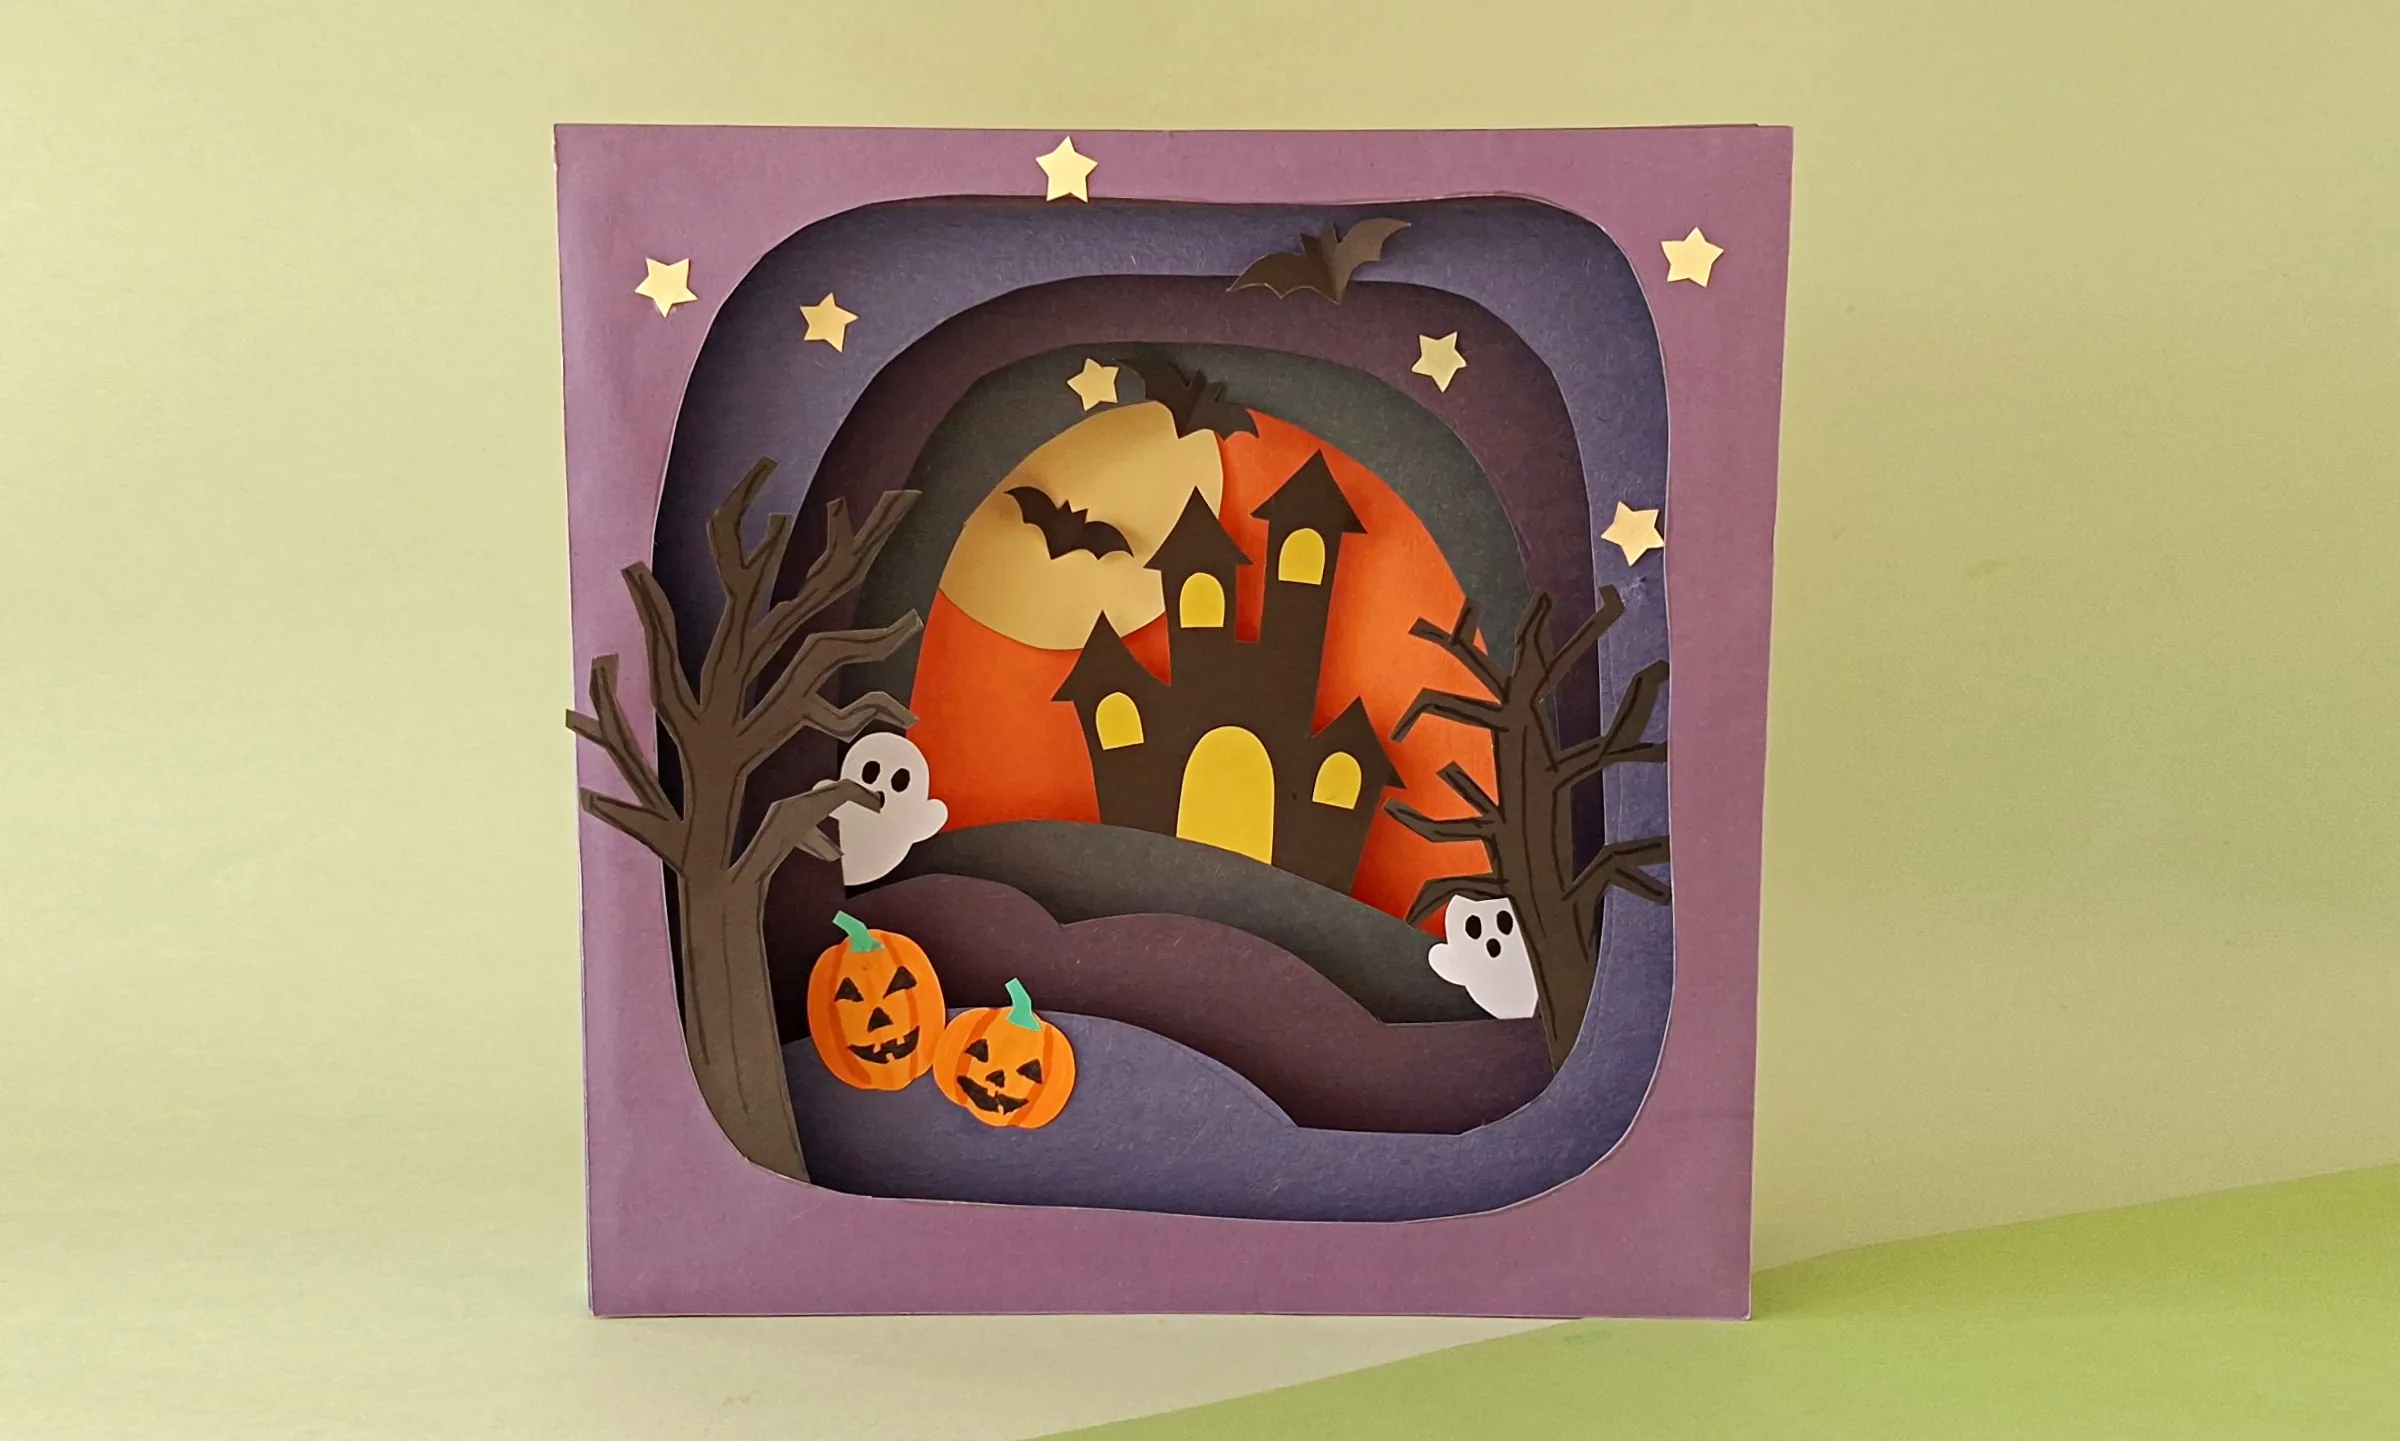
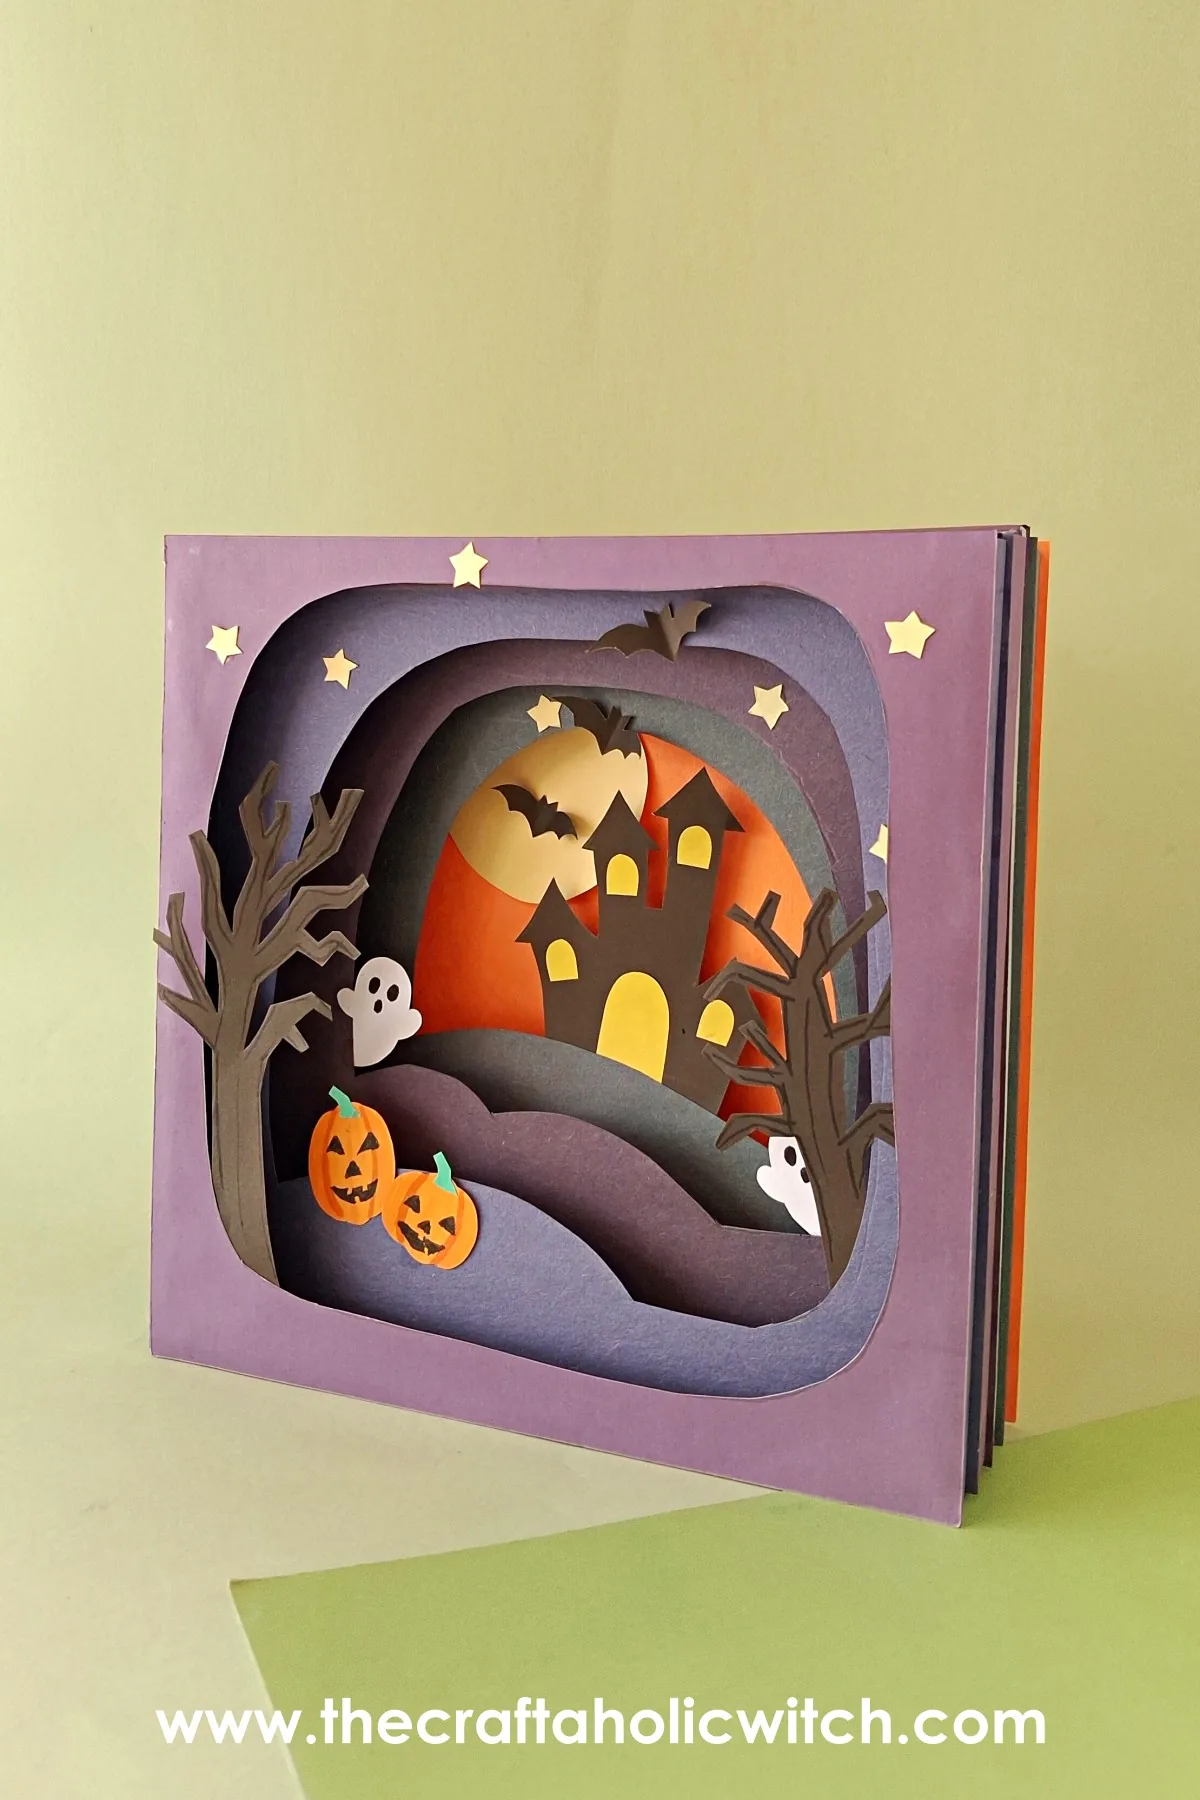
I have a soft spot for Halloween crafts that don’t scream at you. A 3D Halloween shadow box keeps things dim and layered, moodier than gory, which is exactly the kind of shelf piece I want in my own house every October.
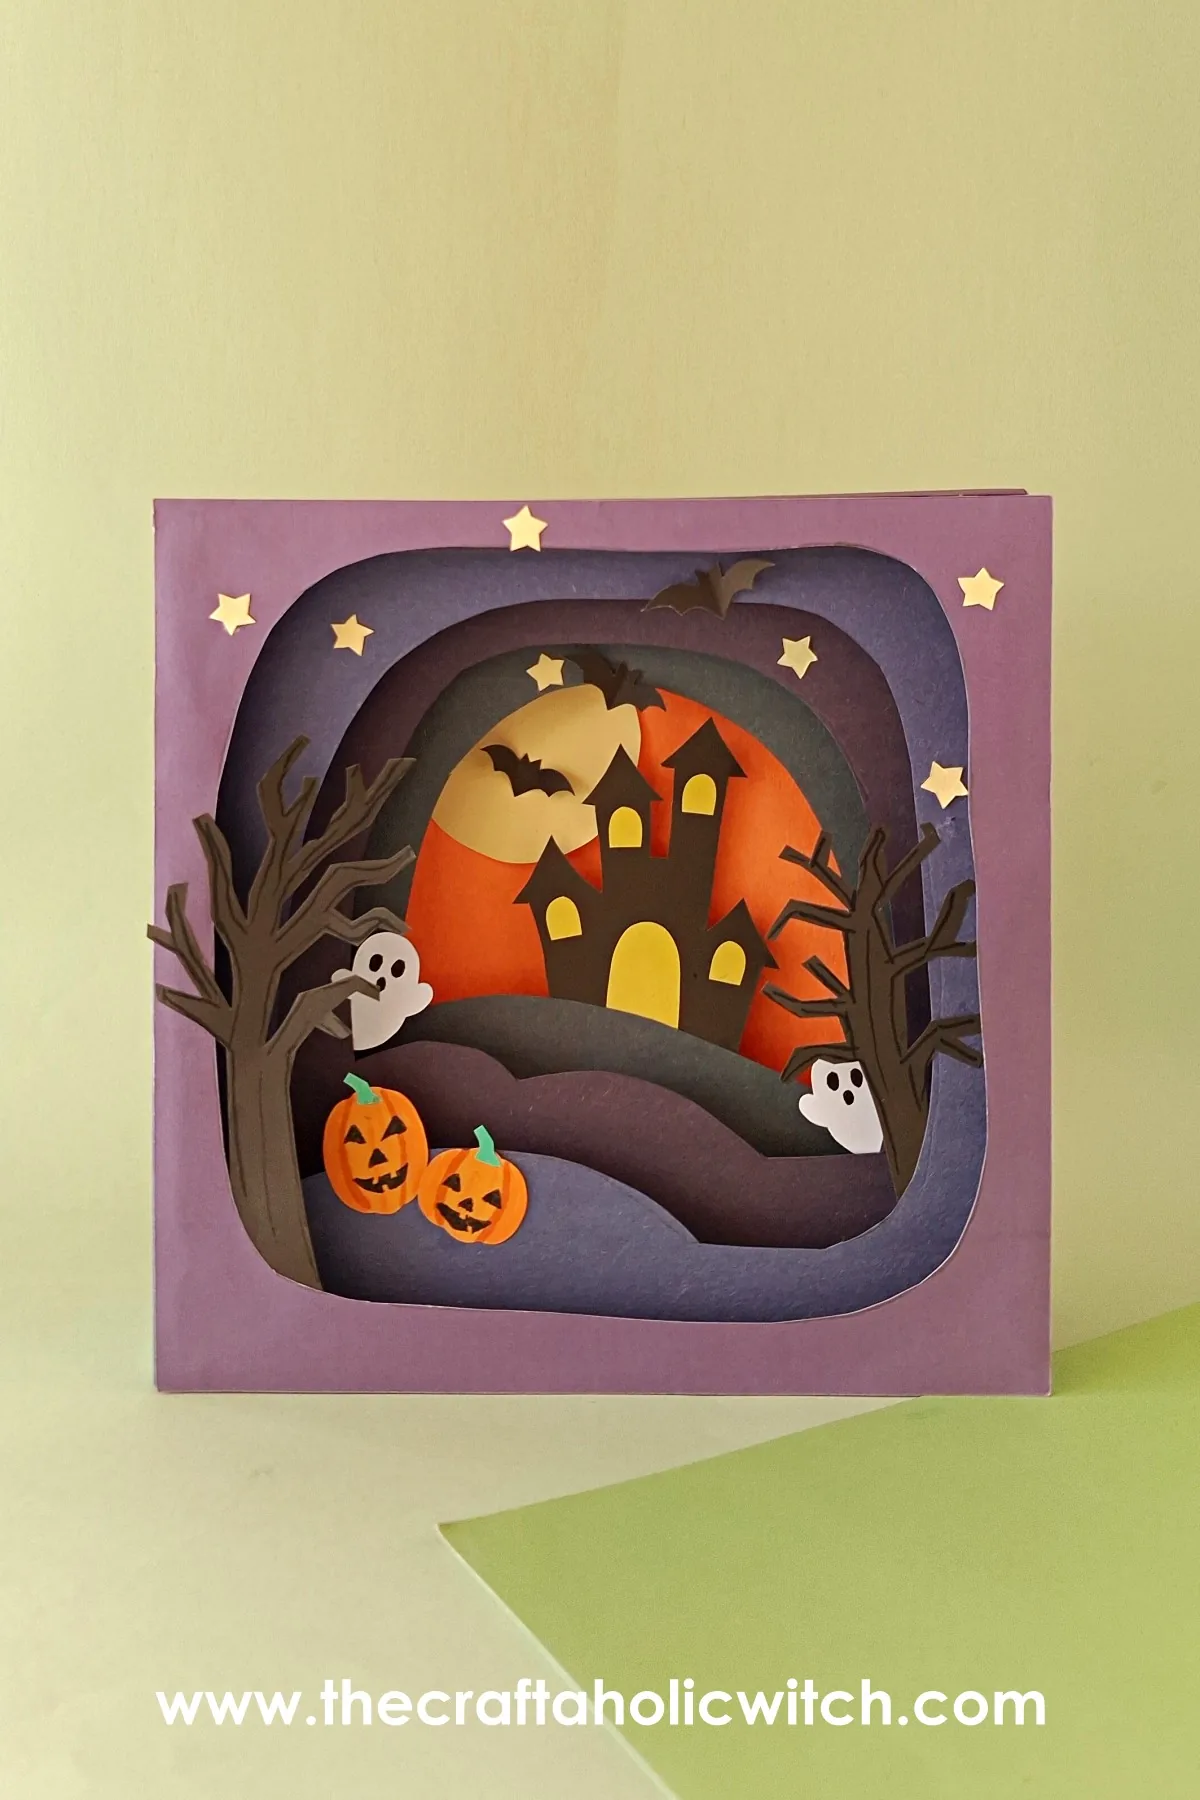
You’ll build a five-layer paper scene of a haunted house, ghosts, and pumpkins under a full moon, using cardstock and a utility knife, in about an hour and a half to two hours, and it stands on its own with no frame needed.
This shadow box lives in our paper decor and 3D crafts collection, and it is the Halloween twin of our 3D layered paper art scene, which uses the same layered-paper technique in warm autumn colors instead of a night sky.
3D Halloween Shadow Box at a Glance
- Difficulty: Intermediate
- Time: 1.5 to 2 hours
- Cost: Under $10 (plus the template)
- Ages: 12+ (utility knife required)
- Best for: Halloween mantel or shelf decor
What You Need to Make a 3D Halloween Shadow Box
Materials
- Thick colored craft paper or medium-weight cardstock (200 to 250 gsm), five same-size sheets in black, dark blue, or dark purple for the layers plus one bright color for the base, since heavier stock holds the cut openings and glued strips without sagging.
- Assorted colored craft paper, for the haunted house, trees, ghosts, bats, moon, and jack-o’-lanterns.
- Craft glue, to join the layers and scene pieces without warping the paper the way a glue stick can.
- Printed shadow box template, available in our shop, gives you the five layer shapes and every scene pattern to trace.
Tools
- Pencil, for tracing the template onto your paper.
- Cutting mat, to protect your table and keep every knife cut clean.
- Utility knife, for cutting the layer openings, since scissors cannot turn the tight inner corners cleanly.
- Ruler, for measuring the spacer strips and scoring straight crease lines.
- Scissors, for cutting out the scene pieces.
- Markers, for drawing the ghost and jack-o’-lantern faces.
If you would rather skip tracing all five layers and every scene piece by hand, the printed template for this shadow box is available in our shop.
Ask inside "Crafty Q&A" while you are making.
"Crafty Q&A" is free to join. Share your question, photo, or the exact step where you got stuck, and chat with other makers plus the Craftaholic Witch team. You can also join any discussion thread already happening inside the space.
How to Make a 3D Halloween Shadow Box
Step 1: Choose Your Five Layer Colors
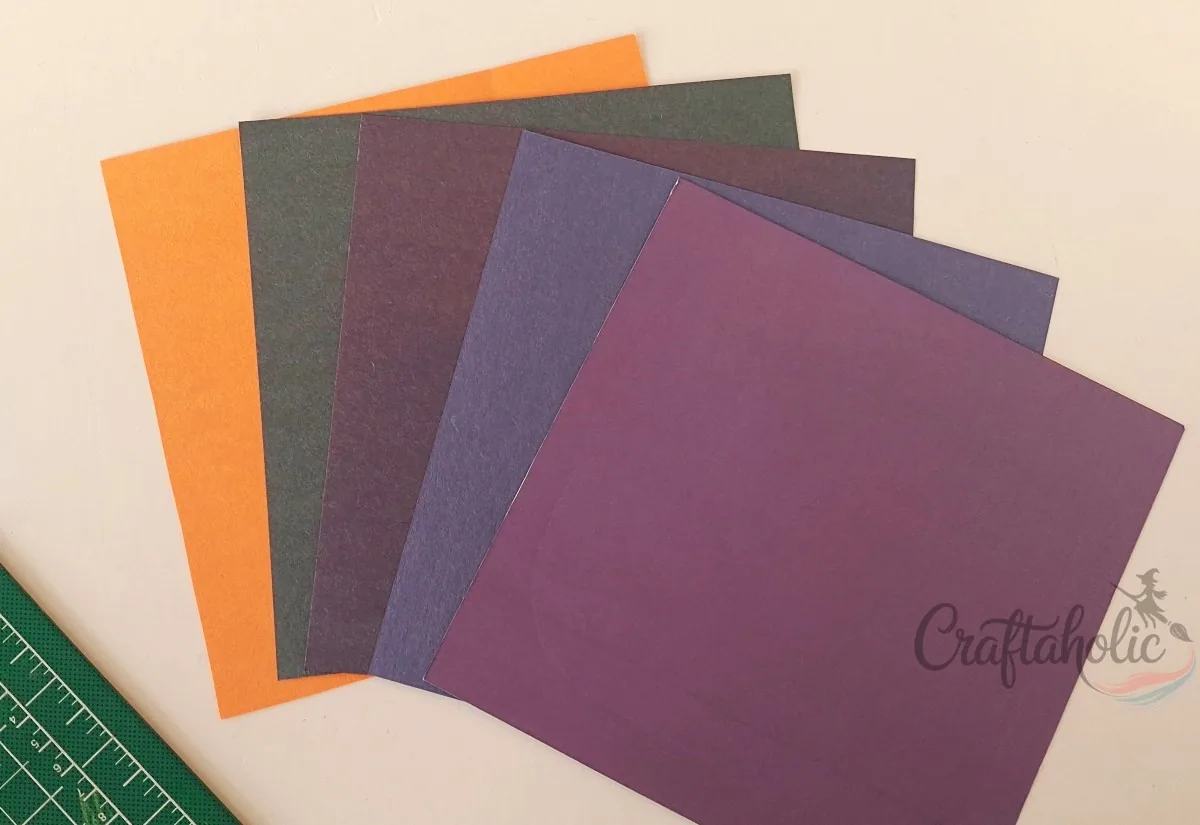
Pick one bright sheet of paper for the Base/Background layer, then choose four sheets in shades of black, dark blue, or dark purple for the First through Fourth/Top layers. Blending a few dark shades together, rather than using one flat color, is what makes the stack read as a night sky instead of four sheets of paper.
Cut all five sheets to the same size before you trace anything. Every layer and spacer strip lines up against that shared edge later.
Step 2: Trace the Fourth/Top Layer’s Opening
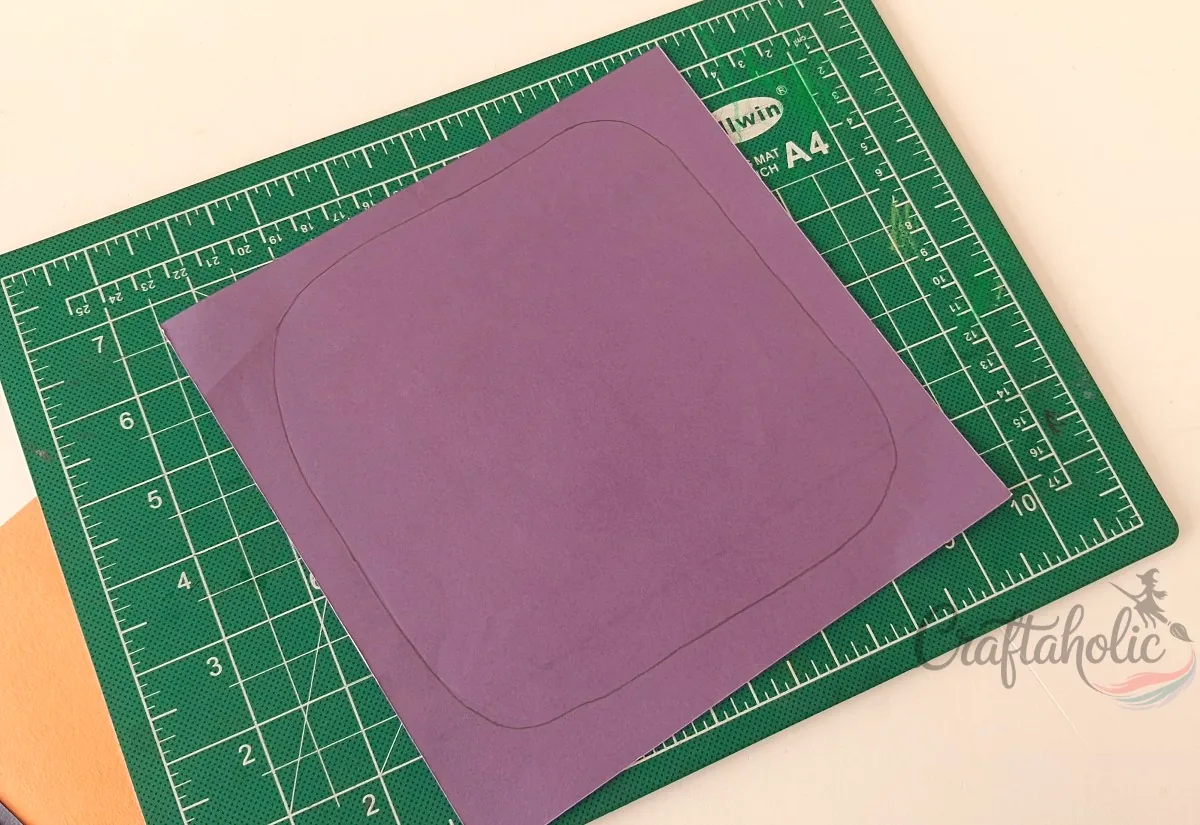
Set the Fourth/Top Layer paper on a cutting mat and trace its opening from the template. This is the widest opening in the stack, the one that frames the whole scene once the box is assembled.
Step 3: Cut Out the Fourth/Top Layer’s Opening
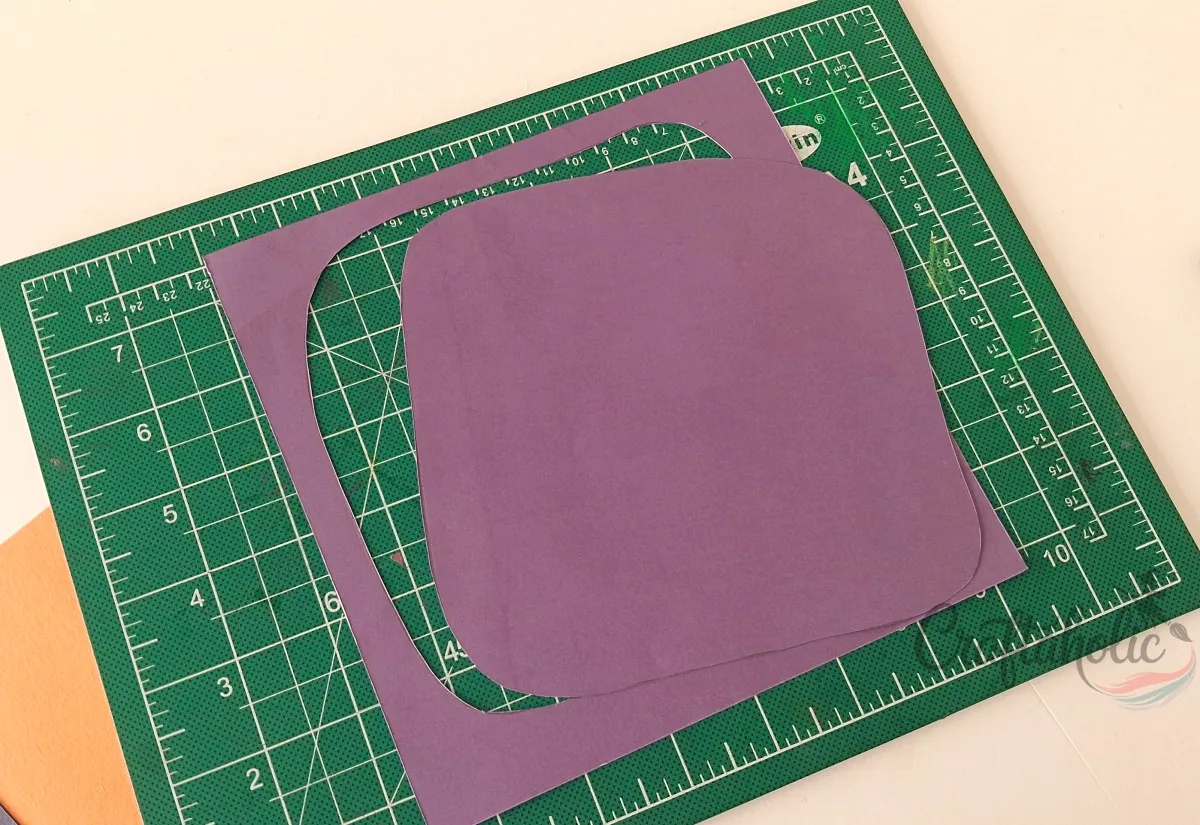
Cut along the traced line with a utility knife, keeping the paper flat on the cutting mat as you go. A utility knife turns the tight curves of this shape more cleanly than scissors can.
Step 4: Trace and Cut the Third Layer
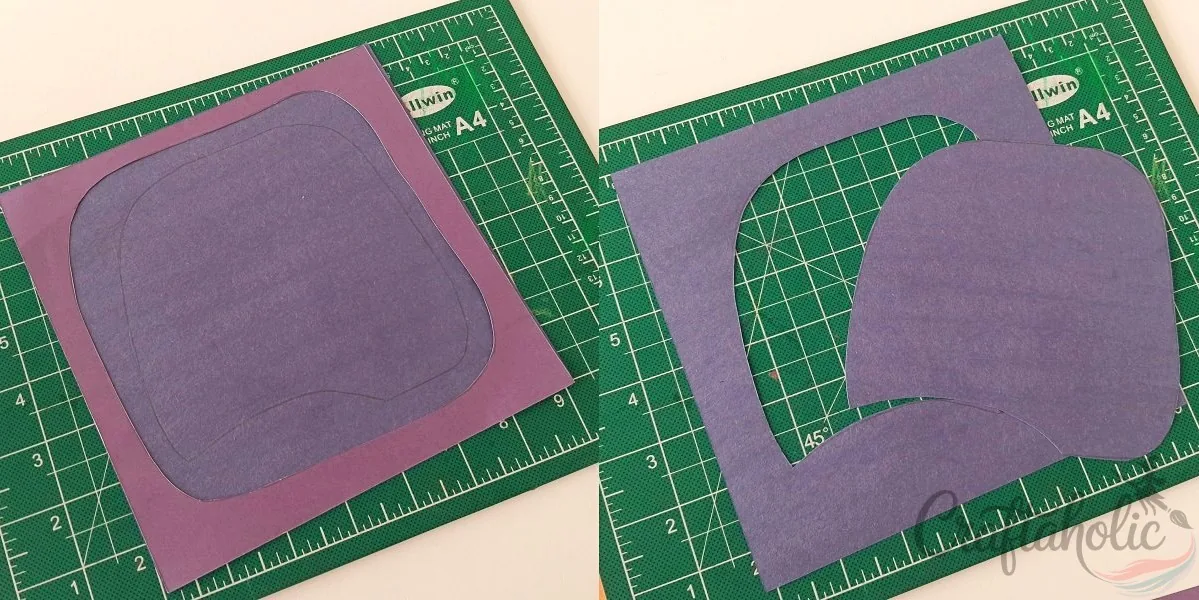
Lay the Third Layer paper under the Fourth/Top Layer and line up the edges. Trace its opening, which sits a little smaller and lower, then cut it out with the utility knife the same way.
Step 5: Check Your Four Cut Layers Against Each Other
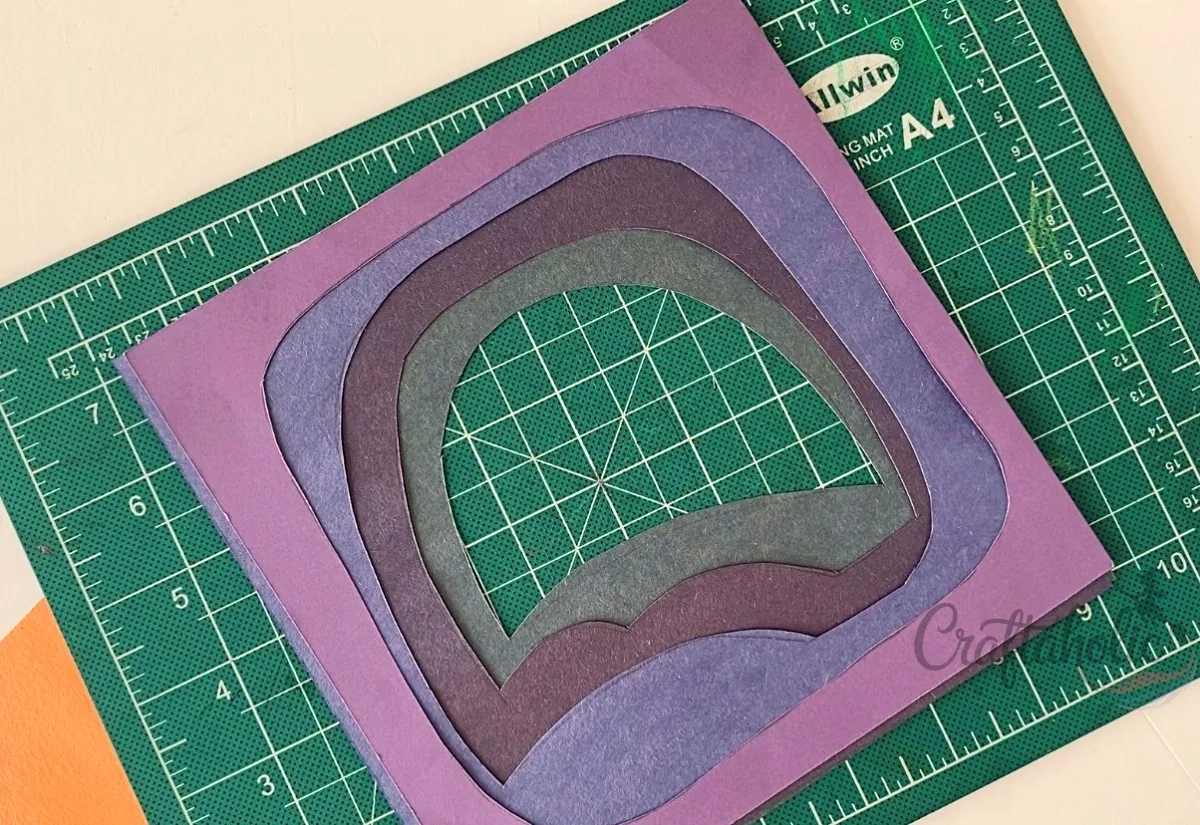
Trace and cut the Second and First layers the same way, each opening slightly smaller than the one above it. Stack all four cut layers together now. If light passes through the openings evenly from top to bottom, they’re ready to glue.
Step 6: Cut Your Sixteen 3D Spacer Strips
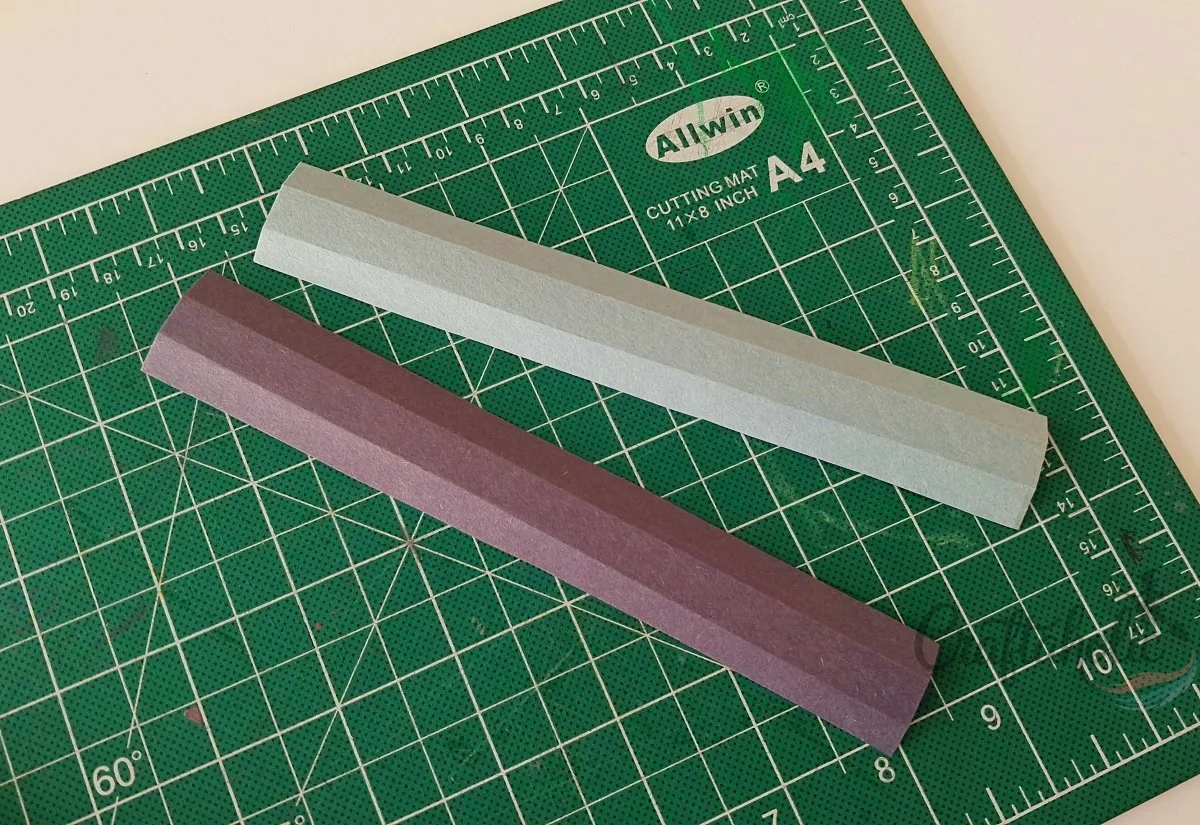
Measure and cut strips 3 cm wide, the same length as your layers. You need four strips per layer, sixteen strips in total, since each one becomes a side of that layer’s spacer frame.
Step 7: Crease Each Strip Into Thirds
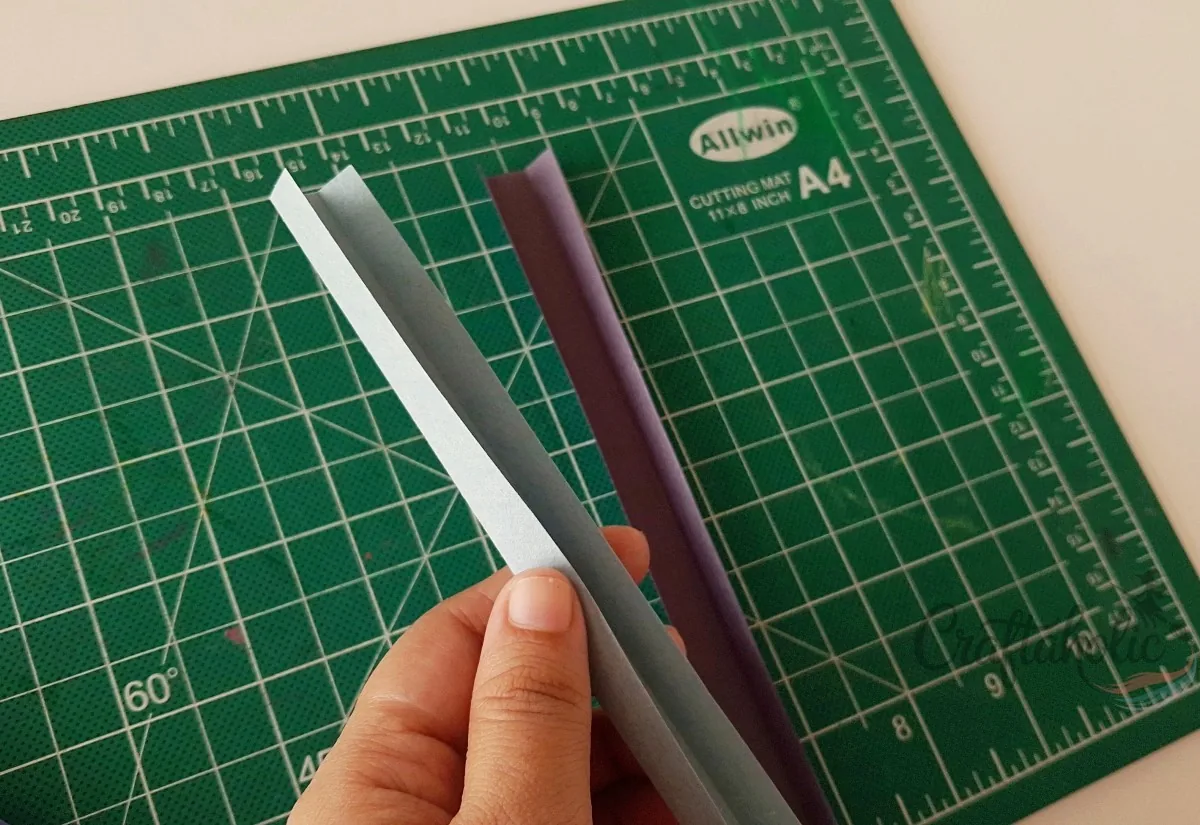
Use a ruler and the back edge of your utility knife to score two lines on each strip, dividing the 3 cm width into three even 1 cm sections, then fold along both creases.
Tip: Score with the knife’s dull edge instead of the blade. It presses a clean line into the paper without cutting through, so the fold stays sharp.
Step 8: Fold All Sixteen Strips Before You Glue Anything
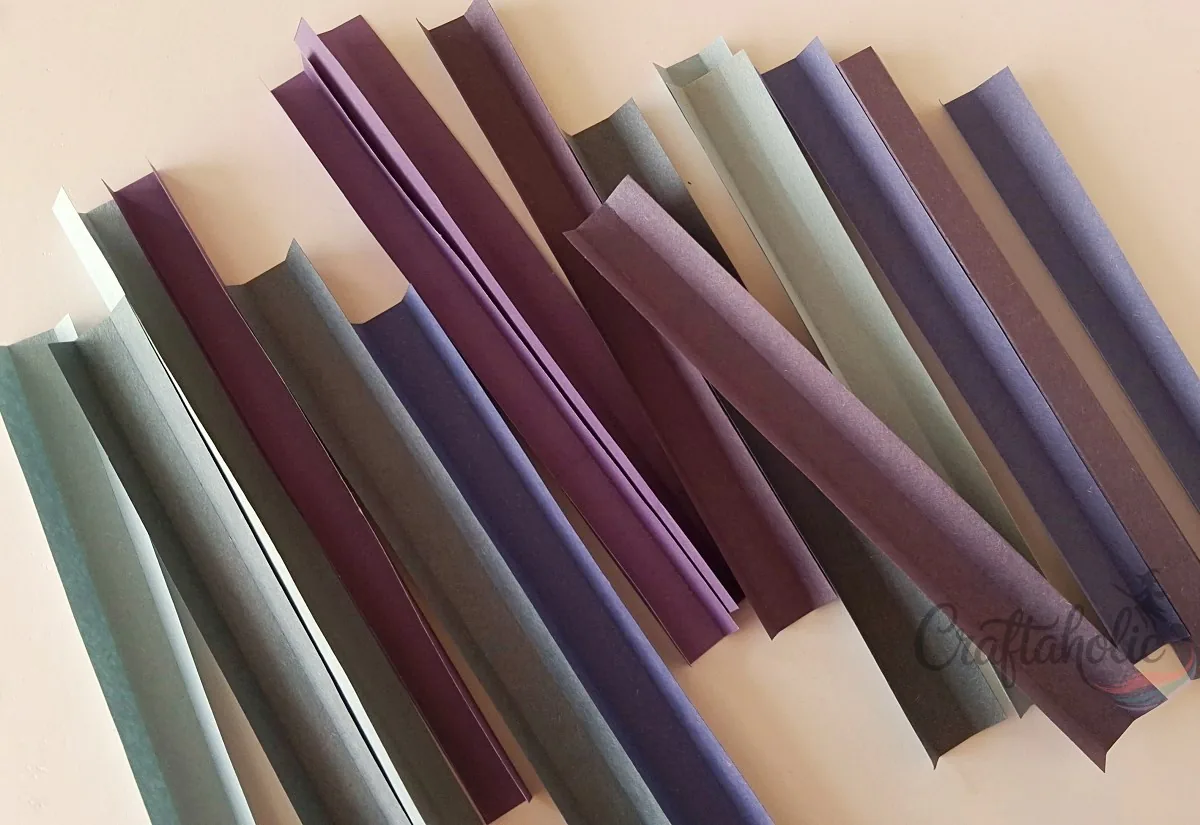
Repeat the crease-and-fold on all sixteen strips, four for each of the four layers. Getting every strip folded now, before any glue comes out, keeps the next stage moving without sticky fingers slowing you down.
Step 9: Glue the Back Edges of the First Layer
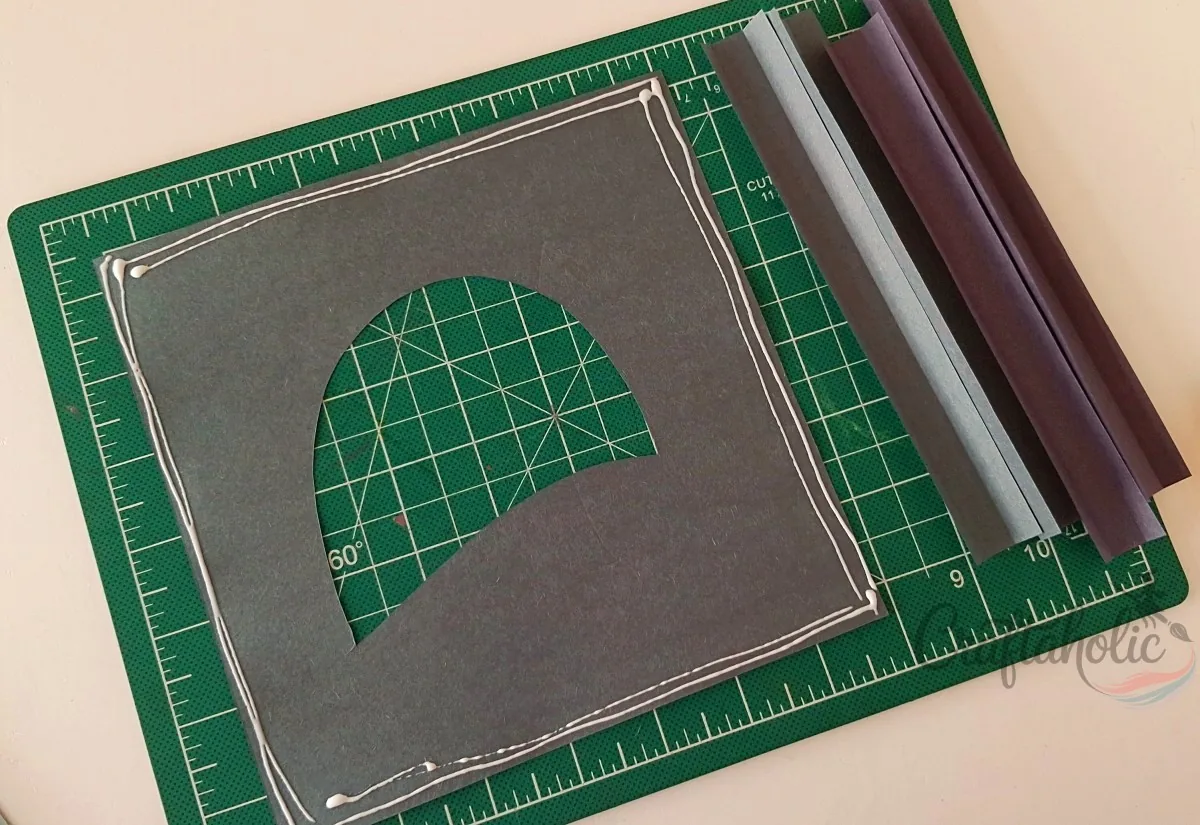
Flip the First Layer face down and run a line of glue along all four edges on the back.
Step 10: Attach a Spacer Strip to the First Edge
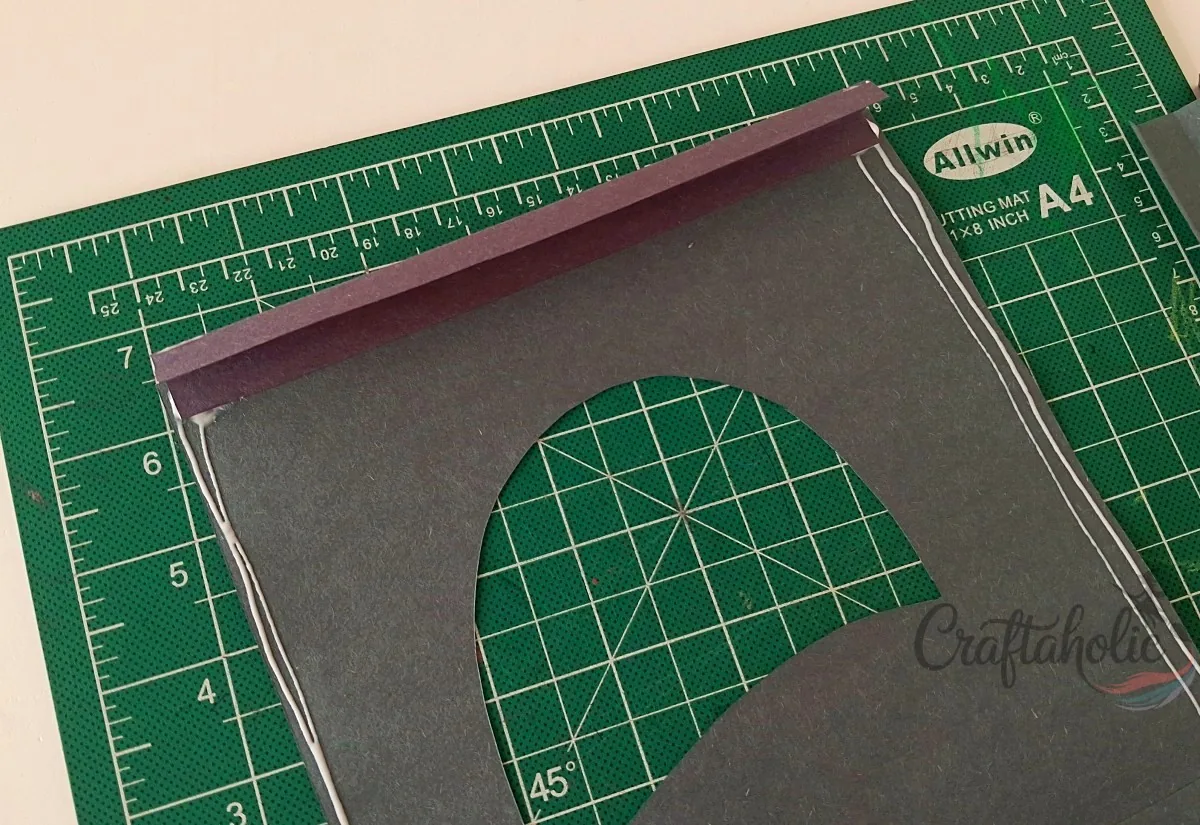
Press one folded strip’s outer flap onto a glued edge of the First Layer. The 1 cm middle section stands the Second Layer off the First, and the strip’s other outer flap is what that next layer will glue onto.
Step 11: Glue All Four Spacer Strips Around the Layer
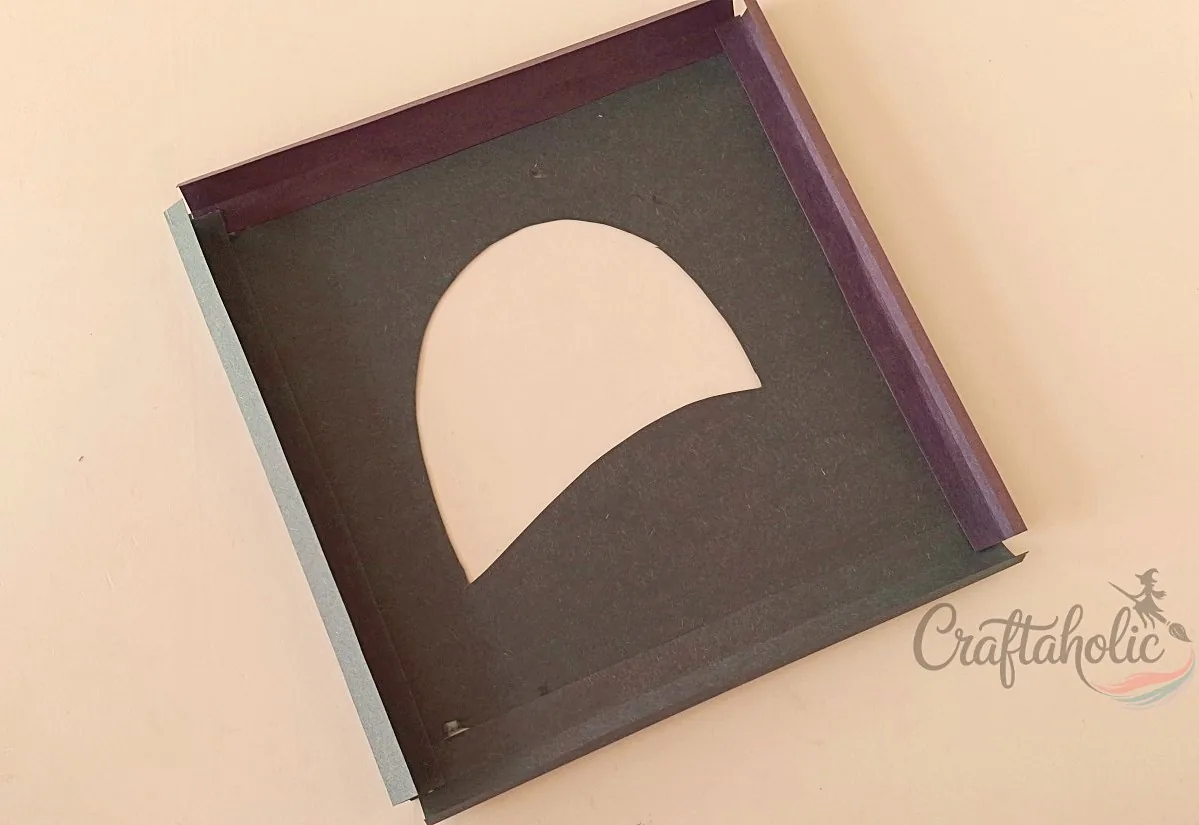
One by one, attach the remaining three strips along the other three glued edges, so all four sides of the First Layer now carry a spacer strip.
Step 12: Glue the Corners Where the Strips Meet
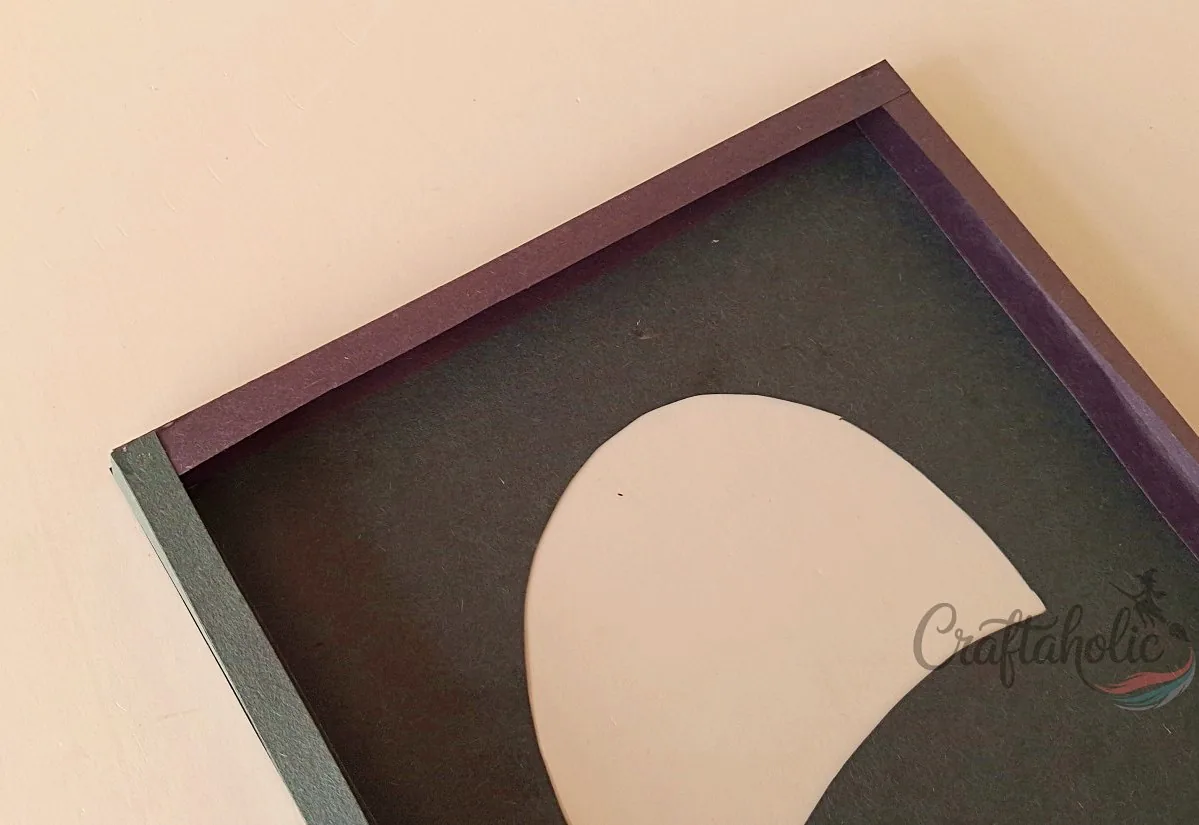
At each corner, overlap the two strip ends and glue them together so the frame holds its shape without a gap.
Step 13: Add Spacer Strips to the Remaining Three Layers
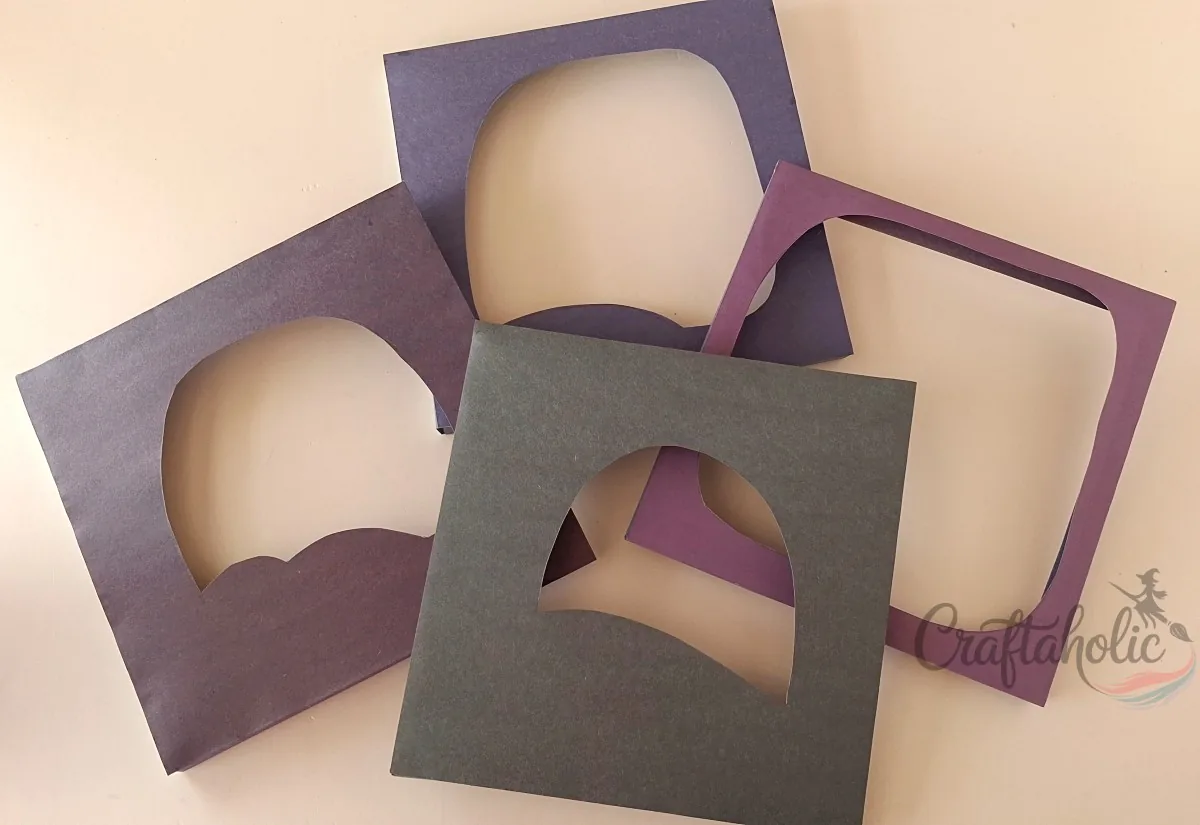
Repeat steps 9 through 12 on the Second, Third, and Fourth/Top layers, gluing a spacer-strip frame to the back of each one. By the end of this step, all four layers should look like shallow open trays.
Step 14: Glue the First Layer to the Base
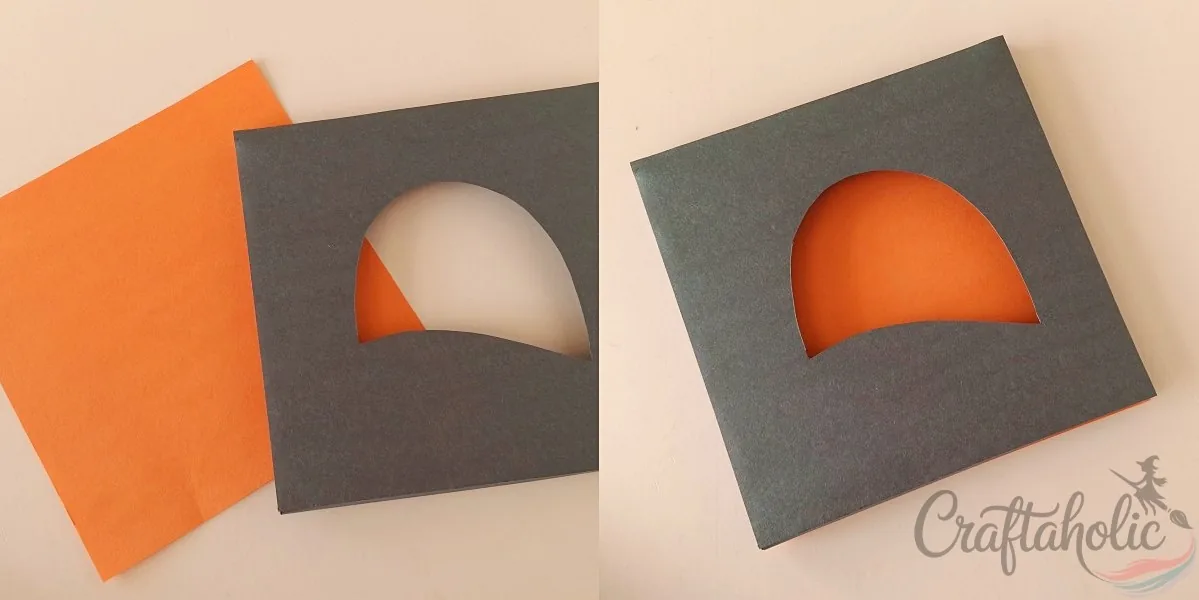
Run glue along the four edges of the Base/Background paper and press the First Layer’s spacer-strip frame down onto it, lining up all four sides.
Step 15: Stack the Second and Third Layers
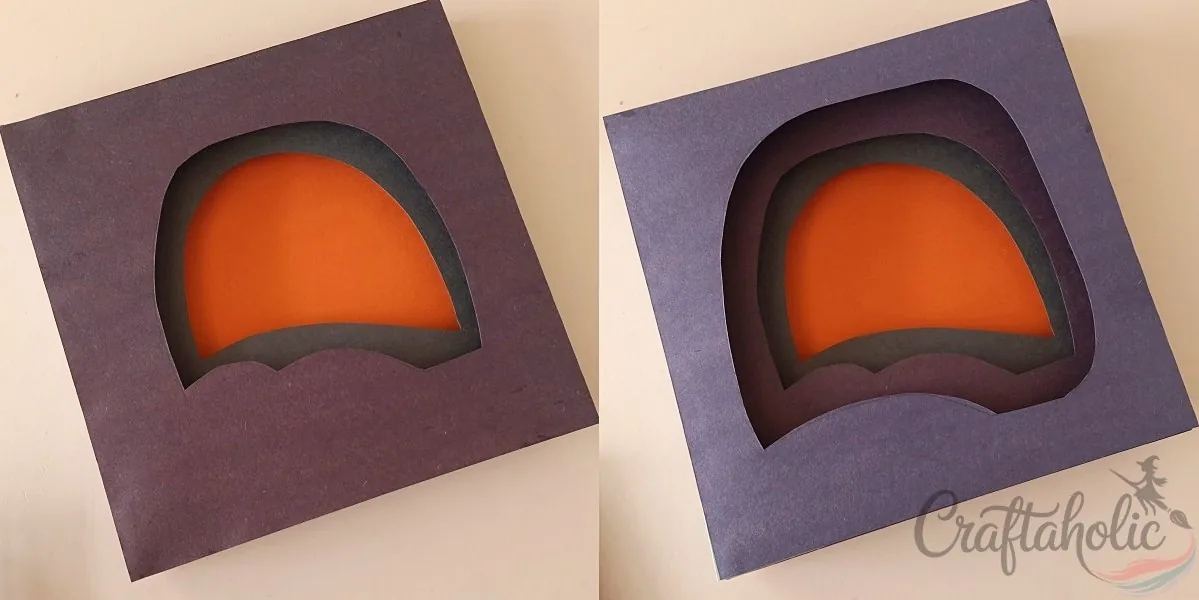
Glue the Second Layer’s spacer-strip frame onto the First Layer, then glue the Third Layer onto the Second the same way.
Line up the edges of each layer before the glue sets. A layer that drifts even slightly throws off the opening you traced back in step 4.
Step 16: Glue On the Fourth/Top Layer to Finish the Stack
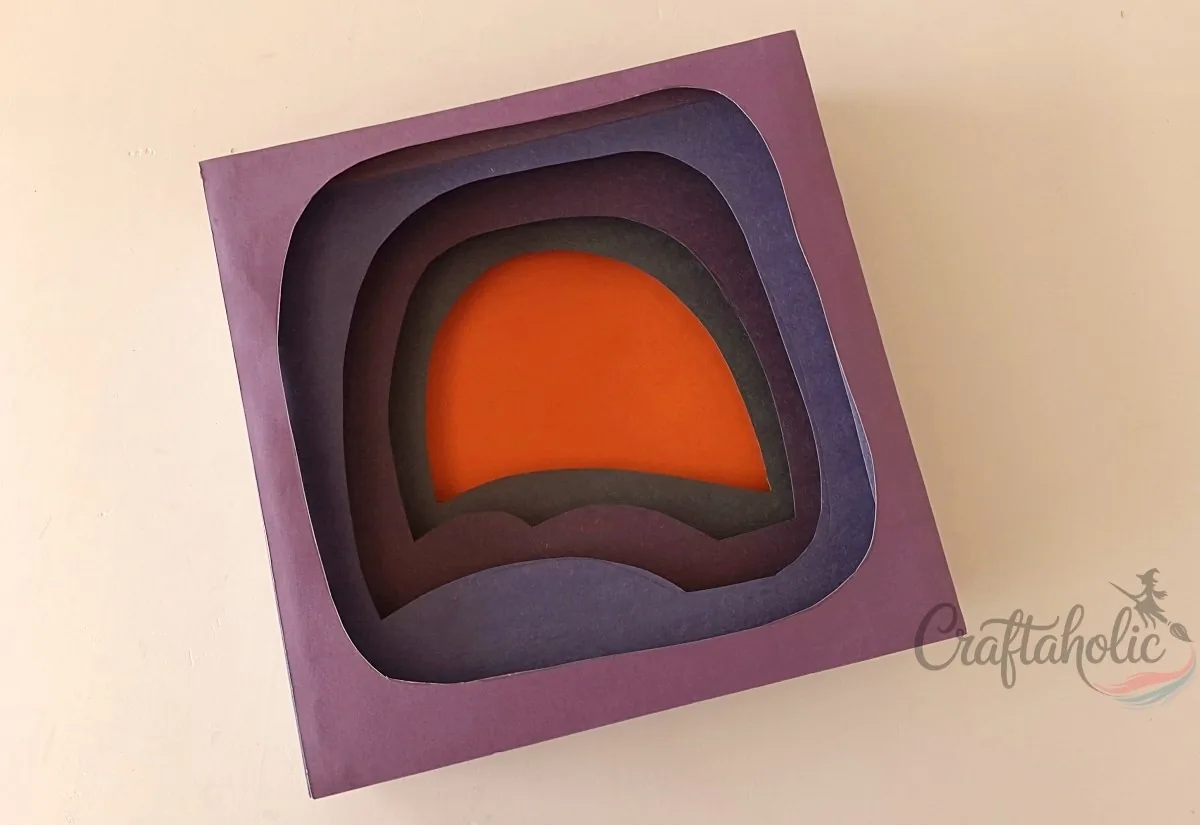
Attach the Fourth/Top Layer onto the Third the same way. With all five layers glued, your shadow box now has its full depth.
Step 17: Cut Out the Haunted House Scene Pieces
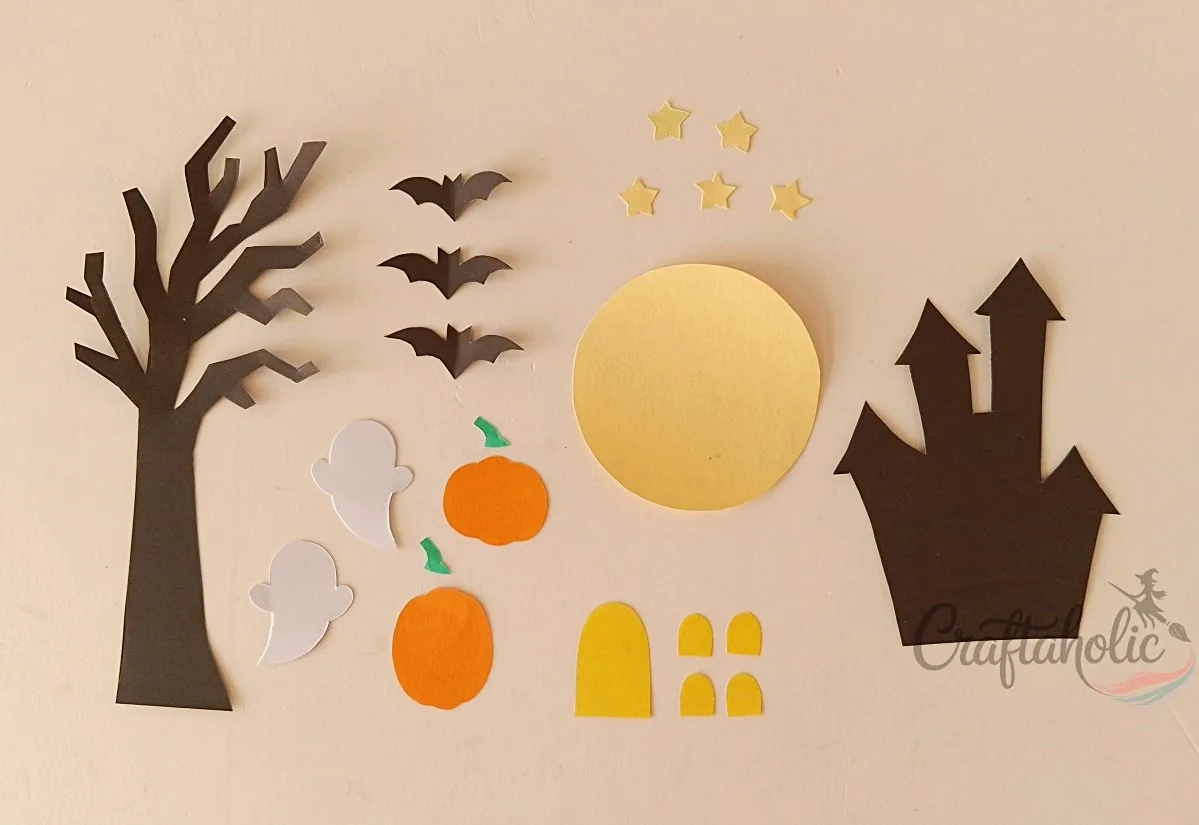
Trace and cut the scene patterns from the template in your choice of colors: the haunted house, two bare trees, a ghost, bats, stars, a moon, and jack-o’-lanterns.
Step 18: Assemble the Haunted House and Draw the Faces
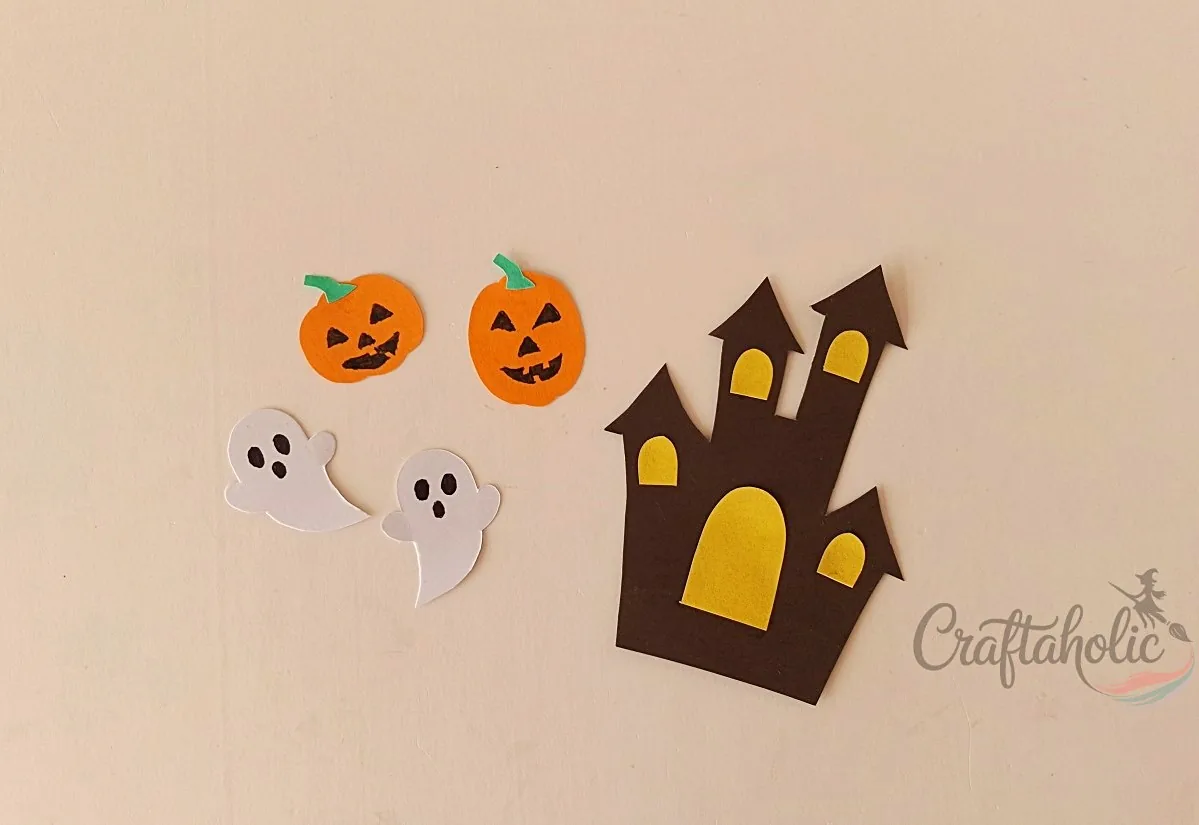
Glue the door and window cutouts onto the haunted house, then use a marker to draw faces on the ghost and jack-o’-lanterns. Glue a stem onto each jack-o’-lantern.
Step 19: Glue the Moon Onto the Background
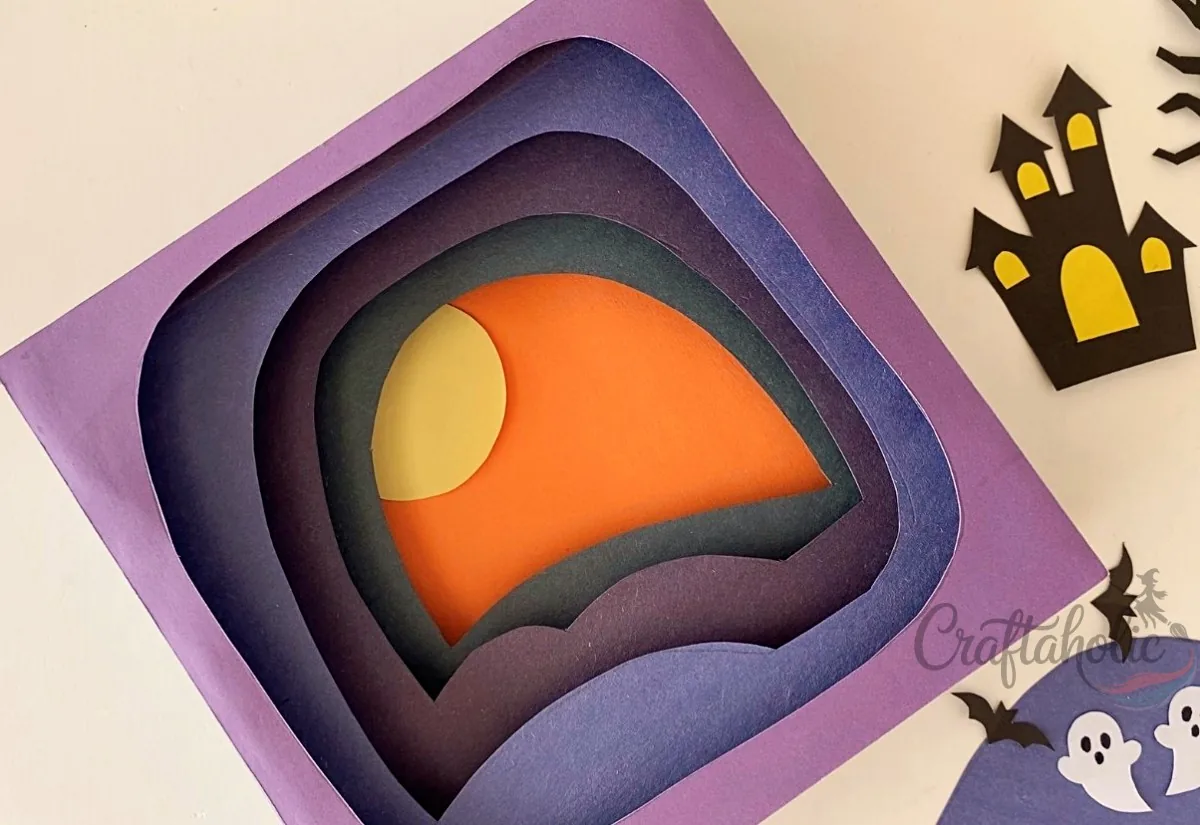
Attach the paper moon to the Base/Background layer first. Every other scene piece gets placed and layered in front of it, so it needs to go down before anything else.
Step 20: Arrange and Glue the Scene Onto the Layers
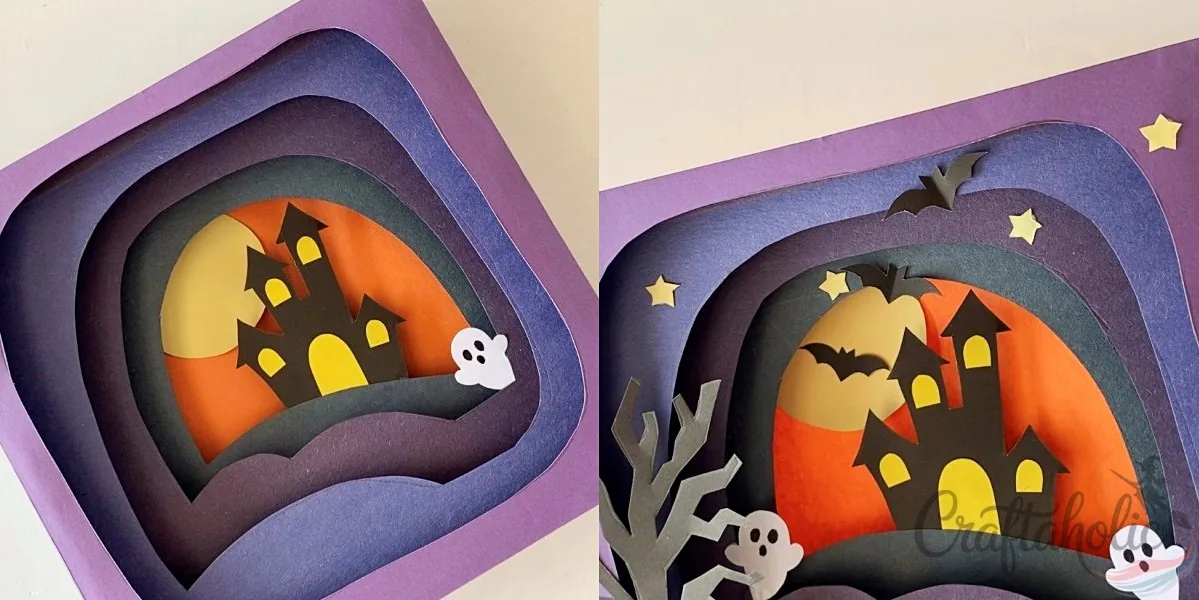
Place the trees, haunted house, ghosts, bats, and pumpkins across the layers to build depth, then glue each piece down once you’re happy with the arrangement.
Tip: Lay every piece in place without gluing first, then step back and check the arrangement before you commit any of them.
Share it in "I Made It" and let us cheer you on.
Post your finished make in "I Made It" so the community can celebrate it with you. Cheer on other makers too. Each month, the most loved craft wins 1 year of Craftaholic Premium ($59)
Tips for Your 3D Halloween Shadow Box
- If your utility knife starts dragging instead of slicing cleanly, swap the blade. A dull blade tears the paper’s edge instead of cutting it, especially on the tight curves of the tree branches and bat wings.
- Use fresh craft glue rather than a glue stick. A glue stick will not hold the weight of the spacer strips once four layers are stacked.
- This one pairs well with the rest of our Halloween paper crafts if you are building out a full shelf display.
Frequently Asked Questions
Can I make a 3D Halloween shadow box without a utility knife?
You need a utility knife for the sharpest inner corners of the layer openings, since scissors tend to tear the paper when they try to turn that tightly. A small hobby or detail knife works just as well if that is what you already have.
What paper works best for the layers?
Medium-weight cardstock, around 200 to 250 gsm, holds the cut openings and glued spacer strips without sagging. Standard printer paper is too thin and will buckle once the strips are glued to it.
How long does this project take?
Plan on about an hour and a half to two hours total, most of it spent tracing and cutting the five layers and sixteen spacer strips. The scene pieces and final assembly go faster once the layers are ready.
Can I reuse the shadow box after Halloween?
Yes. Swap the moon, bats, and haunted house for a different scene, like a winter forest or a birthday message, and the same five-layer base works for any occasion.
Why do my layers look uneven once they’re stacked?
This usually means a spacer strip was not glued flush to the layer’s edge, or the layers were not lined up before the glue set. Realign a crooked layer while the glue is still tacky, or add a touch more glue to a loose corner.
For more projects like this one, browse our paper crafts tutorials:
- Easy 3D Paper Pumpkin to Make with Kids
- How to Make Cute 3D Paper Hearts
- DIY Recycled Pumpkin Box (Toilet Paper Roll Craft)
Share your shadow box in the I Made It space inside Craftaholic Community. The most-loved post each month wins a one year free Premium membership.
0 Comments
Join the conversation
Log in to your Craftaholic Community account to comment, ask questions, and cheer on fellow makers.
Log in to comment