

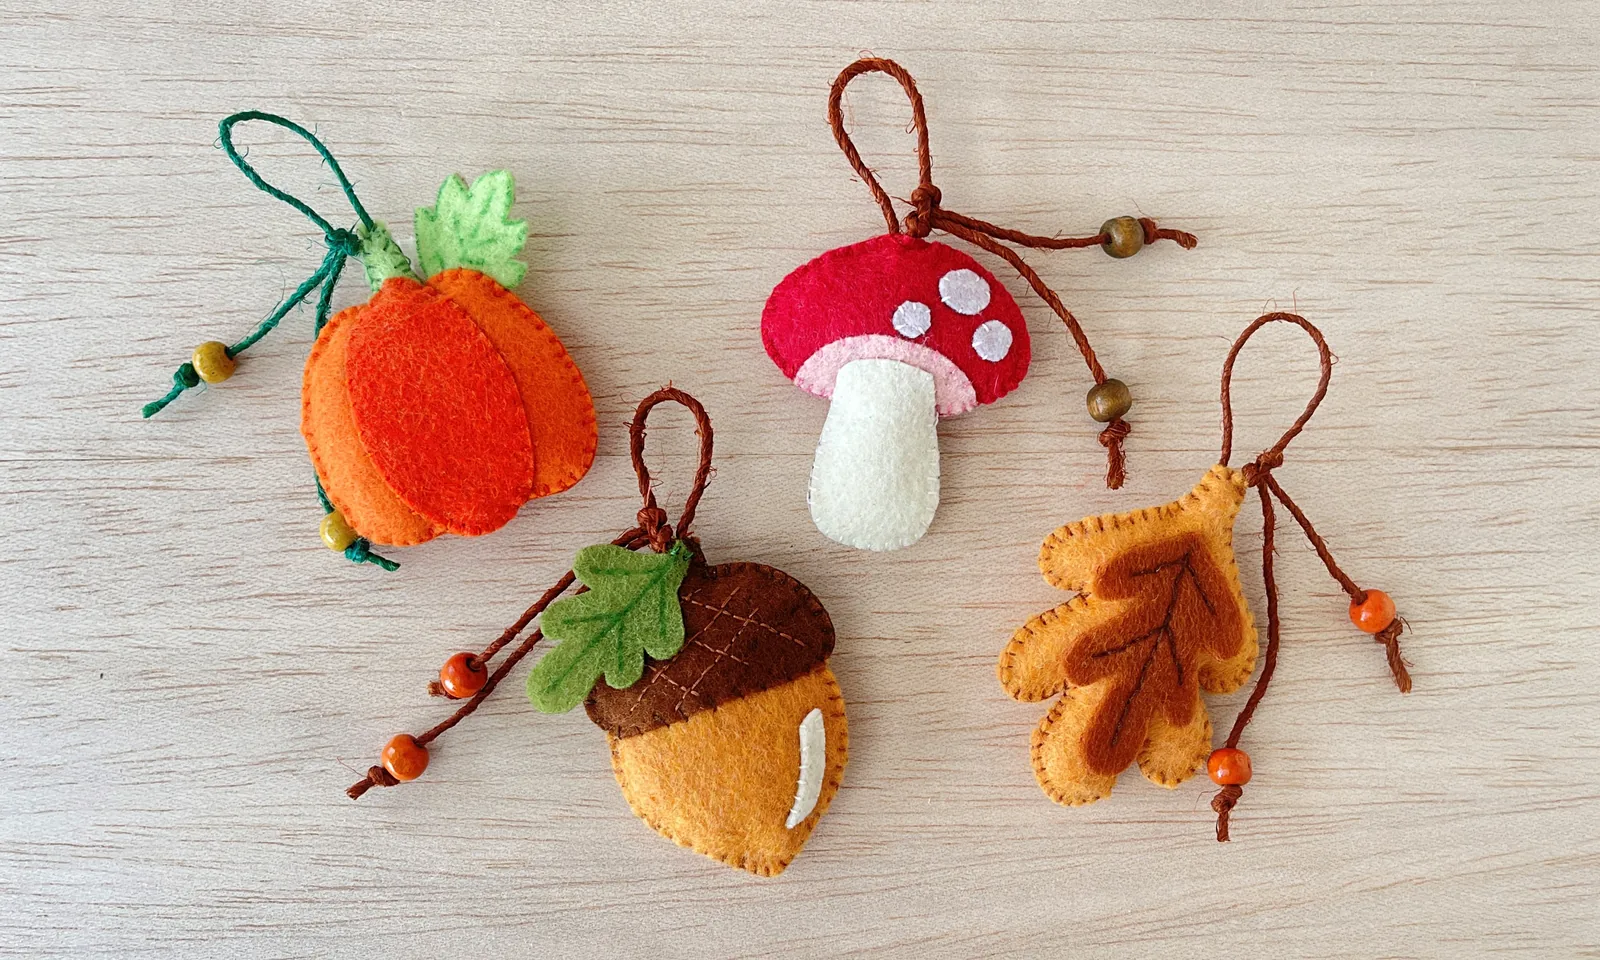
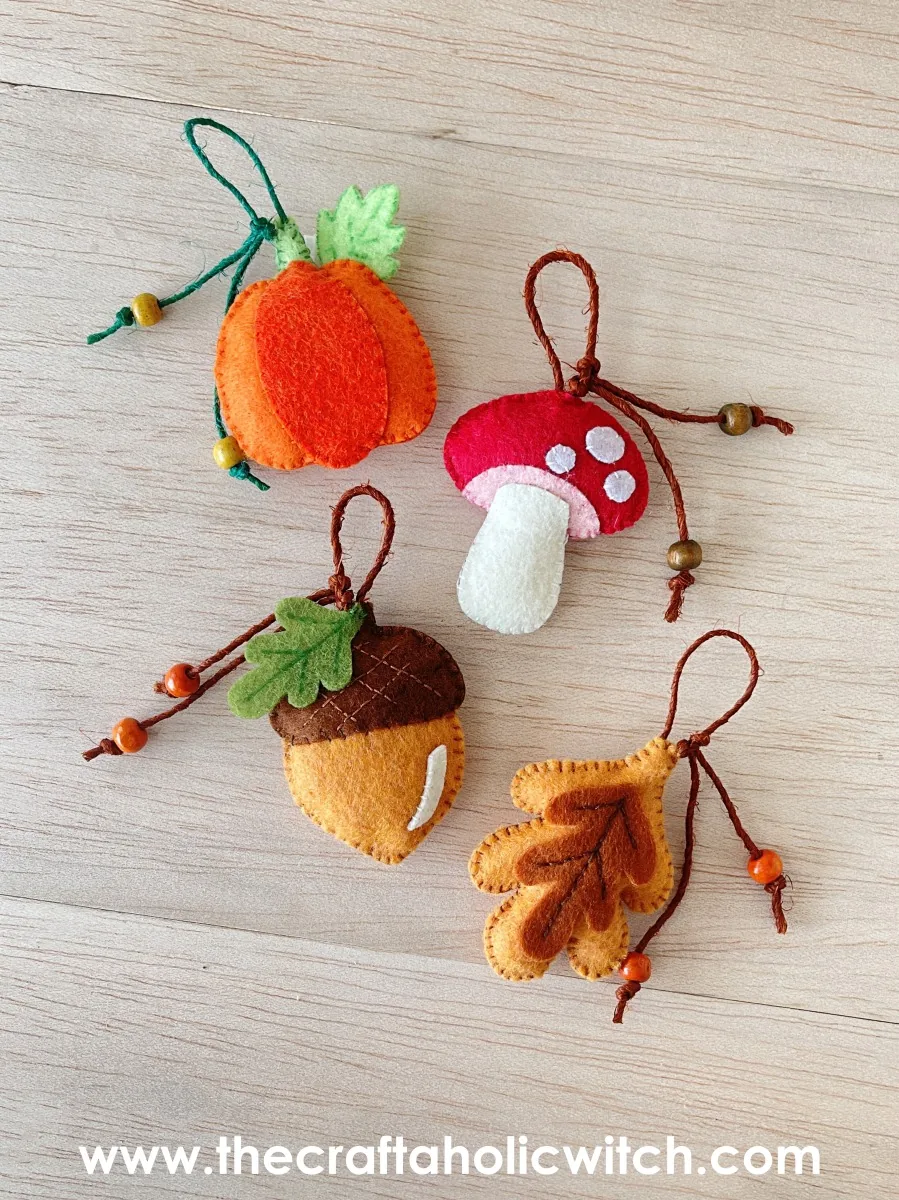
You can make four felt fall ornaments (an acorn, a leaf, a mushroom and a pumpkin) with felt and a needle, and each one is just two stitched felt shapes with a little stuffing between them.
All four go together the same way: a blanket stitch around the edge, then stuffing and a string loop at the top. That means the first ornament teaches you the other three, so start with the leaf if you want a quick win, since it has the fewest pieces. The acorn adds a checkered cup and the mushroom adds dots and gills. Plan on about 45 minutes to an hour per ornament, and you will spend under $10 on felt, thread and cotton. Hang them on a small fall branch or tie one onto a gift.
They sit nicely with the rest of our felt and fabric crafts, and if you are building a fall display, the felt fall gnomes make a good partner piece. More seasonal ideas live in our fall craft collection.
Felt Fall Ornaments at a Glance
- Difficulty: Beginner
- Time: 45-60 minutes per ornament (3 to 4 hours for all four)
- Cost: Under $10
- Ages: 10+
- Best for: Fall decor and handmade gifts
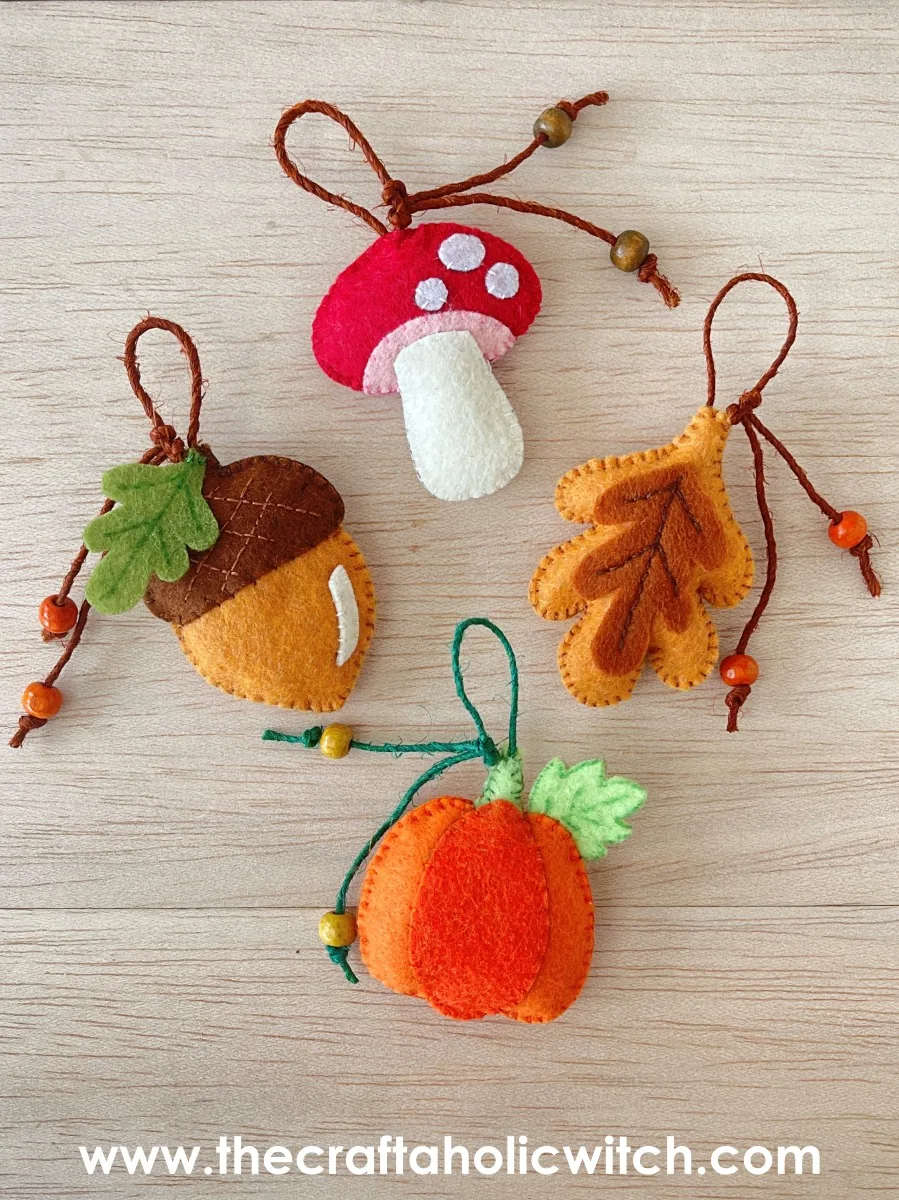
What You Need to Make Felt Fall Ornaments
Materials
- Felt in assorted colors: dark and light brown for the acorn, white for the shine line and mushroom stalk, yellow for the leaf, red or brown for the mushroom cap, and orange and green for the pumpkin. Felt cuts cleanly without fraying, so the edges stay neat.
- Matching thread: so the stitches blend into each ornament, plus one contrasting shade for the acorn’s checkered cup.
- Cotton: for the stuffing. Scrap felt trimmings work too if you would rather not buy cotton.
- String: for the hanging loops. Pick colors that match the ornaments, like brown for the acorn and green for the pumpkin.
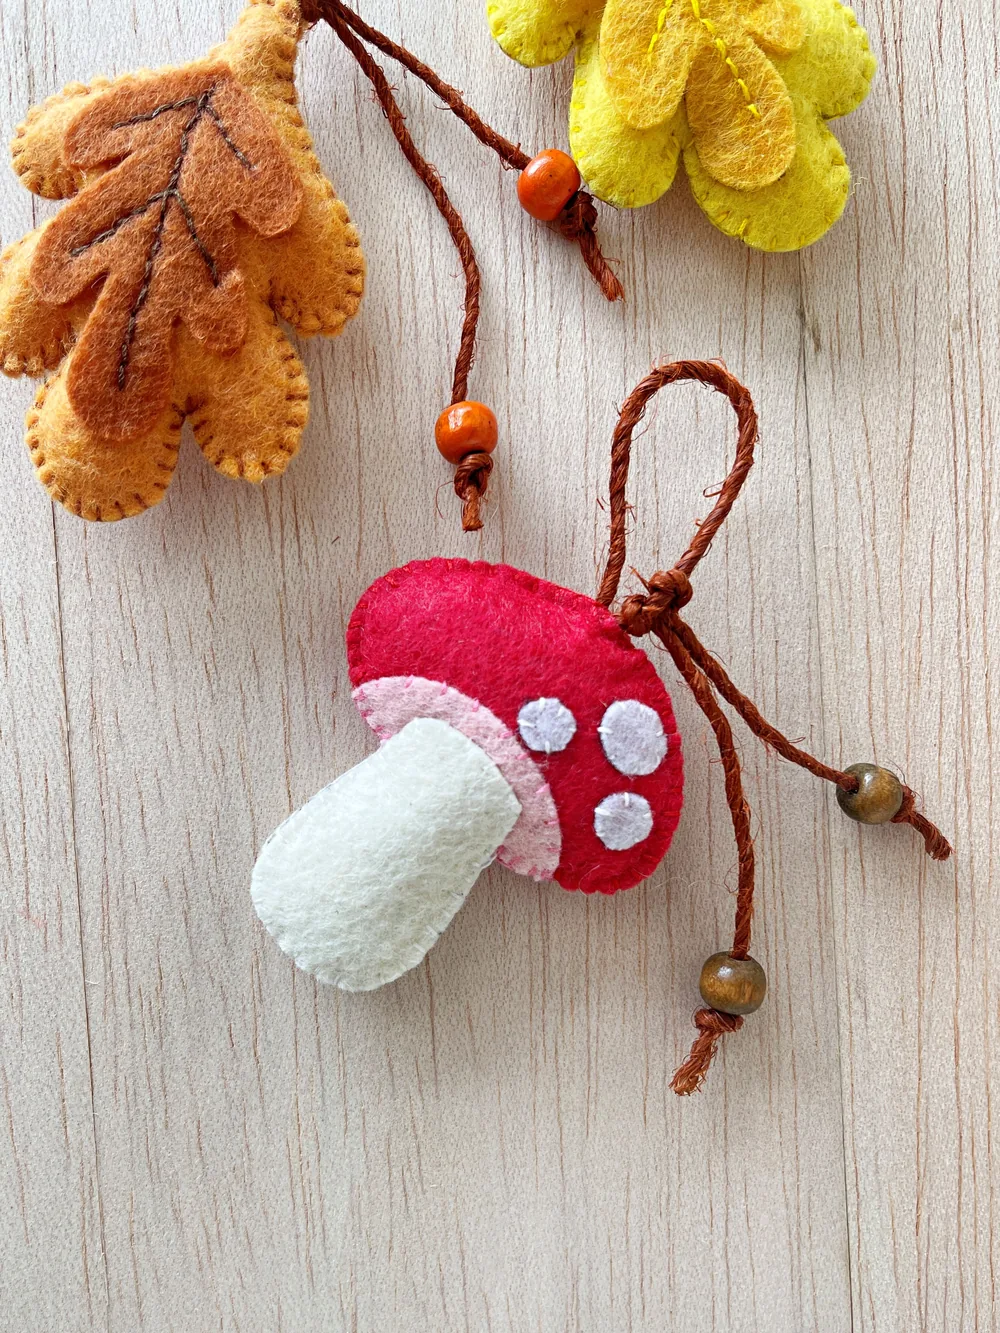
- Small, round, wooden beads (optional): a little color at the ends of the string loops, as in the photos.
Tools
- Printable template: it has every pattern piece for all four ornaments, so the front and back pieces match.
- Fabric marker: for tracing the patterns onto felt and marking the acorn’s checkered pattern.
- A sharp pair of scissors: dull blades chew up felt edges.
- Embroidery needle: its larger eye makes thicker thread easier to pull through.
The printable template PDF includes every pattern piece for the acorn, leaf, mushroom and pumpkin, and it is available in the Craftaholic Witch shop.
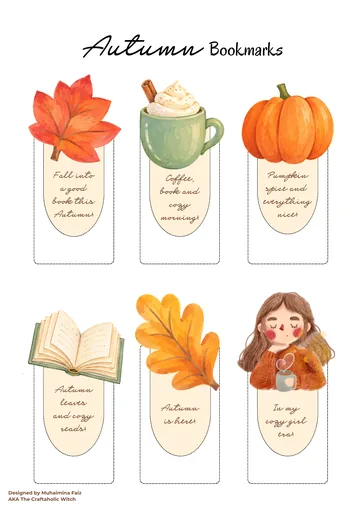
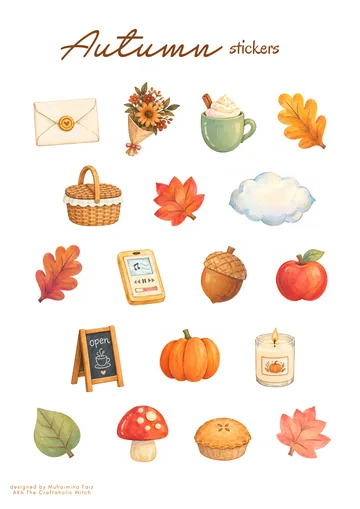
Free Autumn Bucket List + Printable Journal Pack
Everything you need for a cozy autumn, ready to print at home. Join the community for free and download it in one click.
- 13-page printable PDF
- 18 stickers and 6 bookmarks
- Journal pages and recipe cards
- Phone and computer wallpapers
How to Make a Felt Acorn Ornament
Step 1: Trace and Cut the Acorn Patterns
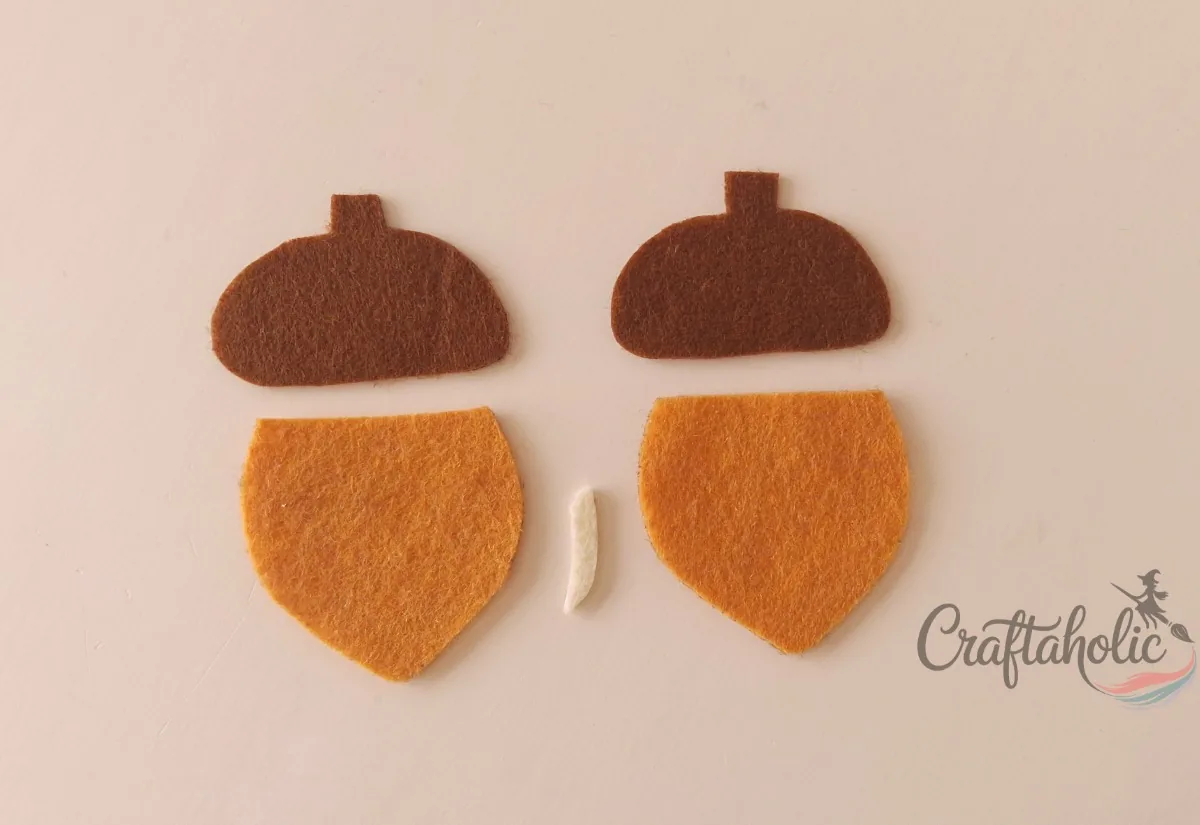
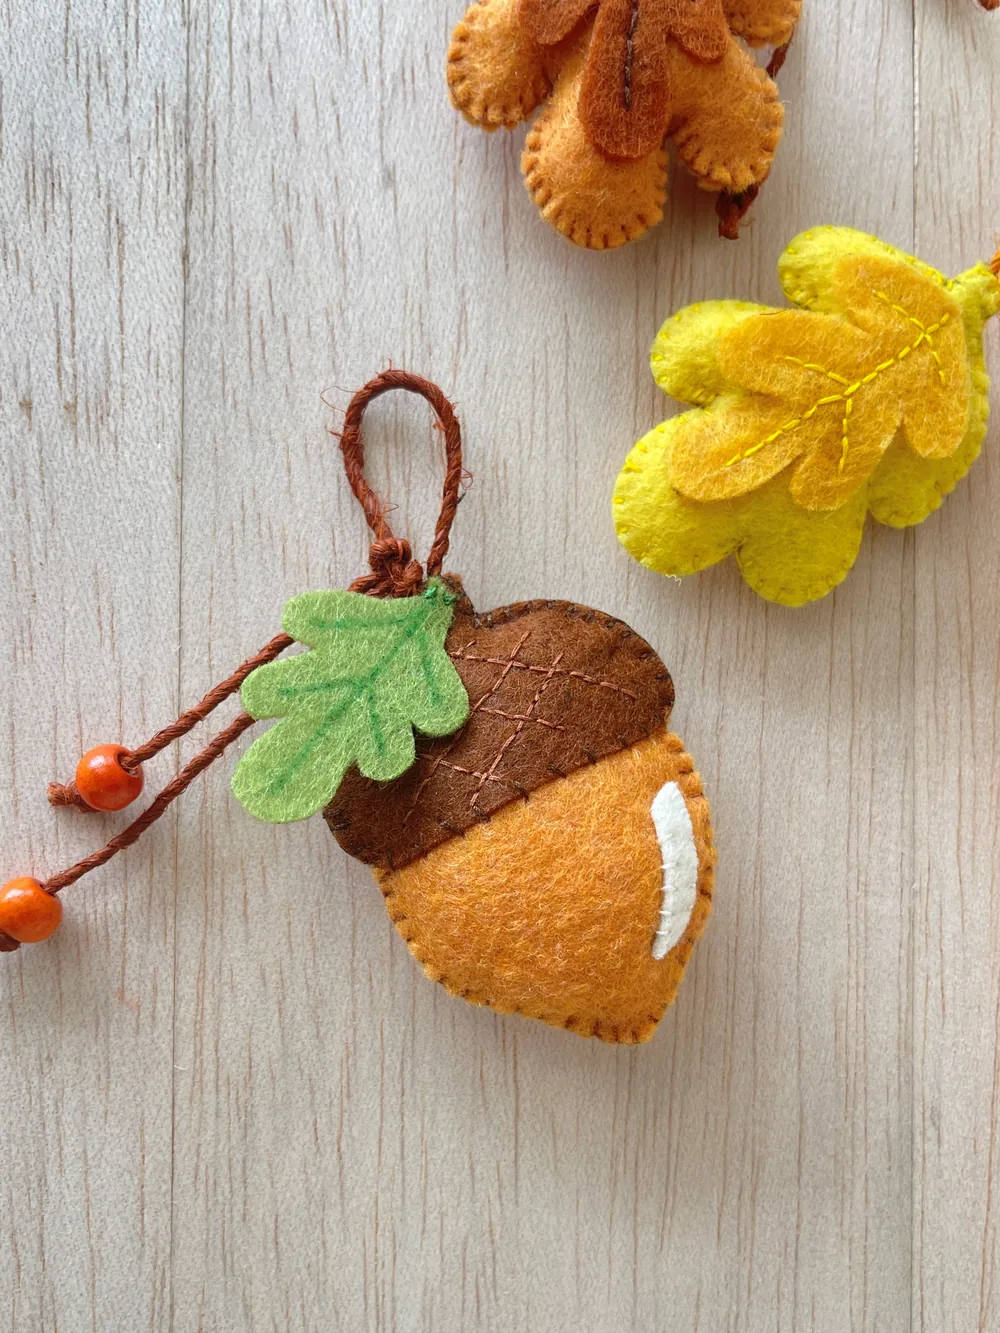
The template has three acorn patterns: the cup, the nut and a small shine line for the nut. Trace the cup on dark brown felt, the nut on light brown felt and the shine line on white felt, then cut them all out with sharp scissors. You need two cups and two nuts, one of each for the front and one of each for the back, but only one shine line.
Step 2: Stitch the Shine Line and the Checkered Cup
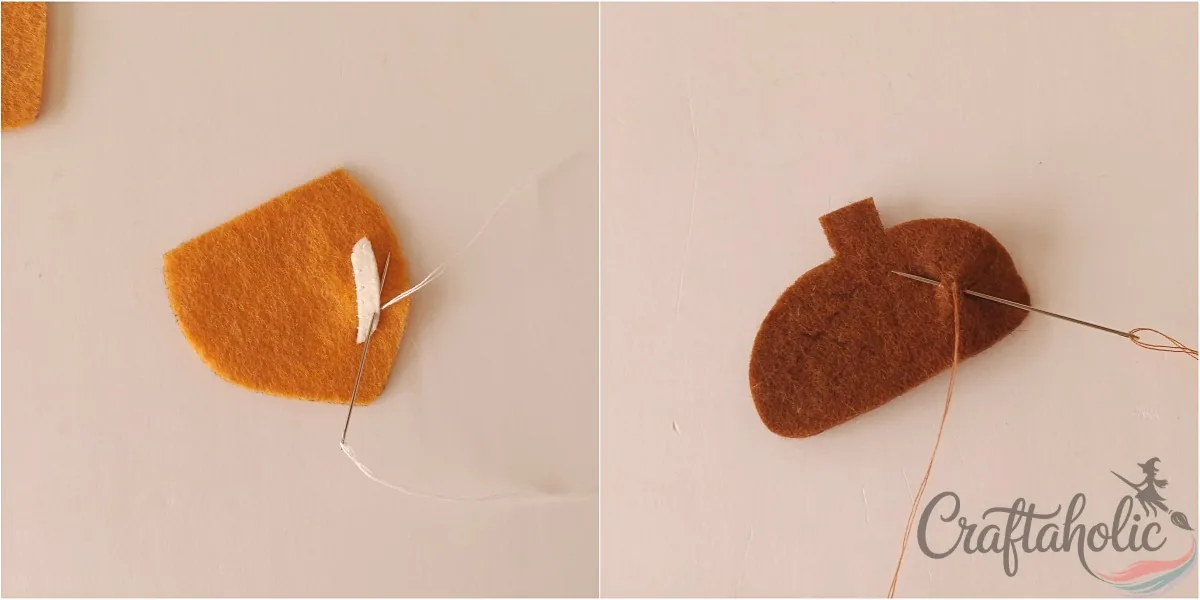
Lay the white shine line on one of the nut pieces, off to one side, and stitch it down with thread that matches the shine line. Next, use a fabric marker to draw a checkered pattern on one of the cups. Back-stitch along the marked lines with a different shade of thread so the pattern stands out.
Step 3: Overlap the Cups and Nuts
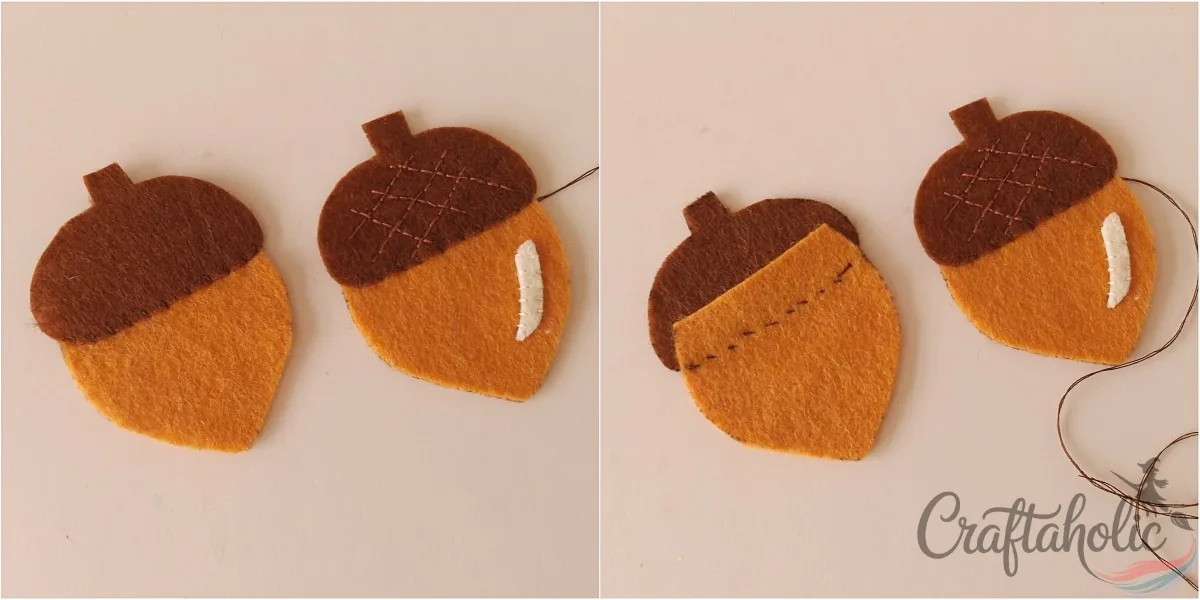
Set the stitched cup over the stitched nut so they overlap slightly, with the cup in front. Do the same with the plain cup and nut for the back. The cup sits in front on both pieces.
Stitch each pair together along the bottom edge of the cup. Then turn the plain back piece over so its wrong side faces up.
Step 4: Stitch the Sides Together
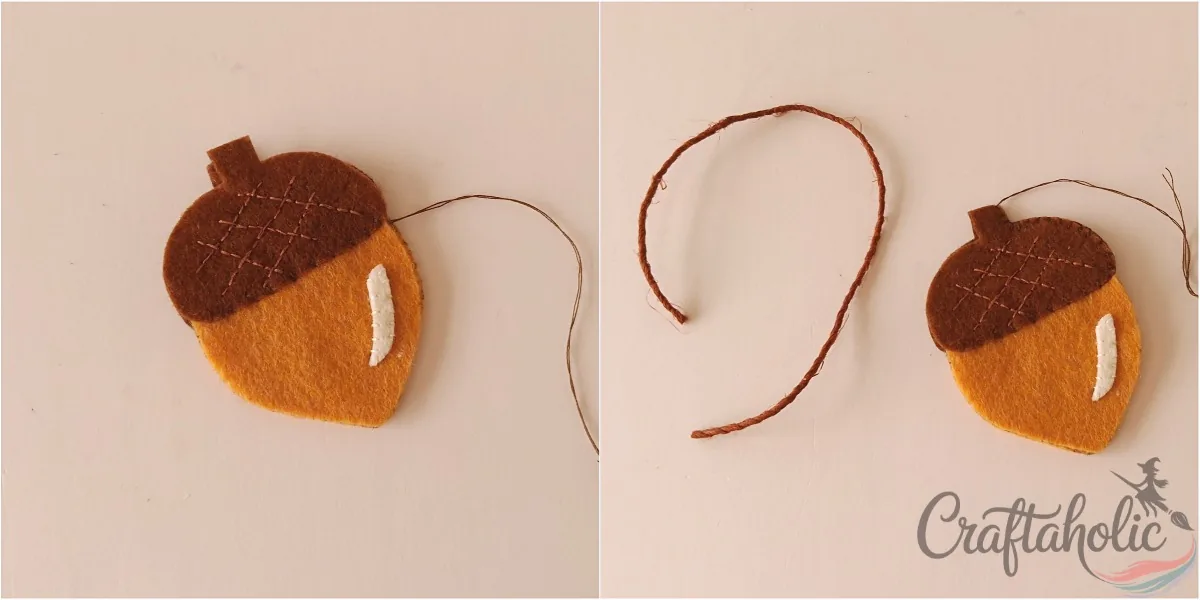
Place the front acorn on top of the plain back piece and join them with a flat blanket stitch around the sides. Keep the stitches evenly spaced so the edge looks tidy, and leave a small gap unstitched for the loop and the stuffing.
Step 5: Add the Hanging Loop
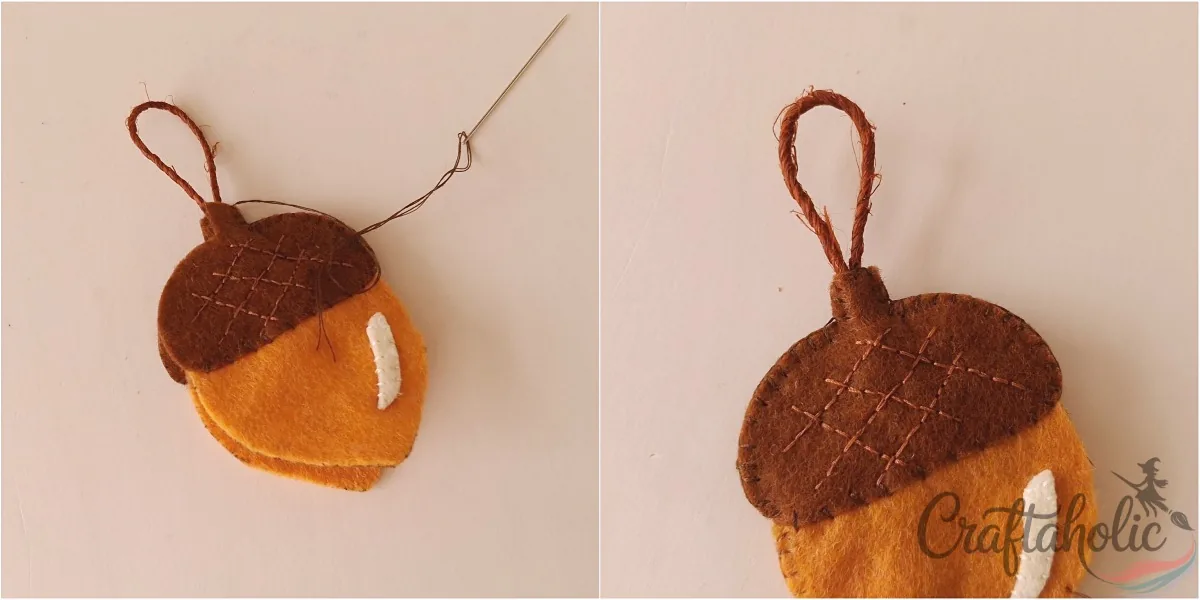
Cut a short piece of string and form it into a loop. Slide the two open ends in between the stem parts of the acorn, then stitch across them to anchor the loop to the felt.
Step 6: Stuff and Close the Acorn
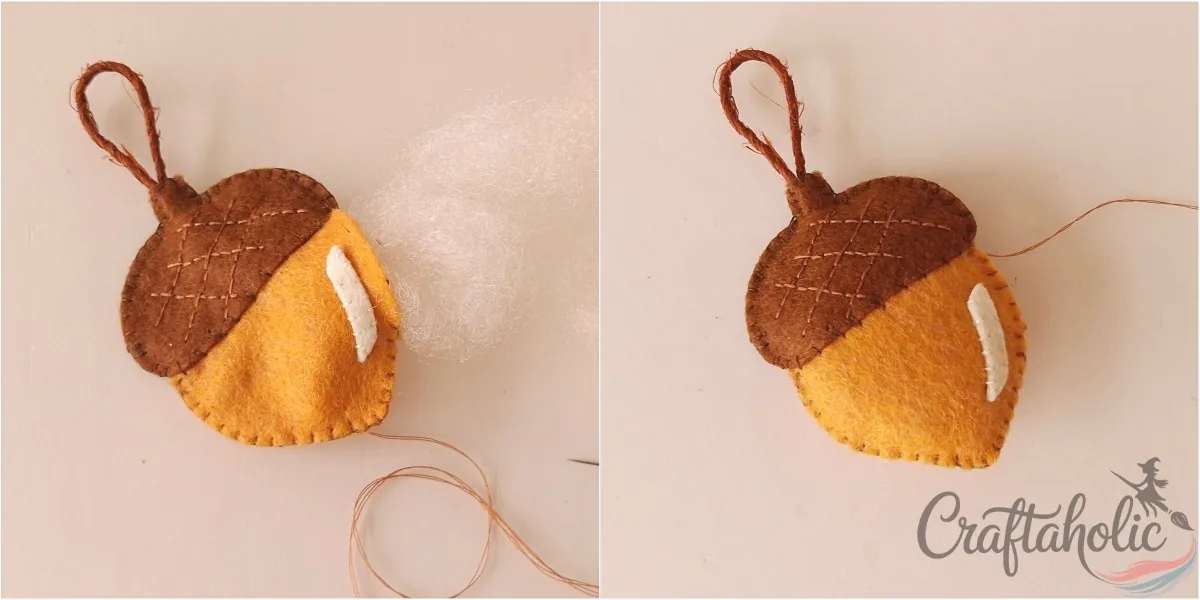
Fill the acorn through the small opening with fluffy cotton or scraps of felt, adding it a little at a time so it fills out evenly. Stitch the opening shut and tie two tight knots. Then draw the needle through the acorn, bring it out at a random spot, and snip off the extra thread.
How to Make a Felt Fall Leaf Ornament
Step 1: Pick the Felt and Cut the Leaf Pieces
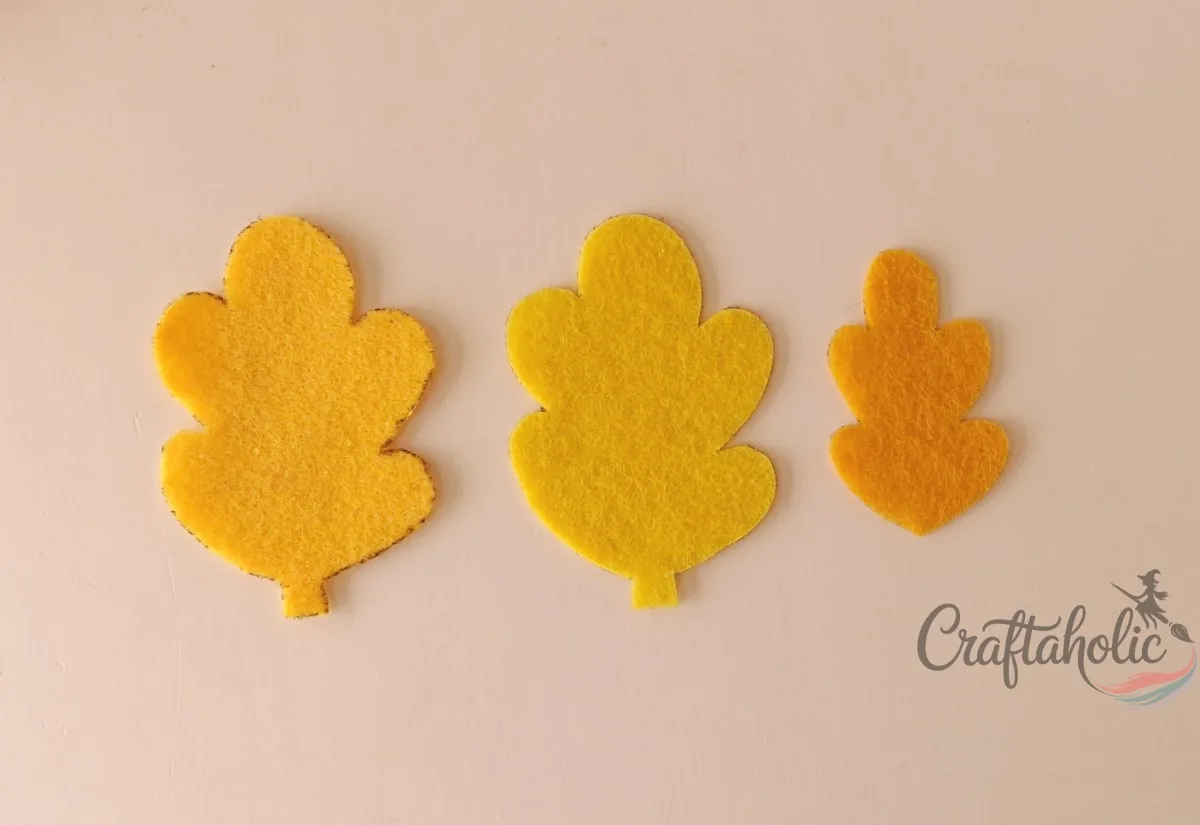
Choose any felt you like for the leaf. Yellow gives it a fall look. The template has two leaf patterns, a base and a smaller inner layer. Cut two bases and one inner layer.
Step 2: Stitch the Veins on the Inner Leaf Layer
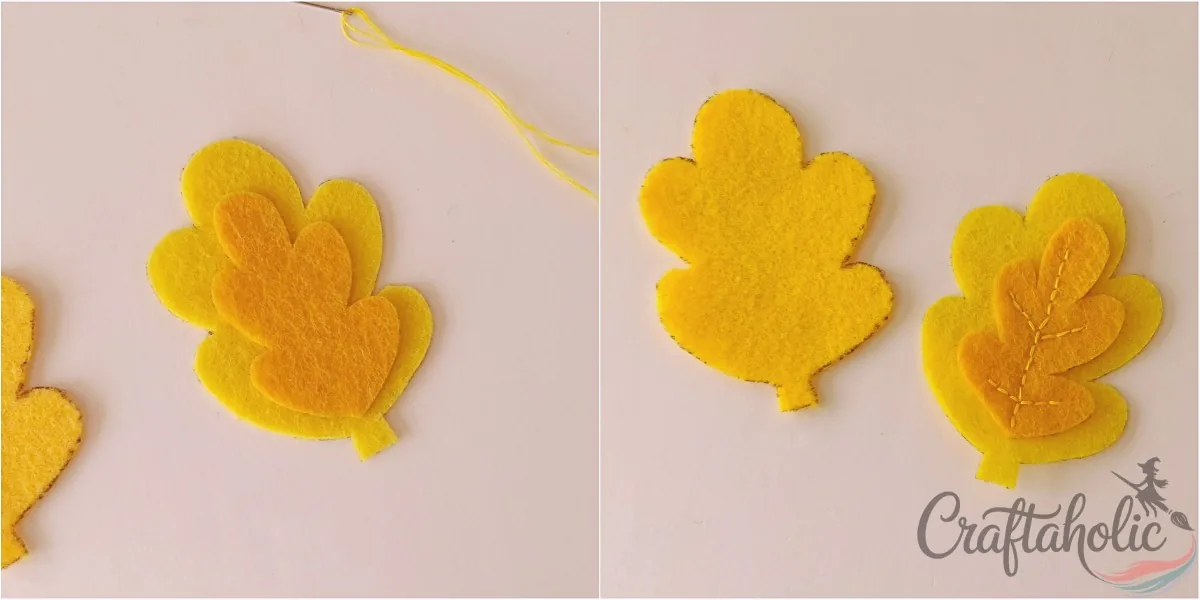
Place the inner leaf on one of the base leaves. Using thread that matches the felt, stitch the leaf veins onto the inner layer. Those stitches also hold the inner layer to the base.
Step 3: Join the Leaf Layers
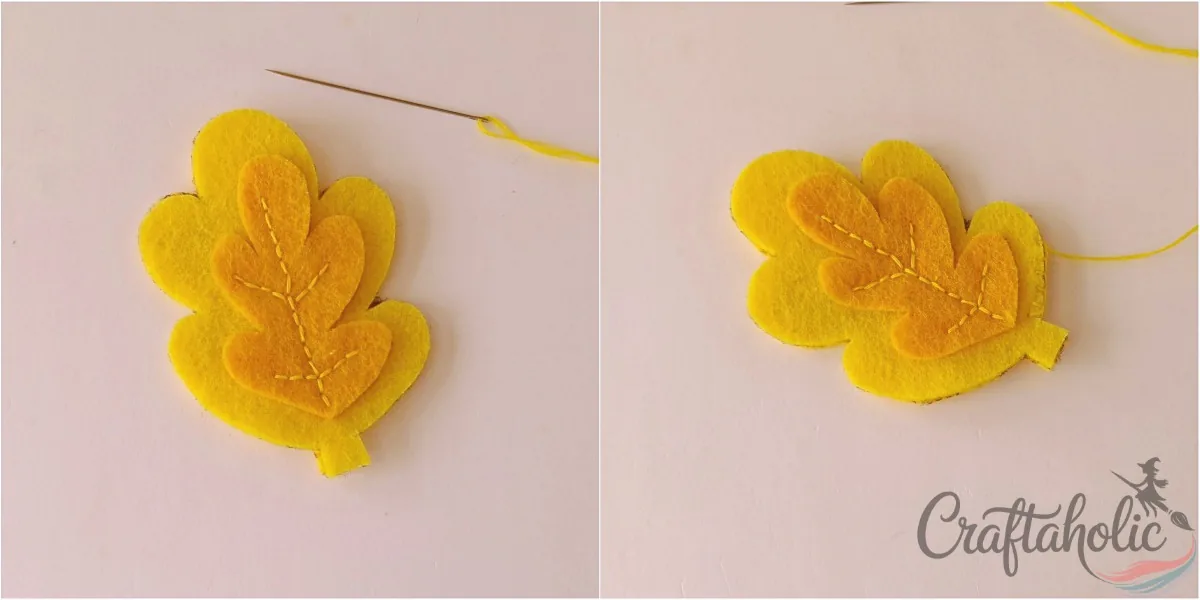
Set the double-layered leaf on top of the plain leaf base. Thread a needle and work a flat blanket stitch around the edges, starting beside the stem. Leave the stem itself unstitched for now.
Step 4: Stitch Around and Stuff the Leaf
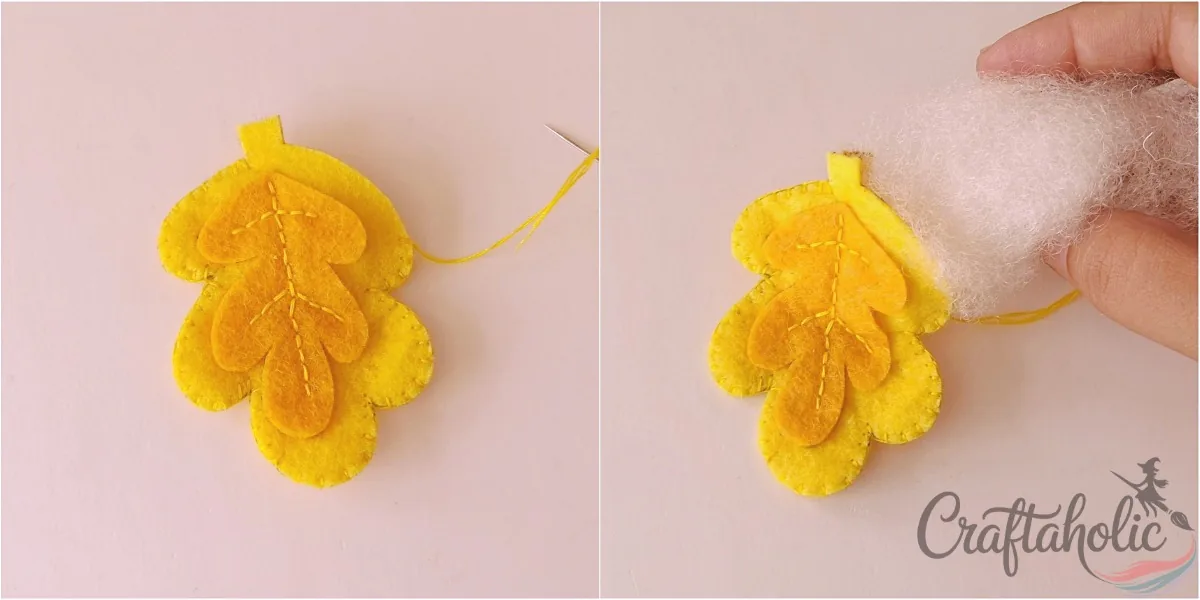
Keep working your way around the leaf, but stop and leave a small opening. Stuff the leaf with fluffy cotton or scrap felt through that opening.
Step 5: Add the Hanging Loop and Close the Gap
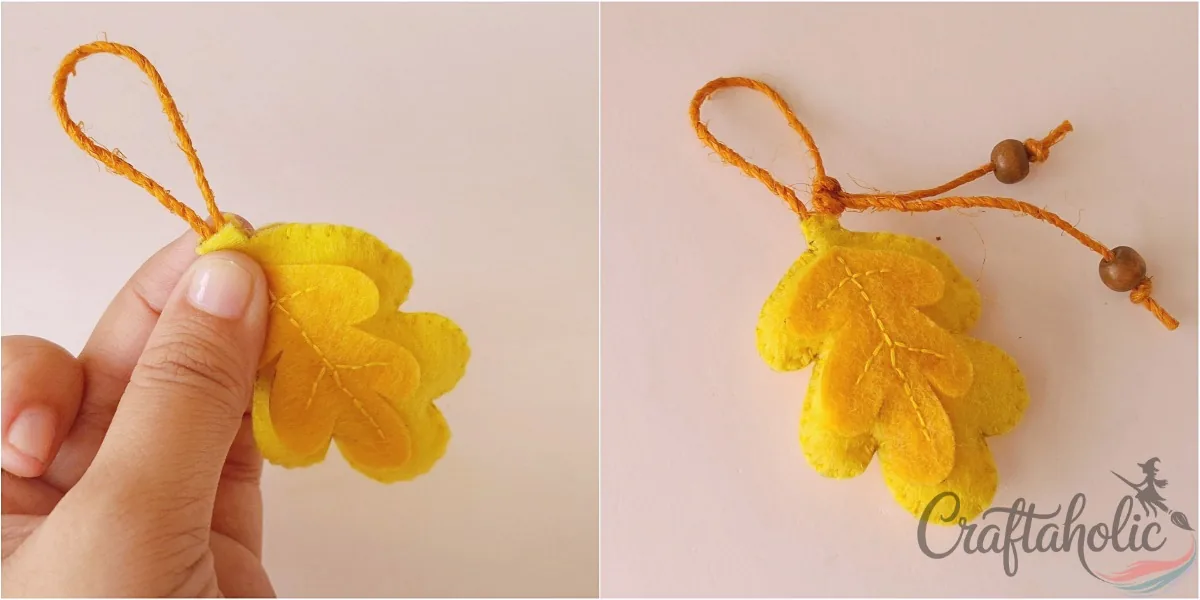
Once the leaf is stuffed, reach down below the stem. Slide both ends of a string loop, made the same way as for the acorn, in between the stem parts of the two leaf layers. Then close the opening with stitches and knots.
How to Make a Felt Mushroom Ornament
Step 1: Pick the Felt and Cut the Mushroom Pieces
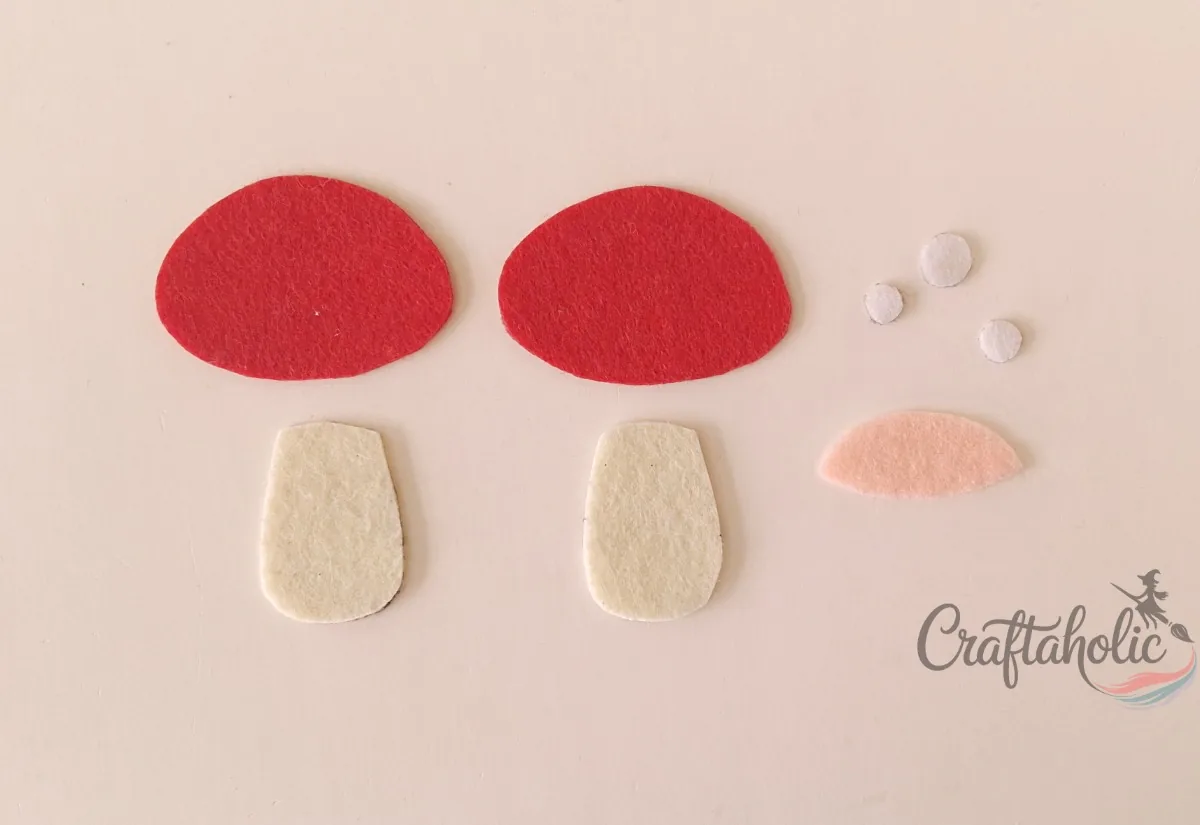
Any felt works for the mushroom, though white for the stalk and red or brown for the cap look especially good. Trace the mushroom patterns from the template and cut them out.
Step 2: Stitch the Dots and Gills to the Cap
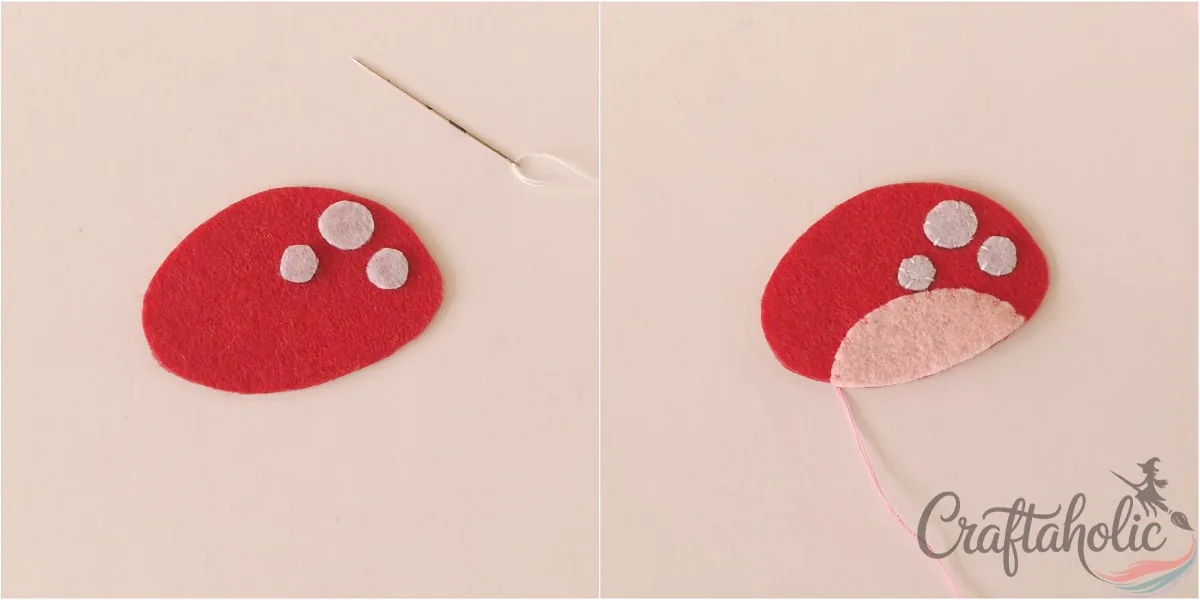
Place the dot pieces on one of the caps and stitch around each one. Then lay the gills piece along the bottom of the same cap and stitch around it as well.
Step 3: Overlap the Stalks and Caps
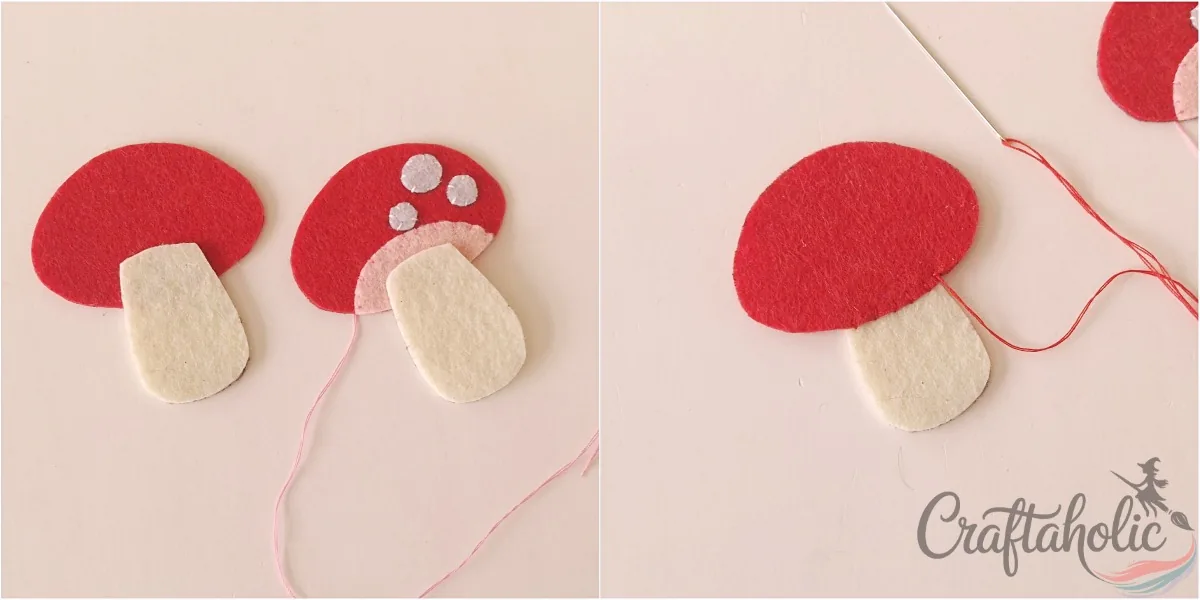
Lay the plain cap flat and place a stalk piece against its bottom edge so the two overlap slightly. Do the same with the other stalk on the stitched cap. On the plain pair, stitch along the overlapped bottom edge of the cap to join the stalk.
Step 4: Join the Front Stalk and Cap
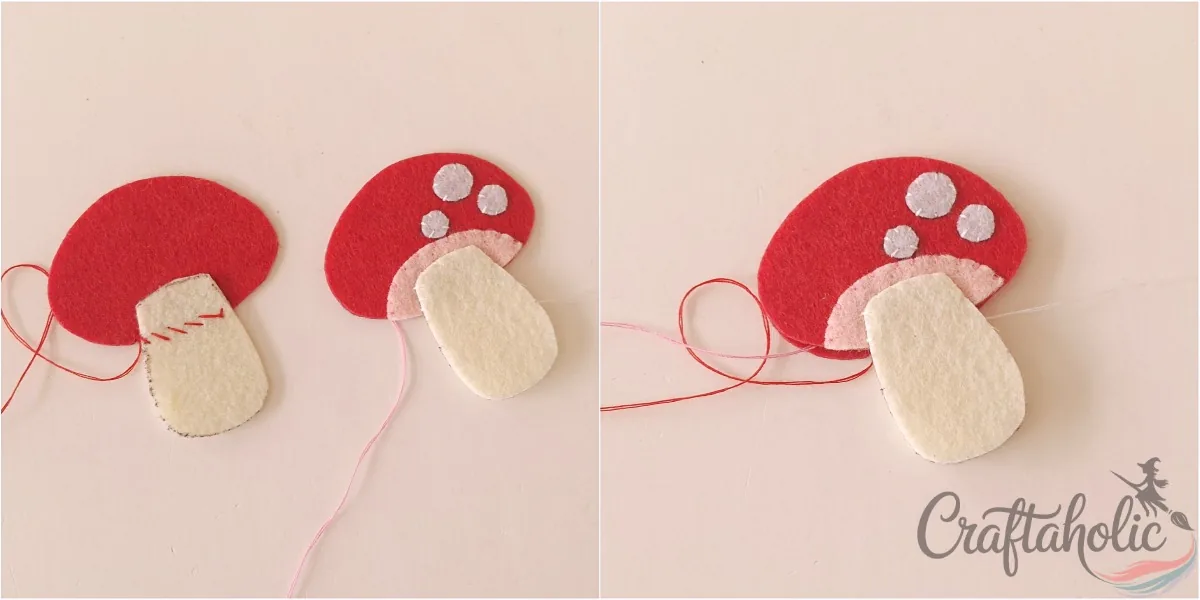
Turn the plain piece, which is the back of the mushroom, so its wrong side faces up. Stitch the front stalk to the front cap by sewing along the top edge of the stalk. Then lay the front piece on top of the back piece.
Step 5: Stitch and Stuff the Stalk, Then Add the Loop
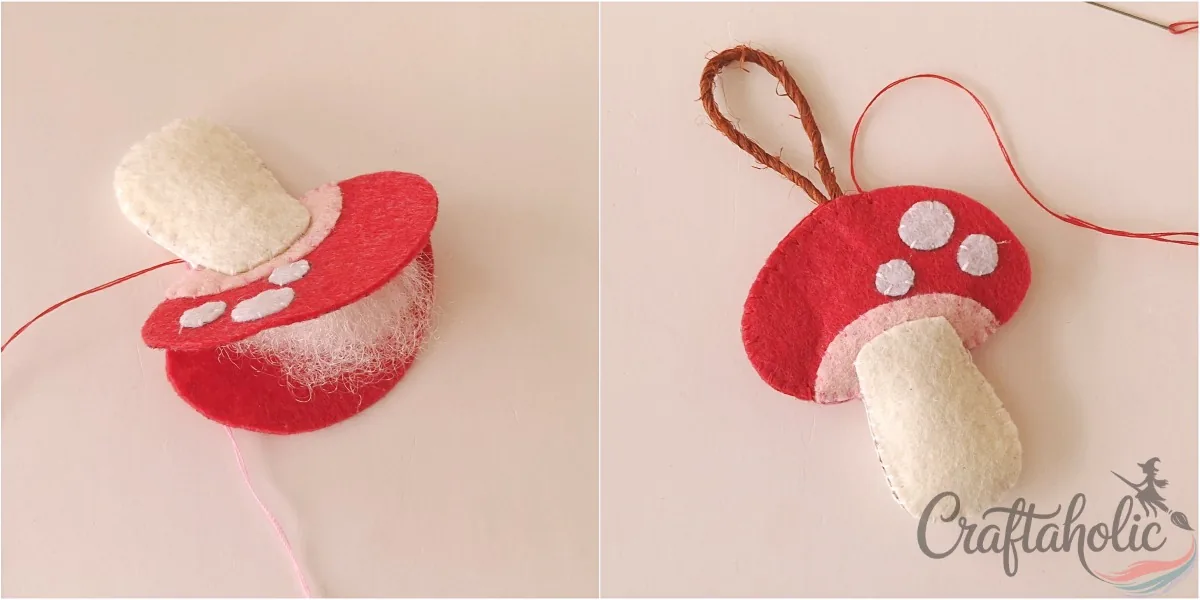
Stitch around the stalk first and stuff it through the opening. Once the stalk is stitched and stuffed, stitch around the cap and stop at the top. Slide the string loop in between the cap layers.
Step 6: Stuff the Cap and Close It
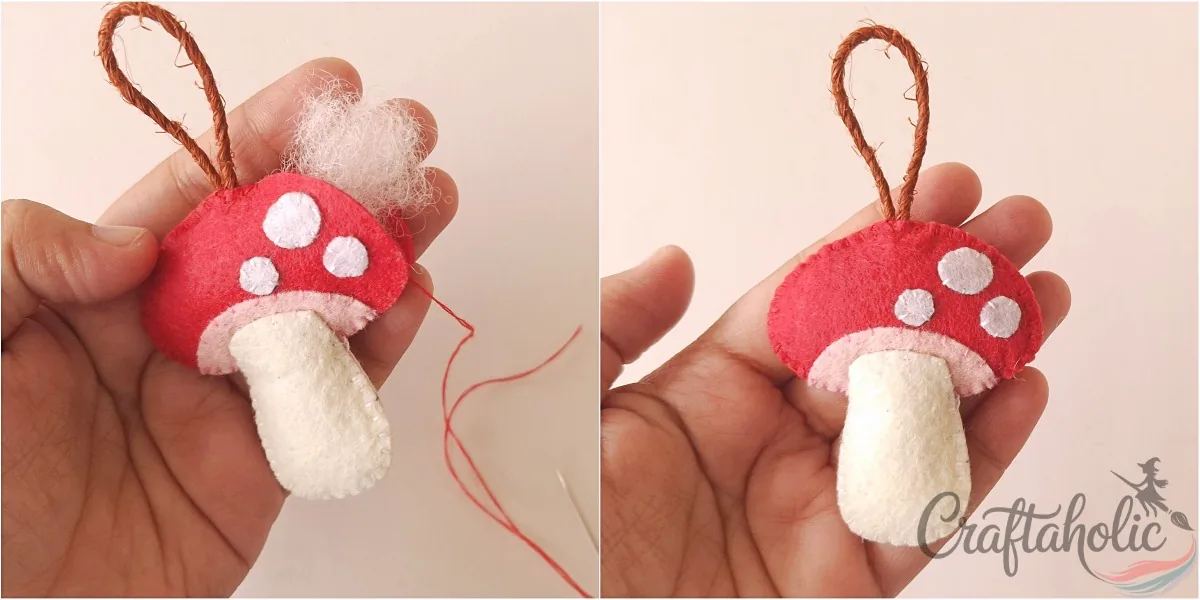
Secure the loop, then leave a small opening. Stuff the cap with cotton and close the opening the same way you did on the earlier ornaments.
How to Make a Felt Pumpkin Ornament
Step 1: Pick the Felt and Cut the Pumpkin Pieces
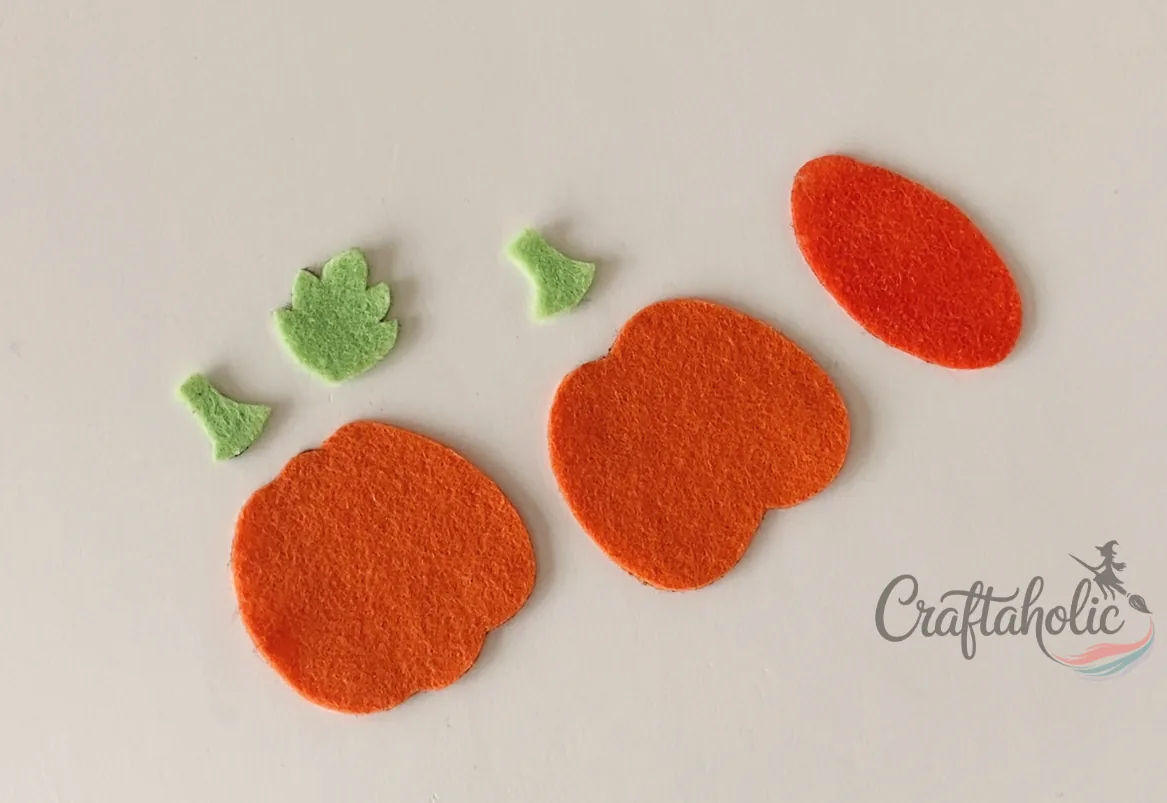
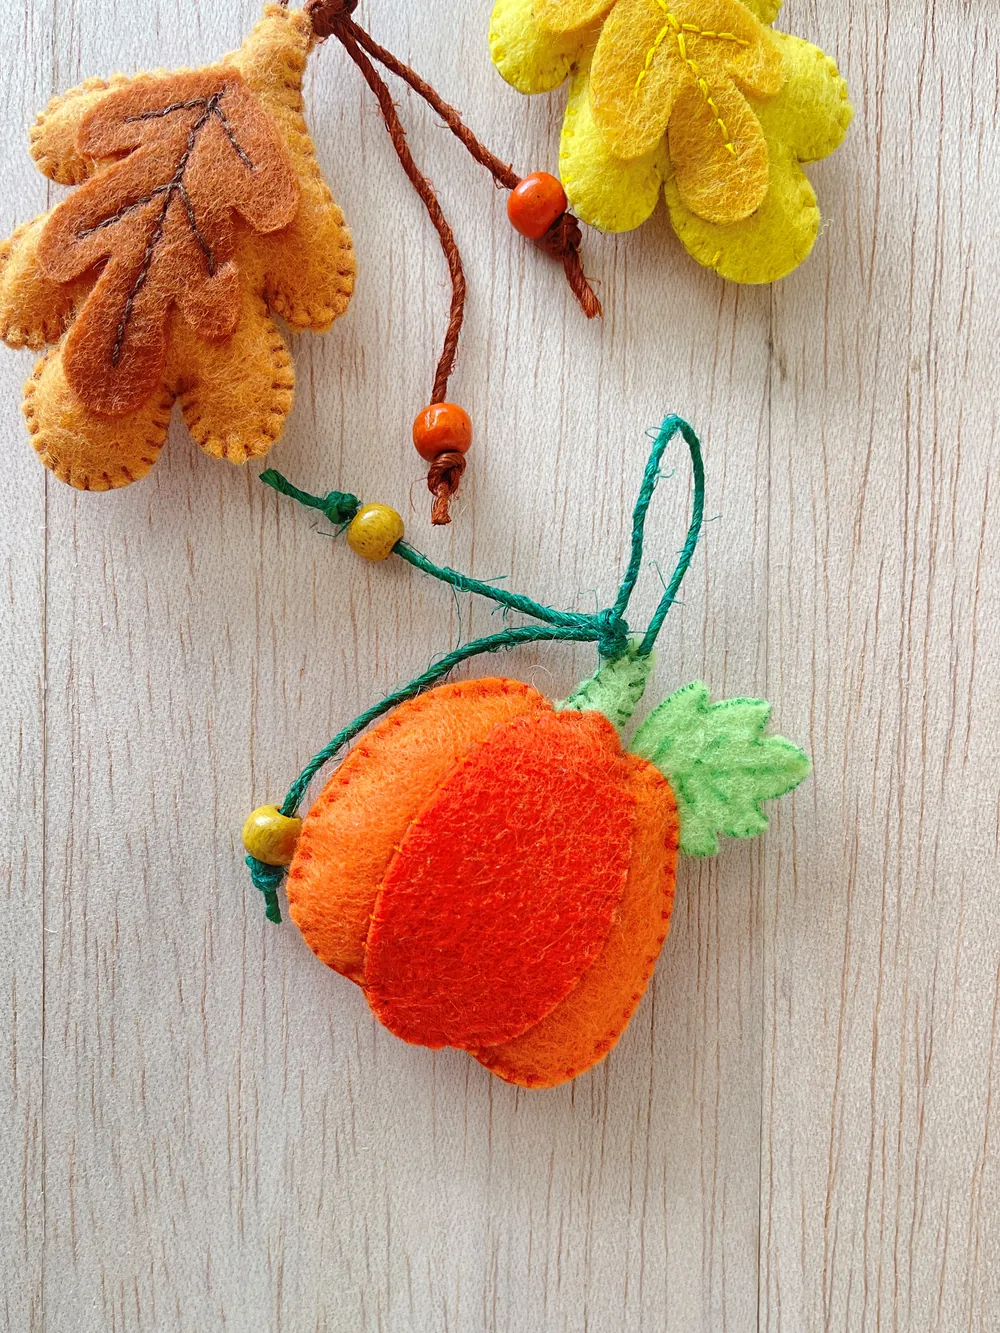
Choose felt colors you like and cut out the pumpkin patterns. The template has a stem, a leaf, a back base, a front base and a middle layer.
Step 2: Place the Stem and Middle Layer on the Front
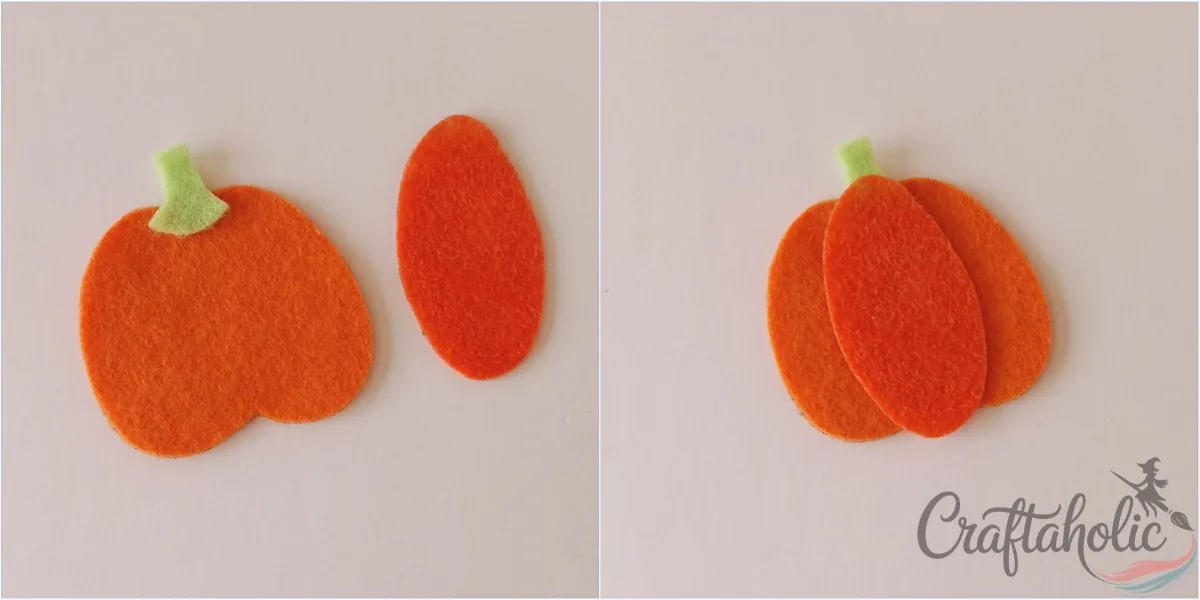
Place the stem at the top center of the front base. Then lay the middle layer along the center of the front base.
Step 3: Stitch the Middle Layer in Place
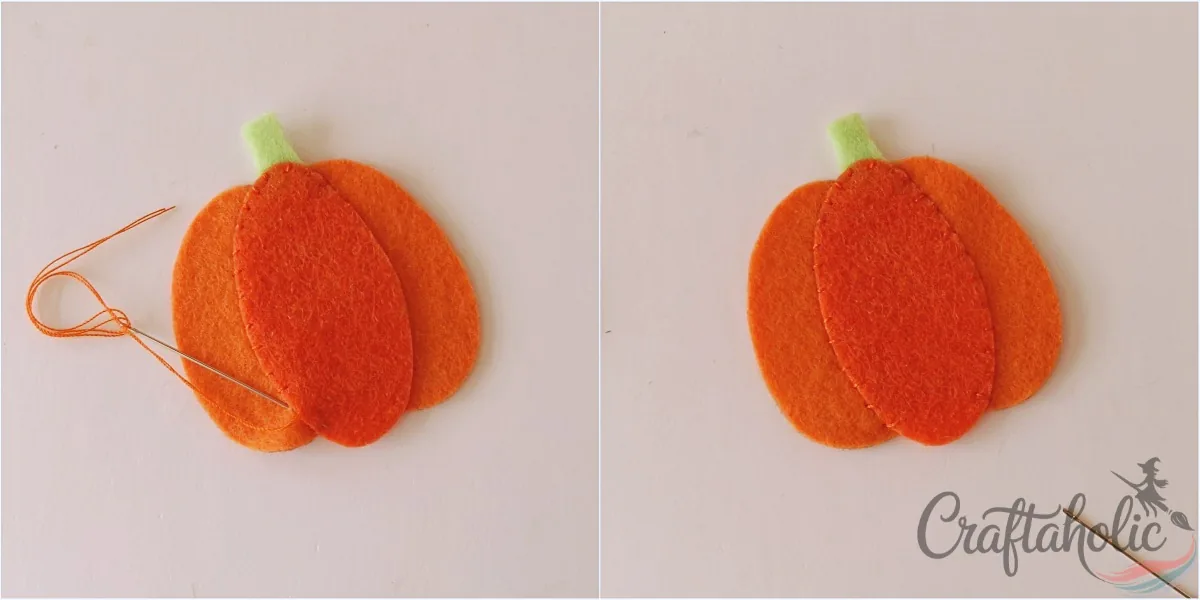
Thread a needle with thread that matches the middle layer and stitch around its border to attach it to the front base.
Step 4: Add the Back Piece
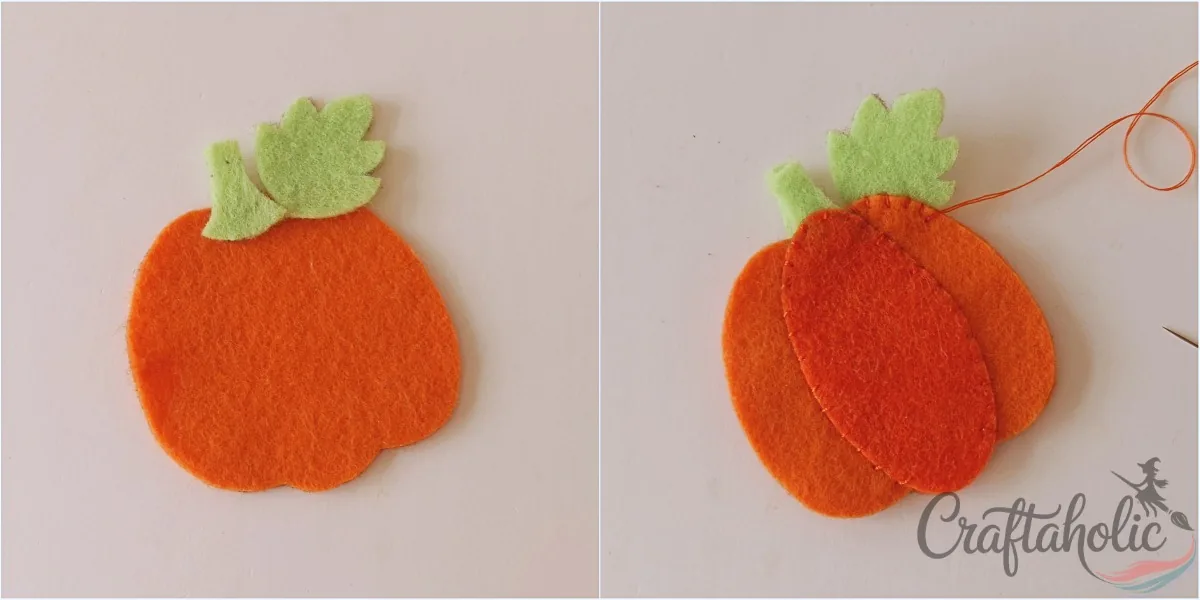
Place the second stem at the top center of the back base and put the leaf beside it. Lay the front piece on top so the stem and leaf end up sandwiched between the two bases.
Step 5: Stitch, Stuff and Close the Pumpkin
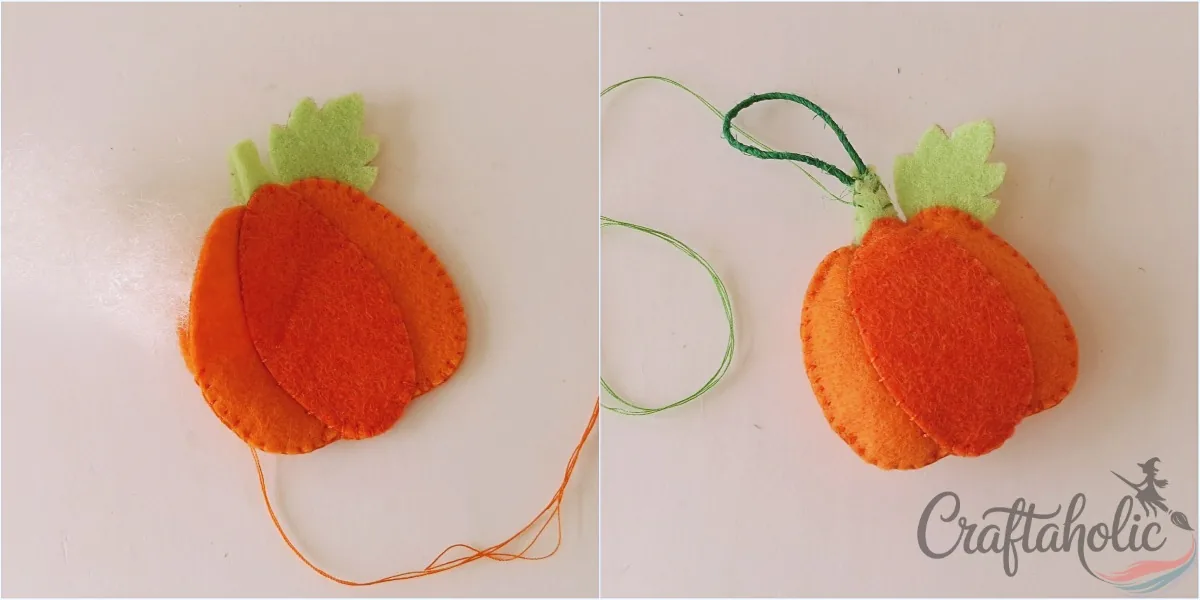
Work a flat blanket stitch around the sides of the back and front bases. When you get close to the end, stuff the pumpkin through the small opening, then close it with blanket stitch and knots to lock the stuffing in.
Want more practice closing a stuffed felt pumpkin? The pumpkin in my felt Halloween garland finishes the same way.
Share it in "I Made It" and let us cheer you on.
Post your finished make in "I Made It" so the community can celebrate it with you. Cheer on other makers too. Each month, the most loved craft wins 1 year of Craftaholic Premium ($59)
Tips and Variations for Felt Fall Ornaments
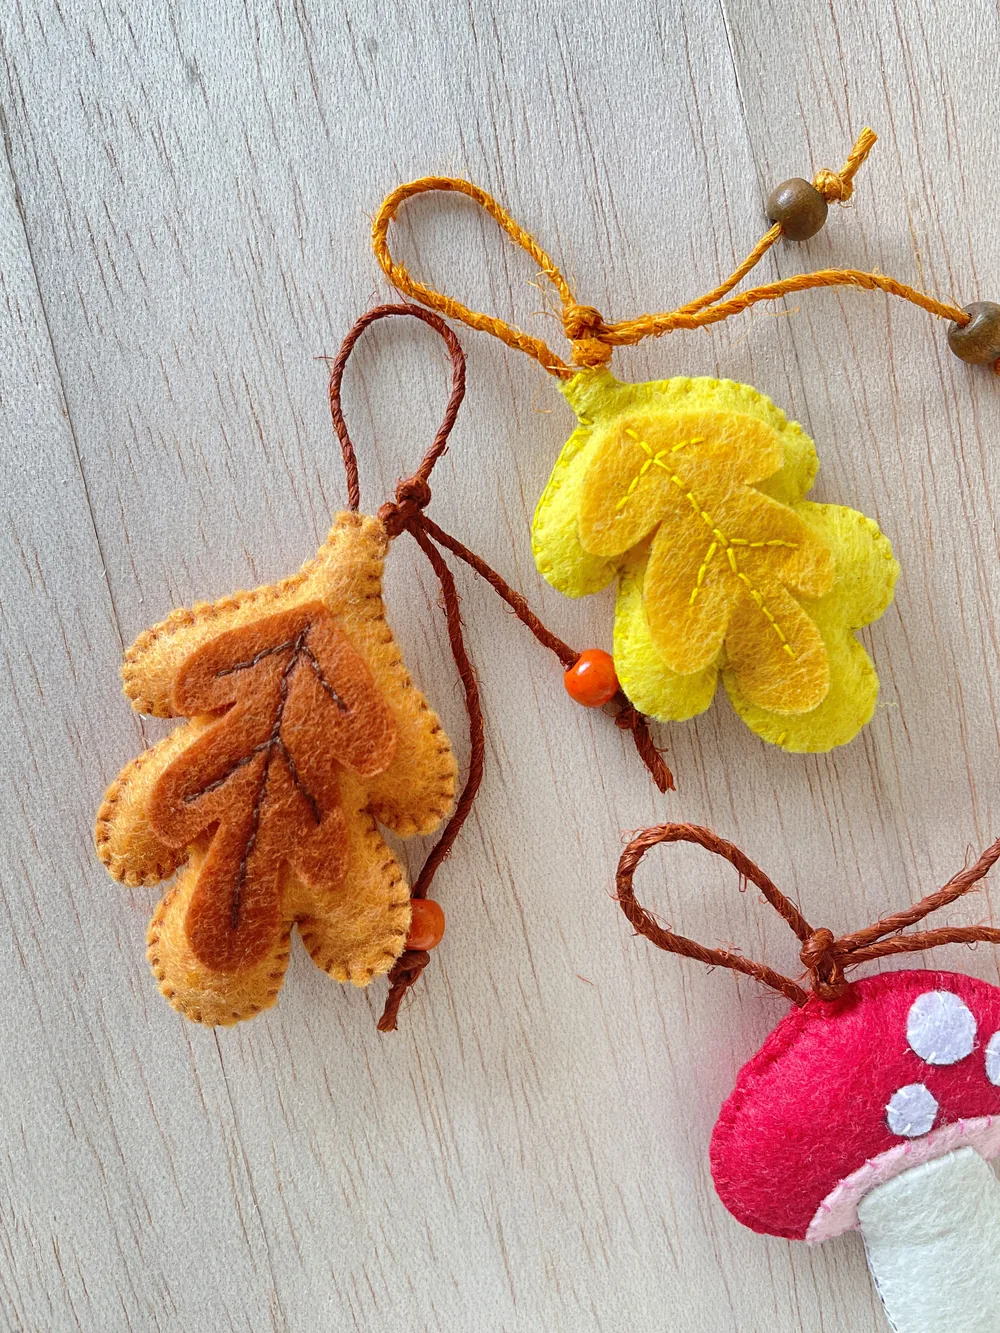
- Leave the wooden beads off if the ornaments are headed for a young child’s room, since small beads are a choking hazard.
- Match each string loop to its ornament, as in the photos: brown for the acorn, leaf and mushroom, and green for the pumpkin.
- Cut the pieces for one ornament at a time and lay them out before you stitch, so you can swap a felt color before it is sewn in.
Frequently Asked Questions
Can I make felt fall ornaments without the template?
Yes. The shapes are simple enough to sketch on paper and cut out yourself, and the steps work the same either way. The template saves you the redrawing and gives you front and back pieces that match, so the edges line up when you stitch them together.
What can I use instead of cotton to stuff the ornaments?
Scrap felt works, and the steps use it as an alternative to cotton. Snip it into very small pieces so it packs evenly. Any soft toy fiberfill would also work if you have some on hand.
How long does it take to make felt fall ornaments?
Plan on about 45 minutes to an hour for each ornament if you are sewing by hand. A full set of four fits into an afternoon or a couple of short evenings.
Which felt fall ornament should a beginner make first?
Start with the leaf. It uses only three felt pieces and five steps, and it teaches the blanket stitch, the stuffing and the hanging loop that the other three repeat. The pumpkin is the next easiest, and the acorn and mushroom come last because they add decorative stitching.
Why does my stuffed felt ornament look lumpy or puckered?
Lumps usually come from pushing in stuffing in one big wad, so pull the cotton apart into small pinches and work them into the corners and points first. Puckering usually means the thread was pulled too tight along the edge, so let each blanket stitch sit snug against the felt without squeezing it.
More Felt and Fabric Crafts Tutorials
- 4 Easy to Make Felt Halloween Plushies (Bat, Cat, Ghost, Pumpkin) + Pattern
- Easy Felt Easter Pencil Toppers (Free Template + Video)
- How to Make a Fall Paper Leaf Wreath (+ Free Template)
Share your felt fall ornaments in the I Made It space inside Craftaholic Community. The most-loved post each month wins a one year free Premium membership.
0 Comments
Join the conversation
Log in to your Craftaholic Community account to comment, ask questions, and cheer on fellow makers.
Log in to comment