

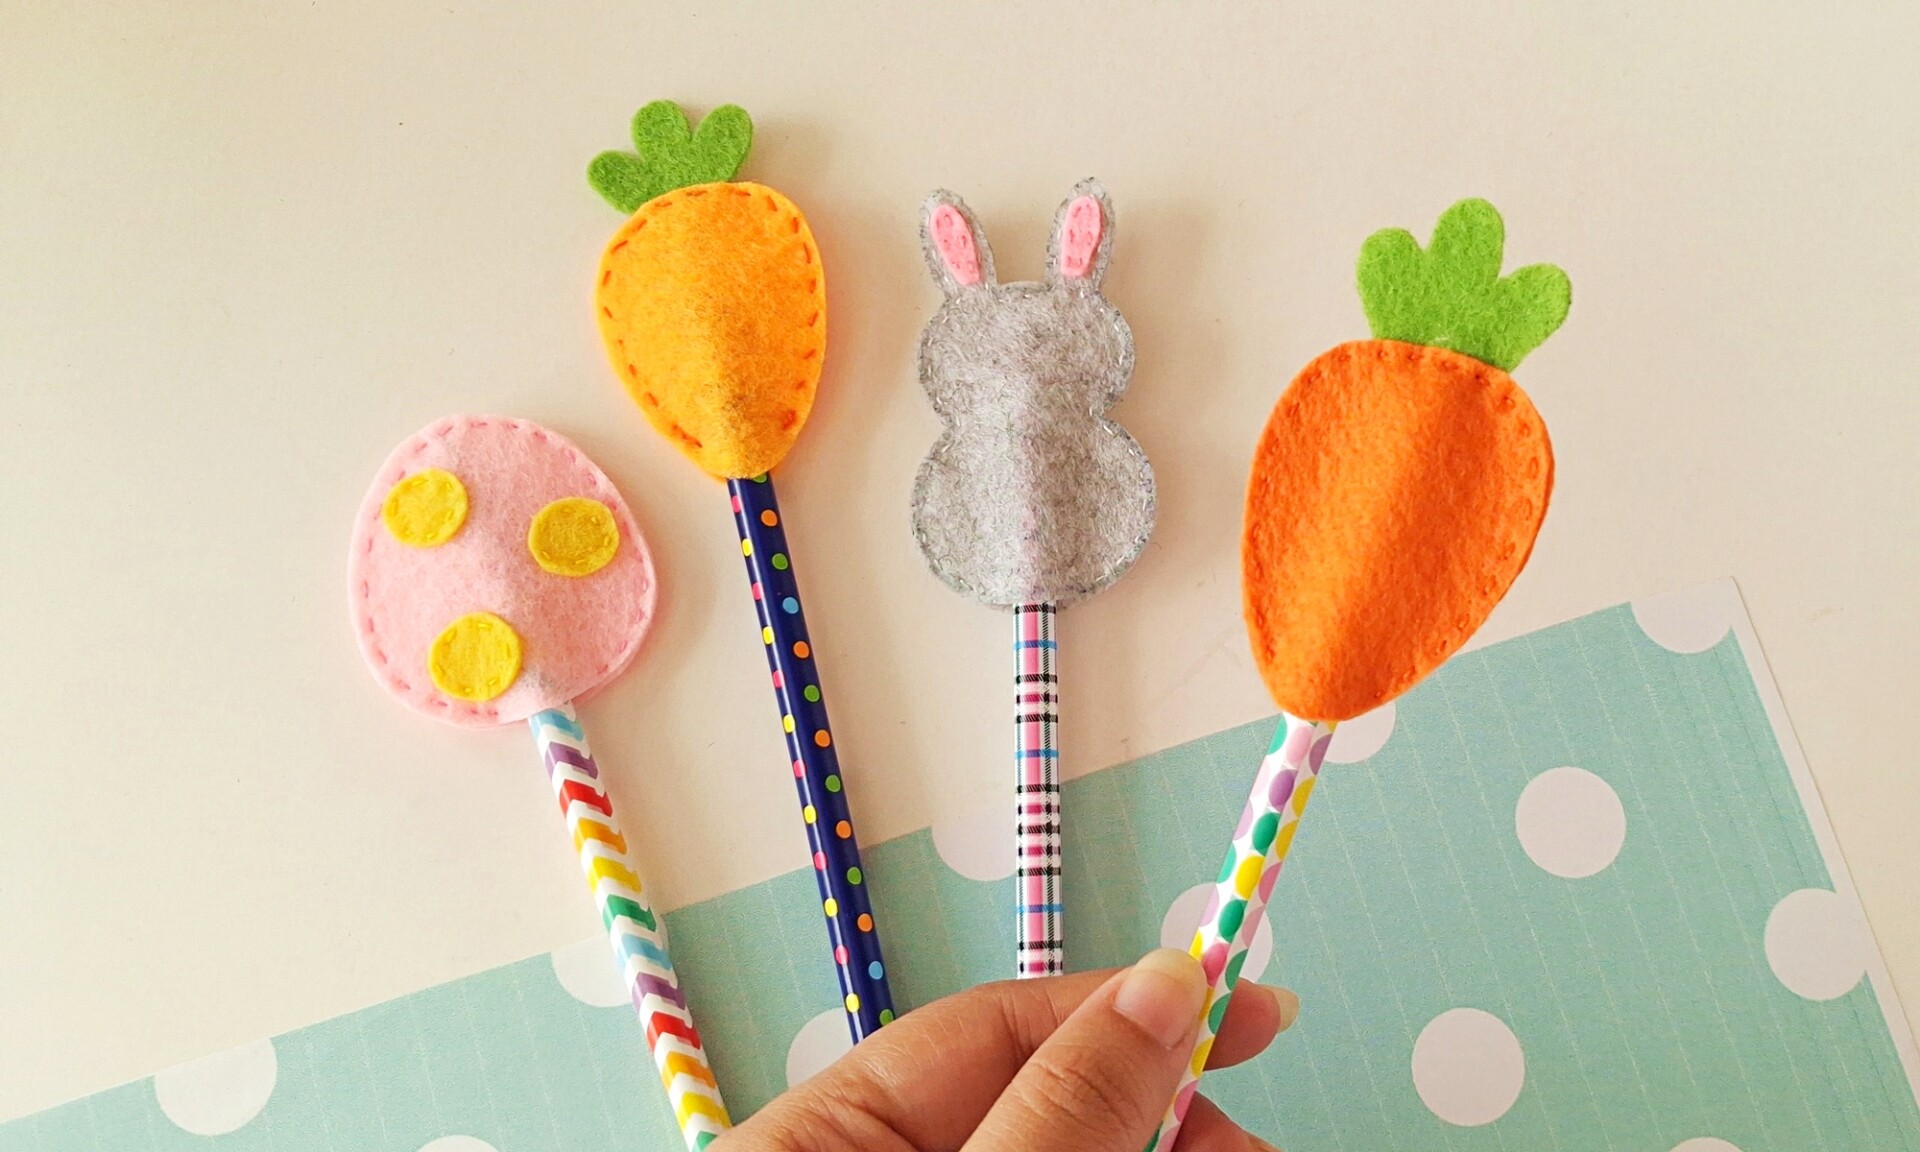
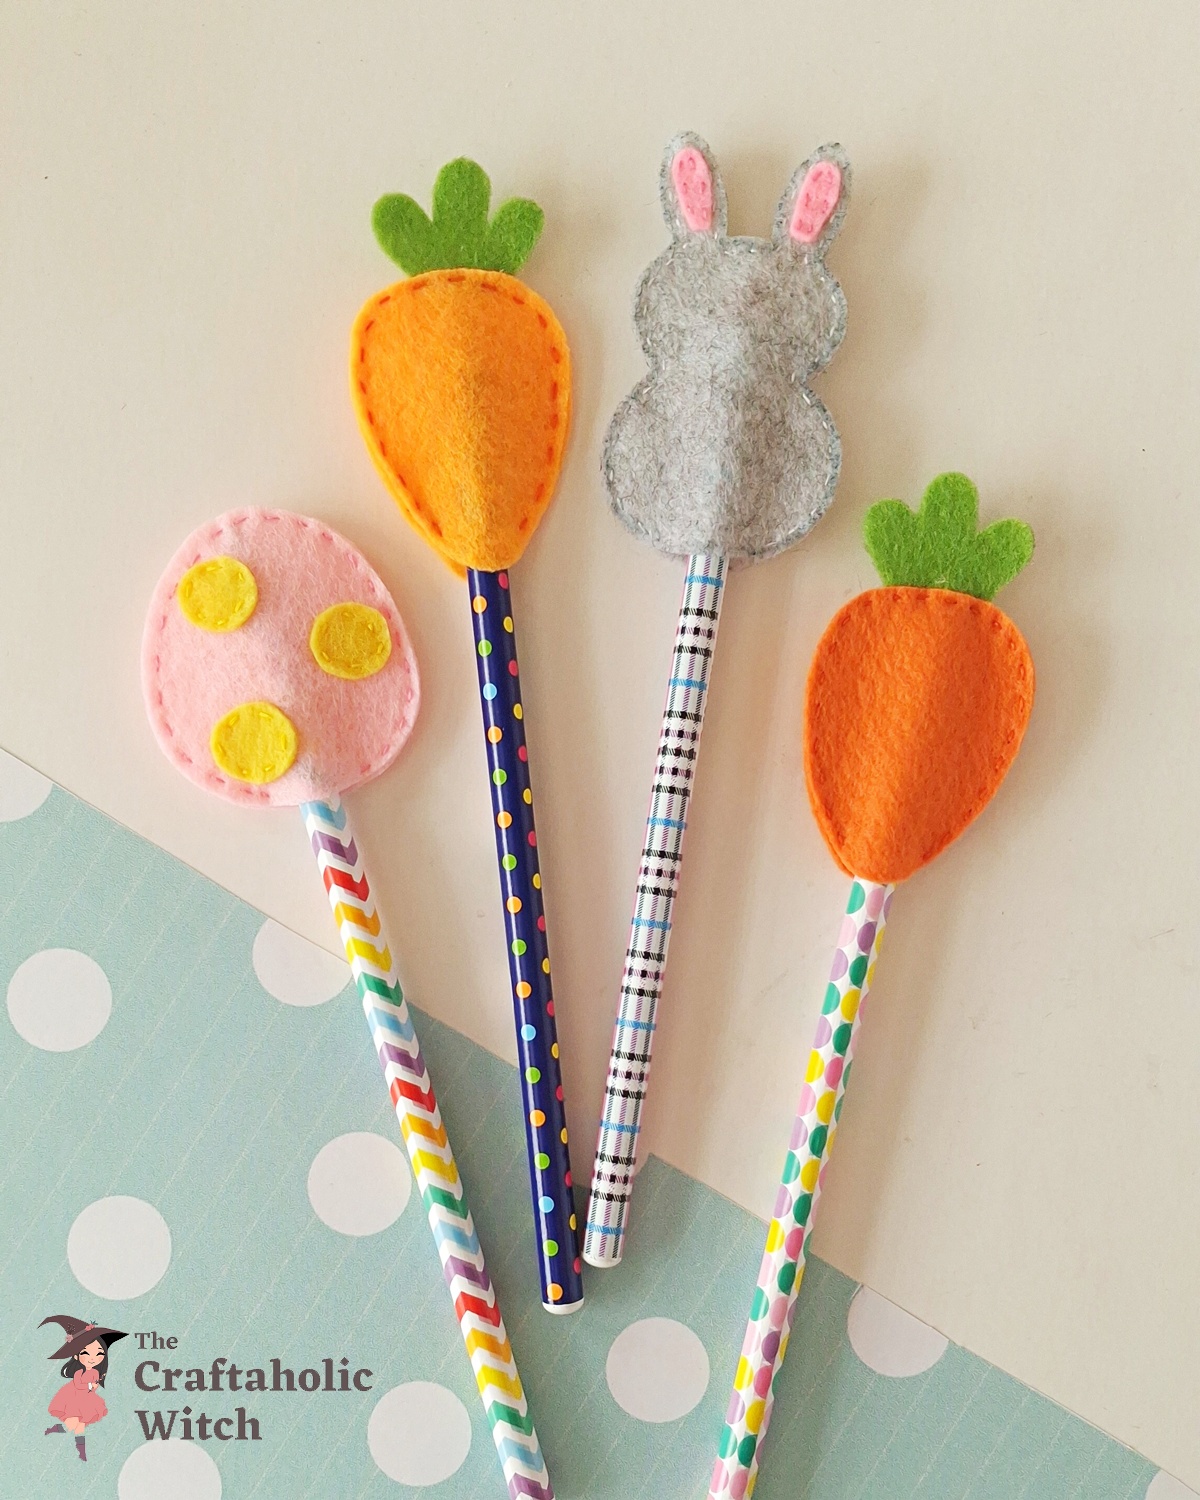
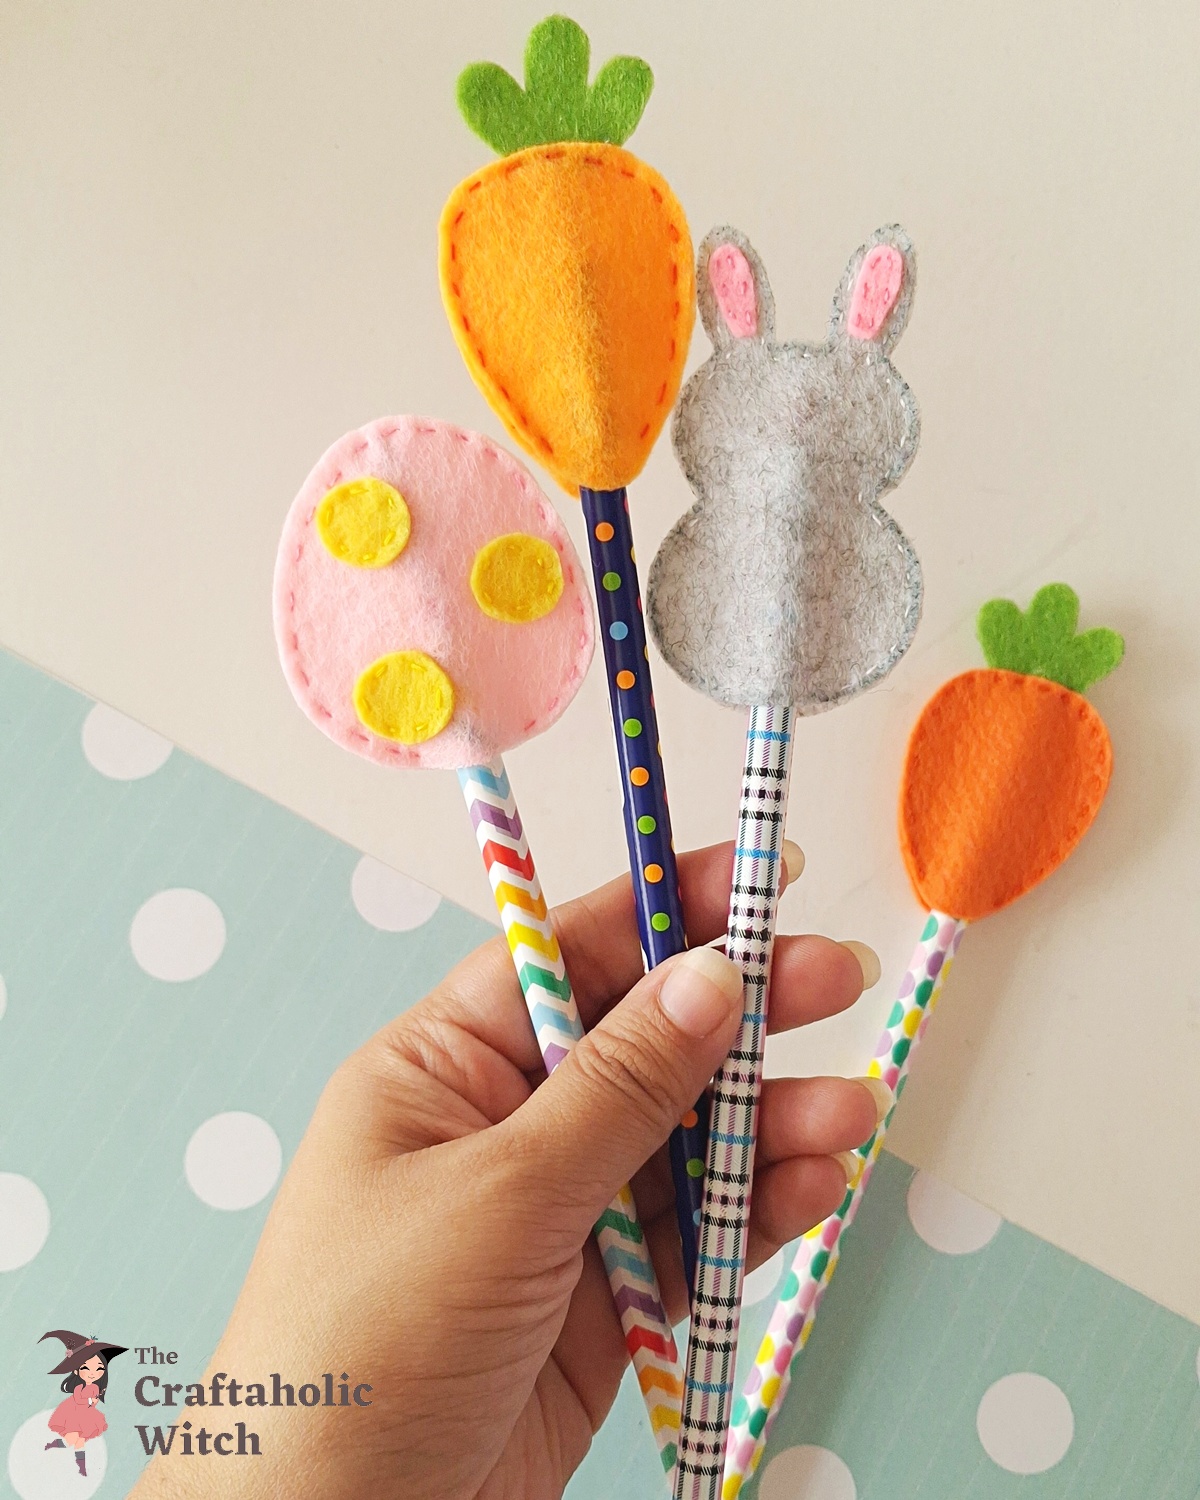
These felt Easter pencil toppers are three hand-stitched designs, an egg, a bunny, and a carrot, made from two layers of felt joined with a simple running stitch and sized to slip right over a pencil.
All three use the same easy running stitch, the technique behind most of our felt sewing projects, so once you’ve made one the rest go faster. Budget 45 to 60 minutes for the full set and just a few dollars in felt and thread. You won’t need a sewing machine.
This is the first project in our upcoming Easter Pencil Toppers for Kids series, and it pairs naturally with our DIY Pencil Toppers collection if your kids want even more styles to top off their pencils this spring.
They’re an easy Easter activity for kids, a fun classroom project, or a handmade gift, and the free printable template plus full video walkthrough make it simple to follow along even on your first felt project.
Felt Easter Pencil Toppers at a Glance
- Difficulty: Beginner
- Time: 45-60 minutes for all three toppers
- Cost: Under $5
- Ages: 8+ independently; younger kids with adult help for the stitching
- Best for: Easter baskets, classroom crafts, and handmade gifts
Join Craft Challenge: Craft Your Calm
Make something that brings you a sense of peace, share a photo, and tell us your story. It's free to enter, open to everyone, and the entry with the most reactions takes home a $100 gift card. Takes five minutes to join.
Entries close August 30, 2026. No purchase necessary.
What You Need to Make Felt Easter Pencil Toppers
Materials
- Felt fabrics, in egg, bunny, and carrot colors (pastels, white, and orange or green work well). This makes the body of all three toppers.
- Matching thread, one spool per felt color so the stitching disappears into the seam.
- A pencil, to sit inside the finished topper.
Tools
- A pair of scissors, sharp ones cut the small rabbit ears and carrot leaf cleanly.
- Sewing needle, for hand-stitching every seam with a running stitch.
- Fabric marker or pen, for tracing the pattern pieces onto felt before you cut.
Free Template
Download the free felt Easter pencil topper template for the egg, bunny, and carrot pattern pieces.
Ask inside "Crafty Q&A" while you are making.
"Crafty Q&A" is free to join. Share your question, photo, or the exact step where you got stuck, and chat with other makers plus the Craftaholic Witch team. You can also join any discussion thread already happening inside the space.
Watch the video tutorial
Step by Step Instructions to Make the Felt Easter Pencil Toppers
Step 1: Preparing the Felt Patterns
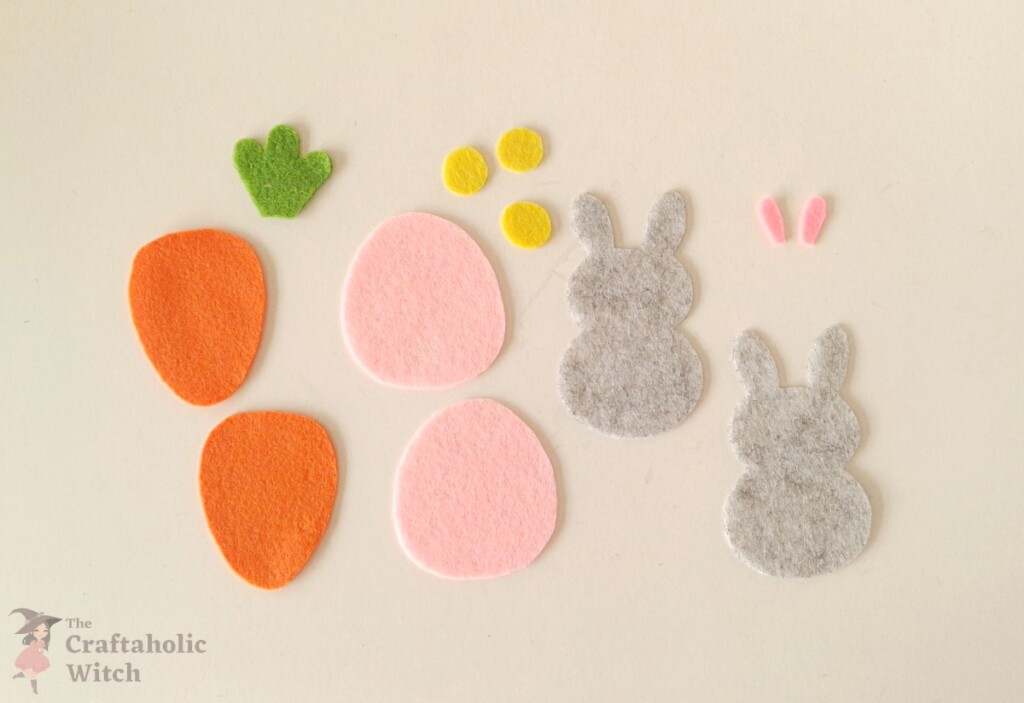
Print the template and cut out the paper pattern pieces: two egg bases plus small round accents, two rabbit bases plus two inner-ear pieces, and two carrot bases plus one leaf. Pin each piece to your felt, trace around it with a fabric marker, and cut just inside the line so the marks don’t show on the finished edge.
Step 2: Stitch the Round Accents Onto the Egg Front
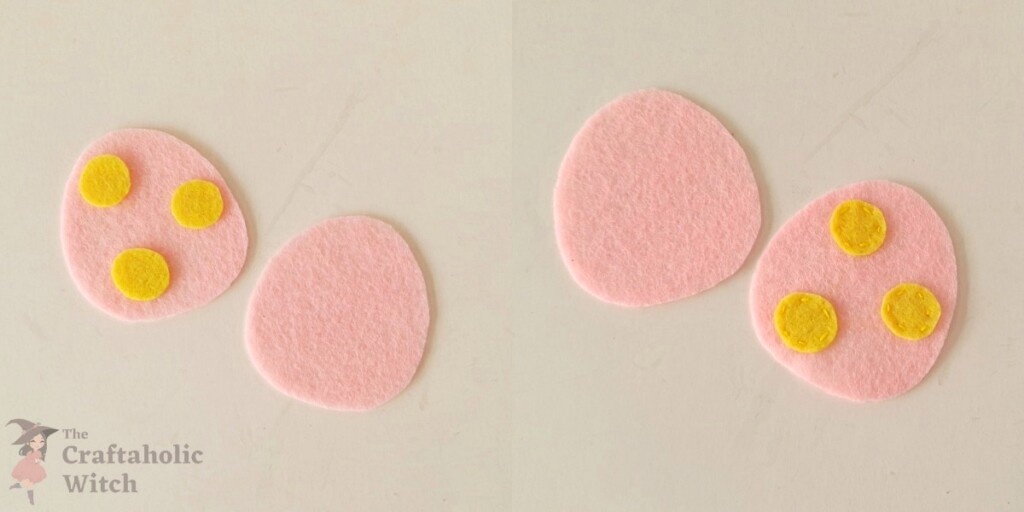
Lay the small round felt cutouts onto one of the egg bases, this is the decorated front piece, and pin them in place so they don’t shift. Thread your needle with matching thread and stitch around each circle with a small running stitch. Keep your stitches close together here; the circles are the first thing anyone notices on the finished egg, so tight, even spacing matters more on this piece than anywhere else in the project.
Step 3: Join the Two Egg Bases, Leaving Room for the Pencil
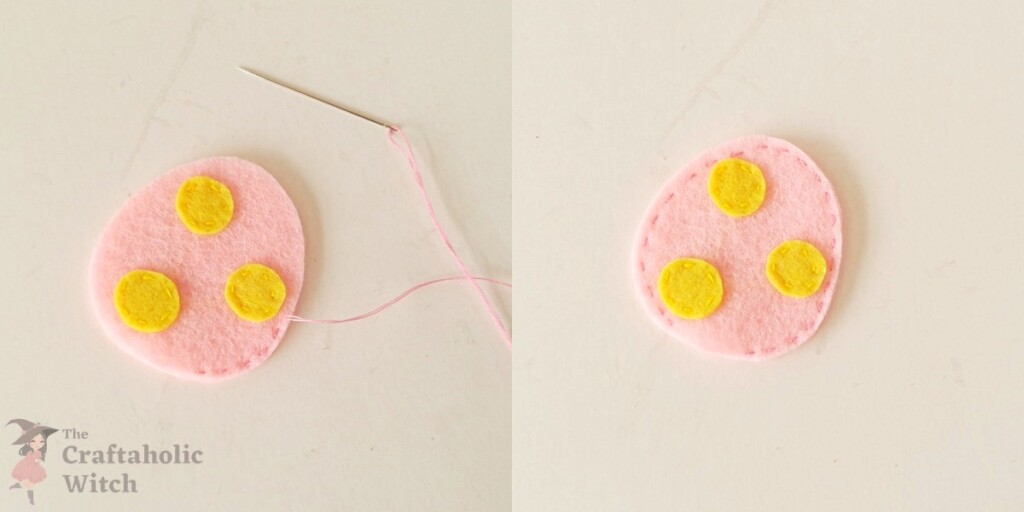
Set the plain egg base underneath the decorated front piece, edges lined up. Starting at one side, work a running stitch around the edge and stop with about a 2 cm gap at the bottom, that’s the opening the pencil slides into. A gap much narrower than that and you’ll be fighting the pencil every time; much wider and the topper slips loose.
Step 4: Stitch the Ear Pieces Onto One Rabbit Base
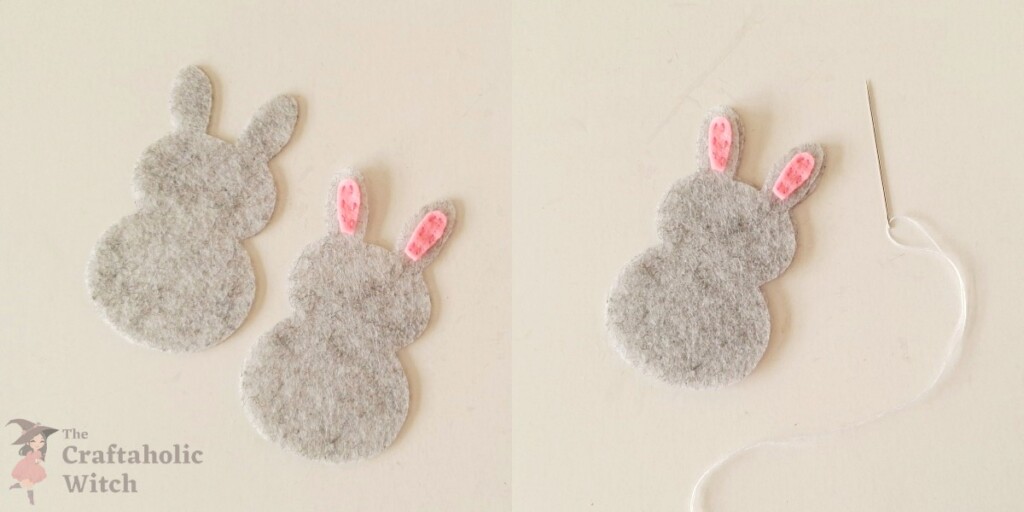
Take one rabbit base and place the two inner-ear cutouts onto the ear shapes. Stitch around each inner ear first, before you do anything else with this piece; it’s much easier to keep your stitches neat while the felt is still flat and not yet joined to its second layer.
Step 5: Stitch the Rabbit Bases Together
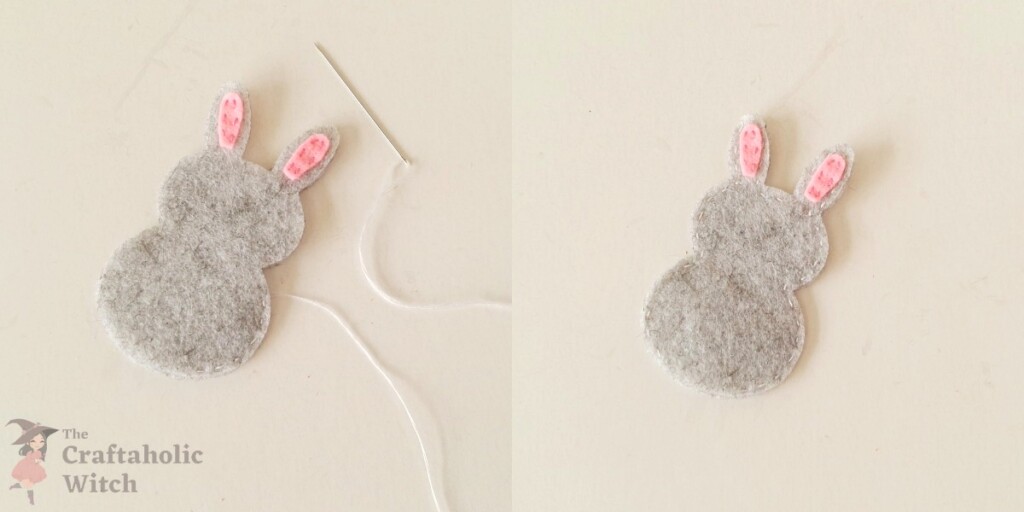
Place the plain rabbit base underneath the one with the stitched ears. Work a running stitch around the outside edge the same way you did for the egg, leaving a small opening at the bottom for the pencil. The rabbit’s ears are the narrowest part of the shape, so go slowly as you stitch around them; the felt has less room to move there than it does around the wider body.
Step 6: Layer the Carrot Leaf Between the Two Bases
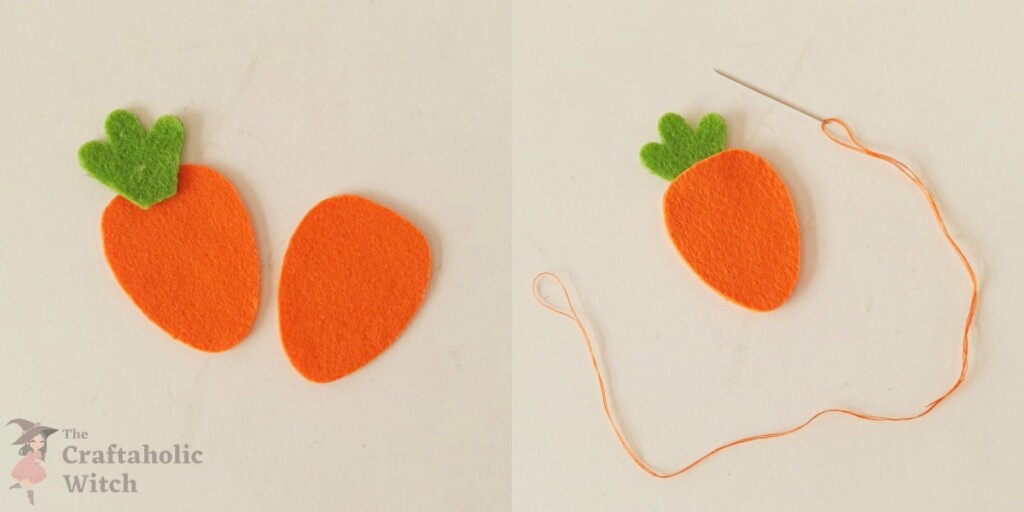
Place the felt leaf cutout at the top of one carrot base, letting it overlap the edge slightly. Set the second carrot base directly on top so the leaf is sandwiched between the two layers with just its tip peeking out. Pin it before you move on; it’s an easy piece to knock loose.
Step 7: Stitch Around the Carrot, Anchoring the Leaf As You Go
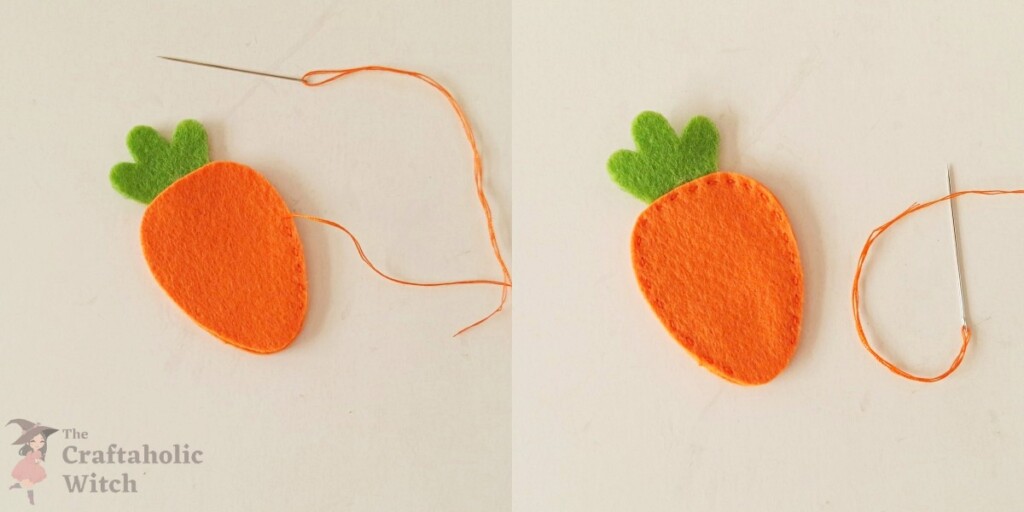
Stitch around the edge of the carrot with a running stitch, same as the other two toppers, and again leave a small gap at the bottom for the pencil. When you reach the leaf, take an extra stitch or two through all three layers to lock it in place. It’s the one spot in this whole project I’ve seen come loose if it’s skipped.
Step 8: Secure the Stitches and Finish
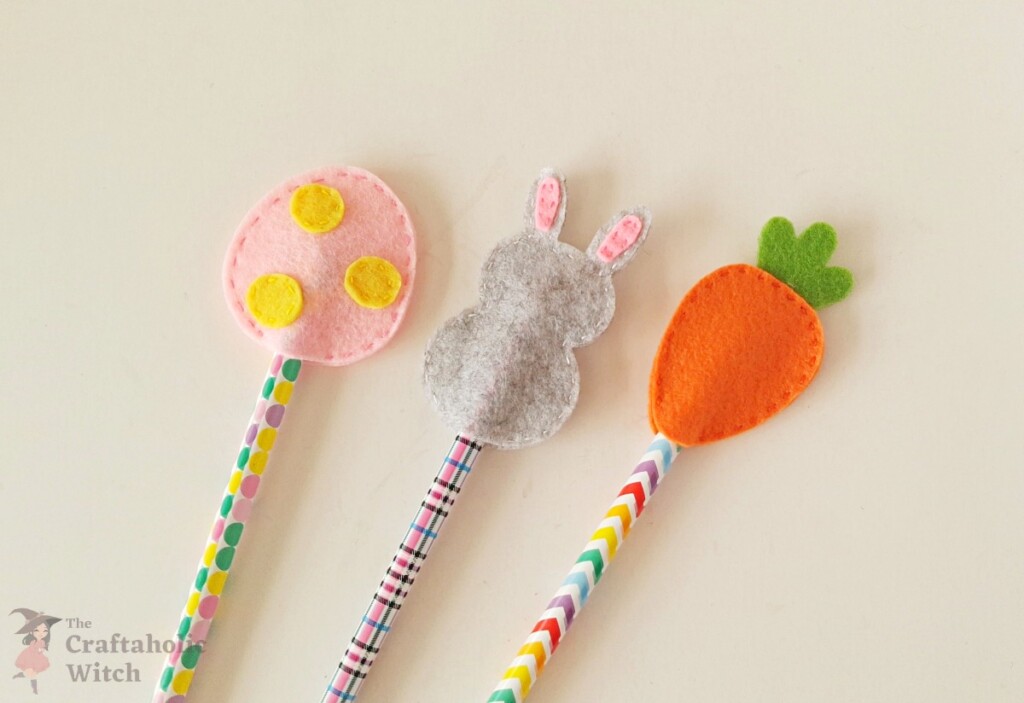
Once you’ve finished stitching a piece, thread the needle to the inside of the topper, tie two tight knots around your last stitch, and snip the extra thread close to the knot. Do this for all three toppers and you’re done. Set them upright in a cup while the thread ends settle, and they’re ready to slide onto a pencil.
Share it in "I Made It" and let us cheer you on.
Post your finished make in "I Made It" so the community can celebrate it with you. Cheer on other makers too. Each month, the most loved craft wins 1 year of Craftaholic Premium ($59)
Tips for Felt Easter Pencil Toppers
- Mix felt colors to match your Easter table, or make a matching set in the same pastel palette.
- Precut the felt shapes ahead of time if you’re making a batch for a whole classroom. The stitching goes much faster once the pieces are ready to go.
- Store finished toppers flat or standing upright rather than tossed in a pencil case. It keeps the rabbit ears and carrot leaf from getting bent out of shape.
Frequently Asked Questions
Can I make these felt Easter pencil toppers without a sewing machine?
Yes, this project is entirely hand-stitched with a simple running stitch. You won’t need a sewing machine, and hand stitching is easier to control on small, curved shapes like the rabbit ears and carrot leaf.
What can I use instead of felt for these pencil toppers?
Felt is the easiest fabric here because the edges don’t fray, so you can skip hemming entirely. If you’re out of felt, a firm cotton fabric works too, but you’ll need to zigzag or overcast the raw edges first or they’ll unravel after a few uses.
How long does it take to make all three pencil toppers?
Budget 45 to 60 minutes for the full set of three once you’re set up with felt, thread, and a needle. The running stitch is the same on every piece, so the egg usually goes slowest since it’s your first, and the carrot and rabbit go quicker after that.
Can kids make these felt pencil toppers themselves?
Kids around 8 and up can usually manage the running stitch with a little guidance, especially on the wider egg shape. The narrower rabbit ears and the carrot leaf take a steadier hand, so it’s worth sitting with younger kids for those two pieces.
Can I make these pencil toppers without the printable template?
You can freehand the egg, rabbit, and carrot shapes if you don’t mind some size variation between toppers. The free template keeps all three the same size and makes sure the ear and leaf pieces actually fit their bases, which is the fiddliest part to eyeball on your own.
Will the felt pencil topper stay on the pencil?
Yes, the small opening left at the bottom of each topper is sized to grip a standard pencil snugly once the stitching is done. If one feels loose, take an extra stitch or two at the opening to narrow the gap.
More Plushies and Soft Toys Tutorials
Share your felt Easter pencil toppers in the I Made It space inside Craftaholic Community. The most-loved post each month wins a one year free Premium membership.
0 Comments
Join the conversation
Log in to your Craftaholic Community account to comment, ask questions, and cheer on fellow makers.
Log in to comment