

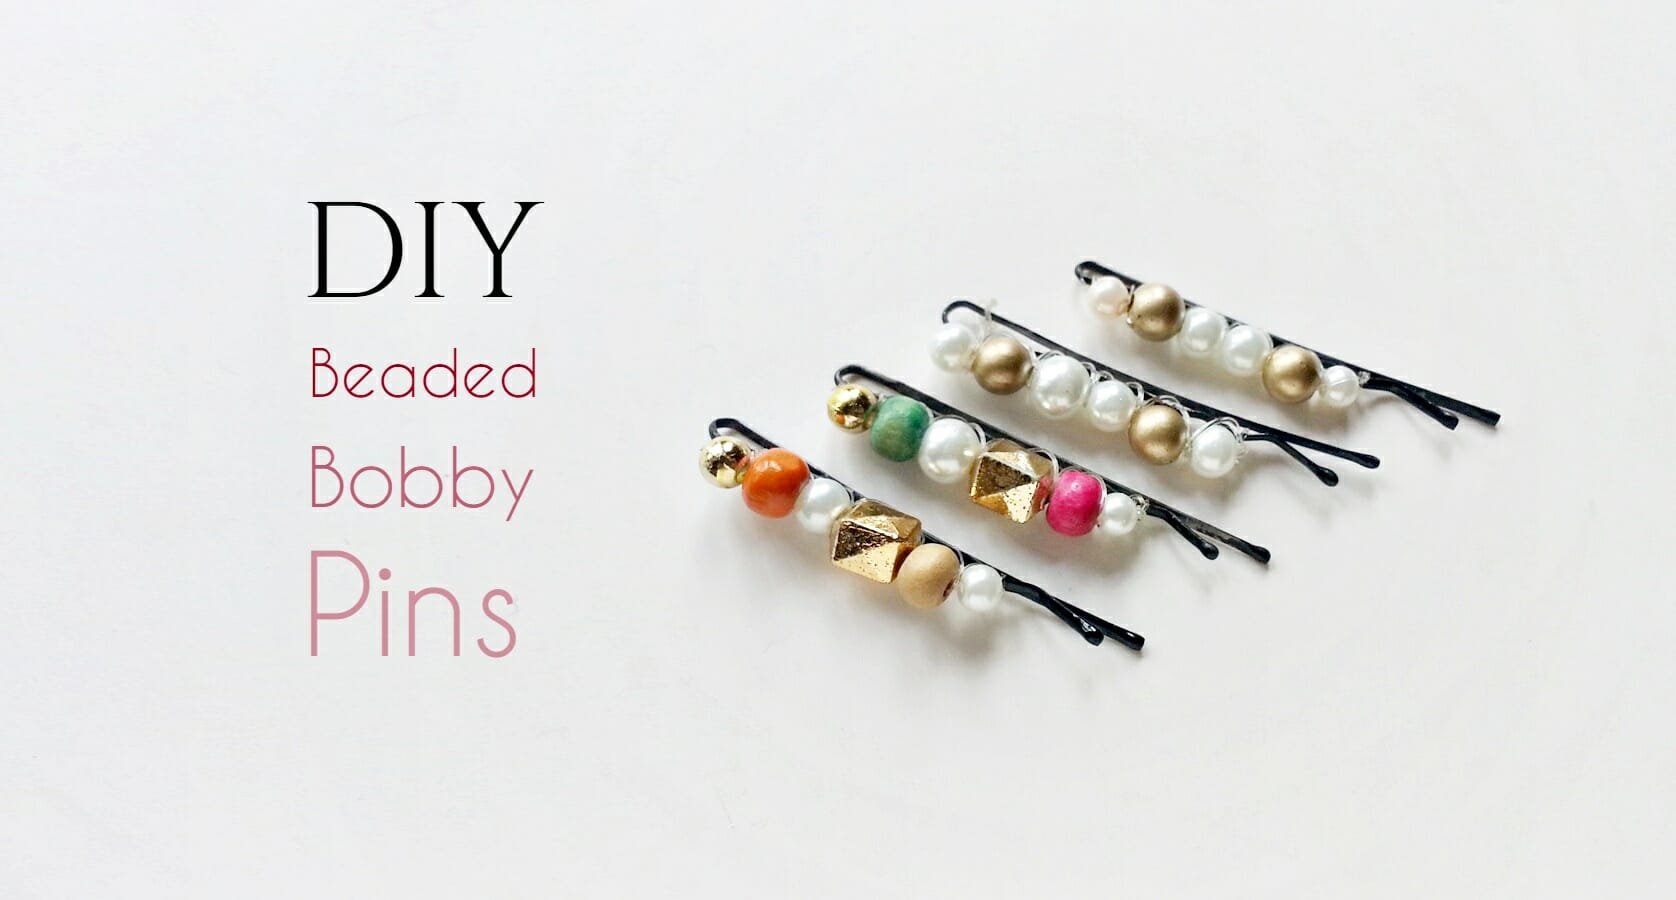
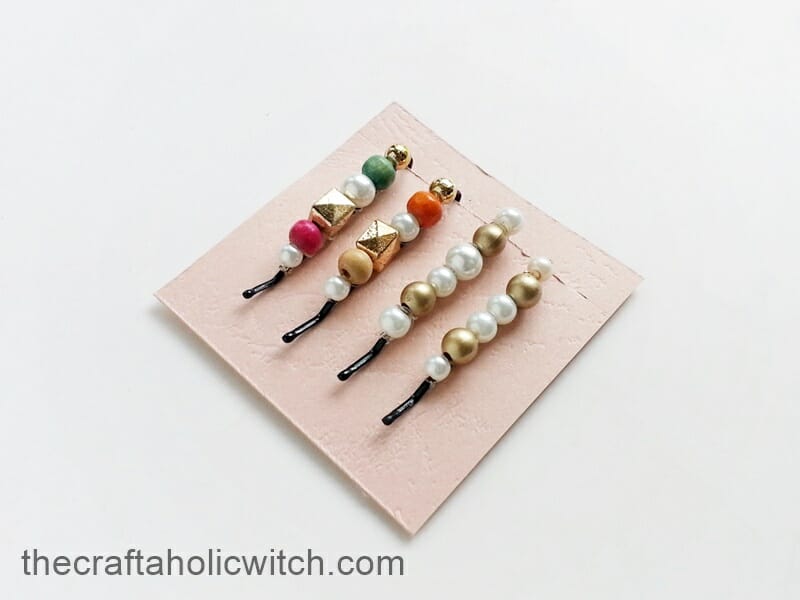
Beaded bobby pins take about 15 minutes to make, cost almost nothing, and turn plain metal pins into something you actually want to wear. I keep a small jar of supplies on my desk now and make a fresh pair whenever I feel like something different in my hair.
You only need five supplies, three of which you probably already have at home. If you’re new to bead crafts, this is a great starting point: the technique is just threading and knotting, with no special tools or skills required.
Beaded Bobby Pins at a Glance
- Difficulty: Beginner
- Time: 15 minutes
- Cost: Under $5
- Ages: 8+
- Best for: Hair accessories, handmade gifts
Join Craft Challenge: Craft Your Calm
Make something that brings you a sense of peace, share a photo, and tell us your story. It's free to enter, open to everyone, and the entry with the most reactions takes home a $100 gift card. Takes five minutes to join.
Entries close August 30, 2026. No purchase necessary.
What You Need to Make Beaded Bobby Pins
Materials
- Bobby pins: standard metal bobby pins work perfectly. Dollar store packs are ideal since they give you extras to practice with.
- Clear plastic thread (monofilament): thin fishing line or clear beading thread. It’s strong, holds knots well, and nearly invisible on the pin. Avoid regular sewing thread; it stretches and the knots loosen over time.
- Colorful beads, 4-5mm: seed beads, pony beads, or small faceted beads all work. Mix colors and shapes for the prettiest result. You’ll need roughly 15-20 beads per pin depending on bead size.
Tools
- Scissors: for cutting the thread to length and trimming the tail ends cleanly after the final knot.
- Super glue (optional): a tiny drop on the last knot keeps everything locked in place. Without it, the knot can work loose after a few wears.
Ask inside "Crafty Q&A" while you are making.
"Crafty Q&A" is free to join. Share your question, photo, or the exact step where you got stuck, and chat with other makers plus the Craftaholic Witch team. You can also join any discussion thread already happening inside the space.
How to Make Beaded Bobby Pins
Step 1: Anchor the Thread to One End of the Bobby Pin
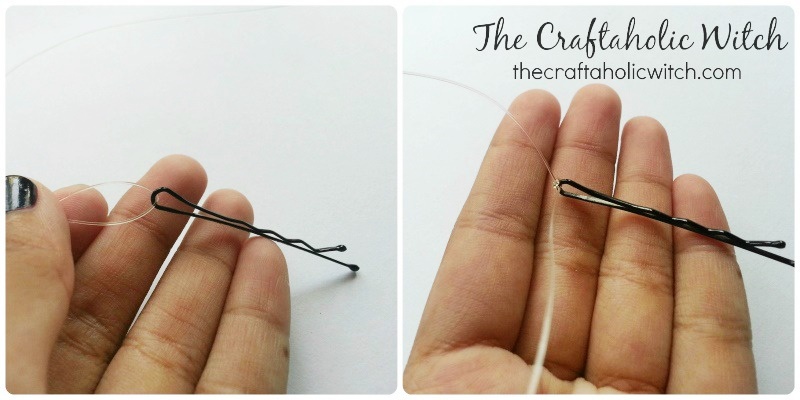
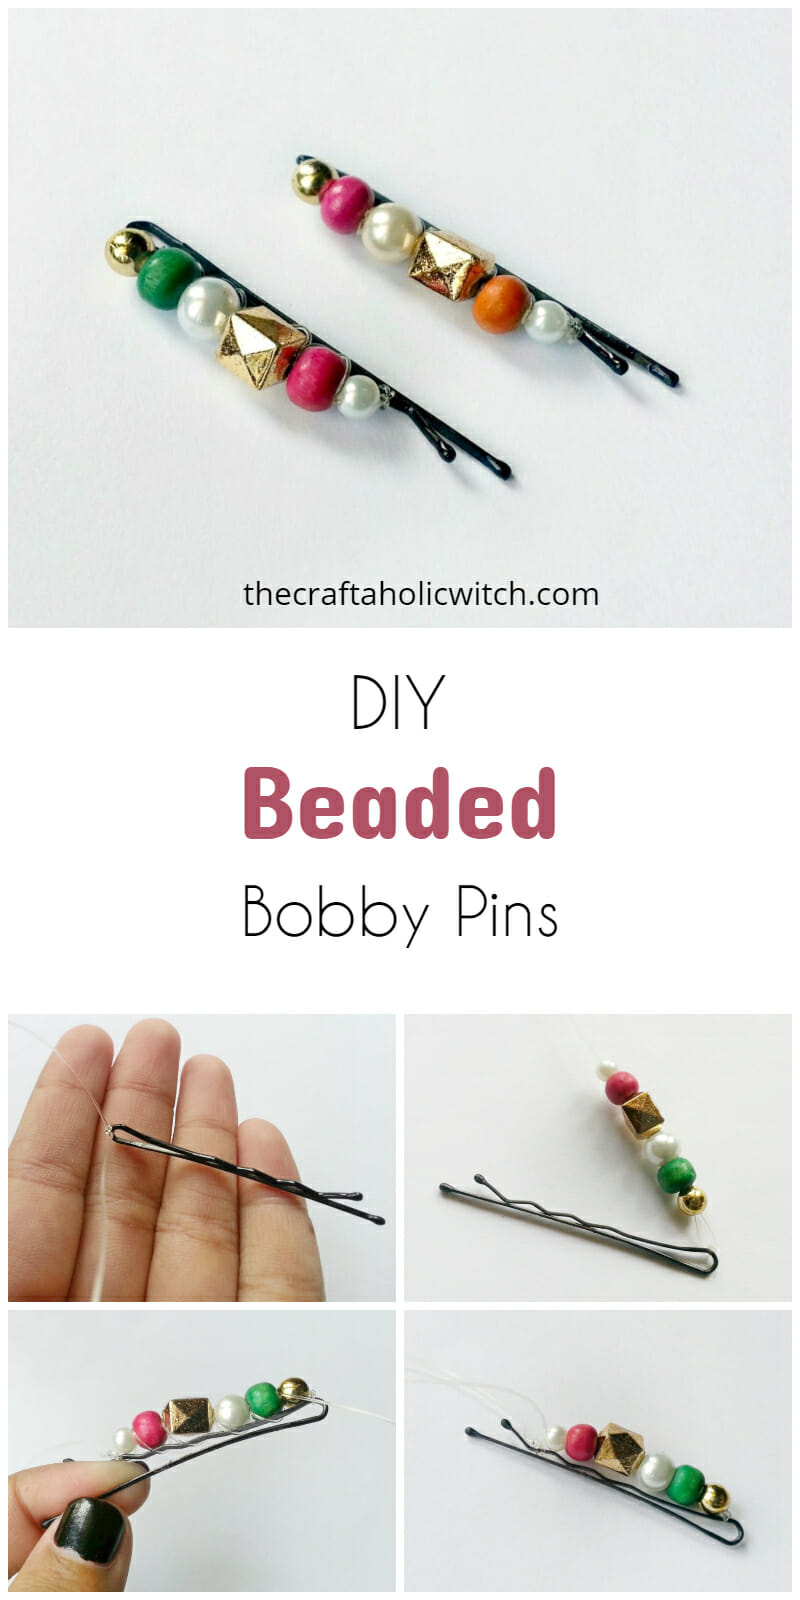
Cut a piece of plastic thread about 10 inches long. Fold it in half, slip the folded loop through the rounded end of the bobby pin, then pass both loose ends through the loop and pull snug. Tie two more knots on top so the anchor holds, and adjust until both strands are the same length.
The knot needs to sit at the very tip of the pin, not a centimeter in. If it slides down, the beads won’t reach end to end. Give it a firm tug to confirm it’s seated before you move on.
Step 2: Thread the Beads Along Both Strands
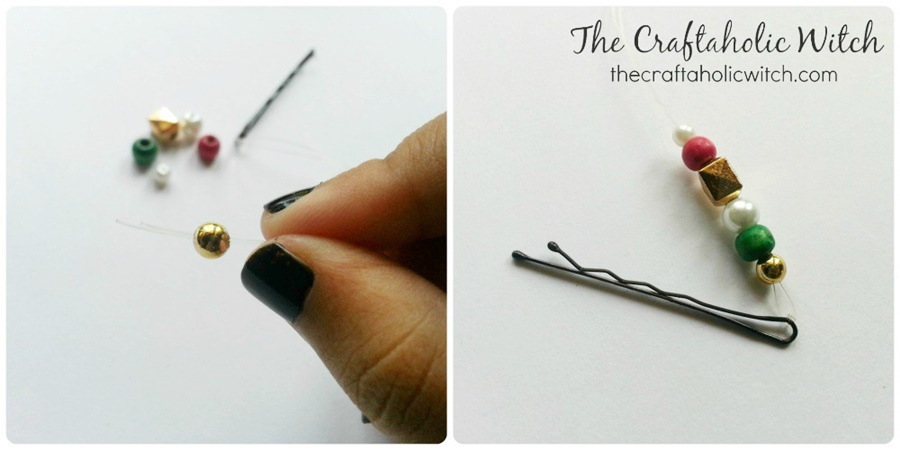
Hold both strands together as one and slide your beads on, mixing colors and shapes as you go. Keep the thread lined up alongside the top bar of the bobby pin so you can gauge how much space you have left. Stop beading when the beads sit just short of the other end, with a small gap remaining to tie off.
If a bead spins or sits loose, it’s too wide for the thread. Switch to a slightly smaller bead or try a thinner monofilament. The finished row should sit snug without rattling.
Step 3: Tie Off, Wrap, Glue, and Trim
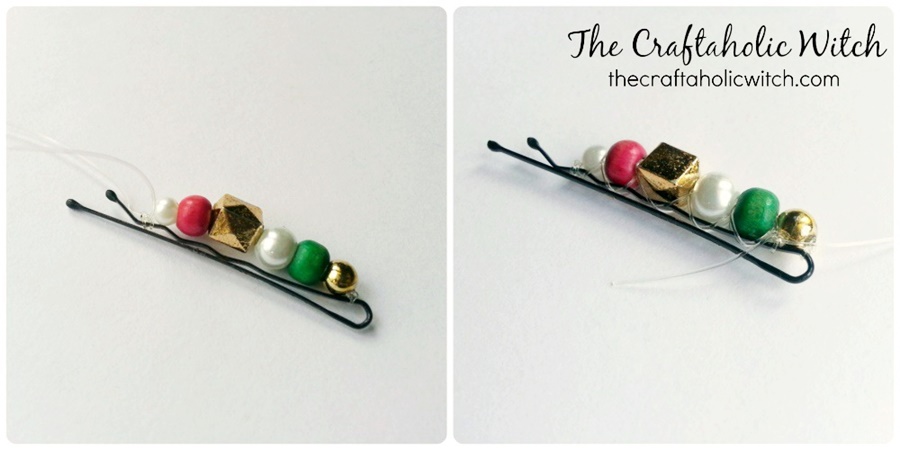
Tie two tight knots at the far end to lock the beads in place. Then take the remaining thread and wrap it back along the pin, weaving between the beads, all the way to the starting end. Tie two more tight knots there and trim the tail close to the knot.
Add a single small drop of super glue on each knot, just enough to cover it. Let it dry fully before wearing. The glue is technically optional, but it’s what keeps the pin together after repeated use rather than unraveling the first time you pull it from your hair.
Share it in "I Made It" and let us cheer you on.
Post your finished make in "I Made It" so the community can celebrate it with you. Cheer on other makers too. Each month, the most loved craft wins 1 year of Craftaholic Premium ($59)
Tips for Making Beaded Bobby Pins
- Make a batch at once. Once your supplies are laid out, 6 pairs take under an hour and give you a full week of different looks.
- For a tonal look, thread 3-4 shades of the same color from light to dark. For a bold style, alternate two contrasting colors every 3 beads.
- Store finished pins in a small tin or ziplock bag so the beads don’t snag on anything in your bag or drawer.
Frequently Asked Questions
How many beads do I need for one beaded bobby pin?
You’ll need roughly 15 to 20 beads per pin, depending on bead size. With 4-5mm beads, around 15-18 usually fills a standard bobby pin. It’s worth counting out a small pile before you start threading so you’re not digging through the bead jar mid-step.
What kind of thread works best for beaded bobby pins?
Clear monofilament works best: thin fishing line or clear beading thread. It’s strong, holds knots well, and nearly disappears against the metal pin. Avoid regular sewing thread; it stretches with wear and the knots tend to loosen after a few uses.
Will the beads fall off with regular use?
Not if the final knots are tight and you add a drop of super glue on each one. The glue is optional in the instructions, but in practice it’s what makes the difference between a pin that holds up for months and one that unravels the first time you take it out of your hair.
Can kids make beaded bobby pins?
Yes, this is a great project for ages 8 and up. The tying and threading steps are easy to follow, and kids love picking their own bead colors. Younger children may need help with the final gluing step, but the rest is perfectly doable on their own.
More Jewelry Making Tutorials
- How to Make Beaded Necklaces (3 Designs with Full Tutorials)
- DIY Beaded Wire Ring (Anyone Can Make It In 6 Easy Steps)
- How to Make Hoop Earrings with Beads
- How to Make a Caged Gemstone Ring
- How to Make Hair Bows (4 Easy Tutorials with Cute Designs)
Share your beaded bobby pins in the I Made It space inside Craftaholic Community. The most-loved post each month wins a one year free Premium membership.
0 Comments
Join the conversation
Log in to your Craftaholic Community account to comment, ask questions, and cheer on fellow makers.
Log in to comment