


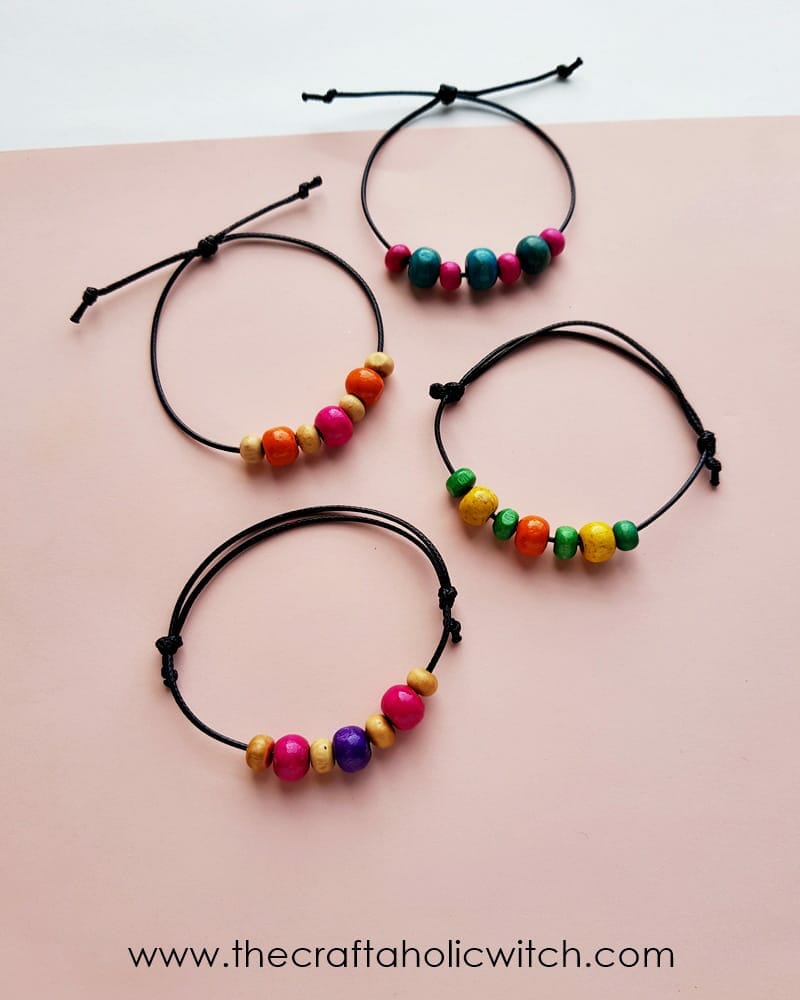
These adjustable beaded bracelets are made entirely from waxed cord and wooden beads. That is the whole supply list. You thread the beads onto the cord, form a ring, and tie a sliding knot at the open end so the bracelet slips on and tightens to fit any wrist size. I’ll show you two versions: one with a single knot on one side, which is the simpler place to start, and one with a knot on each side that opens from either end and sits more evenly on the wrist.
Each bracelet uses just 5 or 6 wooden beads, so a standard pack of 300 goes a long way. With what’s left you can make a pair of boho wooden bead hoop earrings, a graduated fan of dangles on blank hoops that pairs naturally with the bracelet and looks great with a flowy dress or festival outfit, or a wooden beaded bag charm to clip onto a zipper pull or key ring. One pack of beads, three things to make.
Both methods take about 15 to 20 minutes. If you have never tied a sliding knot before, work through Method 1 first. The single knot is easier to see and feel, and it’s the same knot you’ll repeat in Method 2.
Adjustable Beaded Bracelets at a Glance
- Difficulty: Beginner
- Time: 15-20 minutes per bracelet
- Cost: About $4-5 (makes 4+ bracelets)
- Ages: 10+
- Best for: Handmade gifts, jewelry sets, using up leftover beads
Join Craft Challenge: Craft Your Calm
Make something that brings you a sense of peace, share a photo, and tell us your story. It's free to enter, open to everyone, and the entry with the most reactions takes home a $100 gift card. Takes five minutes to join.
Entries close August 30, 2026. No purchase necessary.
What You Need to Make Adjustable Beaded Bracelets
Materials
- Waxed cord: the waxy coating grips the sliding knot so it holds its position during wear but still slides when you pull to adjust. 1mm thickness works well for most wooden beads with standard large holes.
- Wooden beads with large holes: the large holes are key here. When you tighten the knot, both cord strands sit inside the bead together, so a narrow hole will jam before the knot seats properly. Colorful 8-12mm beads give you the most design flexibility.
Tools
- Ruler: to measure the right cord length before cutting. Too short and you won’t have enough cord to tie both knots and the stopper ends.
- Scissors: to trim the cord ends cleanly after the knots are tied.
- Lighter (optional): briefly melting the cut cord tips seals the threads so they don’t fray with regular wear.
Heads up: some of the supply links above are affiliate links. If you buy through them, Craftaholic Witch may earn a small commission at no extra cost to you. We only link supplies we would actually use ourselves.
Ask inside "Crafty Q&A" while you are making.
"Crafty Q&A" is free to join. Share your question, photo, or the exact step where you got stuck, and chat with other makers plus the Craftaholic Witch team. You can also join any discussion thread already happening inside the space.
How to Make Adjustable Beaded Bracelets
Both methods use the same two materials and the same knot. Method 1 has one knot that adjusts from a single side. Method 2 has one knot on each side so the ring opens from either end. Start with Method 1 if this is your first time tying a sliding knot; the technique carries straight into Method 2.
Method 1: Single Sliding Knot

Step 1: Measure the Cord and Load the Beads
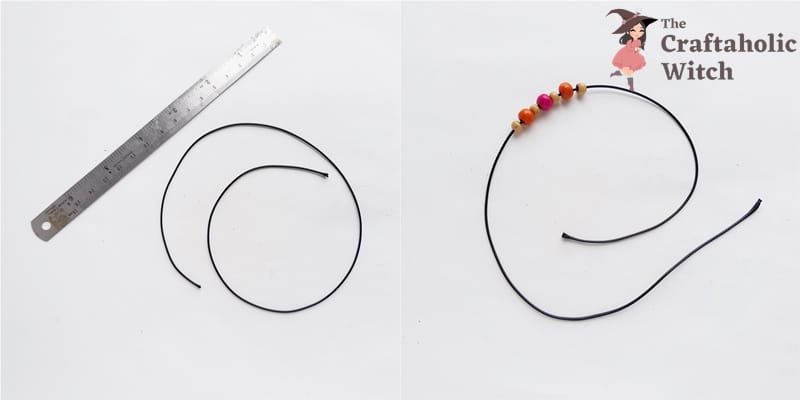
Wrap the cord loosely around your wrist 3 times to gauge the length you need, then cut a piece that is 2.5 to 3 times your wrist size. Thread 5 or 6 wooden beads onto the center section of the cord, leaving both ends free and roughly equal in length. You don’t need to fill the cord all the way to your wrist measurement. A small cluster sits naturally at the front when the bracelet is on.
Step 2: Cross the Ends to Form the Ring
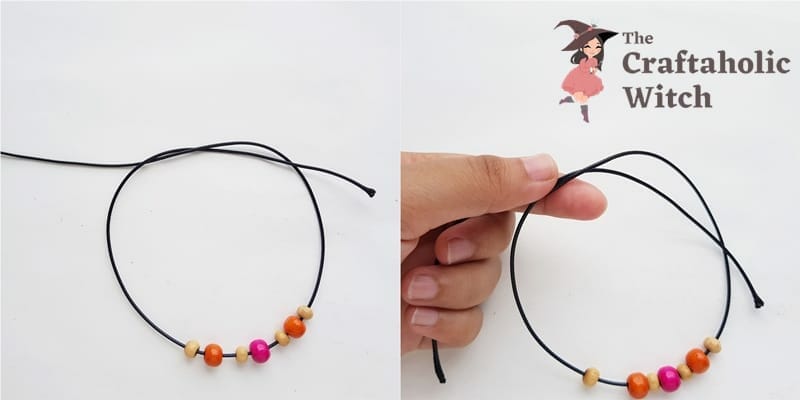
Cross both open ends over each other so the cord forms a ring about 1 cm larger than your wrist. That extra space is what gives the knot room to travel. Keep the same amount of cord sticking out on each side of the crossing point and hold it firmly with your thumb and forefinger. This is where the knot will sit.
Step 3: Circle One End Around Your Fingertip
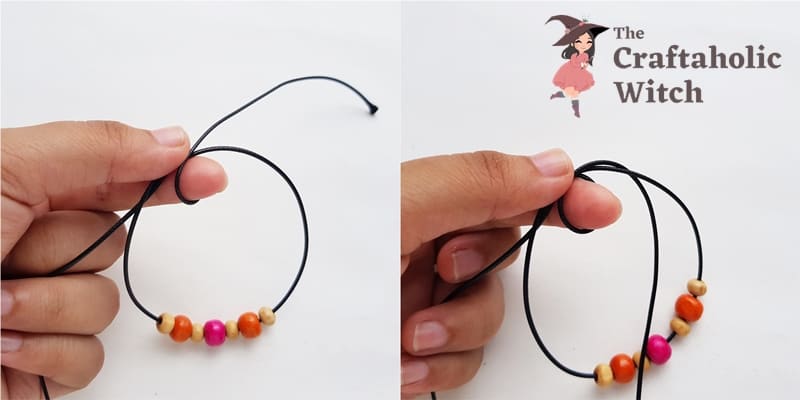
Take one open end and loop it around your fingertip once. Draw the looped end under the main bracelet ring, passing it from front to back. This wraps one strand around the other and sets up the first half of the knot. It should feel a bit like the start of tying a shoelace.
Step 4: Form the Second Loop to Lock the Knot
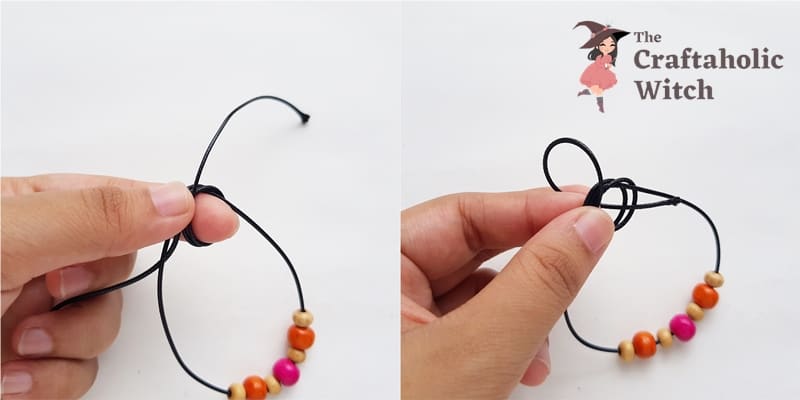
Without releasing the first loop, form a second loop with the same cord end. This time draw the end through the first loop from left to right. Don’t pass it under the main ring again. You should now have two loops stacked on the ring cord, with the open end poking cleanly through the first loop.
Tip: Keep a light grip on the crossing point the whole time. If it slips, the ring collapses and you’ll need to re-form it from Step 2.
Step 5: Pull Tight and Test the Slide
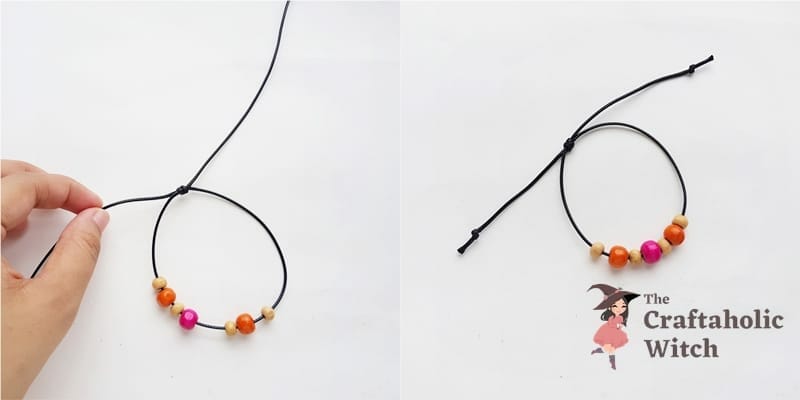
Pull both open ends slowly and evenly to draw the knot snug. Once it looks neat, tug one end at a time; the knot should slide along the main ring in the direction you pull, opening or tightening the bracelet. Tie a small stopper knot at the very tip of each open end so the cord can’t slip back through the knot during wear. If the bracelet won’t slide at all, loosen the knot slightly, smooth the cord strands, and retighten with a little less pressure.
Method 2: Double Sliding Knot
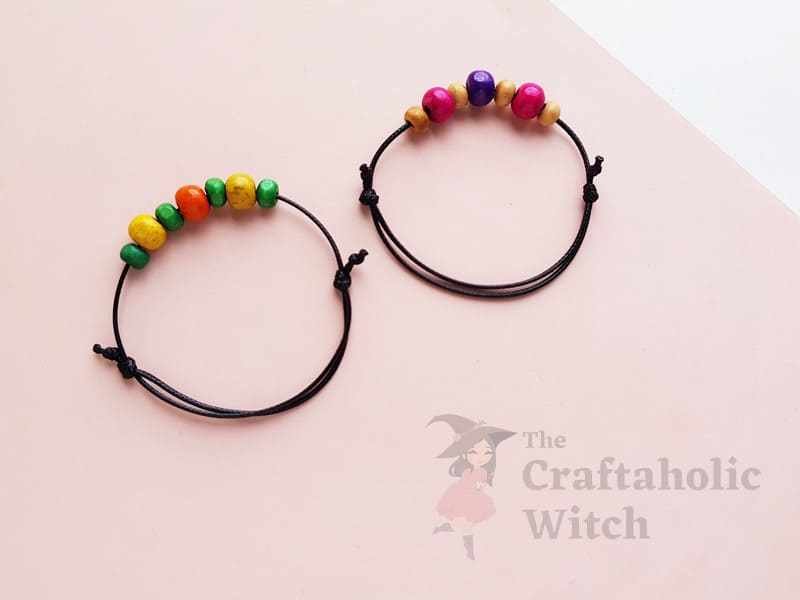
Method 2 has two knots, one on each side of the ring, so the bracelet opens from either end and tends to sit more centered on the wrist. Measure your cord, load the beads to the middle, and form the ring exactly as you did in Method 1 Steps 1 and 2. Then continue below.
Step 1: Tie the First Knot on the Right Side
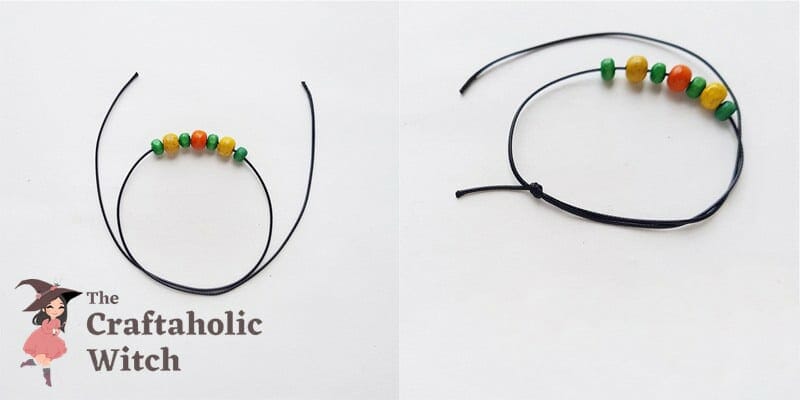
Use the right open end and the closed ring cord running alongside it on the same side to tie the same two-loop knot from Method 1. Leave it slightly loose for now. You’ll equalize both knots before locking them in. When you pull the right open end, this knot should slide and open the ring from that side.
Step 2: Tie the Second Knot on the Left Side and Finish
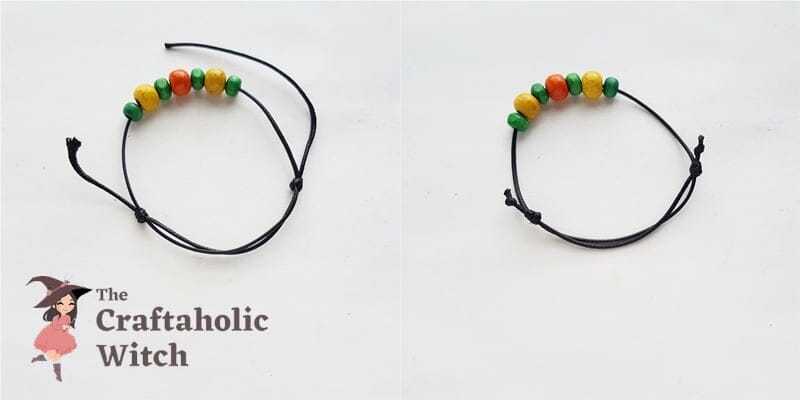
Tie the matching knot on the left side using the left open end and its adjacent ring cord. Pull both knots to the same tension, then test: each open end should slide its own knot independently. Once the fit is right, trim any extra cord and run the cut tips briefly through a lighter flame to seal them. The double-knot bracelet is done.
Share it in "I Made It" and let us cheer you on.
Post your finished make in "I Made It" so the community can celebrate it with you. Cheer on other makers too. Each month, the most loved craft wins 1 year of Craftaholic Premium ($59)
Tips for Adjustable Beaded Bracelets
- If the sliding knot keeps loosening during wear, the issue is usually cord type rather than technique. Waxed cord grips the knot; smooth nylon doesn’t. Switching to waxed cord usually fixes it without re-tying.
- If the bracelet won’t adjust at all, the stopper knots at the cord tips are sitting too close to the slider. Untie them, push the slider a few millimeters along the ring, and retie the stoppers with a little more slack between the stopper and the knot.
Frequently Asked Questions
What is the difference between the single and double sliding knot?
The single knot sits on one side of the bracelet and you adjust the size by pulling that side’s cord end. The double knot has one knot on each side so the bracelet opens from either end and tends to sit more symmetrically on the wrist. Both hold equally well with regular wear.
What cord works best for sliding knot bracelets?
Waxed cord is the best choice. The coating grips the knot so it holds its position during wear but still slides when you pull to adjust. Smooth nylon cord can work but tends to slip loose more easily, especially if the knot is slightly loose from the start.
What size beads do I need for a sliding knot bracelet?
Wooden beads in the 8mm to 12mm range with large holes work well. The hole size matters more than the diameter. When you tighten the knot, both cord strands travel through the bead together, so a narrow hole will jam the bead before the knot seats properly and stops the bracelet from adjusting.
How do I size the bracelet to fit my wrist?
Cut the cord at 2.5 to 3 times your wrist measurement. When you form the ring in Step 2, make it about 1 cm larger than your wrist. That gap is what gives the sliding knot room to travel. The knot lets you tighten from there, but if you start with a ring that is already too snug, there is no way to make it larger once the knot is tied.
More Bracelet Tutorials
- How to Make a Mixed Beaded Bracelet with Faux Pearls
- How to Make Ribbon-Wrapped Bangle Bracelets with Seed Beads
- How to Make a Chevron Friendship Bracelet
- How to Make a Flower Bead Bracelet (Daisy Chain)
- How to Make Hemp Bracelets
Share your finished bracelet in the I Made It space inside Craftaholic Community. The most-loved post each month wins a one year free Premium membership.
0 Comments
Join the conversation
Log in to your Craftaholic Community account to comment, ask questions, and cheer on fellow makers.
Log in to comment