

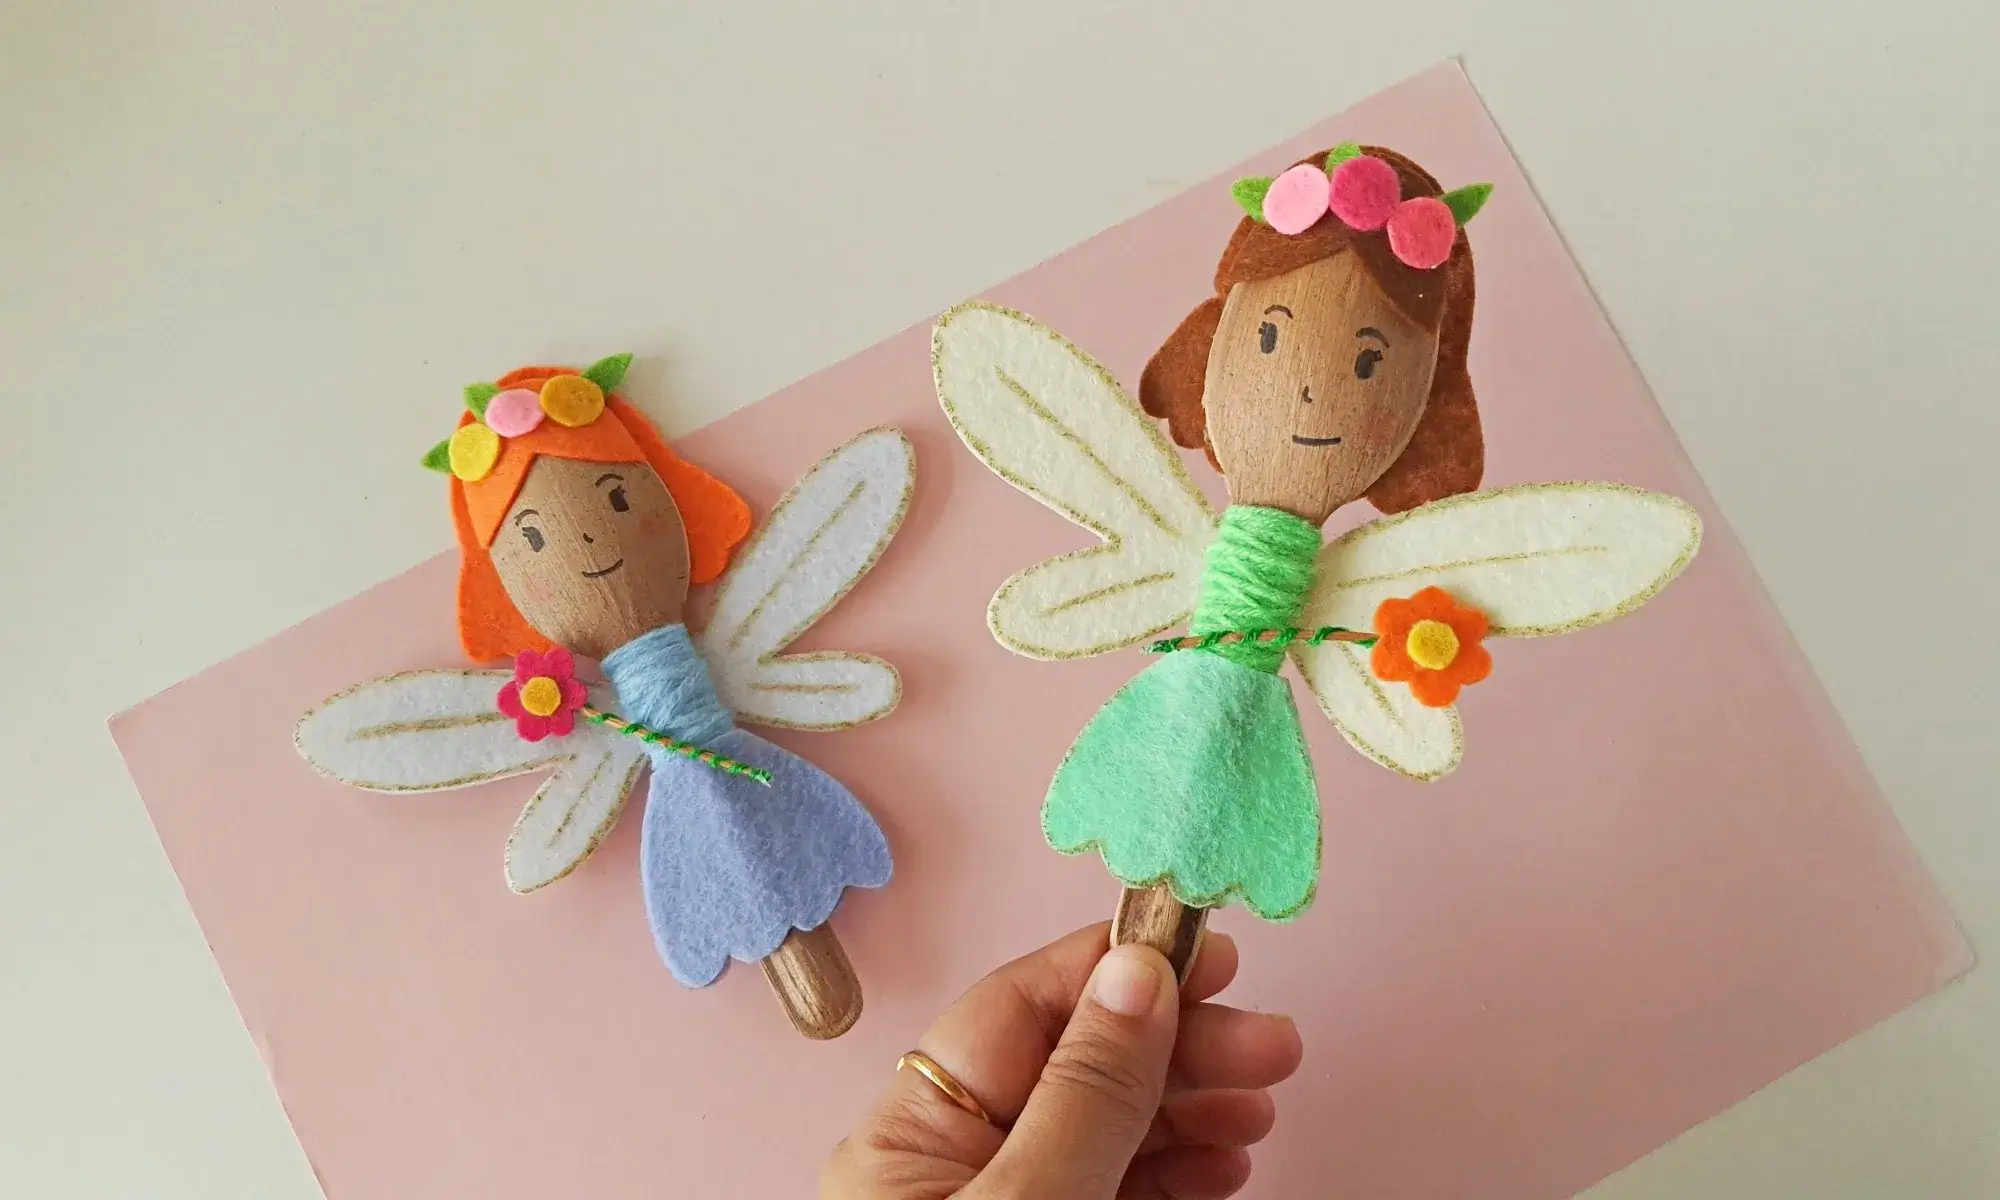
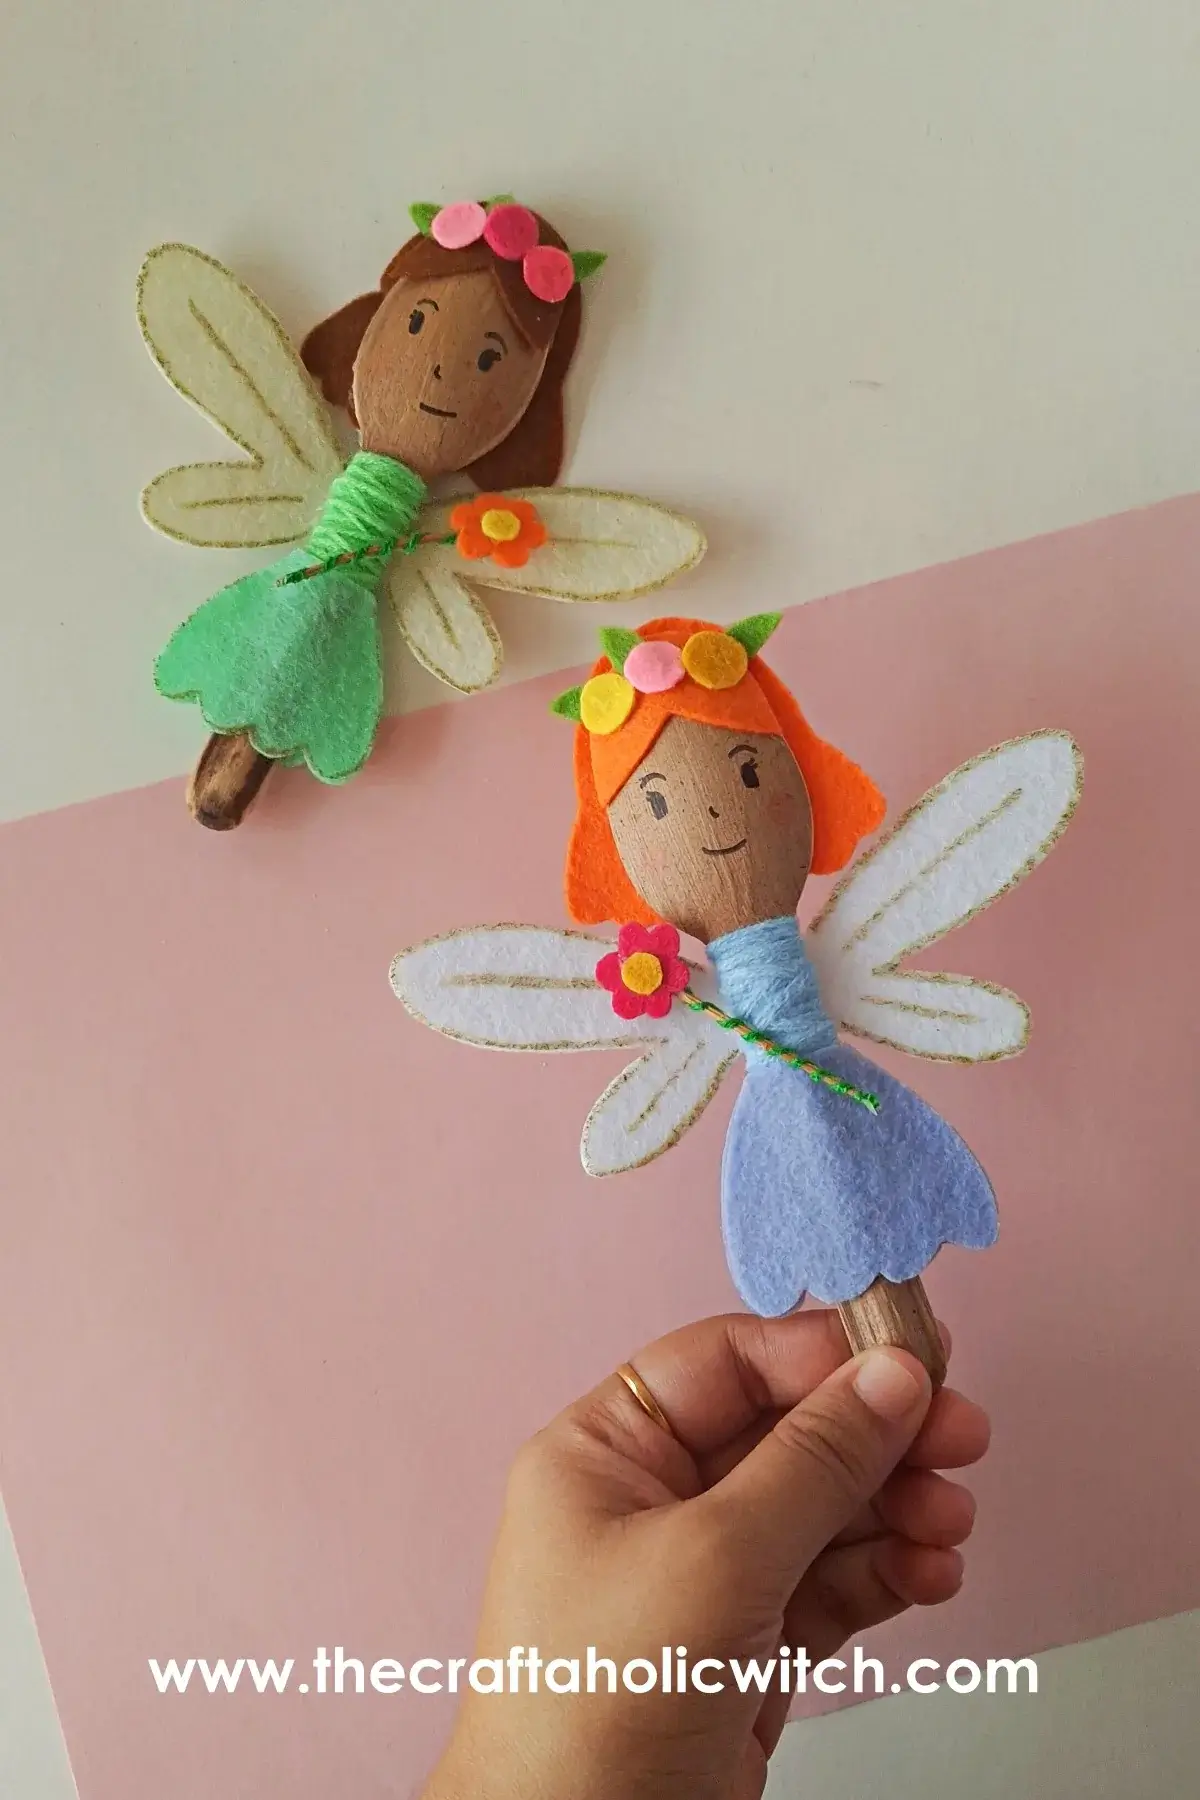
This spoon fairy has quickly become one of my favorite recycled craft ideas for kids. You take a plain plastic or fiber spoon, add yarn wrapping, felt cutouts from the free template, and a tiny handmade wand, and in about 45 minutes you have a whimsical fairy figure the kids will want to keep on display. If you’ve already tried my recycled spoon witch, the technique here is exactly the same, so this is a great follow-on project.
No sewing involved. The hardest part is the hot glue, and even that goes quickly. The template handles all the measuring, so you trace, cut, and glue your way through each step.
Spoon Fairy at a Glance
- Difficulty: Beginner
- Time: 45 minutes
- Cost: Under $5
- Ages: 6 and up (adult help for the hot glue)
- Best for: Quiet crafting at home, classroom projects, fairy-themed parties
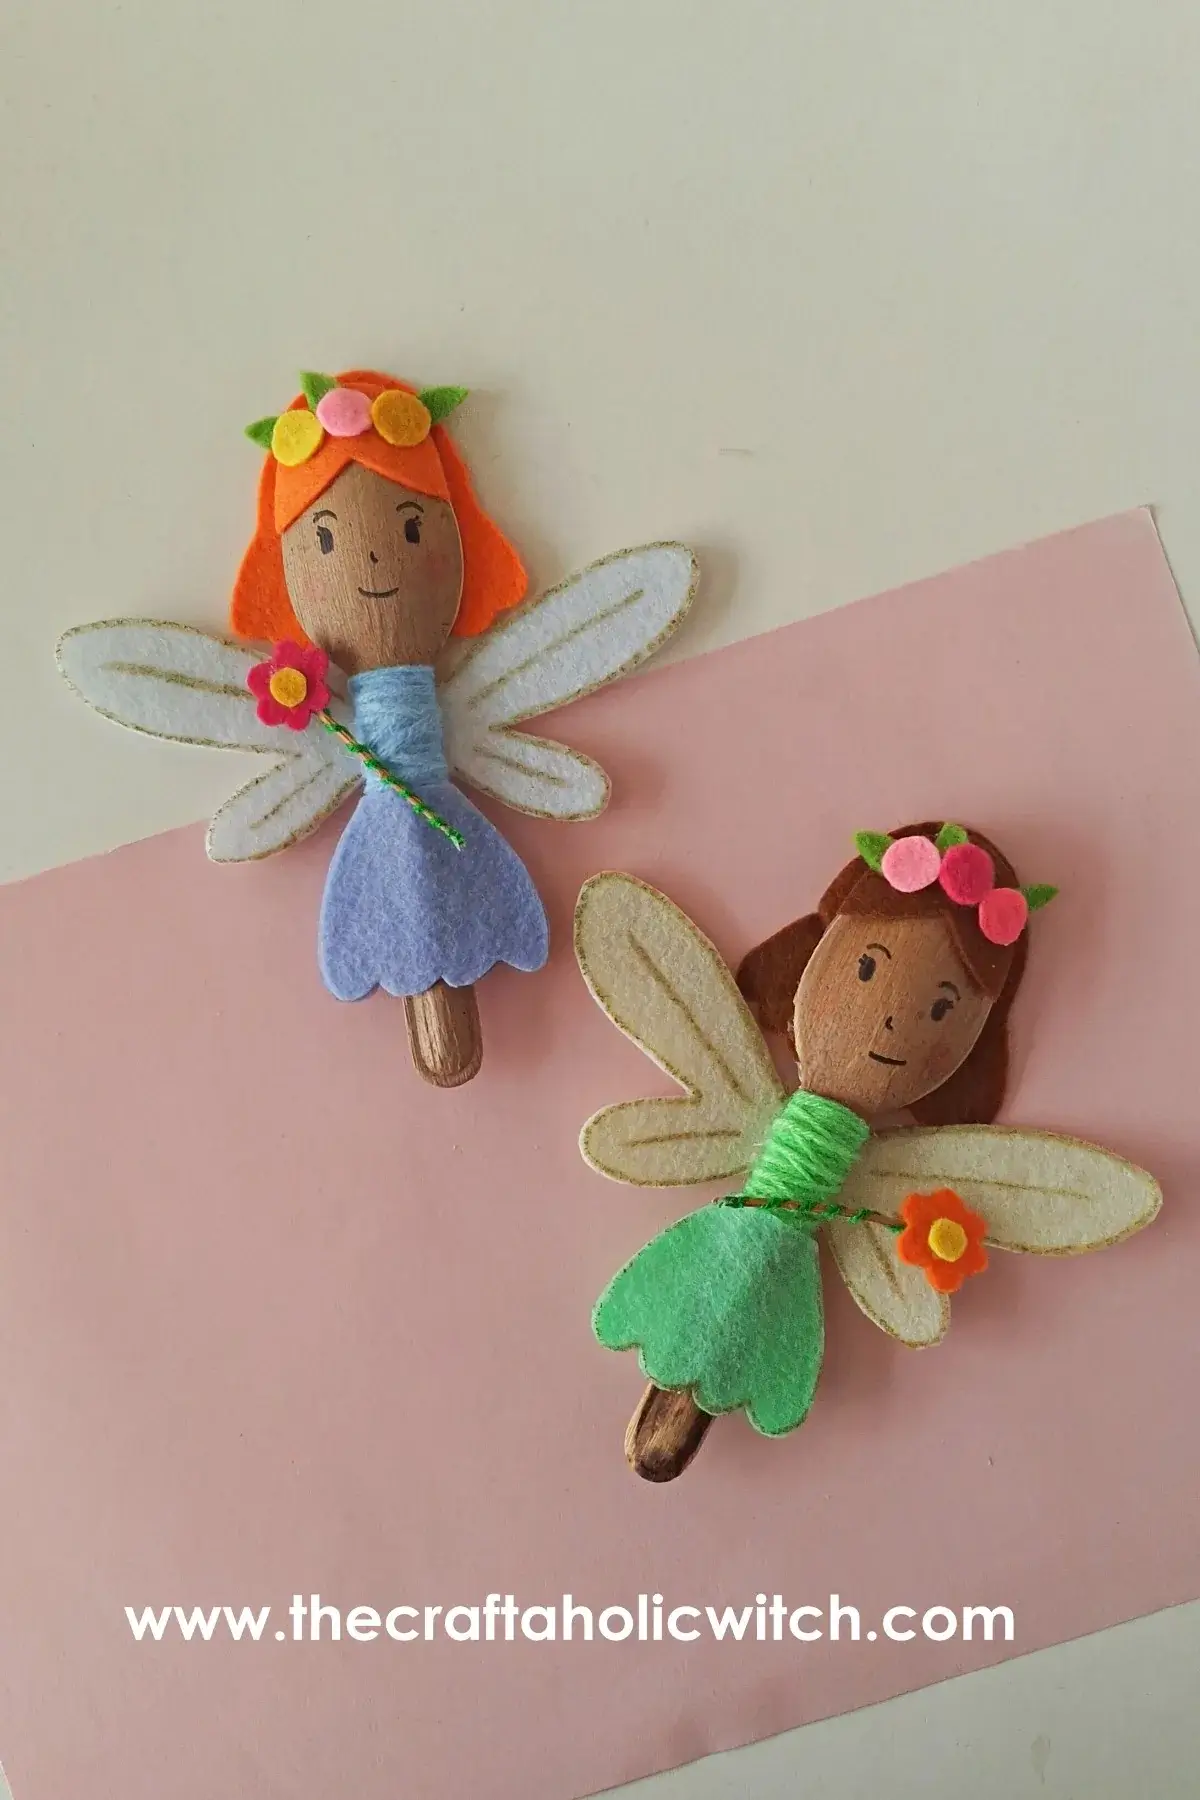
What You Need to Make a Recycled Spoon Fairy
Materials
- A wooden, fiber, or plain plastic spoon (the spoon bowl will become the fairy’s face, so choose one you can easily draw on).
- Felt fabrics in your chosen colors, for the hair, skirt, wings, and flower crown
- Yarn for wrapping the handle into a dress bodice and coiling around the wand stick
- A small stick to use as the fairy’s wand
Tools
- Hot glue gun and glue sticks (the main fastener throughout; a low-temp gun works well for younger kids)
- Pencil for tracing the template shapes onto felt
- Scissors; sharp fabric scissors give the cleanest cuts on felt
- Markers for drawing the fairy’s face on the spoon bowl
Free Template: The printable pattern for this spoon fairy (hair, flower crown, skirt, wings, and wand flower) is available free to members of the Craftaholic Community. Sign up is free; download the template from the Free Templates section before you start.
Ask inside "Crafty Q&A" while you are making.
"Crafty Q&A" is free to join. Share your question, photo, or the exact step where you got stuck, and chat with other makers plus the Craftaholic Witch team. You can also join any discussion thread already happening inside the space.
How to Make a Recycled Spoon Fairy
Step 1: Prepare the Felt Patterns
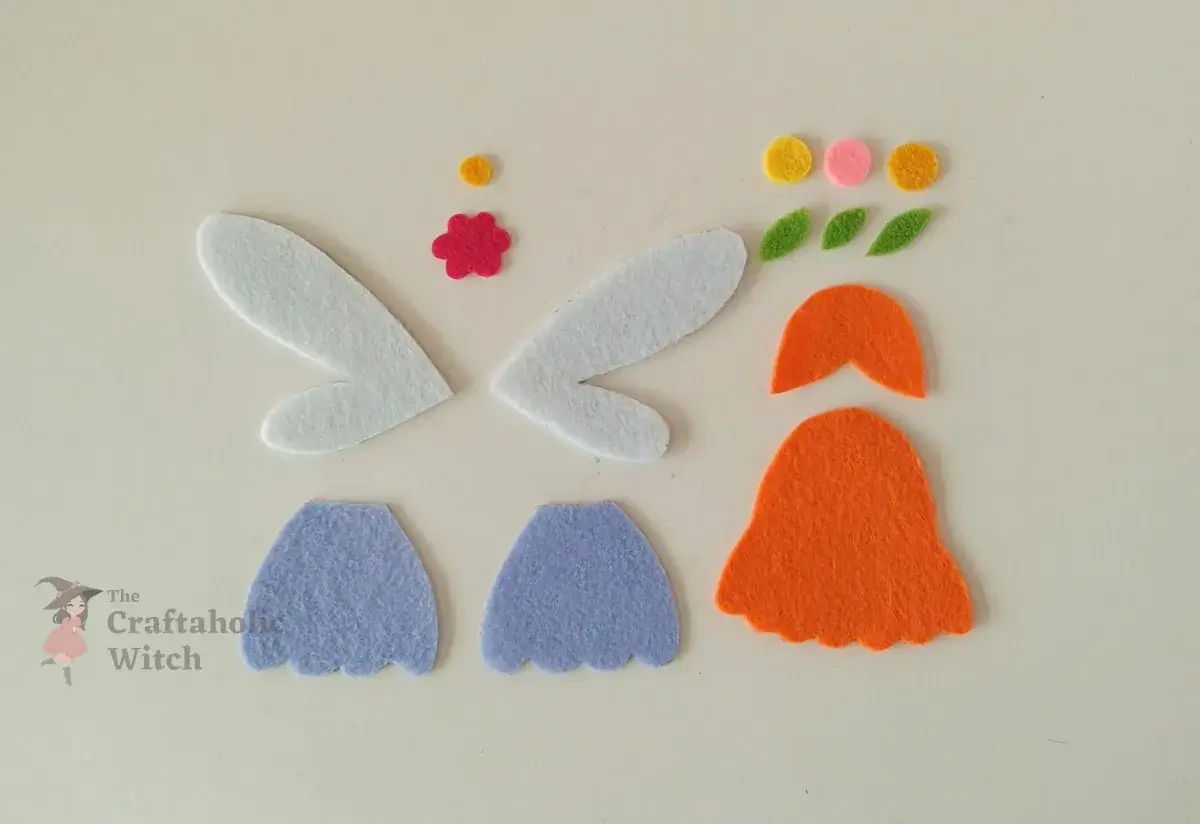
Print the free template and cut out each paper pattern piece. Pick a felt color for each part of the fairy: one for the hair, one for the skirt, one for the wings, and a couple of contrasting colors for the flower crown and wand topper. Trace each shape onto the felt with a pencil and cut them out. If you want to add extra flower details, this felt flowers tutorial has some lovely shapes that work beautifully for a fairy crown too.
Step 2: Select Other Materials
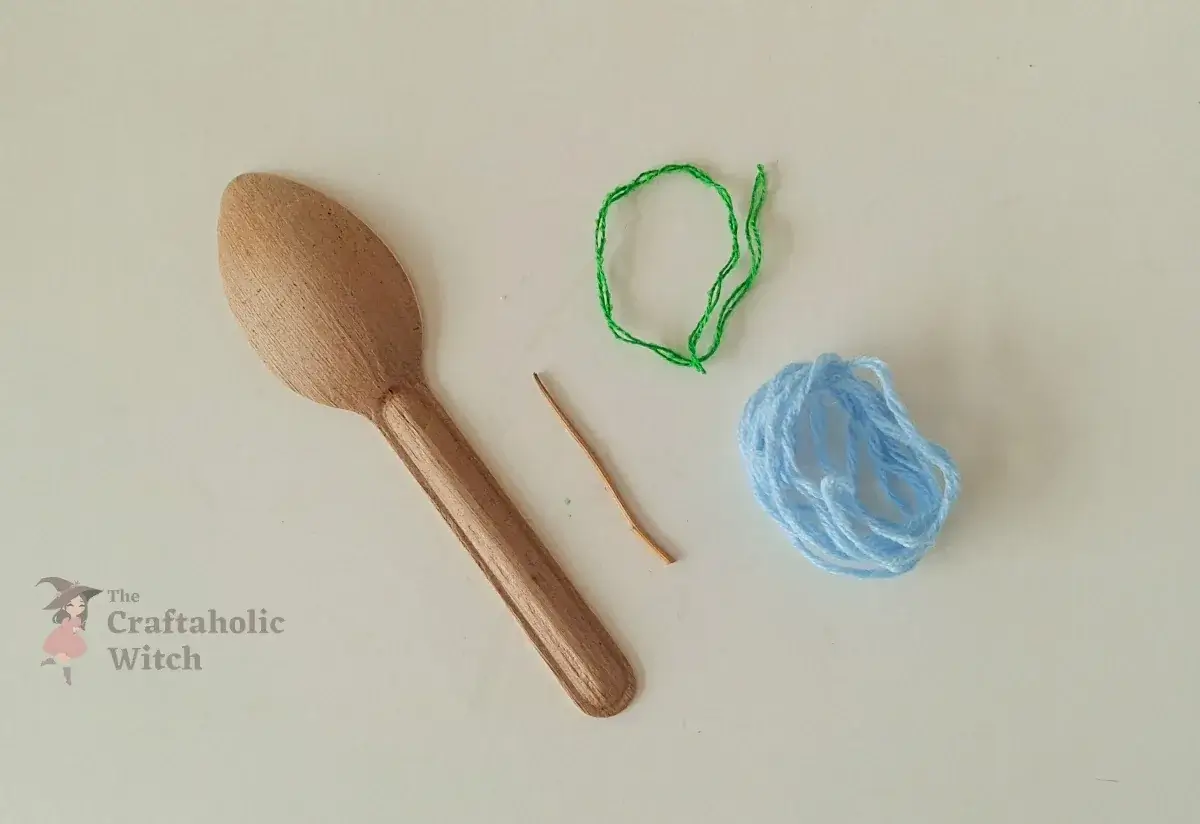
Pick out a fiber spoon or plain plastic spoon. The back of the bowl is where the face goes, so choose one that sits upright steadily. Find a small thin stick for the wand, then pick one or two yarn colors: one to wrap the handle as the dress bodice, and one to coil the wand like a vine.
Step 3: Wrap the Spoon with Yarn
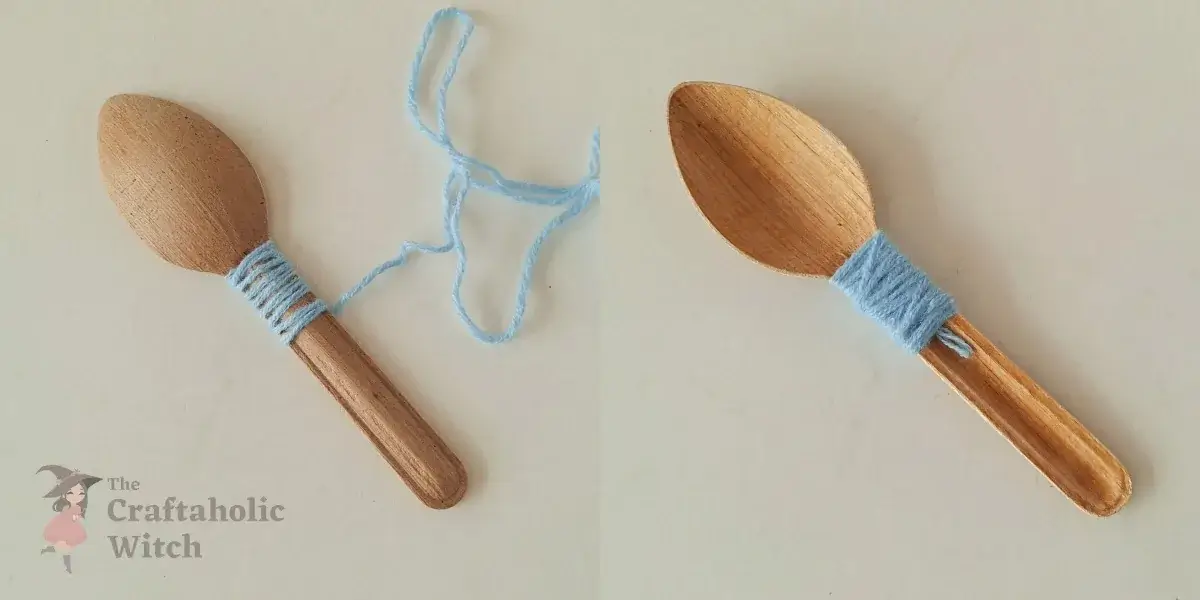
Dab a small dot of glue just below the spoon bowl and press the yarn end onto it. Wrap the yarn firmly around the handle, keeping each row snug against the last so no bare spoon shows through. Stop roughly halfway down the handle, cut the yarn, and tuck the end under with a dot of glue. The rows should sit flat and even; if they keep sliding, the starting glue wasn’t set yet, so add another dot and give it a moment before continuing. This same yarn-wrapping technique is what makes the yarn-wrapped Christmas tree ornament so fun to do with kids.
Step 4: Apply Glue Around the Spoon Bowl
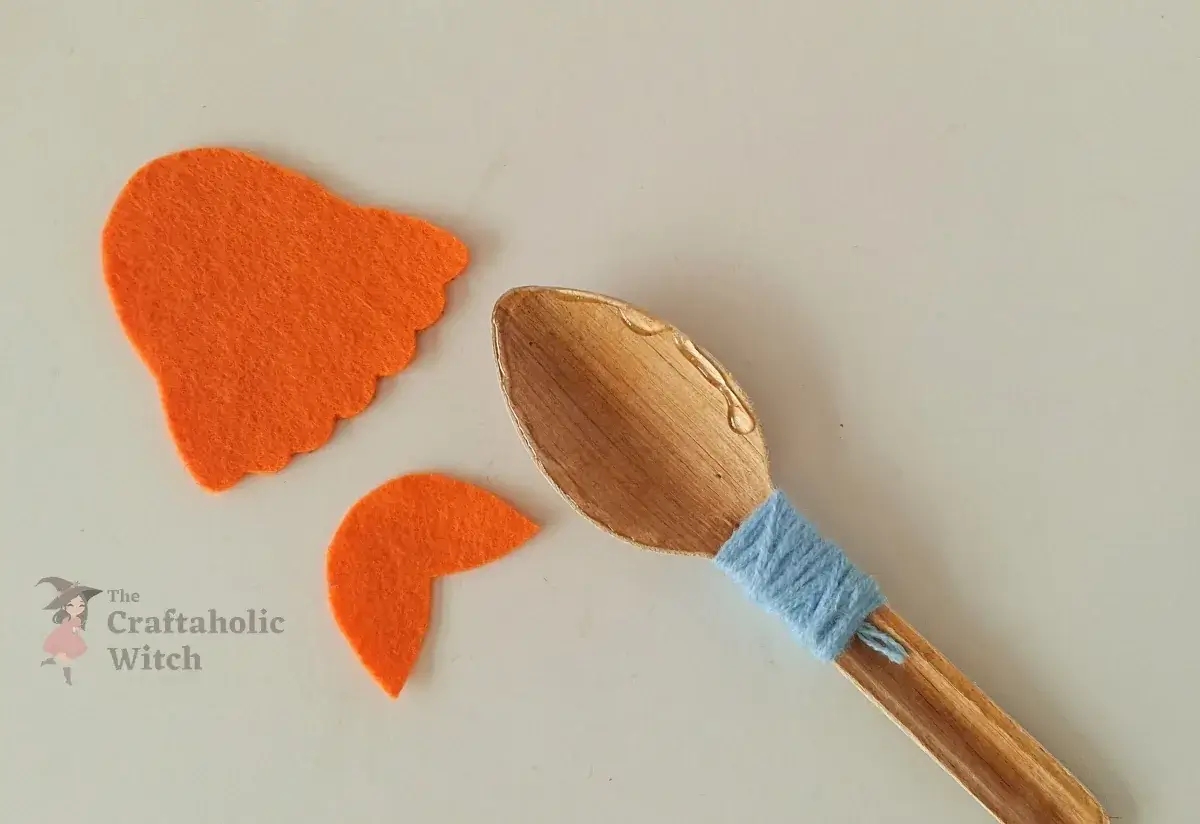
Flip the spoon so you’re looking at the back, then run a ring of hot glue along the top curve of the bowl edge. Work in a half-circle at a time if you need to: hot glue cools fast, so you want the felt pressed on while it’s still tacky.
Step 5: Attach the Hair Base
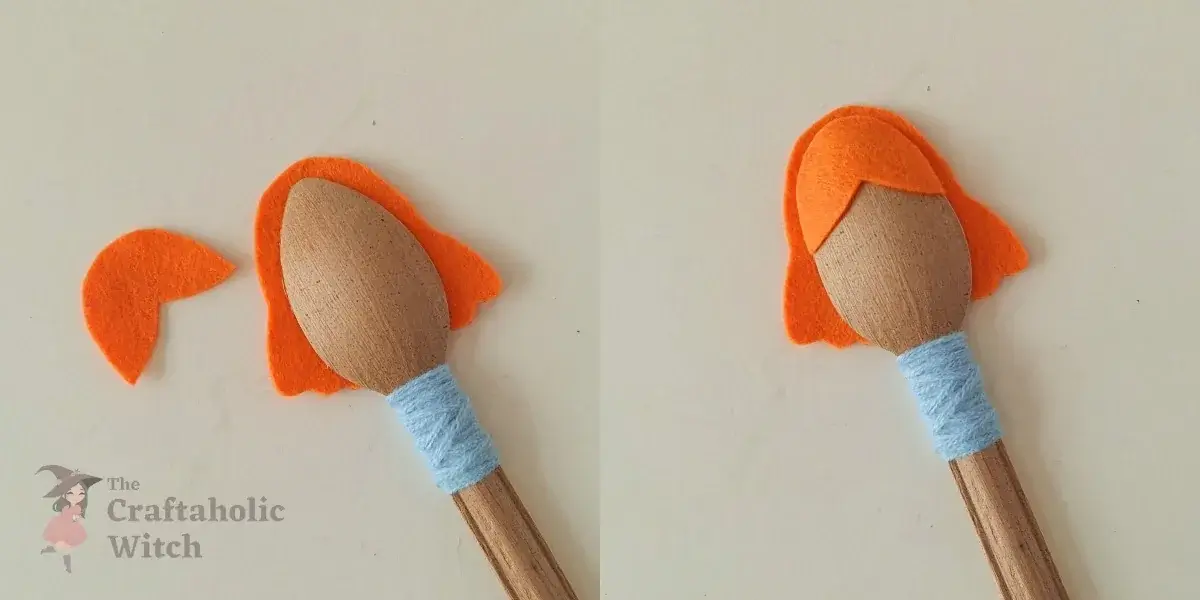
Set the hair base piece on the glued edge so it sits centered, with equal felt on each side of the spoon. Press and hold for a few seconds. Then flip to the front and glue the front edges of the hair down to the bowl’s front side as well. The hair should frame the bowl from both sides with no gap at the top.
Step 6: Attach the Flower Crown
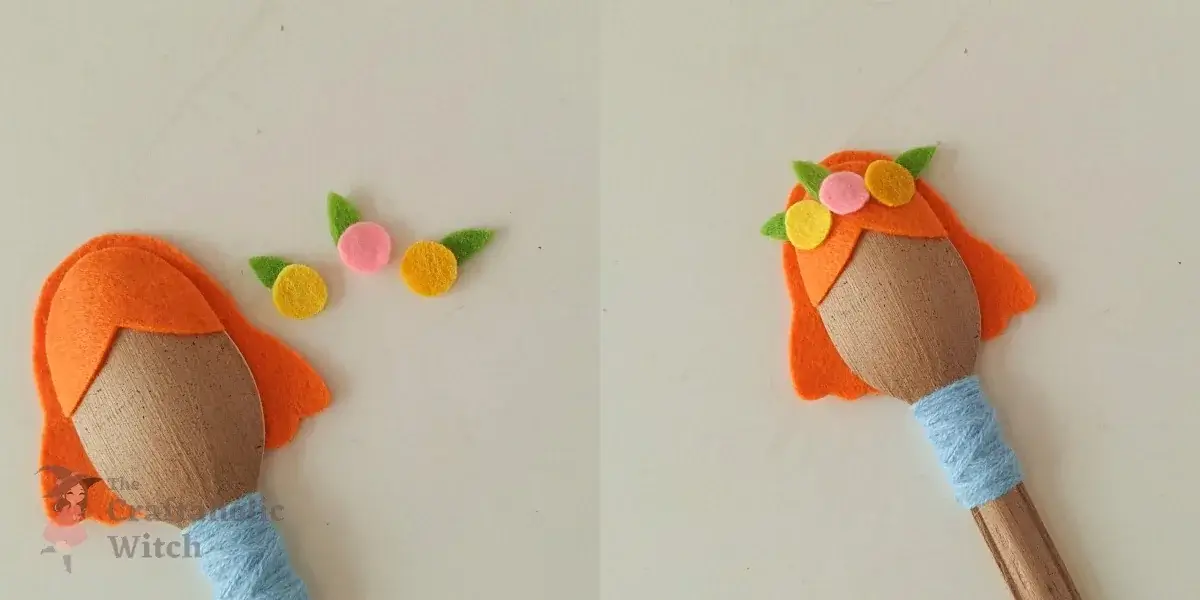
Glue each small leaf cutout to the back of a flower (circle) cutout to add depth and a pop of color contrast. Once all the flowers are backed, glue them in a row along the top of the felt hair. Alternate colors and stagger the sizes slightly for a more natural-looking crown.
Step 7: Attach the Skirt
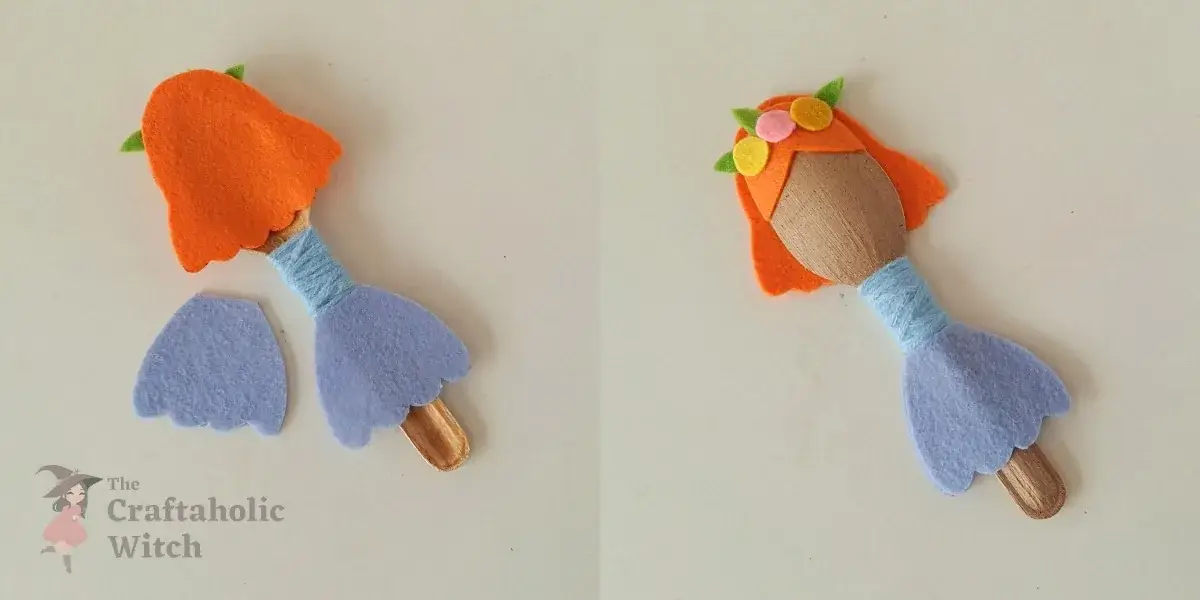
Turn the spoon to its back side and glue the skirt piece right where the yarn wrapping ends. Let it overlap the yarn edge slightly so there’s no gap between bodice and skirt. Flip to the front and glue the front edge of the skirt to the handle to finish the dress shape all the way around.
Step 8: Attach the Wings
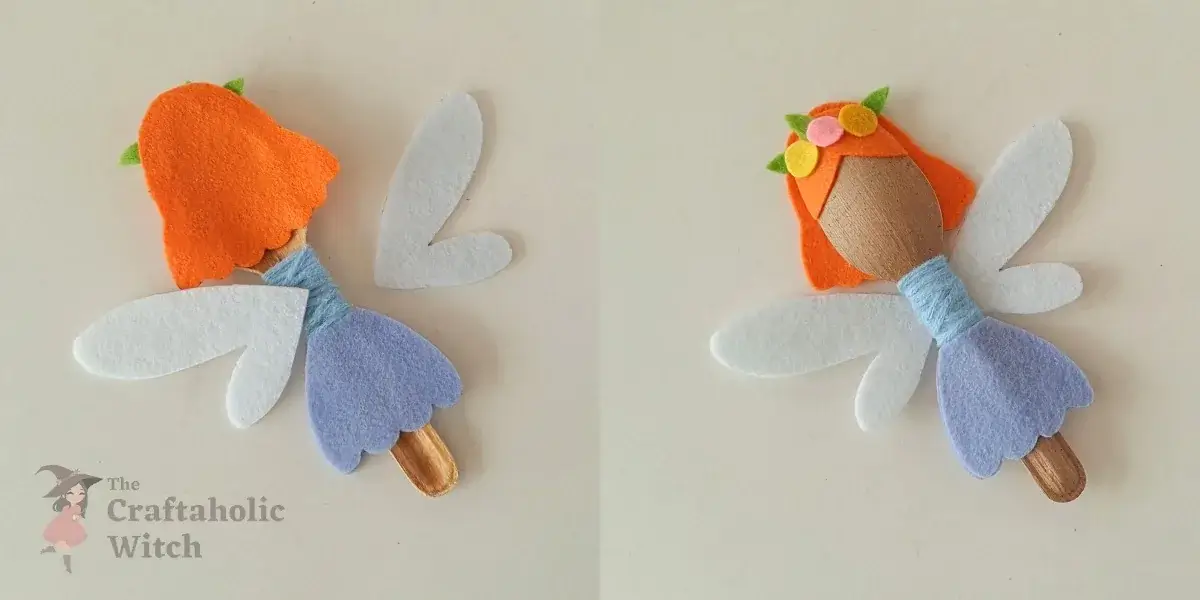
Still on the back side, glue both wing cutouts symmetrically on either side of the spoon, centered between the skirt and the hair. Set the fairy face down on a flat surface and let the glue dry for a full minute before picking it up. Rushing this step is the most common reason wings lift at the edges later.
Step 9: Prepare the Wand Parts
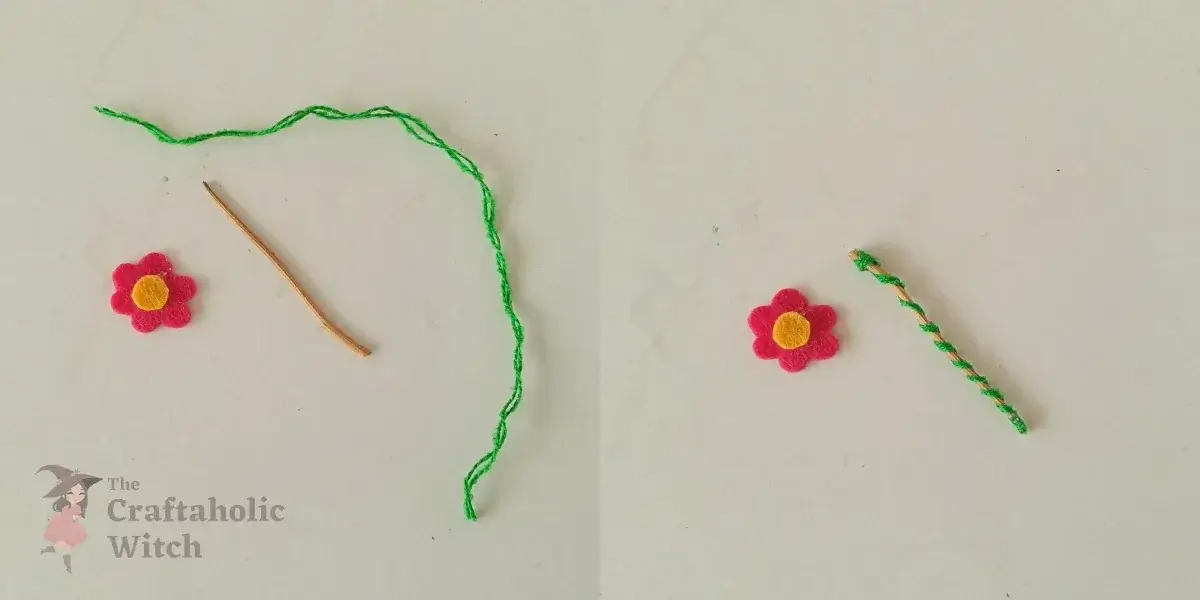
Glue one end of the yarn to the top of the stick and coil it loosely downward, like a vine climbing a branch, then secure the bottom end with glue. While that dries, glue the small circle cutout to the center of the larger flower cutout to make the wand’s topper.
Step 10: Craft the Wand
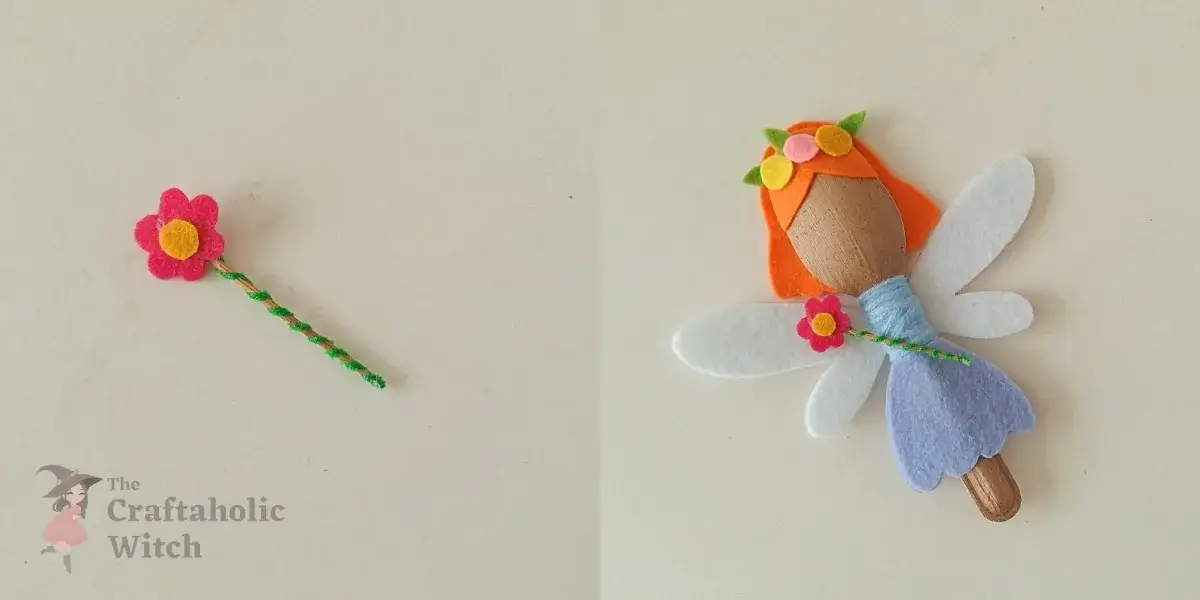
Glue the assembled flower topper to one end of the yarn-wrapped stick and hold until set. Then position the wand alongside the fairy so it looks like she’s holding it, and glue it where her hand would be. Angle it slightly outward so the flower topper shows clearly from the front.
Step 11: Draw the Face
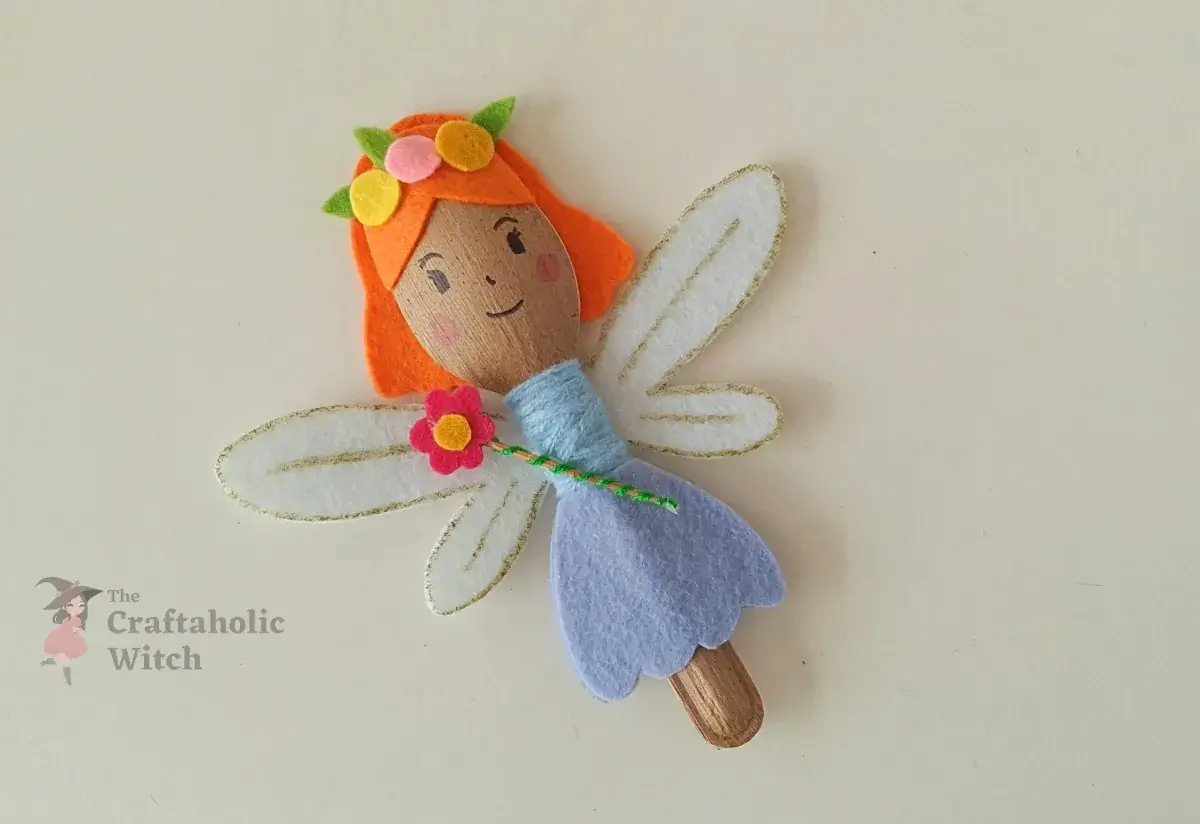
Use a thin black marker for the eyes and eyebrows, and a pink or red one for the lips. Keep it simple: two almond eyes, a tiny nose, and a small smile. Let the kids do this part — no two spoon fairies come out with the same face, and that’s what makes each one feel like theirs.
Share it in "I Made It" and let us cheer you on.
Post your finished make in "I Made It" so the community can celebrate it with you. Cheer on other makers too. Each month, the most loved craft wins 1 year of Craftaholic Premium ($59)
Tips for Your Spoon Fairy
- Use 2mm wool-blend felt for the skirt and wings so the pieces hold their shape after the glue sets.
- Fiber spoons are easier to draw on than shiny plastic; if you’re using plastic, test your marker on the back first to check it doesn’t bead up.
- Make a whole fairy family by swapping felt and yarn colors. Same template, completely different character every time.
Frequently Asked Questions
Can I use a plastic spoon instead of a fiber spoon?
Yes, a plastic spoon works fine. Fiber spoons are easier to draw on because the surface is more porous, but a plastic spoon with a matte finish takes markers well. If the marker beads on a shiny plastic spoon, give it a very light scuff with fine sandpaper first.
What age is this spoon fairy craft suitable for?
Kids 6 and up can handle most of it on their own. The hot glue steps should be adult-supervised for children under 8 or 9. A low-temp glue gun is a good swap for younger crafters since it still bonds well but stays at a safer temperature.
Where do I get the free spoon fairy template?
The printable pattern is free for members of the Craftaholic Community. Sign up is free and the template is in the Free Templates section.
Why do my felt wings keep lifting off?
Wings need a full flat surface to bond to. Make sure the back of the spoon has no yarn under where the wings will sit, press each wing flat for at least 30 to 60 seconds, and lay the fairy face down while the glue cools so both wings get even pressure at the same time.
Can I make this without a hot glue gun?
A hot glue gun gives the fastest and strongest bond here. If you don’t have one, strong craft glue like Aleene’s Original Tacky Glue works as a substitute, but you’ll need to clamp or pin each piece and allow several hours of drying time between steps.
More Fun Crafts for Kids
- DIY Recycled Spoon Witch for Halloween — the sister project to this fairy, same spoon craft technique
- How to Make a Gnome for Beginners — another whimsical character craft with a free template
- Easy No Sew Gnome Dolls — yarn and felt, no sewing needed
- Cute Hedgehog Craft for Kids with Yarn — a beginner yarn craft with a free template
- Easy Moving Caterpillar Craft for Kids — free template and video tutorial included
Made your spoon fairy? Share a photo in the Craftaholic Community — it’s free to join, and seeing everyone’s finished fairies is honestly the best part.
0 Comments
Join the conversation
Log in to your Craftaholic Community account to comment, ask questions, and cheer on fellow makers.
Log in to comment