

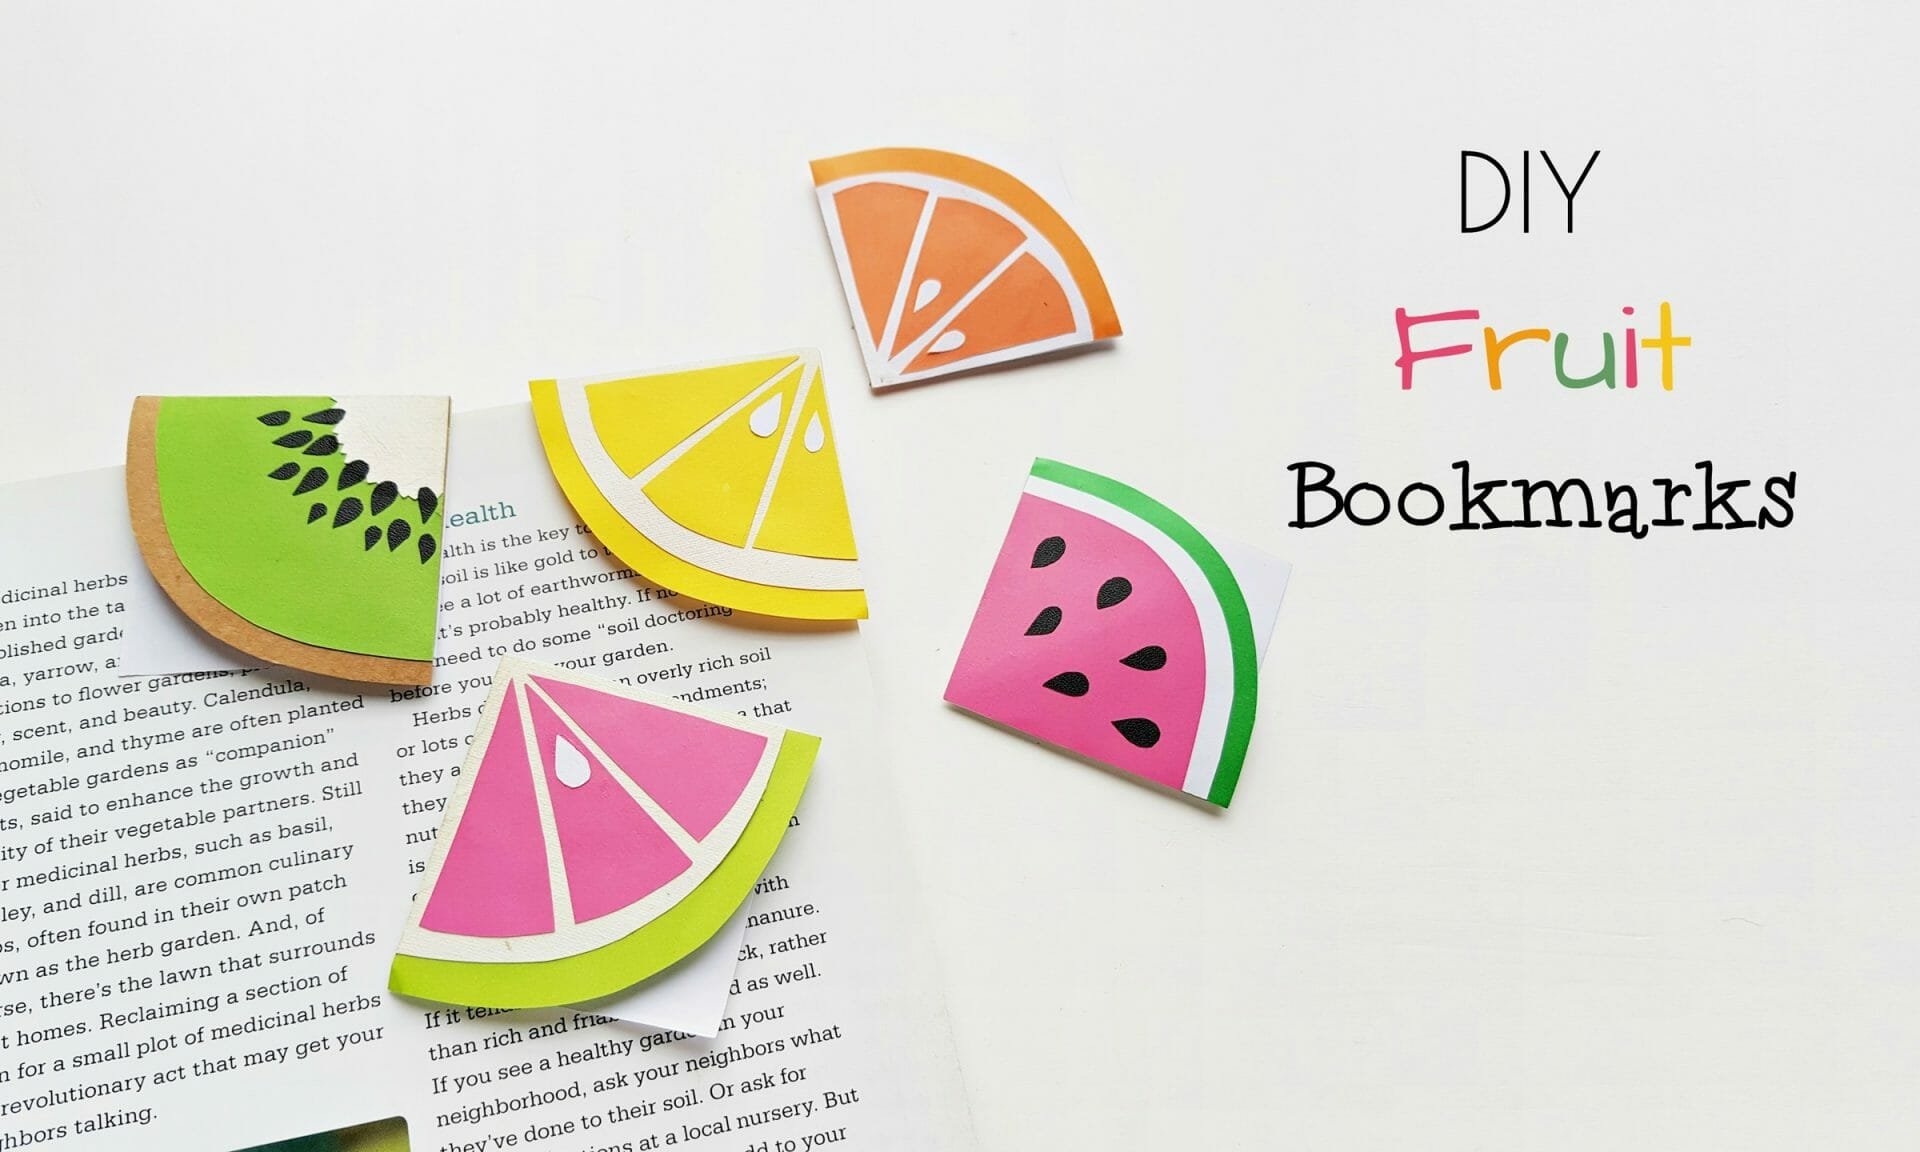
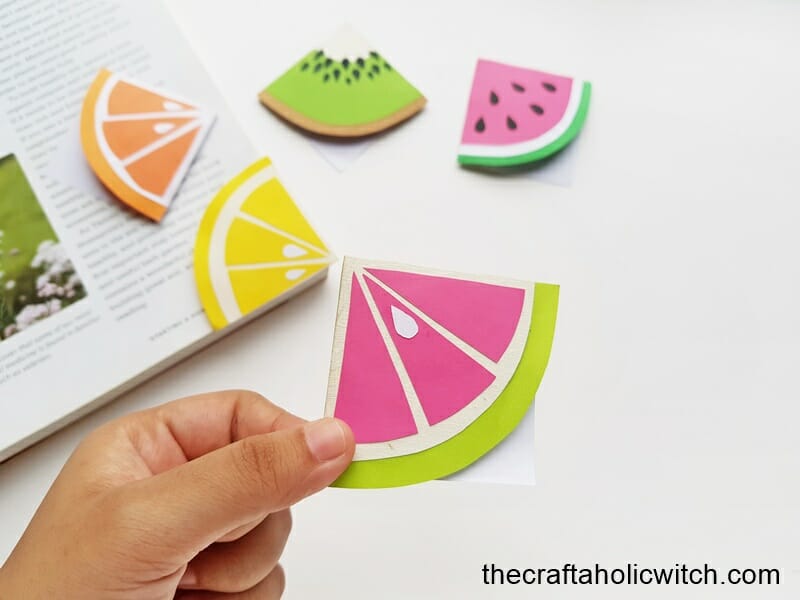
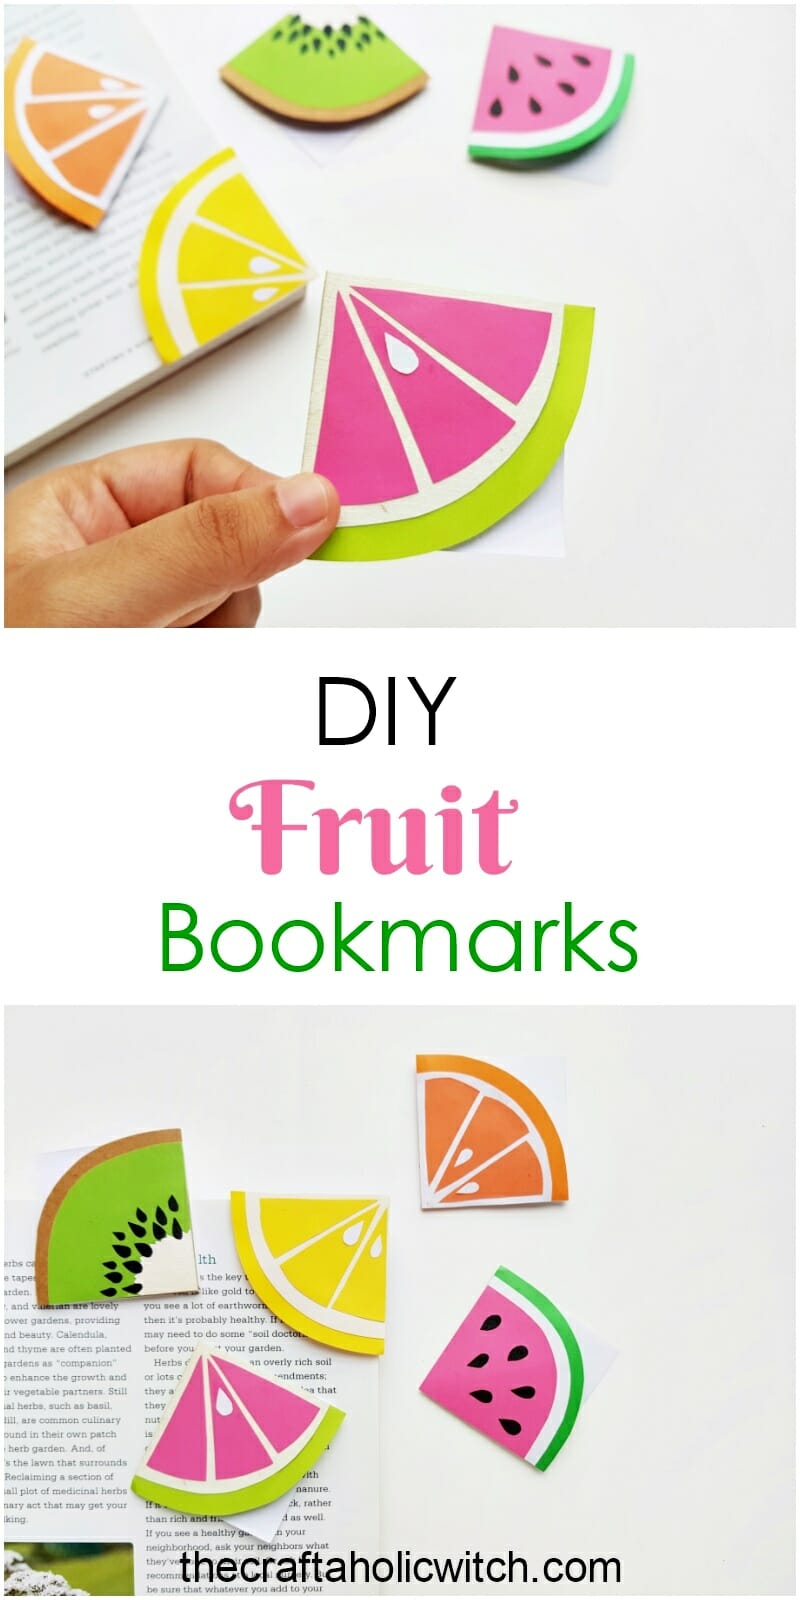
I have a soft spot for anything shaped like a fruit slice, so these DIY fruit bookmarks, paper kiwi, orange, lemon, and watermelon slices you glue onto a folded paper corner, were an easy favorite to design. Trace a few simple shapes from the free template, glue them together, and slide the finished piece onto whatever page you stopped on.
The kiwi slice you’ll see below took me about half an hour once my papers were cut, and there is nothing here beyond tracing, cutting, and gluing, so it is a genuinely beginner-friendly project. A few sheets of colored craft paper, a pencil, scissors, and craft glue are all you need.
Once you have the fold down, you can turn out a whole set in an afternoon, perfect for propping open a stack of summer reading or tucking into a friend’s book as a small back to school gift. Our bookmark tutorials collection has more corner-style bookmarks to try, including these mermaid hug bookmarks.
Fruit Bookmarks at a Glance
- Difficulty: Beginner
- Time: 20 to 30 minutes
- Cost: Under $5
- Ages: 6+ with adult help for cutting
- Best for: Summer reading, back to school gifts, decorating book pages
Join Craft Challenge: Craft Your Calm
Make something that brings you a sense of peace, share a photo, and tell us your story. It's free to enter, open to everyone, and the entry with the most reactions takes home a $100 gift card. Takes five minutes to join.
Entries close August 30, 2026. No purchase necessary.
What You Need to Make Fruit Bookmarks
Materials
- Colored craft paper in green, off-white, black, and brown for the kiwi slice shown here (grab orange, yellow, pink, and lime too if you want to make the other fruits from the template).
- Craft glue, ideally a small tube or bottle with a fine tip, so you can place a thin, even line without the small pieces sliding around.
Tools
- Pencil, for tracing the template pieces onto your craft paper.
- Scissors, a small sharp pair makes cutting the tiny seed shapes much easier.
Download the free Fruit Bookmark Template, which includes the kiwi, orange, lemon, and watermelon patterns, and print it out before you start cutting.
Ask inside "Crafty Q&A" while you are making.
"Crafty Q&A" is free to join. Share your question, photo, or the exact step where you got stuck, and chat with other makers plus the Craftaholic Witch team. You can also join any discussion thread already happening inside the space.
How to Make a Paper Kiwi Bookmark
Step 1: Trace and Cut Your Kiwi Pattern Pieces
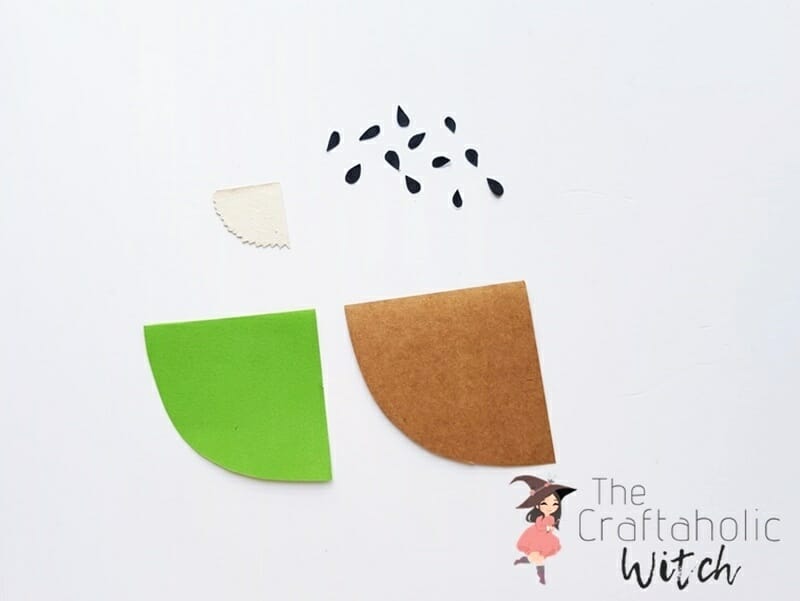
Pick out your green, brown, off-white, and black craft paper, these four colors make up the whole kiwi slice. Trace the pattern pieces from the free template onto the matching colors, then cut everything out with your scissors. The seed shapes are small and fiddly, so take it slow. A couple of uneven ones will not show once they’re glued down.
Step 2: Glue the White Center Onto the Green Rind
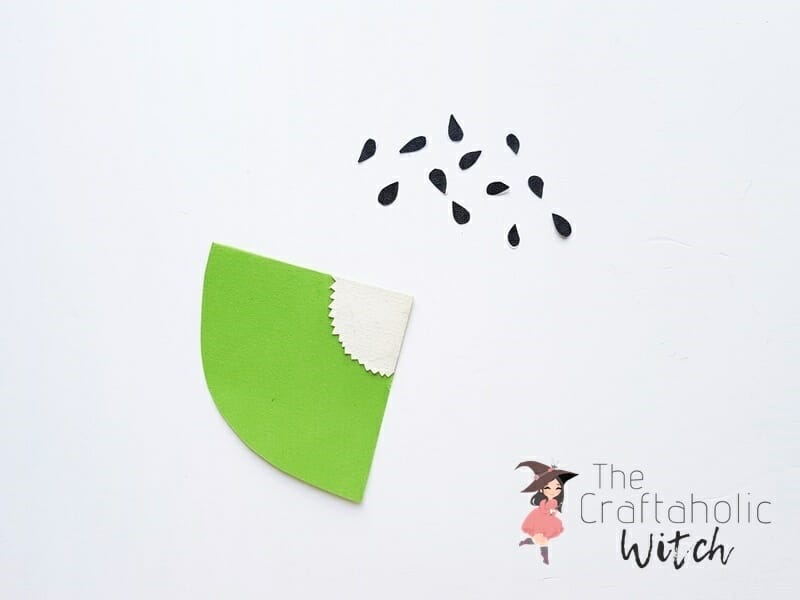
Take your green cutout and the small off-white piece and glue them together at one corner, so the white peeks out like the pale ring inside a real kiwi. Line the corners up exactly. A gap here is the easiest way to end up with a lopsided slice later.
Step 3: Add the Seeds
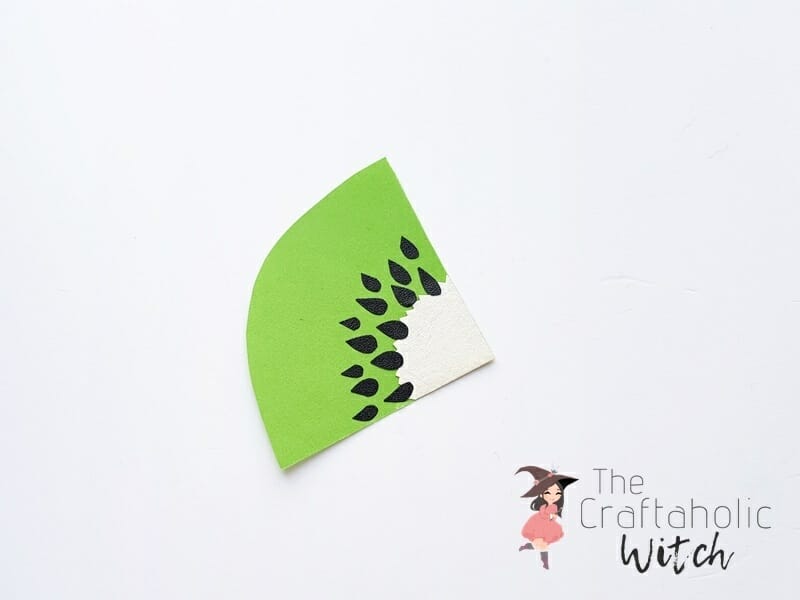
Glue the small black teardrop seeds along the curved edge of the off-white section, letting a few overlap onto the white part itself. Real kiwi seeds cluster more toward the center and thin out at the edges, so keep that in mind as you place them for a natural look.
Step 4: Attach the Rind to the Brown Backing
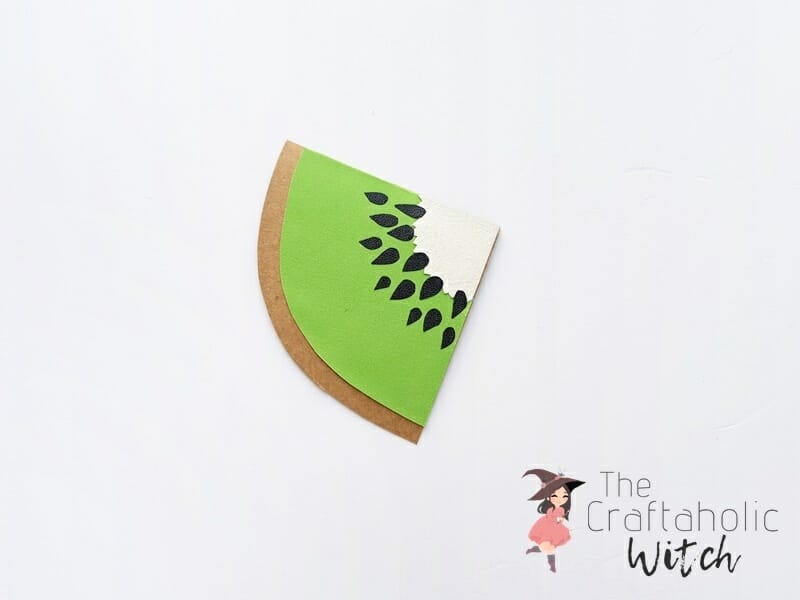
Glue your green and white piece onto the brown cutout, matching the corners the same way you did in step two. Once the glue sets, you have a complete paper kiwi slice, rind, flesh, seeds, and all.
Step 5: Fold the Bookmark Base and Attach the Kiwi
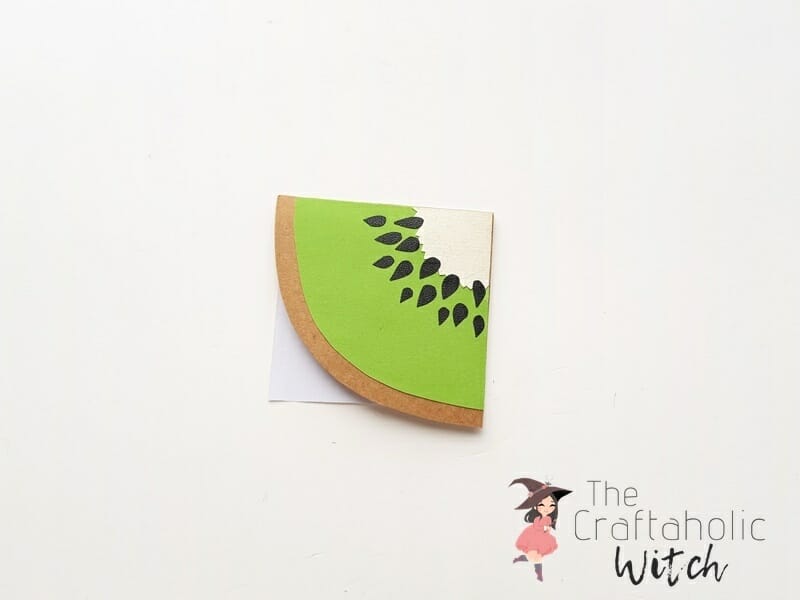
Fold an 8 by 8 inch square of paper into a corner-pocket bookmark. Our corner bookmark tutorial walks through this exact fold if you haven’t made one before. Glue the kiwi slice onto the bookmark’s triangle point, lining up the kiwi’s corner with the bookmark’s corner so the two folds match. Slide it onto whatever page you’re on and it holds itself in place.
Share it in "I Made It" and let us cheer you on.
Post your finished make in "I Made It" so the community can celebrate it with you. Cheer on other makers too. Each month, the most loved craft wins 1 year of Craftaholic Premium ($59)
Tips and Fruit Variations
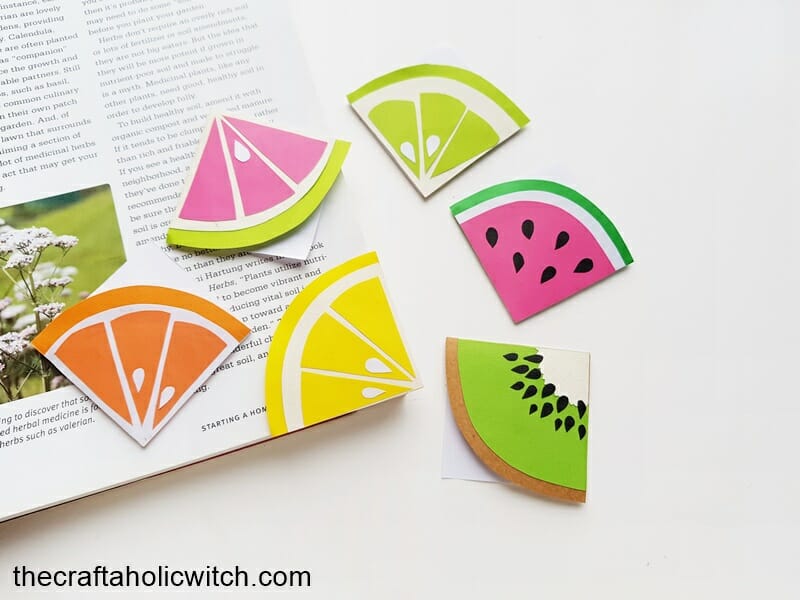
The same fold and gluing steps above work for every fruit in the free template, just swap the paper colors.
| Fruit | Paper Colors | What Changes |
|---|---|---|
| Kiwi | Green, off-white, black, brown | Shown step by step above |
| Orange or Lemon | Orange or yellow, off-white | Wedge shape with straight center lines instead of seeds |
| Watermelon | Pink, off-white, green | Adds a green rind strip and small round seed dots instead of teardrops |
- Trace your pattern pieces on the back of the craft paper in pencil. That side is easy to erase and won’t show once everything is cut and glued.
- Press a finished bookmark under a heavy book overnight so the glued layers dry completely flat instead of curling at the edges.
- Keep your glue line thin. A light coat along the edges holds the pieces just as well as a heavy one and dries faster.
Frequently Asked Questions
What other fruits can I make with this bookmark template?
The free template includes kiwi, orange, lemon, and watermelon slices, and they all use the exact same folding and gluing steps shown here, just with different colored paper. Once you’ve made one kiwi bookmark, the other three take about the same amount of time.
What size paper do I need for the bookmark base?
You need one 8 by 8 inch square of paper for each bookmark base, folded into the corner-pocket shape before you glue the fruit slice on. Any sturdy craft paper or cardstock works, as long as it’s square to start.
Can I use construction paper instead of craft paper?
Yes, construction paper works fine for the fruit pieces, though it’s a little thinner than most craft paper, so keep your glue coat light to avoid wrinkling. Cardstock is a sturdier option if you want the finished bookmark to hold up to more handling.
How long does it take to make one fruit bookmark?
Once your papers are cut, gluing one fruit bookmark together takes about 10 minutes. Tracing and cutting the pieces is the slower part, so budget closer to 20 to 30 minutes total for your first one.
How do I keep the small paper pieces from curling after gluing?
Use a thin, even layer of glue rather than a thick coat, since too much glue is the main reason small pieces buckle as they dry. Pressing the finished bookmark under a heavy book overnight also helps everything dry completely flat.
More Paper Craft Bookmark Tutorials
- 4 Quick & Easy Corner Bookmarks (Free Template + Video)
- Friendship Day Bookmark Coloring and Crafting
- 4 Easy Halloween Bookmarks for Kids (Free Template + Video)
- Browse all of our paper craft tutorials for more ideas.
Share your fruit bookmarks in the I Made It space inside Craftaholic Community. The most-loved post each month wins a one year free Premium membership.
0 Comments
Join the conversation
Log in to your Craftaholic Community account to comment, ask questions, and cheer on fellow makers.
Log in to comment