

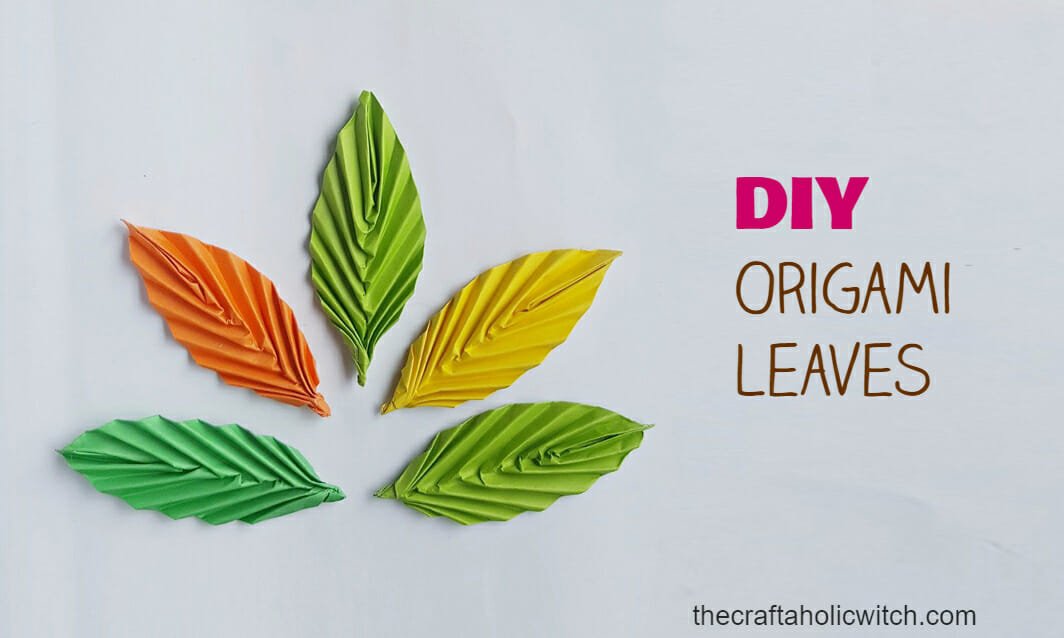
You can fold a set of origami leaves from one square sheet of paper in under 20 minutes, using a diagonal accordion technique that looks far more advanced than it actually is. This tutorial is where our Fold the Forest series starts, seven origami projects that build into a small paper forest scene, and these leaves are the gentlest place to begin.
Once you’ve got the rhythm down, the origami maple leaf later in the series is the natural next challenge. It uses the same folding fundamentals but layers five separate paper pieces into one leaf instead of one, so it’s a good stretch once this one starts to feel easy.
For this project you need one sheet of paper, a small dab of glue, and scissors only to trim a tiny tab at the back. Fold a handful in different shades for an autumn wreath, a garland, or extra greenery among our origami flowers and nature crafts. The accordion fold you’ll learn here also shows up in several other origami tutorials on the site, so it’s a solid one to start with.
Origami Leaves at a Glance
- Difficulty: Beginner
- Time: About 20 minutes
- Cost: Under $1 for a single leaf
- Ages: 8 and up, with an adult for the gluing steps
- Best for: Fall wreaths, garlands, and paper flower arrangements
What You Need to Make Origami Leaves
Materials
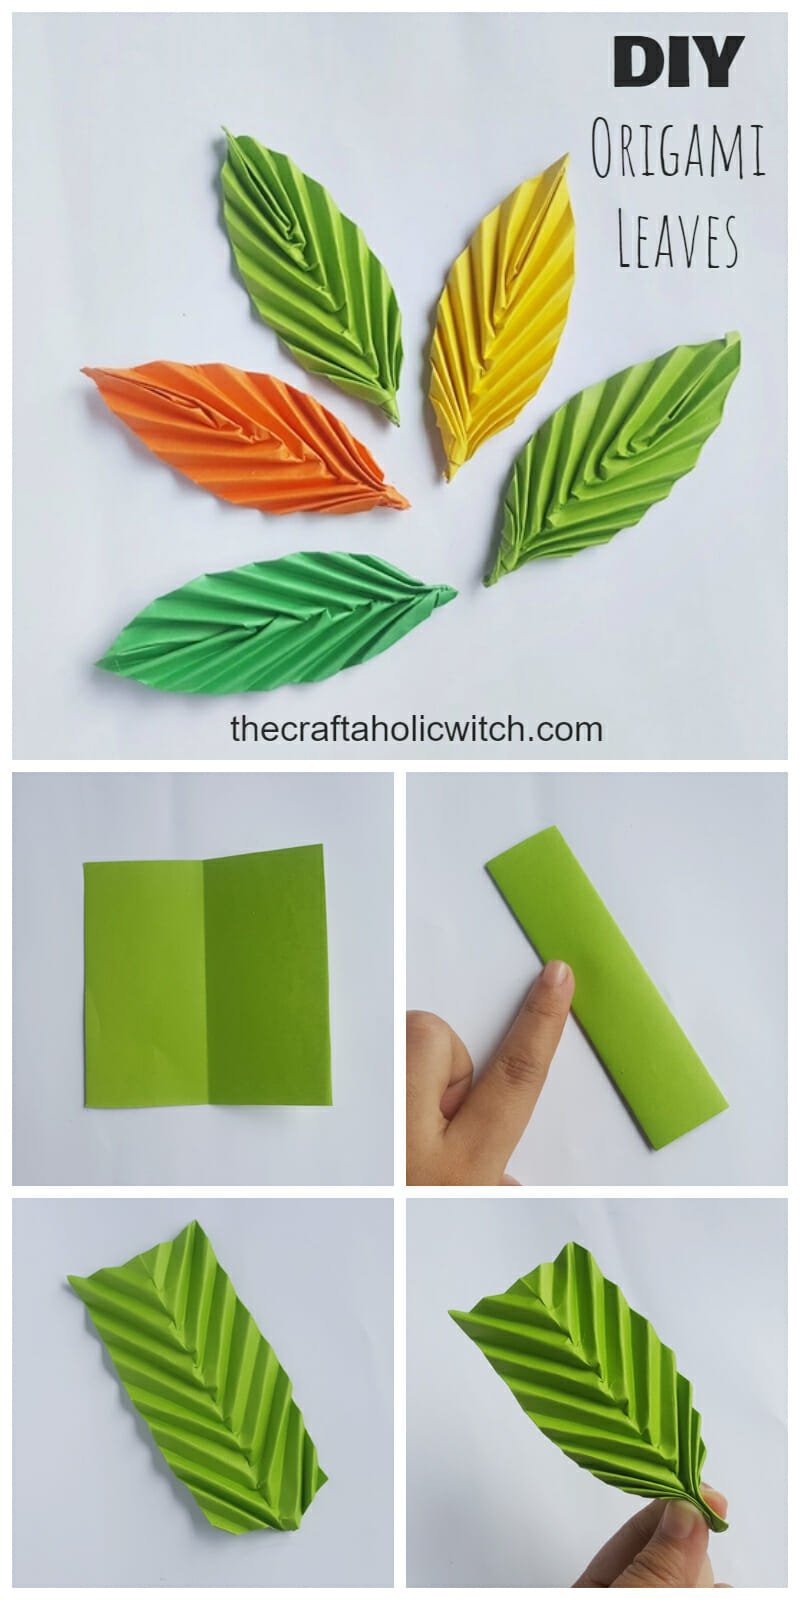
- Square craft paper, 6×6 or 8×8 inches. Start with 8×8 inches on your first attempt, it gives you more room to keep the accordion folds even. Standard construction paper works well, and origami paper is ideal if you have it. Below 4×4 inches the pleats get too small to crease cleanly.
- Craft glue or a glue stick. You only need two small dabs, one at the base and one at the tip. White PVA glue, like Elmer’s, dries clear and stays slightly flexible. Hot glue sets too fast for the few seconds you need to hold the pinch.
Tools
- Scissors. Used only at Step 10, to trim a small tab from the back. Any pair works.
Ask inside "Crafty Q&A" while you are making.
"Crafty Q&A" is free to join. Share your question, photo, or the exact step where you got stuck, and chat with other makers plus the Craftaholic Witch team. You can also join any discussion thread already happening inside the space.
How to Make Origami Leaves: Step-by-Step
Step 1: Fold the Paper in Half Lengthwise to Mark the Center Line

Start with your square sheet face-up. Fold it in half lengthwise, top edge down to bottom edge, and crease firmly. Unfold it again. You now have one crisp crease running down the center of the paper. This line is your guide for the next step.
Step 2: Fold Both Outer Edges in to Meet the Center Line

Fold the left edge in to align with the center crease, then repeat on the right side. Both edges should meet neatly at the center with no gap and no overlap. The paper is now about one quarter of its original width. Run a fingernail along each fold to sharpen the crease.
Step 3: Fold the Entire Strip in Half Lengthwise Again

Fold the whole strip in half lengthwise once more so both folded edges are now tucked inside. You have a narrow four-layer strip. The open edge faces you and the folded spine is on the opposite side. Crease firmly, but not so hard it is impossible to open smoothly later at Step 7.
Step 4: Fold a Small Diagonal Crease at One Open End

At one of the short open ends of the strip, fold a small diagonal pleat at roughly 45 degrees. The width of this first pleat sets the width of every fold that follows, so keep it consistent. About 1 to 1.5 cm wide is a good starting point for a 6×6 sheet.
Step 5: Build the Diagonal Accordion by Repeating the First Fold
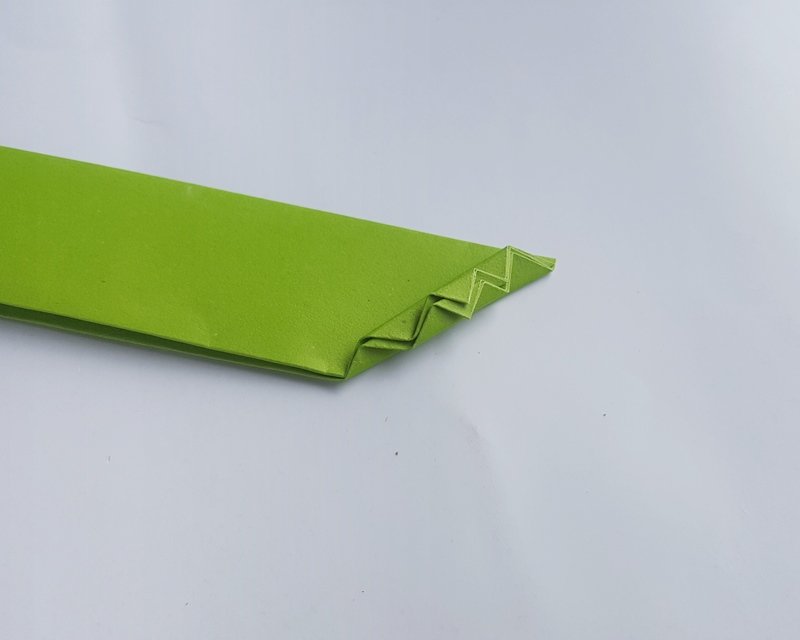
Flip the strip and fold back at the same diagonal angle to make the second pleat. Match the width of this fold exactly to the first. Even, consistent pleats are what give the finished leaf its clean ribbed texture. Take your time here. If the pleats drift wider or narrower as you go, the leaf will look uneven, and you will need to re-fold from Step 4.
Step 6: Continue Accordion Folds Until You Reach the Other End

Keep alternating diagonal folds, flipping the strip each time, until you reach the far end. You should have a compact, fan-like shape. All pleats should be the same width and angle throughout. Hold the bundle up against the light if you want to check alignment.
Step 7: Open Out the Last Half-Fold from Step 3

Gently unfold the outer layer that you folded in Step 3, just open that one layer back out. The accordion pleats stay in place. This step adds width to the leaf blade. The shape should now look wider and more leaf-like when you hold it flat.
Step 8: Pinch and Glue the Bottom to Create the Stem Base

Squeeze the bottom end of the accordion together so all the pleats compress into a tight bundle. Apply a small dab of craft glue and hold it pinched for about 30 seconds while it sets. This becomes the stem end of the leaf.
Step 9: Pinch the Top into a Point and Apply a Small Dab of Glue

Gently press the top of the accordion into a tapered point and apply a tiny dab of glue to keep the tip closed. Hold until set. The leaf shape, wide in the middle and pointed at both ends, should now be clearly visible. The ribbed texture from the accordion folds runs along the surface.
Step 10: Trim the Protruding Tab at the Back with Scissors

Flip the leaf over. There will be a small strip of paper sticking out from the back edge. Trim it flush with scissors. That is it, your origami leaf is finished. Make a few more in different shades and sizes for a full arrangement.
Share it in "I Made It" and let us cheer you on.
Post your finished make in "I Made It" so the community can celebrate it with you. Cheer on other makers too. Each month, the most loved craft wins 1 year of Craftaholic Premium ($59)
Tips for Better Results
- Paper size on your first attempt. Start with 8×8 inches. The larger the sheet, the easier it is to keep your accordion folds even. Scale down once the technique feels natural.
- Paper type. Printer paper works for practice but is slightly stiff. Origami paper gives the crispest result, and kraft or recycled brown paper gives autumn decor a nice earthy look.
- Color and shade mixing. Fold a batch in two or three shades of the same color for a fuller, more natural-looking cluster, especially once you’re grouping these leaves with the other pieces in the Fold the Forest series.
Frequently Asked Questions
What size paper works best for origami leaves?
Any square from 4×4 to 8×8 inches works. For a first attempt, go with 6×6 or 8×8, since larger paper makes it much easier to keep the accordion folds even. Below 4×4 inches the pleats become too small to crease cleanly. Standard construction paper or origami paper both give good results.
Can I use regular printer paper instead of craft paper?
Yes. Printer paper works for practice. The folds are slightly stiffer and less crisp than with craft paper. For leaves you plan to display or use in a wreath, 65-80lb colored craft paper gives a cleaner result and holds the accordion shape better over time.
Why won’t my origami leaf hold its shape?
The most common reason is uneven accordion folds. If the pleats are different widths, the leaf won’t compress cleanly at the ends. Take extra care on Steps 5 and 6. After gluing the base and tip, hold each end pinched for at least 30 seconds before letting go.
Do I need a template to get the leaf shape?
No template needed. The leaf silhouette comes entirely from the folding and pinching in Steps 8 and 9. The accordion pleats create the ribbed texture automatically. There is no cutting or tracing until the tiny trim at the very end.
Can I make a bouquet or wreath with these paper leaves?
Yes. Make six to eight leaves in different sizes and shades of green. Attach floral wire or a wooden skewer to the base of each with tape or extra glue. Group them with paper flowers for an autumn arrangement, or press them into a foam wreath base with a dab of hot glue. They also pair well with origami maple leaves for a fuller fall display.
More Origami Tutorials
Ready to keep building the forest, or just want more origami to try? Here are a few favorites.
- How to Make an Origami Acorn (Part 2 in the Fold the Forest series)
- How to Make Origami Pumpkins
- How to Make a Traditional Origami Crane
Share your origami leaves in the I Made It space inside Craftaholic Community. The most-loved post each month wins a one year free Premium membership.
2 Comments
SUPER..AWESOME..NEED MORE
I’m glad that you liked our tutorial. We also have an origami maple leaves tutorial on our website. I hope you’ll like that too.
Join the conversation
Log in to your Craftaholic Community account to comment, ask questions, and cheer on fellow makers.
Log in to comment