


These paper strip Christmas ornaments start as eight strips cut from two sheets of colored A4 paper. Glue the strips together at one end, give each one a single twist, and the whole thing swells into a hanging lantern with a two-tone swirl.
It’s a beginner project that takes about 30 minutes for your first one, and everything you need is paper, glue, scissors and a length of string. Hang one in a window, or make a few in different color pairs and let them dangle at different heights from a branch.
If you’d rather fold than twist, our 3D paper snowflakes hang just as easily. This ornament sits with the rest of our paper decor and 3D crafts, and there are more tree-ready ideas in our Christmas craft collection.
Paper Strip Christmas Ornaments at a Glance
- Difficulty: Beginner
- Time: About 30 minutes
- Cost: Under $5
- Ages: 8+, with help for younger kids
- Best for: Hanging on a Christmas tree, in a window or from a curtain rod
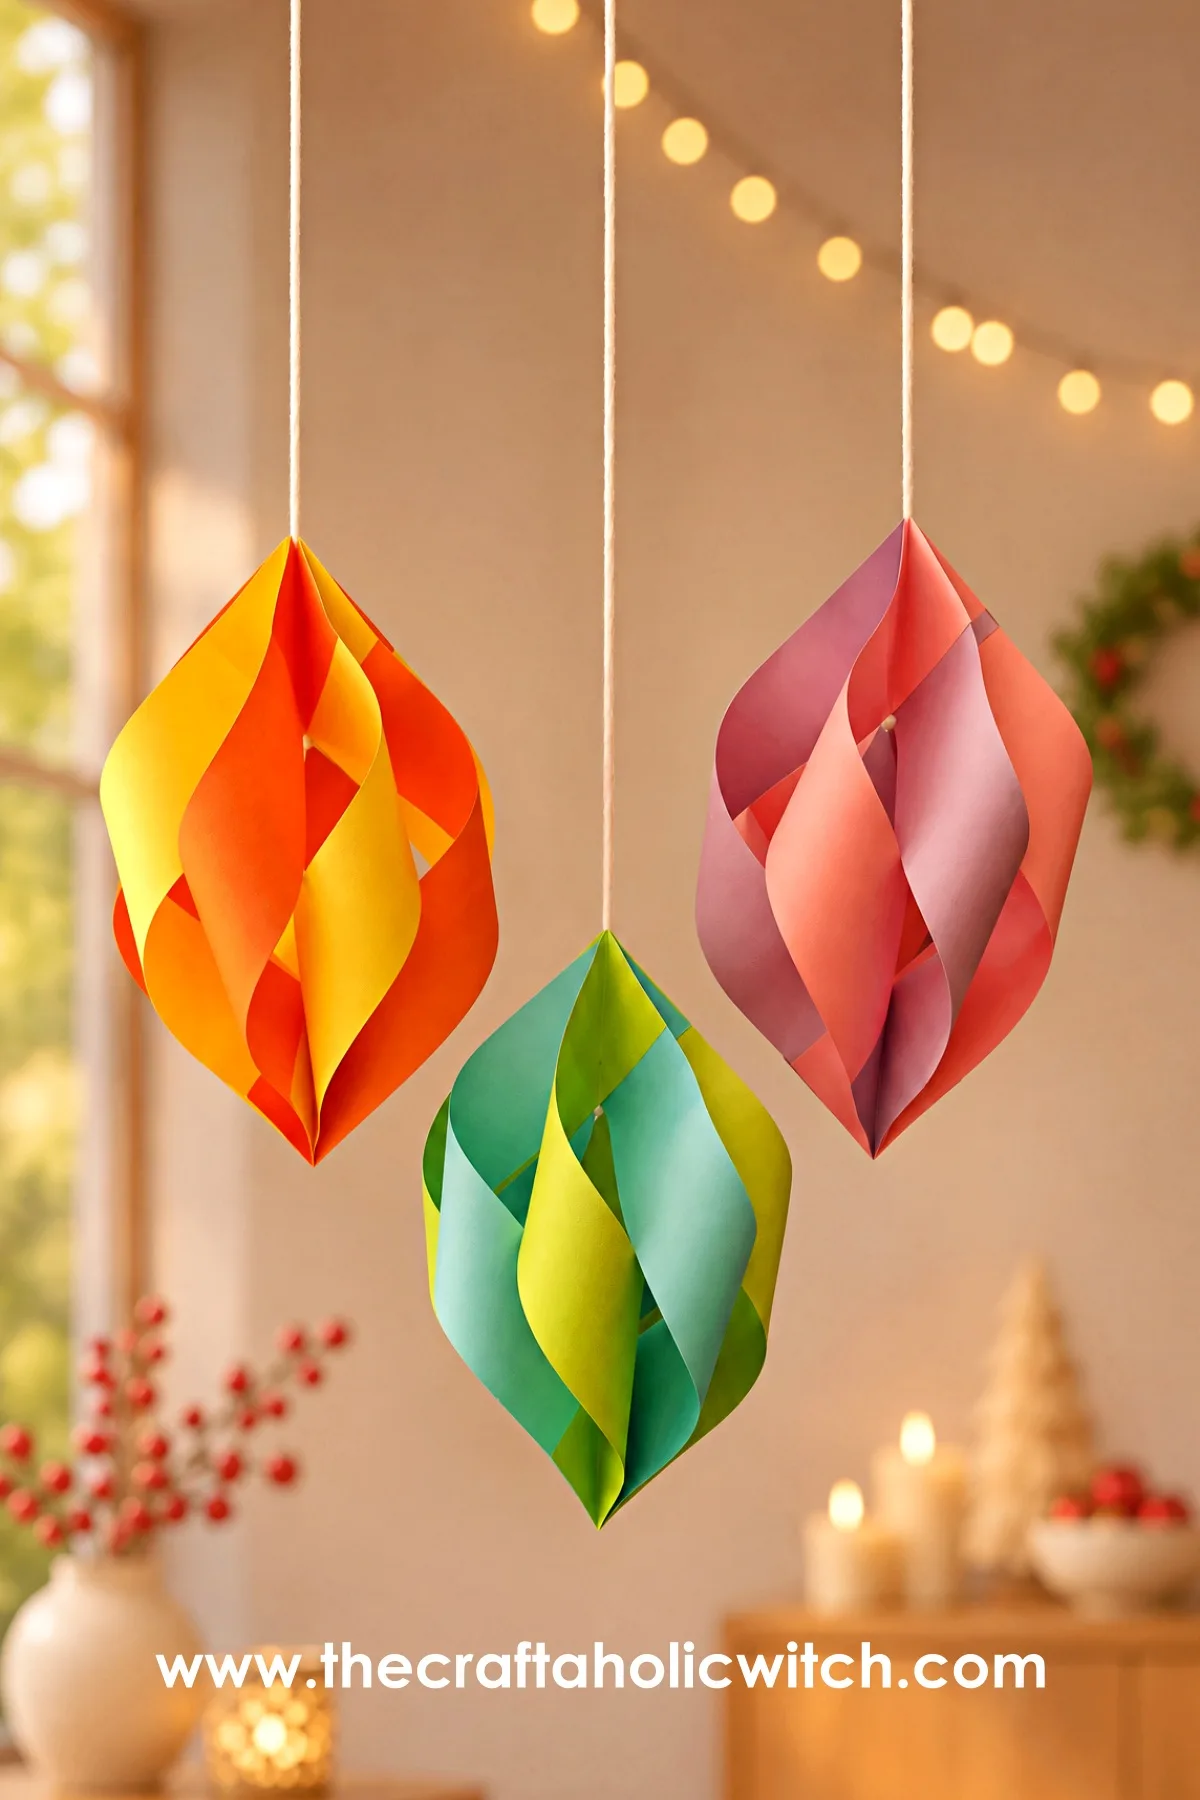
What You Need to Make Paper Strip Christmas Ornaments
Materials
- Colored A4 craft paper, 2 sheets in 2 colors: each sheet gives four strips, and the two colors alternate for the swirl. US letter sheets work too.
- Craft glue: a thin, even layer holds the flaps without warping the paper.
- String or yarn, 3 to 4 feet (90 to 120 cm): the extra length lets you adjust how low the ornament hangs.
Tools
- Scissors: for cutting the strips, and the closed tip also holds each twist in place while you glue.
- Tapestry needle: the large eye takes yarn, and the blunt tip is gentle on the paper.
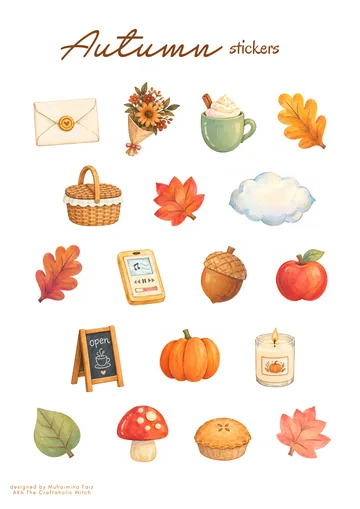
Free Autumn Bucket List + Printable Journal Pack
Everything you need for a cozy autumn, ready to print at home. Join the community for free and download it in one click.
- 13-page printable PDF
- 18 stickers and 6 bookmarks
- Journal pages and recipe cards
- Phone and computer wallpapers
How to Make Paper Strip Christmas Ornaments
Step 1: Choose Two Paper Colors
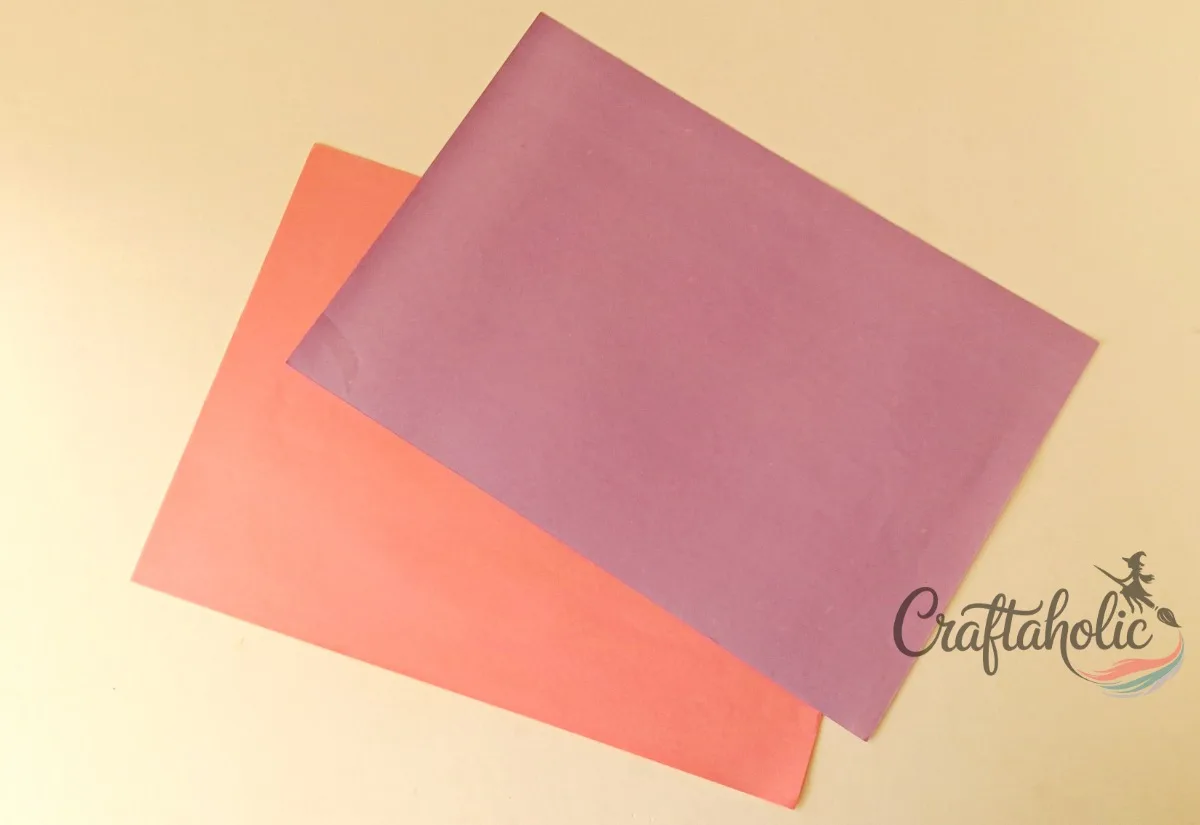
Pick two sheets of A4 colored craft paper in shades that look good side by side. I’ll call them color A and color B from here on.
Tip: Once you’ve made one ornament, try different paper sizes or more than 2 colors.
Step 2: Fold the First Sheet Into Quarters
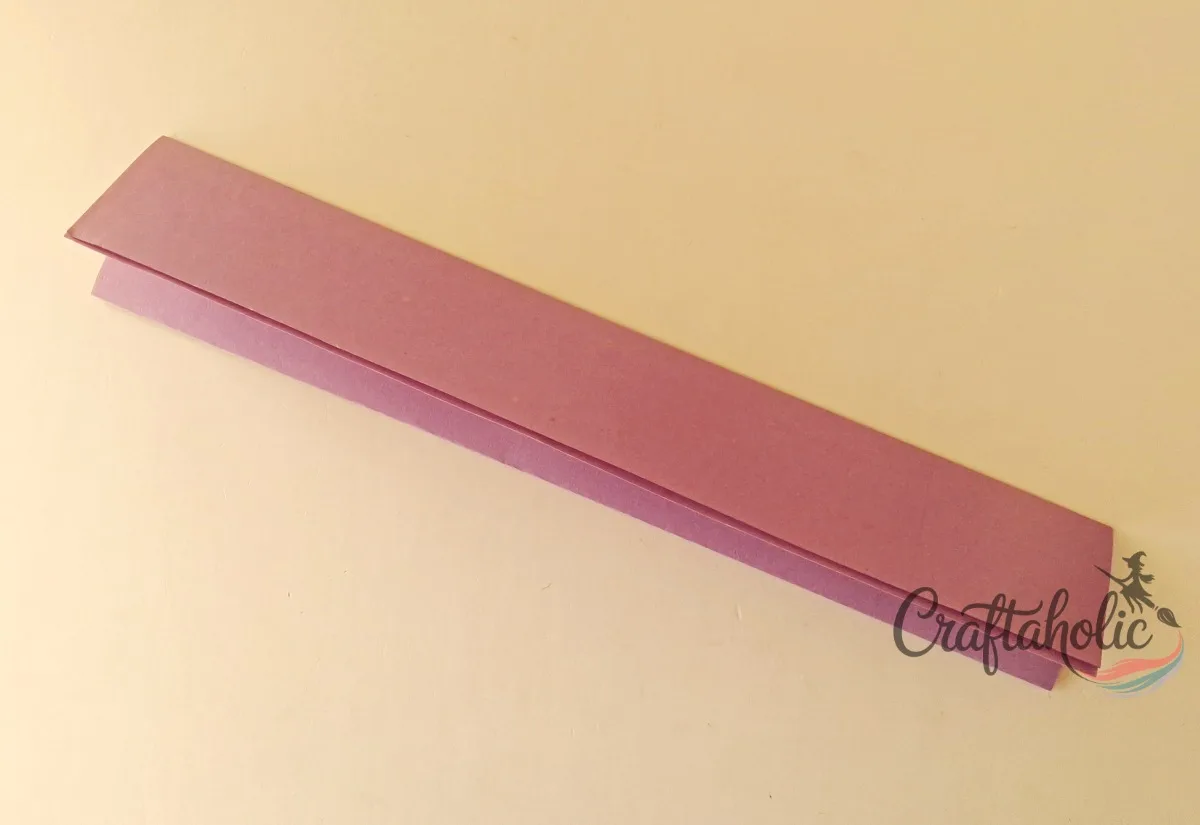
Fold one sheet in half along its long side, then fold it in half the same way again. Run a fingernail along each crease so the cutting lines are easy to see.
Tip: You can skip the folding and mark four even sections with a ruler and pencil instead.
Step 3: Unfold and Cut Four Strips
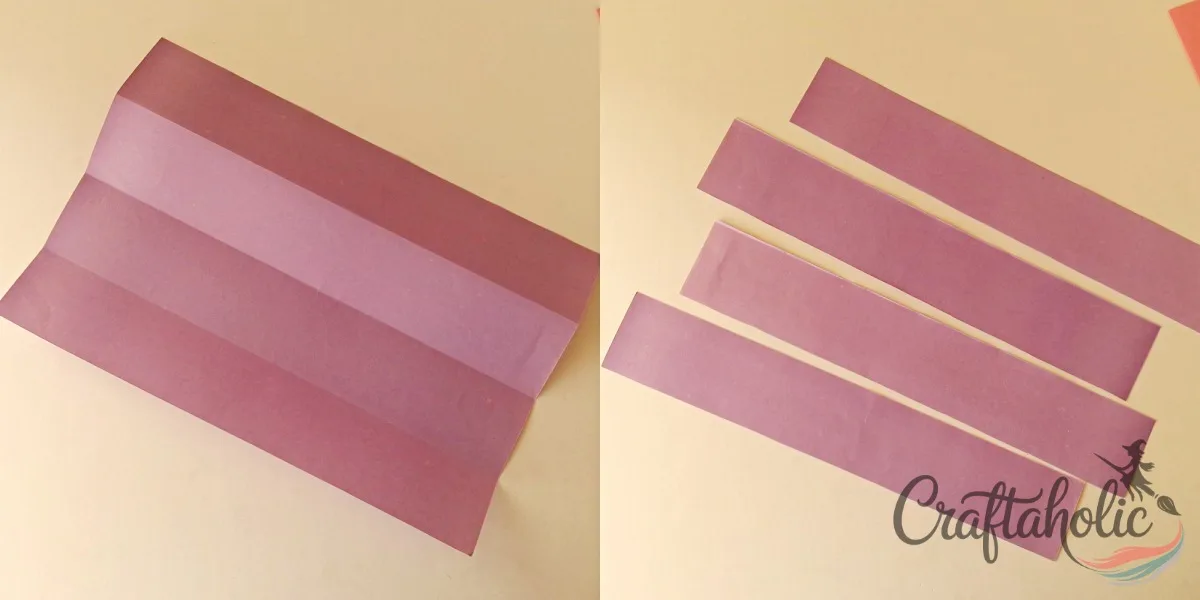
Open the sheet and you’ll see three crease lines dividing it into four equal sections. Cut along each crease to get four strips, each about 5 cm wide on A4 paper.
Fold and cut the second sheet the same way, so you finish with eight strips in two colors.
Step 4: Fold Diagonal Corners on One Strip
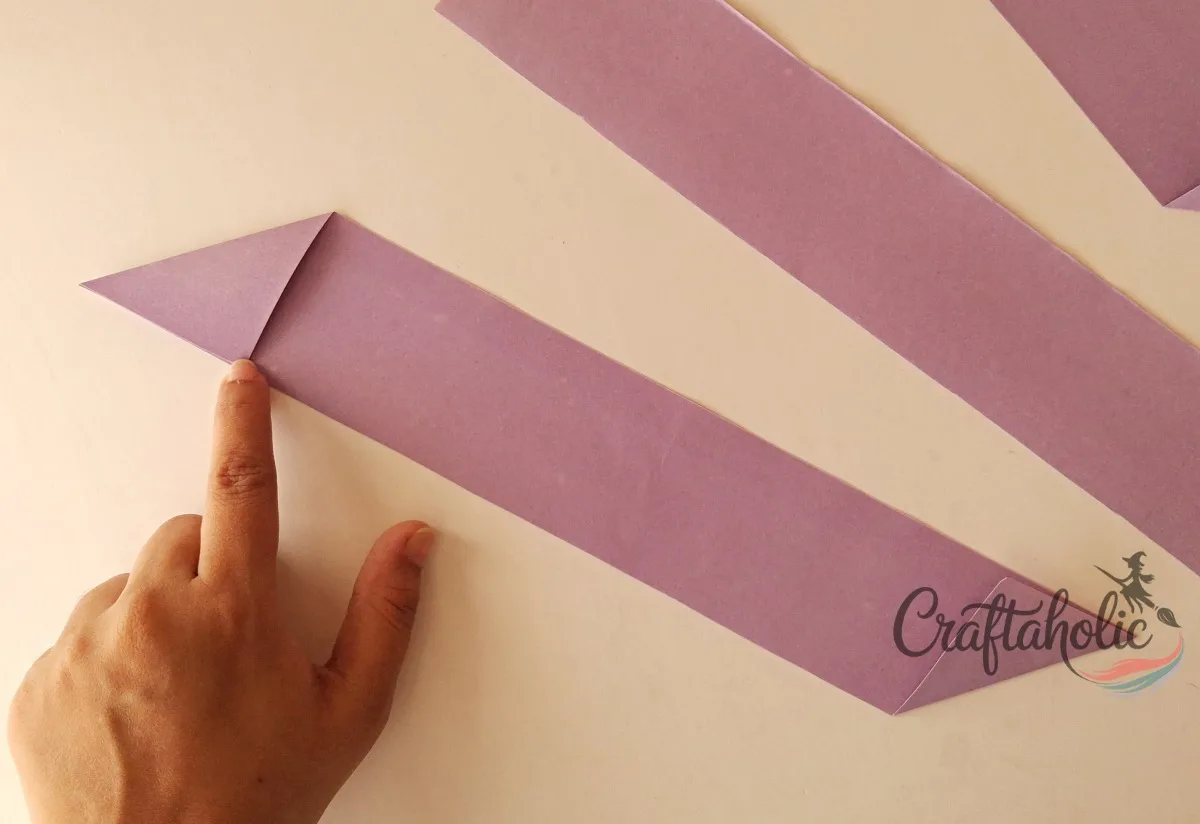
Take one strip and fold one end’s corner down at an angle, so that end becomes a small triangle. At the other end, fold the corner on the opposite long edge, so the two folds mirror each other.
Step 5: Fold All Eight Strips and Number Them
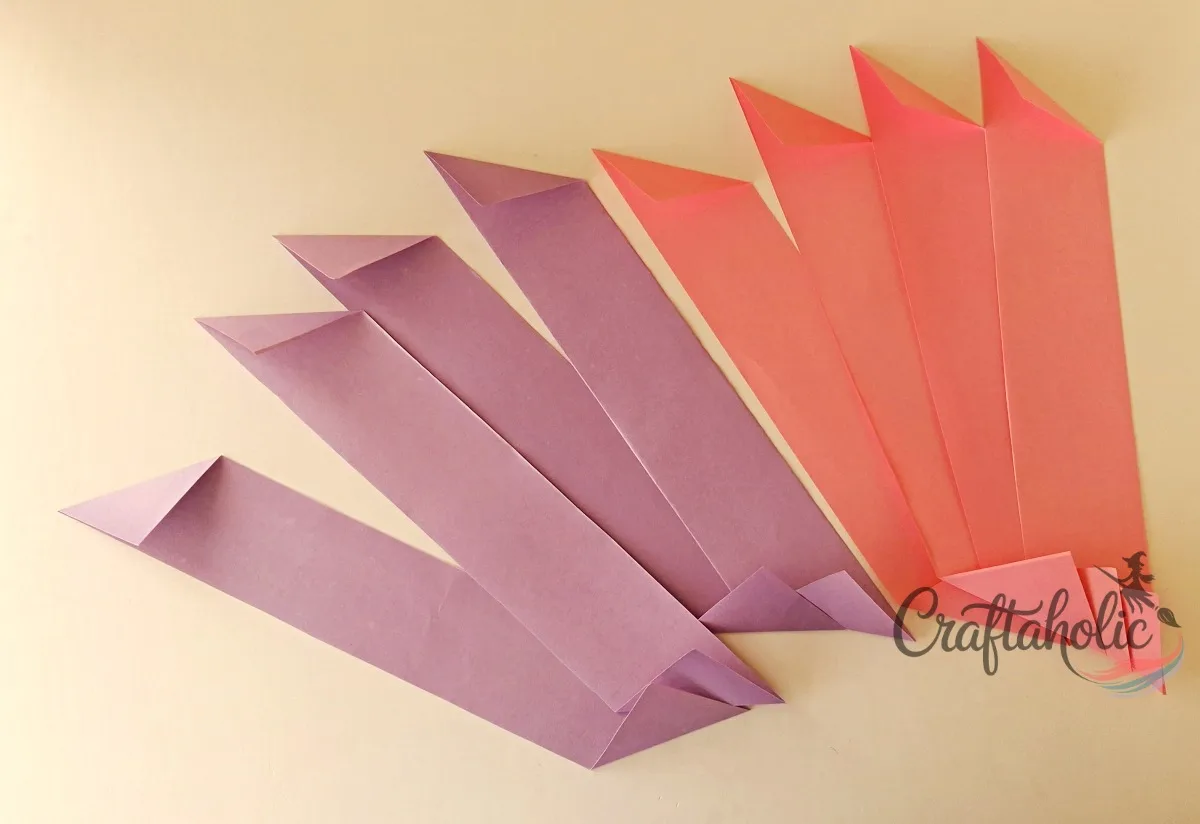
Give the other seven strips the same diagonal folds at both ends. Then lay them out with the colors alternating and number them 1 to 8, so the odd numbers are color A and the even numbers are color B. I’ll use those numbers for the rest of the steps.
Step 6: Glue Strip 1 to Strip 2
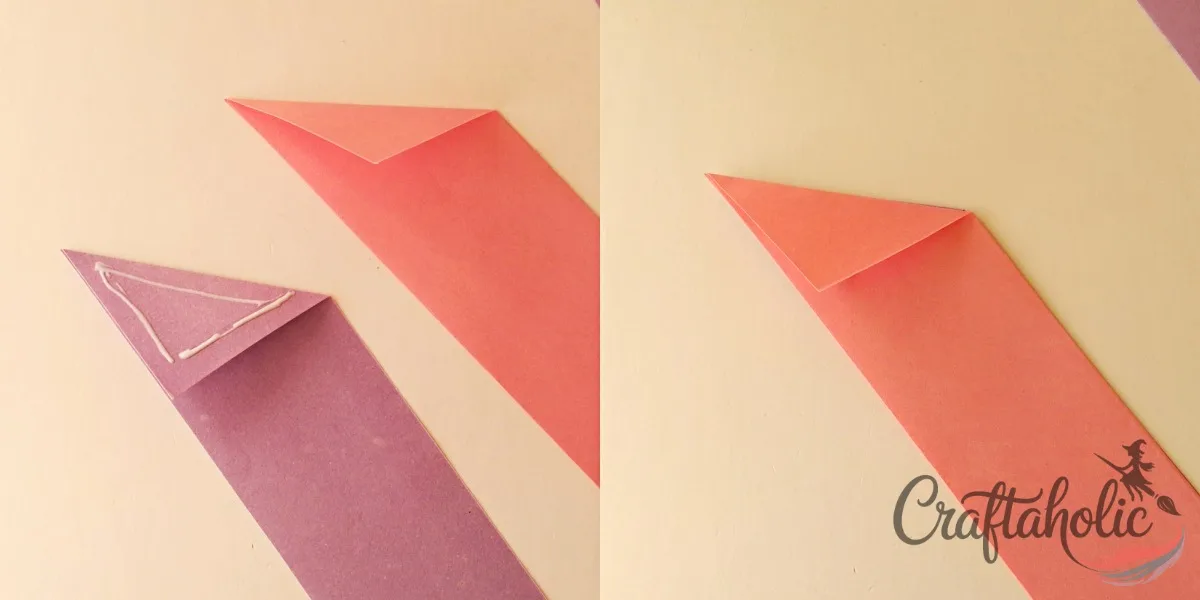
Take strip 1 and strip 2, which are two different colors. Spread glue over the triangle flap at one end of strip 1, then press strip 2 onto it so their flaps overlap.
Step 7: Add the Rest of the Strips One by One
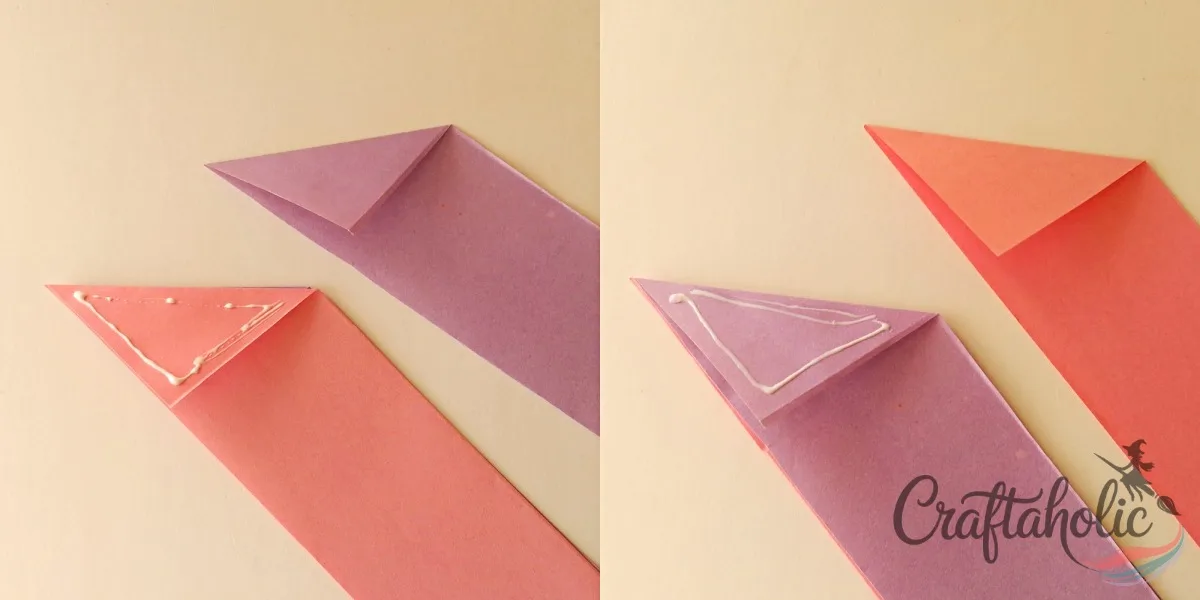
Glue the triangle flap of the strip you just attached, then press the next numbered strip onto it. Keep working in number order up to strip 8, which keeps the colors alternating.
Step 8: Let the Glue Set
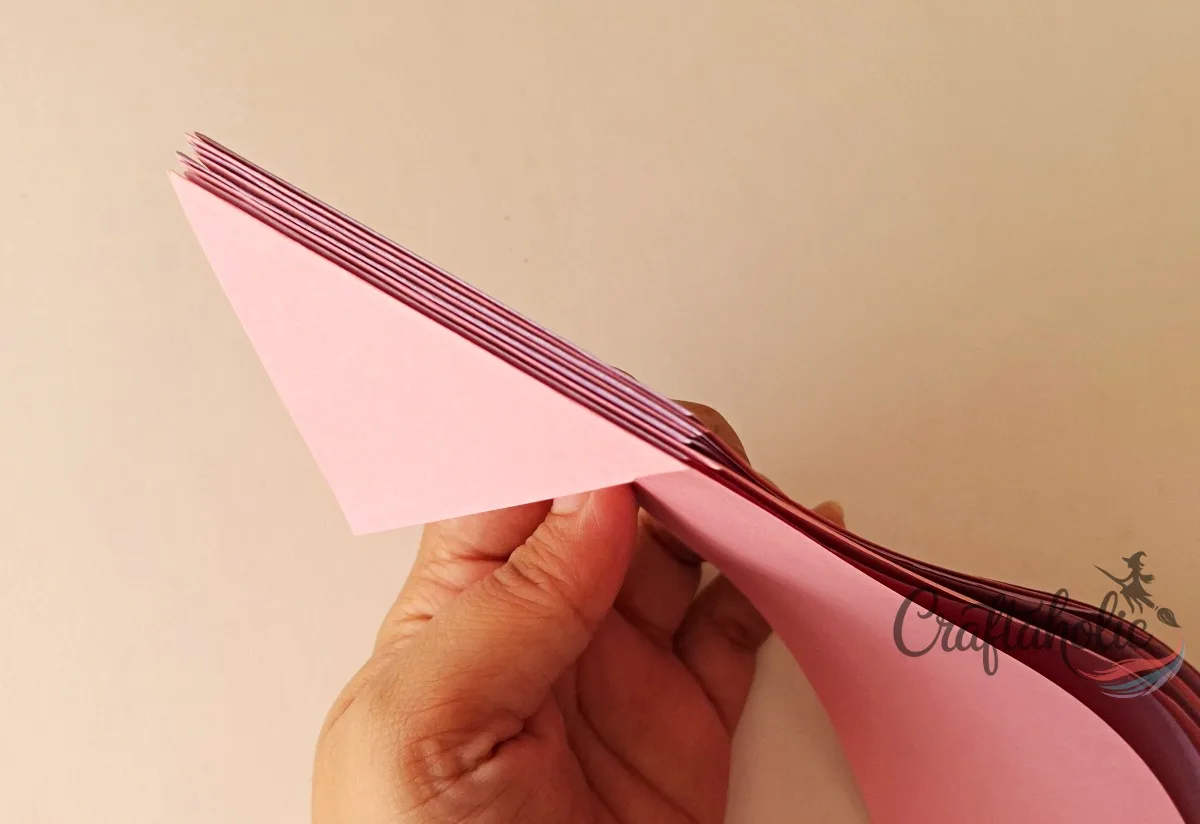
With all eight strips joined at one end, put the stack down and give the glue a few minutes. Bending the strips too soon lets the flaps slide apart.
Step 9: Close the Ring With the Last Flap
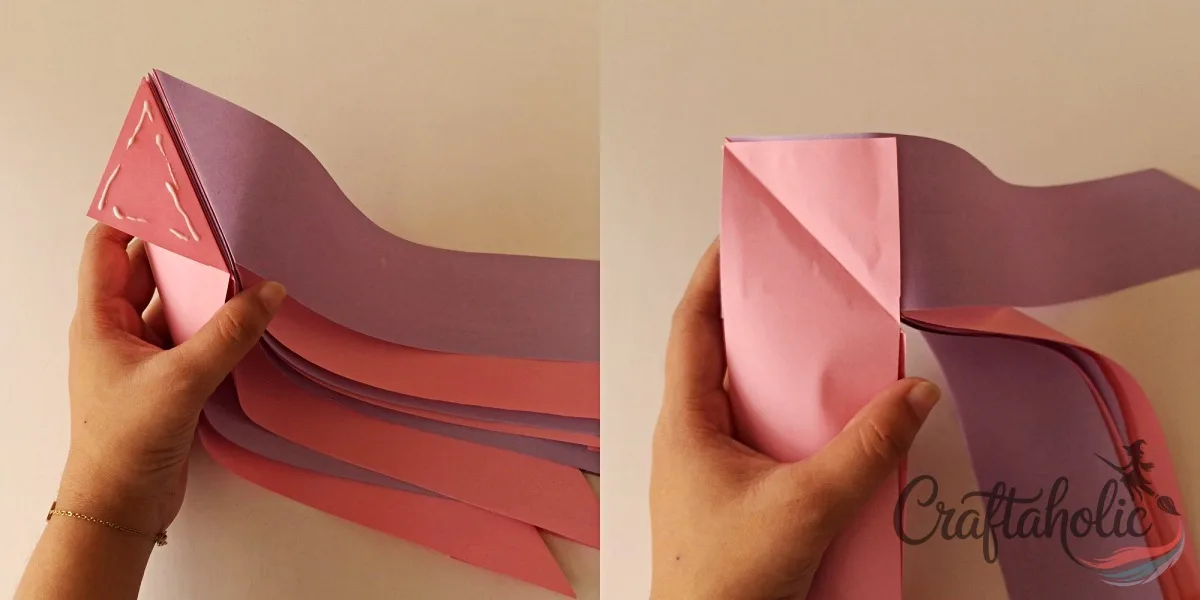
Spread glue on the triangle flap of strip 8 and press it onto strip 1. That joins the last strip to the first and closes the ring.
Step 10: Check the Joined End
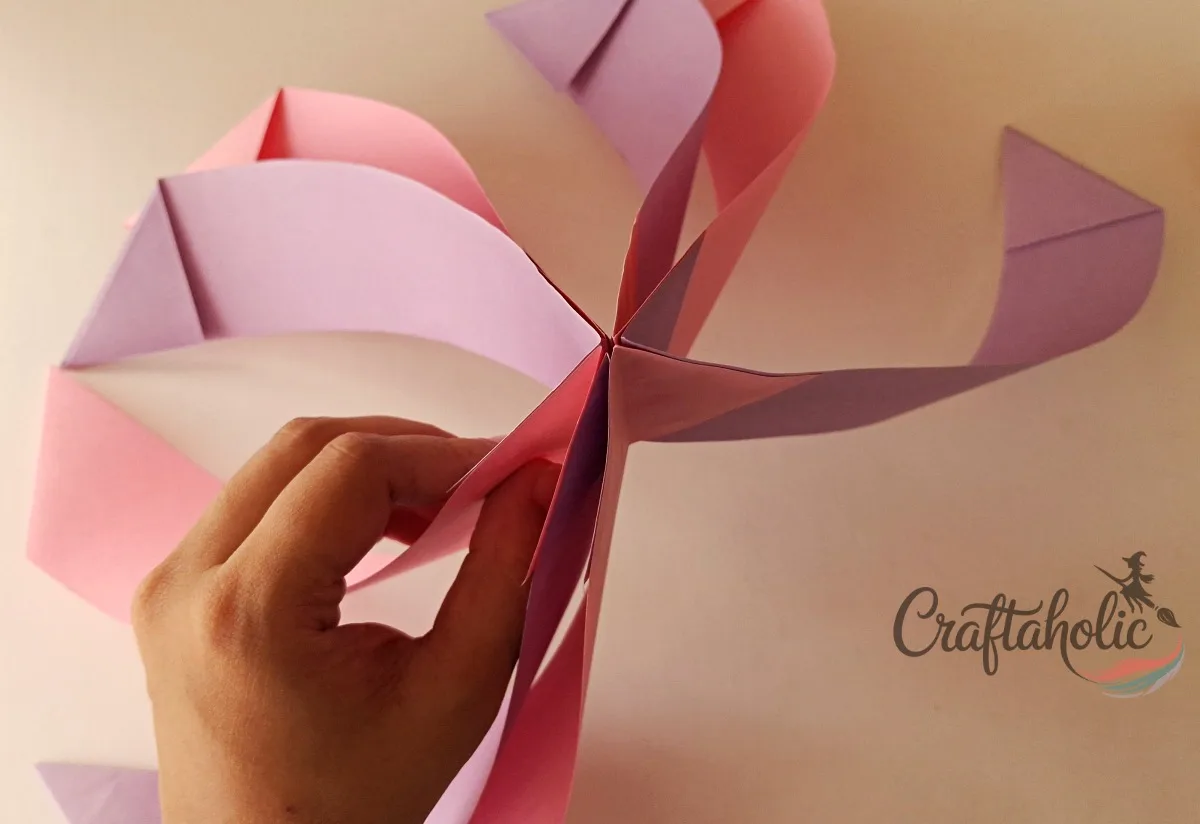
Look at the joined end from above. The eight strips should fan out evenly from the center, with the two colors alternating all the way around. There’s nothing to do here except compare yours with the photo before moving on.
Step 11: Pull One Strip Away at a Right Angle
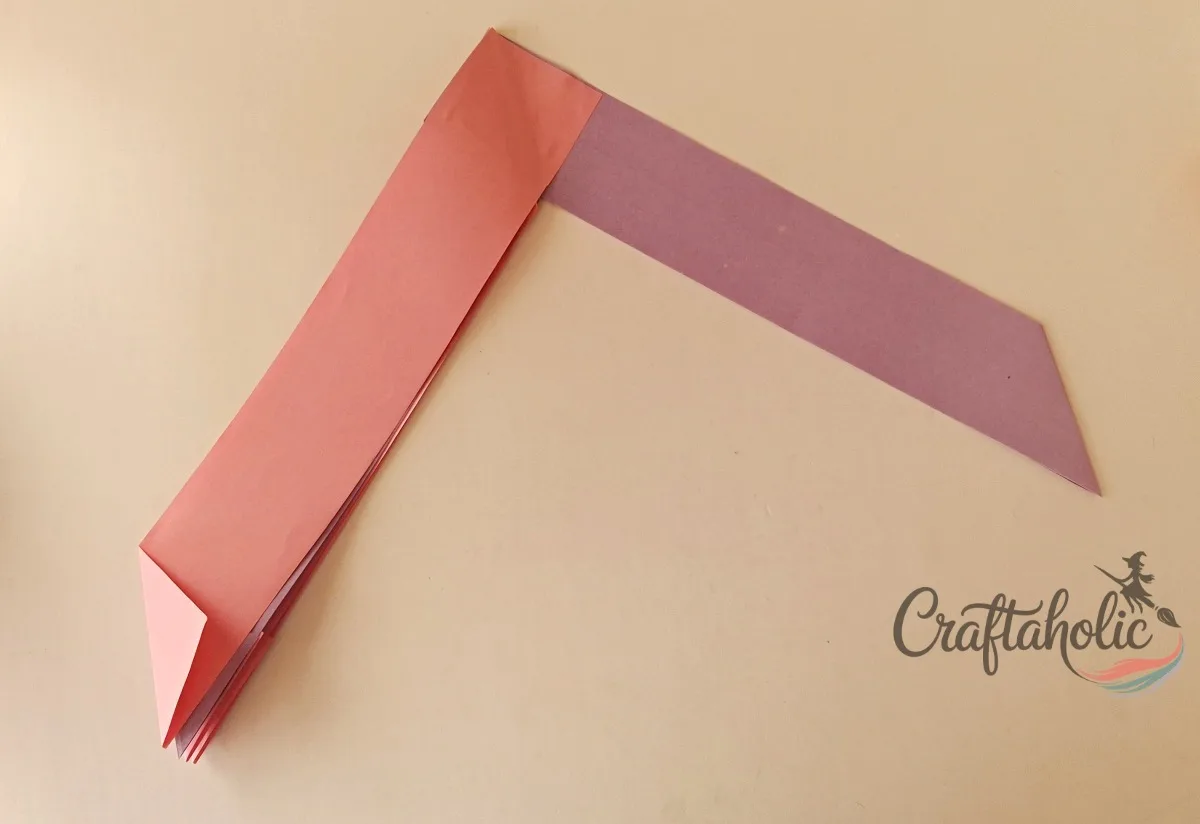
Lay the group flat on your table, then pull one strip away from the rest and turn it so it sits at a 90 degree angle to the others. This is the strip you’ll twist first.
Step 12: Twist the Strip Once and Glue the Twist
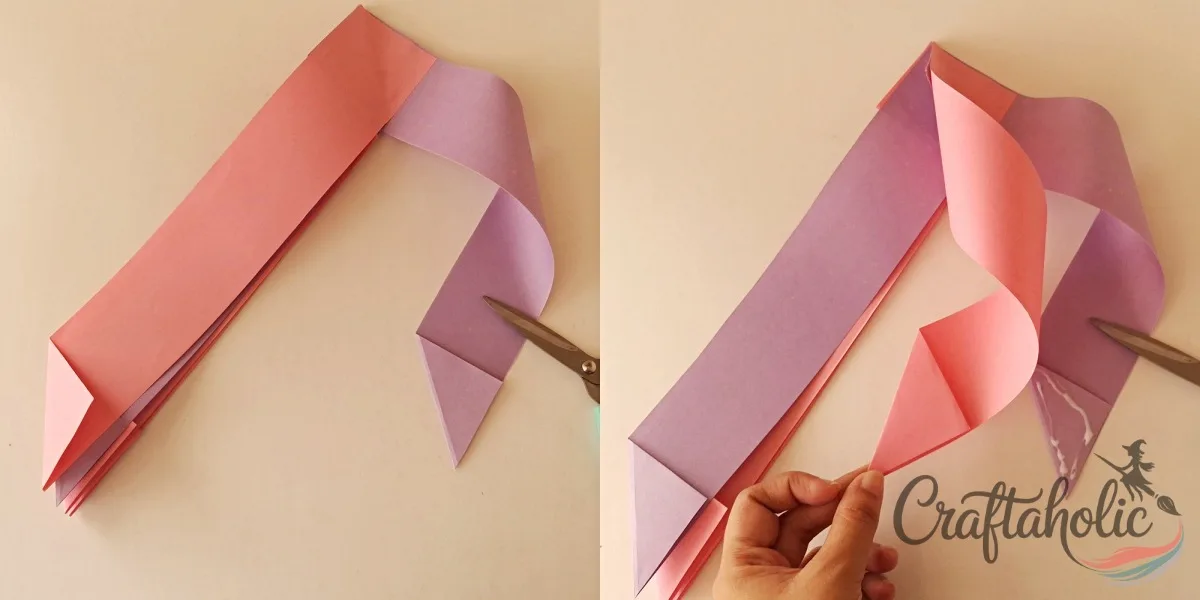
Hold the open end of the separated strip and give it one twist. Press the tip of your closed scissors on the twist to keep it from springing back, add glue where it meets the next strip, and move along. Twist the next strip once in the same way.
Step 13: Join the Twisted Strips Around the Ornament
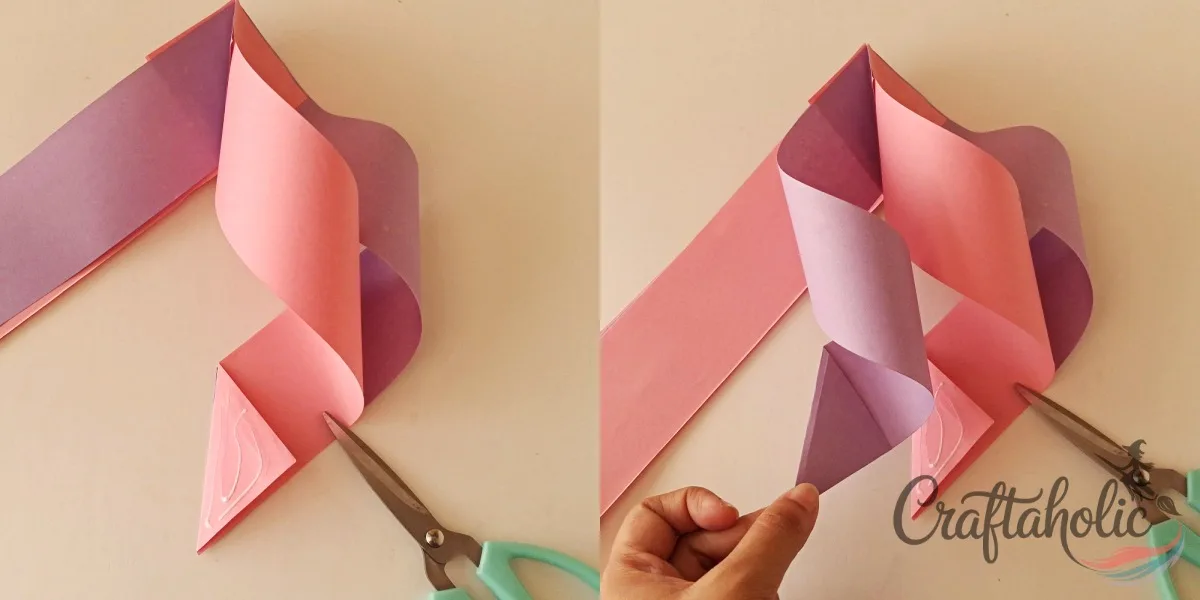
Glue the back of strip 2’s triangle flap to the glued flap on strip 1. Then keep going: twist each strip once and glue its flap to its neighbor’s, working in number order until you reach the last strip.
Step 14: Bring the Last Strip Into Position
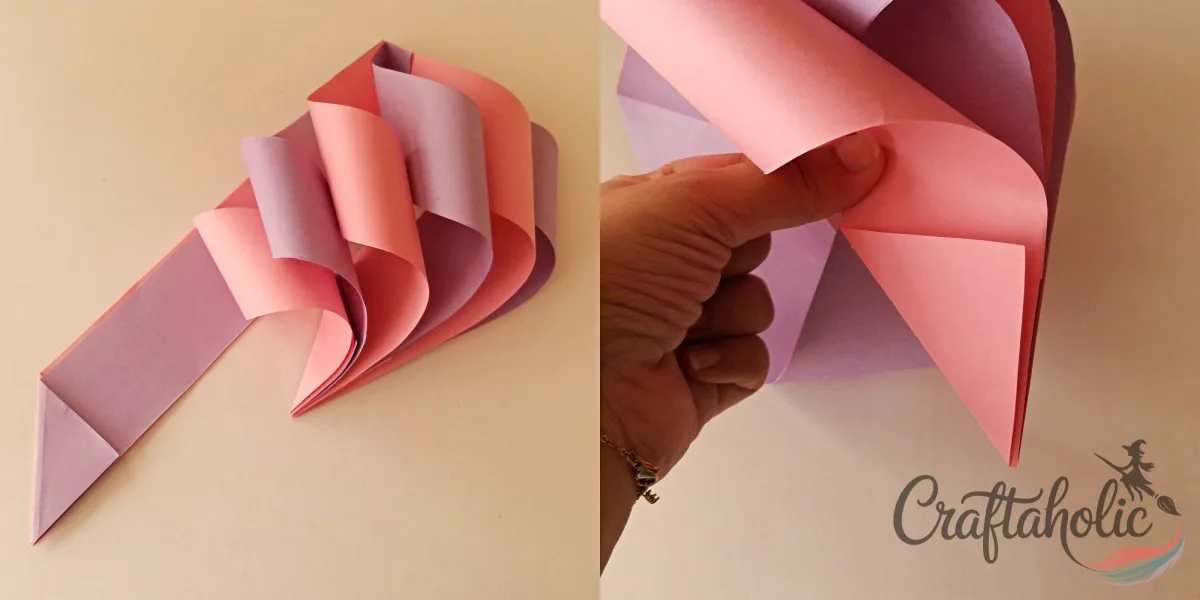
By now seven strips are twisted and glued, and the ornament has started to curl into a bulb. Hold that group in one hand and bend the last strip around toward the others. Keep its triangle flap pinched between your fingers, ready for the next step.
Step 15: Glue the Last Flap to Finish the Body
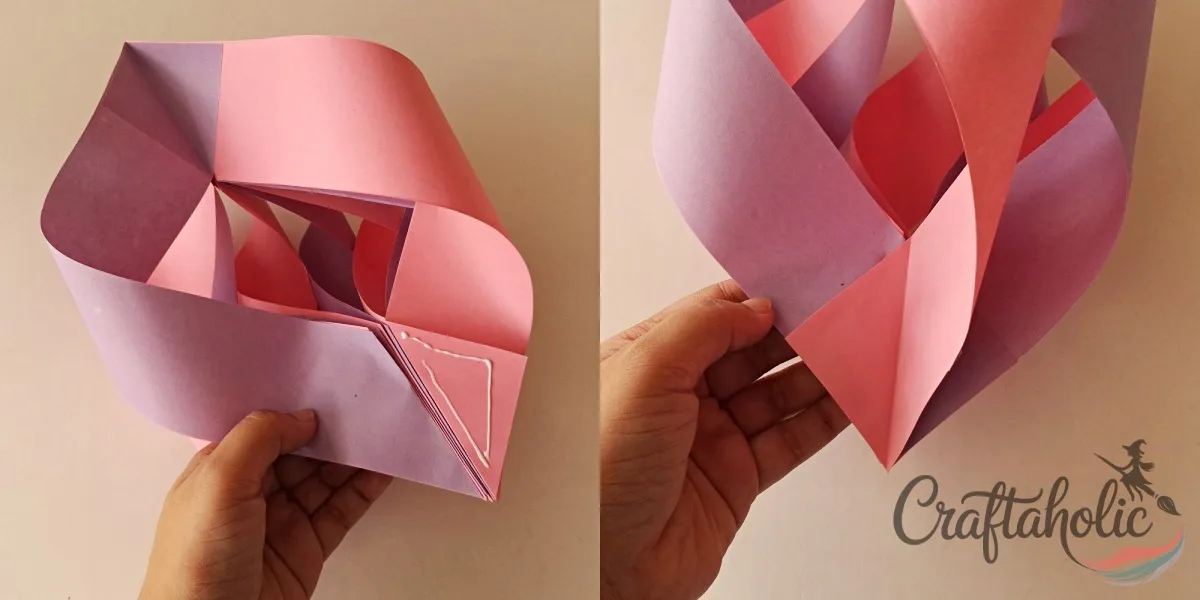
Spread glue on the outside of the last triangle flap and press it onto the neighboring strip. That closes the lantern shape and completes the body of the ornament.
Step 16: Thread the String Through the Center
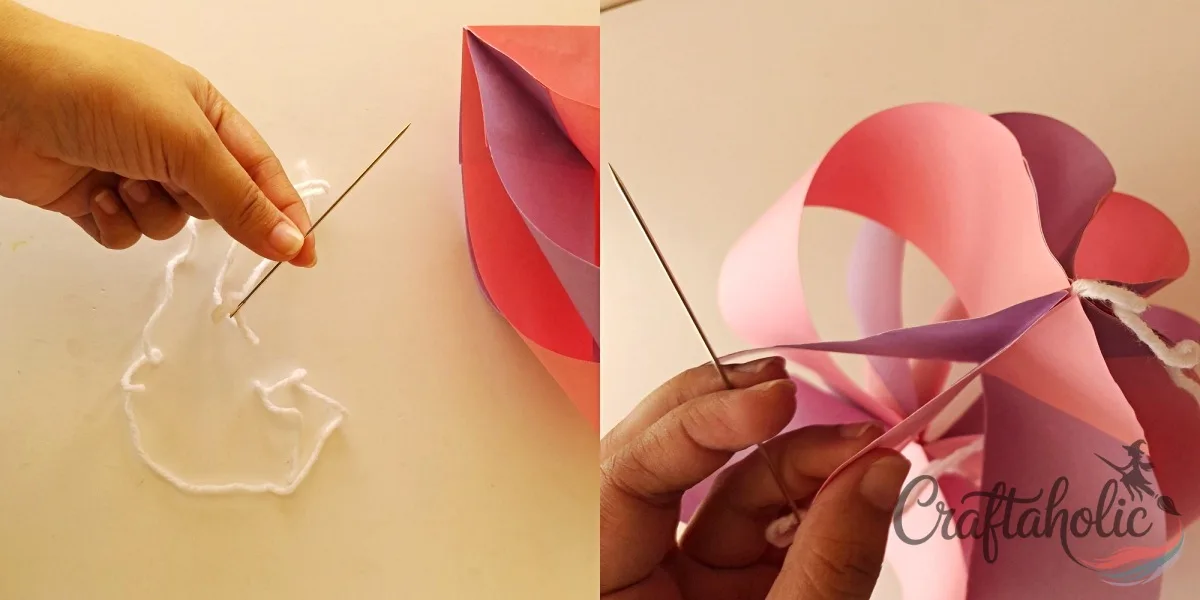
Thread a tapestry needle with 3 to 4 feet (about 90 to 120 cm) of string or yarn. Pass the needle through the center of the ornament, going in from either side.
Step 17: Knot the Inner End and Hang It
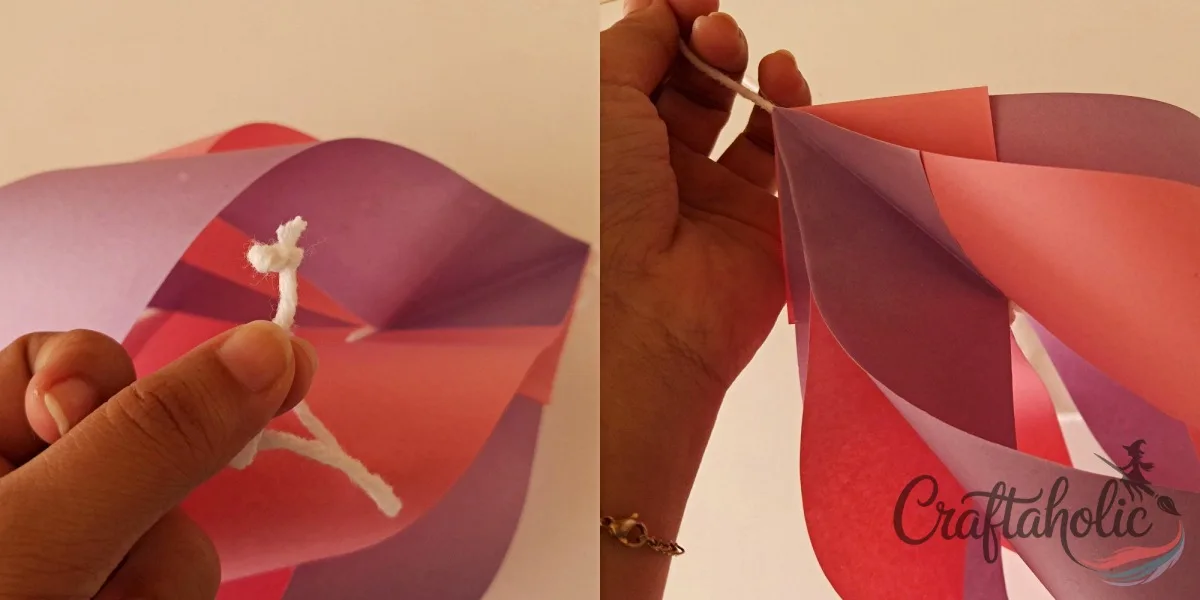
Pull the needle out through the inside of the ornament and slip it off the string. Tie several knots at the inner end so the string can’t slide back out, and leave the outer end long so you can adjust how low the ornament hangs.
Share it in "I Made It" and let us cheer you on.
Post your finished make in "I Made It" so the community can celebrate it with you. Cheer on other makers too. Each month, the most loved craft wins 1 year of Craftaholic Premium ($59)
Tips and Variations
- Pair two shades of the same color for a softer look, or two contrasting colors for a bolder swirl.
- Make three in different color pairs and hang them at different heights so they catch the light separately.
- Store finished ornaments in a box with a layer of tissue paper, so the strips keep their curve.
Frequently Asked Questions
How long does it take to make paper strip Christmas ornaments?
Plan on about 30 minutes for your first ornament, including a short pause while the glue sets. Cutting the strips and folding the corners goes quickly, and most of the time goes on the twisting and gluing in steps 12 to 15. Once you’ve made one, the next ones come together faster.
Can I use US letter paper instead of A4?
Yes. Letter paper gives you strips a little shorter than A4 strips with about the same width, so the ornament comes out slightly smaller. Fold and cut it exactly as in steps 2 and 3 and use eight strips as usual.
What paper is best for paper strip ornaments?
Regular colored craft paper works best because it twists without cracking. Very thick cardstock tends to fight the twist and crease, and very thin paper can go limp once the glue is on.
Can kids make paper strip Christmas ornaments?
Older kids can make them on their own, and younger ones can join in with a little help. The parts that need an adult are cutting the strips and threading the tapestry needle in step 16. The twisting and gluing is the hands-on part kids tend to enjoy.
How do I make the ornament bigger or smaller?
Start with larger or smaller sheets of paper and cut them into strips the same way. The folds and the eight strips stay the same, so only the size changes. Once you’re comfortable with the build, you can also use more than two colors.
More Paper Crafts Tutorials
- Make a 3D paper Christmas tree to stand beside your hanging ornaments.
- Craft an easy paper Christmas wreath for the door or a wall.
- Browse more paper craft tutorials for your next project.
Share your ornaments in the I Made It space inside Craftaholic Community. The most-loved post each month wins a one year free Premium membership.
0 Comments
Join the conversation
Log in to your Craftaholic Community account to comment, ask questions, and cheer on fellow makers.
Log in to comment