

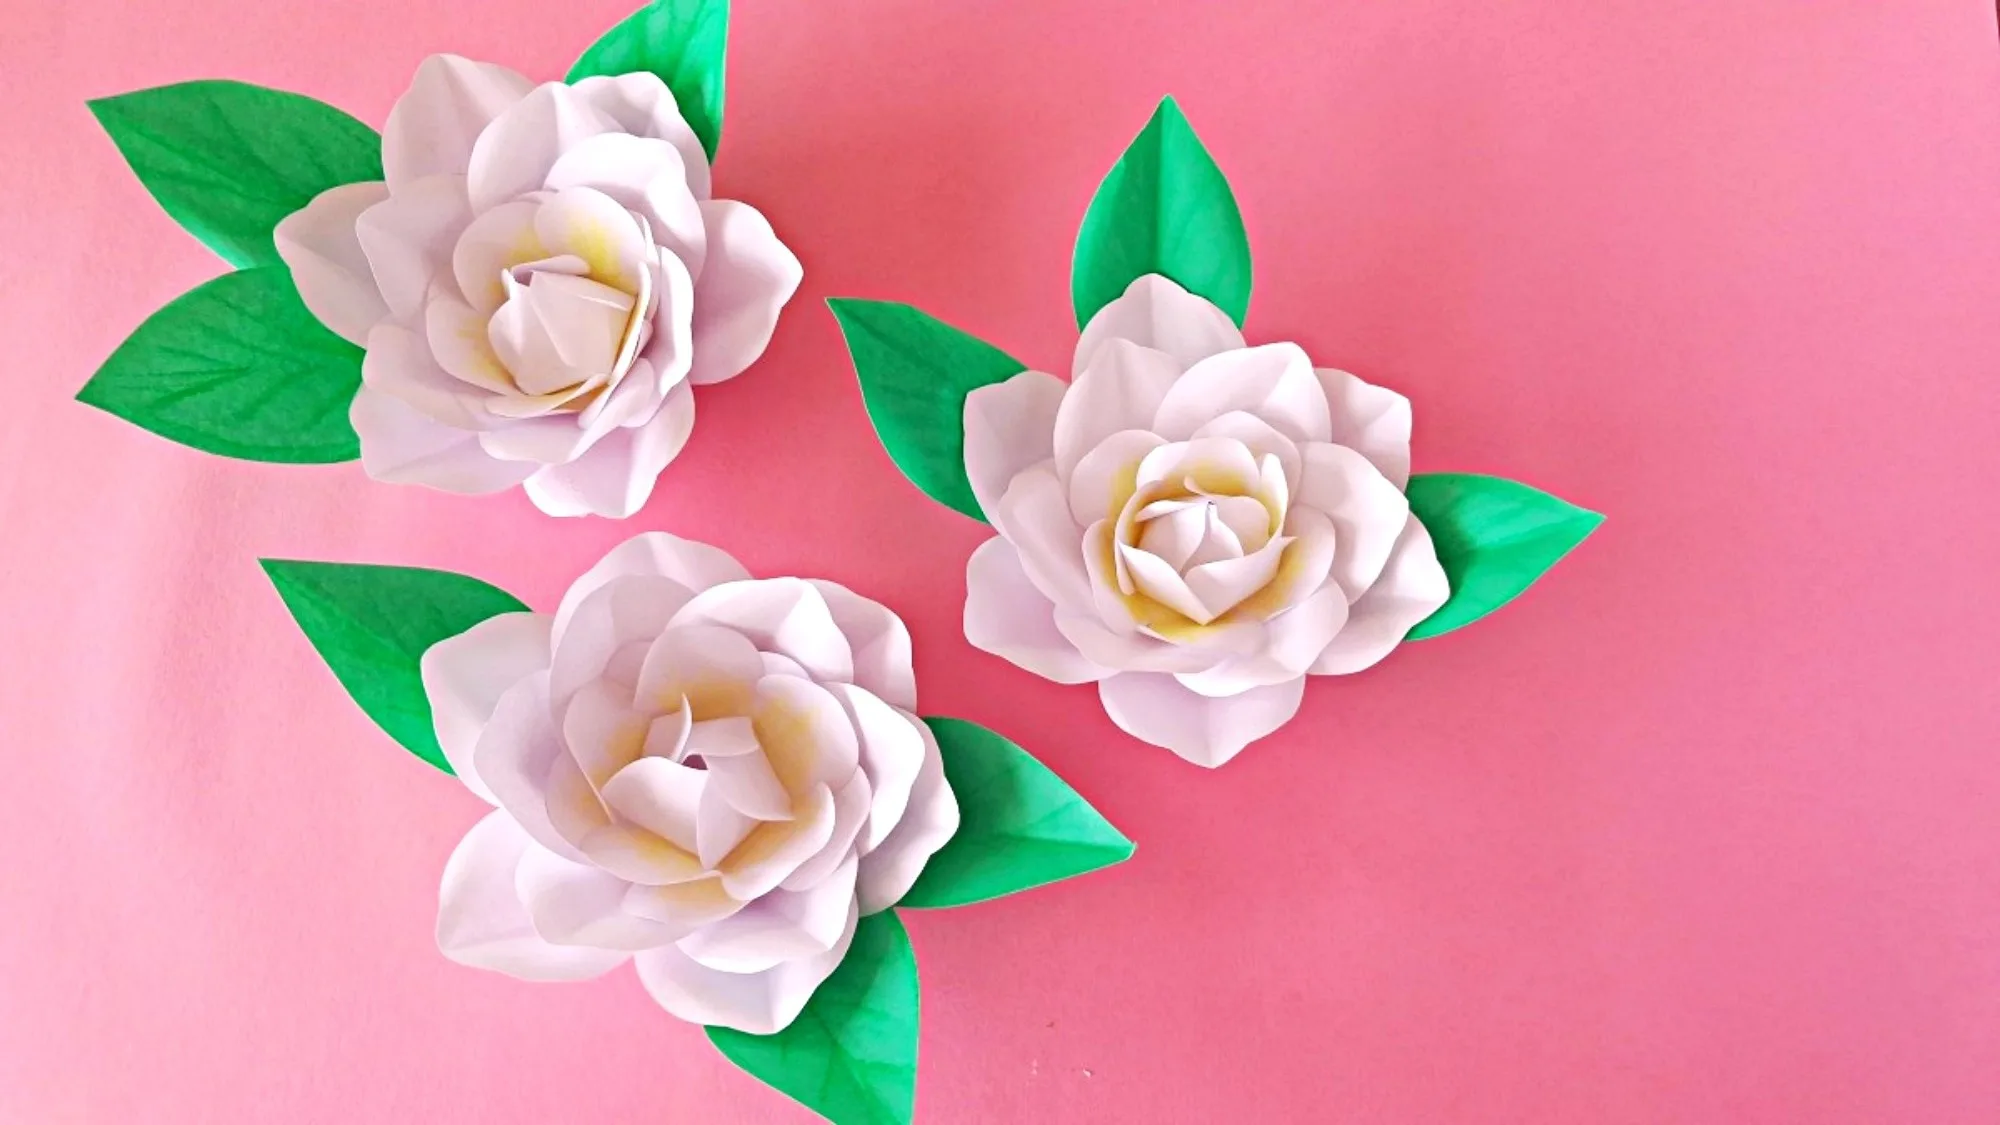
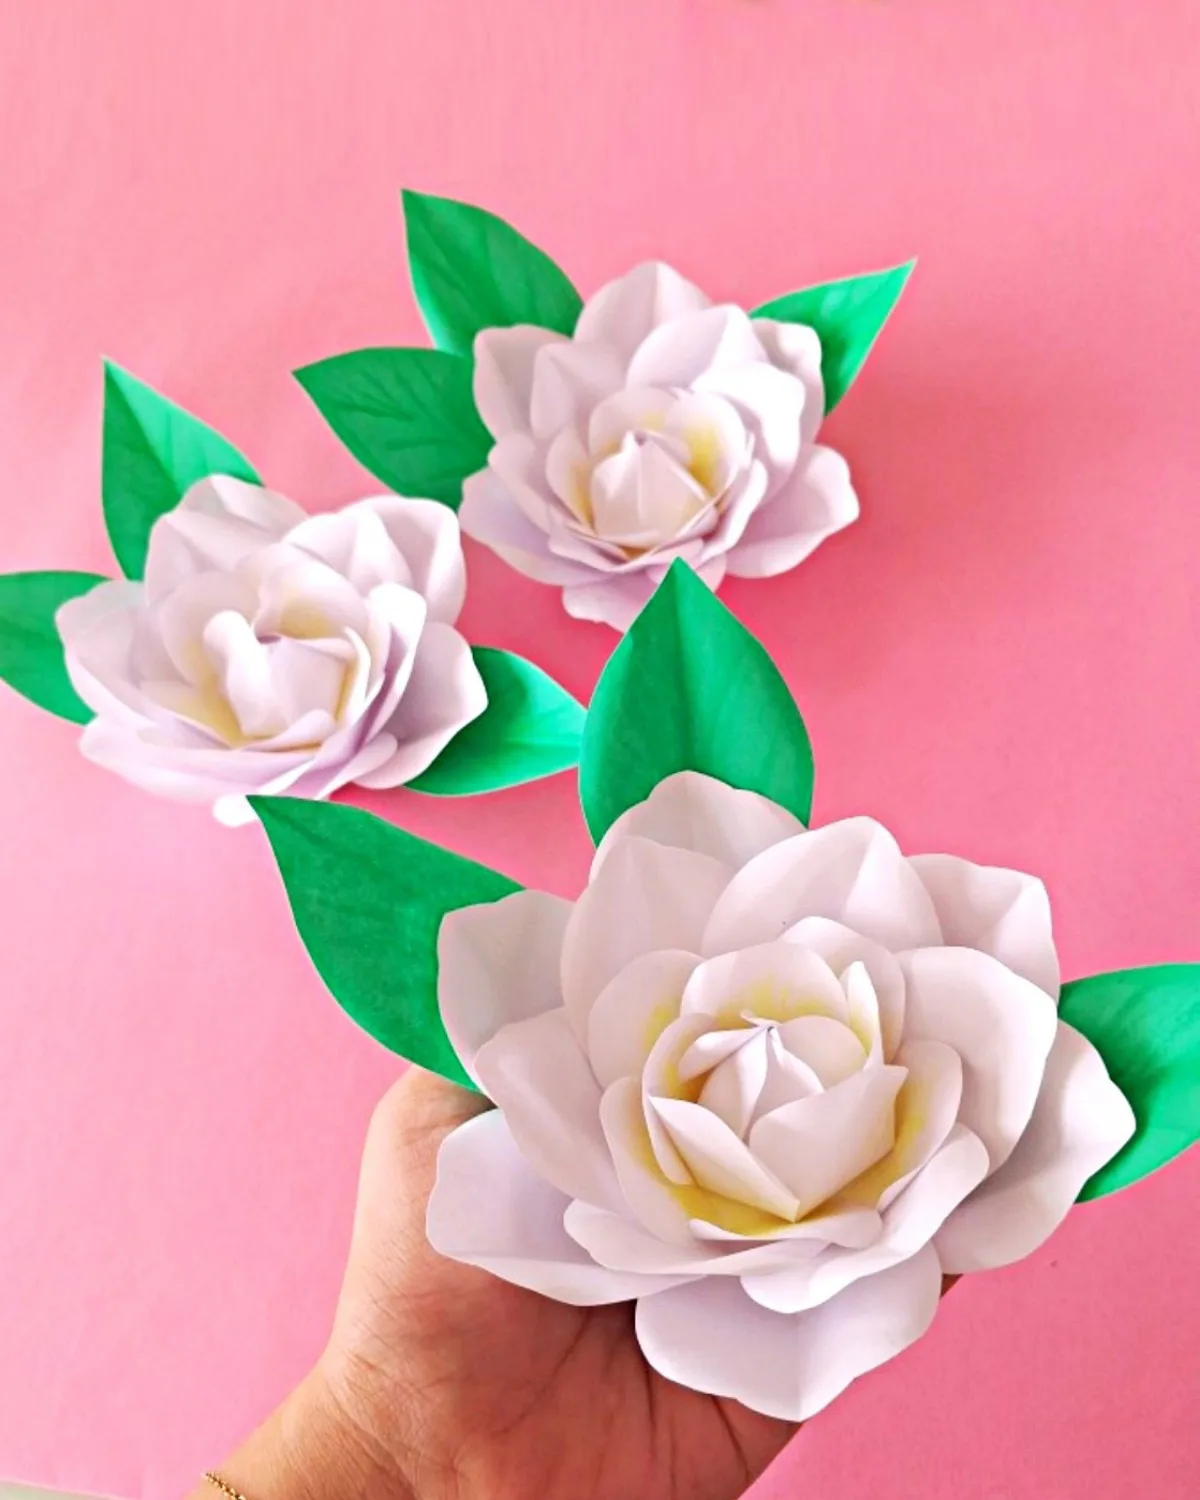
A real gardenia is full of soft, curled petals that layer over each other, and that’s what makes it fun to recreate in paper. This realistic paper gardenia flower comes together with simple folds, curls, and a bit of stitching, and the result looks just as full as the real thing.
This one is better suited to crafters who’ve made a paper flower before, not a first-timer’s project. You’re curling and shaping fifteen small petals by hand and stitching a few of them together, so it takes patience more than any special skill. If you’re new to paper flowers, you can still make it, just set aside extra time for your first try.
It’s part of our paper flowers collection, and it pairs nicely with paper lilac flowers if you want to build out a matching bouquet. If you’d rather skip tracing your own petals, a ready-to-print template for this gardenia is available in our shop.
Realistic Paper Gardenia Flower at a Glance
- Difficulty: Intermediate
- Time: 45 to 60 minutes per flower
- Cost: Under $5 in craft paper and glue
- Ages: 8 and up, with adult help for younger kids on the stitching steps
- Best for: Home decor, gift toppers, or building out a paper flower bouquet
Join Craft Challenge: Craft Your Calm
Make something that brings you a sense of peace, share a photo, and tell us your story. It's free to enter, open to everyone, and the entry with the most reactions takes home a $100 gift card. Takes five minutes to join.
Entries close August 30, 2026. No purchase necessary.
What You Need to Make a Realistic Paper Gardenia Flower
Materials
- Medium thick white craft paper, for the petals and base. It holds a curl and a crease without tearing at the slit, unlike regular printer paper.
- Medium thick green craft paper, for the leaves, matched in thickness to the white paper so both curl the same way.
- Crayons (yellow and green), to shade the petal centers and leaf edges so they read as natural instead of flat.
- Craft glue, to join petal layers and secure everything to the base.
- Needle and thread, to stitch the center petal sets into a spiral and knot them off.
Tools
- Pencil, for tracing the template pieces.
- Template, the pattern pieces for the large petals, medium petals, center cutouts, base, and leaf.
- A pair of scissors, to cut out the traced patterns.
- Round craft stick, to curl and crease the petals and leaves.
Ask inside "Crafty Q&A" while you are making.
"Crafty Q&A" is free to join. Share your question, photo, or the exact step where you got stuck, and chat with other makers plus the Craftaholic Witch team. You can also join any discussion thread already happening inside the space.
How to Make a Realistic Paper Gardenia Flower
Step 1: Trace and Cut the Petal, Base, and Leaf Patterns
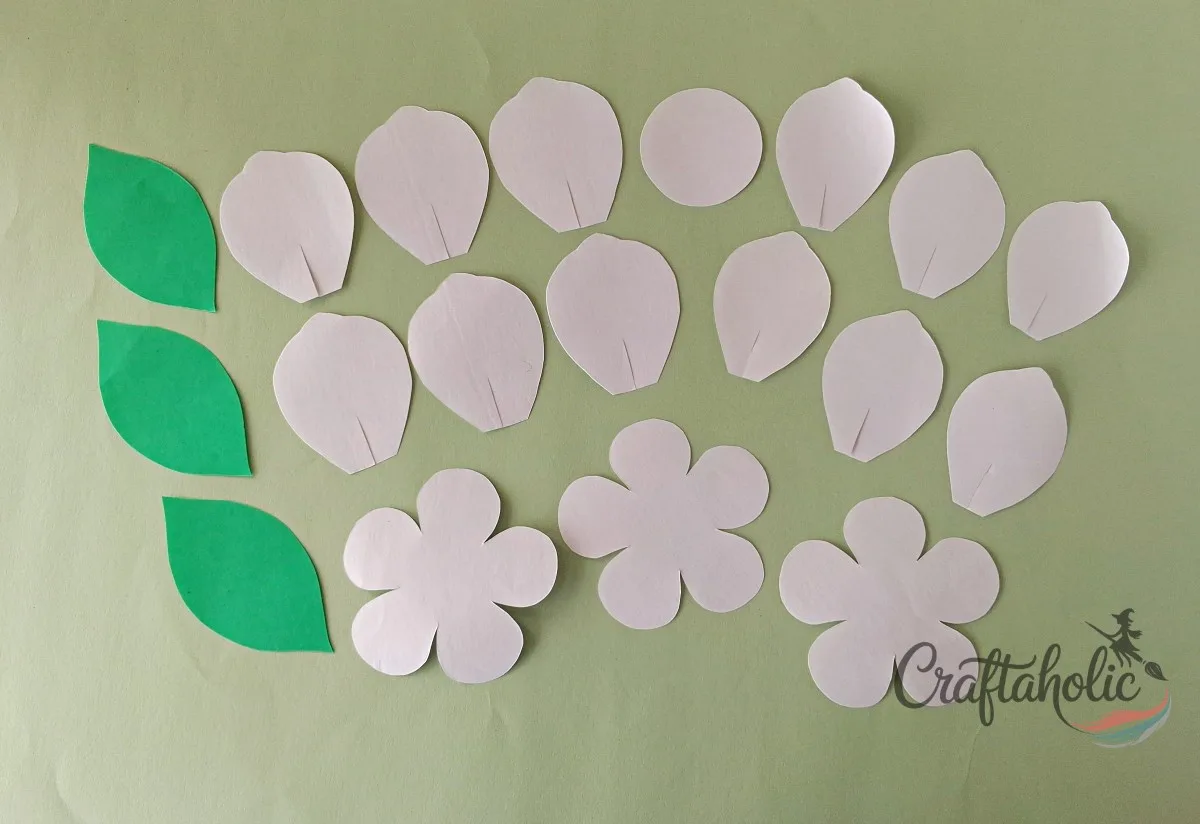
Print the template and trace its pieces onto paper: the large petals and medium petals plus the three five-petal center cutouts onto white craft paper, and the leaves onto green craft paper. Cut every traced piece out neatly. You’ll end up with 6 large petals, 6 medium petals, 3 five-petal center cutouts, 1 base, and 3 leaves, which is everything you need for the rest of the tutorial.
Step 2: Cut a Center Slit Into Each Large and Medium Petal
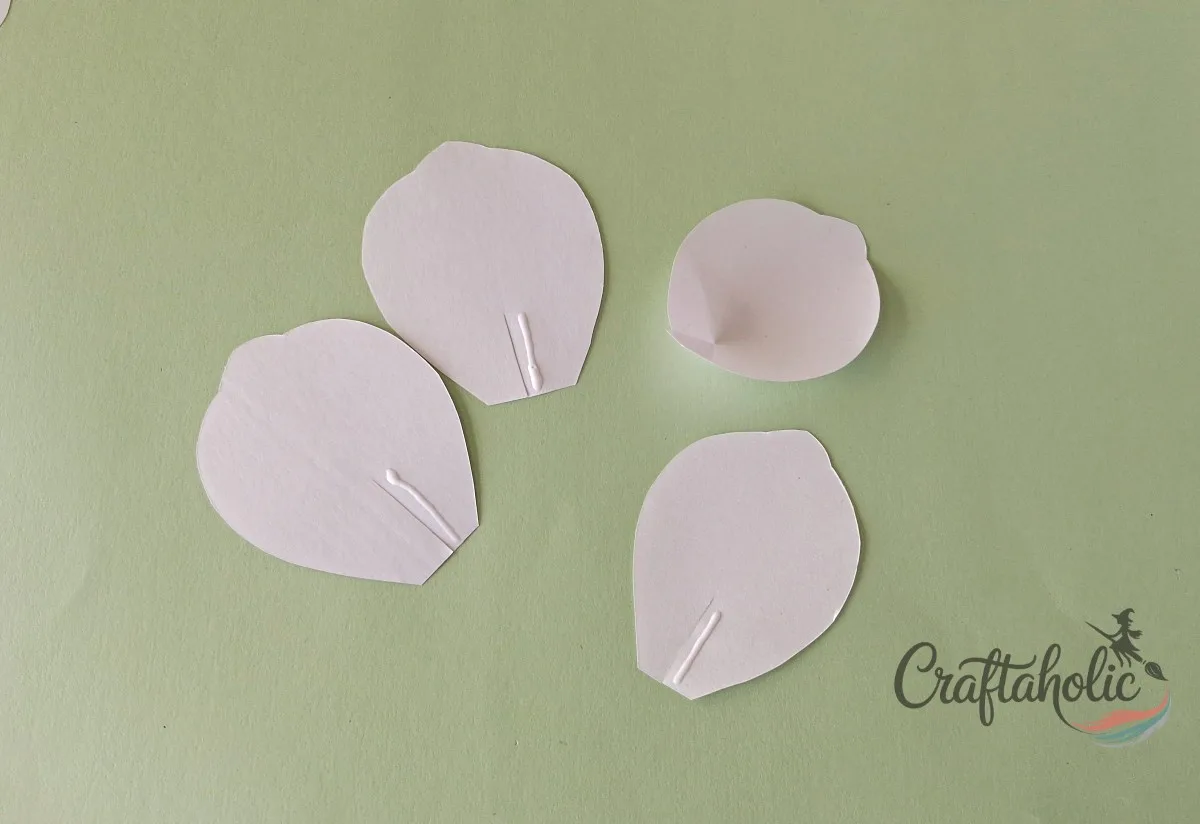
Take all 6 large petals and all 6 medium petals and snip a 1 cm slit into the straight edge of each one, right in the middle. This slit is what lets you overlap the two sides in the next step to curve the petal into shape.
Step 3: Overlap the Slit to Shape Each Petal in 3D
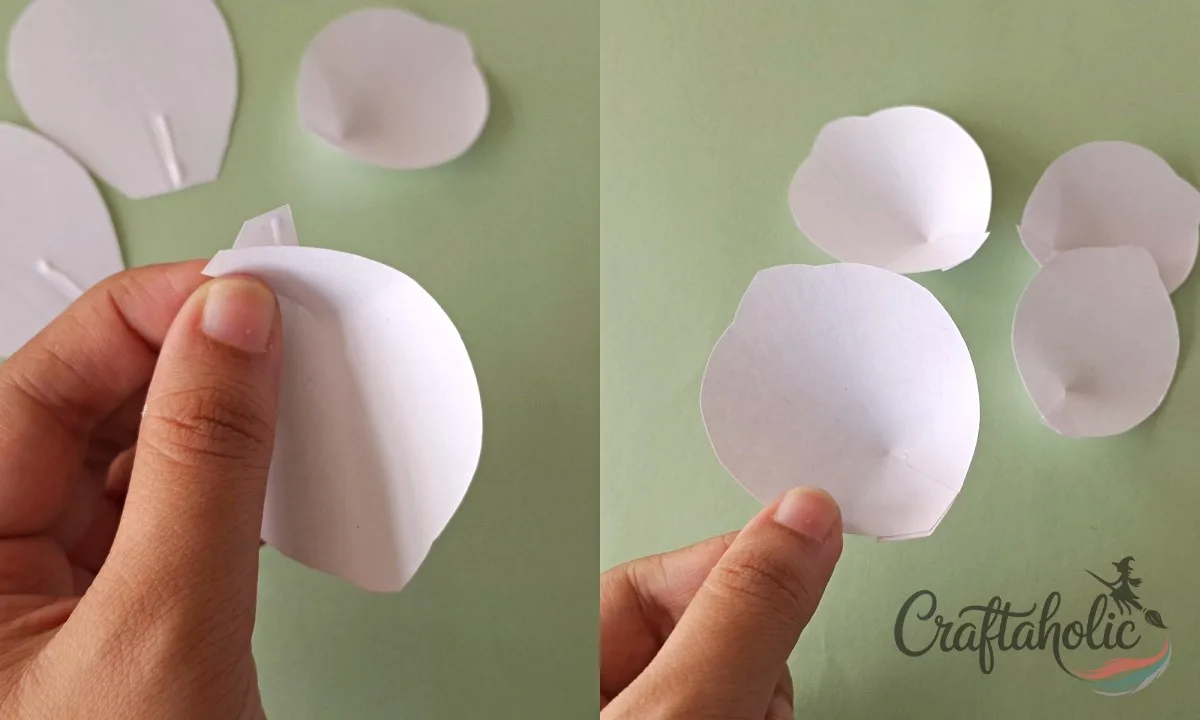
Run a line of glue along one side of the slit, then overlap the other side over it so the two edges meet neatly. That overlap is what pulls the flat petal into a gentle 3D curve instead of lying flat.
Step 4: Curl the Petal Edges for a Realistic Look
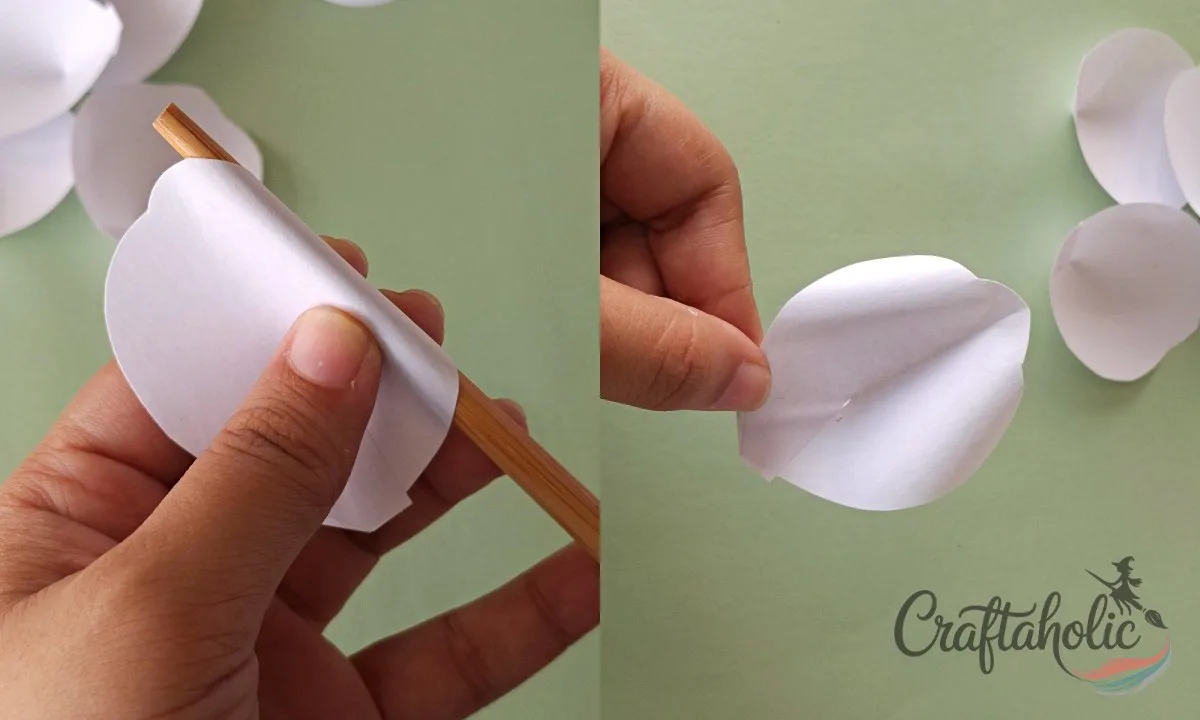
Run the round craft stick along the left and right edges of the petal’s rounded top to curl them outward, then press a soft vertical crease down the center with the same stick. That crease and curl combination is what makes each petal read as realistic instead of flat paper.
Step 5: Repeat for All 12 Large and Medium Petals
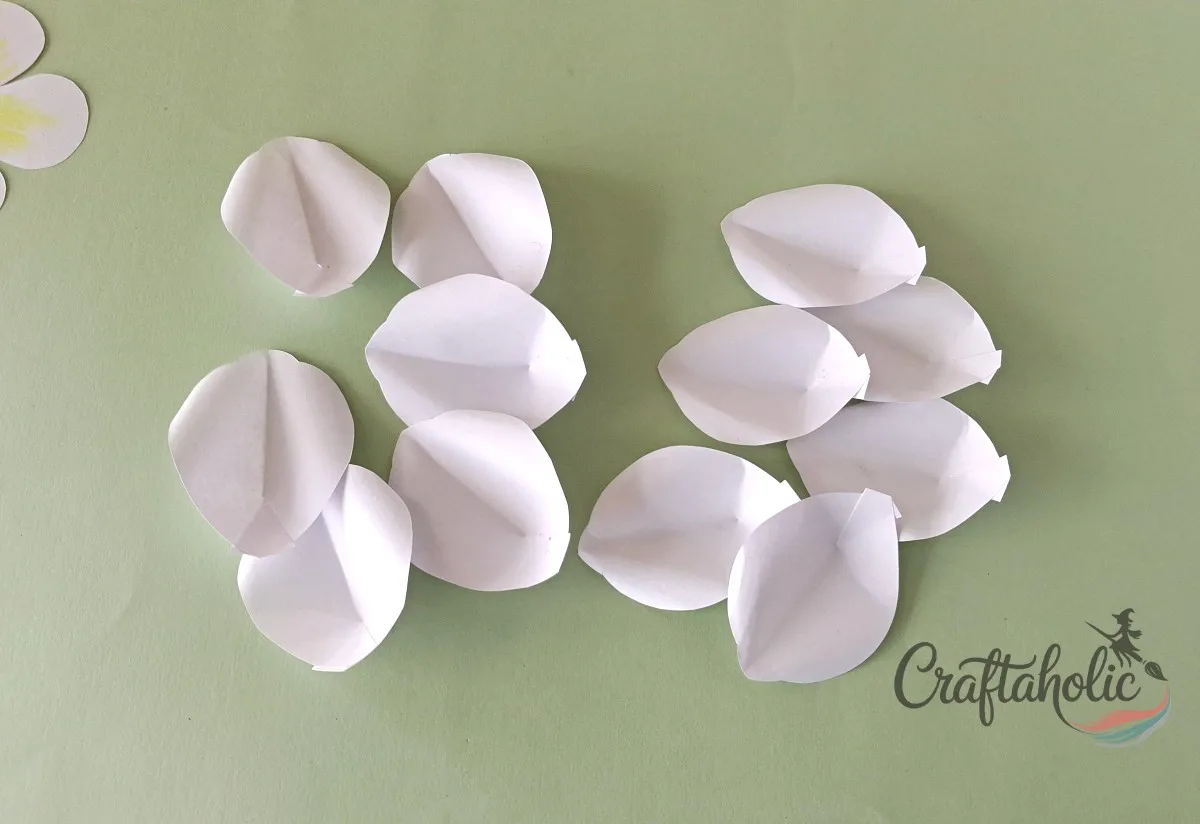
Work through steps 2 to 4 on the rest of the large and medium petals until all 12 are slit, glued, and curled the same way. It’s the same three moves each time, slit, glue, curl, so once you’ve done a few, the rest go quickly.
Step 6: Color the Centers of Two of the Three Petal Sets
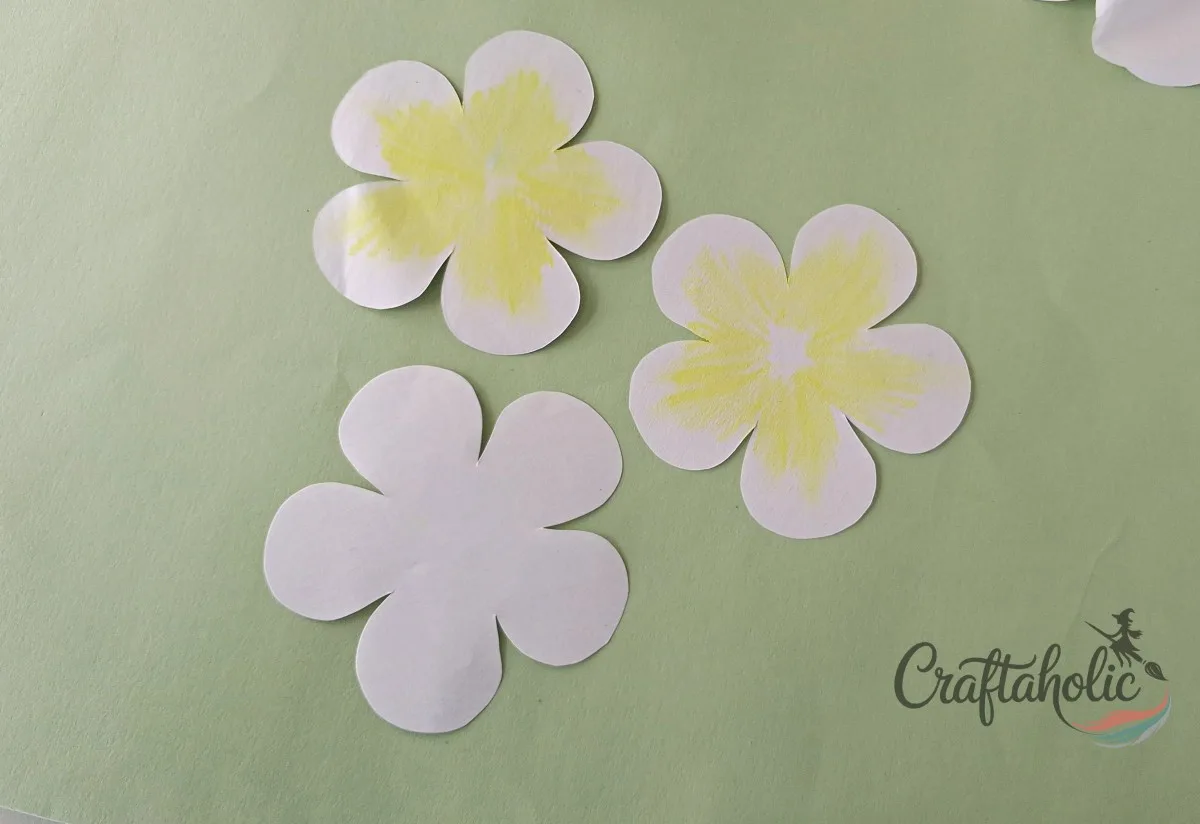
Lay out your 3 five-petal center cutouts. Color the middle of 2 of them with yellow crayon, blending it outward a little so the color fades instead of stopping in a hard line. Leave the third cutout plain white, it becomes the innermost layer of the flower’s center.
Step 7: Curl Each Petal of the White Center Set, Alternating Directions
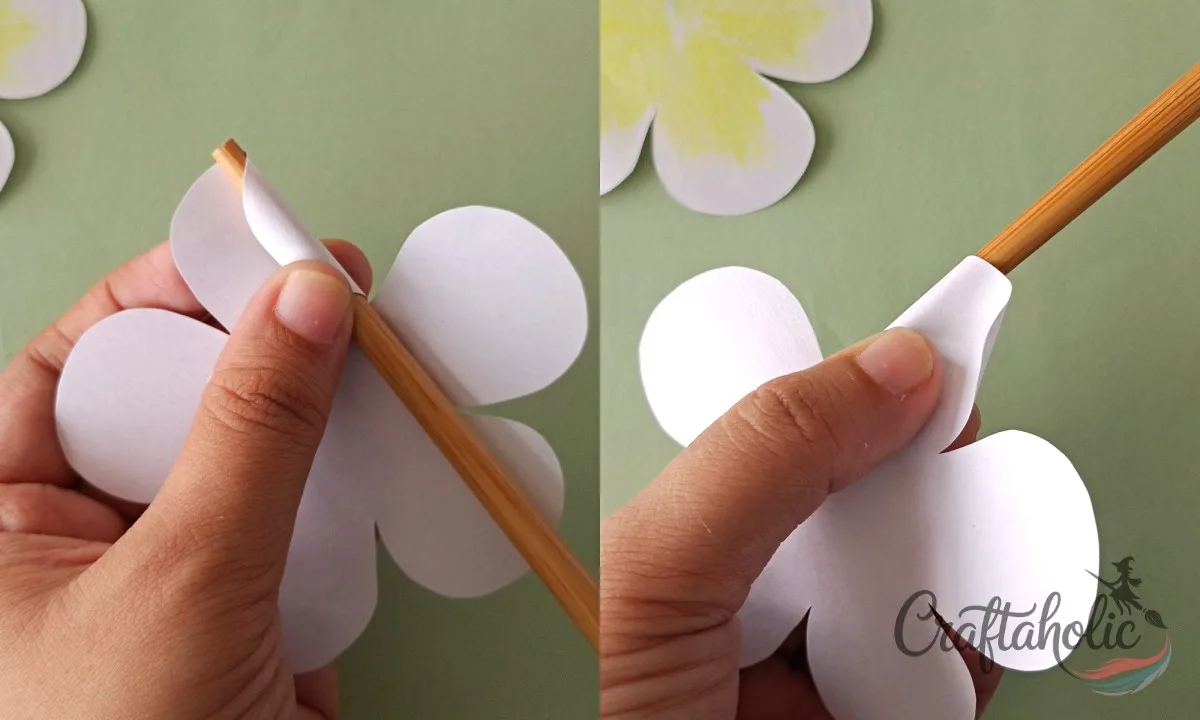
On the white cutout, curl the right side of one petal outward with the craft stick, then curl the left side of that same petal inward. Curling both directions on one petal is what lets it nest into its neighbors in a later step.
Step 8: Curl the Rest of the White Petals, Working Clockwise
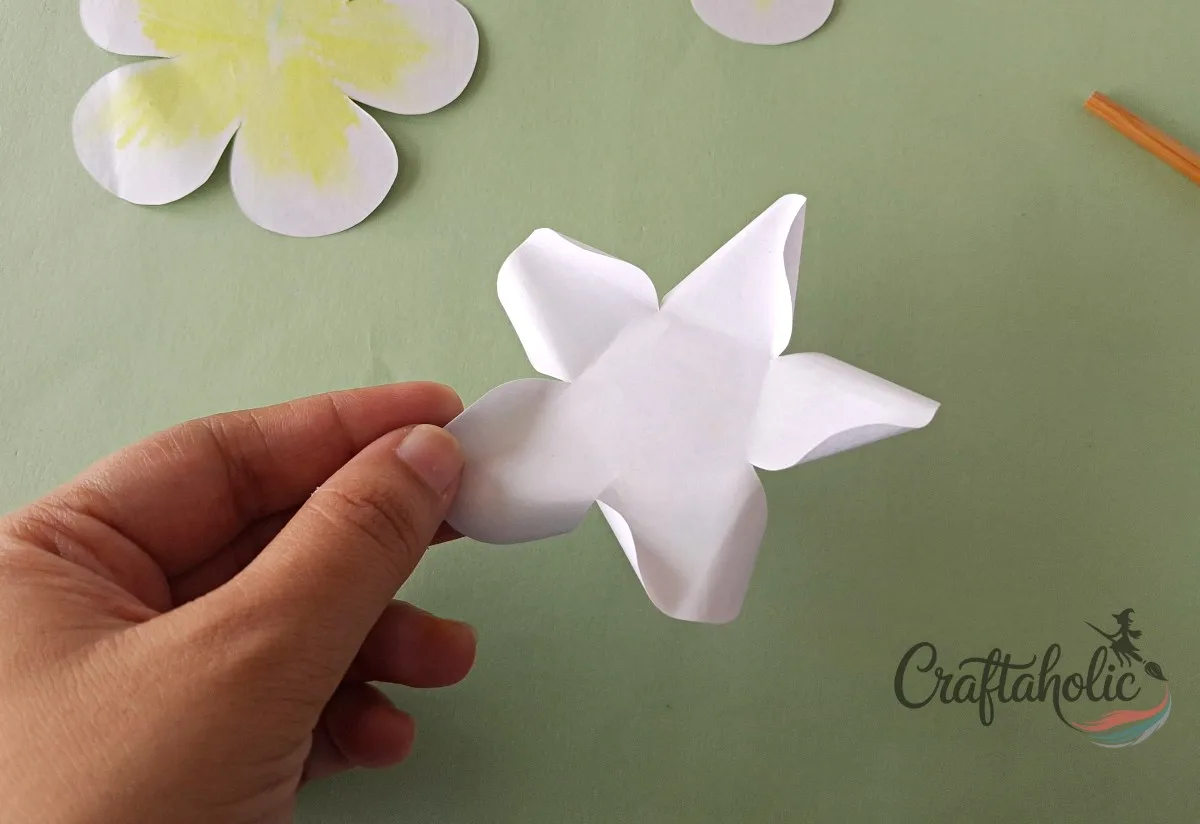
Move to the next petal clockwise and curl it the same way, right side out, left side in, then continue around until all 5 petals on the white cutout are curled. Keeping a consistent direction is what keeps the spiral even once you start overlapping them.
Step 9: Overlap and Glue the Petals Into a Spiral
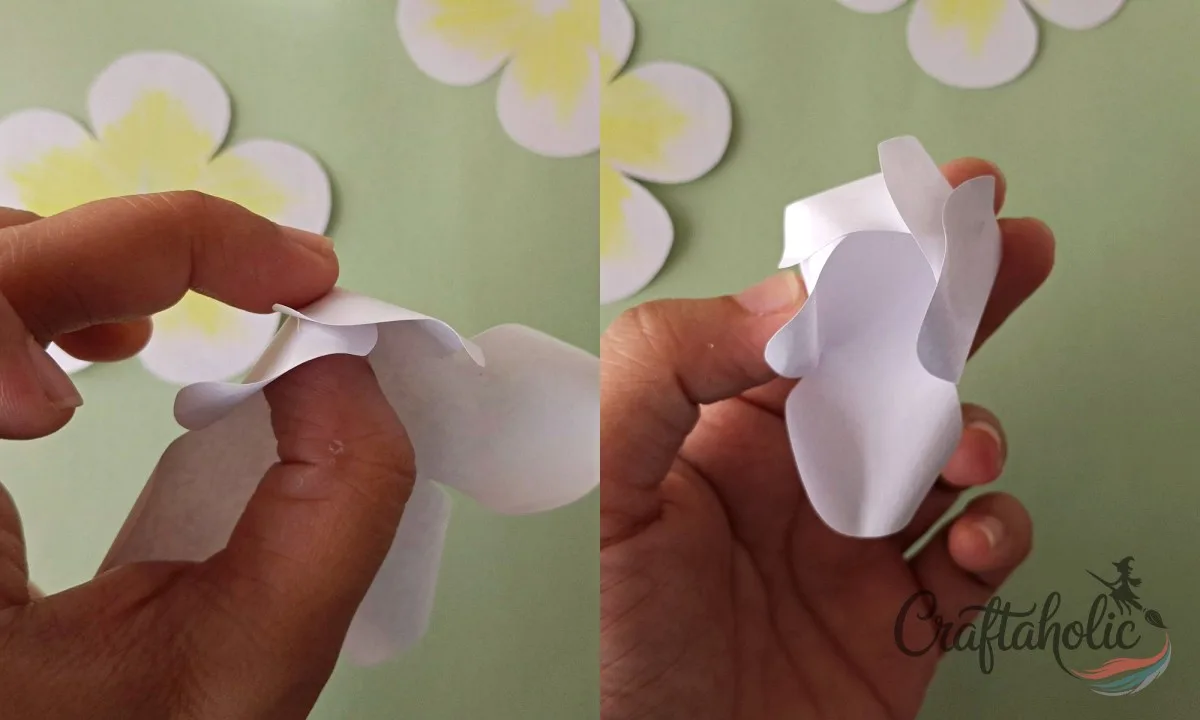
Thread a needle and knot the end, then take your first petal and glue the outside of its curled-in, left edge. Fold the next petal over the glued edge so its curled-out, right side overlaps on top, running your needle through the base of both petals to hold them together as you go. Pull each petal in close to the center as you add it.
Step 10: Close the Spiral by Tucking the Fifth Petal Under the First
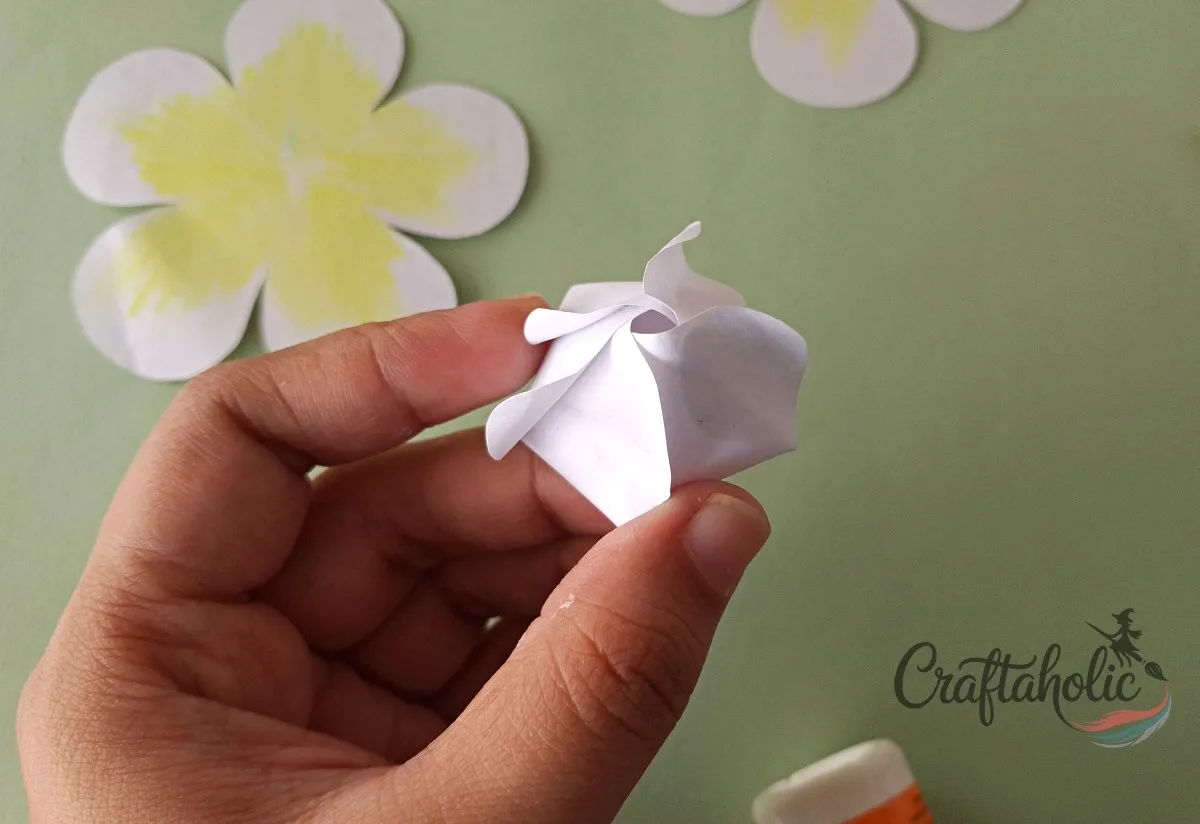
Number the five petals 1 through 5 as you work clockwise, so you can track where you are. Keep stitching and gluing petals 2, 3, and 4 the same way, then tuck petal 5’s curled-in edge underneath petal 1 to close the spiral into a cupped rosette.
Step 11: Curl the Two Yellow-Centered Petal Sets the Same Way
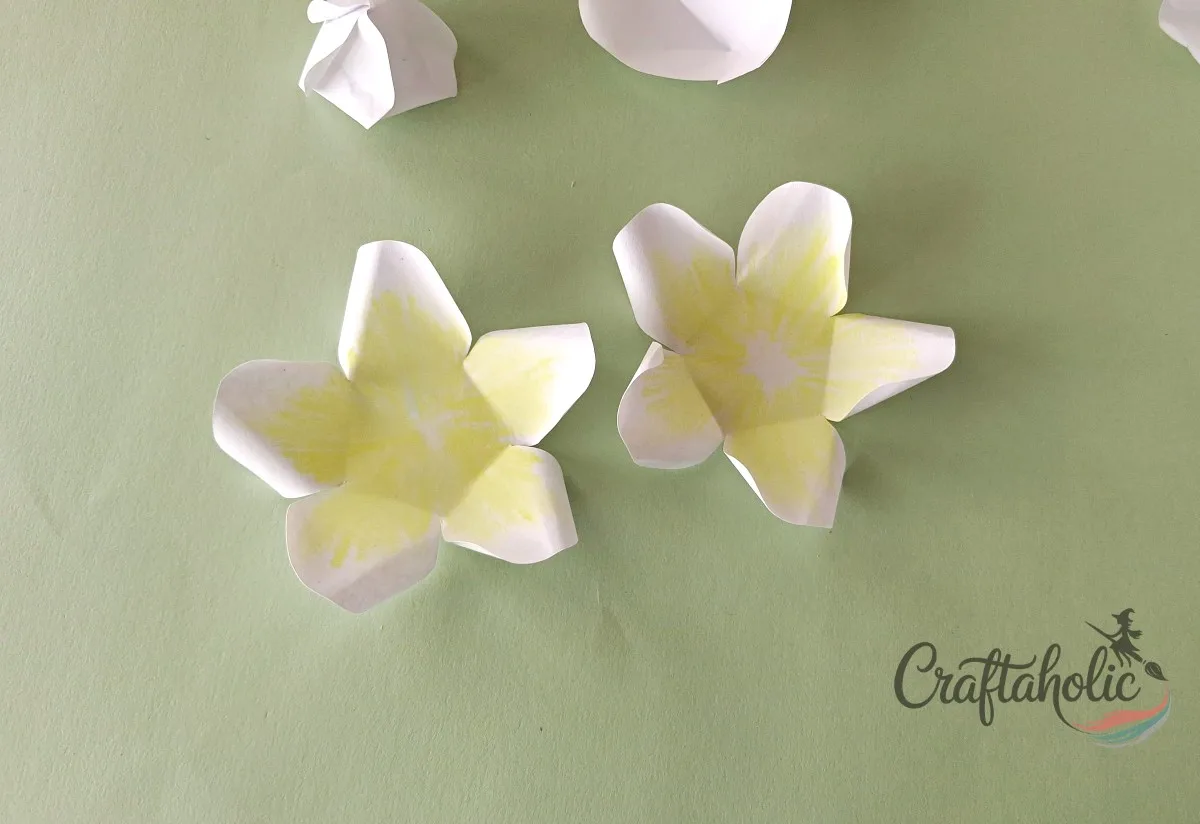
Curl both yellow-centered cutouts petal by petal, right side out and left side in, exactly like you did for the white one. You’ll use these two sets for the outer two layers of the flower’s center.
Step 12: Spiral One Yellow Set, Leaving Room in the Center
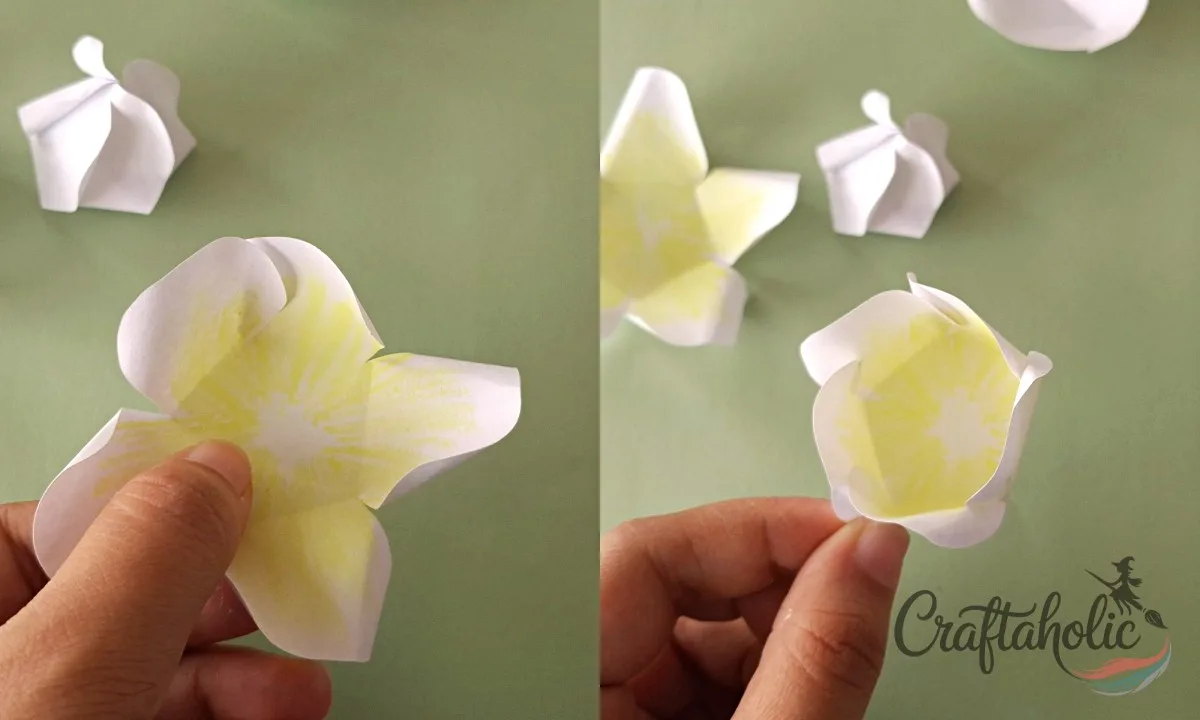
Take one yellow-centered set and thread a needle the same way you did for the white set. Fold up the first petal only about halfway, not all the way to the center, then stitch and glue the next petal the same way, keeping this looser fold going so a small opening stays in the middle instead of closing flat.
Step 13: Tie Off the Spiral, Leaving the Topper Gap Open
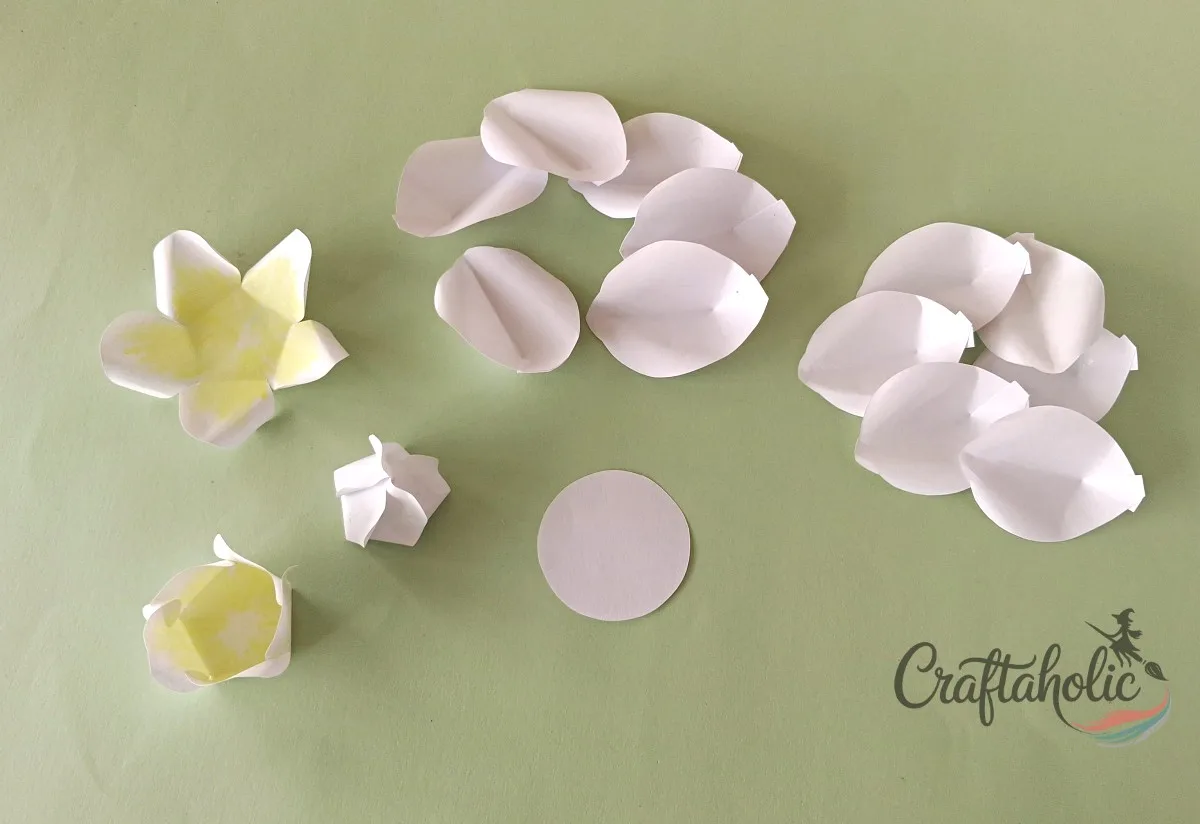
As you stitch your way back around to the first petal, leave a small gap open there, that’s the opening the topper will sit in later. Tie off the thread with 2 knots around the last stitch to hold the spiral, then trim the extra thread close to the knot.
Step 14: Nest the Three Petal Sets Into the Flower’s Center
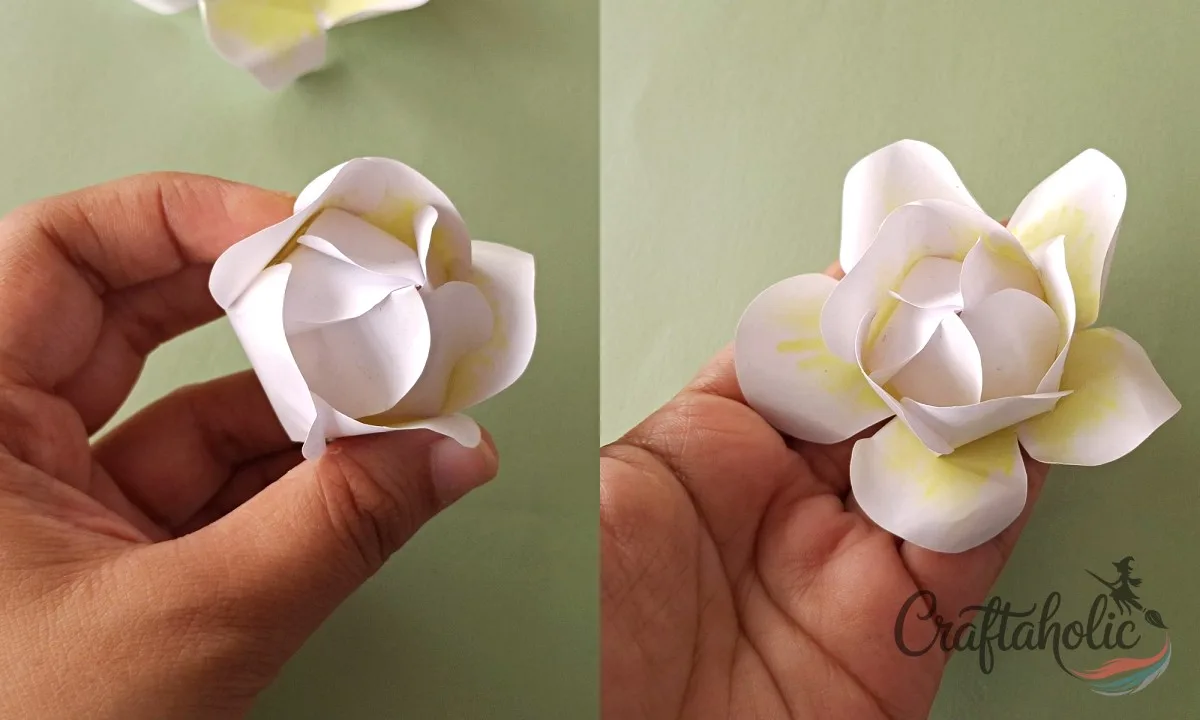
Glue the white petal set inside the second yellow-centered set, then glue that pair inside the last yellow-centered set. Nesting all three like this, white innermost, is what gives the finished center its warm gradient. The flower’s center is now ready.
Step 15: Cut the Flower Base
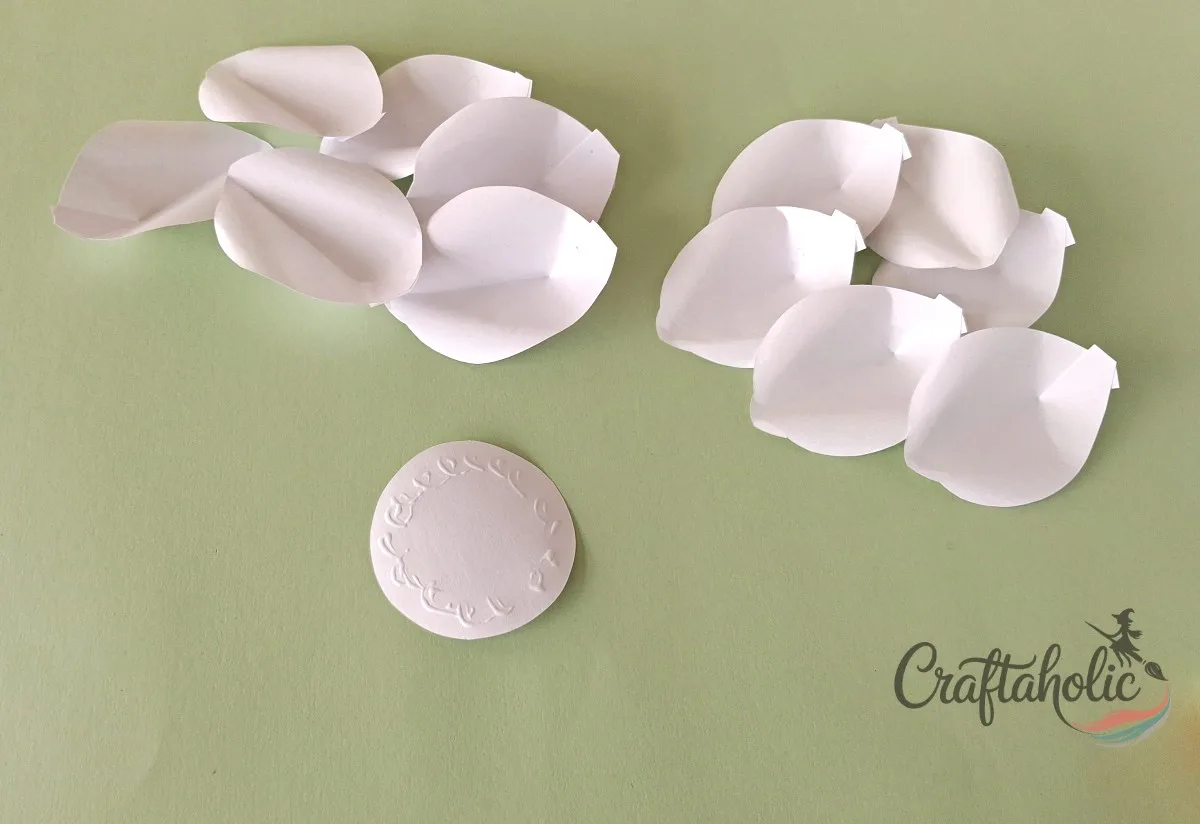
Cut the base piece out of white paper using the template. This disc is what every petal layer and the finished center will glue onto.
Step 16: Glue the First Layer of Large Petals to the Base
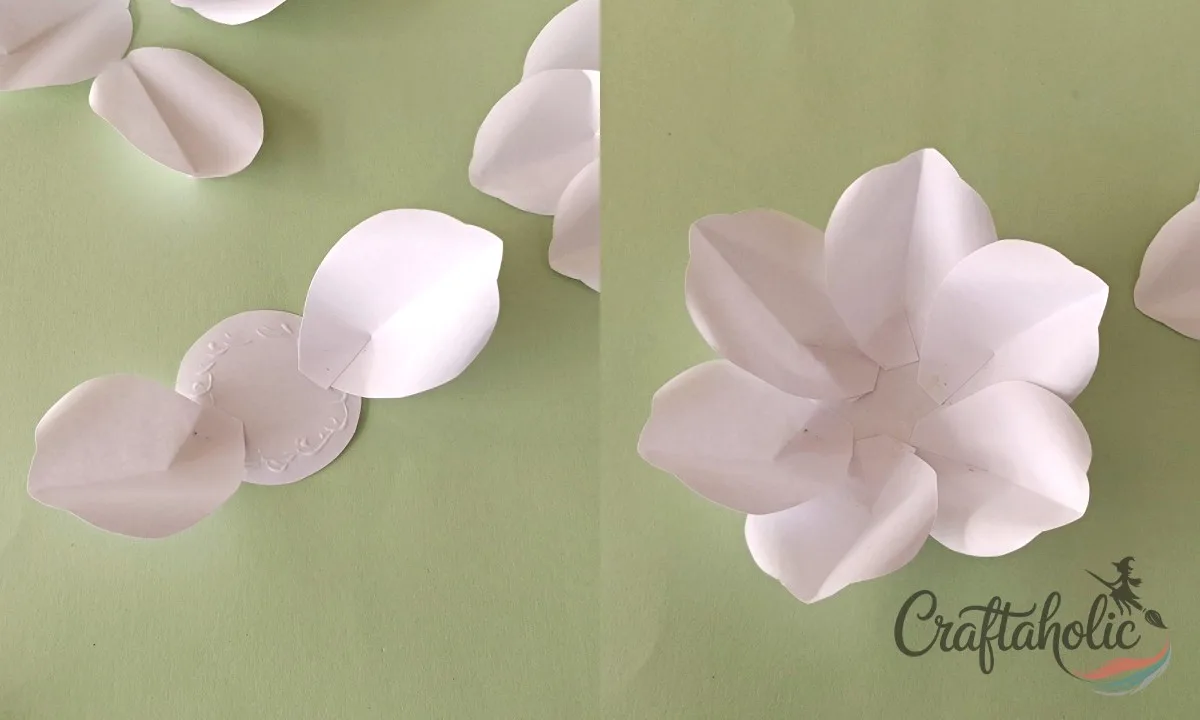
Start with your 6 large petals. Glue one near the edge of the base, then glue a second directly opposite it. Fill the two gaps on either side with a large petal each, then continue around gluing the remaining large petals evenly spaced until the whole first layer is in place.
Step 17: Add the Medium Petals as the Second Layer
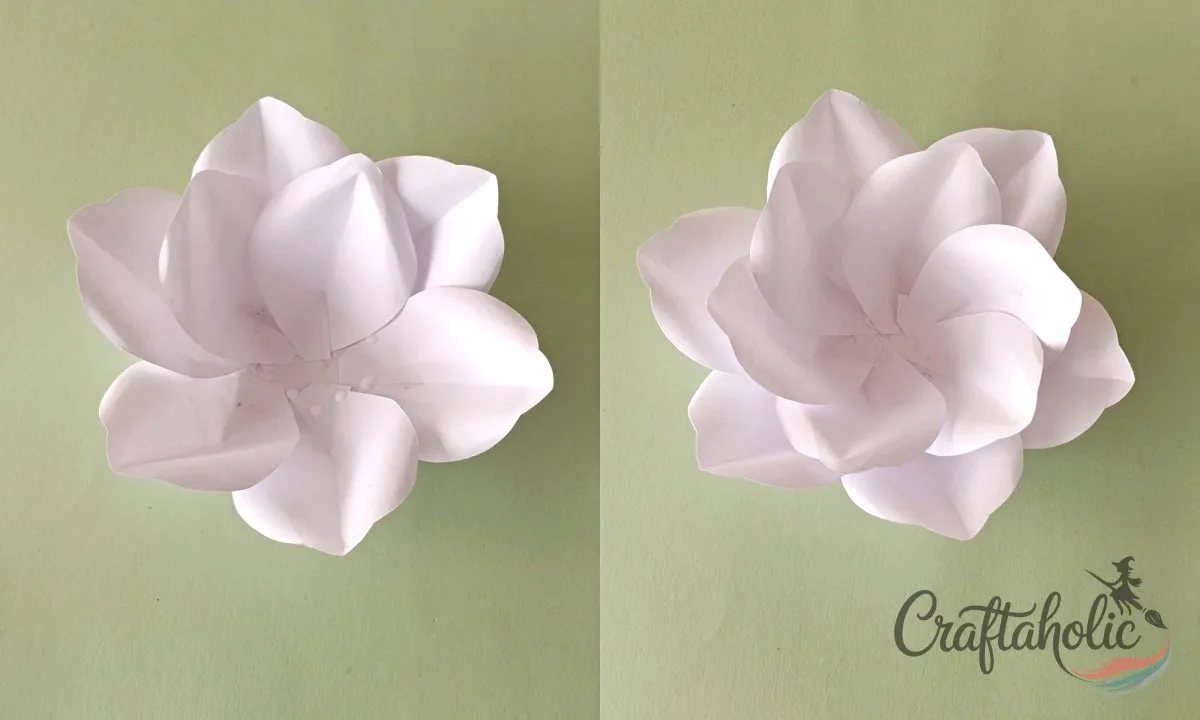
Once the large-petal layer is dry, glue the 6 medium petals over it as the next layer. Overlap them evenly between the large petals below, and leave an open circle in the middle of the base for the center piece.
Step 18: Glue the Flower Center Into Place
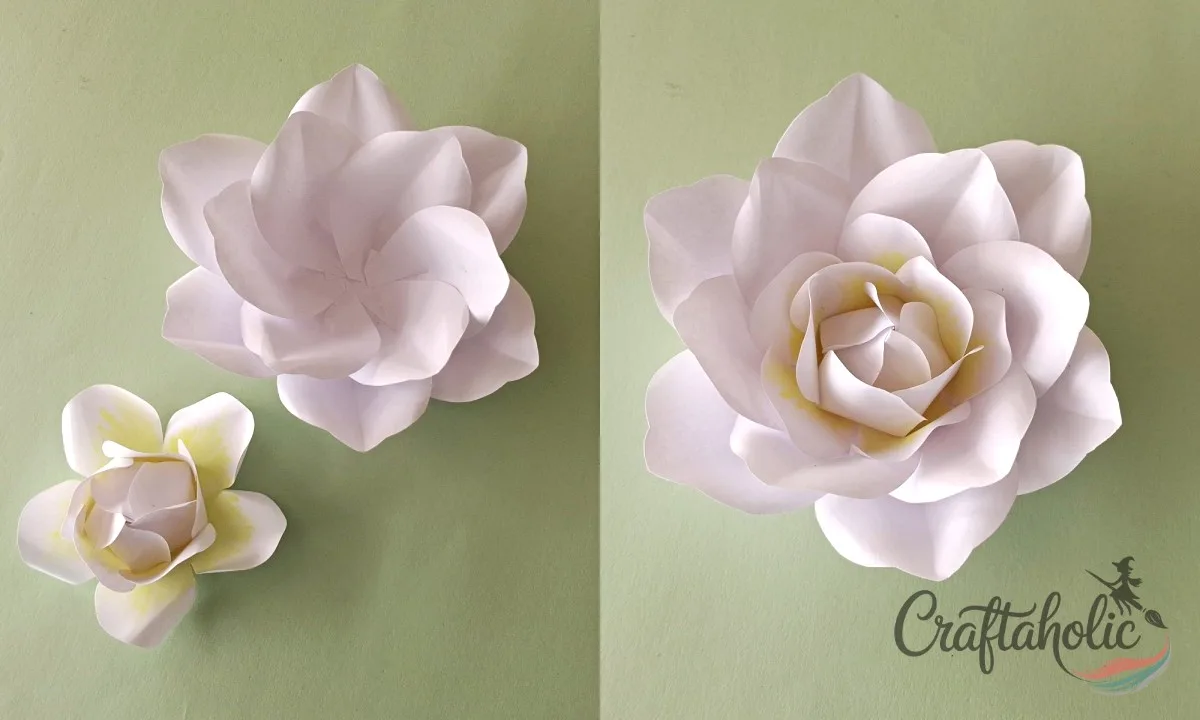
Let the medium-petal layer dry fully, then glue the finished center piece into the open space in the middle of the base. This is the moment the gardenia actually looks like a flower.
Step 19: Shade the Leaf Cutouts for Depth
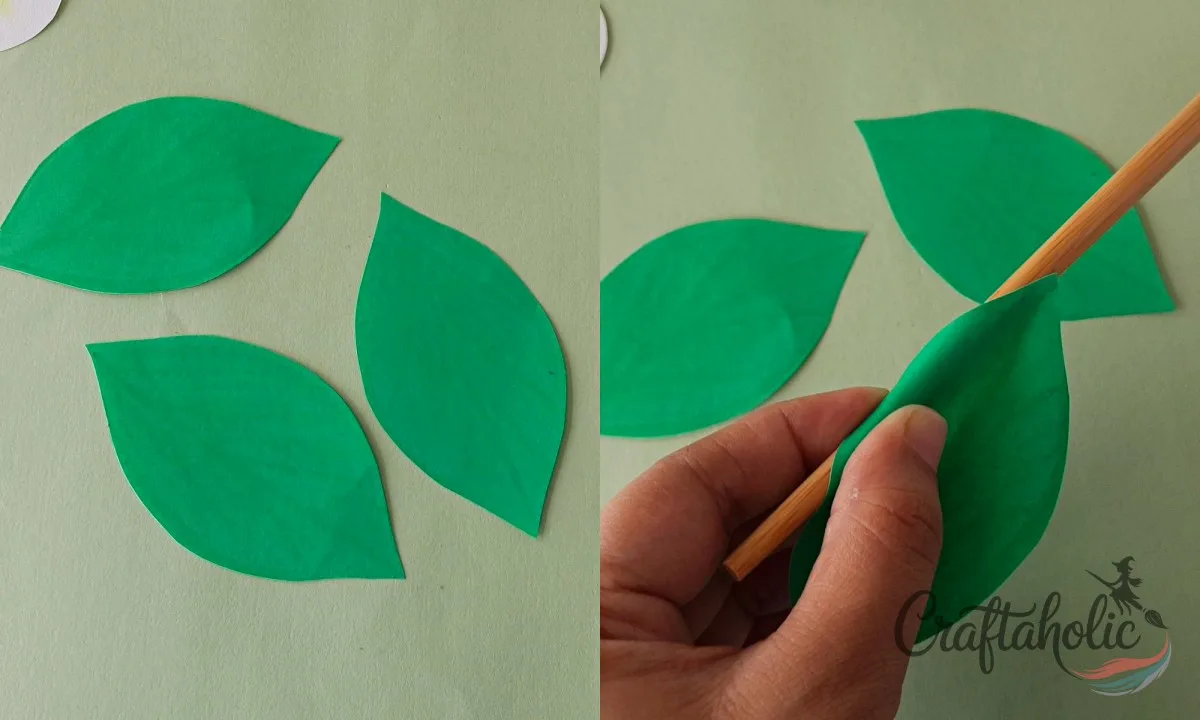
Color the leaves with a darker shade of green crayon, adding shadow and texture rather than a flat, even fill. That variation is what keeps the leaves from reading as plain green paper.
Step 20: Curl the Leaf Edges
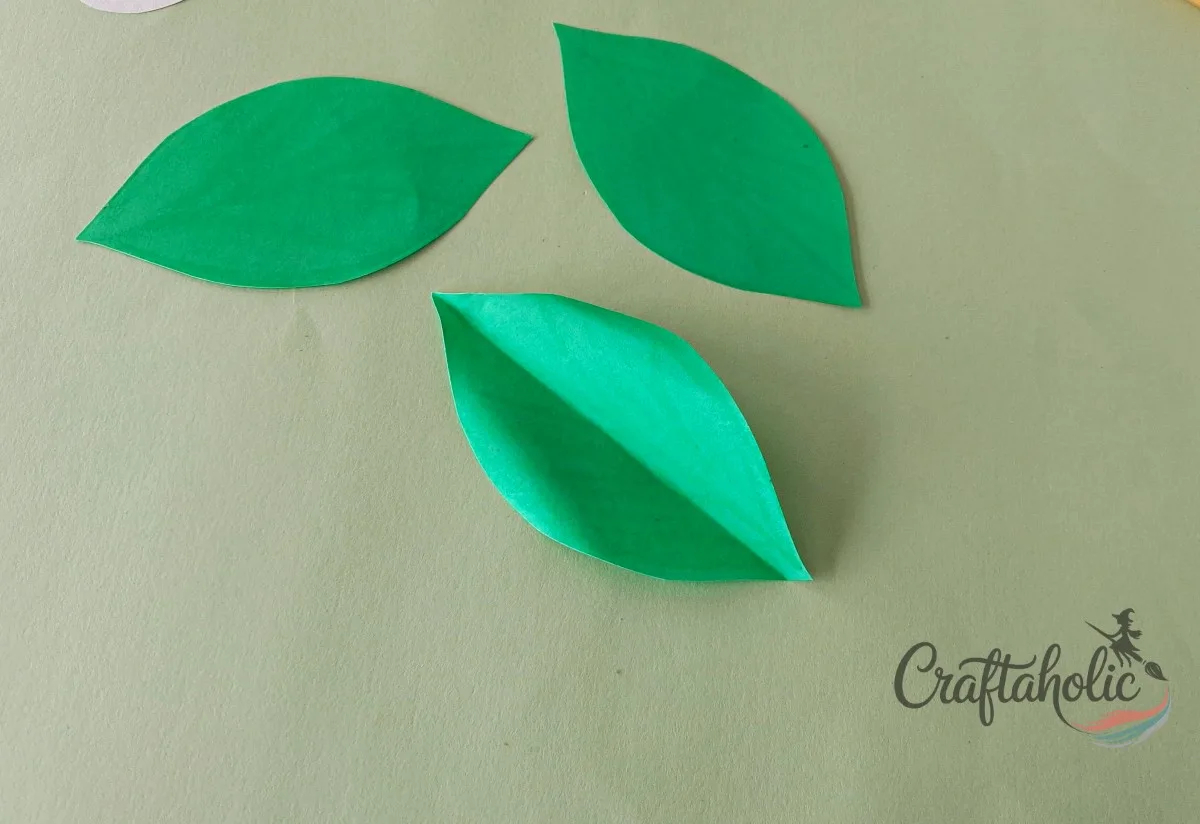
Run the round craft stick along the edges of each leaf to curl them, the same way you curled the petals. A slight curl keeps the leaves from lying stiff and flat against the finished flower.
Step 21: Glue the Leaves Onto the Finished Flower
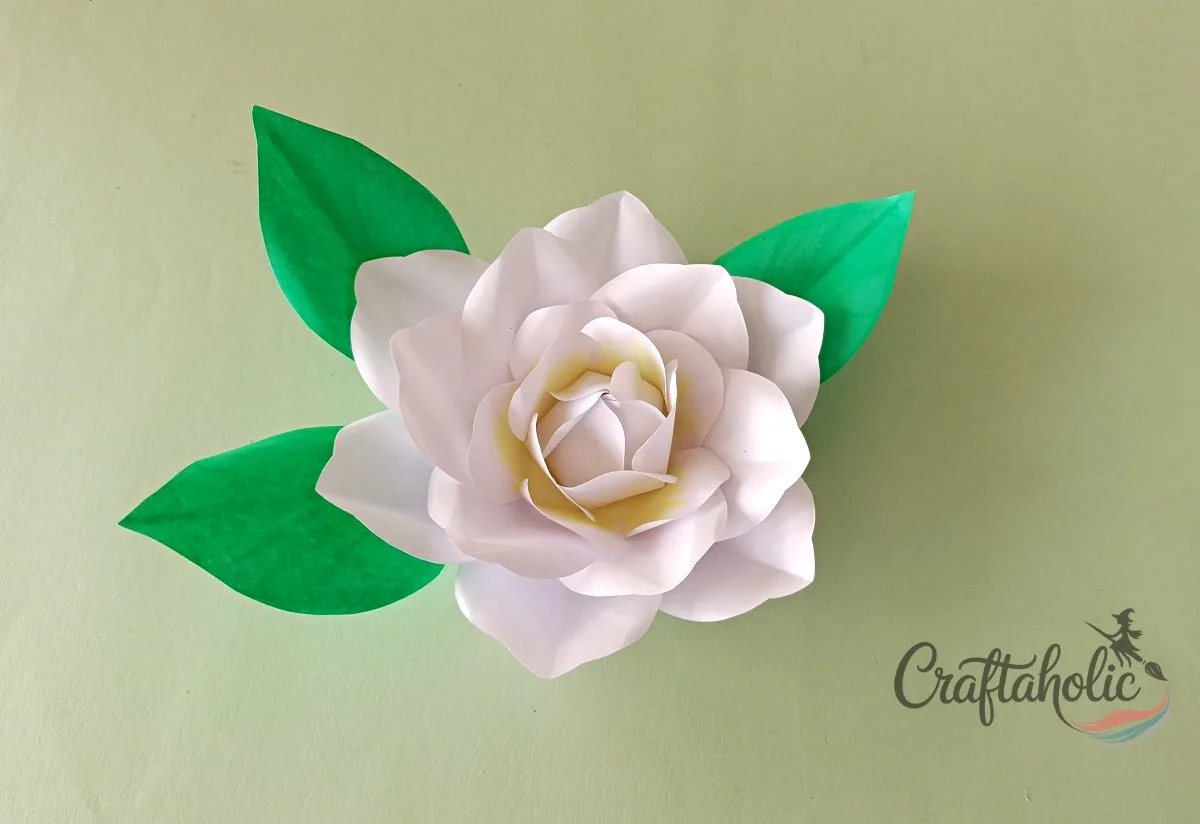
Glue the leaves to the underside of the base, or tucked behind the large petals, so they peek out around the finished bloom. Your realistic paper gardenia flower is complete.
Share it in "I Made It" and let us cheer you on.
Post your finished make in "I Made It" so the community can celebrate it with you. Cheer on other makers too. Each month, the most loved craft wins 1 year of Craftaholic Premium ($59)
Tips for a More Realistic Paper Gardenia
- Use two slightly different whites across the petal layers if you have them on hand. Real gardenia petals are rarely a single flat white.
- Curl every petal before you glue or stitch anything. It’s much harder to shape a petal once it’s already fixed to the base or spiraled into the center.
- If a petal looks flat after curling, run the craft stick over it again with a light touch. Pressing hard creases the paper instead of curling it.
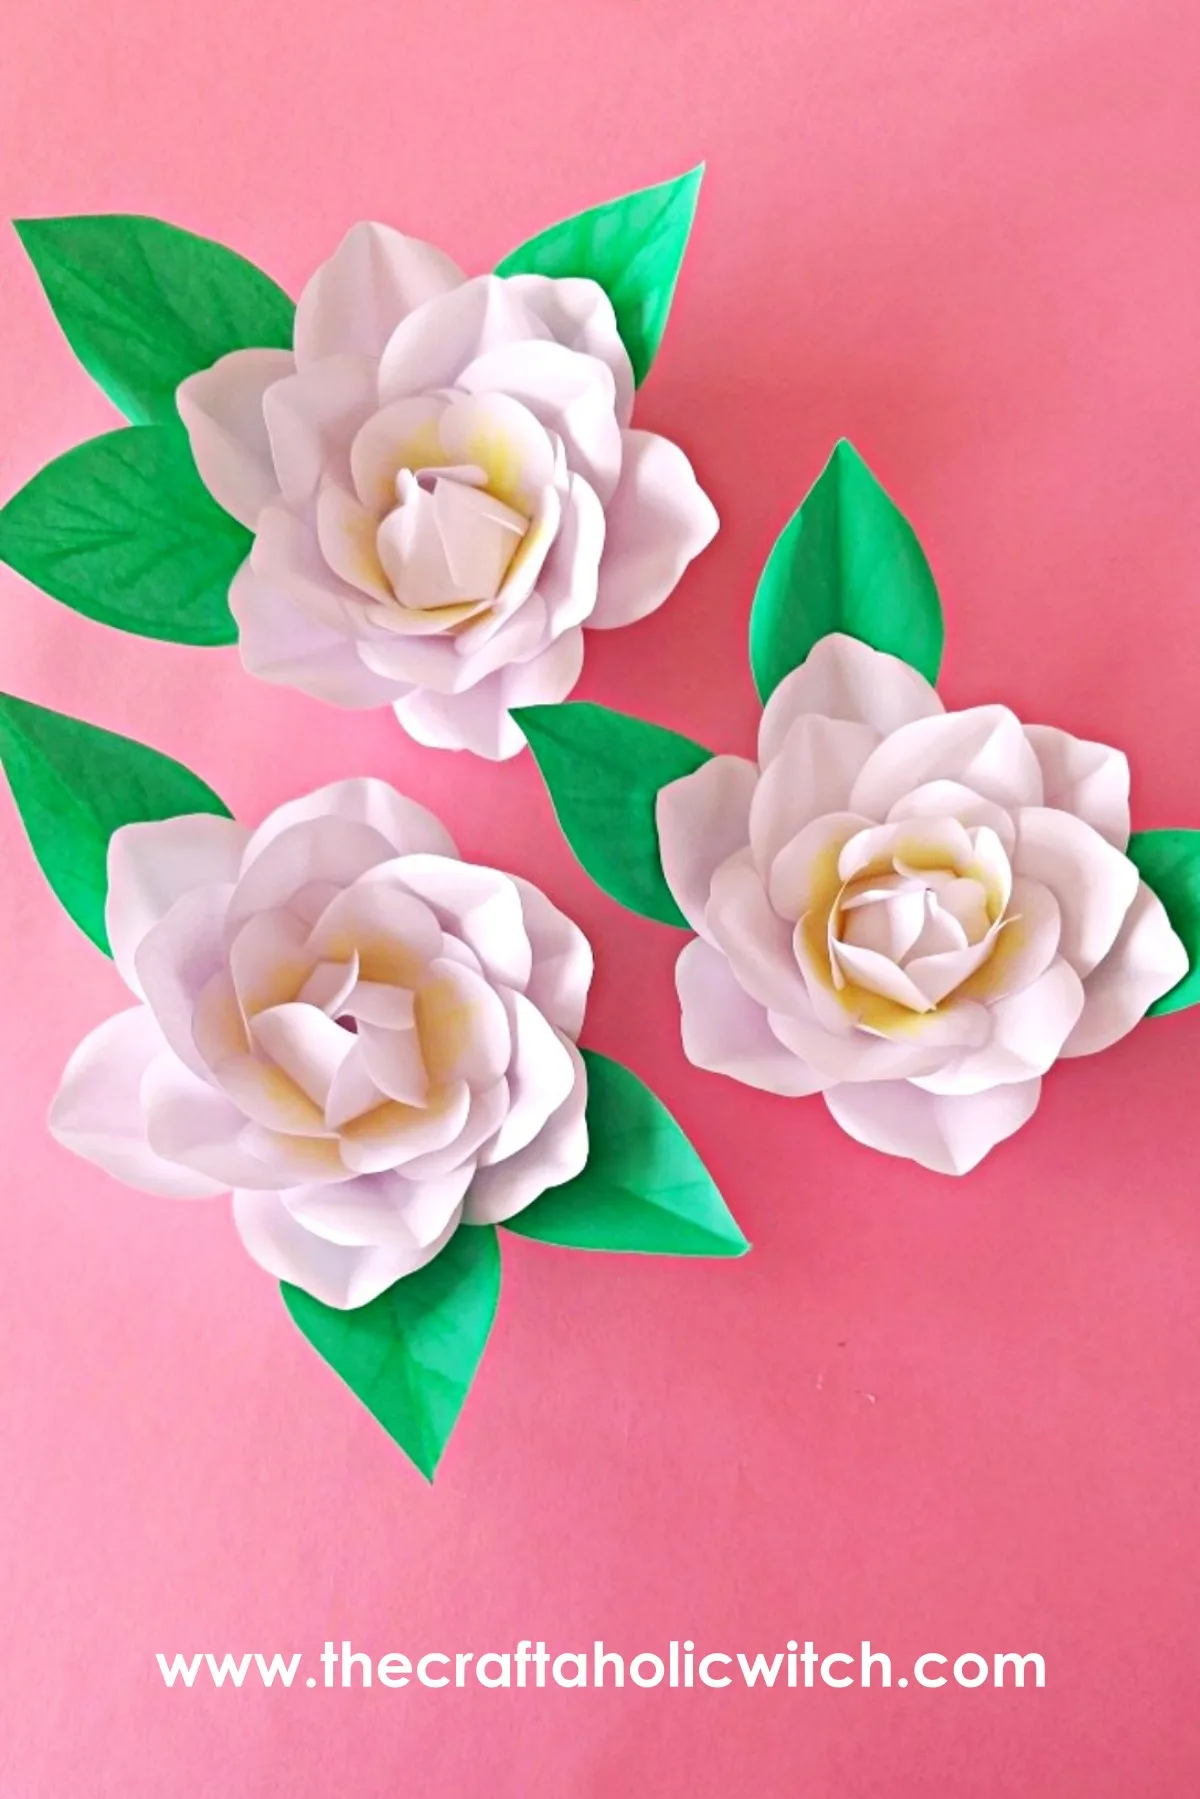
- Make a few flowers at once and pair them with the paper leaves for a fuller cluster, like the finished photos on this page.
Frequently Asked Questions
Is this paper gardenia flower tutorial beginner-friendly?
It’s an intermediate project. None of the individual folds or curls are hard on their own, but you’re preparing 15 separate petals plus a stitched center before you start assembling, so it takes patience more than skill. Budget extra time for your first flower if you’ve never curled paper petals before.
What kind of paper works best for a realistic paper gardenia?
Use a medium thick craft paper rather than regular printer paper or thin tissue. It’s sturdy enough to hold a curl and a crease without tearing at the slit, but still thin enough to shape easily with a craft stick.
How long does it take to make one paper gardenia flower?
Plan on about 45 to 60 minutes for one flower once you’re familiar with the steps, most of it spent curling and shaping the 15 individual petals. Cutting all the patterns ahead of time speeds up the rest of the process.
Can I use cardstock or construction paper instead?
Cardstock is usually too stiff to curl smoothly around a craft stick and can crack at the slit instead of overlapping cleanly. Construction paper works in a pinch but tears more easily at the slit and stitch points, so a medium thick craft paper is still the safer choice.
Why do my petals look flat instead of realistic?
Flat petals almost always mean the curl step got rushed or skipped. Go back over the petal edges with the round craft stick, working slowly, and add the vertical center crease if you missed it. That crease and curl combination is what gives the petal its dimension.
Can I make the flower smaller or larger?
Yes. Scale the template up or down before you print it, keeping all the pieces proportional to each other. A smaller flower curls a little faster since there’s less paper to shape, while a larger one holds its curl best with a slightly heavier paper.
Browse more paper crafts tutorials, or keep the bouquet going with:
More Paper Flower Tutorials
Share your realistic paper gardenia flower in the I Made It space inside Craftaholic Community. The most-loved post each month wins a one year free Premium membership.
0 Comments
Join the conversation
Log in to your Craftaholic Community account to comment, ask questions, and cheer on fellow makers.
Log in to comment