

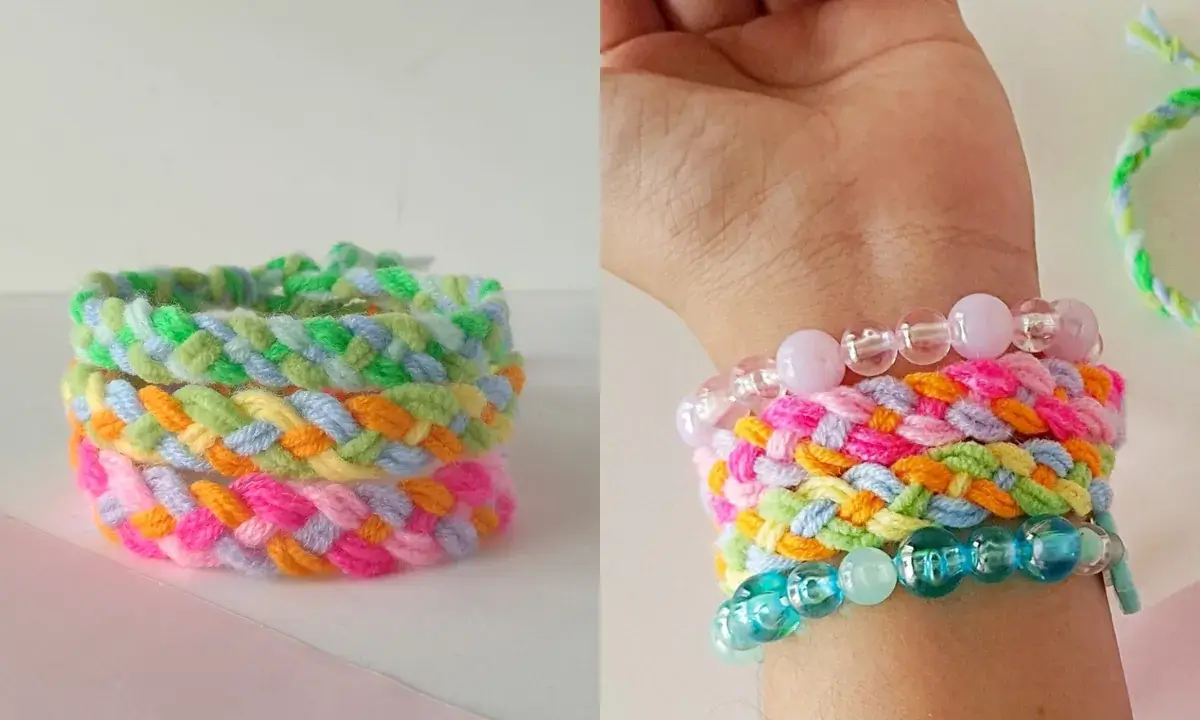
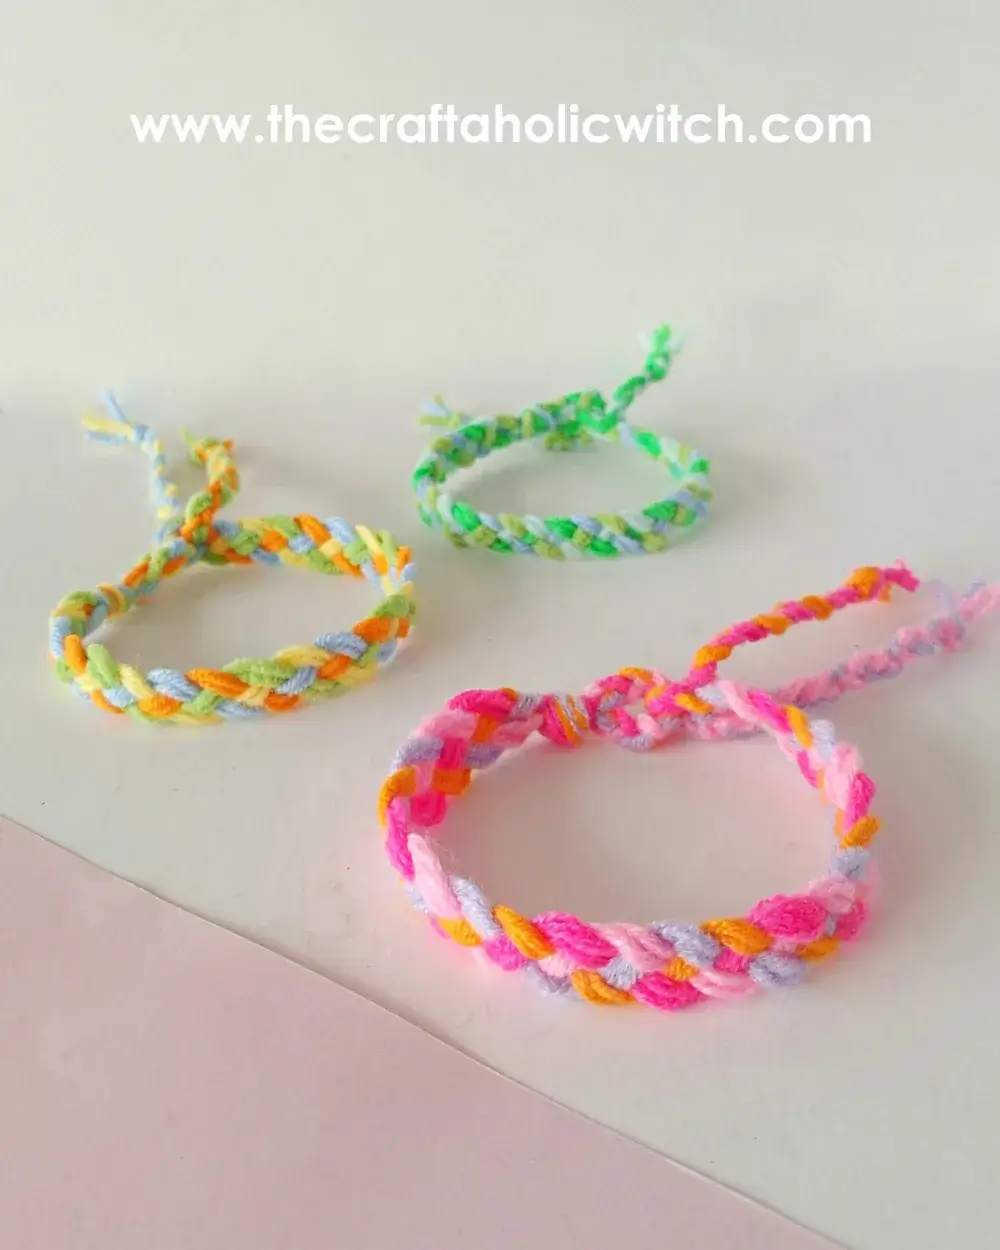
Some things do not need an explanation. You make two, you keep one, you give one. That is the whole idea behind a braided friendship bracelet, and it is part of the A Gift for Every Friend series, five handmade Friendship Day projects where each tutorial makes a complete gift for a different kind of friend. This one is the classic, and it is the easiest project in the whole series.
All you need is yarn in a few colors, a bit of tape, and scissors. You braid a small loop at one end, work a simple four-strand braid down the length, and finish with two little ties that thread through the loop to close it. No tools, no glue, and no heat, which is exactly why this braided friendship bracelet is such a great project for kids to make and swap at school.
Want more Friendship Day ideas? This series is shared through Create & Celebrate, where we release craft series for 15 occasions throughout the year. This bracelet is also part of the Friendship Day Craft Bundle, and if you love this technique, try the slightly fancier chevron friendship bracelet next.
Braided Friendship Bracelet at a Glance
- Difficulty: Beginner (kid-friendly)
- Time: 30 minutes
- Cost: Under $2
- Ages: 6+ (no tools, glue, or heat)
- Best for: Friendship Day, classroom swaps, party activities
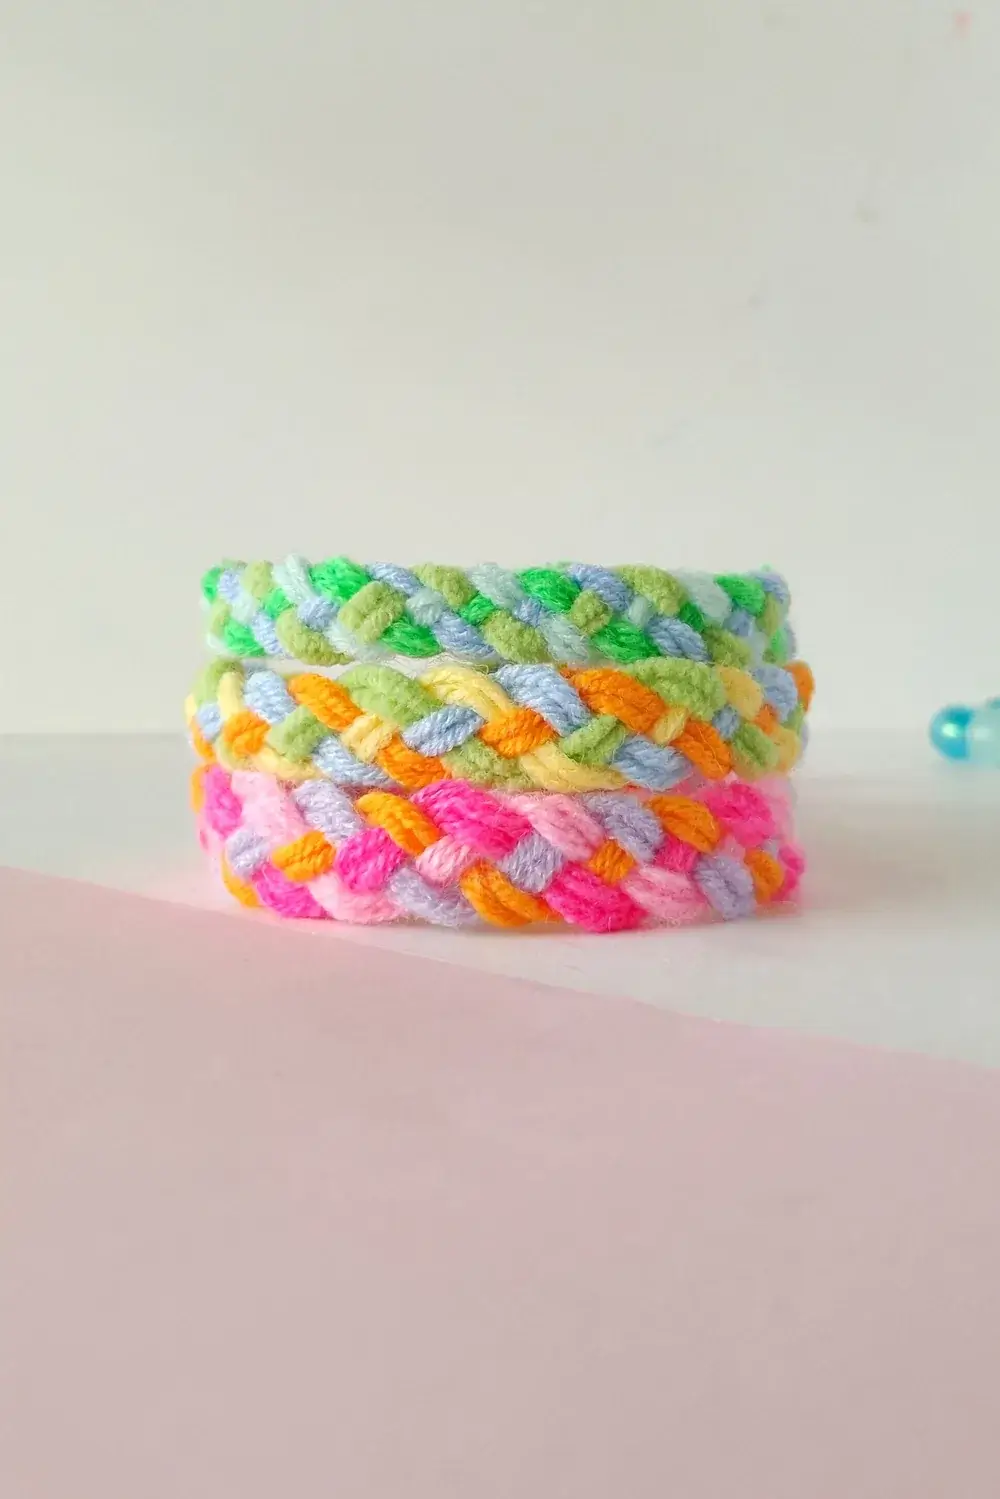
What You Need to Make a Braided Friendship Bracelet
Materials
- Yarn in 4 colors. Pick four different colors for a bright, clearly patterned bracelet. Use your friend’s favorite colors to make it personal.
Tools
- Clear tape. To anchor the loop to your work surface so you can braid with both hands.
- Scissors. For cutting the strands and trimming the ends.
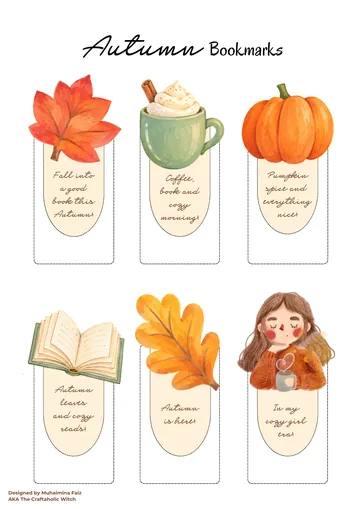
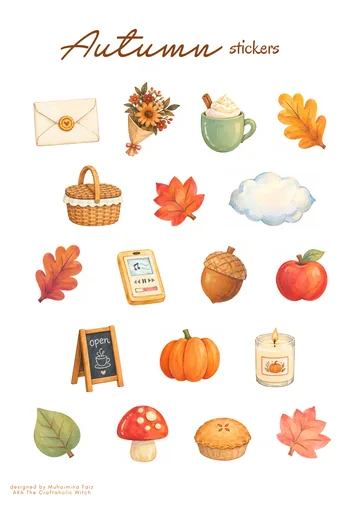
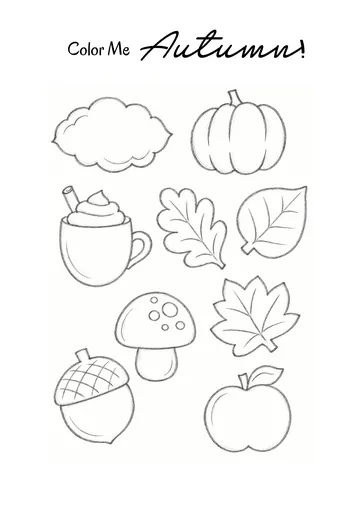
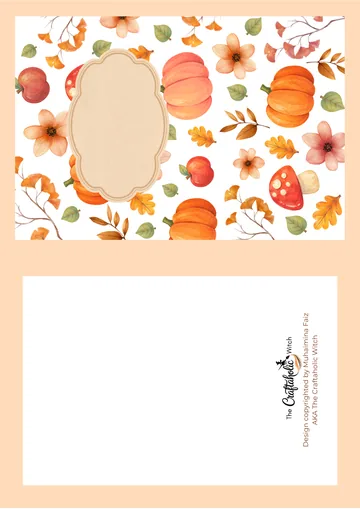
Free Autumn Bucket List + Printable Journal Pack
Everything you need for a cozy autumn, ready to print at home. Join the community for free and download it in one click.
- 13-page printable PDF
- 18 stickers and 6 bookmarks
- Journal pages and recipe cards
- Phone and computer wallpapers
How to Make a Braided Friendship Bracelet
Step 1: Cut Four Strands of Yarn
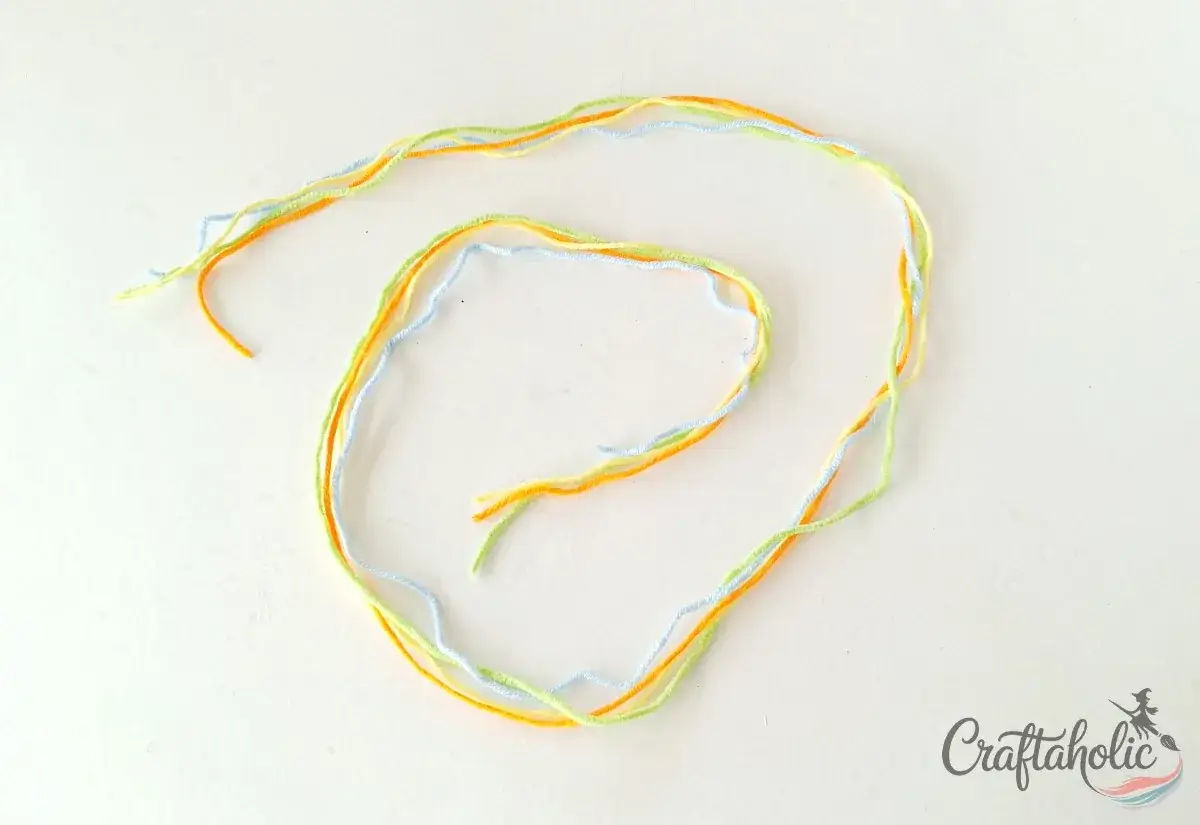
Choose four different yarn colors so the braid pattern shows up clearly. Cut one long strand of each color, all the same length. We cut ours to about 36 inches (90 cm). Then hold all four strands together in a bundle.
Tip: Cut a little long on purpose. You can always trim the extra at the end, but you cannot add length once you start braiding.
Step 2: Fold the Bundle in Half
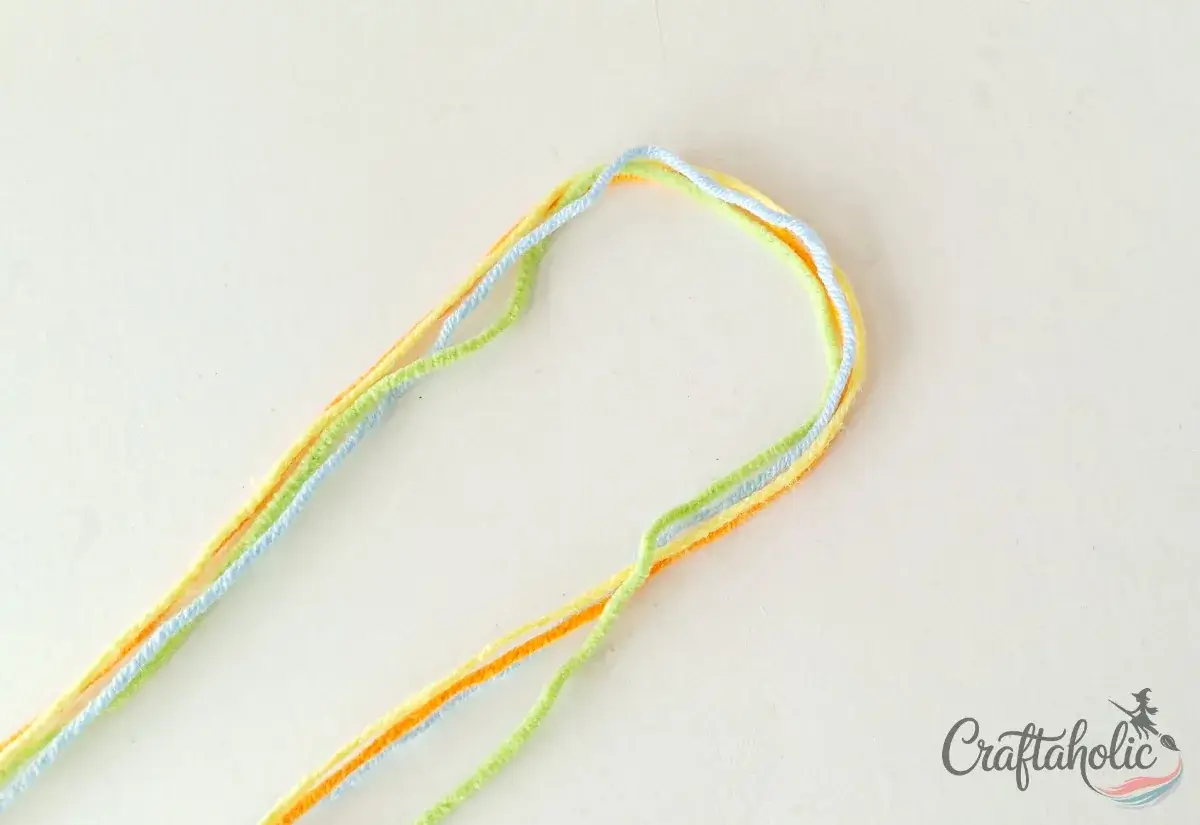
Holding all four strands together, fold the bundle in half to find its center. Pinch about 2 inches on either side of that center point. This middle section is where you will build the closure loop.
Step 3: Braid a Short Section at the Center
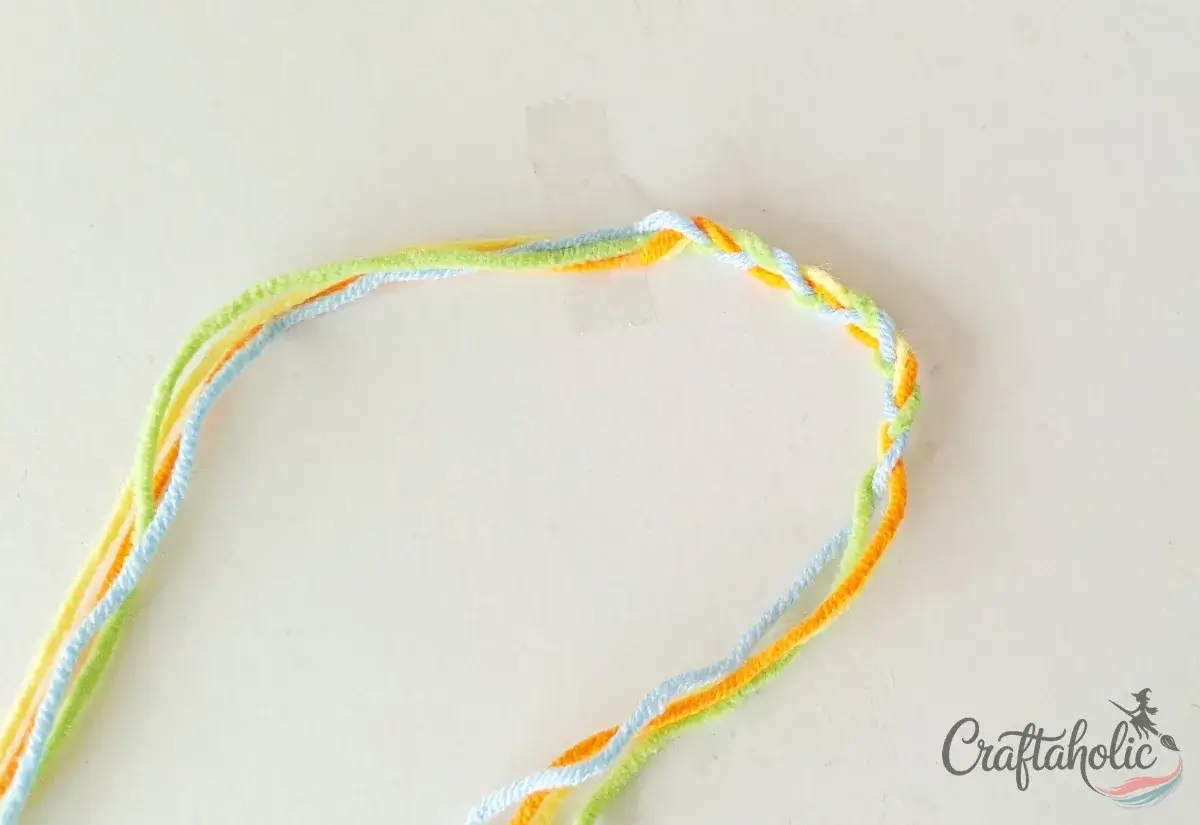
Pinch the bundle a few centimeters to one side of the center, then braid about 2 inches using the four strands. Keep this braid even and snug so the loop holds its shape.
Step 4: Bend the Braid Into a Loop
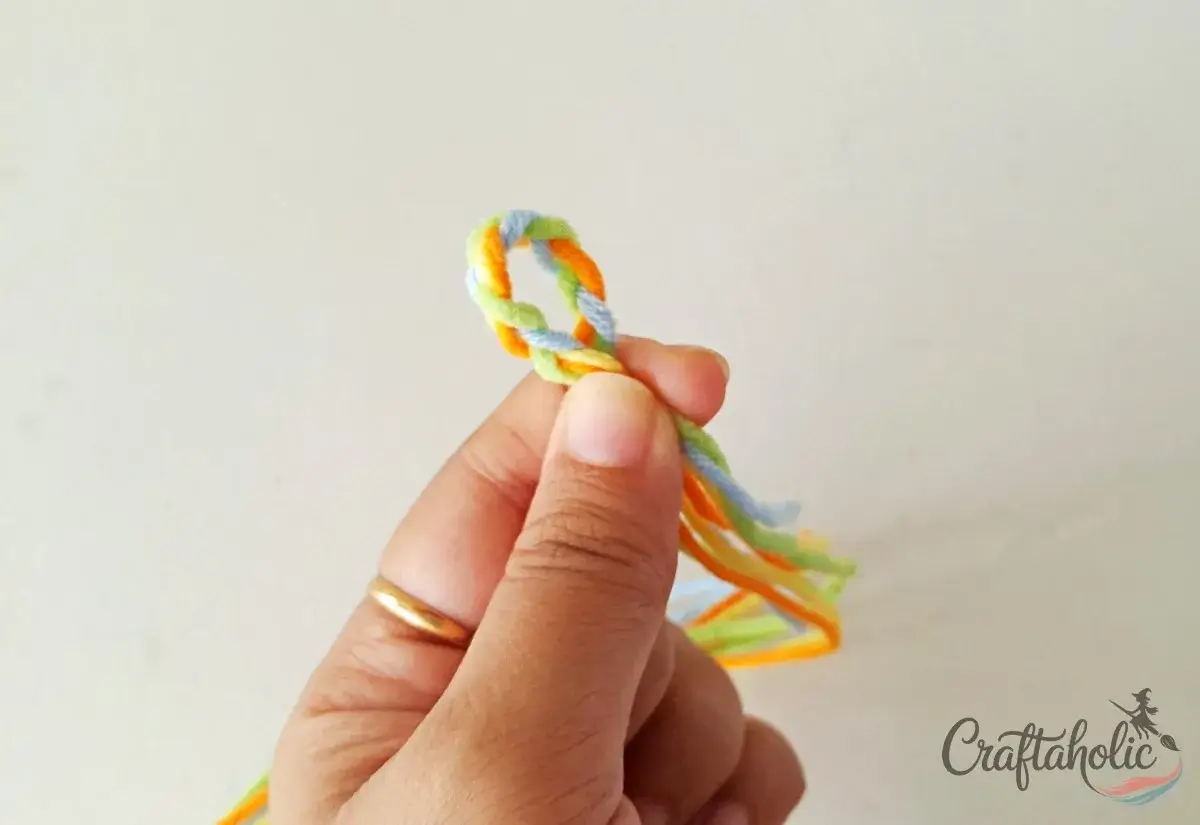
Hold both ends of the braided section and bring them together so the braid bows into a small loop. This loop is what the bracelet will hook onto to fasten.
Step 5: Knot the Base of the Loop
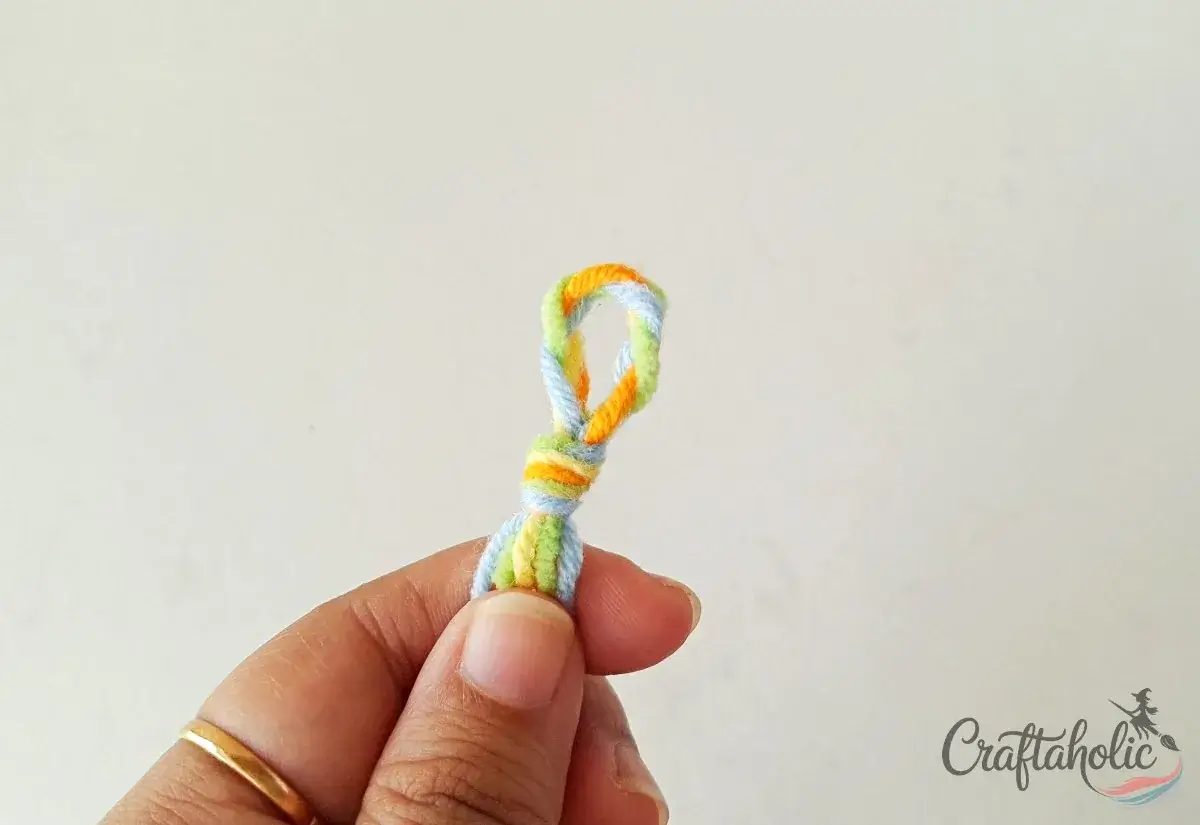
Tie a firm knot right where the two ends of the braided section meet, locking the loop closed. You now have a neat loop with all eight strand-ends hanging below it.
Note: This loop is the “buttonhole” end of your closure, so pull the knot tight. A loose loop can stretch out of shape.
Step 6: Tape the Loop to Your Work Surface
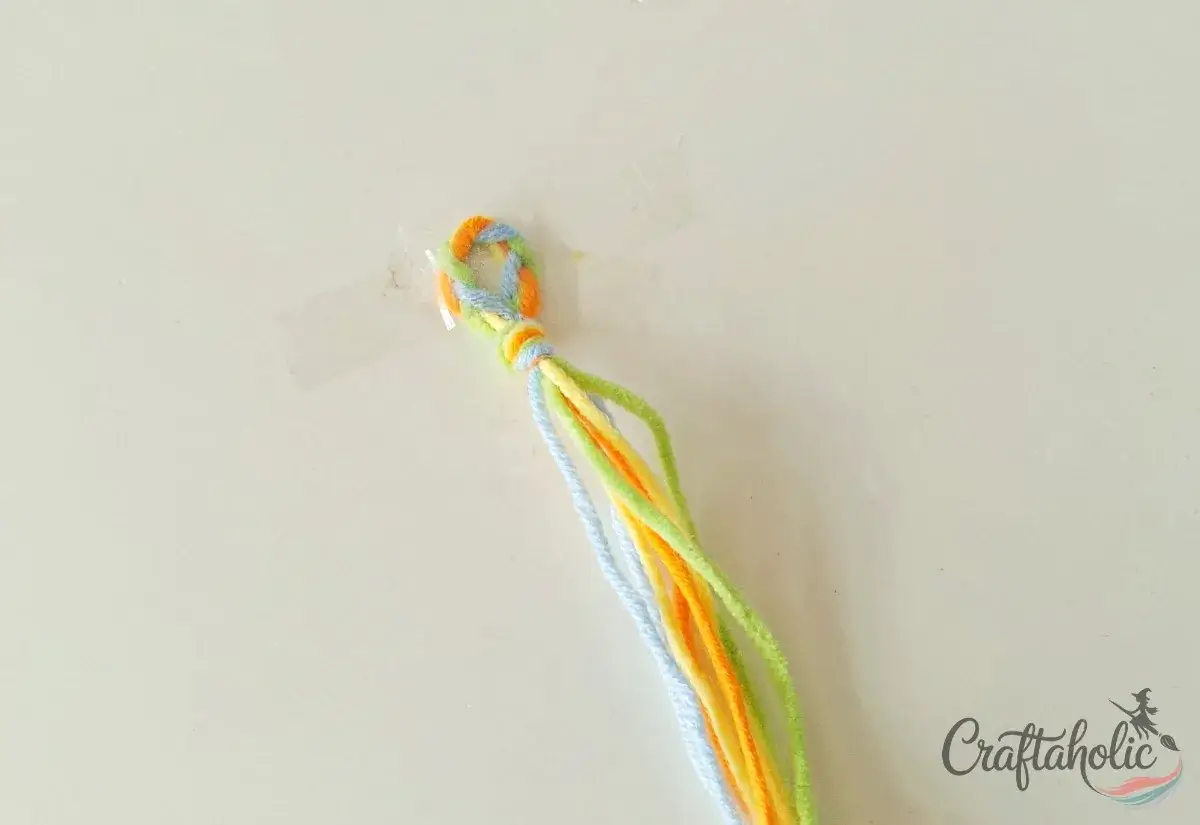
Press a piece of clear tape over the loop to anchor it flat to a table. A secured anchor lets you pull against it and keep even tension, which is the secret to a tidy braid.
Step 7: Split the Strands Into Four Groups
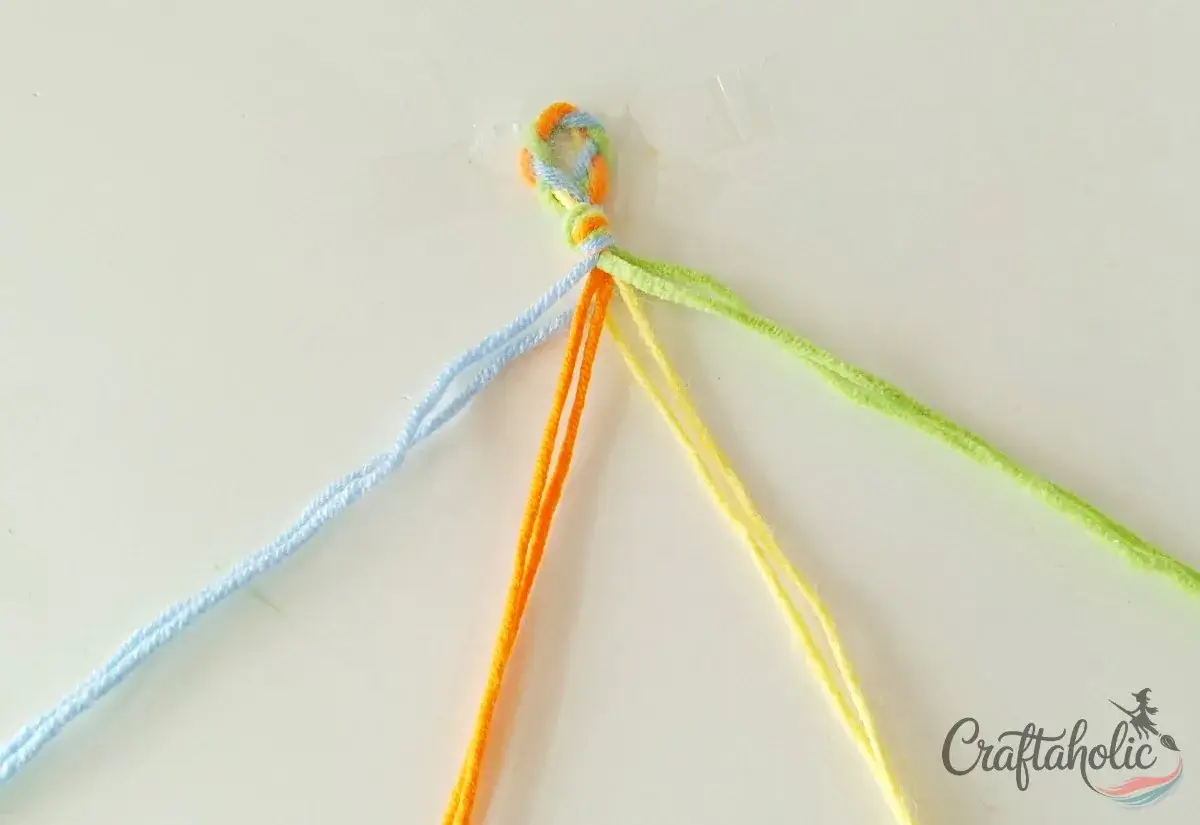
Below the knot you have eight strands. Two of each color. Pair them by color into four groups and lay them out in order from left to right. Think of them as groups 1, 2, 3, and 4; you will refer to those positions as you braid.
Step 8: Start the Four-Strand Braid
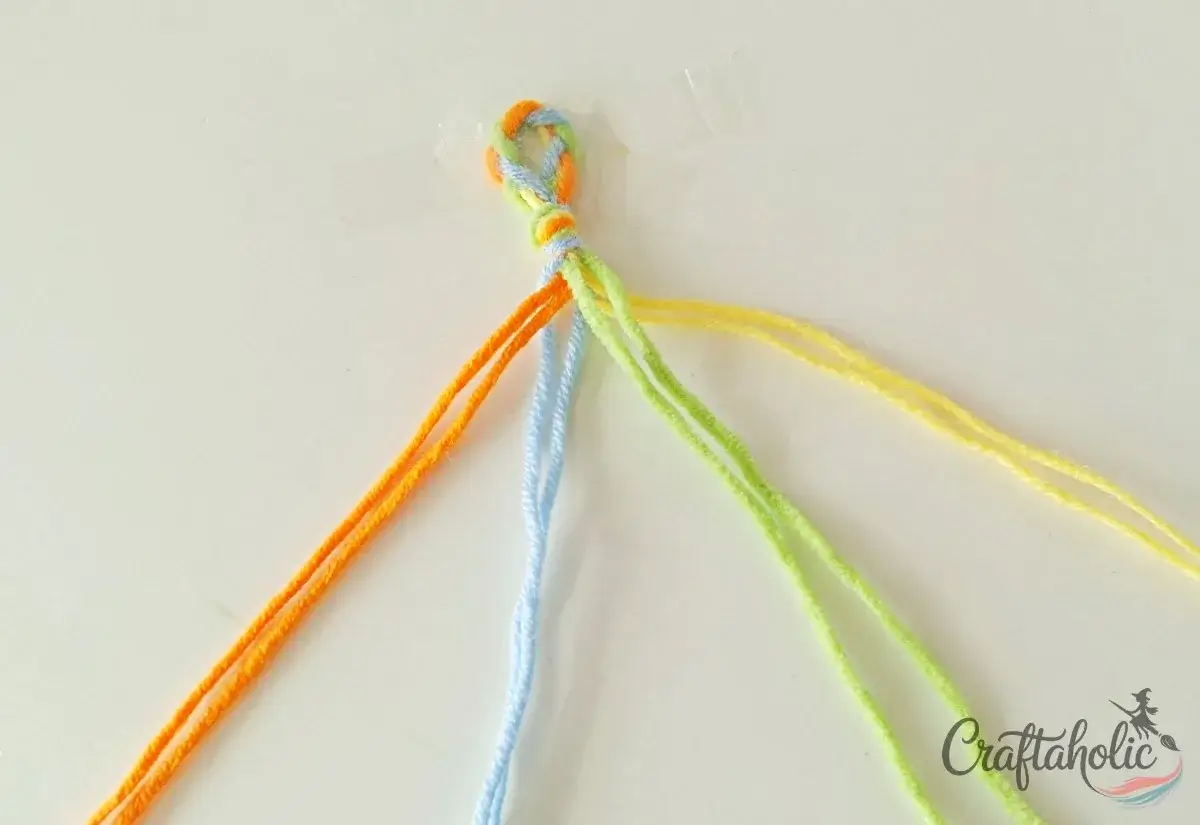
Working from the right, cross the far-right group (4) over the group beside it (3) toward the middle. Then cross the next right-hand group over toward the left. Pull gently to set each cross in place.
Tip: Keep each cross snug against the one before it so no gaps show in the braid.
Step 9: Cross the Two Middle Groups
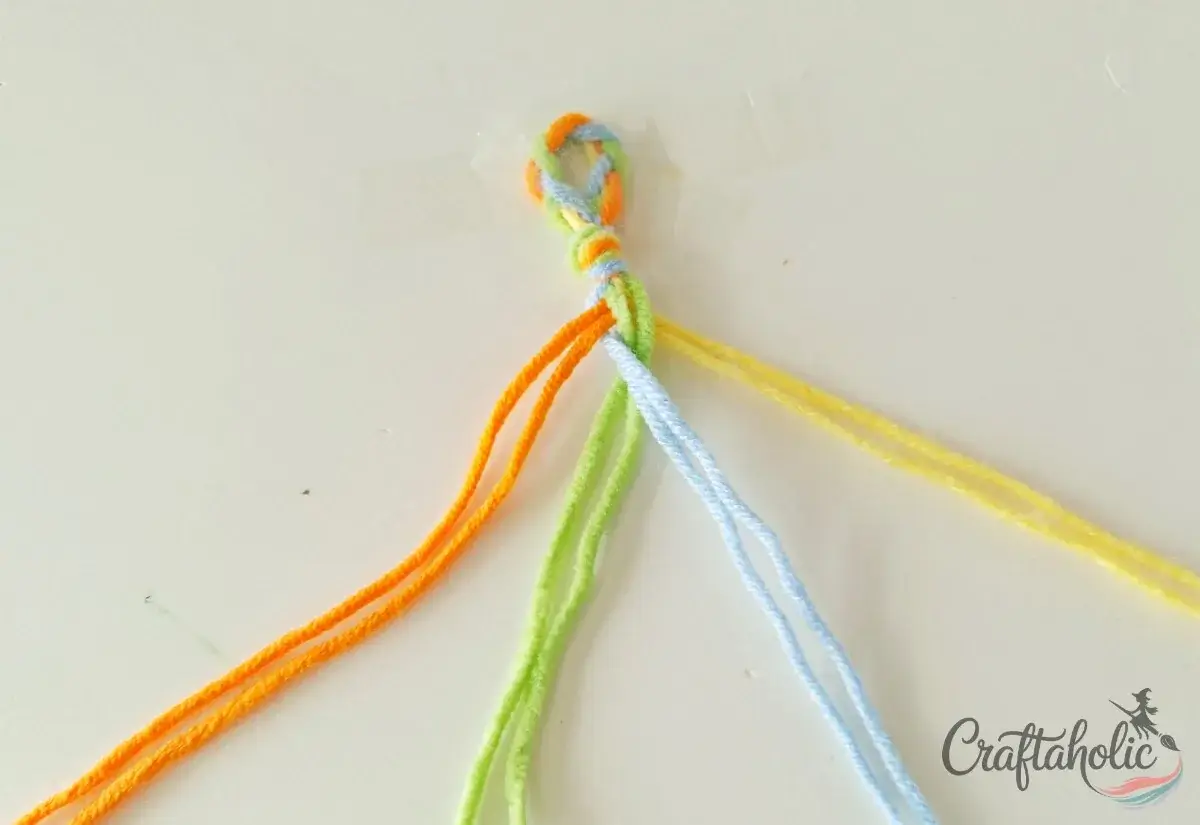
Now bring the left-middle group over the right-middle group. That single center cross completes one full round of the four-strand braid.
Step 10: Lock In the Rhythm
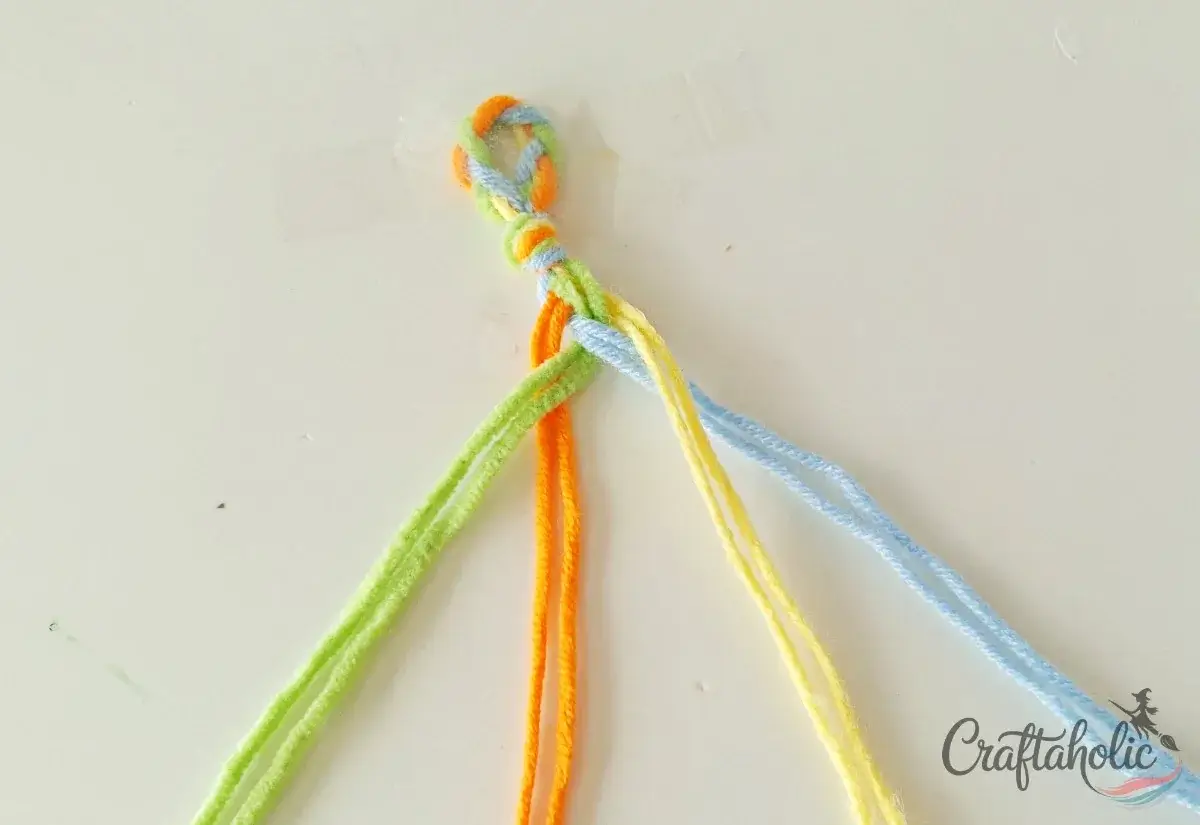
Notice the pattern you just made: right group over its neighbor, then left-middle over right-middle. The whole braid is only these two moves on repeat.
Note: This is a “read and remember” step, not a new action. Saying “right over, then middle cross” out loud as you go makes it easy to keep your place.
Step 11: Repeat the Center Cross
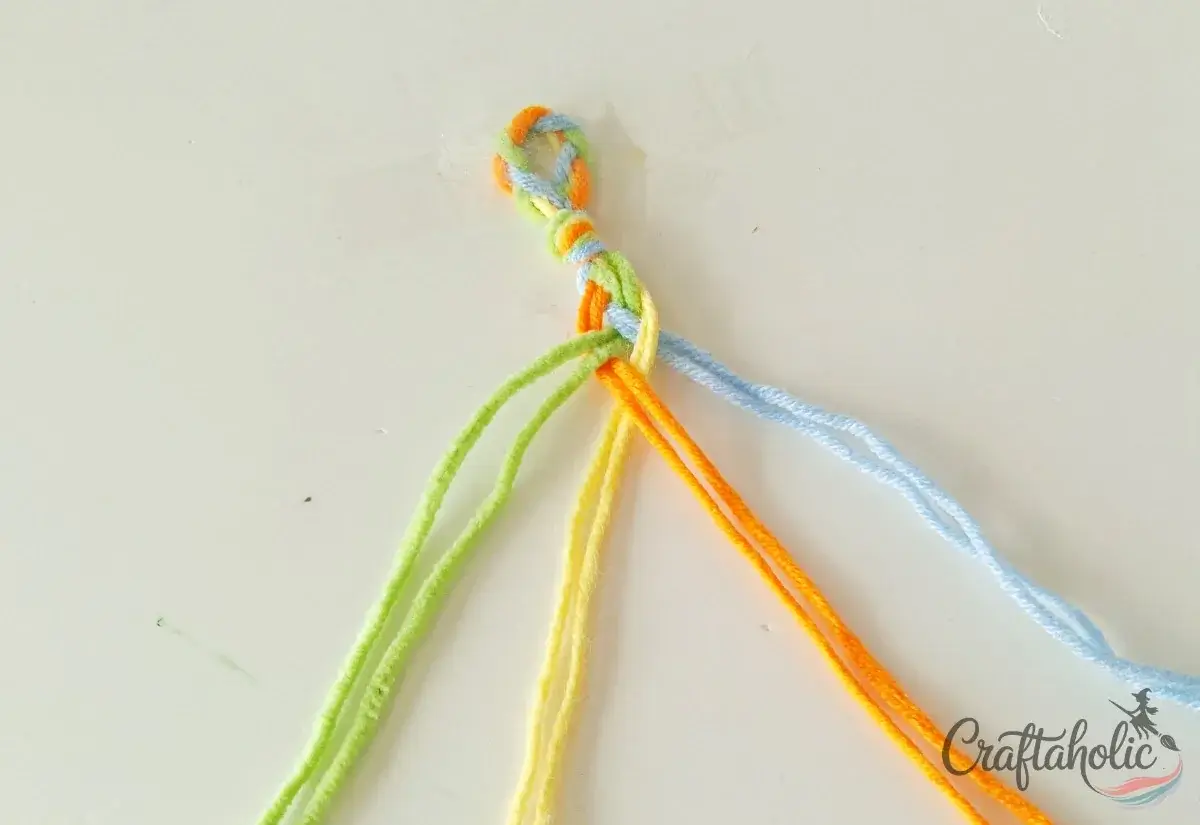
Begin the next round the same way: after the right-hand cross, draw the left-middle group over the right-middle group again. Match your tension to the first round so the braid stays the same width.
Step 12: Keep Braiding in the Same Pattern
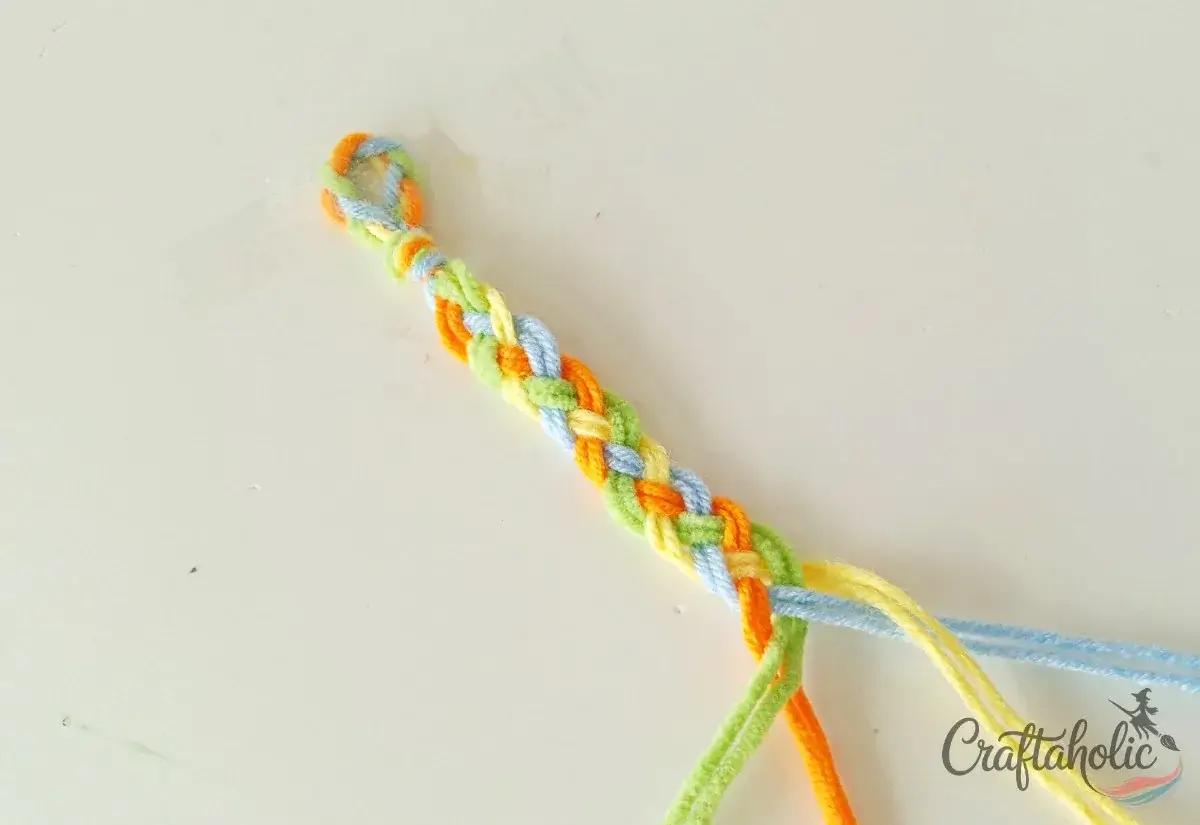
Continue repeating the two-move cycle down the strands. Every inch or so, check that your tension is consistent and the braid is lying flat instead of twisting.
Step 13: Braid Until It Fits the Wrist
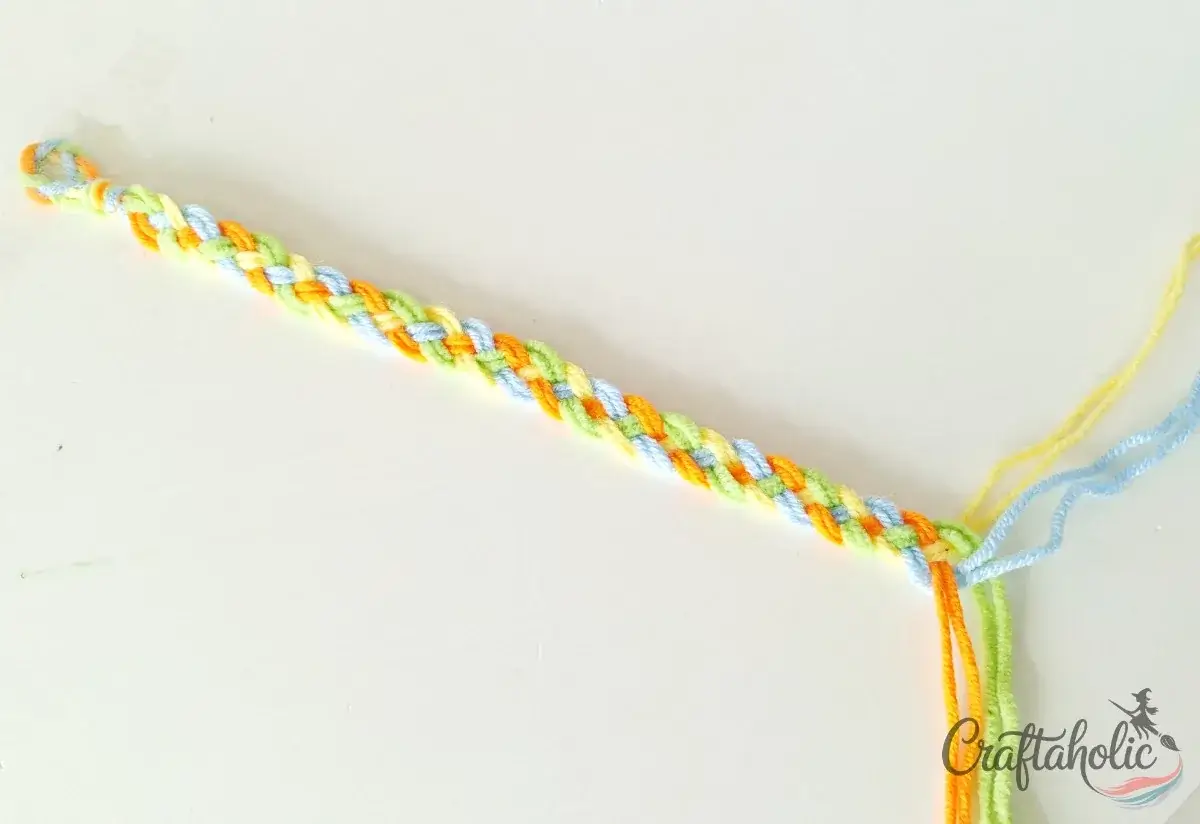
Keep going until the braided length wraps comfortably around the wrist you are making it for. Wrap it around your own wrist as you check.
Tip: Stop about a finger-width short of a full wrap. The loop-and-tie closure adds the rest of the length.
Step 14: Divide the Loose Strands Into Two Halves
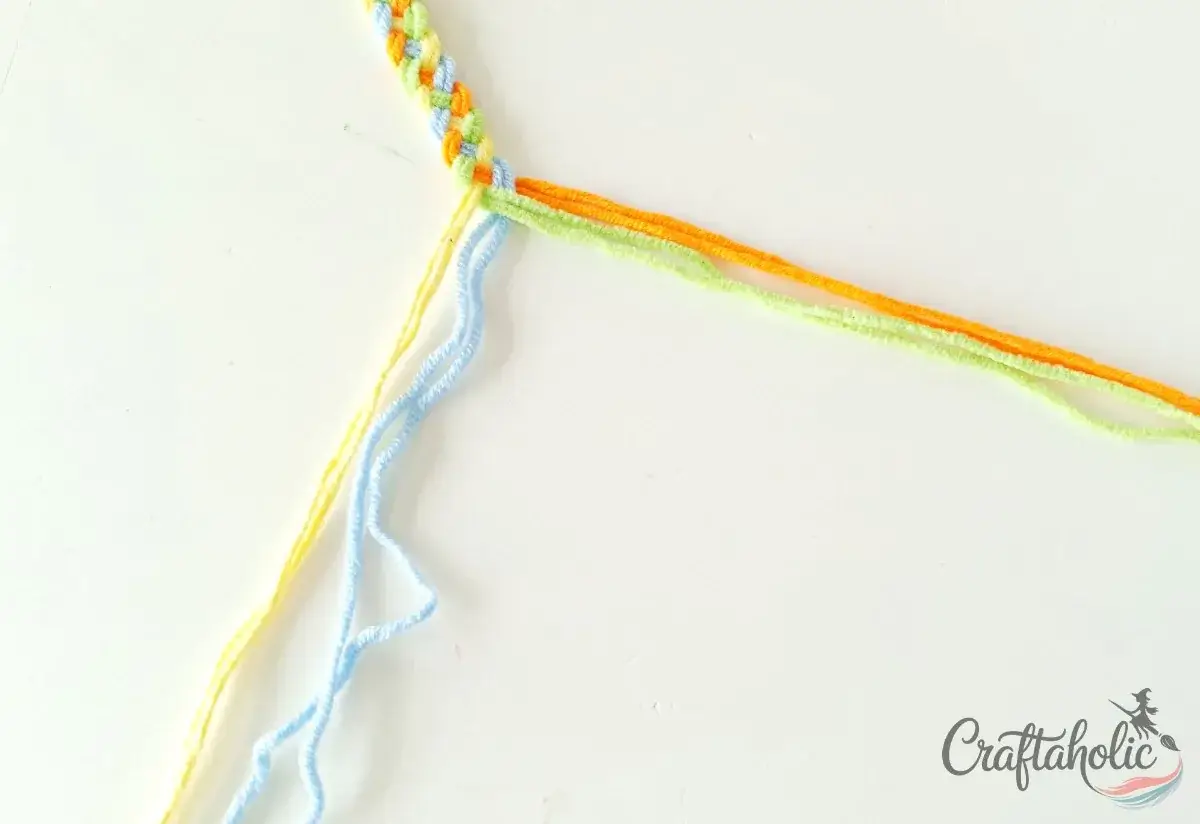
Once the braid is long enough, split the eight loose strands into two groups of four. Four on the left, four on the right. These two halves become the ties that fasten the bracelet.
Step 15: Braid the Left Half Into a Tie
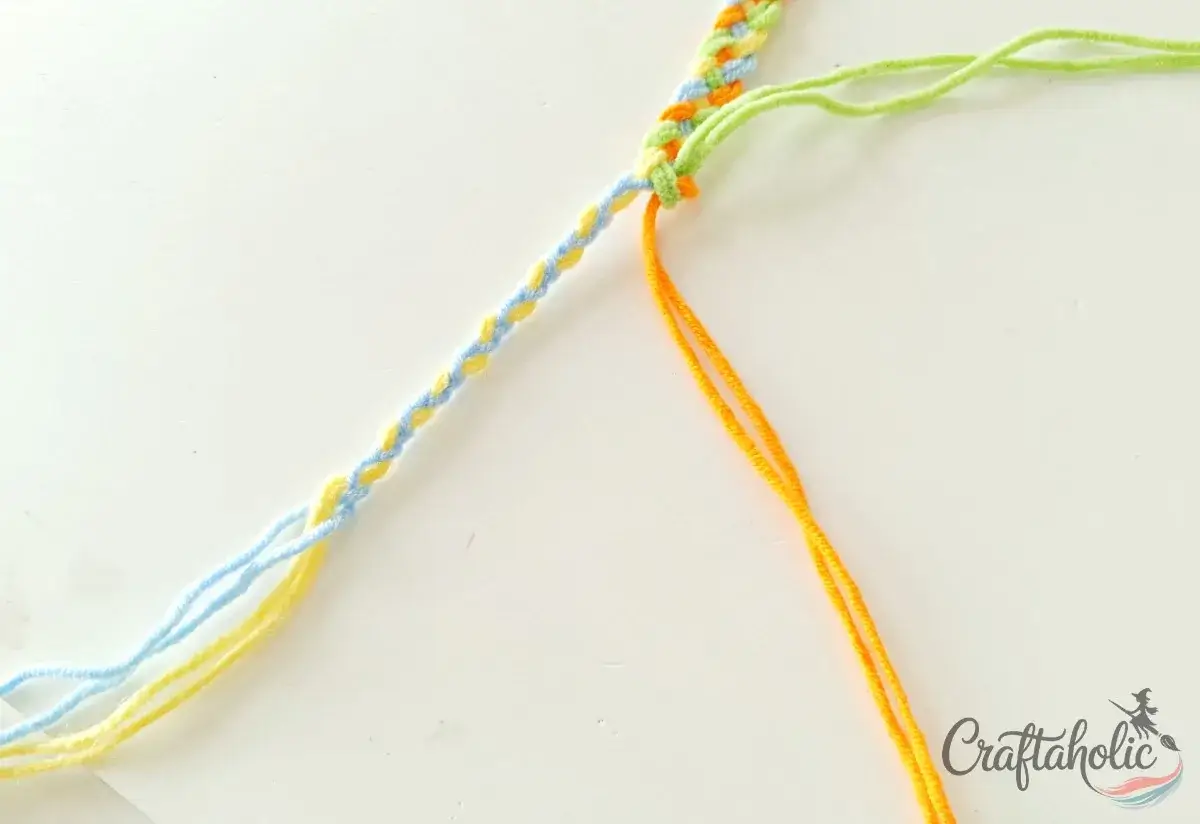
Hold the right four strands aside and braid the left four into a simple tail about 2 inches long. This is your first closure tie.
Step 16: Knot and Trim the Left Tie
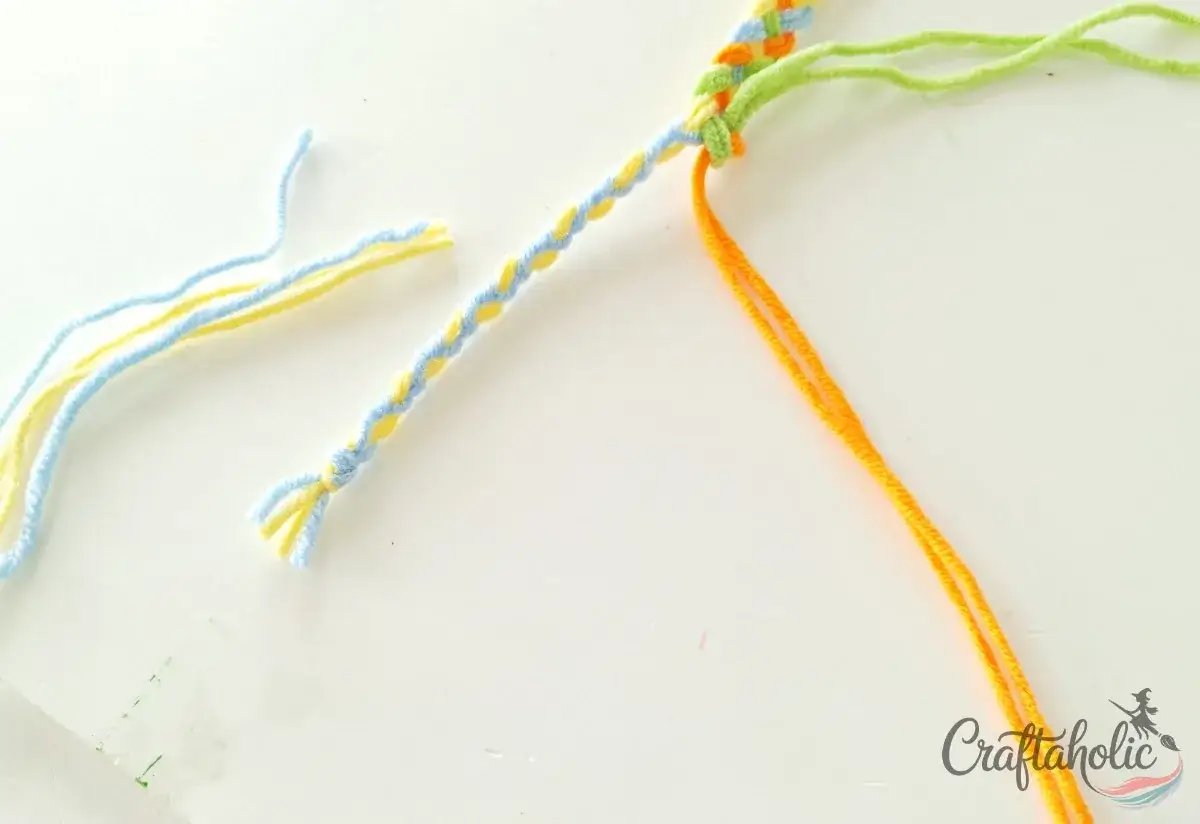
Tie a tight knot at the end of the braided tail to keep it from unraveling. Leave about 1 cm past the knot, then snip off the rest.
Warning: Do not trim right up against the knot, or it can slip loose. Always leave that 1 cm tail.
Step 17: Braid, Knot, and Trim the Right Tie
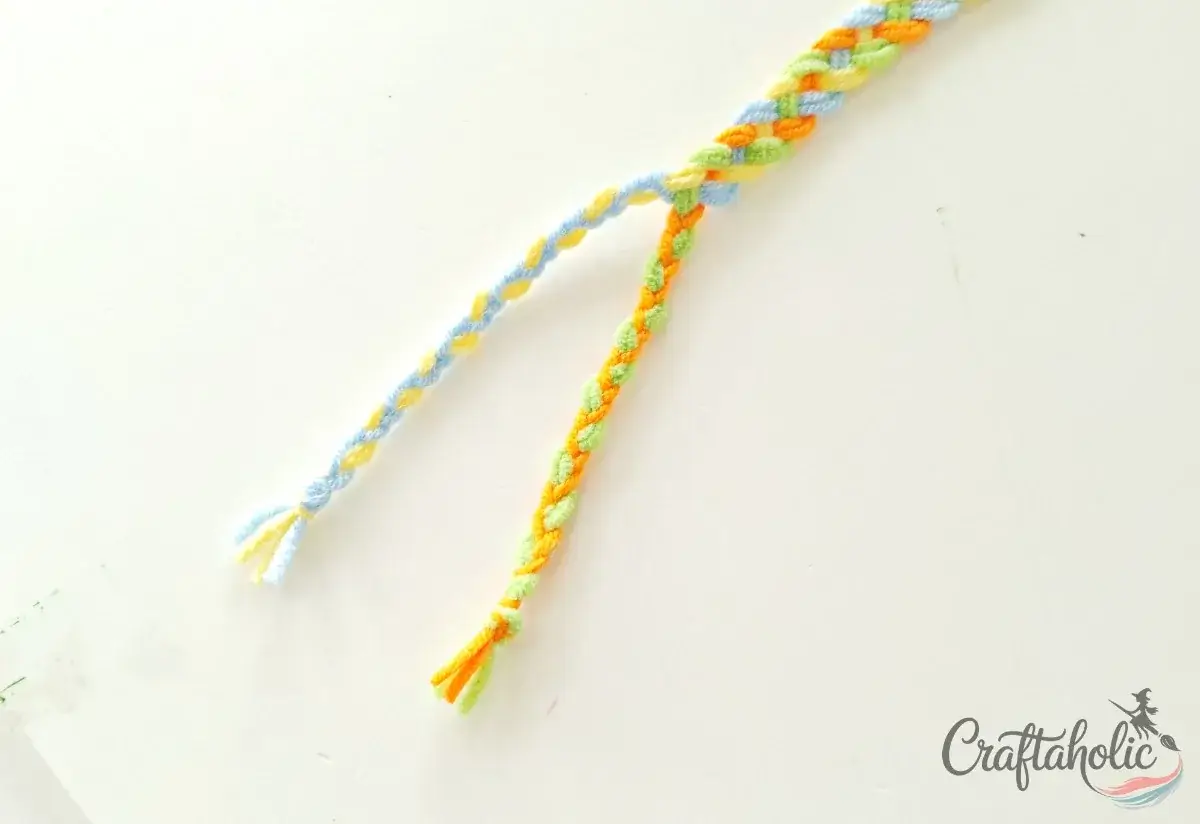
Do the same with the right four strands: braid a 2-inch tail, knot the end tightly, and trim to a matching 1 cm tail so both ties look even.
Step 18: Check Your Finished Braid
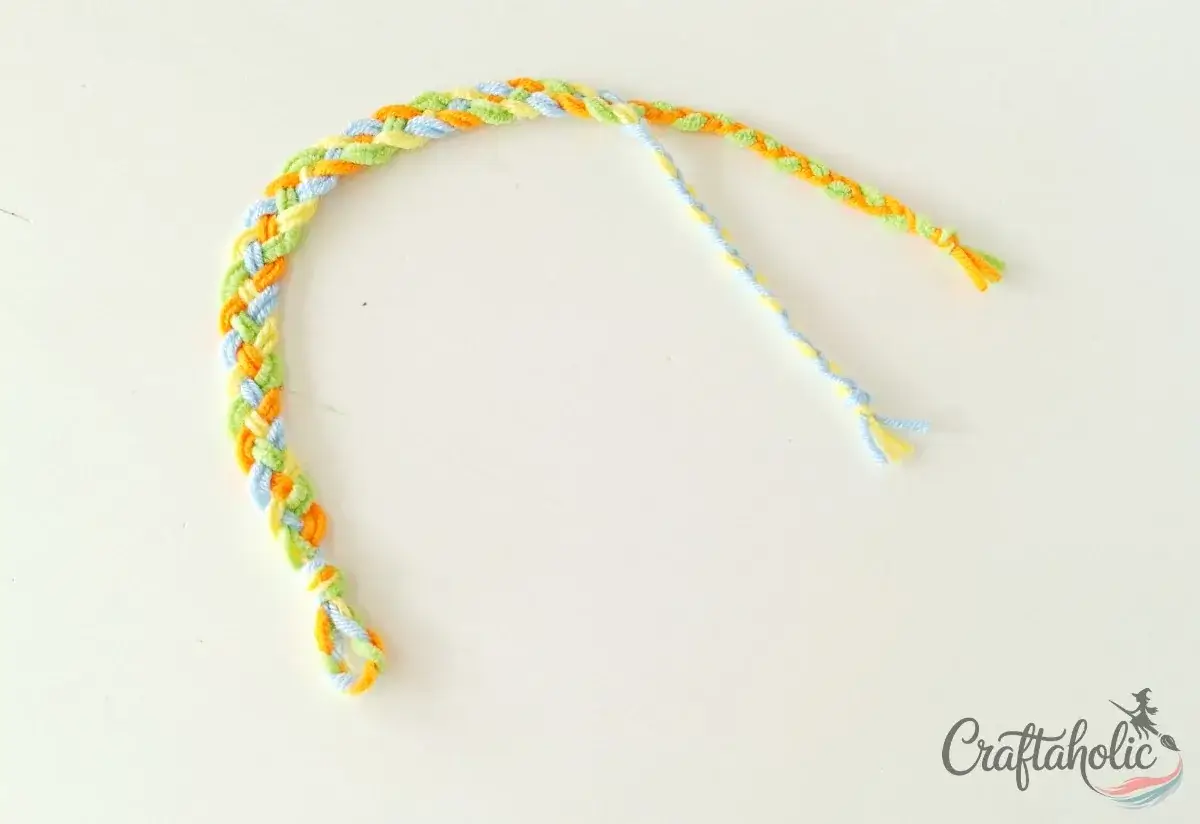
Your bracelet is now fully braided. A loop at one end and two braided ties at the other. No glue or extra fastening is needed; the braids and knots hold everything in place.
Step 19: Thread a Tie Through the Loop
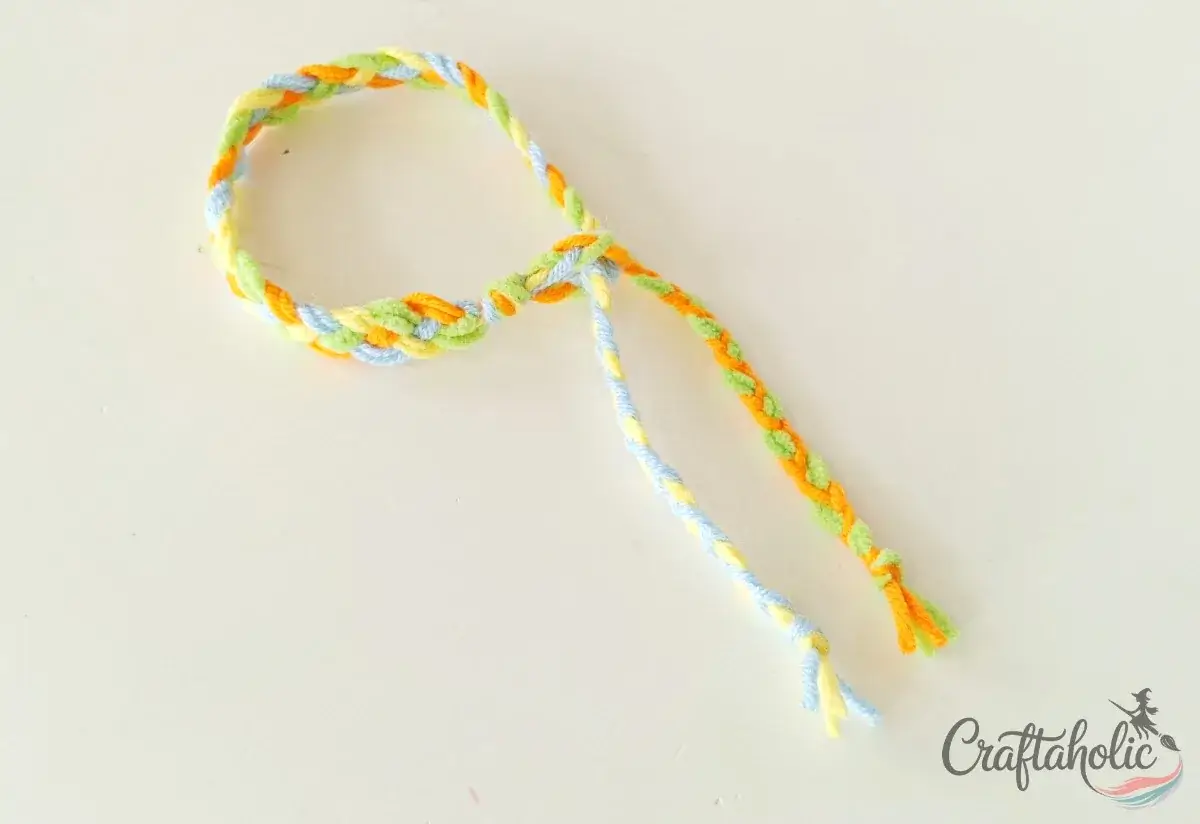
To wear or gift it, wrap the bracelet around the wrist and push one of the braided ties through the loop at the opposite end.
Step 20: Tie the Two Ends Together to Close
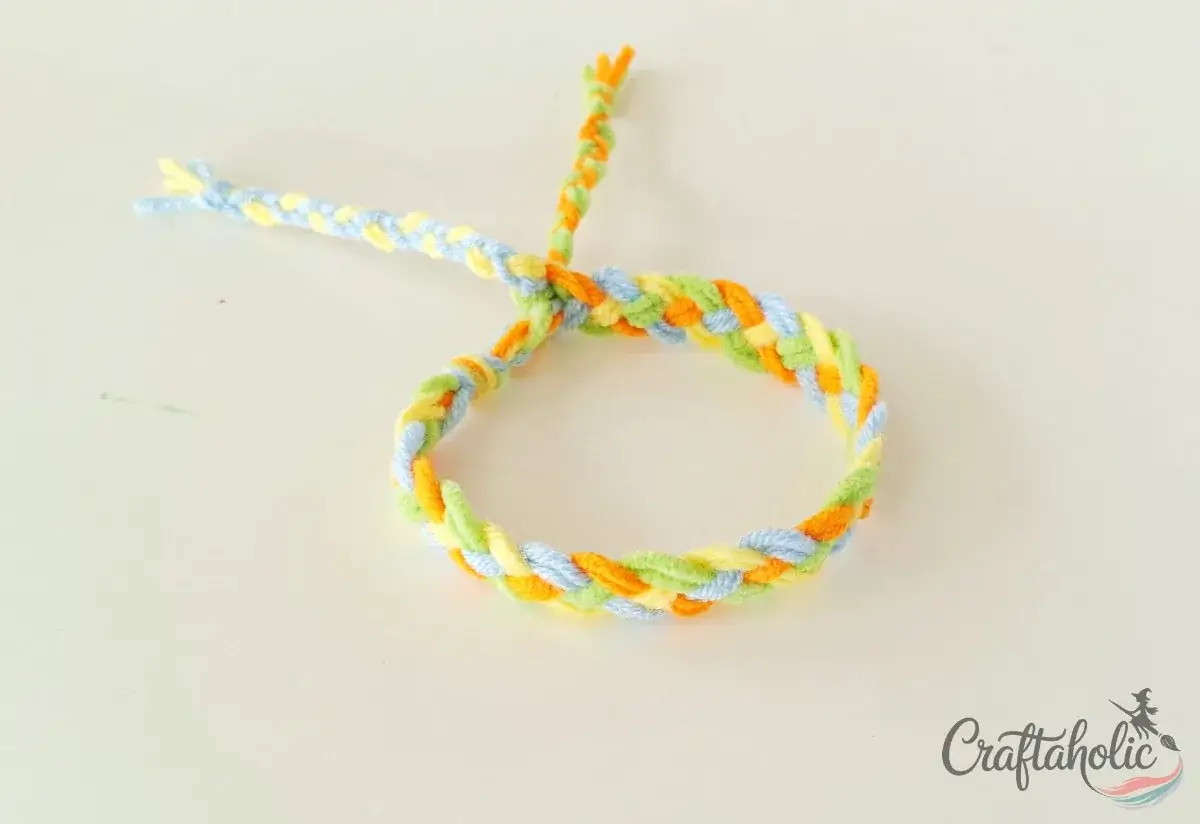
Pull the tie all the way through the loop, then knot it together with the second tie to fasten the bracelet. Adjust the knot to loosen or tighten the fit. That is it. Simple, secure, and ready to give.
Share it in "I Made It" and let us cheer you on.
Post your finished make in "I Made It" so the community can celebrate it with you. Cheer on other makers too. Each month, the most loved craft wins 1 year of Craftaholic Premium ($59)
Tips for Your Braided Friendship Bracelet
- Cut the strands longer than you think you need. For an adult wrist, 36 inches is comfortable; for kids, you can go a little shorter, but extra length is always easy to trim.
- Keep your tension even and snug. Loose braiding looks uneven, and braiding too tight makes it curl.
- This is a perfect no-tools activity for kids to make and exchange at school, since there is no glue, no heat, and nothing sharp beyond the scissors.
- Make it together: invite your friend over and braid each other’s bracelet at the same time, then trade.
Pin for Later
Frequently Asked Questions
How long should I cut the yarn?
About 36 inches per strand works well for an adult wrist. The braid uses up a surprising amount of length, so it is always safer to cut longer and trim the extra at the end than to run short mid-braid.
What yarn works best for a friendship bracelet?
Any medium-weight cotton or acrylic yarn works. Cotton holds a crisp braid and is comfortable on the skin, while acrylic comes in the brightest colors. For a thinner, more delicate bracelet, use embroidery floss instead.
Is this bracelet good for kids to make?
Yes, it is one of the best beginner bracelets for kids. There is no glue, no heat, and nothing sharp except scissors, so kids around 6 and up can braid and swap them. Taping the loop down makes braiding much easier for little hands.
How do I keep the braid from twisting?
Tape the loop firmly to a flat surface and keep steady, even tension as you cross the strands. Straighten the strands out flat before each pass so they do not tangle, and the braid will lie neat and flat.
More Friendship Day Craft Tutorials
This bracelet is part of the A Gift for Every Friend series. Here are the other Friendship Day projects in the series:
- Friendship Day Coloring Bookmark
- Felt BFF Bunny Plush
- Paper Polaroid Camera Card
- Paper Quilling Photo Frame
Made a bracelet (or a whole stack)? Join Craftaholic Community and share your braided friendship bracelet. We would love to see your color combos.
0 Comments
Join the conversation
Log in to your Craftaholic Community account to comment, ask questions, and cheer on fellow makers.
Log in to comment