
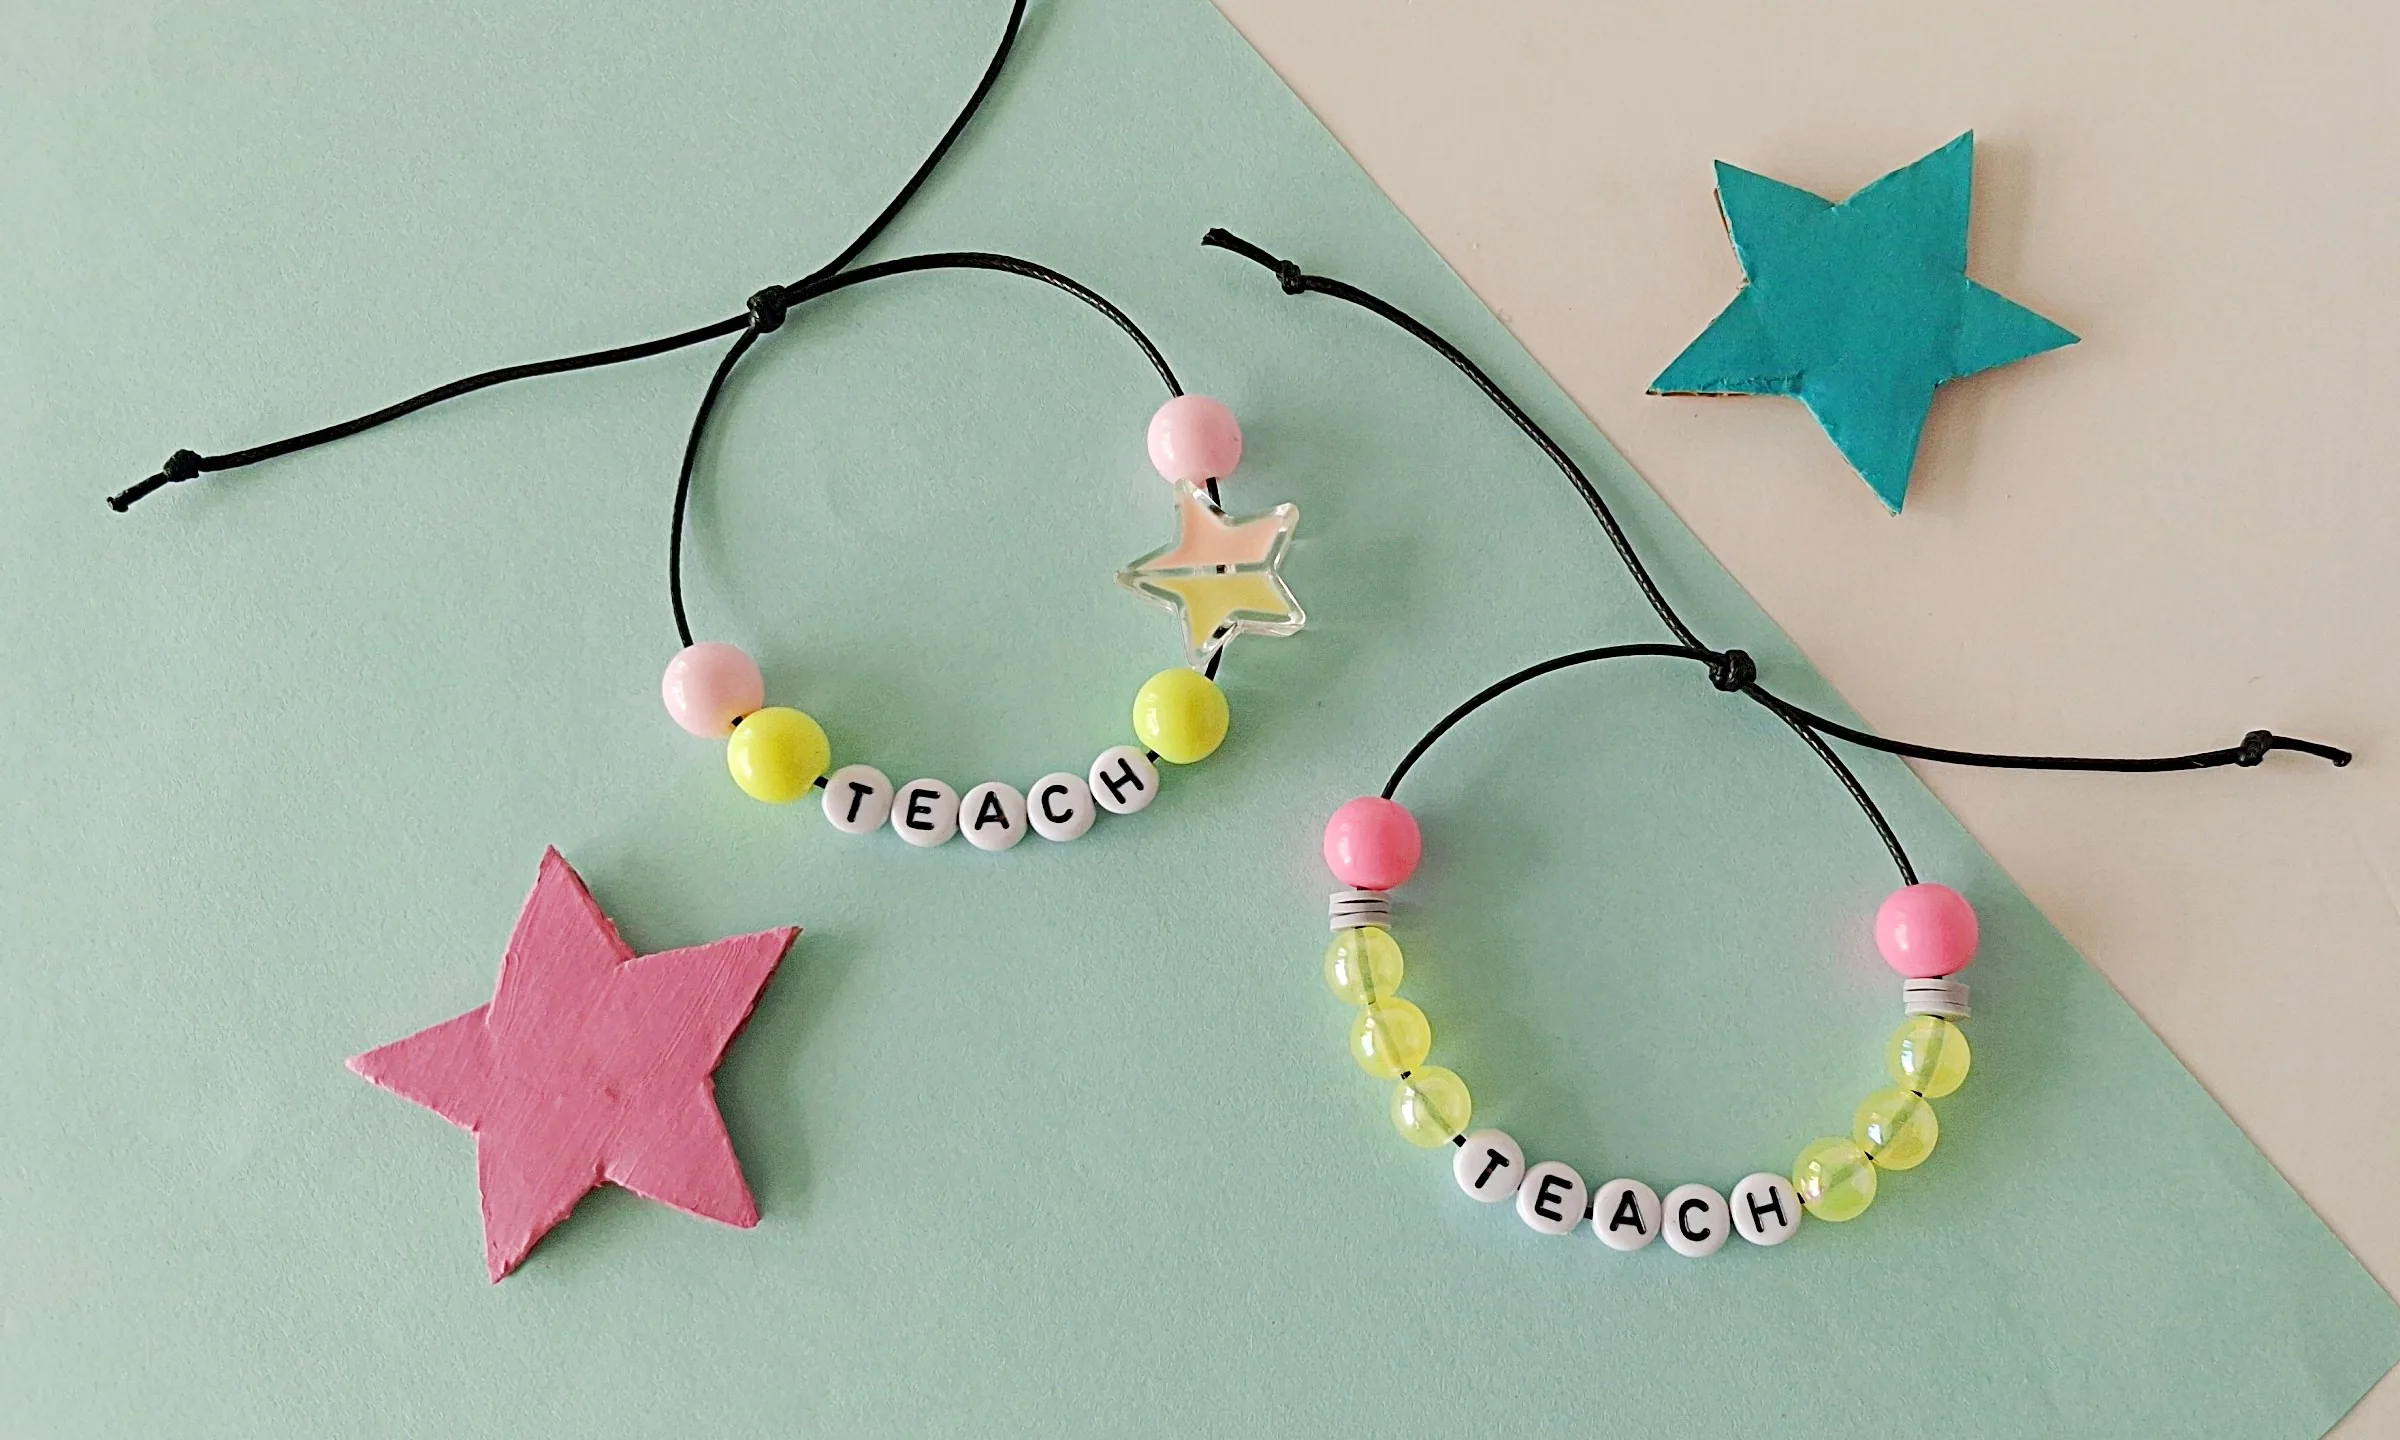
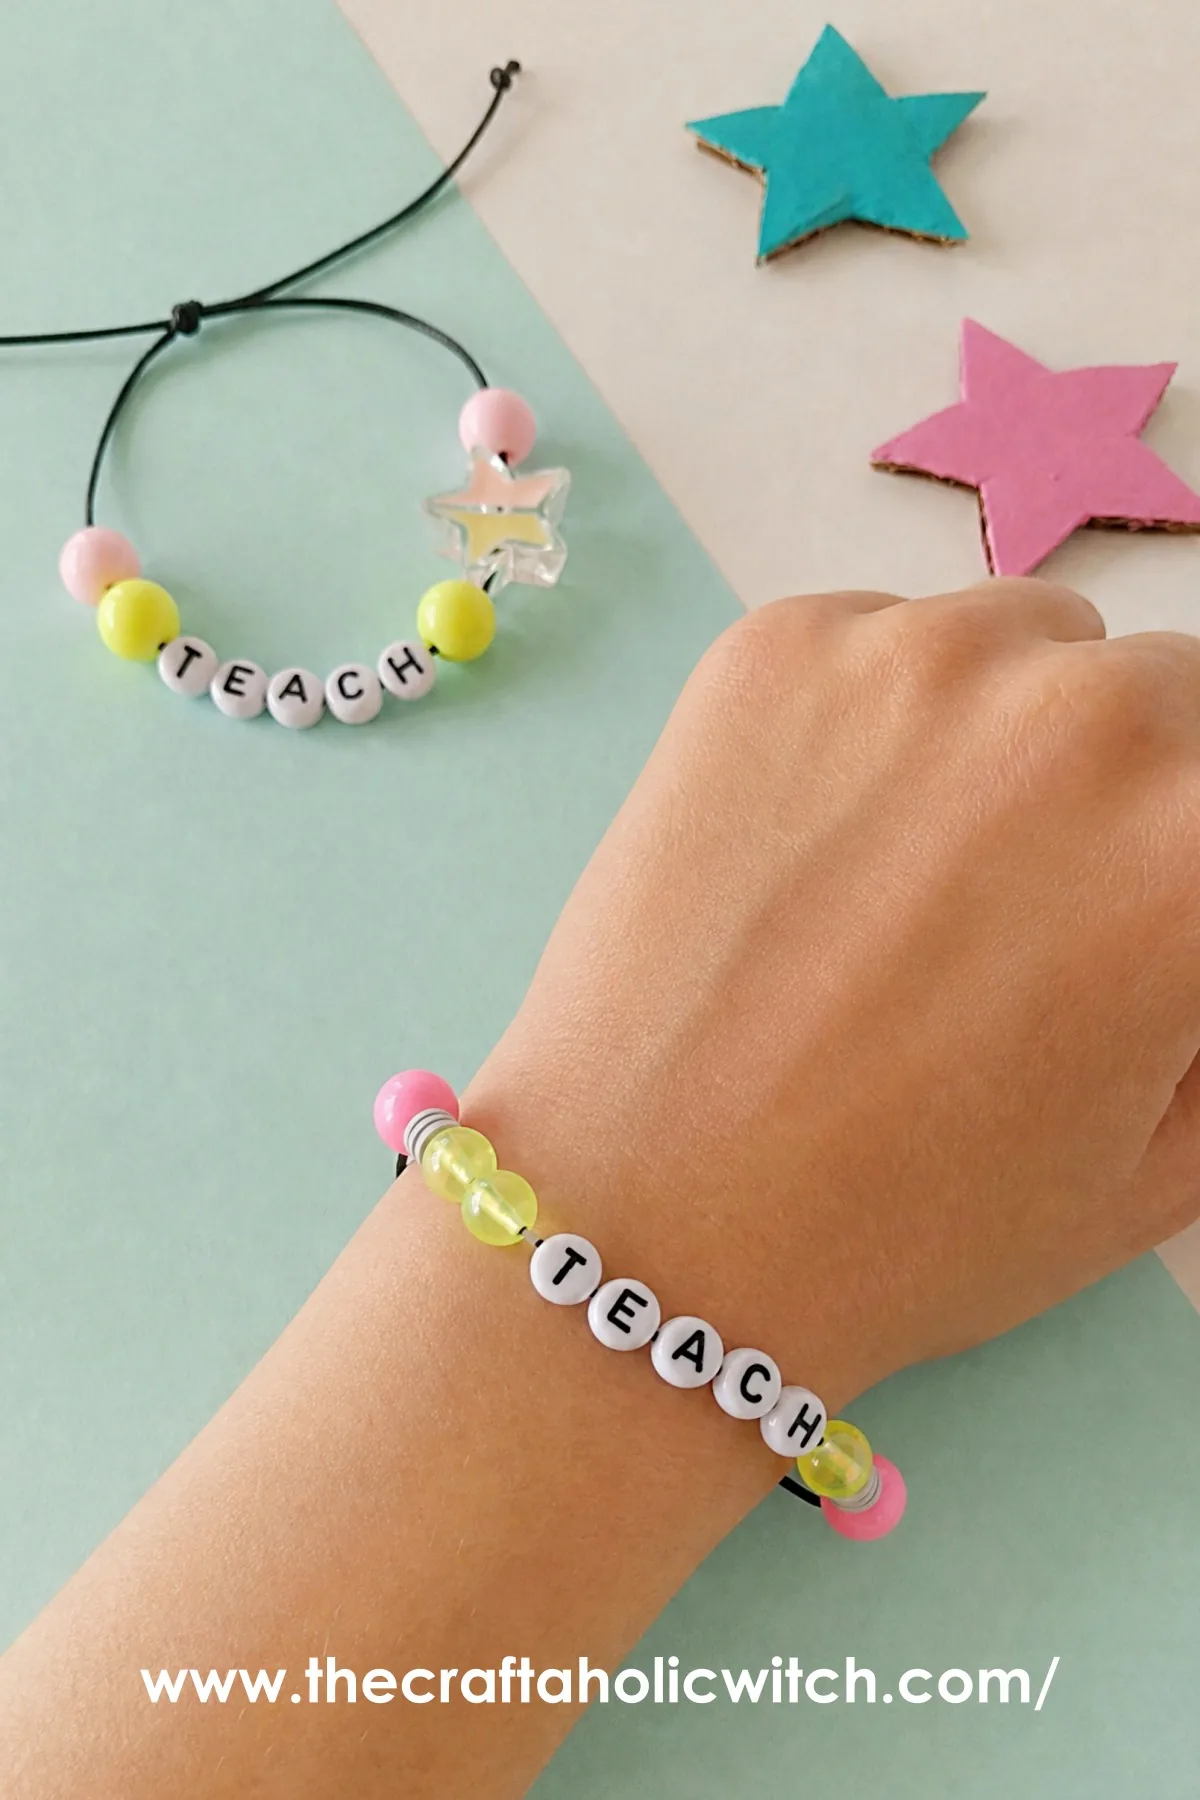
You can make this easy beaded bracelet with just a length of cord and a handful of beads, tied off with an adjustable sliding knot that needs no clasp, in about 15 to 20 minutes.
This bracelet is No. 4 in A Craft for Everyone Heading Back to School, our nine-project collection built around the three people a new school year is really about: the teacher setting up the room, the student walking in, and the parent sending them off. It follows the classroom reward jar, opening Act 2, the student-facing trio, with a school bus photo frame up next.
It’s simple enough for kids to finish on their own, and while it makes a sweet handmade gift for a favorite teacher, there’s no rule it has to stop there, give one to a parent, grandparent, sibling, or best friend too. Browse the rest of the back to school collection for more.
Easy Beaded Bracelet at a Glance
- Difficulty: Beginner
- Time: About 15 to 20 minutes
- Cost: Under $5 if you already have cord and beads on hand
- Ages: 6 and up, with an adult nearby for kids who still mouth small objects
- Best for: Kids’ crafts, teacher and family gifts, back-to-school projects
Join Craft Challenge: Craft Your Calm
Make something that brings you a sense of peace, share a photo, and tell us your story. It's free to enter, open to everyone, and the entry with the most reactions takes home a $100 gift card. Takes five minutes to join.
Entries close August 30, 2026. No purchase necessary.
What You Need to Make an Easy Beaded Bracelet
Materials
- Faux leather cord: holds up better than plain string and knots cleanly for the sliding closure.
- Beads of your choice: round beads and letter beads both work; pick colors and a word that fit whoever you are making it for.
Tools
- A pair of scissors: for cutting the cord to length.
- Bracelet beading tray (optional): keeps loose beads from rolling away while you plan the pattern; a shallow box lid works fine as a stand-in.
Want the exact bead layout I used for the TEACH word design? Follow the pattern described in step 2, or swap in your own word or name using the same letter-bead technique.
Ask inside "Crafty Q&A" while you are making.
"Crafty Q&A" is free to join. Share your question, photo, or the exact step where you got stuck, and chat with other makers plus the Craftaholic Witch team. You can also join any discussion thread already happening inside the space.
How to Make an Easy Beaded Bracelet
Step 1: Cut the Cord
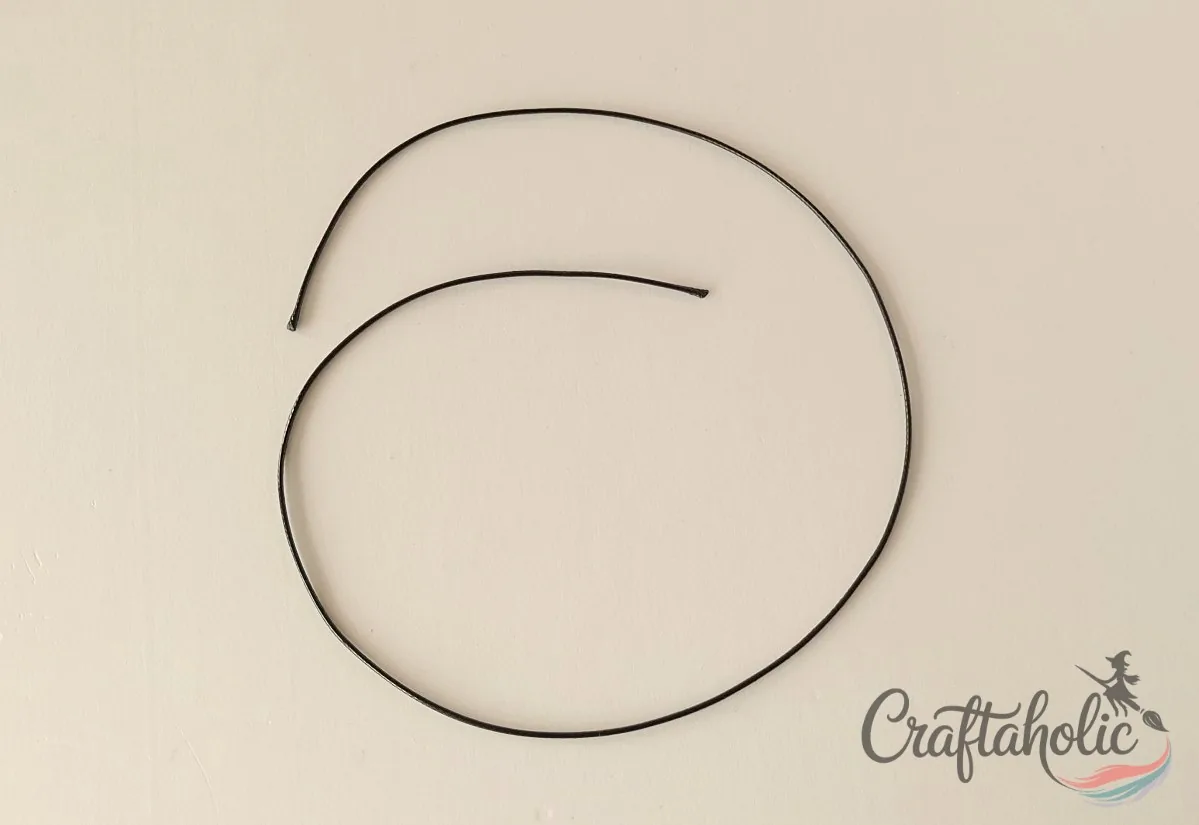
You usually do not need to measure your wrist for this craft, since the finished bracelet adjusts to fit several sizes. Measure and cut a 15 inch length of cord. A longer cord is easier to hold onto while you bead it, so do not trim it shorter than that.
Step 2: Lay Out Your Beading Pattern
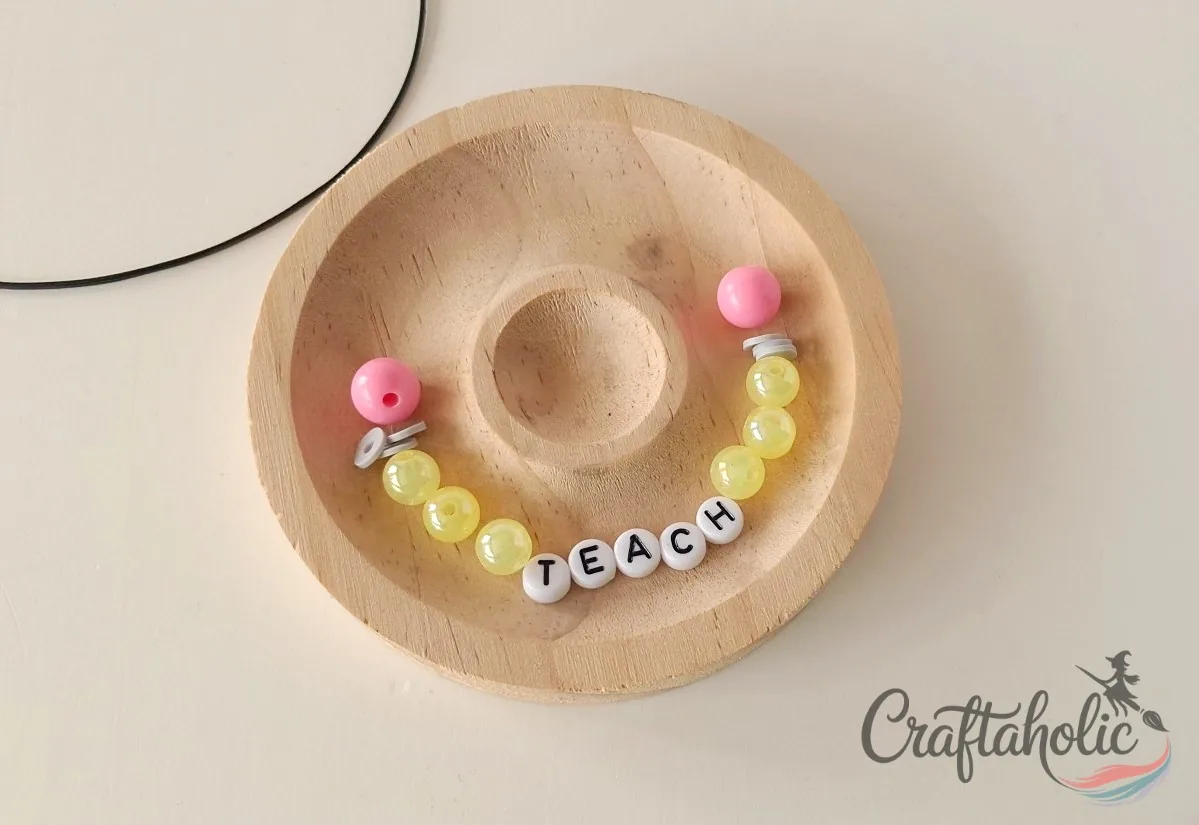
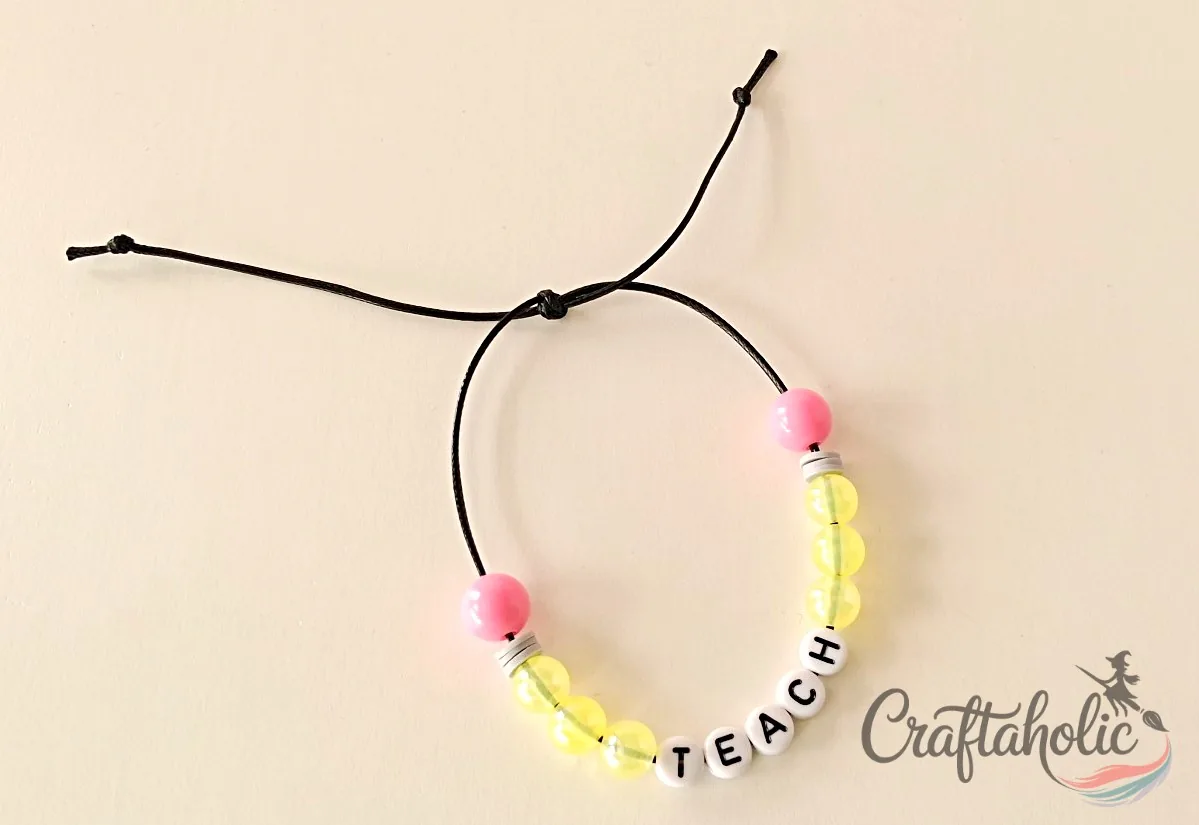
Take a bracelet beading tray and arrange the beads the way you want them strung. I built a pencil design with a round pink bead for the eraser, gray disc beads for the band, and round yellow beads for the pencil body, then added letter beads spelling “teach.” Laying it out first means you are not second-guessing the order once you start threading.
Step 3: Start Threading the Beads
Pick up the first bead from either end of your laid-out pattern and thread it onto the cord. It does not matter whether you start left or right, just keep working the same direction as you go so the pattern does not reverse partway through.
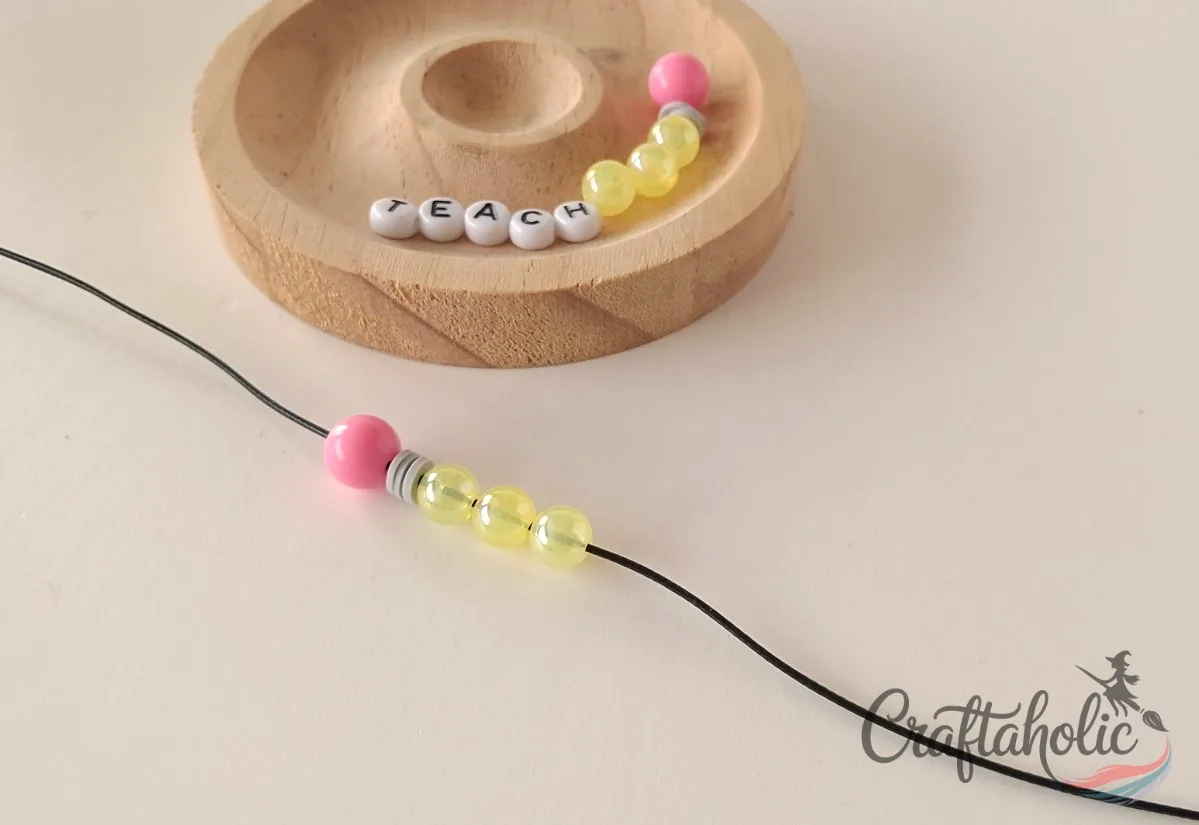
Step 4: Finish Threading the Pattern
Keep threading beads onto the cord until the whole pattern is strung. Pull one bead at a time from the same side of the tray as you go; grabbing from both sides is the easiest way to scramble the order you just planned.
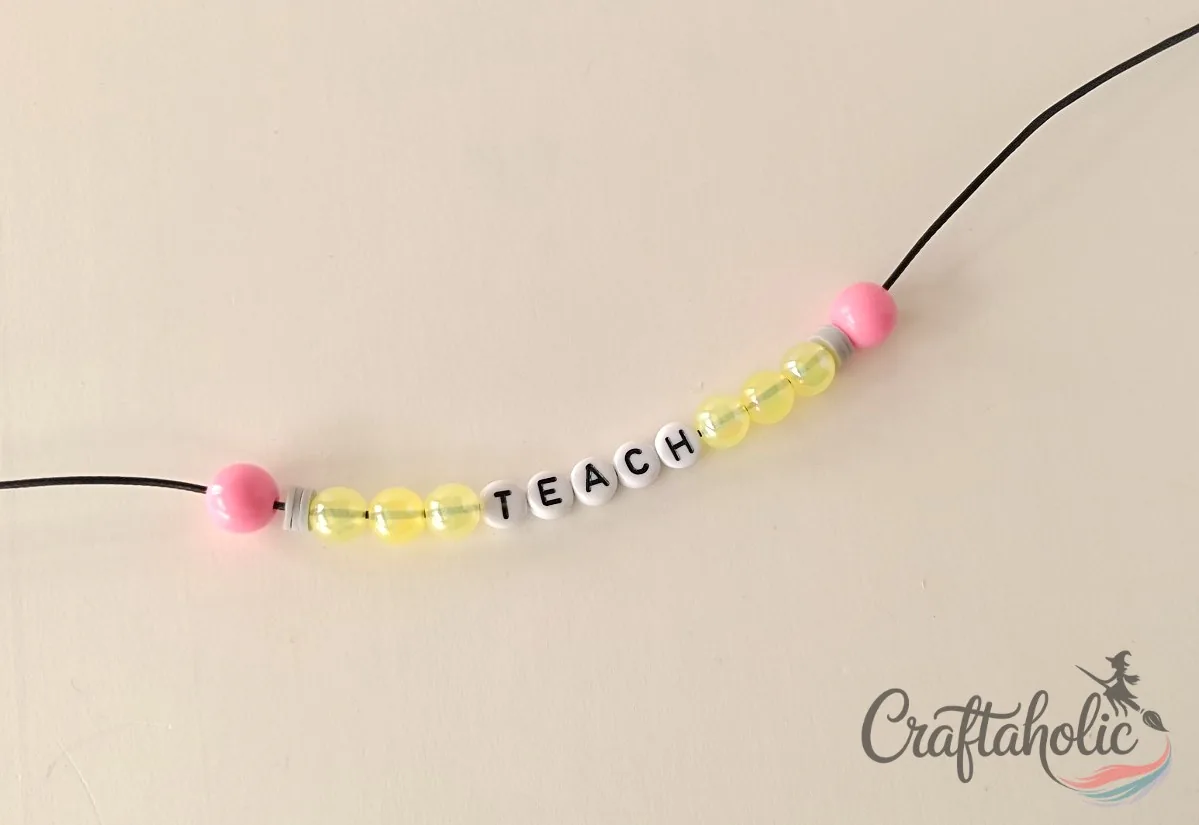
Step 5: Cross the Cord Ends
Slide all the beads to the middle of the cord so you have two bare ends to work with. Cross the left end over the right end. From here on, “left” and “right” mean whichever end started on that side, since that is how you will tell them apart for the next several steps.
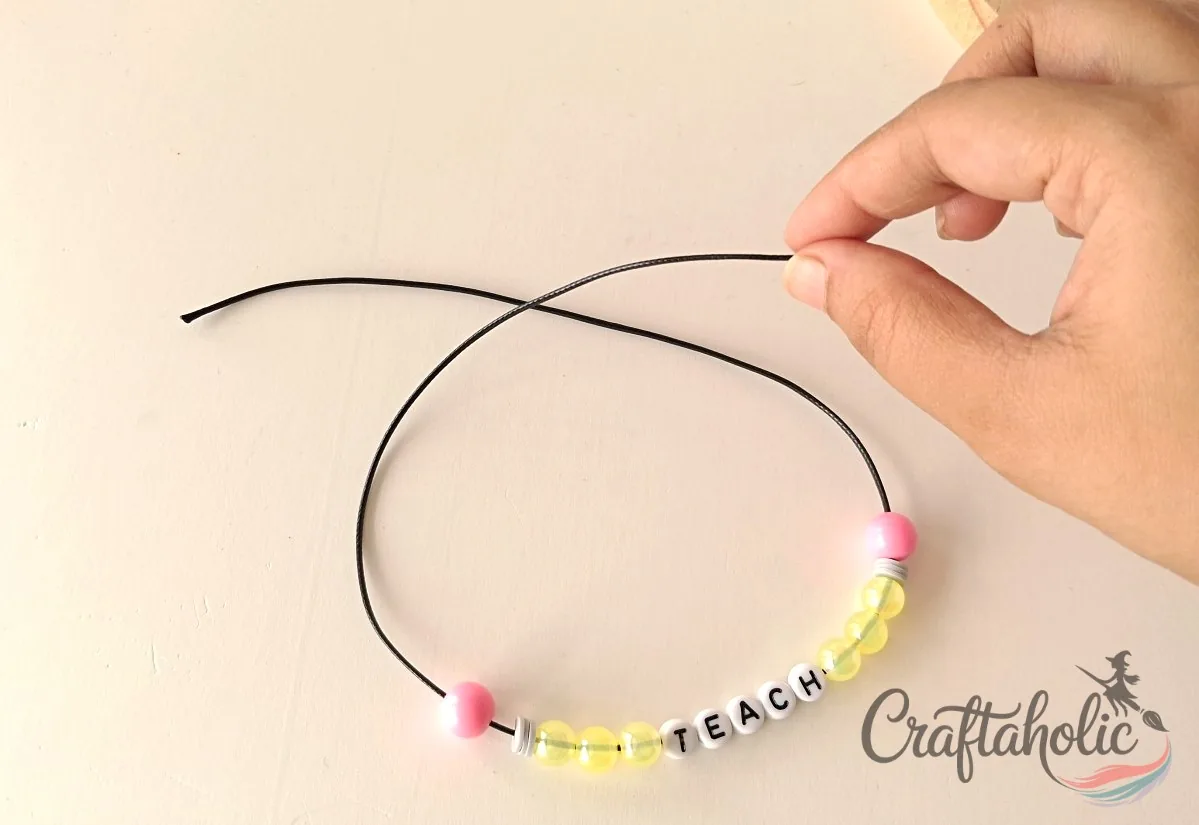
Step 6: Tie the Starting Knot
Draw the left end under the right end and back up through, or just tie a simple overhand knot with both ends together. This is only the anchor knot. The sliding part comes next.
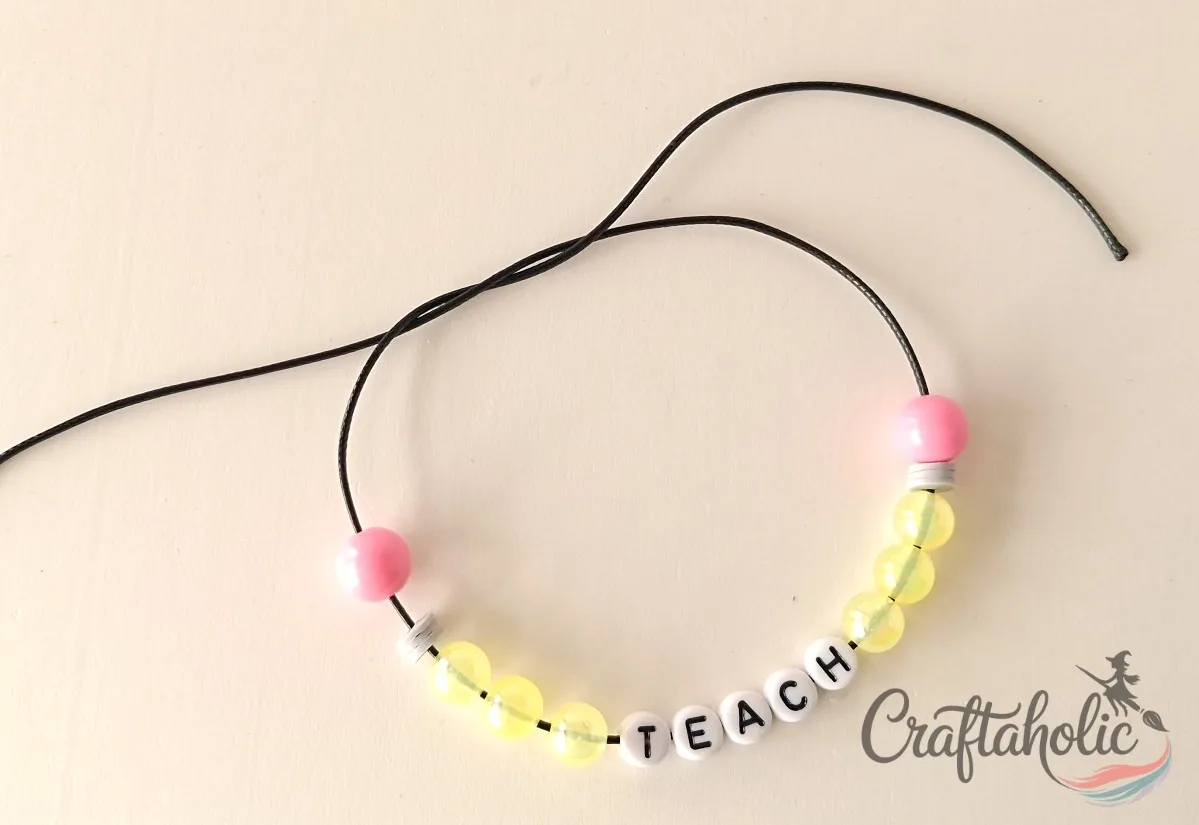
Step 7: Hold the Knot in Place
Pinch the knot firmly so it cannot work itself loose, and rest your pointer finger right below it. Keep that same finger in place for the next three steps; it is what the sliding loop gets built around.
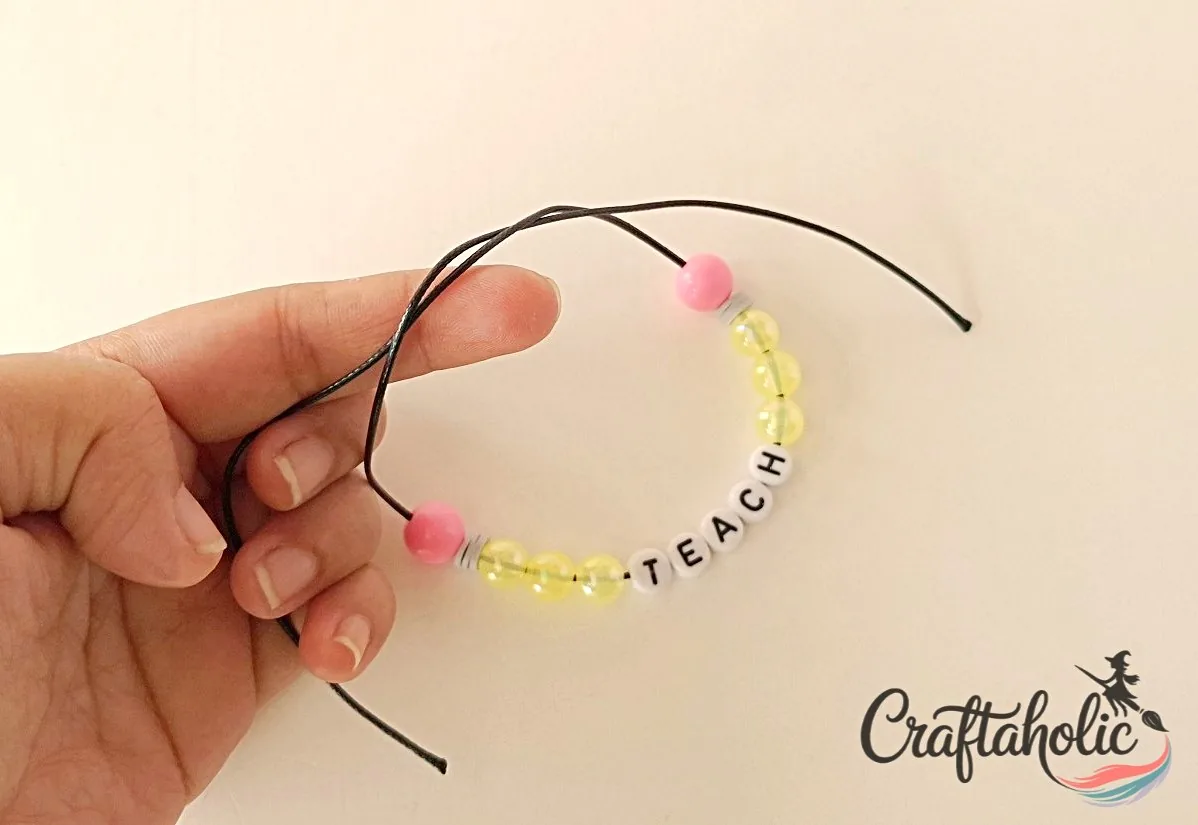
Step 8: Wrap the Left Cord Around Your Holding Finger
Wrap the left cord end around that same finger once, loosely enough that you will be able to slide the wrap off later.
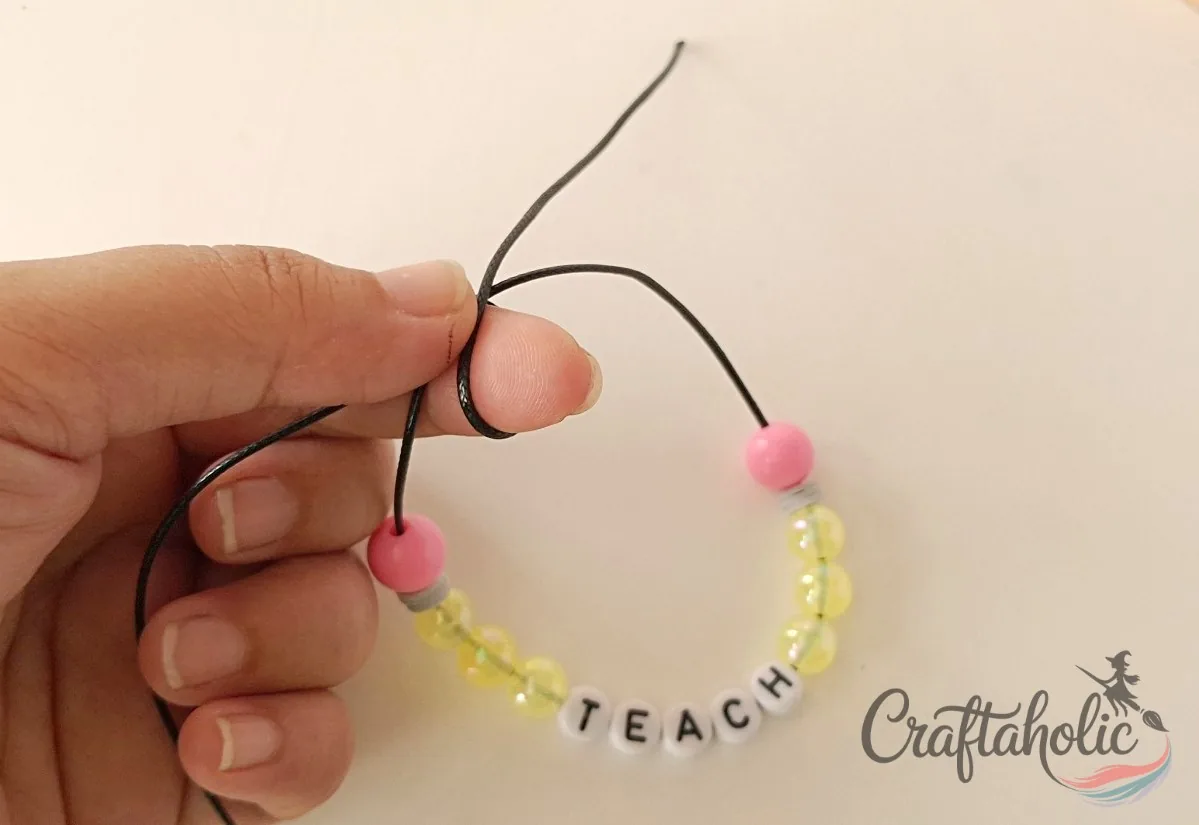
Step 9: Wrap It a Second Time
Wrap the left cord around your holding finger one more time, right beside the first wrap, so you end up with two loose loops sitting on the finger together.
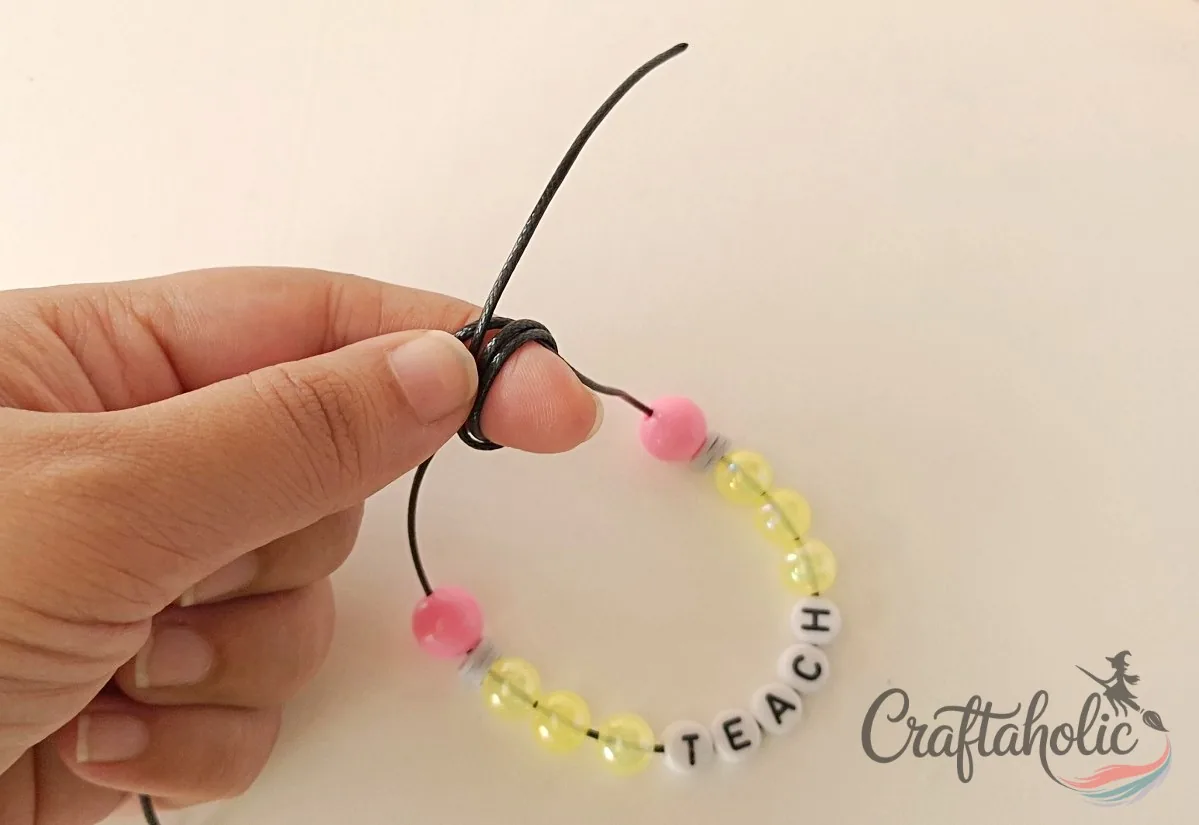
Step 10: Slide Your Finger Out of the Loops
Carefully slide your finger out from inside the two loops, leaving them loosely hanging on the cord. Try not to pull the loops tight as you pull free, since the next step threads through them.
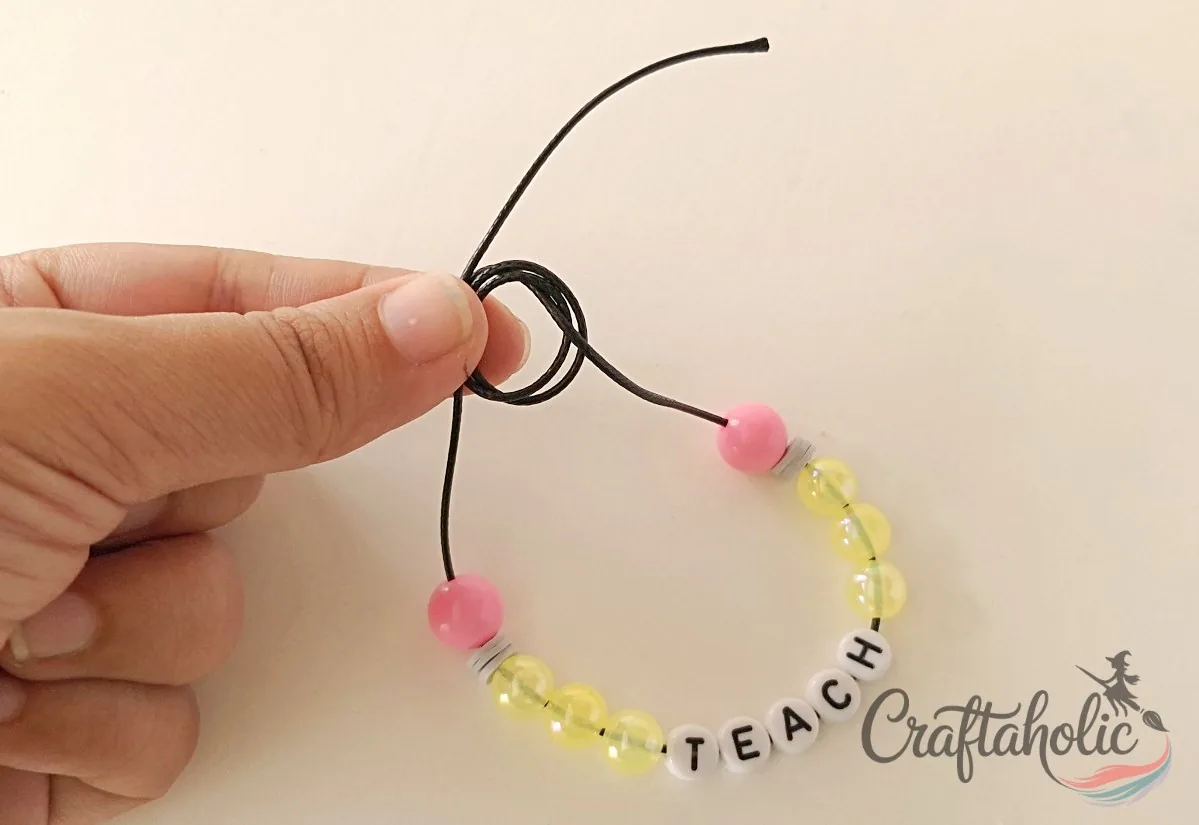
Step 11: Thread the Left End Through the Loops
Insert the left end of the cord through the loops you just left behind, coming in from the back side.
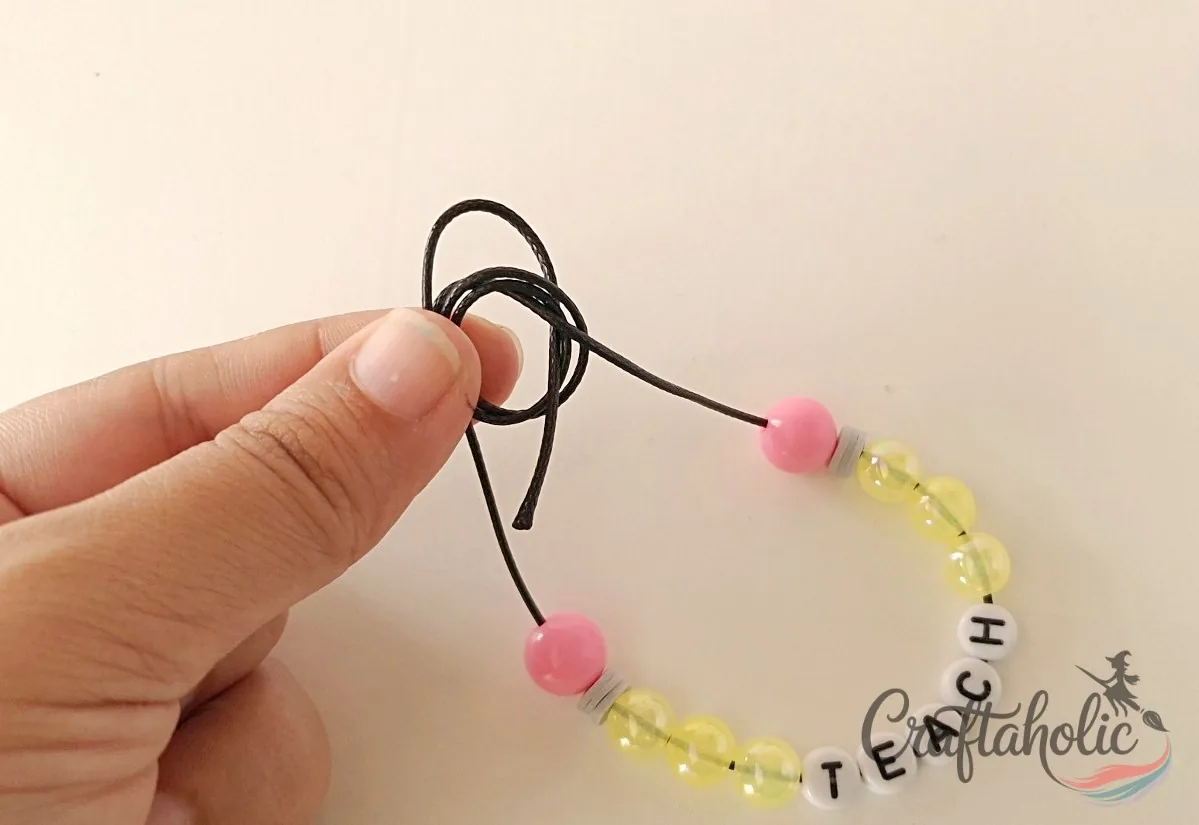
Step 12: Pull the Left End to Cinch the Loops
Gently pull the left end of the cord. The loose loops tighten around the right cord as you pull, turning into the sliding knot that lets the bracelet adjust to fit.
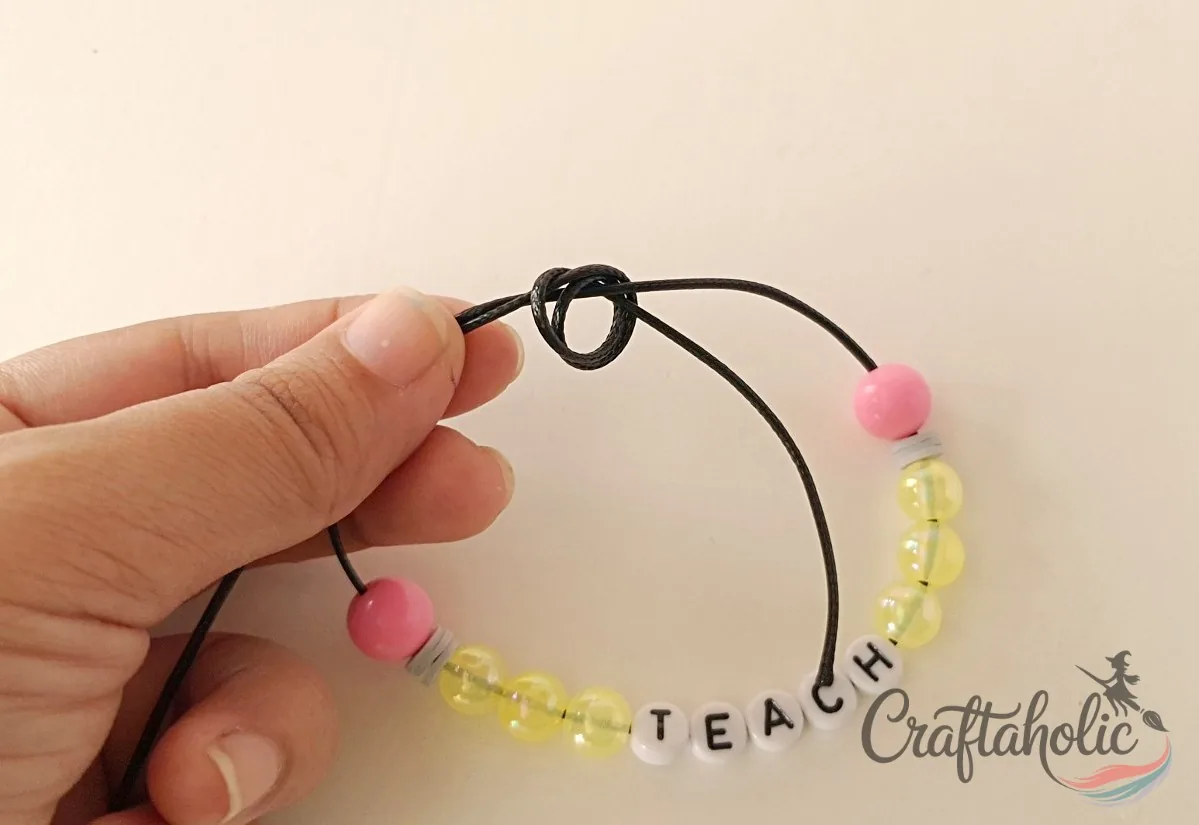
Step 13: Check That the Knot Wrapped Evenly
Look the wrapped loop over and make sure it tightened evenly around the cord, with no wrap sitting looser than the others. An uneven wrap is the most common reason a sliding knot catches instead of gliding smoothly, so it is worth a second look here.
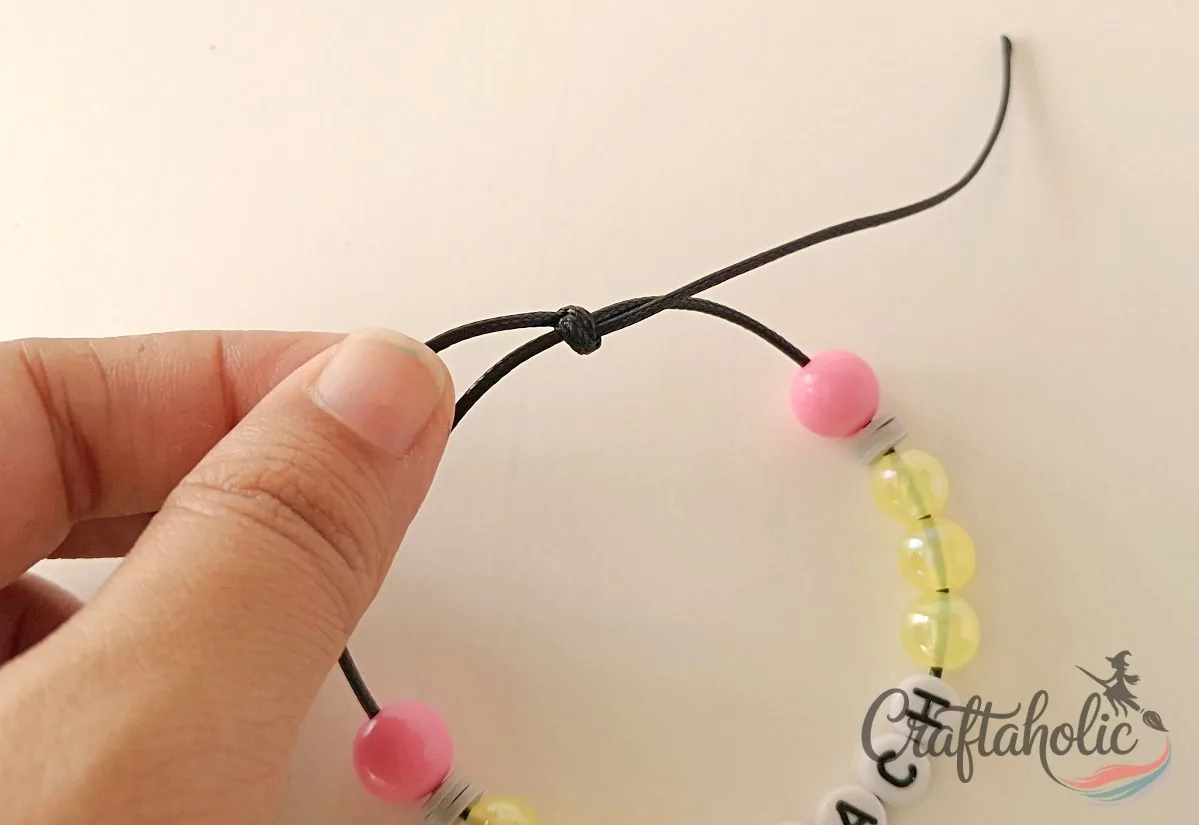
Step 14: Knot Both Open Ends
Tie a simple knot at each of the two open cord ends. This stops them from pulling all the way back through the sliding knot and keeps the closure from coming apart with wear.
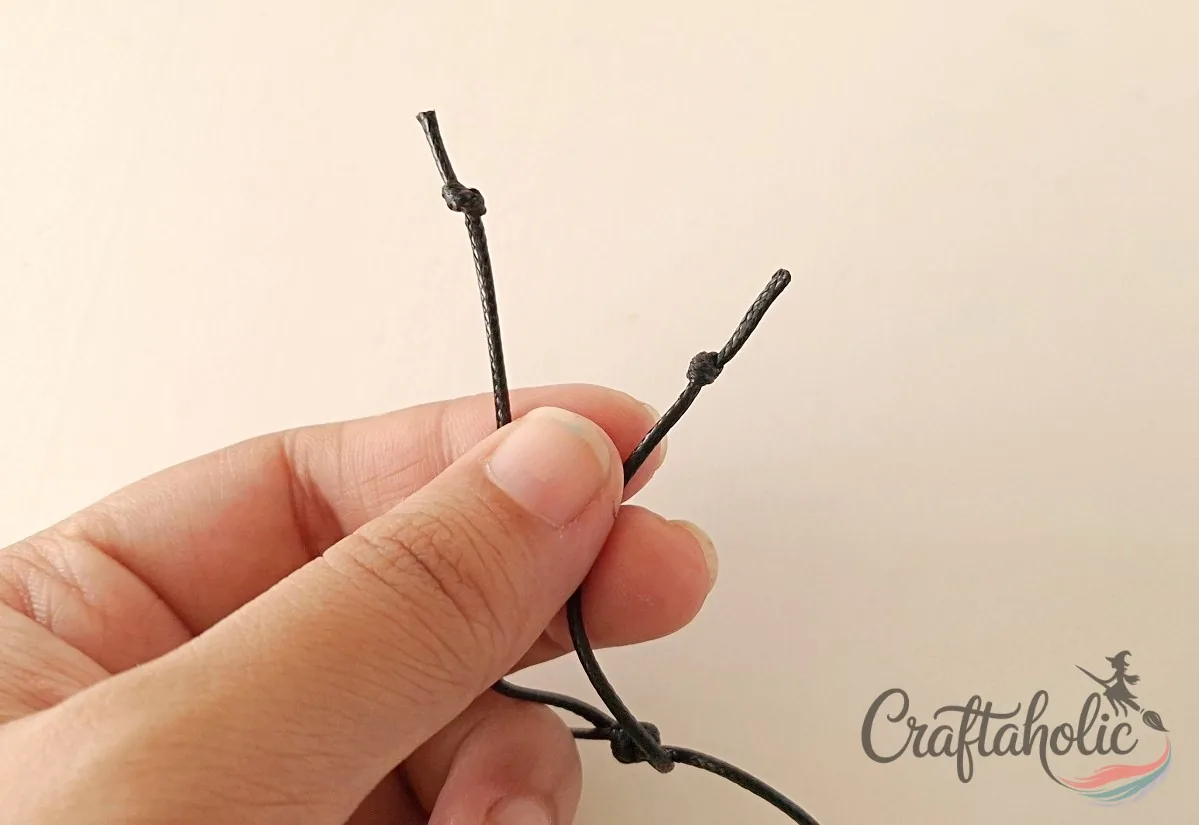
Step 15: Test the Slide
One end of the cord stays fixed while the other slides through the knot, so the loop opens and closes to fit different wrists. Slide it a couple of times now to check it moves smoothly before you call it done.
Share it in "I Made It" and let us cheer you on.
Post your finished make in "I Made It" so the community can celebrate it with you. Cheer on other makers too. Each month, the most loved craft wins 1 year of Craftaholic Premium ($59)
Tips for Your Easy Beaded Bracelet
- No beading tray on hand? A shallow box lid or a folded piece of paper keeps loose beads from rolling away just as well.
- Swap in a different word or a name in letter beads to make the same bracelet for a different person on your gift list.
- To size the bracelet up for an adult wrist, thread on a few extra plain beads before you tie off the sliding knot.
- Keep any leftover cord and beads in a small bag so you can put together a matching bracelet later without a fresh trip to the craft aisle.
Frequently Asked Questions
How long does this beaded bracelet take to make?
Most kids and adults finish one in about 15 to 20 minutes once the beads are laid out. Planning the pattern on a beading tray first is the slowest part; the threading and knotting go quickly after that.
What can I use instead of a beading tray?
A shallow box lid, a plate, or even a folded piece of paper works fine to keep beads from rolling off the table while you arrange them. The tray is just a convenience, not a required tool.
Is this bracelet safe for young kids to make?
It is a good project for kids around 6 and up who no longer put small objects in their mouths, since the beads are a choking hazard for younger children. An adult should stay nearby to help with the sliding knot, which takes a bit more finger coordination than the threading does.
How do I make the bracelet bigger or smaller?
Thread on a few extra beads before tying the sliding knot to make it fit a bigger wrist, or use fewer beads for a smaller one. The sliding knot itself already adjusts the bracelet across several sizes, so small wrist differences usually do not need any changes at all.
What if my sliding knot does not slide smoothly?
Check that both wraps around your finger were even and snug before you pulled the loops tight; a loose or uneven wrap is the most common reason a sliding knot catches. If it still sticks, untie the wrapped section and redo steps 7 through 12 rather than forcing it, since a knot pulled too tight will not loosen again.
Can I use a different word or name instead of TEACH?
Yes, letter beads work the same way no matter what word you spell out. Swap in a name, a short message, or drop the letters entirely for an all-bead pattern if you would rather keep it simple.
Next up in our back-to-school lineup: the classroom reward jar, another quick project you can knock out in an afternoon.
Share your beaded bracelet in the I Made It space inside Craftaholic Community. The most-loved post each month wins a one year free Premium membership.
0 Comments
Join the conversation
Log in to your Craftaholic Community account to comment, ask questions, and cheer on fellow makers.
Log in to comment