

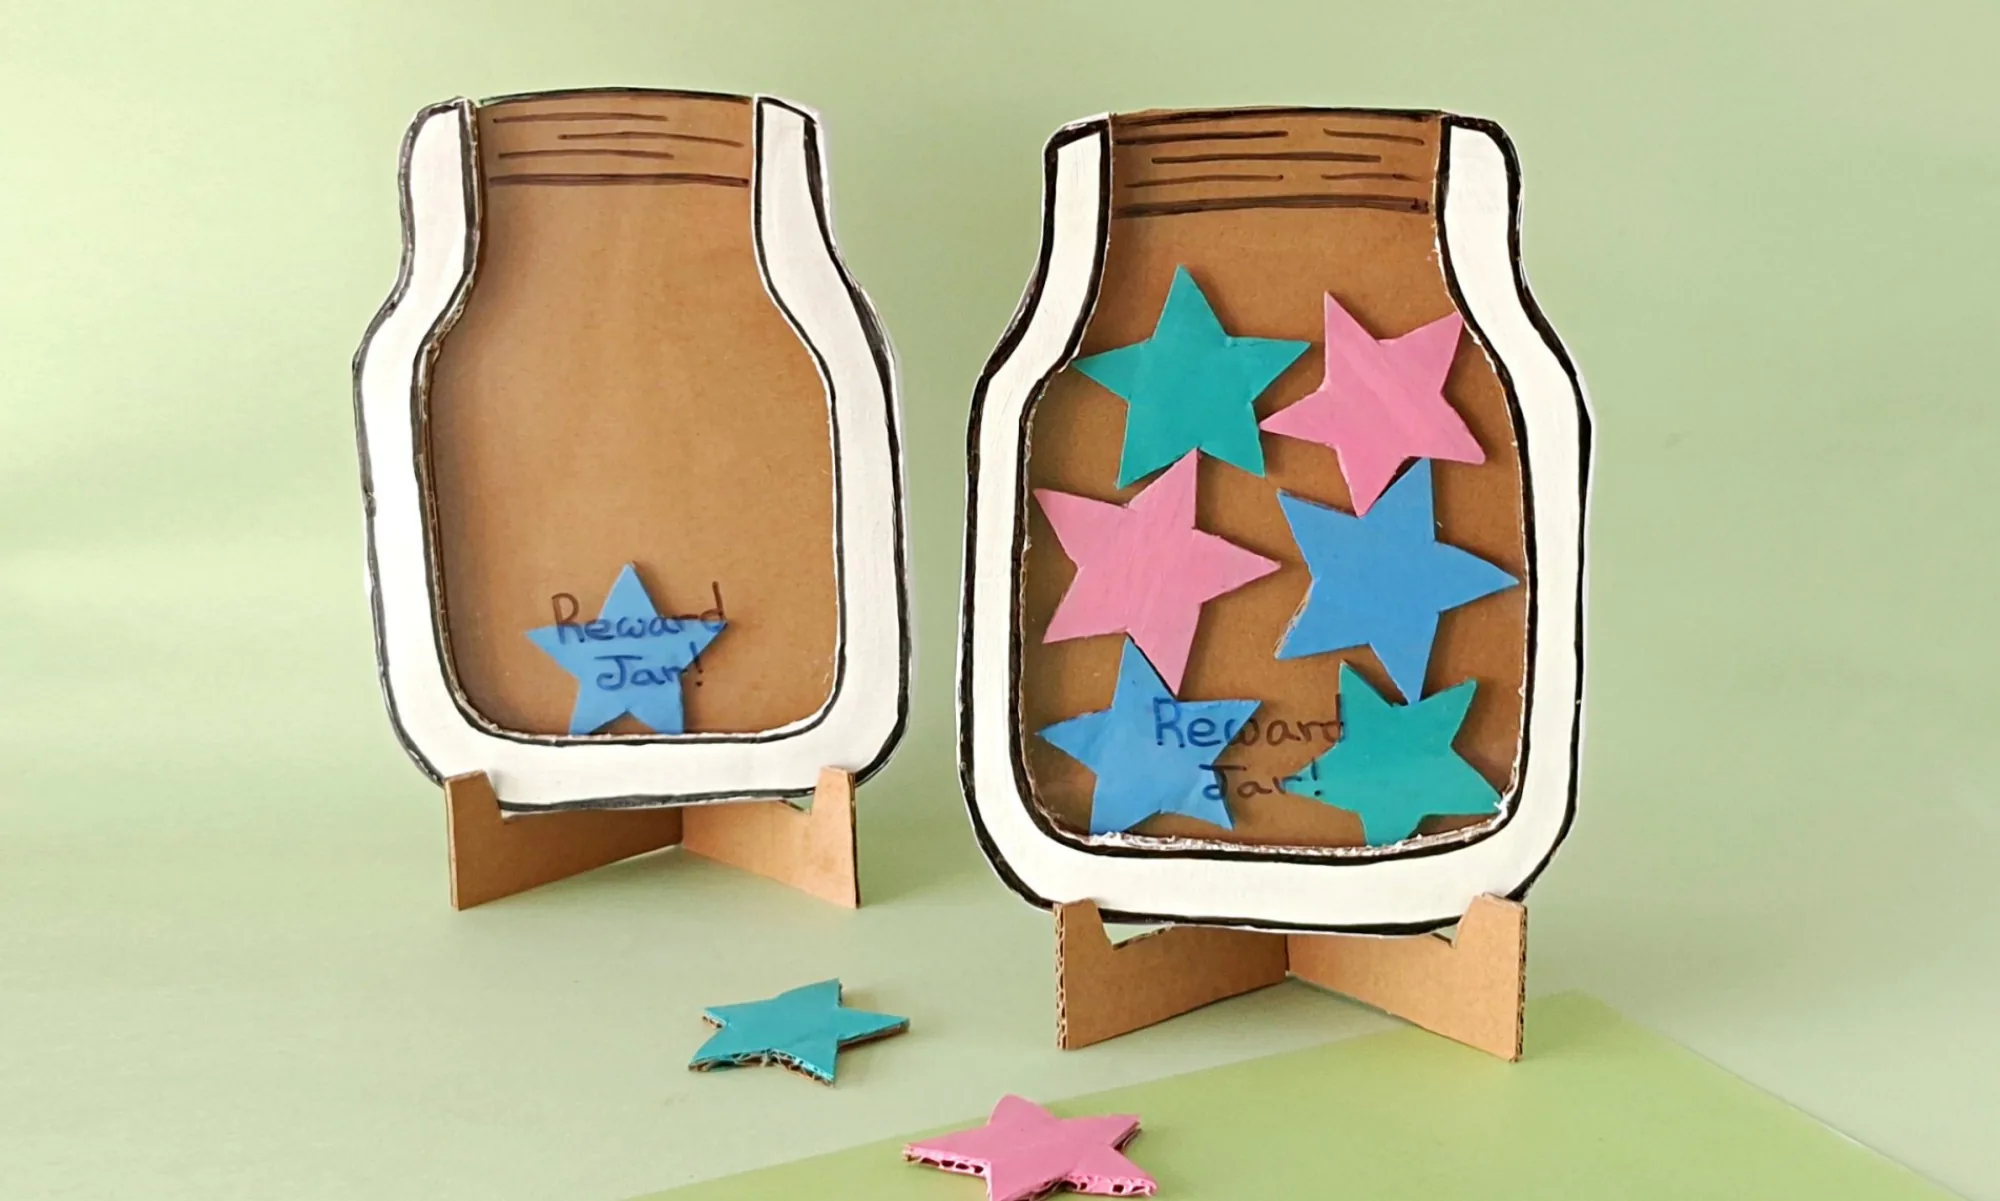
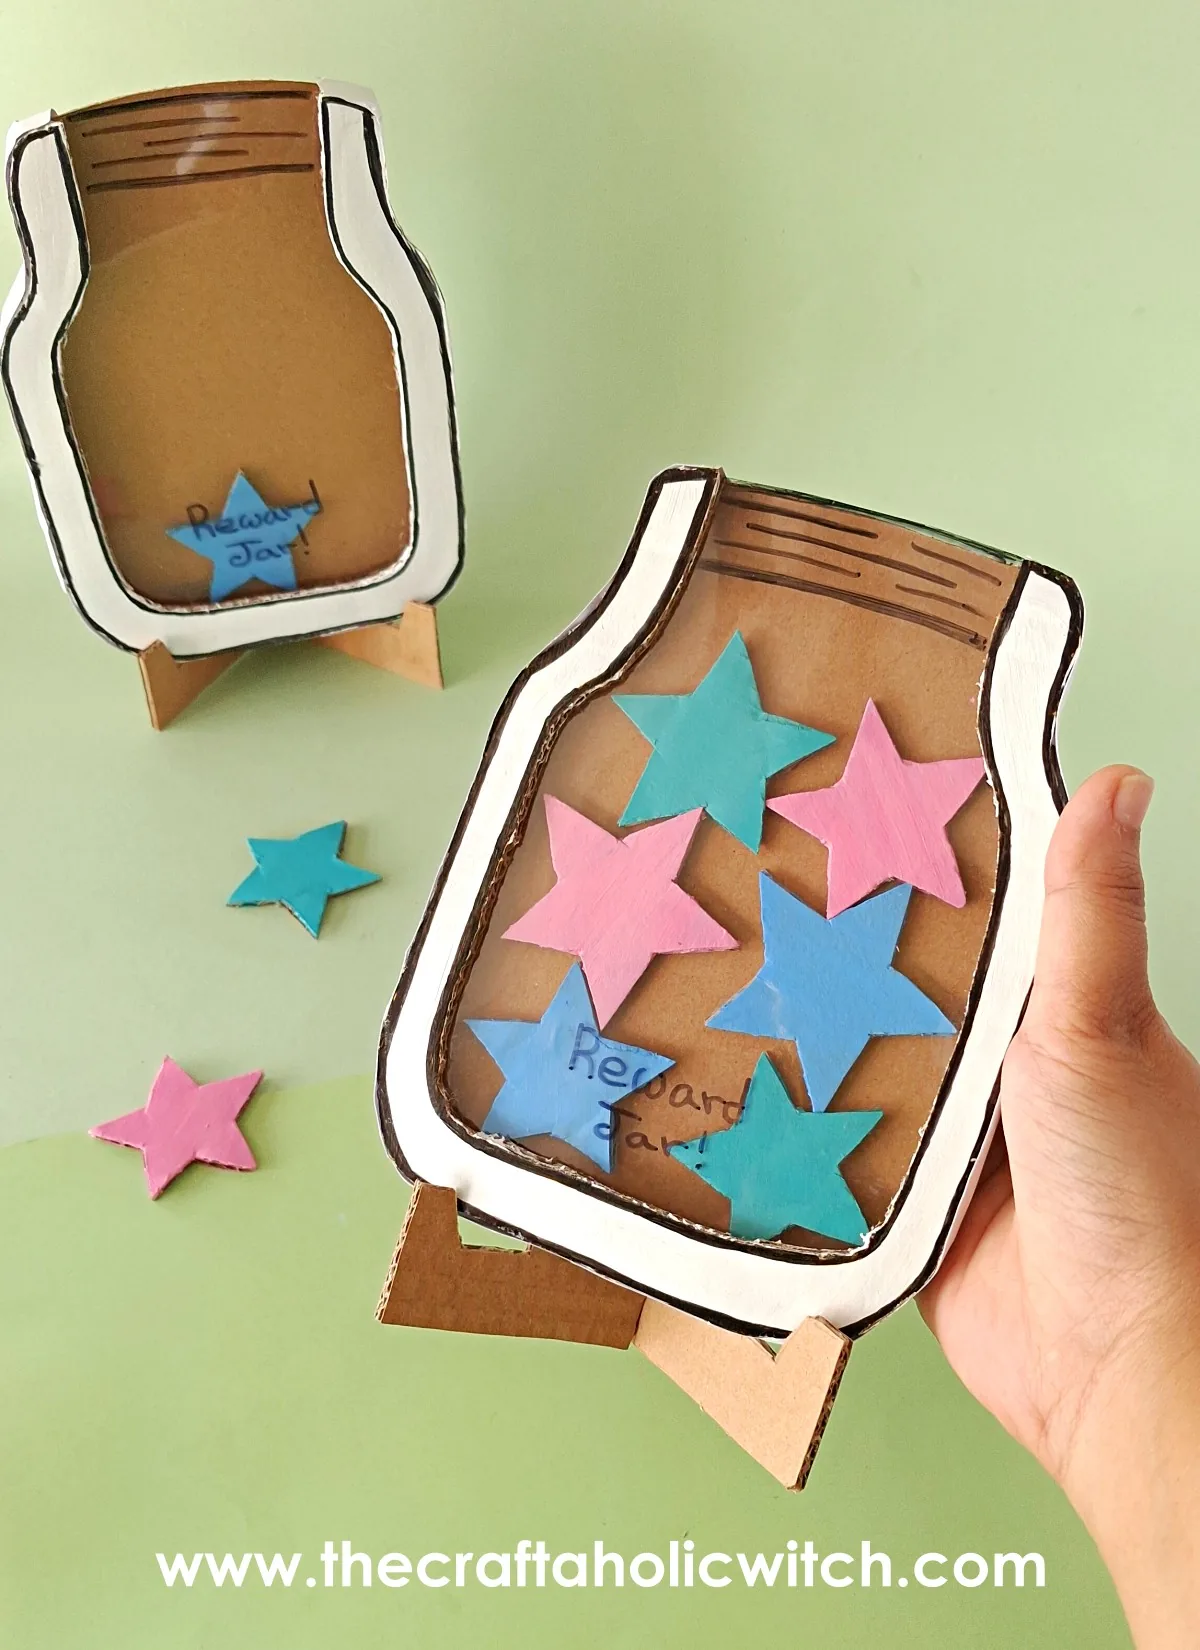
A classroom reward jar only works as motivation if every kid can actually see it filling up, and a cardboard version you build yourself does that better than most reward charts taped to a wall.
You’ll build a reusable cardboard classroom reward jar with a clear acrylic front and painted stars in about an hour, and it’s sturdy enough to refill all year long.
This reward jar is No. 3 in A Craft for Everyone Heading Back to School, our nine-project collection built around the three people a new school year is really about: the teacher setting up the room, the student walking in, and the parent sending them off. It follows the felt star pencil toppers, wrapping up Act 1’s teacher-facing trio, and a beaded bracelet for teachers opens Act 2 next. Browse the rest of the back to school collection for more.
Classroom Reward Jar at a Glance
- Difficulty: Beginner to Intermediate
- Time: About 1 hour, plus drying time for paint and glue
- Cost: Under $5 if you already have paint and glue on hand
- Ages: 8 and up, with adult help for the X-acto knife cuts
- Best for: Classroom management, teacher gifts, back-to-school decor
Join Craft Challenge: Craft Your Calm
Make something that brings you a sense of peace, share a photo, and tell us your story. It's free to enter, open to everyone, and the entry with the most reactions takes home a $100 gift card. Takes five minutes to join.
Entries close August 30, 2026. No purchase necessary.
What You Need to Make a Classroom Reward Jar
Materials
- Cardboard sheet: the jar layers, base, and stand are all cut from this, so a sturdy flat piece (an old moving box works well) holds its shape better than thin packaging cardboard.
- Clear acrylic sheet: becomes the see-through front so the class can watch the stars pile up. A stiff plastic page protector or report cover works as a stand-in if you don’t have acrylic.
- Acrylic paint: colors the stars and the jar’s front layer. One coat is usually enough.
- Craft glue: attaches the paper border strip around the side of the jar.
- Hot glue: holds the structural pieces, the jar layers and the stand, since it grabs cardboard fast and sets under the acrylic without slipping.
- Paper strip (cardstock or scrapbook paper): wraps around the side of the jar for a finished edge; pick a color or pattern that fits your classroom.
Tools
- Pencil: for tracing the pattern pieces onto cardboard.
- Black marker: outlines the front layer once the jar is assembled.
- Scissors: for cutting the cardboard patterns and the paper border.
- X-acto knife: cuts the notches in the stand pieces cleanly. Save this one for an adult.
- Paintbrush: for the stars and the front layer.
The printable pattern for the jar layers, stand, and stars is part of our Back-to-School Craft Bundle inside Craftaholic Community, so you don’t have to draw the shapes freehand.
Ask inside "Crafty Q&A" while you are making.
"Crafty Q&A" is free to join. Share your question, photo, or the exact step where you got stuck, and chat with other makers plus the Craftaholic Witch team. You can also join any discussion thread already happening inside the space.
How to Make a Classroom Reward Jar
Step 1: Cut the Cardboard Pattern Pieces
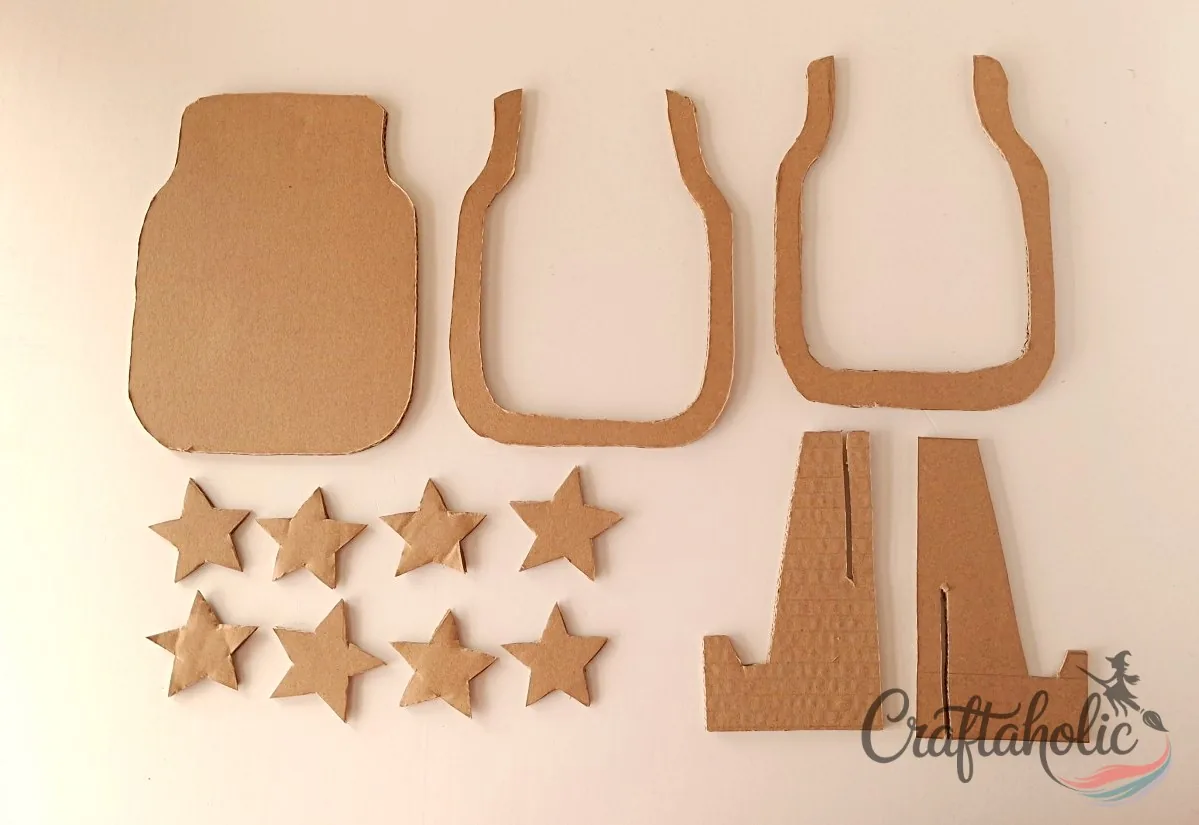
Print the template and trace each pattern onto your cardboard sheet: the jar base, the middle layer, the front layer, the two stand pieces, and eight stars. Cut them all out with scissors, switching to the X-acto knife for the tighter corners on the stand.
These five pieces (base, middle layer, front layer, stand, stars) are what every later step refers back to, so keep them sorted as you go.
Step 2: Paint the Stars
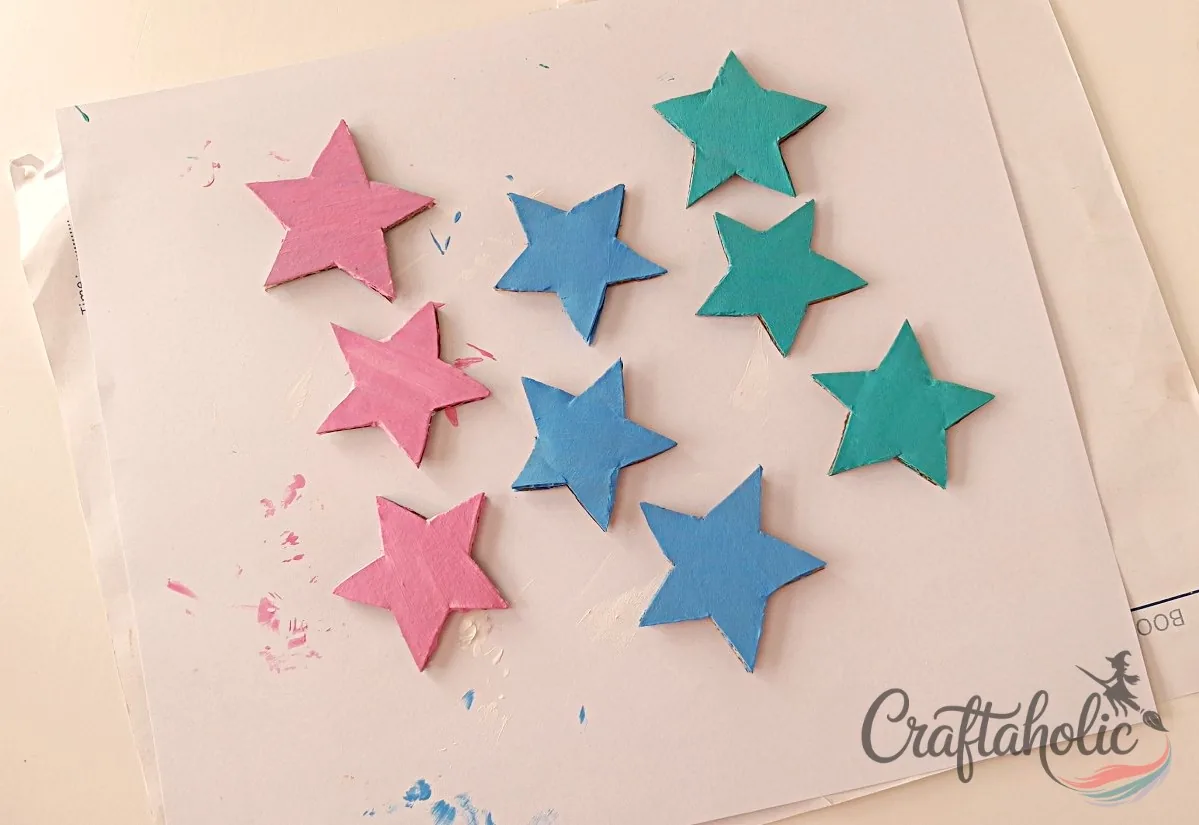
Brush a coat of acrylic paint over the eight stars, one side or both, whichever finish you’d rather see through the acrylic front. Set them somewhere flat to dry while you move on to the jar itself.
Step 3: Paint the Front Layer White
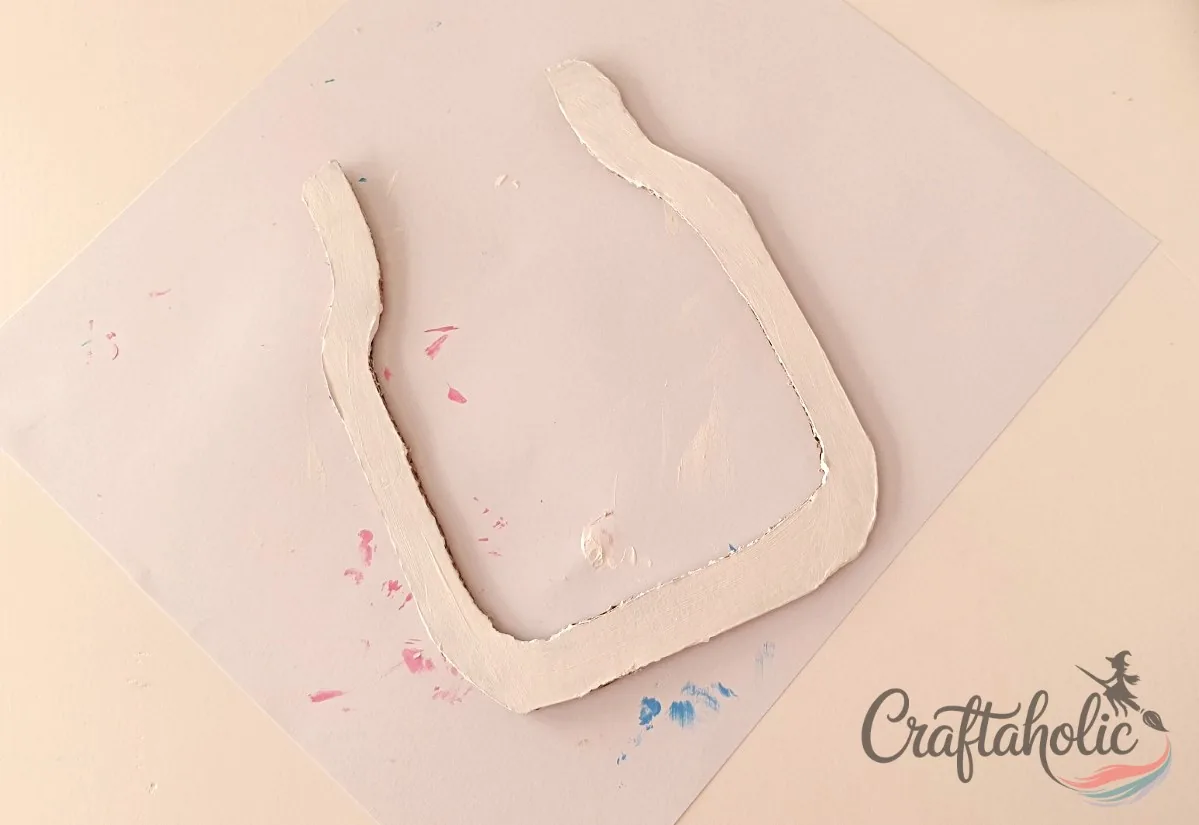
Give the front layer piece a coat or two of paint. White keeps the jar looking like glass, but any color works if you’d rather match a classroom theme.
Step 4: Glue the Base and Middle Layer Together
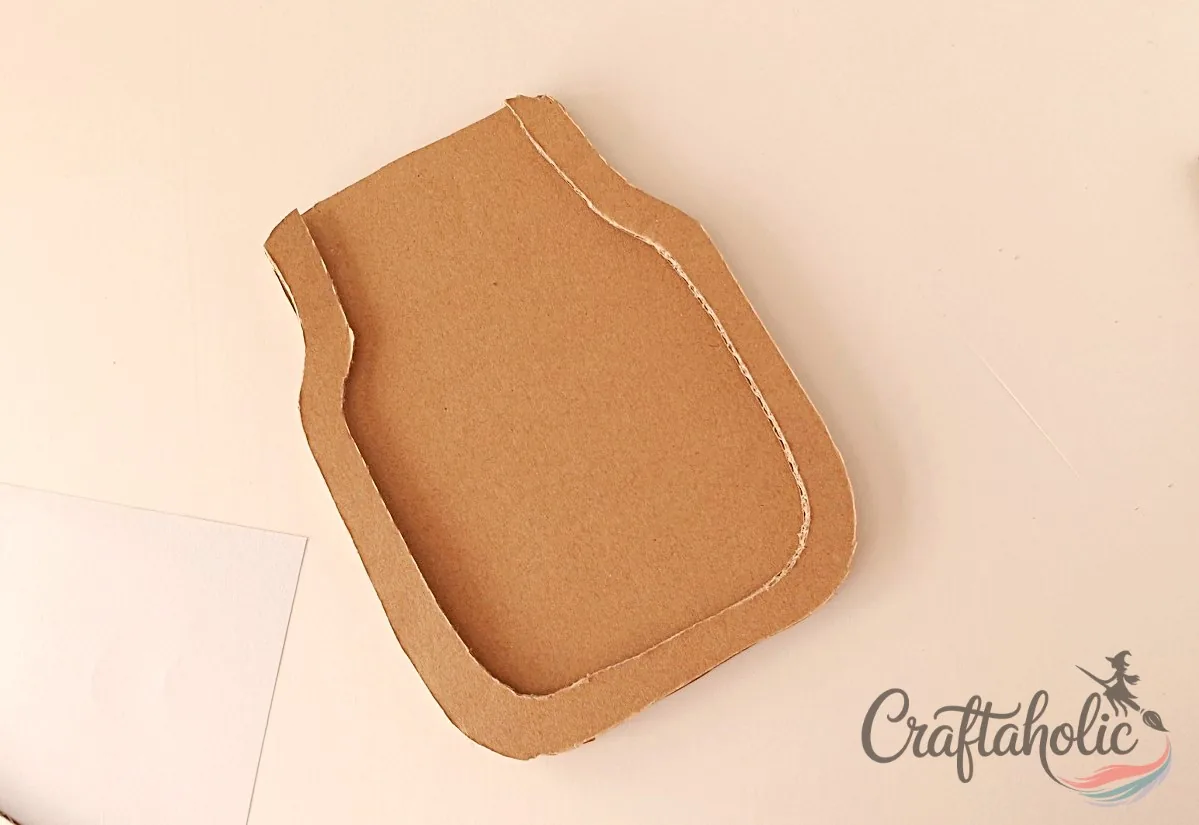
Run a bead of hot glue around the middle layer and press it onto the jar base, lining up the edges before the glue grabs. This pairing is what gives the jar its depth once the acrylic and stars go in between them.
Step 5: Trace the Front Layer Onto the Acrylic Sheet
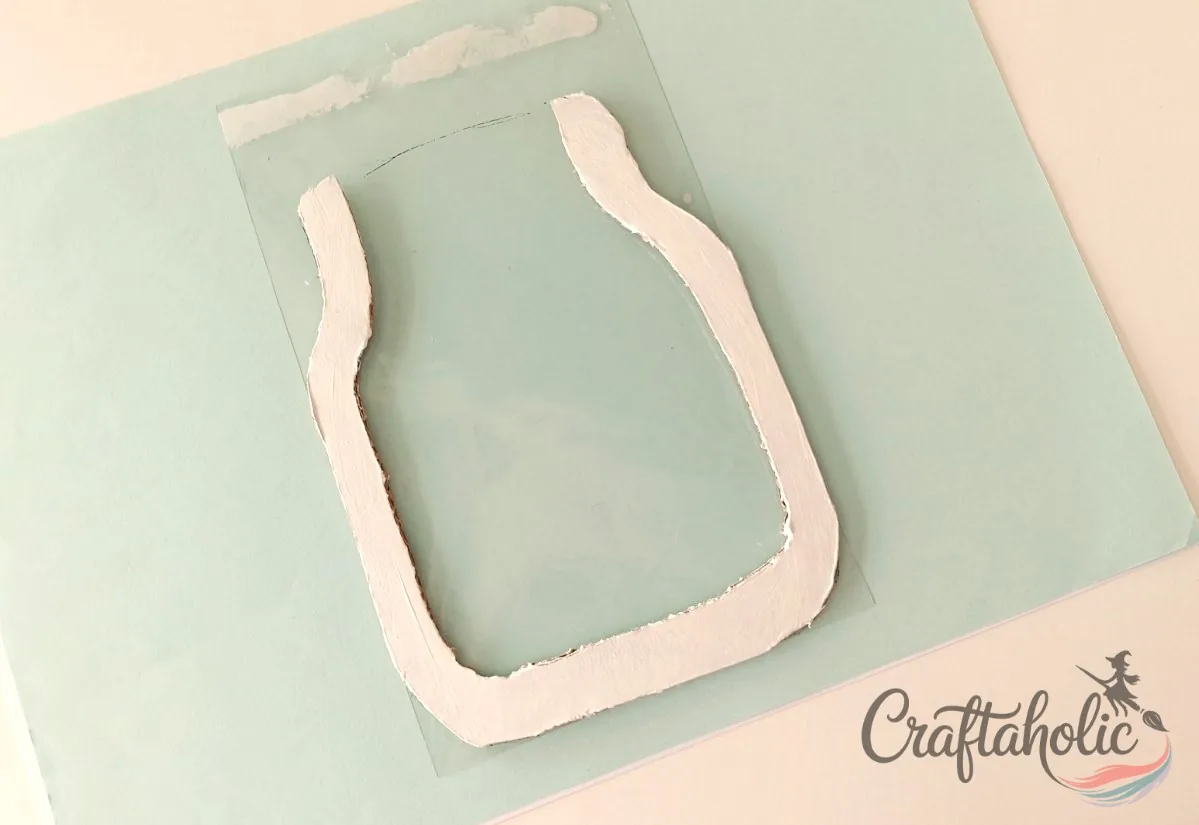
Lay the acrylic sheet on a flat surface, set the painted front layer on top, and trace its outer edge with a pencil. Cut the acrylic along that line so it matches the front layer exactly.
Step 6: Glue the Acrylic Sheet Onto the Middle Layer
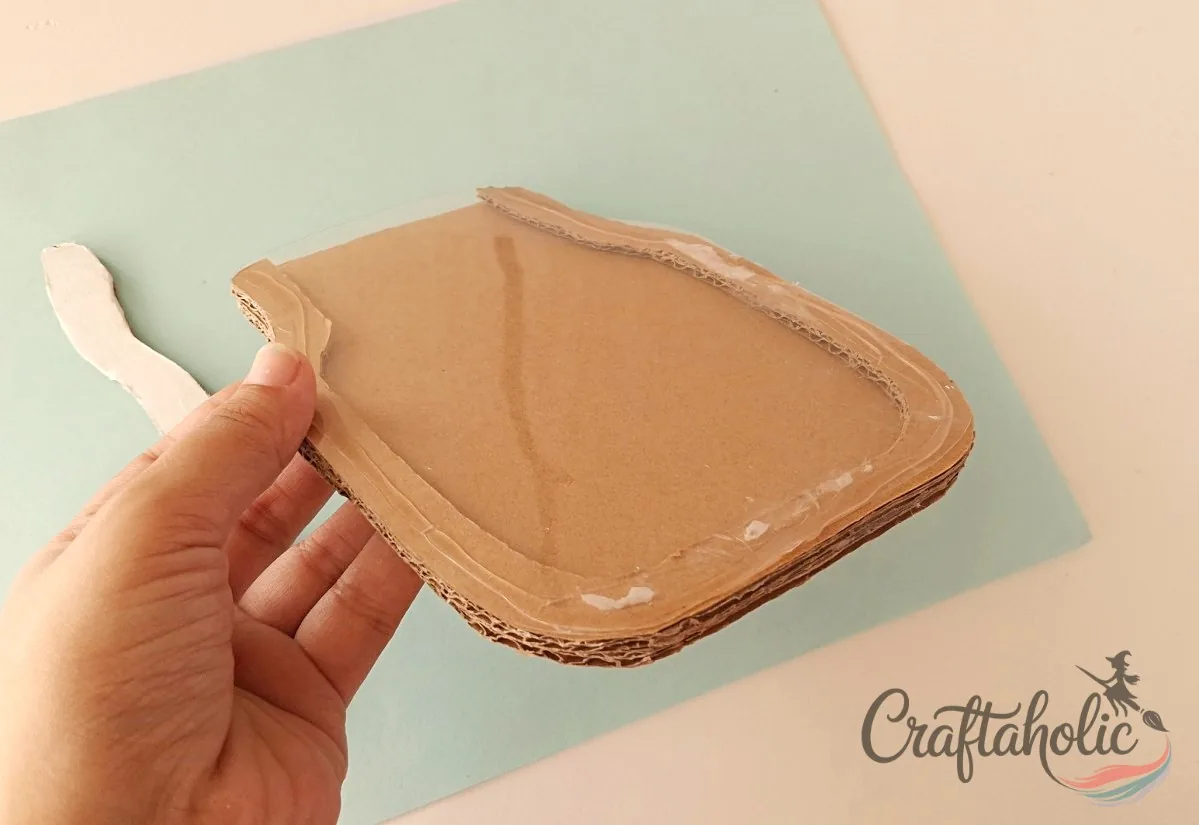
Apply hot glue along the top surface of the middle layer, then set the cut acrylic sheet on top of it. Keep the glue to a thin line right at the edge so it doesn’t smear across the clear plastic.
Step 7: Glue the Front Layer Over the Acrylic Sheet
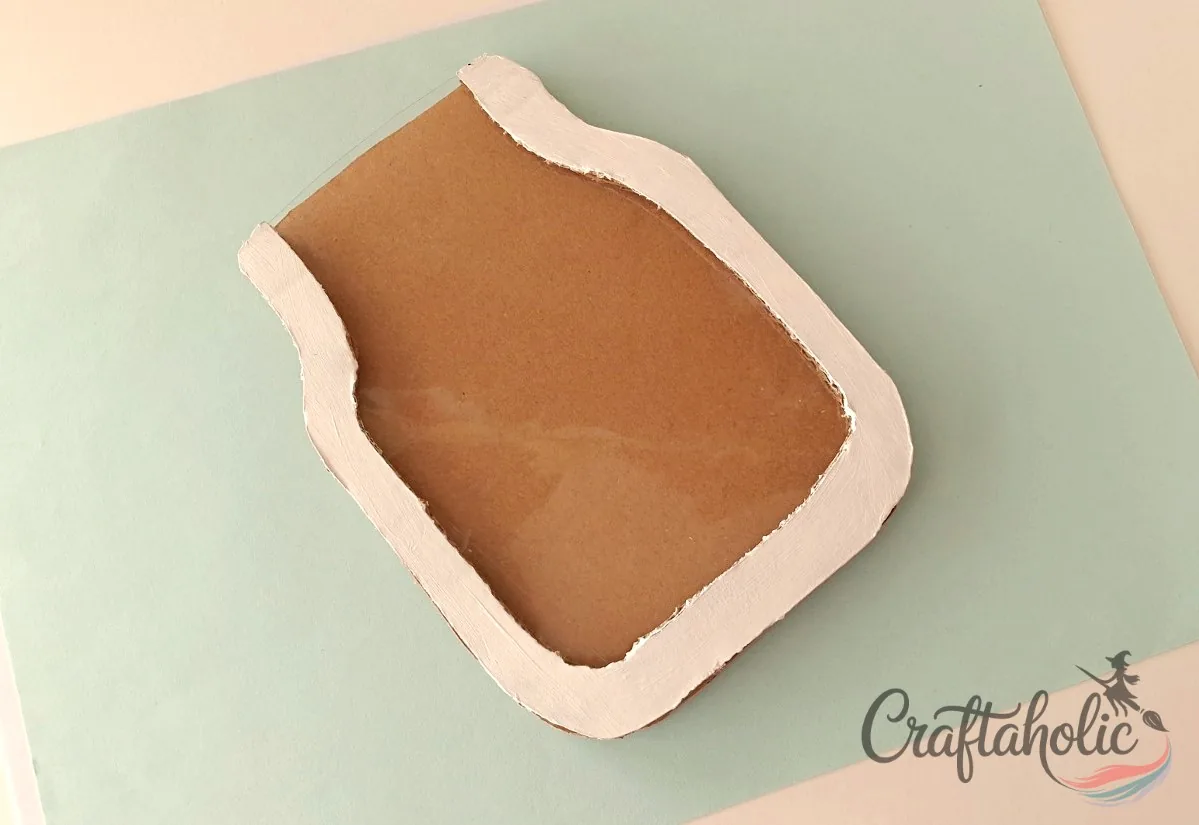
Run hot glue around the border of the acrylic sheet and press the painted front layer down onto it. That closes up the jar pattern into a single piece with the acrylic sandwiched safely inside.
Step 8: Outline the Jar in Black Marker
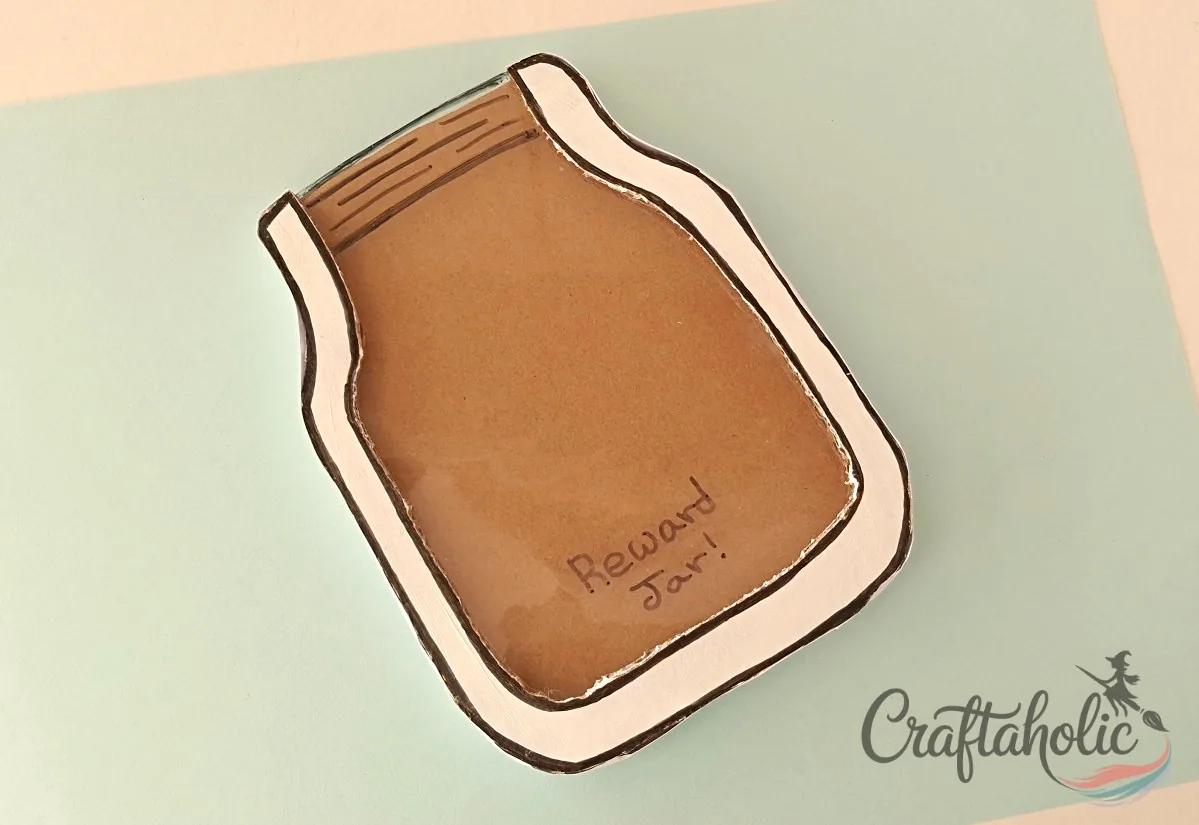
Trace a black marker line around the front layer and across the top of the acrylic to give the jar a finished, hand-drawn look. This is also a good spot to add “Reward Jar” or a class name across the front, the way it appears in the photos.
Step 9: Wrap a Paper Border Around the Jar
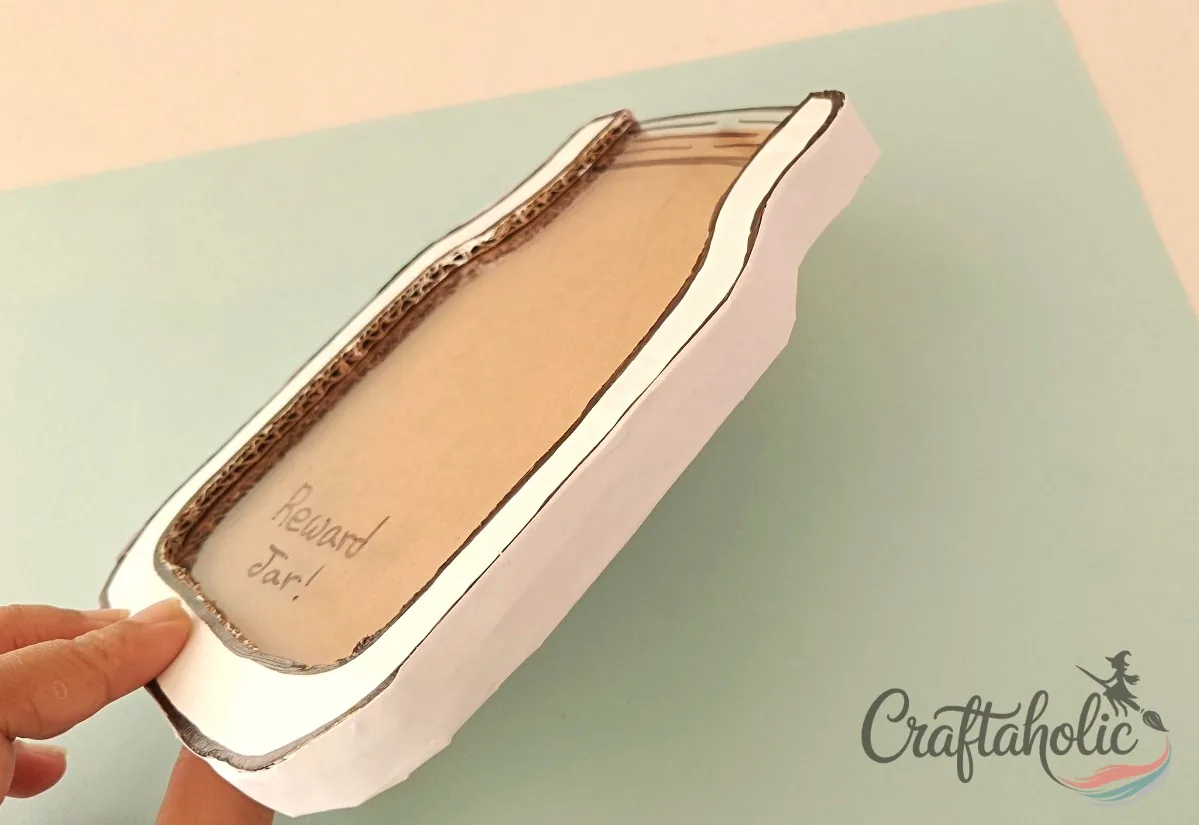
Measure a strip of paper long enough to wrap the side of the jar and just as thick as the layered cardboard. Glue it around the edge with craft glue so the raw cardboard sides disappear behind a clean border.
Step 10: Assemble the Cardboard Stand
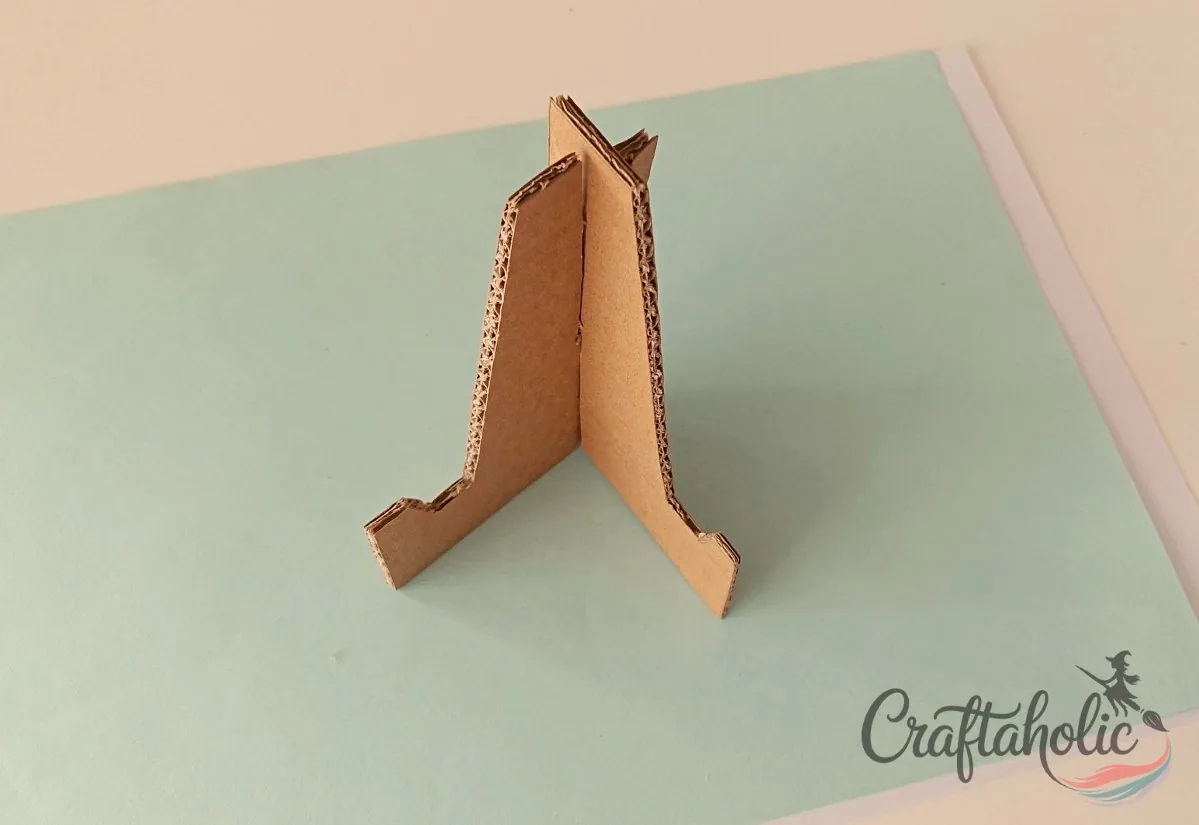
Slide the slots on the two stand pieces into each other until they lock into an X shape. No glue needed here, the notches hold the stand together on their own.
Step 11: Set the Jar on Its Stand and Add the Stars
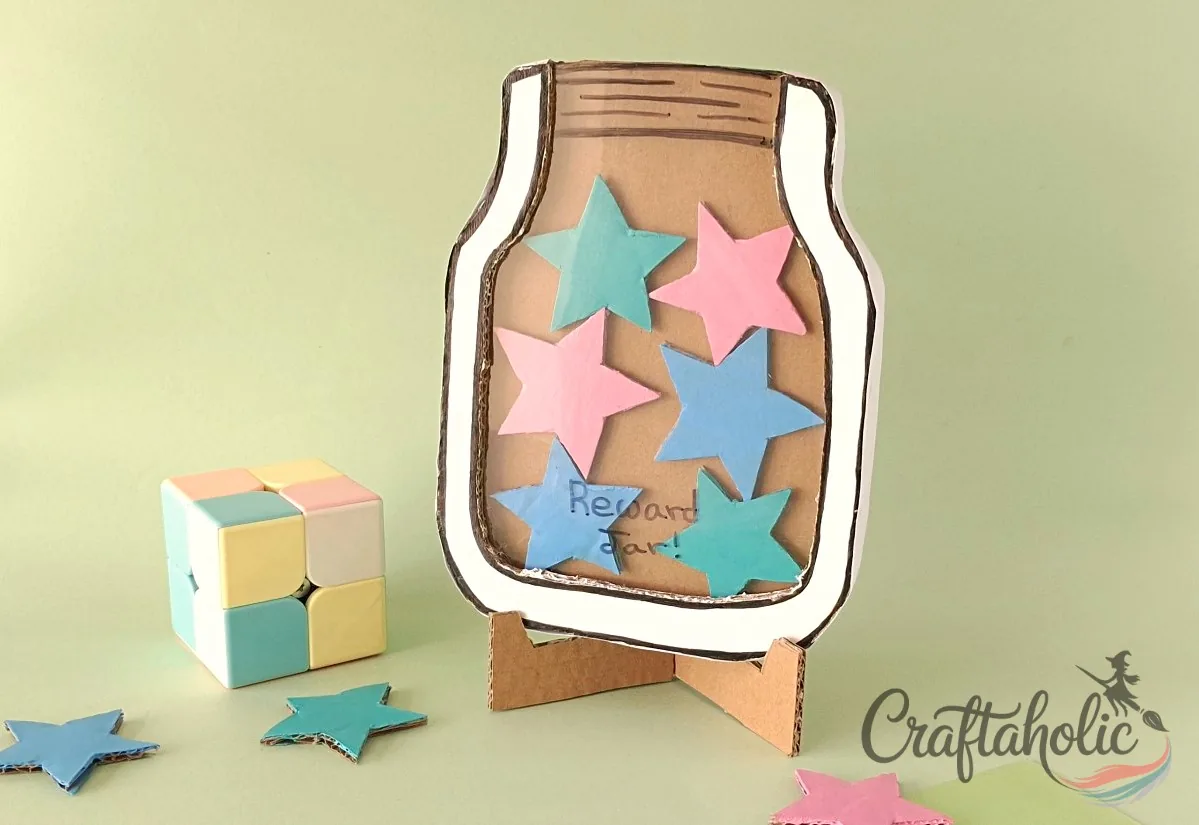
Slot the bottom edge of the jar through the stand so it stands upright on its own. Drop the painted stars in through the open top whenever the class earns one, and watch them stack up behind the acrylic all year.
Share it in "I Made It" and let us cheer you on.
Post your finished make in "I Made It" so the community can celebrate it with you. Cheer on other makers too. Each month, the most loved craft wins 1 year of Craftaholic Premium ($59)
Tips for Your Classroom Reward Jar
- No acrylic sheet on hand? A stiff plastic page protector or report cover works as a stand-in, just glue it down flat before you add the front layer so it doesn’t bow.
- Wipe the stars off with a damp cloth at the end of the year and start fresh in the fall. The cardboard body and acrylic front hold up for several school years if you keep it out of direct sun.
- Use a different star color for each type of achievement, teamwork, kindness, or effort, so the jar tracks more than one goal at a glance.
- Add a coat of clear sealant or a layer of clear packing tape over the front layer if the jar is going to get handled a lot by younger students.
Frequently Asked Questions
How do I use a classroom reward jar?
Add a star to the jar each time the class hits a shared goal, shows kindness, or works well as a team, then set a reward for when it fills up. Because the front is clear acrylic, the whole class can watch it fill in real time, which is what makes it work better than a wall chart.
What can I use instead of a clear acrylic sheet?
A stiff plastic page protector, a report cover, or clear packaging plastic all work as a stand-in. It won’t be as rigid as acrylic, so glue it down flat against the middle layer before adding the front, and avoid anything too thin or it will bow.
How long should the paint dry before I start assembling?
Give acrylic paint at least 20 to 30 minutes to dry to the touch before handling the stars or the front layer, longer if you used two coats. Rushing this step is the most common reason the paint smudges during assembly.
Can I reuse the jar for a new class each year?
Yes. Wipe the stars clean or swap in a fresh set, and the cardboard body and acrylic front hold up for several school years if you store it flat and out of direct sun. Keep the extra stars in an envelope taped to the back of the stand so they don’t get lost over the summer.
Is this project safe for kids to help with?
Kids can cut the stars, paint, and glue the border strip. Save the X-acto knife cuts on the stand and the acrylic tracing for an adult, since those steps need a steadier hand and a sharp blade.
More Home Decor Tutorials to Try
- Easy Cardboard Snowflake Ornament for Kids
- Toilet Paper Roll Fairy House Lantern
- DIY Recycled Pumpkin Box
Share your classroom reward jar in the I Made It space inside Craftaholic Community. The most-loved post each month wins a one year free Premium membership.
0 Comments
Join the conversation
Log in to your Craftaholic Community account to comment, ask questions, and cheer on fellow makers.
Log in to comment