


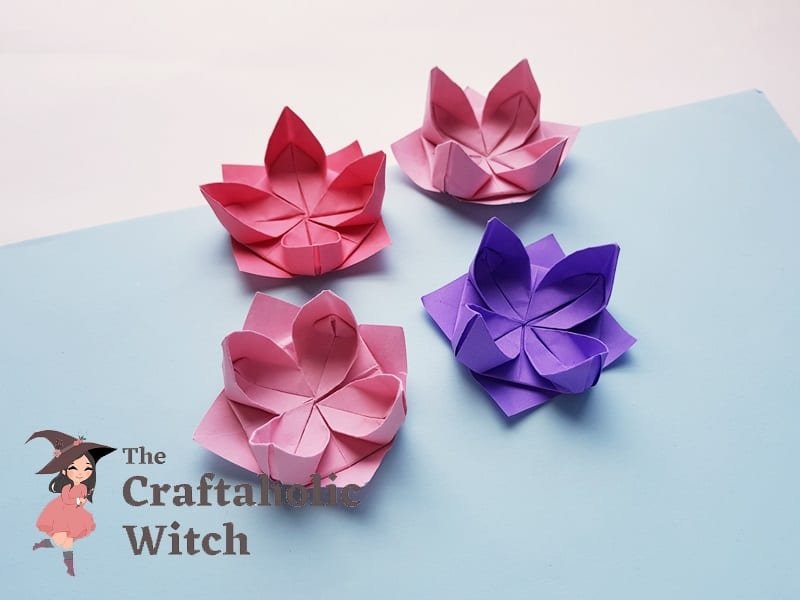
One square of paper, a little patience with corner folds, and about 15 minutes is all it takes to fold an origami lotus flower that looks like it took much longer.
This is the beginner lotus in the Fold a Paper Flower Garden series, where we fold five different origami flowers and arrange them in a moss-filled basket. In the finished garden, these simple lotus flowers sit along the front and sides of the basket. If you want the larger, more detailed centerpiece lotus, the realistic origami lotus flower tutorial is the one to grab next.
The whole method comes down to one repeated move: folding corners to the center. You do it three times across 13 steps, and by the end the layers lift open into rounded petals on their own. Once you make one, the next goes much faster.
Origami Lotus Flower at a Glance
- Difficulty: Beginner
- Time: About 15 minutes
- Cost: Under $1 (one sheet of paper)
- Ages: 8+ (younger with adult help on the petal-opening steps)
- Best for: Spring decor, gift toppers, the Fold a Paper Flower Garden arrangement

Join Craft Challenge: Craft Your Calm
Make something that brings you a sense of peace, share a photo, and tell us your story. It's free to enter, open to everyone, and the entry with the most reactions takes home a $100 gift card. Takes five minutes to join.
Entries close August 30, 2026. No purchase necessary.
What You Need to Make an Origami Lotus Flower
Materials
- 1 sheet of square paper, 15 cm x 15 cm (6 x 6 inches): standard origami paper works perfectly, and colored printer paper cut to a square is a great free substitute
Tools (Optional)
- Ruler and pencil, only if you are cutting a square from regular paper
- Scissors, for trimming a square from a larger sheet
- A small drop of craft glue, to keep the inner petal folds locked in steps 9 and 10

Ask inside "Crafty Q&A" while you are making.
"Crafty Q&A" is free to join. Share your question, photo, or the exact step where you got stuck, and chat with other makers plus the Craftaholic Witch team. You can also join any discussion thread already happening inside the space.
How to Make an Origami Lotus Flower
Step 1: Base Creases

Fold the square paper in half horizontally, then unfold. Fold it in half vertically, then unfold. Now fold diagonally corner to corner in both directions, unfolding each time. You end up with four crease lines crossing at the center of the square. These are the guide lines that everything else builds on, so take your time and make them crisp.
Step 2: Folding Corners

Bring one corner up to meet the center point exactly, using the crease lines as your guide. The corner tip should land right where all four lines cross. Fold all four corners in the same way. When you are done, you have a smaller square with neat edges meeting in the middle.
Step 3: Folding Corners (2nd Time)

The square now has four smaller new corners. Bring each one to the center point again, the same way as before. Press each fold flat with your fingernail before moving to the next. You are building up the layers that will become the inner petals.
Step 4: Flip the Pattern

Keeping all the folds in place, slide your hand underneath and flip the whole piece over in one smooth motion. The folds should now be facing down on the table.
Step 5: Folding Corners (3rd Time)

You are on the back of the piece now, and you have four new corners. Bring each one to the center, just as in steps 2 and 3. Three rounds of corner folds is what gives the lotus its layered petal structure, so this third round matters.
Step 6: Unfold the Last Folds

Open up the four corner folds you just made in step 5, folding them back out. Only the outermost layer opens; the layers underneath stay folded and in place.
Step 7: Fold Out Corners

Take one corner and fold it outward, away from the center, so roughly two-thirds of the flap fans out. Work around all four corners the same way. These become the large outer petals. A light touch here gives a more natural, open look than pressing them completely flat.
Step 8: Flip the Pattern

Hold everything together and flip the piece back over, outer petals face down on the table. You are now looking at the front of the lotus.
Step 9: Fold in Corners

You can see two overlapping squares on the front. Take one corner of the top, smaller square and fold it toward the center. This is the spot where a tiny drop of craft glue makes a real difference if you want the finished lotus to stay open long term.
Step 10: Fold in All Corners

Fold in the other three corners of the top square the same way. Once all four are down, you have a neat square center with a ring of inner petals forming just underneath. Press each fold firmly so they hold.
Step 11: Fold Out the Bottom Layer

Flip the piece over. You will see four tucked-in triangular flaps on the back. Carefully pull one of them out and away from the center. Go slowly here; the paper has a lot of layers stacked at this point and it can tear if you rush.
Step 12: Bring the Bottom Layer to the Front

Fold that released flap all the way over to the front and press it flat. This adds one outer petal layer. The paper is thick here, so firm, deliberate pressure gets a cleaner result than speed.
Step 13: Bring All 4 Bottom Layers to the Front

Pull out and fold over the remaining three flaps one at a time. After the last one folds forward, your origami lotus flower is complete. Run your fingernail gently along the outer petals to curve them back slightly and you get a more bloomed, open look that really brings the flower to life.
Share it in "I Made It" and let us cheer you on.
Post your finished make in "I Made It" so the community can celebrate it with you. Cheer on other makers too. Each month, the most loved craft wins 1 year of Craftaholic Premium ($59)
Tips for Making an Origami Lotus Flower
- Start with a square that is exactly square. Even a slight difference between width and height throws the center point off and the petals end up uneven.
- Press each crease with your fingernail as you go. Soft folds compound: a slightly loose crease in step 2 becomes a noticeably wobbly petal by step 13.
- Use a small drop of craft glue in steps 9 and 10 if you plan to display the lotus or add it to an arrangement. It keeps the inner petals from drifting open over time.
- When pulling out the bottom layers in steps 11 and 12, go one at a time and hold the rest of the piece steady. Pulling all four at once is the fastest way to tear the paper at the seams.
Watch: Origami Lotus Flower Folding Instructions
Frequently Asked Questions
What size paper do I need to make an origami lotus flower?
A 15 cm x 15 cm (6 x 6 inch) square is the standard size and folds cleanly every time. Standard origami paper comes pre-cut to this size, which is why it works so well. If you are cutting from regular colored or printer paper, any square in that ballpark will work fine. Just make sure the corners are true right angles or the center point ends up off center.
Do I need special origami paper for this?
Not at all. Any paper that holds a crease well will work. Colored printer paper and construction paper both fold cleanly for this design. Avoid tissue paper because it is too floppy to hold the corner folds, and skip very thick card stock because the multiple folding rounds get too bulky to press flat. Crisp and lightweight is what you are after.
Why do my origami lotus petals keep unfolding?
The most common reason is loose folds in steps 9 and 10. Go back over those with your fingernail and press a sharp crease. A tiny drop of craft glue between those layers, before you press them flat, will hold the inner petals closed permanently. This matters most if you plan to display the lotus or add it to a paper flower garden arrangement.
How long does it take to fold an origami lotus flower?
About 15 minutes for your first one. The 13 steps look like a lot at first glance, but each is a quick corner fold. After your second or third lotus the whole thing takes closer to 10 minutes. Making a batch of five for the Fold a Paper Flower Garden series goes faster than you expect once you get into the rhythm.
What can I make with origami lotus flowers?
A single lotus works as a gift topper, a greeting card accent, or a decorative piece on a shelf or windowsill. Make three to five and they become a table centerpiece or a wreath filler. In the Fold a Paper Flower Garden series, the simple lotus flowers fill in the front and sides of the basket arrangement, while the large realistic origami lotus flowers take the center focal spots.
More Origami Flower Tutorials
- How to Make an Origami Lily
- How to Make Origami Tulips
- How to Make an Origami Rose in Bloom
- Realistic Origami Lotus Flower (Advanced)
- How to Make Paper Daffodils
Share your finished origami lotus flower in the I Made It space inside Craftaholic Community. The most-loved post each month wins a one year free Premium membership.
4 Comments
Super easy to make and looks beautiful too
I tried some with my sister’s
Loved it ??????
Thanks 🙂
It will help me make more lotus for my school board
tried with origami paper, was kind of hard to fold near the end but turned out quite nice
Join the conversation
Log in to your Craftaholic Community account to comment, ask questions, and cheer on fellow makers.
Log in to comment