

We're building a home for crafters, lifetime membership is open. Founding membership is open Become a Founding Member Join
Skip to content
Explore
Home Tutorials Series Shop Seasonal
Community
Membership Idea Board Craft Challenges Create & Celebrate
More
About Search tutorials
Craftaholic Witch
Login
Home Tutorials Series Shop Seasonal Membership Idea Board Craft Challenges
Sign in Join free
Home / Home Decor / Storage & Utility Crafts / Burlap gift pouch

How to Make a Small Gift Bag With Burlap (Eco Friendly)

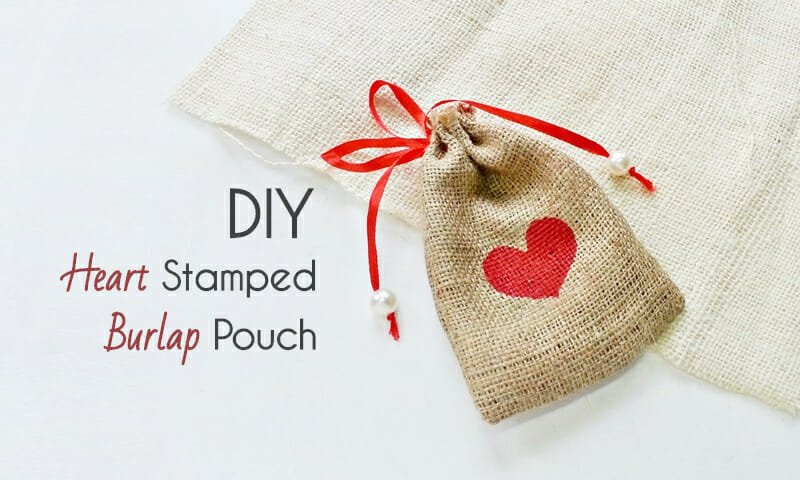
Make a small burlap gift pouch with a painted heart and ribbon drawstring using simple sewing or gluing steps. This beginner-friendly project is a reusable way to wrap jewelry, charms, gift cards, and other tiny handmade gifts.

Muhaimina Faiz
Author & Craft Artist
683 Makers
Share ▾
Save to Pinterest Share on Facebook Share by email
Add to Preferred Sources
At a Glance
Time
35-45 minutes
Skill Level
Beginner
Est. Cost
Under $6
Best for
Jewelry, charms, and tiny keepsakes
Small burlap gift pouch with a painted heart and ribbon drawstring
Supplies & Tools

What You'll Need

Materials
Burlap fabric 1 piece about 5.5 x 13 inches, or 2 matching rectangles
Sticker paper for a simple heart stencil
Fabric paint any color you like
Sewing thread to match or contrast with the burlap
Satin ribbon about 1 cm wide for the drawstring
Optional beads for the ribbon ends
Tools
Scissors
Paintbrush
Sewing machine or a hand-sewing needle
Tapestry needle or safety pin for threading the ribbon
Let's Make It

Step-by-Step Tutorial

3 steps · 10 supplies and tools · 0%
Craftaholic Premium Enjoying this project?

There are hundreds more waiting for you.

Premium unlocks every printable template and pattern on the site, an ad-free read, the members' studio, and a fresh craft challenge every month. Founding pricing is open now, and the yearly plan is the best value.

See what Premium unlocks or create a free account

Cancel anytime. Join the crafters already inside.

Step 1 of 3

Cut the burlap and paint the front panel

Cut burlap fabric and paint a heart on the front panel for the gift pouch

Cut one long piece of burlap about 5.5 x 13 inches, or cut two matching rectangles if you prefer to sew the front and back separately. Place a heart sticker or another simple stencil about 3 inches below the top edge, slide scrap paper underneath, and paint inside the shape before letting it dry fully.

Tip
Leave a little extra seam allowance while cutting because loose burlap edges can fray as you handle them.
Step 2 of 3

Sew the pouch body and turn it right side out

Fold and stitch the burlap to form the small gift pouch body

Fold the burlap with the painted side facing inward and stitch the two side edges, leaving the top open. If you started with two rectangles, stitch around three sides instead, then turn the pouch right side out so the painted heart sits neatly on the front.

Note
If you are skipping the sewing machine, fabric glue can replace the side seams, but let the pouch dry completely before you thread the ribbon.
Step 3 of 3

Thread the ribbon drawstring and finish the pouch

Thread a ribbon through the top of the burlap pouch to make the drawstring

Use a tapestry needle or safety pin to weave a narrow ribbon through the loose top edge of the pouch until both ends meet. Pull the ribbon to gather the opening, tie a bow or knot, and add beads to the ribbon ends if you want a more finished gift-ready look.

Tip
Keep the ribbon a little below the very top edge so it slides more smoothly and helps the pouch close evenly.
Before You Shop

Material Selection Tips

Choose a tighter weave if you want crisper painted edges
Loose burlap still works, but a slightly tighter weave makes the stencil edge read more clearly and helps the pouch feel sturdier after sewing.
Use fabric paint instead of regular acrylic when possible
Fabric paint sits better on burlap and stays a little more flexible after drying, which matters if the pouch will be reused or folded flat later.
Leave enough space at the top for the drawstring path
Keep the painted shape and the side stitching a little lower than the rim so the ribbon can slide through the upper weave without catching on the design.
Got Questions?

Frequently Asked

Can I make this burlap gift pouch without a sewing machine?
Yes. You can hand stitch the side seams with strong thread or use fabric glue if the pouch will hold only light items. Let glued seams dry completely before threading the ribbon.
What can I put inside a small burlap gift pouch?
This size works well for earrings, rings, bracelets, gift cards, wrapped chocolates, charms, and other small keepsakes that do not need a rigid box.
Can I use a different shape instead of a heart?
Absolutely. Stars, initials, leaves, snowflakes, and other simple motifs all work well with the same stencil-and-paint method.
How do I stop the burlap from fraying too much?
Leave a little seam allowance, avoid overhandling the cut edges, and stitch the sides soon after cutting. Threading the ribbon close to the top also helps that upper edge look more controlled.
Community

Made this? Share your make.

Share your finished burlap pouch inside Craftaholic Community or tag @craftaholic_witch_official so other makers can see your version.

Join the circle Tag @craftaholic_witch_official
Article Details
Published
January 22, 2016
Updated
May 6, 2026

Muhaimina Faiz

Author & Craft Artist

Muhaimina Faiz has published 52 home decor tutorials focused on handmade projects that feel useful, giftable, and display-ready. She has taught crafts since 2012, won 50+ international competitions, and her work has been featured in Good Housekeeping and Dhaka Tribune.

Discussion

0 Comments

No comments yet. Be the first to join the conversation.

Join the conversation

Log in to your Craftaholic Community account to comment, ask questions, and cheer on fellow makers.

Log in to comment
Contents
At a Glance Supplies & Tools Step-by-Step Tutorial Step 1: Cut the burlap and paint the front panel Step 2: Sew the pouch body and turn it right side out Step 3: Thread the ribbon drawstring and finish the pouch There are hundreds more waiting for you. Material Tips FAQ Share Your Make Discussion
Craftaholic Witch

Ready-to-make craft projects with templates, steps, and supplies included, plus self-paced courses and a community of makers. Everything you need to finish what you start.

Founded by Muhaimina Faiz

Crafts

Jewelry Making Origami Paper Crafts Paper Flowers Home Decor Plushies & Soft Toys Crochet

Platform

Shop Idea Board Membership Community Free Templates Courses Tutorials Seasonal Crafts

Company

About Contact Privacy Policy Terms of Service Disclaimer
© 2026 Craftaholic Witch · Aralas Creative
Pinterest Instagram YouTube Instructables Facebook

🛡️

Keep the tutorials free

Ads are what keep every tutorial on this site free to follow. Please turn off your ad blocker to keep reading — or create a free account and browse without this reminder.

Join free