

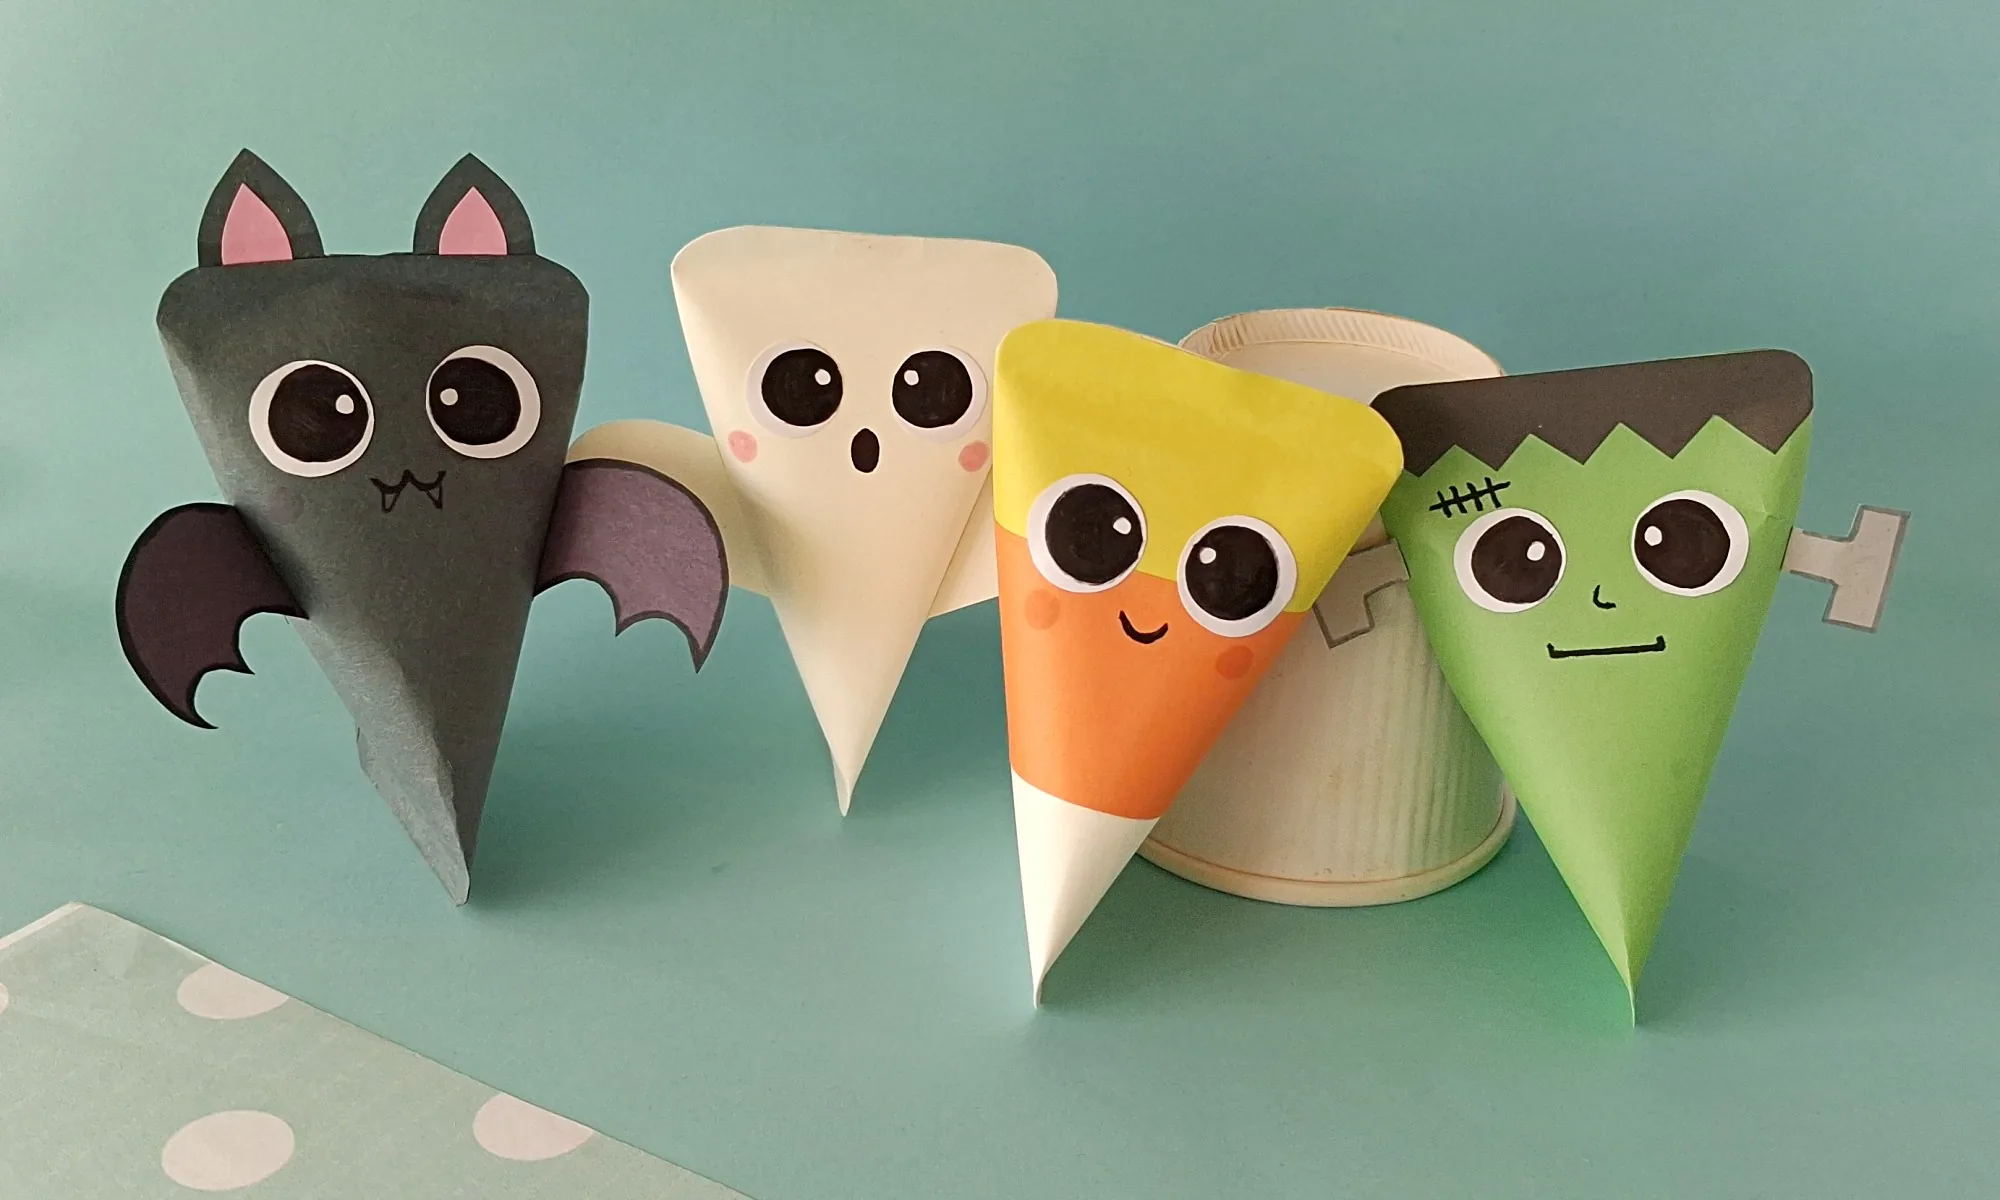
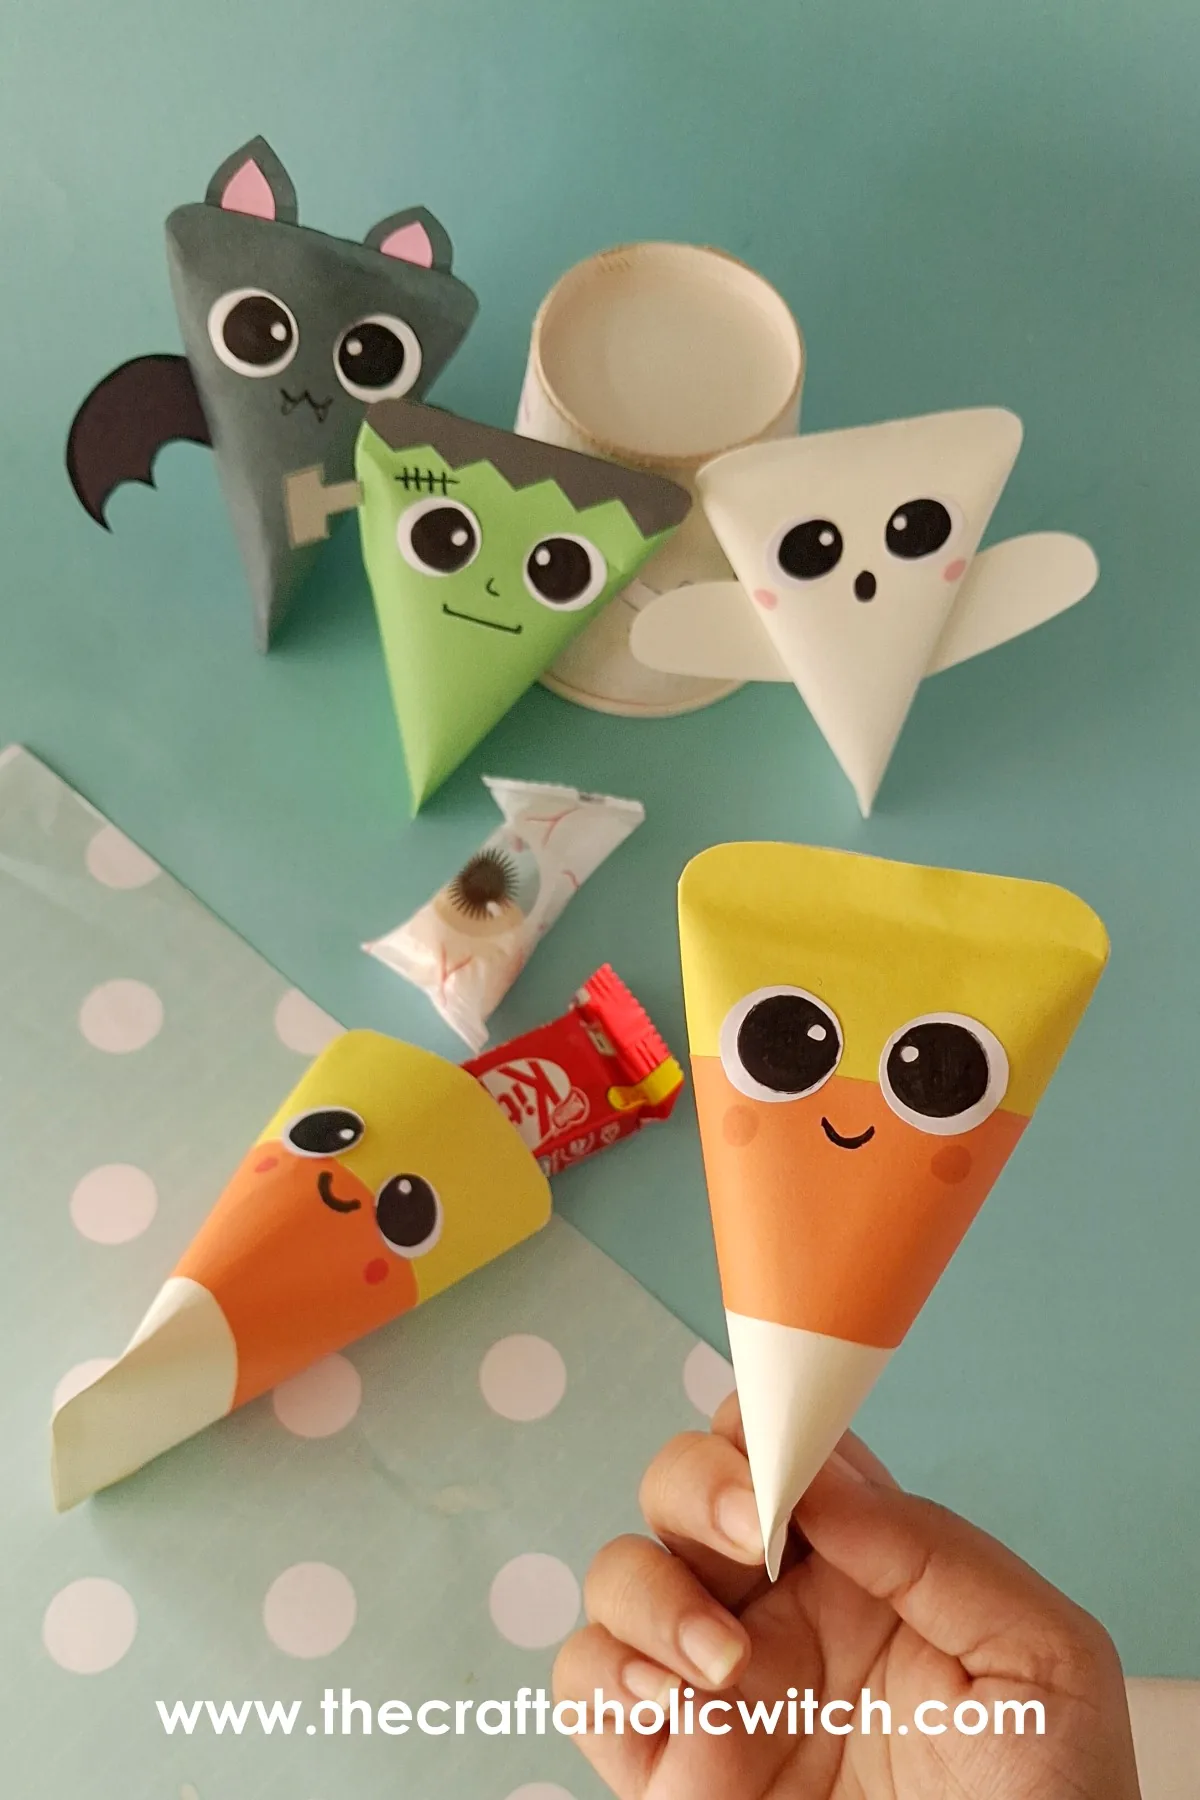
One rolled paper cone is the base for every design in this paper halloween treat box set: fold it once, then swap the face and add-ons to make a ghost, a Frankenstein, a bat, or a candy corn.
Each box comes together from a few sheets of craft paper, a printed pattern to trace, and glue, no cutting machine or sewing needed. Budget about 15 to 20 minutes per box once you’ve made the first one and gotten the fold down.
Fill them with candy, stickers, or a small toy and they double as place settings for a Halloween party table or favors for a classroom treat swap. If you want more paper projects for the same holiday, our roundup of Halloween paper crafts for kids has plenty of others worth trying.
Paper Halloween Treat Box Set at a Glance
- Difficulty: Beginner
- Time: 15 to 20 minutes per box (about an hour for all four)
- Cost: Under $5, mostly craft paper you likely already have
- Ages: 6+ with adult help for gluing; 9+ can work independently
- Best for: Halloween parties, trick-or-treat favors, classroom treat swaps
What You Need to Make Paper Halloween Treat Boxes
Materials
- Different colored craft papers, matched to each character (white or off-white for the ghost, green/black/gray for Frankenstein, gray and pink for the bat, white/yellow/orange for the candy corn)
- Printed pattern templates, traced onto your chosen paper before cutting
- Craft glue, for rolling the base and attaching each add-on
Tools
- Pencil, for tracing the patterns
- A pair of scissors
- Black, pink, and gray markers, for drawing each face
Ask inside "Crafty Q&A" while you are making.
"Crafty Q&A" is free to join. Share your question, photo, or the exact step where you got stuck, and chat with other makers plus the Craftaholic Witch team. You can also join any discussion thread already happening inside the space.
How to Make Paper Halloween Treat Boxes
Make the Ghost Treat Box
Step 1: Prepare the Ghost Patterns
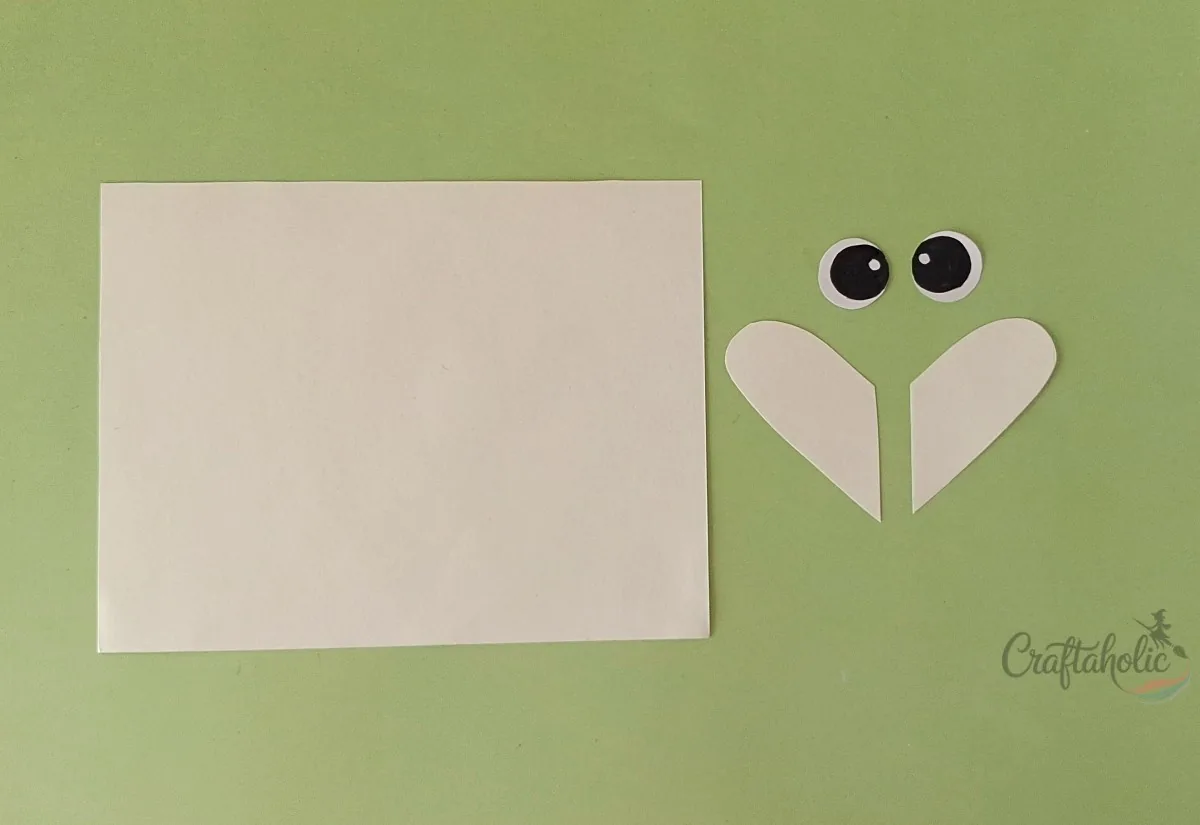
Select thick white or off-white craft paper for the ghost treat box. The template includes 1 base, 2 eyes (shared across all four treat boxes), and 2 arms. Trace the patterns onto your paper and cut them out with a pair of sharp scissors.
Step 2: Roll the Base and Flatten a Side
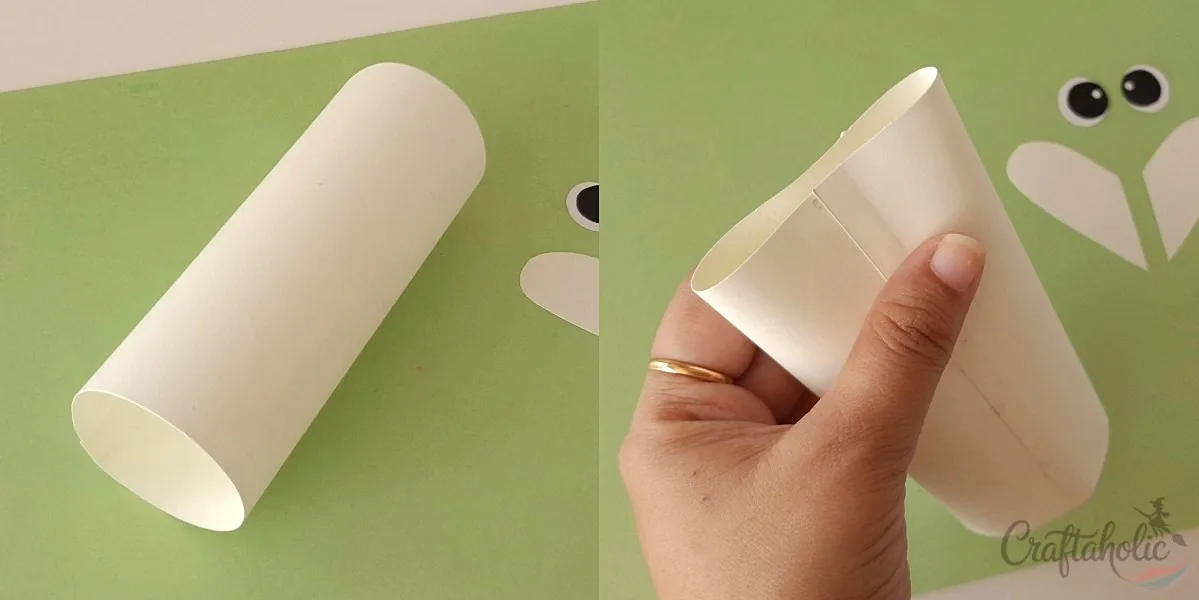
Apply glue along a short side of the base paper and roll it into a tube, joining the glued side to the other side. Go slowly here. A fold or crease line at this stage will show through on the finished box.
Hold the tube and flatten one side, keeping the glued seam along the middle as you press it flat. Let the glue dry completely before you flatten, or the seam can pop back open.
Step 3: Flatten and Glue Both Sides
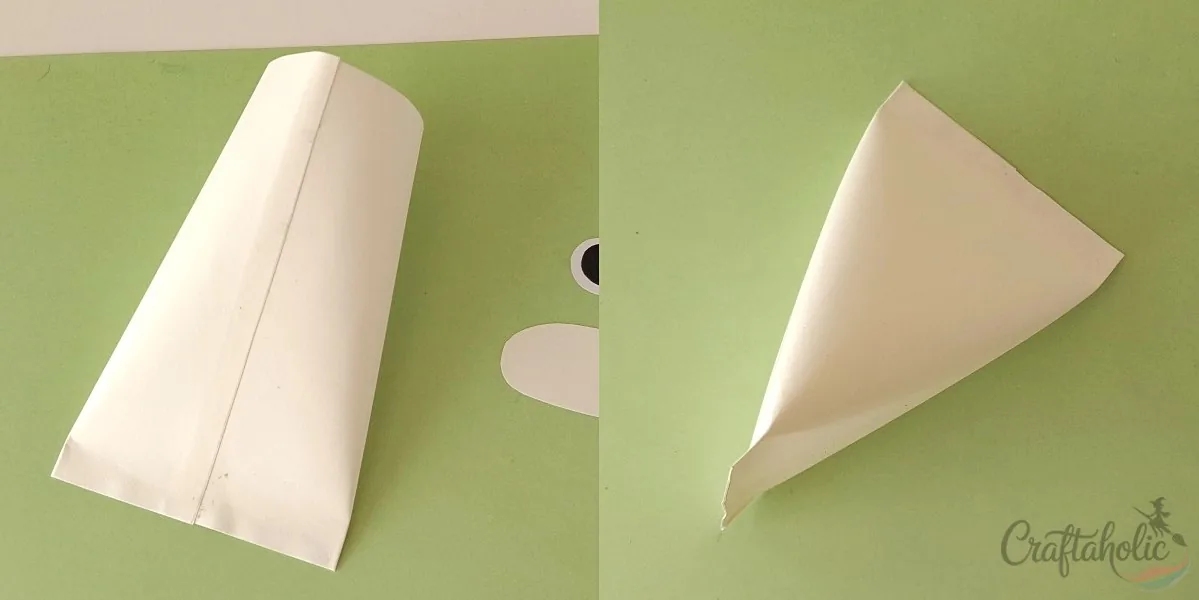
Glue along the inner edge of the flattened side and close it. Add the treats now, then flatten the opposite side 90 degrees from the first and glue that closed too. Once both sides are sealed you’ll have a triangle box.
Tip: Add the treats before you close the second side. It’s much harder to fit them in after the box is fully sealed.
Step 4: Attach the Ghost Arms
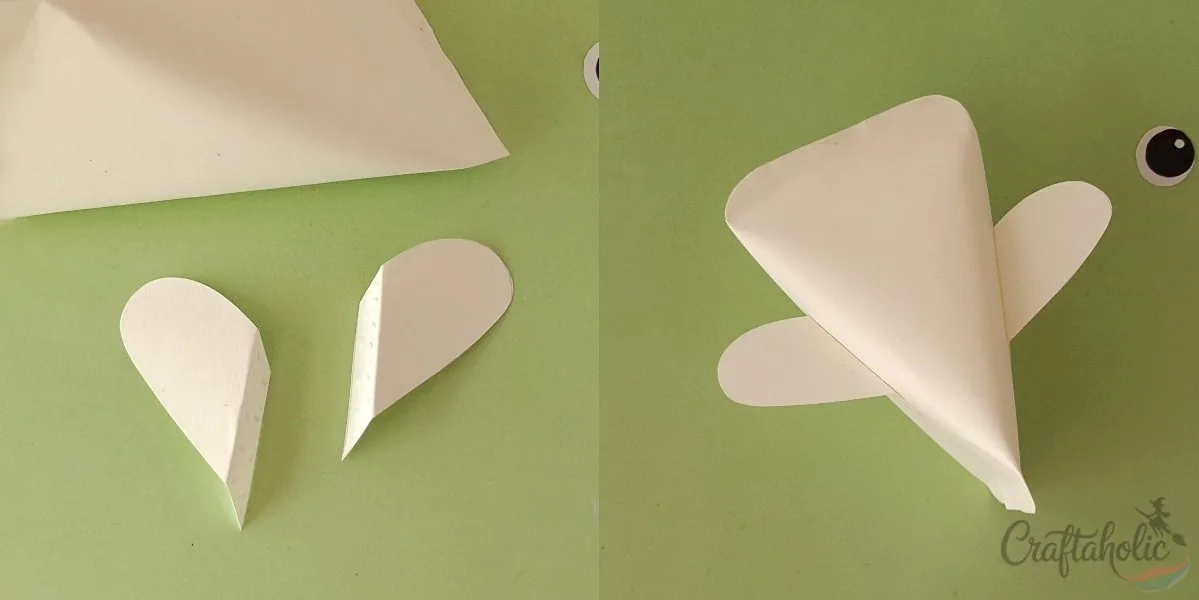
Make a thin fold along the straight edge of each ghost arm, then glue the folded edge to either side of the triangle box. The wide end of the box is the ghost’s head, so double-check which end is which before you glue.
Step 5: Draw the Ghost Face
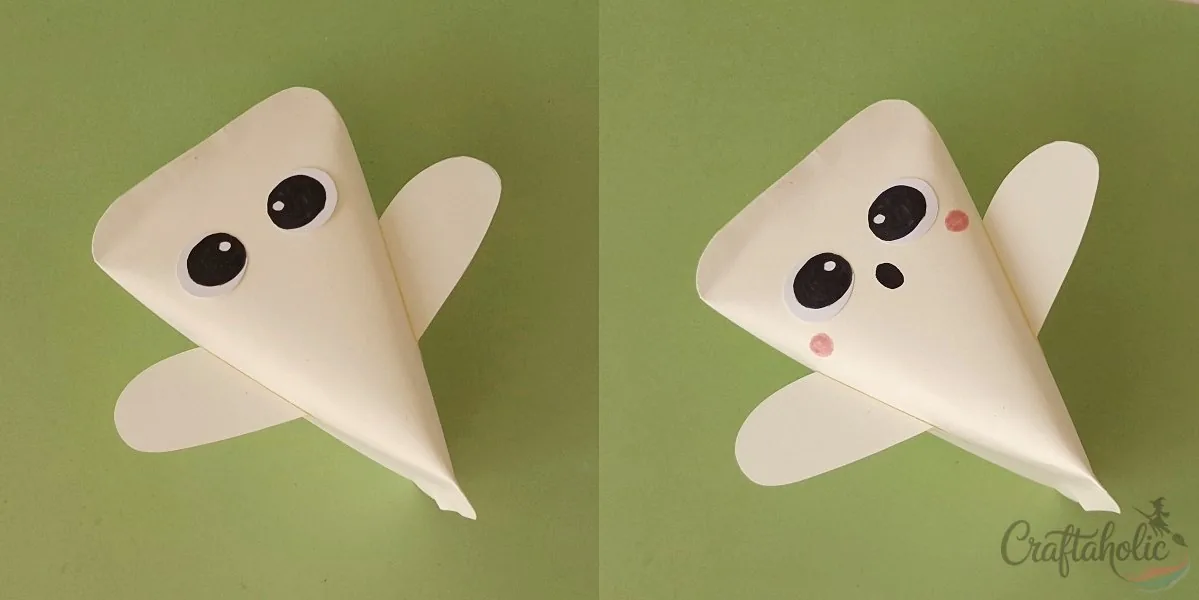
Glue on the eyes, then use a black marker for the mouth and a pink marker for two blush spots. That’s your first treat box done. On to the next one.
Make the Frankenstein Treat Box
Step 1: Prepare the Frankenstein Patterns
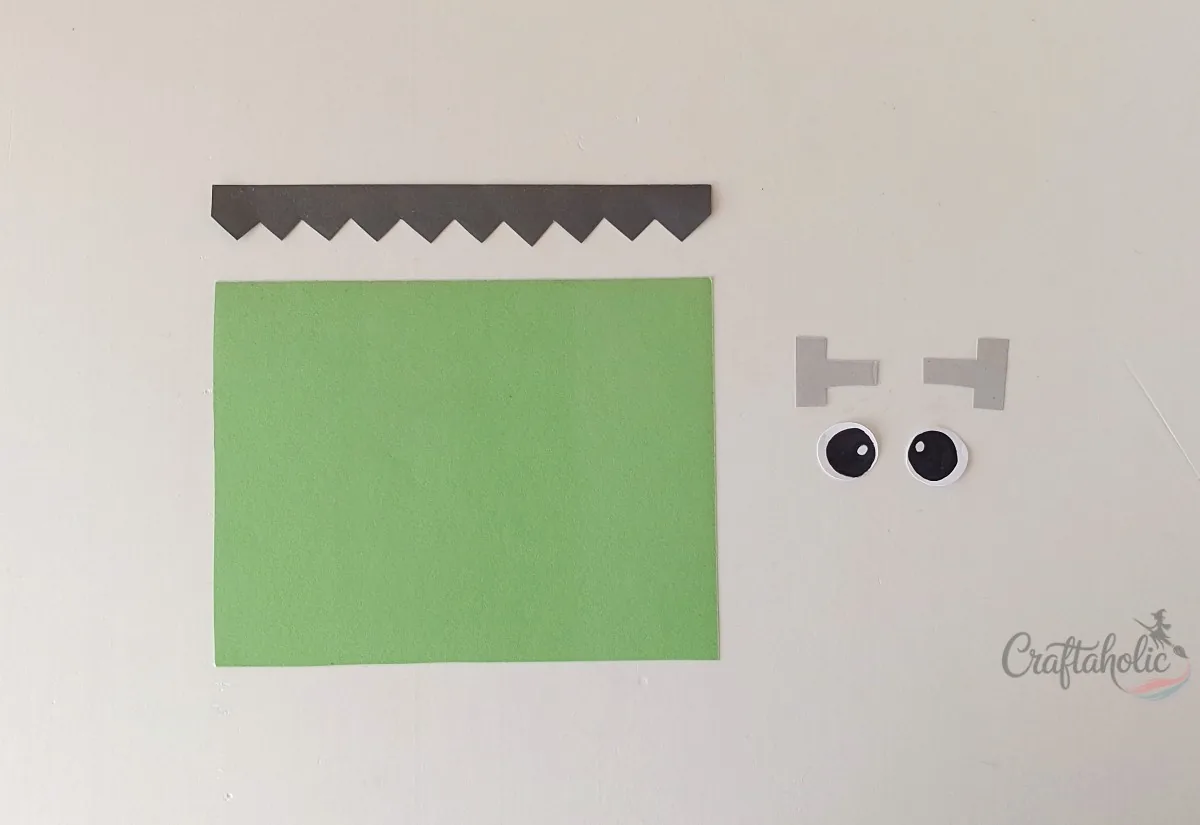
Use green paper for the base, black for the hair, and gray for the bolts (the eyes cut from the shared template work here too). Trace each piece onto its matching paper and cut them out.
Step 2: Attach the Hair and Join the Sides
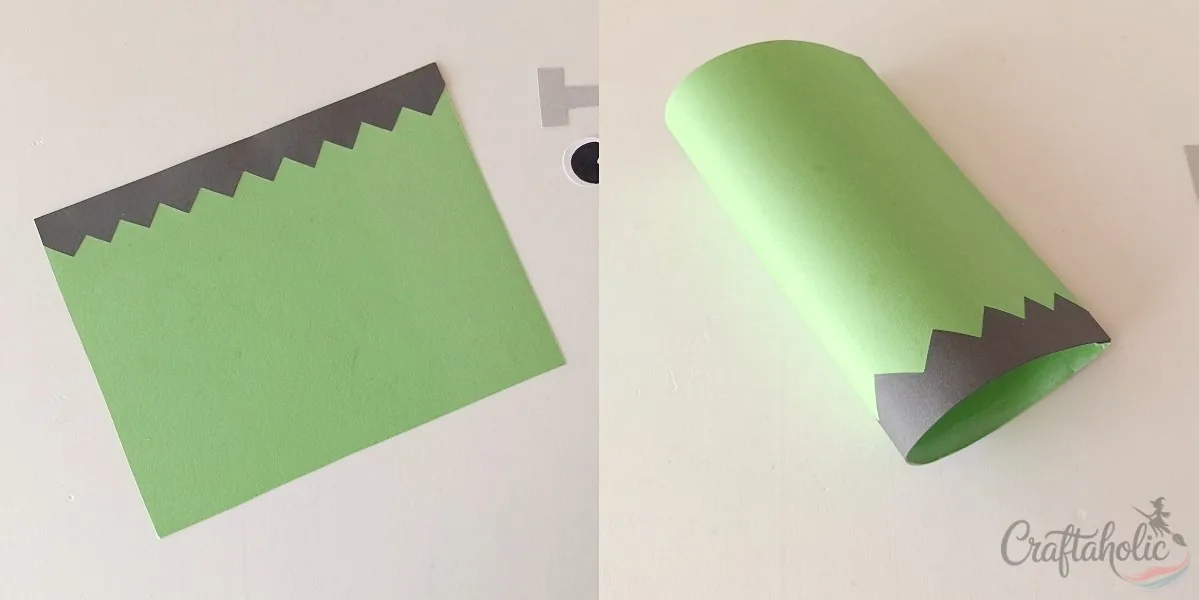
Glue the hair cutout along a long side of the base with its zigzag edge facing inward, then join the base’s short sides so the hair ends up facing outward on the rolled tube.
Tip: If the hair is glued facing inward by mistake, it’ll be hidden inside the fold instead of framing the face, so check it before the glue sets.
Step 3: Secure the Sides
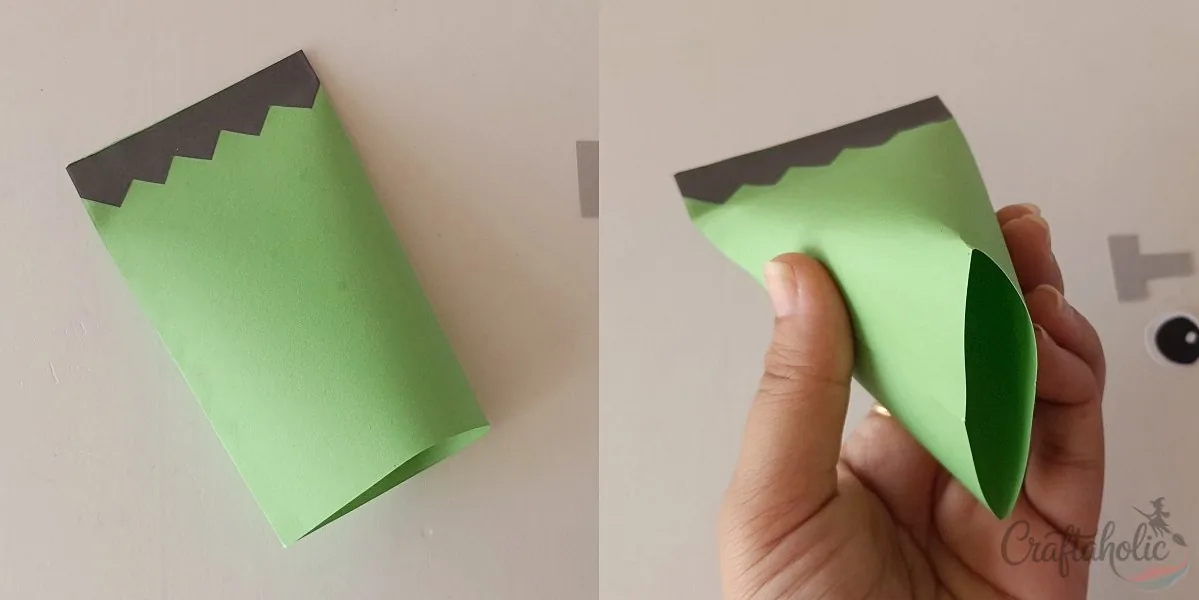
Flatten the hair side first and glue it. This becomes the top of Frankenstein’s head. Add the treats, then flatten the opposite side 90 degrees from the first and glue it closed to finish the base.
Step 4: Secure the Box and Attach the Bolts
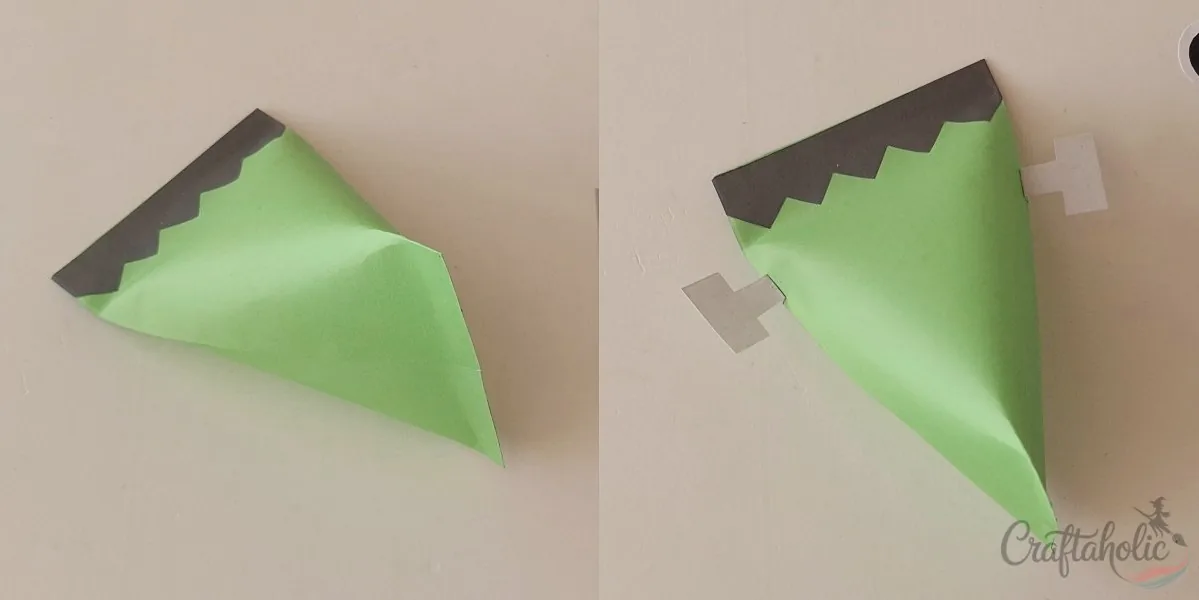
With the treats already inside, glue the bolt cutouts to both sides of the triangle box, just below the hairline.
Step 5: Complete the Face
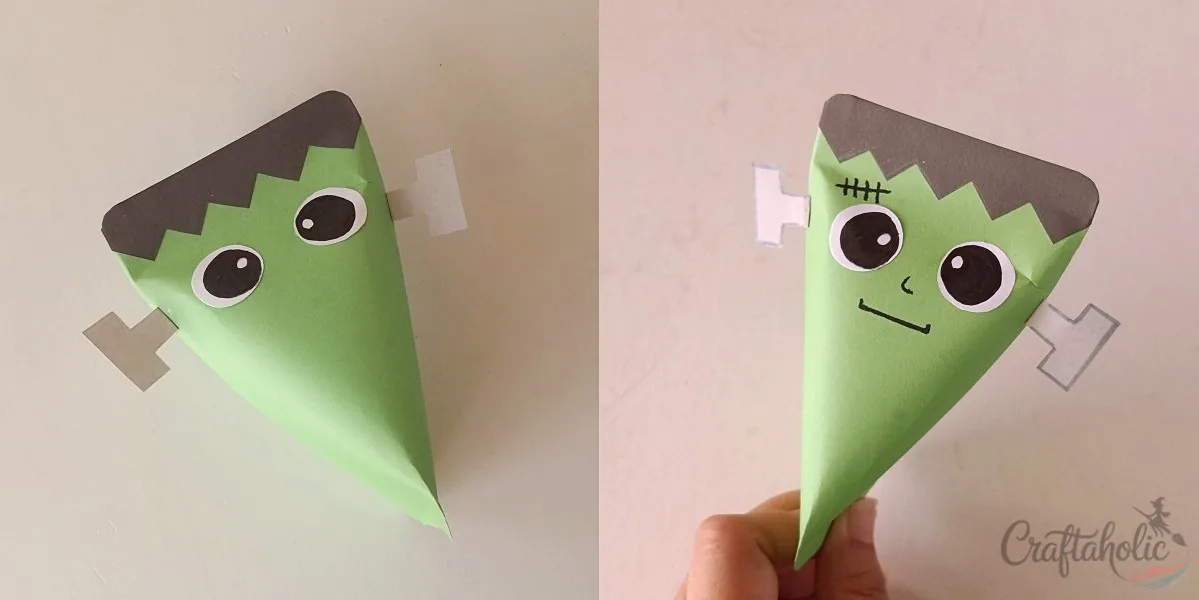
Glue on the eyes and draw the face with a black marker, then trace the bolt outlines in gray to finish the Frankenstein treat box.
Make the Bat Treat Box
Step 1: Prepare the Bat Patterns
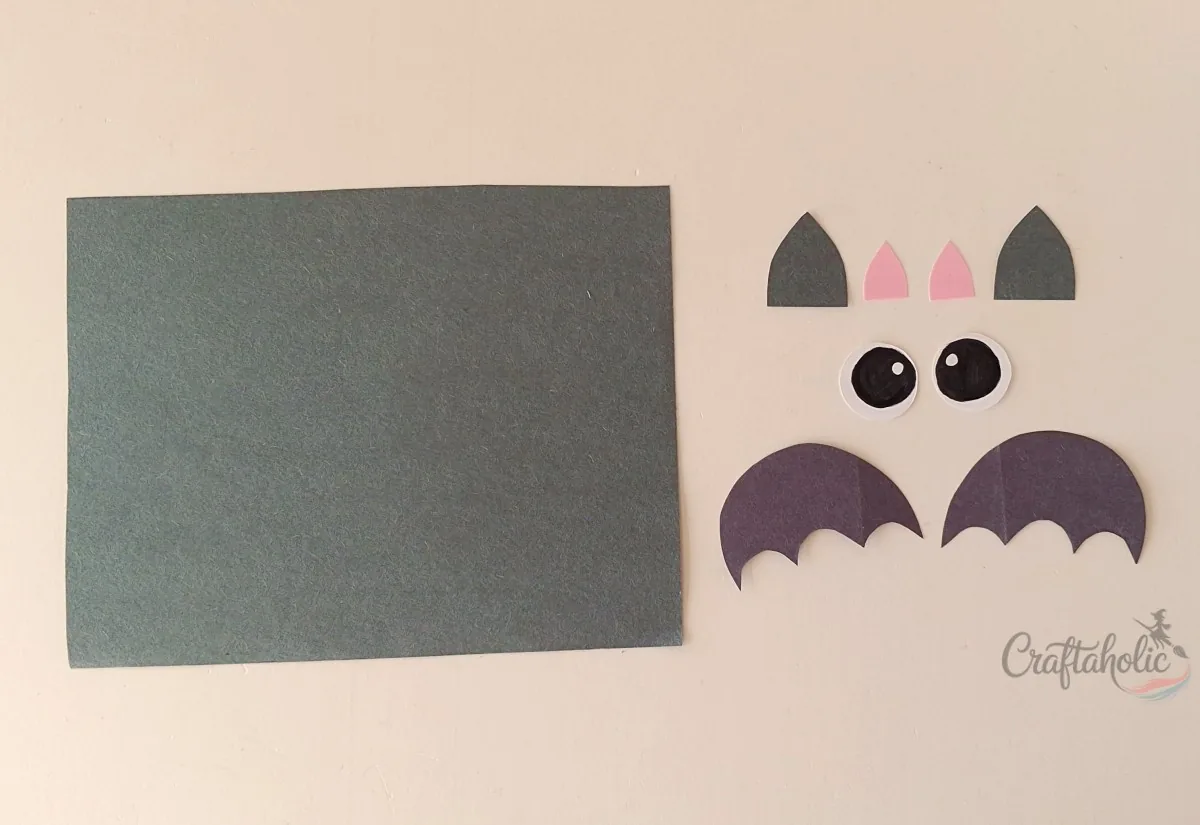
Use gray or another dark paper for the base, outer ears, and wings, and pink for the inner ears. Trace and cut all the pieces.
Step 2: Glue the Ears and Roll the Base
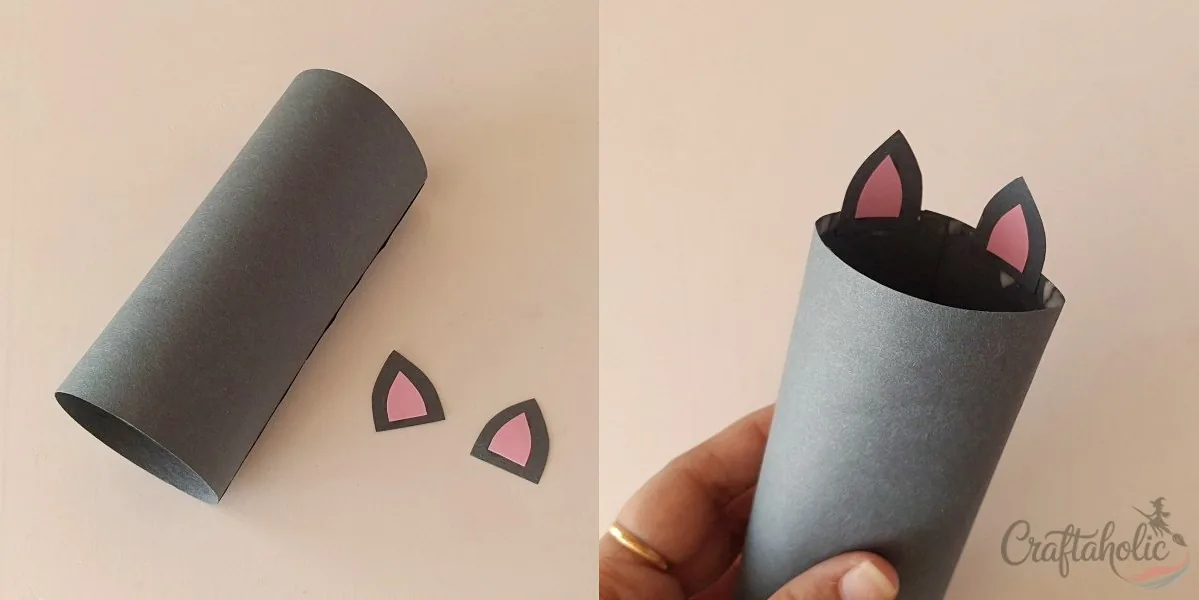
Glue each inner ear onto its matching outer ear, then roll and secure the base paper into a tube. Attach the finished ears to the top edge of the rolled paper.
Step 3: Secure the Sides of the Box
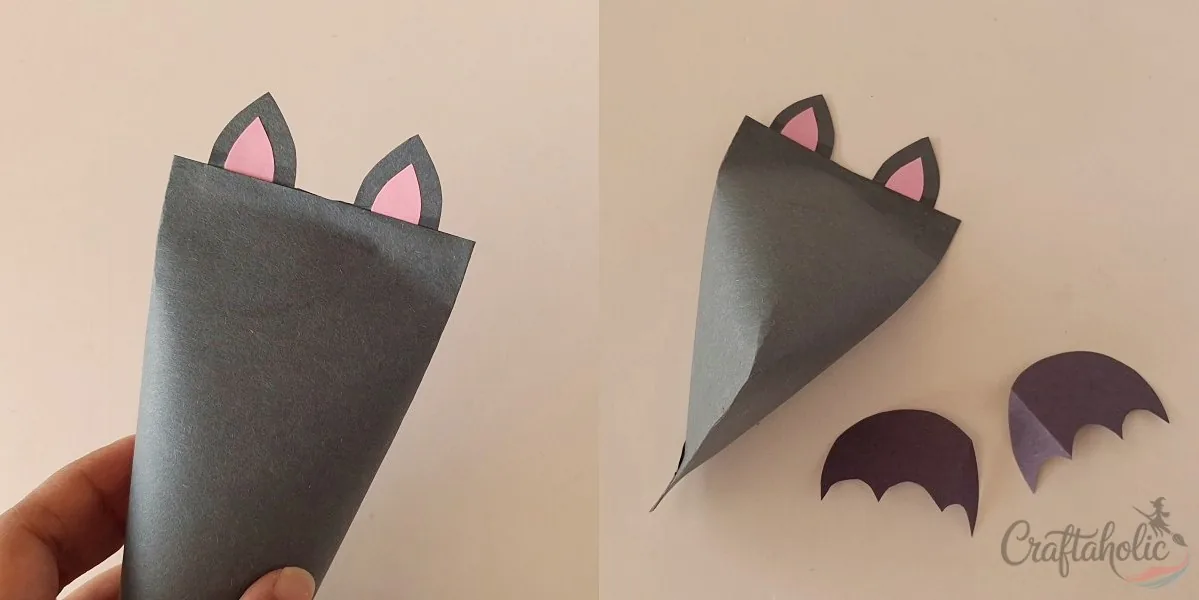
Flatten the ear side, spacing the ears evenly, and glue it. This is the top of the bat’s head. Add the treats, then flatten and glue the other side the same way you did for the earlier boxes.
Step 4: Attach the Wings and Complete the Face
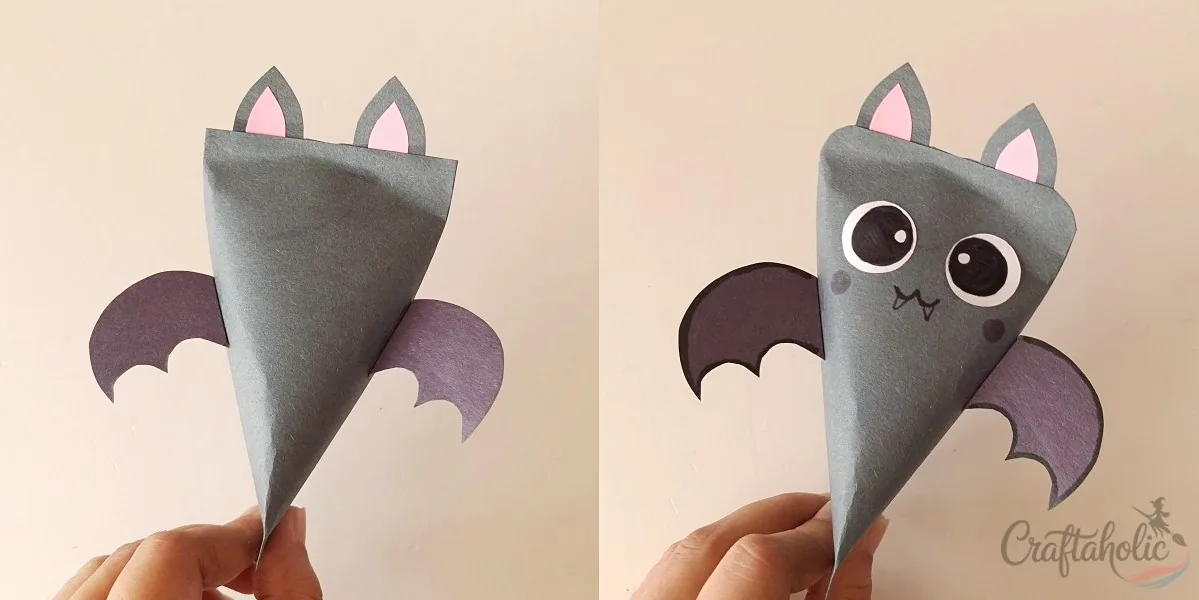
Fold a thin edge along one side of each wing, then glue that fold to either side of the box. Glue on the eyes, and finish with a black marker for the mouth and blush spots.
Make the Candy Corn Treat Box
Step 1: Prepare the Candy Corn Patterns
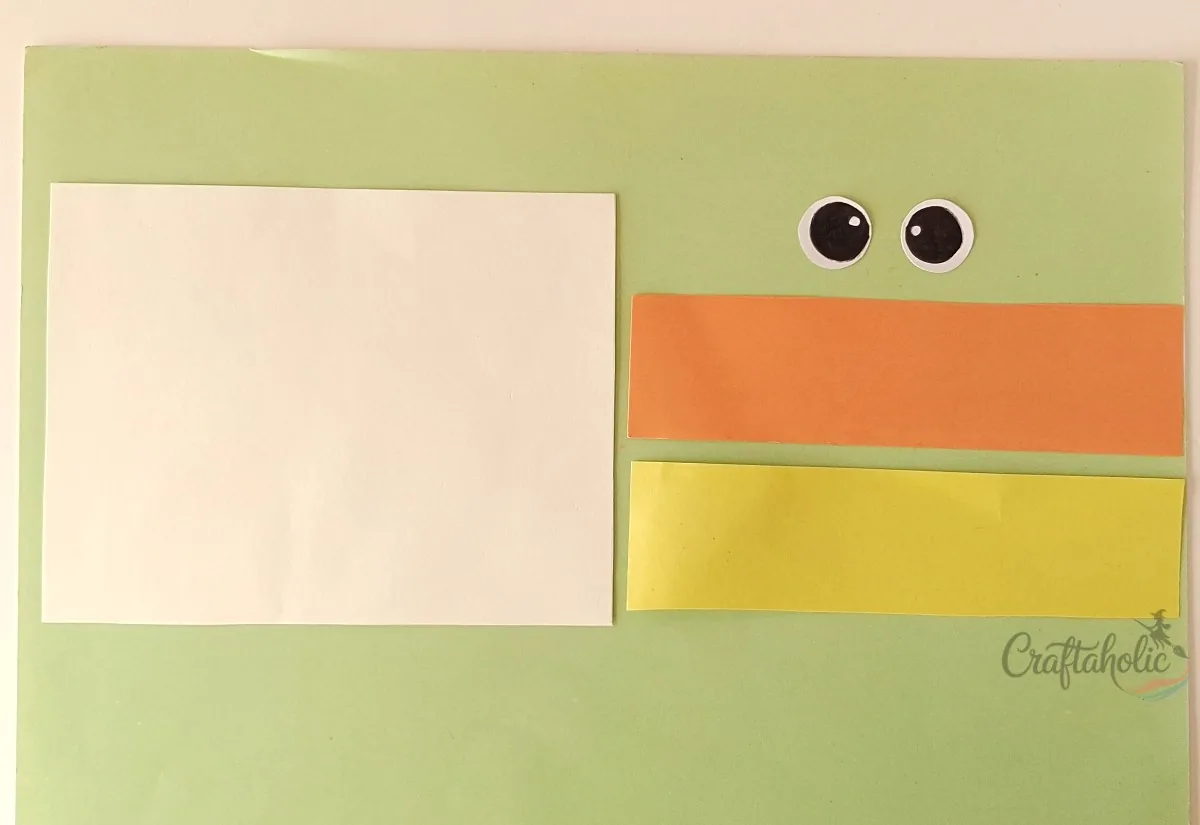
Trace the base onto white paper and the two color-band shapes onto yellow and orange paper (the eyes come from the shared template sheet). Cut everything out with scissors.
Step 2: Build the Candy Corn Base
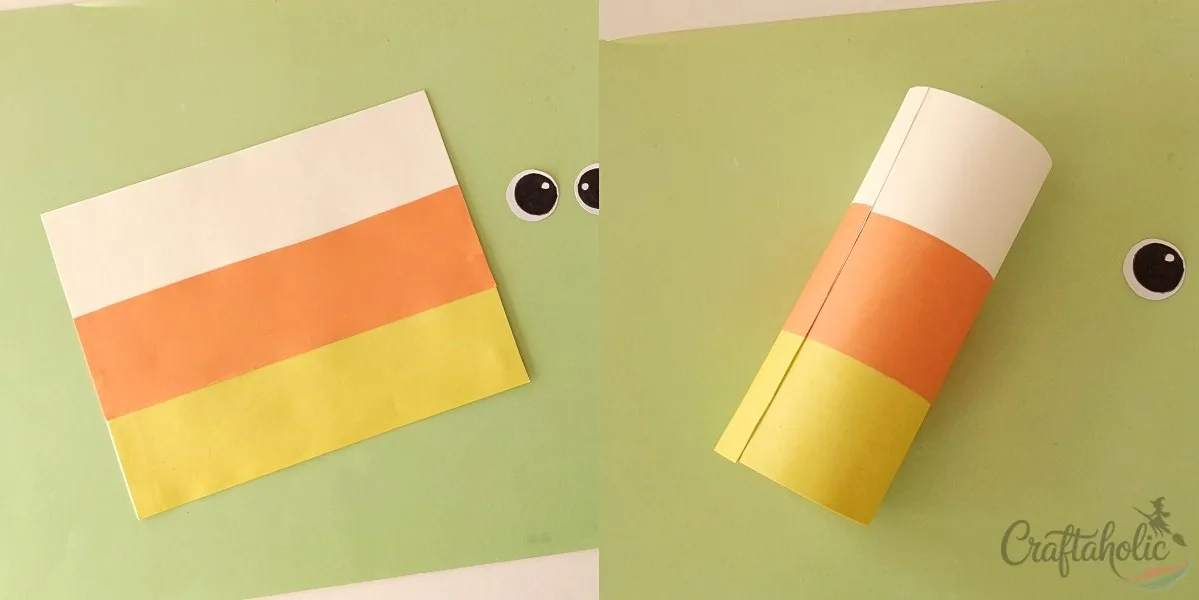
Glue the yellow and orange cutouts onto the white base to build the candy corn’s color bands. Let that glue dry fully, then roll the base into a tube and secure the sides.
Step 3: Secure the Sides and Complete the Face
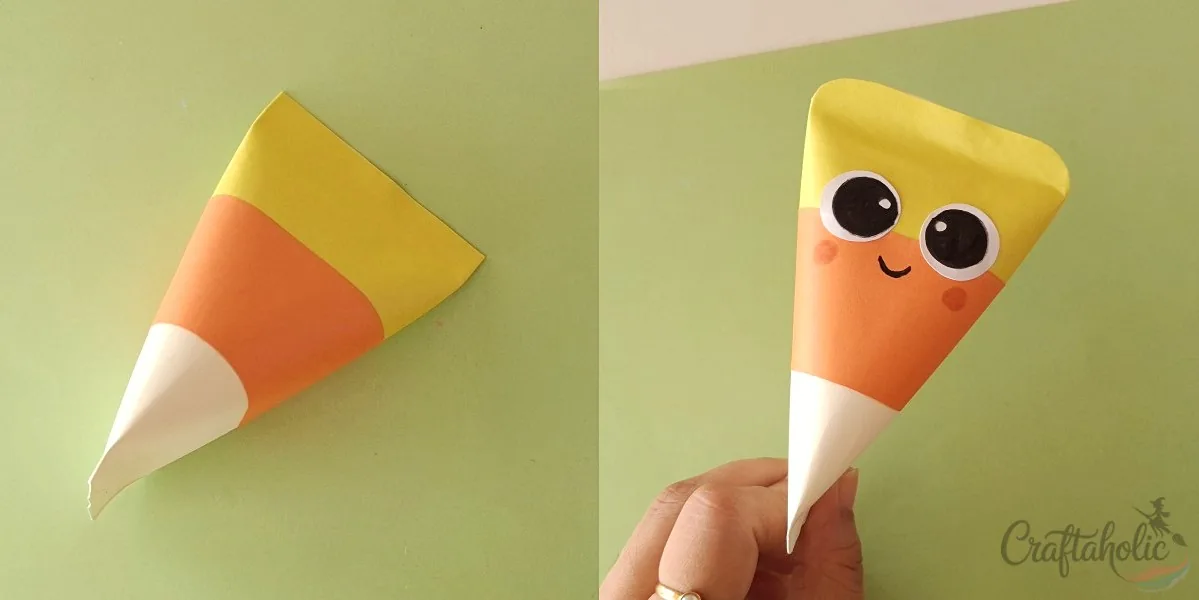
Flatten and glue the yellow end first, that’s the top. Add the treats, then close the other end the same way you did for the earlier boxes. Glue the eyes where the yellow and orange sections overlap, and add a mouth and blush spots with your markers.
Tip: Same as every box in this set, get the treats in before you glue the second side shut.
Share it in "I Made It" and let us cheer you on.
Post your finished make in "I Made It" so the community can celebrate it with you. Cheer on other makers too. Each month, the most loved craft wins 1 year of Craftaholic Premium ($59)
Tips for Paper Halloween Treat Boxes
- Swap the candy for stickers, temporary tattoos, or a small toy if you’re making these for a classroom with food allergies to watch for.
- Store finished boxes flat-side down in a drawer or shoebox until you’re ready to fill them, so the folded shape doesn’t get crushed.
- Once you’ve made one character, the rest go faster, since the rolling-and-flattening motion for the base is the same every time.
- Cut a few extra bases at once if you’re making these for a group; the base pattern is identical across all four characters.
Frequently Asked Questions
What can I use instead of craft paper for these treat boxes?
Cardstock or a slightly heavier scrapbook paper both work well, since they hold the rolled cone shape better than thin printer paper. Just avoid anything too stiff to fold cleanly at the glued seams.
How long does it take to make a set of four paper Halloween treat boxes?
Once the patterns are traced and cut, each box takes about 15 to 20 minutes to assemble, so budget roughly an hour for all four, including drying time for the glue between steps.
Do I need to print the template to make these boxes?
The printed pattern is the easiest way to get a consistent cone shape and matching add-ons. You can trace an existing paper cone or freehand a triangle base without one, but the face and add-on pieces (ears, wings, bolts) are harder to freehand accurately.
Can kids make these paper treat boxes on their own?
Kids around 9 and up can usually manage the whole project independently. Younger children will likely need help holding the paper steady while it’s rolled and glued, especially for the ghost’s arms and the bat’s wings, which use thinner folds.
Why won’t my treat box hold its triangle shape?
This is almost always the base tube: either it wasn’t rolled tightly enough before gluing, or a side got flattened before the glue fully dried. Let the rolled tube dry completely, then flatten and glue one side at a time rather than rushing both.
How do I store these treat boxes before Halloween?
Keep them flat-side down in a box or drawer, away from direct sunlight so the paper colors don’t fade, and add the treats right before serving so nothing gets crushed in storage.
More Paper Crafts Tutorials
- Browse all our Paper Crafts tutorials
- More Paper Decor & 3D Crafts projects
- Easy 3D Paper Pumpkin Craft
- Craft a Flapping Paper Bat
Share your paper halloween treat boxes in the I Made It space inside Craftaholic Community. The most-loved post each month wins a one year free Premium membership.
0 Comments
Join the conversation
Log in to your Craftaholic Community account to comment, ask questions, and cheer on fellow makers.
Log in to comment